Stampin’ Up! Waterside Retreat Father’s Day card for the Happy Inkin’ Thursday Blog Hop


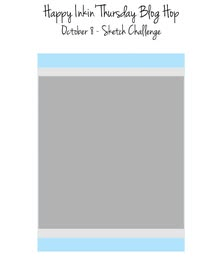
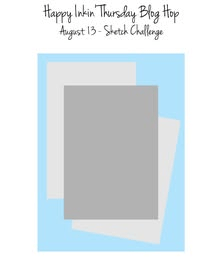
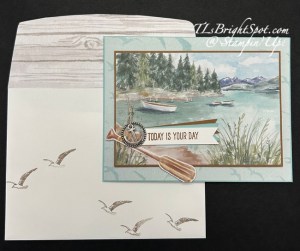
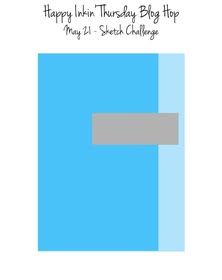
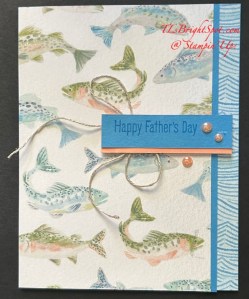
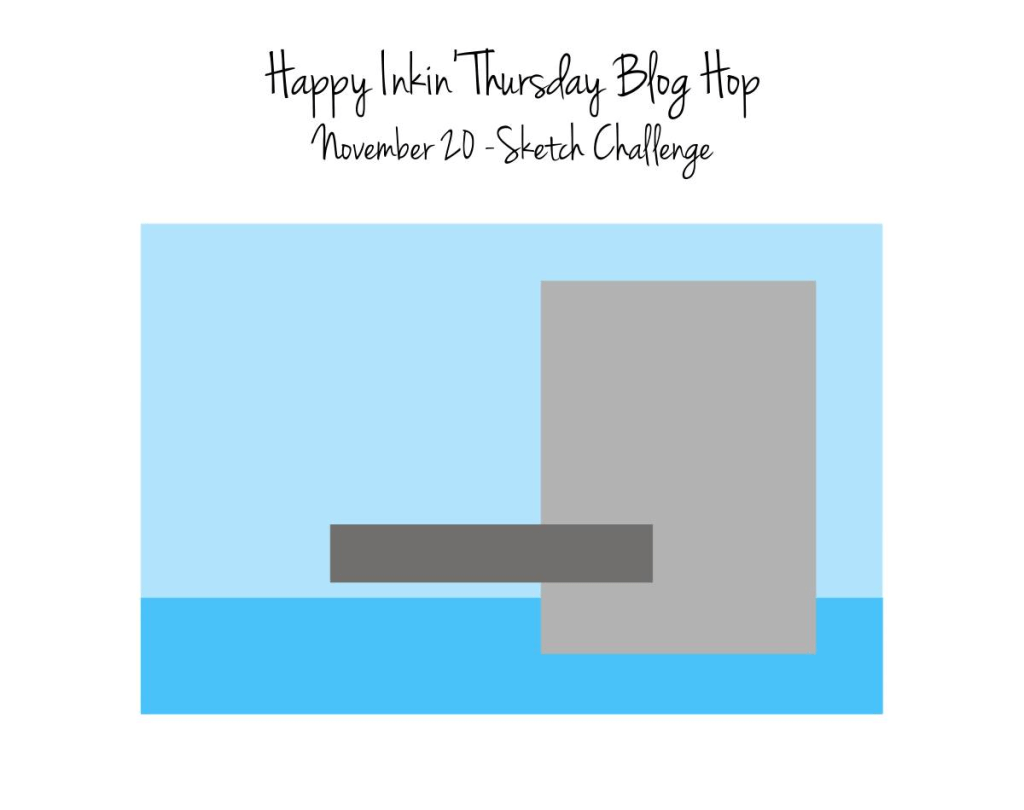
It’s Thursday & time for another Blog Hop from this fabulous Krew! We have a sketch challenge today that is so versatile and can be used for lots of cards – birthdays, sympathy, you name it. I chose this Waterside Retreat DSP as this card is for a fisherman for Father’s Day. I think this fits well!

Stampin' Up! Blog logo
Stampin' Up! Blog sketch challenge
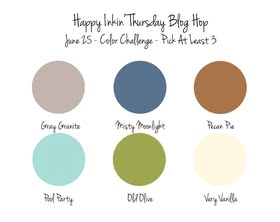
Stampin' Up! Waterside Retreat sketch challenge

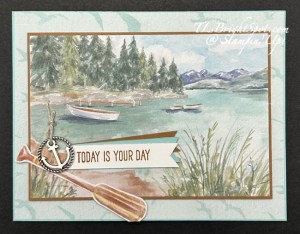
Here’s what I did to create this card… I first cut a panel of the Waterside Retreat DSP 3 3/4 x 5 1/2 & added a slip margin of Azure Afternoon card stock to the one side. I set this aside and cut a 1 x 5 1/2 piece of the same DSP (it’s the reverse side of the fish images) and added it to the 8 1/2 x 5 1/2 Azure Afternoon card base (yep, scored at 4 1/4. I then added the set aside panel. These were all added with liquid glue. I stamped the sentiment in Azure Afternoon ink using the Relaxing Waterside stamp set, on the Azure Afternoon 5/8 x 2 1/2″ strip. I attached this to a Crisp Cantaloupe 3/4 x 2 1/2 strip & slipped a large Linen Thread bow between dimensionals & attached it with a glue dot to the strip. The strip was added to the card front with dimensionals as mentioned. Final touch – 2026-2028 In Color Dots in Crisp Cantaloupe.

Stampin' Up! Waterside Retreat inside card

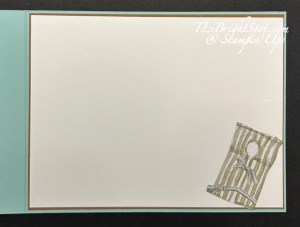
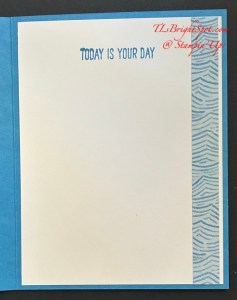
For the inside… A 4 x 5 1/4 piece of Basic White with a strip of the Waterside Retreat DSP 3/4 x 5 1/4 was then stamped with na sentiment from the Relaxing Waterside stamp set in Azure Afternoon ink. This was added to the inside of the card.

Stampin' Up! Waterside Retreat card & envelope

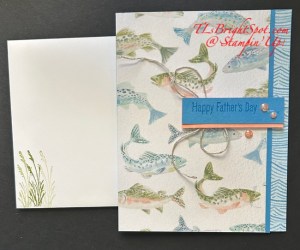
For the envelope… a 2 1/4 x 6″ strip of the Waterside Retreat was added to the flapn & trimmed to fit. On the front a simple grass stamped in Old Olive ink three times without re-inking in between. This gives a sense of dimension to the image. Love the simplicity!

Stampin' Up! Blog next b utton

Amy Koenders

Mary Deatherage

Karen Ksenzakovic

Tara Carpenter

Terry Lynn Bright

Join as a demonstrator now & you’ll get our new 2026–2028 In Color Stampin’ Pads FREE along with their Starter Kit! Or if you’d rather have different products instead of ink pads, we’ve got that covered there, too—you can add an extra $35 USD | $50 CAD worth of products to your Starter Kit.

You’ll also enjoy all the perks that come with being a demonstrator, like a 20–25% product discount, early access to the latest products and catalogs, the opportunity to earn a modest commission, the chance to attend incredible training and crafting events, and so much more.

Stampin' Up!

JOIN WITH ME HERE

SHOP WITH ME BY CLICKING HERE

Stampin’ Up! has some beautiful new Online Exclusives that are available to order now!!  And they’ve created a printable flyer to make it MUCH easier to shop the new products!  WOOHOO!! You can get to the flyer for the newest Online Exclusives by clicking here

You won’t find the Online Exclusive products in any catalog, they’ll only be listed in the online store.  The Online Exclusive product releases will continue throughout the year so there will be new products to shop from, in addition to new catalogs!

Thanks for stopping by. May you have a beautiful day. Make someone happy by sending them a handmade card filled with ❤️

Product List

Stampin’ Up! Waterside Retreat Suite for the Happy Inkin’ Thursday Blog Hop

Hello Thursday – time for another amazing hop of the Happy Inkin’ Thursday Blog Hop! We have a theme challenge today and I had trouble making a decision as to what suite or bundle or DSP exactly to use – so many from which to choose! But the Waterside Retreat Suite won 😀

Stampin' Up! Blog Hop logo
Stampin' Up! Theme challenge

A friend of mine is retiring soon and this card is perfect for him. I think it fits our theme perfgectly.

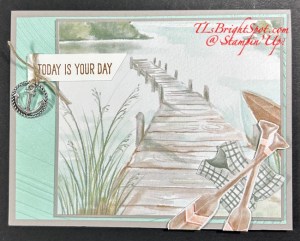
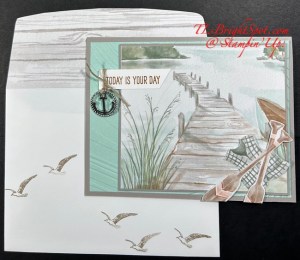
Stampin' Up! Waterside Retreat Card front

Gray Granite 5 1/2 x 8 1/2 scored @ 4 1/4; Pool Party two tone 4 x 5 1/4 embossed w/ So Swirly; Gray Granite again 4 3/8 x 3 7/8; & layer of DSP 4 1/4 x 3 3/4 attached with dimensionals. Fussy cut the life jacket & oars aa& add with dimensionals + liquid adhesive. The sentiment is stamped in Pecan Pie using the Relaxing Waterside stamp set. I wrapped a length of Baker’s Twine around twice & looped through the Loose Anchor Trinket. It’s attached with a dimentional on the left end and liquid glue on the right. The anchor trinkent has a single glue dot to keep it secure on the card

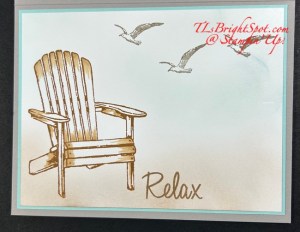
Stampin' Up! Waterside Retreat card inside

For the inside… a layer of Pool Party 4 x 5 1/4 adhered to the inside of the card. On the Basic White I used Crumb Cake & a Blending Brush to add color to the lower portion (like sand). On the top portion is a mix of Balmy Blue & Pool Party & a Blending Brush resembling sky. I stamped the chair in Pecan Pie ink then using Light Pecan Pie to add more shading. The sentiment is also in Pecan Pie; the birds are in Gray Granite. Each stamp is from the Relaxed Waterside stamp set.

Stampin' Up! Waterside Retreat card & envelope

On the envelope… more seagulls stamped in Gray Granite and on the flap another of the aterside Retreat DSP 2 1/4 x 6 & trimmed to fit.

Stampin' Up! hop button

Amy Koenders

Mary Deatherage

Karen Ksenzakovic

Tara Carpenter

Terry Lynn Bright

Stampin' Up! Joining Promotion

 join as a demonstrator now, you’ll get our new 2026–2028 In Color Stampin’ Pads FREE along with their Starter Kit! Or if you’d rather have different products instead of ink pads, we’ve got that covered there, too—you can add an extra $35 USD | $50 CAD worth of products to your Starter Kit.

You’ll also enjoy all the perks that come with being a demonstrator, like a 20–25% product discount, early access to the latest products and catalogs, the opportunity to earn a modest commission, the chance to attend incredible training and crafting events, and so much more.

JOIN WITH ME HERE

Thanks for stopping by. May you have a beautiful day. Make someone happy by sending them a handmade card filled with ❤️
Product List

Stampin’ Up! Scenic Coast Suite in a Fun Fold for Amy’s Inkin’ Krew Blog Hop

Oh yes – ’tis almost time for sailing season! For some it’s already here… and I’m all ‘a flutter’ over this new bundle & it’s coordinating Scenic Coast SDSP & the Sunset Sparkle Sequins. ❤️ The theme for this hop is to make something for the ‘men/ boys’ in our lives. This card relates to that as we sold our sailboat last year & it was tough. But we have such fond memories of our sailing days that it’s ok. 👍

Stampin' Up! Blog hop logo
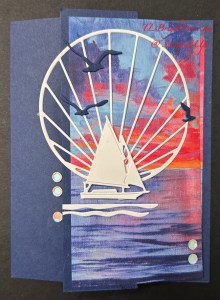
Stampin' Up! Scenic coast Suite fun fold card front
Stampin' Up! Scenic Coast Suite fun fold card inside

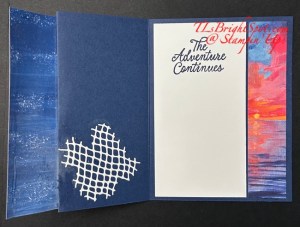
On the inside I added the second panel of the Scenic Coast DSP to the inside on the right of the card. Next to it is a Basic White stamped panel 2 3/4 x 5 1/4. The sentiment is from the Sunset Coast stamp set & I used Night of Navy ink.

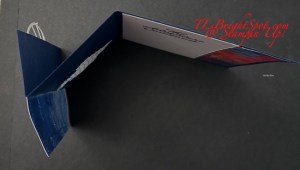
Final touch on the inside was this fabulous die cut that looks like netting, and I added it with dabs of liquid glue to the left portion of the card. – And done! The card looks like this from the top.

Stampin' Up! Scenic Coast Suite fun fold, from the top

See below for the list of products to make this card. Consider too, joining my team for that 20% Stampin’ Up! discount after joining – for ALL ORDERS!!! There are other reasons to join as well & you can some of those below the list of products – so look for that info!

Now, time to visit the others participating in today’s hop. Click the next button or click on a name. Enjoy!

Stampin' Up! blog button
  1. Karen Finkle
  2. Terry Lynn Bright
  3. Karen Ksenzakovic
  4. Tara Carpenter
  5. Nicole Bloxom
  6. Christie King
  7. Mary Deatherage
  8. Ann Louise Fodgaard
  9. Charlene Tackvic
  10. Amy Koenders
Stampin' Up! Joining Offer

Join as a demonstrator now & get our new 2026–2028 In Color Stampin’ Pads FREE along with your Starter Kit! Or if you’d rather have different products instead of ink pads, you’re covered there, too—you can add an extra $35 USD | $50 CAD worth of products to their Starter Kit.

As a Demonstrator, you will also enjoy all the perks that come with being a demonstrator, like a 20–25% product discount, early access to the latest products and catalogs, the opportunity to earn a modest commission, the chance to attend incredible training and crafting events, and so much more.

JOIN MY TEAM HERE!

Thanks for stopping by. May you have a beautiful day! Make someone happy by sending them a handmade card filled with ❤️

Product List

JOIN MY TEAM HERE

Stampin’ Up! Sketch Challenge for the Happy Inkin’ Thursday Blog Hop

Good morning… it’s Thursday and you KNOW what that means – the wonderful Happy Inkin’ Thursday Blog Hop. We have some very talented folks on this team & it amazes me what folks create. I hope you appreciate all the talent you see on our hops. It is so funny, I was a week ahead of myself & made something for that… so I re-grouped!

Yesterday I received a Stampin’ Up! package with items from the Jan-April 2026 Mini Catalog, along with my catalog! YAY! So, in re-grouping and with the new items, I created something, well, different for me. My hubby really likes it – so hopefully you will too.

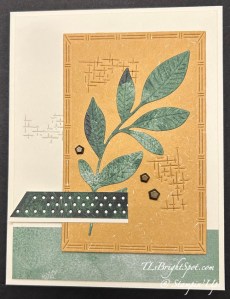
Stampin' Up! Nature's Symphony card front

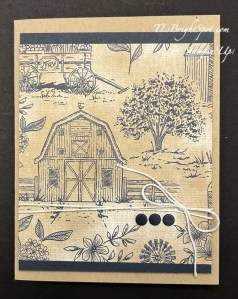
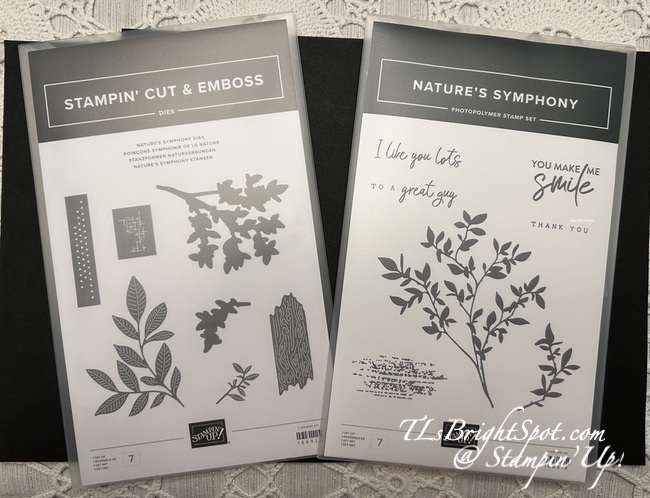
The items on this card are all from the Nature’s Walk Suite Collection in the new January – April 2026 Mini Catalog. First off, I cannot believe we are quickly moving into 2026!!! How did that happen? Secondly – this suite is full of gorgeous Designer Series Paper (2!), embellishments, a bundle & ribbon. I used all but the ribbon for this card. Check the texture on the paper behind the leaf die cut. That’s called Natural Hues Textured Specialty Paper. And the die cut leaf is from one of the Nature Walk DSP; the panel at the bottom is from the same sheet. The odd-shaped cuts in the paper – a die from the Nature’s Symphony Dies. More texture! And the piece with the holes – another die. And of course, it was cut from the same piece of DSP!

I used additional products to make this card… the Textured Notes Dies (third from largest), Very Vanilla card stock & Secret Sea ink.

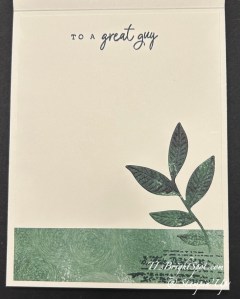
Stampin' Up! Nature's Symphony, inside card

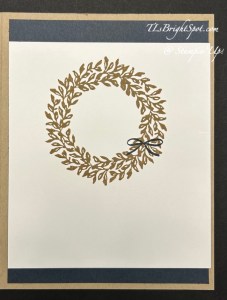
For the inside of the card… Another strip of the Nature Walk DSP across the bottom of a 4 x 5 1/4 panel of Very Vanilla; the leaf is actually a portion of the leaf from the leaf on the card front :O) The sentiment is from Nature’s Symphony stamp set – stamped in Secret Sea ink. There’s another stamp on there too, on the paper under the leaf, it’s just really hard to see, but it comes from this stamp set as well.

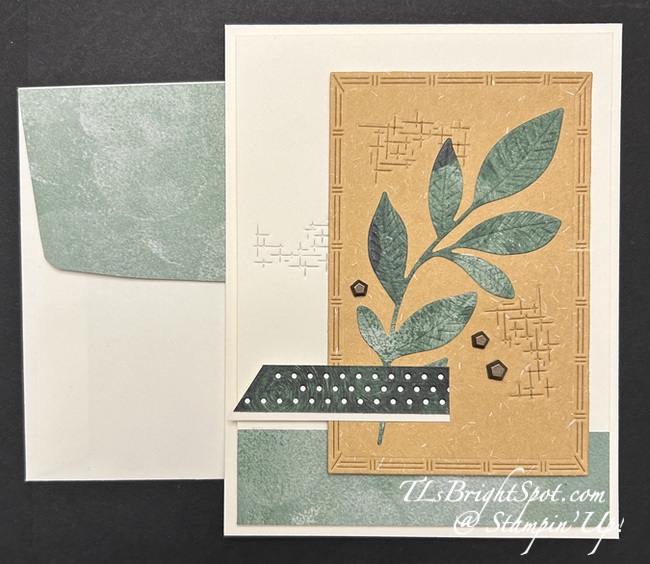
Stampin' Up! Nature's Symphony card & envelope

Card & envelope… I left this in the ‘large’ size so you can see the texture on the larger panel of Specialty Paper. I will definitely be playing more with this set! You can see more photos below of the products in this suite – the Nature Walk Suite Collection – out in the January- April 2026 Mini Catalog.

Take a ‘walk’ through the folks participating in today’s hop by clicking the link below or clicking on a name. Enjoy!

Stampin' Up! Hop button

Amy Koenders

Mary Deatherage

Karen Ksenzakovic

Akiko Sudano

Tara Carpenter

Terry Lynn Bright

Nicole Bloxom

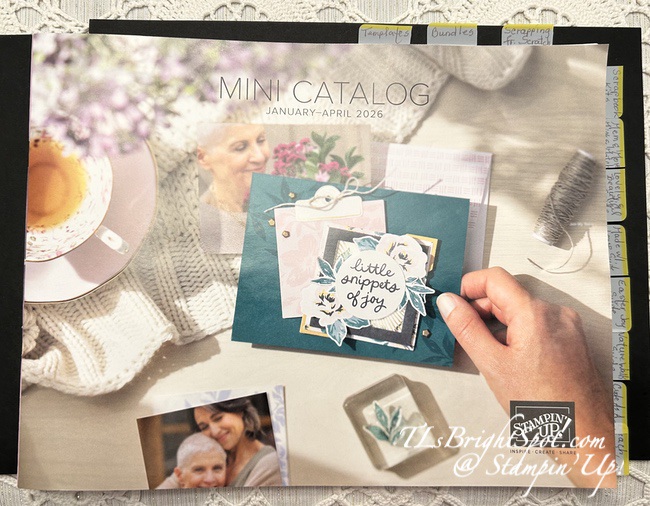
Here are photos of this suite of products, plus the front of the catalog. You can see I tabbed it already so I can find what I’m looking for more easily.

Stampin' Up! Jan-April 2026 MINI Catalog
Stampin' Up! Nature's Symphony stamp set & dies
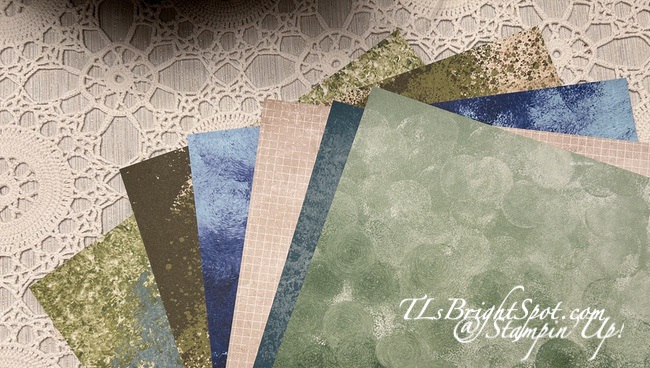
Stampin' Up! Nature Walk DSP, side A

Nature Walk 12 x 12 DSP: coordinating colors in this pretty paper – side A: Cloud Cover, Night of Navy, Old Olive, Pecan Pie, Pretty Peacock & Secret Sea.

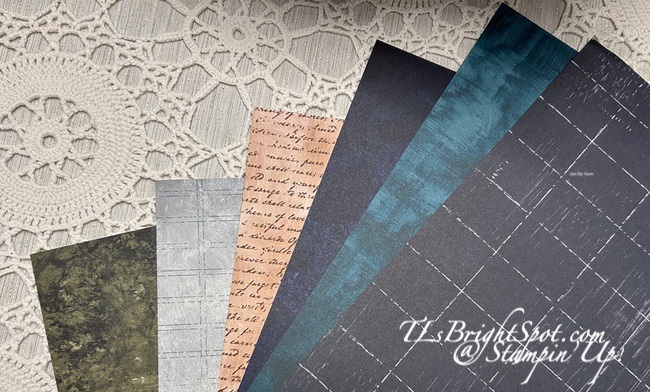
Stampin' Up! Nature Walk 12x12 DSP, side B

Side B of Nature Walk 12 x 12 DSP

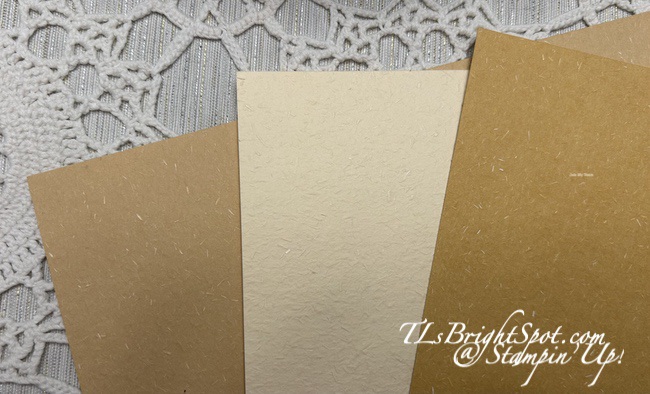
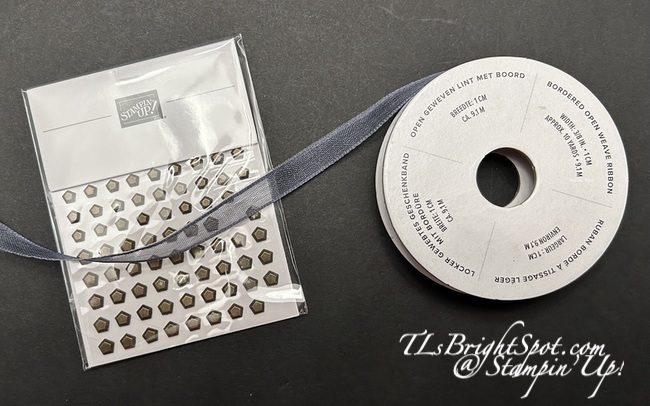
On the left: Natural Hues 12 x 12 Textured Specialty Paper in Cream, Tan & Gold. On the right are the Faux Bronze Pentagons embellishments and the Secret Sea 3/8″ Bordered Open Weave Ribbon.

Other Stampin’ Up! News:

From November 25 to December 1, get up to 40% off select products. 40% OFF

 25% OFF

 15% OFF

Select Cardstock

Start making that list NOW and remember to shop with me here

Thanks for stopping by. May you have a beautiful day. Make someone happy by sending them a handmade card filled with ❤️

Stampin’ Up! Prairie Grass and Thoughtful Journey

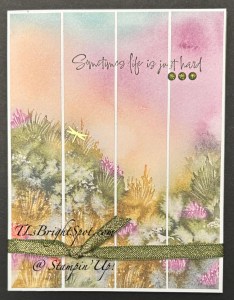
Good Tuesday, Sep 2 and 55 degrees here at the shore in NJ – not typical weather for this early in the month. When the kids return to school it is usually hot as blazes. But not this year… My card today is more than just thinking of you; it’s recognizing that life is not always easy. I used the Prairie Grass stamp set from the ONLINE EXCLUSIVES – it’s available to customers now. It’s become a favorite for things peaceful, restful, reassuring.

Stampin' Up! Thoughtful Journey, & Prairie Grass

I cut 1″ strips of Thoughtful Journey 6×6 DSP (1 x 5 3/8) and added them to a Basic White background. Next I stamped the sentiment in Mossy Meadow ink using the Prairie Grass stamp set. I took a length of Mossy Meadow & Gold trim, wrapped it around and tied a knot, securing it with a glue dot. I then added three Low Profile Sparkle Dtos under the sentiment. Finally, I added a single Adhesive-Backed Dragonfly. This completed front panel was added to a Mossy Meadow card base.

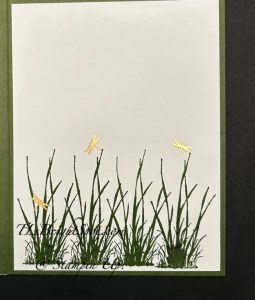
For the inside of the card, I stamped this grassy image four times across the bottom with Mossy Meadow ink. And yes, the stamp comes from Prairie Grass stamp set. I added three more of the Adhesive-Backed Dragonflies as they are very flat and so appropriate for this grassy scene. I adhered the Basic White panel to the inside of the card and voila – this card is ready to send.

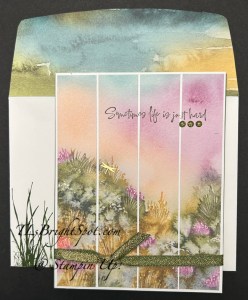
Stampin' Up! Prairie Grass and Thoughtful Journey card & envelope

For the envelope… yet another panel of the Thoughtful Journey 6×6 was adhered to the flap & trimmed to fit. Again on the front, I stamped the same grassy image in Mossy Meadow ink from Prairie Grass stamp set to carry out the theme. This card will be sent today to a friend of mine who lives near the beach and diagnosed with ALS. Such an awful disease….

Tomorrow, Wednesday Sep 3, the Sep-Dec 2025 Mini Catalog will be open to ordering by customers – AND – there are some fabulous new ONLINE EXCLUSIVE products that can be ordered as well. If you do not have a demonstrator, I’d love to help you find your creative side. Click the image below to take you to my shop for purchases.

Stampin' Up! Sep-Dec 2025 Mini Catalog

Thanks for stopping by – may you have a beautiful day. Make someone happy by sending them a handmade card filled with ❤️


Product List

Stampin’ Up! NEW Gathering Moments

Good Friday – my goodness August is flittering away – Monday is LABOR DAY! Today’s card is all about fall and it uses a September Release ONLINE EXCLUSIVE. The bundle is Gathering Moments.

Stampin' Up! Gathering Moments bundle
Stampin' Up! Gathering Moments card front

The card has a Basic Beige front from which I die cut the large leaf with Gathering Moments Dies. I wanted to use the Timeless Plaid 6×6 DSP behind the die cut but on an angle. This meant an odd shape for cutting the DSP and it needed to be slightly smaller than the Basic Beige card front. Once I cut the DSP I added it to an Old Olive panel and that to the card base of Cajun Craze.

Stampin' Up! Old Olive w/ Timeless Plaid 6x6 DSP
Stasmpin' Up! Gathering Moments die cut w/ dimensionals on back

I put dimensionals all over the back of the die cut panel and adhered it to the the card. I stamped the sentiment in Cajun Craze ink using the Gathering Moments stamp set and die cut the basic White with Textured Notes Dies. I cut a piece of Old Olive for a backing, adhered the two together and added them directly to the card front. I tied a double bow with Natural Tones Linen Thread then added three Cajun Craze and Gold Dots.

Stampin' Up! Gathering moments card front unfinished
Stampin' Up! Gathering Moments inside card

For the inside… I used the die cut that came out of the front die cut to stamp the sentiment from Gathering Moments in Cajun Craze ink. I added this to a Basic White panel then both to Old Olive then to the inside of the card base..

Stampin' Up! Gathering moments card & envelope

For the envelope, more of the Timeless Plaid 6×6 DSP on the flap trimmed to fit, then a single leaf stamped on the front: Gathering Moments stamp set in Old Olive ink. Totally fall – good for a masculine card too!

These new products are ONLINE EXCLUSIVES to be released Wed Sep 3. For those products available today, see the list below. Today (the 29th), tomorrow the 30th and Sunday the 31st, I have a special deal going on as Stampin’ Up! has a promotion through end of August of 2025-2027 In Color SALE. When shopping with me, I am offering with a $50 order & up, a spool of Linen Thread in addition to my regular benefits. Other benefits… the monthly tutorial sent right to your inbox, daisy points to add together for a free item down the road, and having fun with the Stampin’ Up! products. Shop the In Color Sale by clicking the image below.

Stampin' Up! 2025-2027 In Color Sale

Last chance products are available through my store as well – click the image below to view those items, updated regularly by Stampin’ Up!

Stampin' Up! LAST CHANCE PRODUCTS

Thanks for stopping by. May you have a beautiful day. Make someone happy sending them a handmade card filled with ❤️


Product List

Stampin’ Up! Beautiful Gallery for the Happy Inkin’ Thursday Blog Hop

Wow – tomorrow is THE DAY – the Fourth of July – what are you doing special? Picnic? Fireworks? Friends? Welcome to the Happy Inkin’ Thursday Blog Hop! We have a sketch challenge today that offers so man y possibilities Let’s have a look….

Stampin' Up! Happy Inkin' Krew Blog Hop
Stampin' Up! Sketch challenge
Stampin' Up! Beautiful Gallery card front

What do you think – does this work for the sketch? I used a few items in the Gallery Suite of products.. the Beautiful Gallery 6×6 DSP (the reverse side!) the Damask Designs embossing Folder, the Gallery Blooms Bundle (die cuts), and the Beautiful Motifs stamp set for the sentiment. In lieu of the embellishments in the suite, I used the Adhesive-Backed Birds & Dragonflies. Here’s how I created this…

  • Basic Gray card base 8 1/2 x 5 1/2 scored at 4 1/4
  • Basic Gray layer 5 x 3 3/4, embossed with Damask Designs embossing folder. Adhere directly to card base
  • Beautiful Gallery 6×6 DSP 3 x 4 1/4, backed with card stock for strength (to be added to card front with dimensionals once decorated)
  • Die cuts: created using the Gallery Blooms Dies… Mossy Meadow for the background leaves; Basic White colored with Blending Brushes using Peach Pie and Mossy Meadow then die cut for the middle flowers & a bit of Pecan Pie on the edges of the flowers after die cutting; die cut the front leaves from Basic White then use a Blending Brush & Pecan Pie ink to color lightly. These were layered as shown with liquid glue.
  • The sentiment is stamped in Secret Sea ink using the Beautiful Motifs stamp set, then the Basic White strip ‘bannered’ on the ends with paper snips. It was added with dimensionals.
    • I wrapped the one end with Basic Twine Essentials in gray, three times around and secured in back with Tear n Tape, creating a pattern of lines.
    • Final touch – two of the dragonflies from the Adhesive-Backed Birds & Dragonflies.
    • Attach this completed panel with dimensionals, centering.
Stampin' Up! Gallery Blooms card inside

For the inside… I stamped & die cut this wonderful image in Secret Sea ink and was originally going to use it on the front, then decided not to use it. When it came time to do the inside, I decided to0add the die cut (Gallery Blooms Dies) to the 4 x 5 1/4 Basic White panel. And done!

Stampin' Up! Beautiful Gallery card & envelope

For the envelope… I took the remaining piece of this DSP and added it to the envelope flap & trimmed to fit. To me, this seems like a perfect masculine card – could be used for thinking of you after an illness or sympathy, a thank you – just about anything!

Please enjoy the hop by clicking on the ‘next’ button to take you to Amy or click on a name if you wish to visit another’s blog.

Stampin' Up! hop - next button

Amy Koenders

Mary Deatherage

Karen Ksenzakovic

Tara Carpenter

Terry Lynn Bright

You may shop the products to make this card by visiting the links below.

SHOP LAST CHANCE PRODUCTS HERENEW ITEMS ADDED TO THE LIST… MAKE CERTAIN MY NAME IS LISTED AS YOUR DEMONSTRATOR WHEN YOU CHEVCK OUT! :O) REMEMBER…Browse the selection of Last Chance paper crafting products. Additional items are added every other month. These products are available only while supplies last so be sure to buy them before they are discontinued! Discounts vary and are subject to change.

Thanks for stopping by. May you have a beautiful day!

Make someone happy by sending them a handmade card filled with love. ❤️

Product List

–>

Stampin’ Up! Woven Textures + Textured Notes for the Happy Inkin’ Thursday Blog Hop

Hello again to this weekly Happy Inkin’ Thursday Blog hop! We have a sketch challenge today that is quick & easy and can be used for any sentiment or card needed – depending on the DSP (Designer Series Paper) used & the stamp set. I’ve used the Woven Textures 12×12 DSP and the Textured Notes Bundle for the sentiments & die cutting.

I hope you like the updates made to my blog – still a work in progress. Thanks to a special teammate for their help and my daughter Wendy as well. I have more work to do on it, but I’m liking what’s happening :O) I’m still recovering from a knee replacement on 5/5, so limited in what I can really do yet.

Stampin' Up! Happy Inkin' thursday Blog Hop
Stampin' Up! Sketch Challenge
Stampin' Up! Woven Textures & Textured Notes card front

I began with an Early Espresso card base 84 1/4 x 11 and scored at 5 1/2. I added this gorgeous pattern directly to the card base, from the Woven Textures 12×12 DSP cut at 4 1/4 x 5 1/2. Use the adhesive of choice, but I tend to use liquid glue. I then cut a piece of Early Espresso 3 1/8 x 4 1/8 and added a different pattern from the Woven Textures DSP cut 3 x 4 to it – again with liquid glue. These were attached to the card front with dimensionals. I then stamped the sentiment from the Textured Notes Bundle on a scrap of Basic White using Early Espresso ink – then die cut it with the Textured Notes Dies. I added this to the card front with liquid glue. And while you cannot see them, I also added Adhesive-Backed Textured Dots – and the card front was complete.

Stampin' Up! Woven Textures + Textured Notes card inside

For the inside.. I cut a Crumb Cake piece 4 x 5 1/4 and added it to the inside of the card, trimmed a Basic White panel to 3 7/7 x 5 1/8, stamped it with the fun basket weave image from textured Notes stamp set with Crumb Cake ink. This was added to the Crumb Cake piece already attached to the inside of the card – and bingo – card is ready.

Stampin' Up! Woven Textures + Textured Notes card & envelope

For the envelope… more of the Woven Textures 12×12 DSP was added to the flap & trimmed to fit. I again used the same basket weave stamp from the Textured Notes stamp set and Crumb Cake ink to stamp the front of the envelope. Yay! Such a nice masculine card – and can be a thank you, or thinking of you – again, versatility.

Below is information on how to purchase products from me, but please don’t forget to make your way around those participating in today’s hop. Click on the ‘next’ button to take you to Amy or click on a name to take you to another person’s blog.

Stampin' Up! Next icon

Amy Koenders

Mary Deatherage

Akiko Sudano

Karen Ksenzakovic

Tara Carpenter

Terry Lynn Bright

Thanks to everyone already making the most of our newly added Notify Me feature in the online store. If selected, this tool sends an email notification when an out-of-stock item becomes available—it’s already proving helpful to streamline the ordering process for demonstrators.
Unfortunately, the notification service experienced a disruption from May 6 to 11. As a result, back-in-stock emails weren’t sent for the following items:

  • Beautiful Butterflies Hybrid Embossing Folder (164614), Beautiful Butterflies Bundle (164615), and Papillons Superbes Bundle (164616)
  • Mixed Florals Dies (164641), Mixed Florals Bundle (164642), Mixed Florals Suite Collection (164659), and Fleurs et Techniques Mixtes Suite Collection (164660)
  • Elements of Text Cling Stamp Set (164774)

This issue was resolved on May 12. However, back-in-stock emails that should have sent during the impacted timeframe will not send for the items listed above. All messages moving forward should function properly. Just remember to ask for that option to be notified when placing the order if it comes up not currently available.

OK – info on ordering from me…. first of all – no more HOST CODE is needed – YAY! Instead for every order of $20 + Stampin’ Up! has it’s own rewards. And for every $30 order from me in my ONLINE STORE you will earn Darling Daisy Points – one Darling Daisy for every $30 purchase from me. Save those Darling Daisy Points up to 15points and you’ll be able to order a free gift from me valued to $40. And for that $30 purchase from me, you’ll also receive the monthly tutorial – and for May it features the Gallery Blooms bundle.

As you probably already know, the 2025-2026 Annual Catalog is now LIVE to customers AND there were two new kits unveiled in the Kits Collection, PLUS more ONLINE EXCLUSIVES released! Stampin’ Up! is ROCKIN’ IT. And here’s another thing – the JOINING PROMOTION. Become a demonstrator (would love to have you on my team!)

Starter Kit Special is NOW AVAILABLE!

Have you heard? From May 6–31, new demonstrators get $165 USD | $220 CAD worth of products in their Starter Kit for just $99 USD | $135 CAD. (That’s $66 USD | $85 CAD in extra products—our biggest Starter Kit Special yet!) As a bonus, new demonstrators also score FREE shipping on their Kit, FREE business supplies, and a FREE Paper Pumpkin kit! Become a demonstrator and enjoy all the perks that come with that, like a 20–25% product discount, exclusive early access to products, the opportunity to earn a modest supplemental income, the chance to attend incredible training and crafting events, and so much more! 

Stampin' Up! Joining Promotion

Become a Stampin’ Up! demonstrator between May 6–31 and choose $165 worth of products for only $99! (And did we mention your Starter Kit comes with FREE shipping, FREE business supplies, AND a bonus, FREE Paper Pumpkin kit?) Click the link in the image above to join with me & create your Starter Kit! What’s to lose – 20% discount/ 20% commission on all orders.

See the list below of items used for this card. Questions? Connect with me! Thanks for stopping by today – may you have a beautiful day! Send a card – make someone happy. 😀

***************************************************************************************************************** Product List

Stampin’ Up! Grow with Love Card

Online Exclusives are just that – items not in any of the Stampin’ Up! Catalogs. This Grow with Love bundle is perfect for cards for no specific reason. I like sending cards just for fun and it makes the receiver feel special.

Stampin' Up! Grow with Love  Card front

The card base is a standard A2 size in Shaded Spruce. I layered an embossed Basic White panel 4 x 5 1/4. The embossing folder is another ONLINE EXCLUSIVE called Plaster Painting 3D embossing folder. It has lots of texture. The next layer is Shaded Spruce 2 3/8 x 4 3/8 with Regals 6×6 cut 2 1/4 x 4 1/4 adhered directly to the card front. The center Basic White panel is 2 1/4 x 3 3/4 stamped in Shaded Spruce ink with another of the stamps in Grow With Love, then die cut with the appropriate Grow With Love Dies. I really like the corner edges! Again, this was adhered directly to the card front, centering. The mint leaves were stamped again and die cut and attached with dimensionals over the stamped image. I tied a double Linen Thread and attached it with a glue dot. Lastly, Adhesive-Backed Dots were added for contrast.

Stampin' Up! Grow with Love card inside

For the inside… another stamp in the Grow with Love is Thyme – and it’s stamped here in Shaded Spruce on the Basic White 4 x 5 1/4 panel.

Stampin' Up! Grow With Love card & envelope

The envelope… more of the Regals 6×6 DSP in Shaded Spruce added to the flap & trimmed to fit (2 1/4 x 6) and on the front another image – this time it’s Rosemary :O). I messed up when stamping the image so did it again on a scrap, die cut it and adhered with liquid glue. When die cutting the image, it cuts off the name of the plant, so I fussy cut that with my paper snips and added it.

Fun, easy card, could be masculine if one is needed. It shows appreciation and care for another human being – which the world always needs.

You may this Grow With Love bundle in my store – look around at all the possibilities, kits, last chance products and more . When shopping with me and your purchase is $50 or more, you will receive a SU! item valued up to $10 and the current months fabulous tutorial – for April, it’s Memorable Blooms. And use my HOST CODE until April 12.

HOST CODE Y3TPZVYN

Remember the LAST CHANCE LIST I mentioned in an earlier post? Click here to shop that list.

Click this link to see all that’s available in the Stampin’ Up! world and make sure my name is at the top when checking out.

Thanks for stopping by. May you have a beautiful day!

Stampin’ Up! Window Flip Fun Fold

Hello Friday! Today’s card is a fun fold using the Everyday Arches Dies, the Everyday Skies 6×6 DSP and more. It begins with a full sheet of card stock scored at 4 1/4 on the short side, turn and score at 5 1/2 on the long side. Depending how you want the card to fold will determine which quadrant to remove. For this card, it is in portrait style and I removed the upper left quadrant along the score lines. Burnish all score lines. I trimmed an additional 1/16″ off the inside upper quadrant so it would fold nicely.

Stampin' Up! Window Flip Fun Fold
Stampin' Up! Window Flip Fun Fold, open

In the first photo you see the card closed and the image of the plane that peeks through the ‘window’. In the second photo, it shows the card fully open, with the upper left quadrant removed. :O)

Directions:

  • Adhere a 4 1/8 x 5 3/8 panel of DSP to the card front, inking only along the edges
  • Using the Everyday Arches Dies, 3rd from largest, center die on the front panel and die cut, creating this wonderful window.
  • Remove the DSP from the card stock die cut piece. This is a bit tricky as the holes in the die cut tend to hold the pieces together. Be careful not to tear either the DSP or the card stock.
  • Adhere the DSP to the inside of the upper inside panel of the card as shown in photo 2. I stamped mine using the Adventurous Sky stamp set for the sentiment and the Everyday Arches stamp set for the airplane and Night of Navy ink.
  • With the upper flip flap closed, adhere another piece of the Everyday Skies DSP, 4 x 5 1/4, to the flip panel, closed – photo 3.
  • With that die cut card stock window that you saved, die cut it again, this time using the 5th from largest die in the Everyday Arches Dies, making it a smaller arch.
  • Close the card front and add arch to the ‘star’ covered panel, centering with the card front arch.
  • With Basic White card stock and the 7th from largest die in the Everyday Arches Dies, die cut a white arch.
    • Stamp this piece using the Adventurous Sky stamp set and Balmy blue ink for the clouds.
    • Stamp the sentiment using Night of Navy ink and the coordinating Everyday Arches stamp set. Adhere to the Balmy Blue panel, centering it.
  • Stamp the airplane in Smoky Slate ink on a scrap of Basic White, using the Adventurous Sky stamp set.
    • Add color to the plane with Stampin’ Blends Balmy Blue
    • Die cut propellers from Basic White scrap using the Adventurous Sky Dies. Add with dab of liquid glue.
    • Add plane to this panel with dimensionals.
  • The last panel – the sentiment panel… stamp the clouds from the Adventurous Sky stamp set in Balmy Blue ink. I did this twice overlapping just a tiny bit.
  • Stamp the sentiment in Night of Navy ink – also from Adventurous Sky stamp set.
Stampin' Up! Window Flip Fun Fold card & envelope
  • Envelope…
    • Add another piece of the Everyday Skies DSP to the flap, trim.
    • Stamp the clouds on the lower portion of the envelope front with Balmy Blue ink and the Adventurous Sky stamp set.
    • Stamp the airplane from Everyday Arches stamp set in Night of Navy ink.

This is just a great masculine card! And a fun fold to boot just makes it all the more fun.

The Everyday Arches bundle and the Everyday Skies 6×6 DSP is available in my store through the Stampin’ Up! ONLINE EXCLUSIVES. Go to that link here.

The Adventurous Skies Bundle is in the 2024-2025 Annual Catalog and you can find that here.

And if you want to visit the Jan-April 2025 Mini Catalog – go here.

Thanks for stopping by. May you have a beautiful day!!!