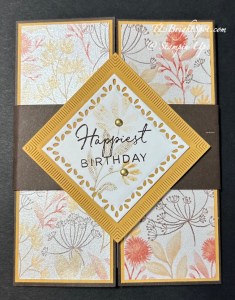
Stampin’ Up! Tile Garden Sneak Peek with Rtisan Sketched Garden for the Happy Inkin’ Thursday Blog Hop

Good morning, good morning! We have a fun sketch challenge today and i’m so glad you have joined us! You may have come from the fabulous Tara or hopped right in nhere. Haowever you arrived, I hope you’ll check out what everyone has created.

Stampin' Up! Blog hop Group
Stampin' Up! Blog Hop sketch challenge

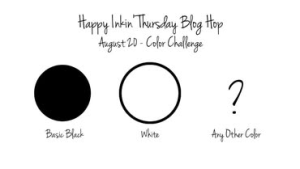
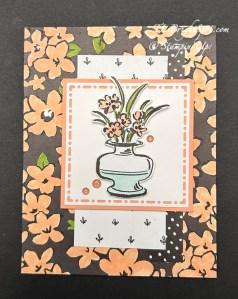
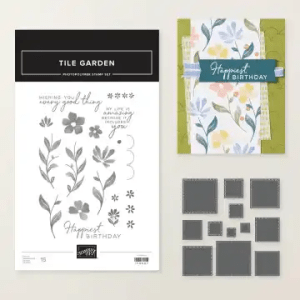
Our challenge today, as you can see is to create using Black & White plus one other color. I chose to work with Crisp Cantaloupe for this card & the wonderful Artisan Sketched Garden DSP from the May-Aug Catalog. The other big item is the NEW Tile Garden bundle from the Stampin’ Up! Sep-Dec 2026 Catalog that goes live Sep. 1! The dies in this bundle are all squares and haqve the same pattern as the Spotlight on Nature Dies, which are circles. Very cool!

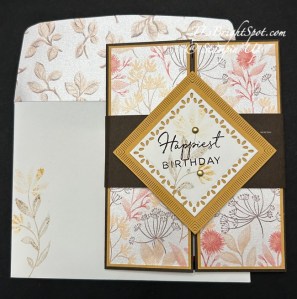
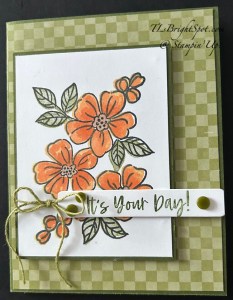
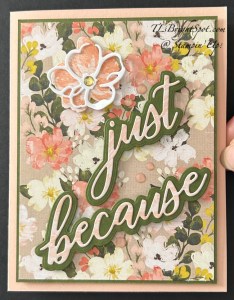
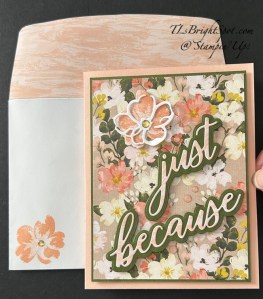
Stampin' Up! Tile Garden + Artisan Sketched Garden card front

The Artisan Sketched Garden DSP is all black & white – the whole package of papers. And of course it can be used as is – or colored. As you can see, I colored the main front panel using the Crisp Cantaloup Shimmer brush. While the shiny doesn’t show in the photo, it does in real life. 😀 After coloring I added this to a Basic Black 4 1/4 x 11 scored at 5 1/2. To that I added a 3/4 x 4 3/4 polka dot strip to the much more white panel 2 x 4 1/4, & attached those to the card front. Next I die cut the white piece using the NEW Tile Garden Dies & added a Crisp Cantaloupe behind it 2 7/8 x 2 7/8. These were added to the card front with dimensionals. I already had this vase of flowers sitting on my desk that I had fussy cut after coloring with Stampin’ Blends: Crisp Cantaloup. Granny Apple Green & Pool Party. I added this to the front again with dimensionals then three Glossy Garden Dots (also from the new Sep-Dec 2026 catalog.)

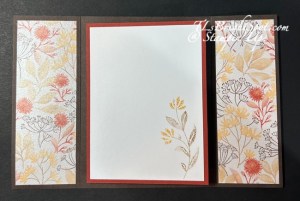
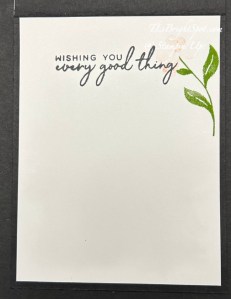
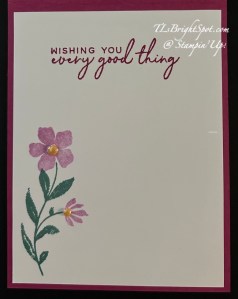
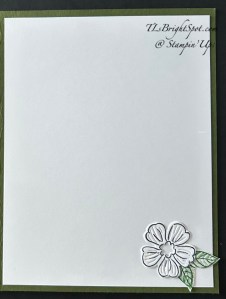
Stampin' Up! Tile Garden inside card

For the inside of the card I used the NEW Tile Garden stamp set for the sentiment (stamped in Memento ink) and the floral image (stamped in Granny Apple Green and Crisp Cantaloupe (this one stamped off once) This is such a sweet delicate flower. I’m loving the images in this set.

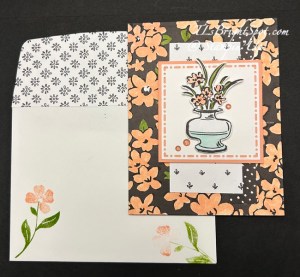
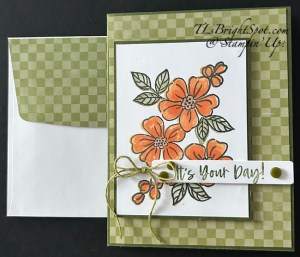
Stampin' Up! Tile Garden + Artisan Sketched Garden card & envelope

The envelope… more of the Tile Garden stamp set used on the front, stamping the leaves min Granny Apple Green and the flowers in stamped off Crisp Cantaloupe. The flap has yet another panel of the Artisan Sketched Garden DSP adhered & trimmed to fit.

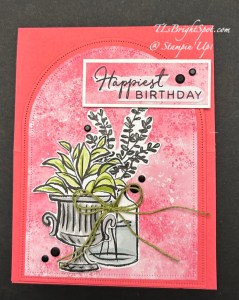
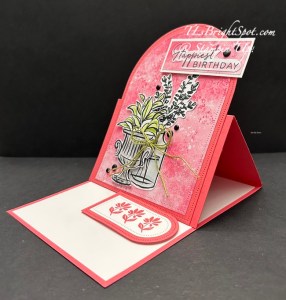
I made another card while I was at it – this time making an easel card with Strawberry Slush, the Everyday Arches Dies, Tile Garden stamp set for the sentiment and tiny flowers, more Artisan Sketched Garden DSP (for the black & white plus theme) and a couple of retired products 🥴 The point is, products can coordinate! It’s the Stampin’ Up! way!!!

Stampin' Up! Artisan Sketched Garden fun fold
Stampin' Up! Artisan Sketched Garden easel card
Stampin' Up! Artisan Sketched Garden easel fold card & envelope

Speaking of the Stampin’ Up! way – right now, today & tomorrow, Stampin’ Up! is offering DOUBLE REWARDS when making your purchases – the 19th-21st of August, 2026. See more information about that below.

Click the link below to see what others on the team have created!

Stampin' Up! Blog Hop button

Amy Koenders

Mary Deatherage

Karen Ksenzakovic

Tara Carpenter

Terry Lynn Bright

Charlene Tackvic

  • Earn double Stampin’ Rewards (2x Rewards) for 3 days only, starting August 19 and ending August 21. That means 20% instead of the standard 10%! All orders qualify once the Stampin’ Rewards threshold of $20 USD | $25 CAD is met. Some exclusions apply. View the Stampin’ Rewards page to learn more.
  • This offer applies to ALL commissionable products! (Excludes existing Paper Pumpkin subscriptions.)
  • To participate, customers must have a Stampin’ Up! account and be opted in to the Stampin’ Rewards program. Encourage them to complete these steps before the offer begins.

SHOP WITH ME HERE

Thanks for stopping by. May you have a beautiful day! Make someone happy by sending them a handmade card filled with ❤️

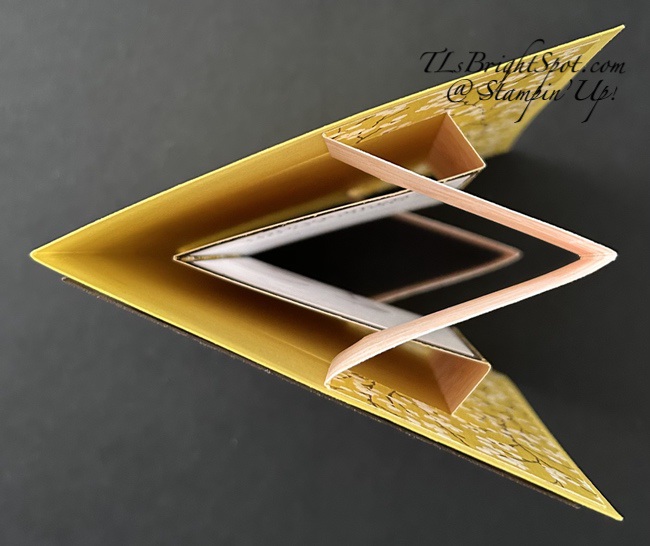
Stampin’ Up! Sneak Peek Scalloped Christmas Cheer Dies on Triangle Gatefold Flip-Up Card

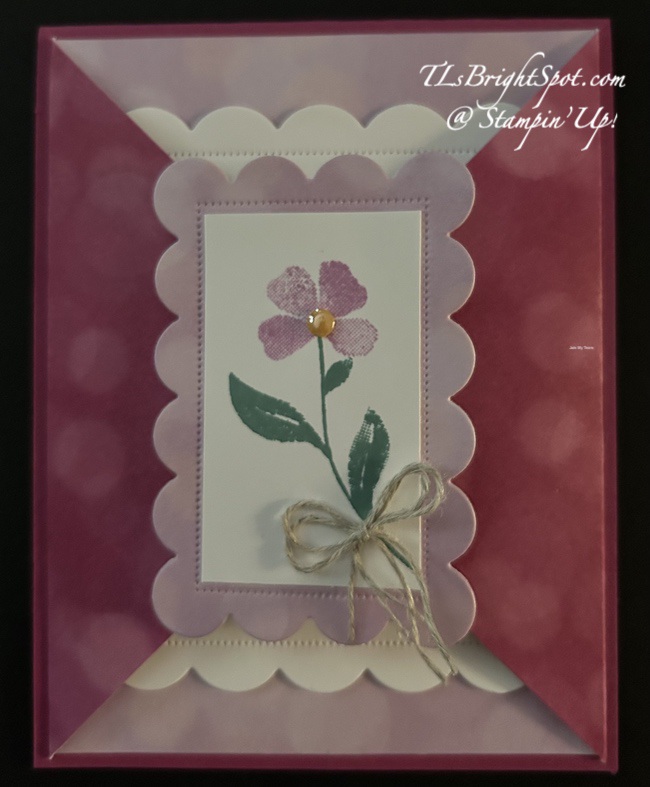
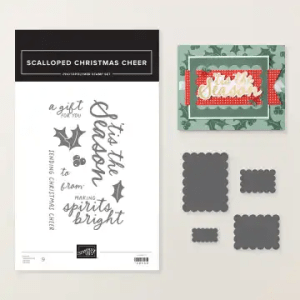
Happy Friday! Golly the week has gone f-a-s-t… I have a sneaky peek of two new items in the Sep-Dec 2026 Catalog: the Scalloped Christmas Cheer Dies AND the Tile Garden stamp set. Both of these come as separate bundles but this is how I paired them for this card – and it’s a fun fold too!

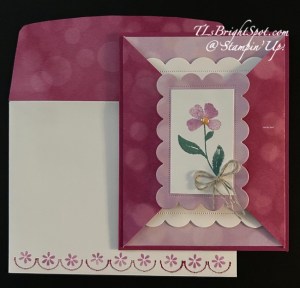
Stampin' Up! Scalloped Christmas Cheer Dies w/ Triangle Gatefold Flip-Up card & envelope

I used an old set of 6×6 papers called Bokeh, but you could use any papers that would compliment the dies and the stamp set – or change the stamp set!

Card cuts & how to:

  • Card base 4 1/4 x 11 scored at 5 1/2 – I used Berry Burst
  • mat: I used the Bokeh 6×6 DSP ~ 4 x 5 1/4
  • Cut 2 panels of Bokeh 6×6 DSP 3 3/4 x 3 3/4,
    • score on the diagonal, burnish folds and attach to backside of the 4 x 5 14 piece
    • Add to front of card base
  • Add Basic White (2 1/2 x 3 1/2) to back of another piece of Bokeh 6×6 DSP for sturdiness (2 1/2 x 3 1/2) ~ die cut with 2nd smallest die in the Scalloped Christmas Cheer Dies
    • Cut Basic White (1 1/2 x 2 12) for stamping images from the Tile Garden stamp set ~ stamp leaves in Lost Lagoon and flower in Fresh Freesia. Add to die cut piece. Embellish w/ 2026-2028 In Color Dots in Golden Glow & a double Linen Thread bow; set aside
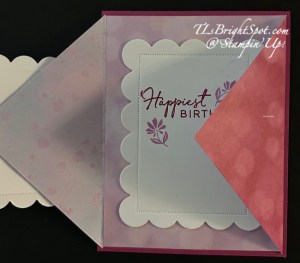
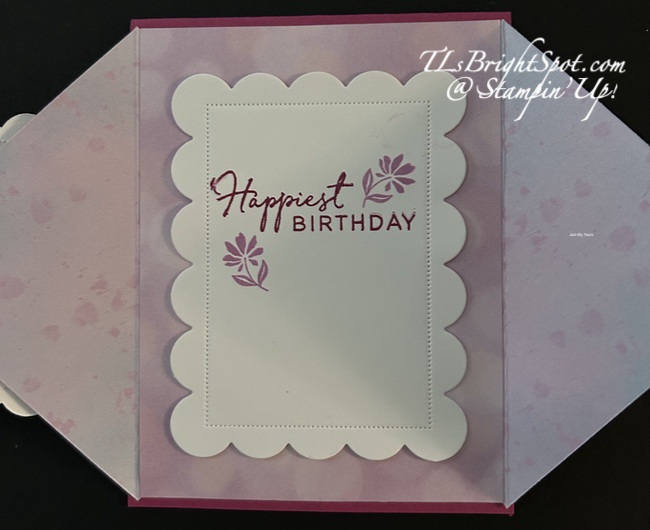
  • On the inside... cut another piece of Basic White w/ the 2nd largest Scalloped Christmas Cheer Dies: stamp the sentiment in Berry Burst ink and the flowers in Fresh Freesia ink from the Tile Garden stamp set; add to inside of gatefold on the large DSP panel
  • Add the set aside front die cut all stamped & ready – to the left side of the DSP triangle gatefold – with dimensionals, centering so it is centered with the inside Basic White scalloped piece
  • Flip the card open to create the final Basic White panel (4 x 5 1/4) … stamp the sentiment in Berry Burst ink, the leaves in Lost Lagoon and the flowers in Fresh Freesia – all using the Tile Garden stamp set. Add Golden Glow accents from the 2026-2028 In Color Dots. Attach to the inside of the card.
  • Envelope
    • Add the 2 12/4 x 6 strip of Bokeh 6×6 DSP to the flap, trimming to fit
    • Stamp the scallop stamp in Berry Burst ink three times, re-inking each time
    • Stamp the Flowers in Fresh Freesia ink three times, re-inking each time.
    • Both these stamps are from the Tile Garden stamp set

Yay! This card is ready to be sent to my grand niece! It’s such a feminine & lovely card. The stamp bundle and the die bundles are in the Sep-Dec. 2026 Catalog – available Sep 1. If you do not have a demonstrator, I would very much like to send a catalog to you so you can order from me. Please let me know how I can help with that opportunity.

Stampin' Up! Tile Garden bundle

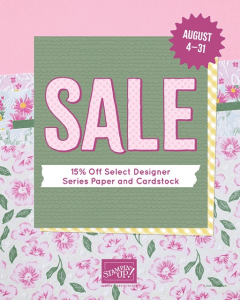
Going on right now – Stampin’ Up! has a card stock & Designer Paper Sale through Aug 31, 2026. Shop the sale by clicking on the image below.

Last chance Stampin’ Up! products are also available. Click the image below to shop those items with me.

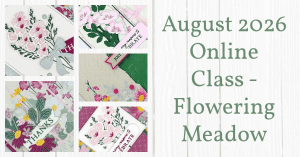
When shopping with me… when your purchase is over $50 before shipping & taxes, you will receive the current monthly tutorial. For the month of August, that tutorial using the Flowering Meadow Suite of products. See my customer rewards page for more benefits!

Thanks for shopping with me! Make one, share one, send one! Make someones day by sending them a handmade card made with ❤️

Product List

Stampin’ Up! Butterfly Hot Foils Fun Fold with Valley in Blooms DSP for the Happy Inkin’ Thursday Blog Hop

Welcome welcome. Oh it is so energizing to try new products and new fun folds, etc. etc. I think we have a treat for you today.

Stampin' Up! Blog Hop group
Stampin' UpHop  Theme Challenge

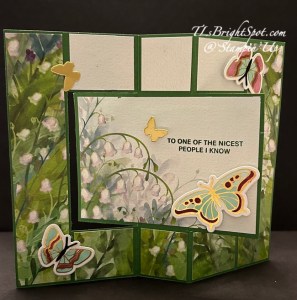
Let’s look more closely at this card with some other photos.

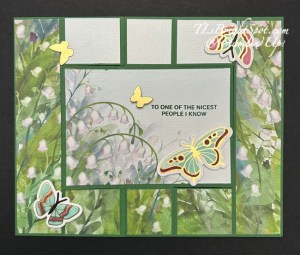
Stampin' Up! Butterfly Flight Hot Foil fun fold, flat
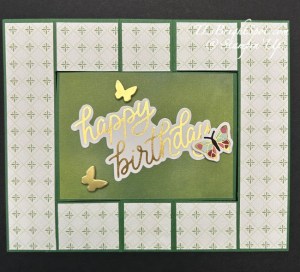
Stampin' Up! Butterfly Hot Foil fun fold, flat, other side

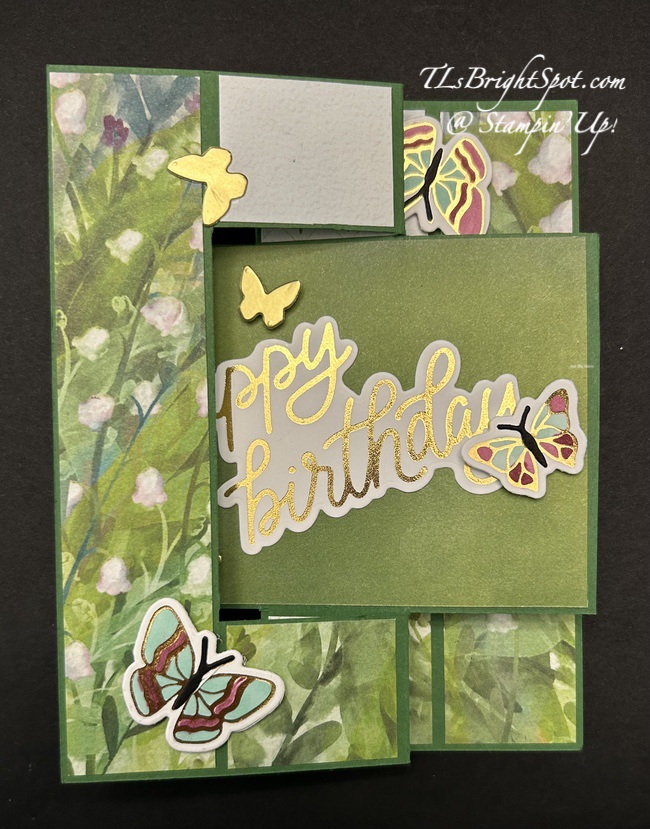
What’s neat about this fun fold is the way it opens and flips or flaps one way or the other while the center remains intact. It’s hard to describe, but it can close either way & it fits in a standard A2 envelope.

How to make this card… and it might help to do a template first! This is called a flip-flap card.

  • Card base is 6 3/4 x 5 1/2. Mark all four sides lightly with a pencil at the 1 1/4″ mark.
  • With the long side at top, score at 2 3/4 & 4″ both above & below the 1 1/4″ mark
  • With the long side at top and the right edge at the 1 1/4 mark on the right side of the paper trimmer, cut from 1 1/4″ to 4 1/4″ (or the pencil mark). Follow this with long side at top for the opposite side.
  • With short side at top & the right edge of paper at the 1 14″ mark on the right side of the trimmer, cut from 1 1/4″ to 2 3/4″. Flip paper over & with short side at top, do same on opposite end.
  • You have now connected the cuts, leaving the center held at top & bottom between the scored areas of 2 3/4″ & 4″ 😀
  • Burnish the scores as mountain & valley.
  • Now you may decorate! Be sure to erase your pencil lines prior to adding your DSP pieces 😁 Long panels on both right & left are 1 1/8 x 5 3/8 (cut 2 for front & 2 for back. Add these with adhesive of choice. Short sections at top & bottom are the same dimensions: 1 3/8 x 1 1/8, 1 1/8 x orate.1 1/8 & 1 3/8 x 1 1/8. Cut 4 of each for both front & back. Adhere appropriately. The center section is 4 1/8 x 2 7/8 (cut 2 – one for front & one for back). Adhere & decorate.
  • You can see I used the Valley In Bloom 12×12 DSP & the Lily of the Valley stamp set for the one sentiment (to one of the nicest people I know) stamped in Garden Green ink. The colored butterflies were done using the Hot Foil machine on Willow White paper then colored after the foil process with Stamp[in’ Blends: Blackberry Bliss & Pool Party. The small foil dies were die cut from Gold Foil using the Butterfly Flight Dies. The happy birthday sentiment was made with the hot foil system using White Will & of course the gold foil for the system & heated then die cut – Classic Greetings Hot Foil Dies. All butterflies were added with dimensionals.

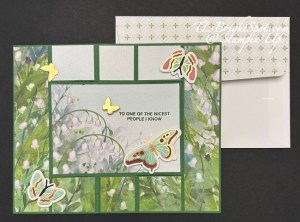
For the envelope…only the flap was decorated – using a pattern from the Valley In Bloom 12×12 DSP.

Stampin' Up! Butterfly Flight Hot Foil fun fold card & envelope

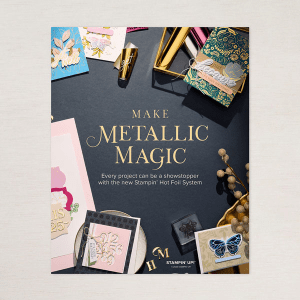
The Stampin’ Up! Hot Foil System will be available for customer purchase on 7/10/2026 and you may order it from me (of course!). See my information below the list of names to learn how to do that!

Now… time to see what others on the hop have created for this birthday them challenge. See the list below, click on the next button or click on a name. Enjoy.

Stampin' Up! hop button

Amy Koenders

Mary Deatherage

Karen Ksenzakovic

Tara Carpenter

Terry Lynn Bright

info about the hot foil system

– Included in the Stampin’ Hot Foil System & Craft Class:

– Metallic Magic Craft Class ($30 value—limited time only!)
– Stampin’ Hot Foil platform
– Stampin’ Hot Foil Shim & Spacer
– Stampin’ Hot Foil Magnetic Pick-Up Tool
– Silicone platform station
– Silicone cooling pad
– Power cord
– Instructions on how to use the system

Stampin' Up! Hot Foil Magic!

– Hot Foil results are best with either White Willow or Two-Tone Cardstock. Smoother card stocks like the Two-Tone Cardstock and White Willow will achieve the best results when using the system, but you can use the regular card stocks too.

– The Hot Foil System, foil rolls and new hot foil dies and bundles will be available Friday, 10 July 2026 in the online Stampin’ Up! store.

– A FREE Hot Foil Online Class from Stampin’ Up! is included with your hot foil system purchase (a $30 value!), do not add the class separately to your cart (you’ll be charged for it if you

do!). You’ll automatically get a link to it after you purchase the Stampin’ Hot Foil System.

– The Stampin’ Hot Foil system is $160.  Dies & foil are sold separately.

– Stampin’ Up! has let us know that if the Stampin’ Hot Foil system goes on backorder, it may take longer than normal to restock. So if you would like to order the system, order sooner rather than later!

– IMPORTANT NOTE: Cutting dies are not designed to be used with hot foiling. You cannot die cut using foiling dies. Doing so risks damaging the dies and the system.

For now – think about it – get excited – and – you can order it from me here

AND… while I had ended the double Daisy Rewards – I’m re-instituting that – so double your fun. DOUBLE REWARDS + for orders $50 & up, the monthly tutorial.

Stampin' Up! Jly monthly tutorial

Thanks for stopping by. May you have a beautiful day. Make someone happy by sending them a handmade card filled with heart! ♥️

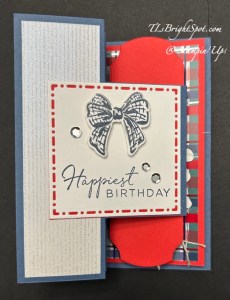
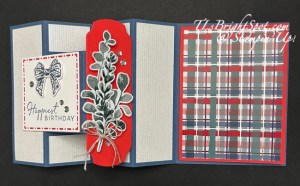
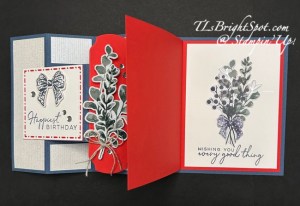
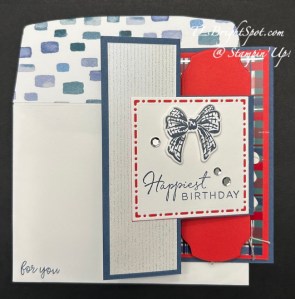
Stampin’ Up! Waterside Retreat DSP for the Happy Inkin’ Thursday Blog Hop

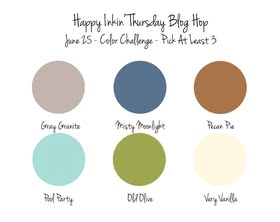
Welcome to Thursday and this fun Happy Inkin’ Thursday Blog Hop! You’ll see some creative stuff today I’m sure. We have a color challenge and it’s perfect for the Waterside Retreat DSP – all the colors in the challenge are used 😀.

Stampin' Up! Happy Inkin' Thursday Blog Hop
Stampin' Up! Hop Color Challenge

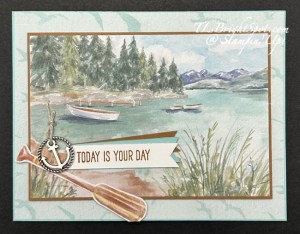
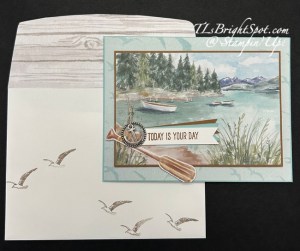
The cards front image was cut out directly from the patterned paper and added to a background of Pecan Pie. Another pattern in the Waterside Retreat DSP was added to the Pool Party card base., then the picture image pieces were attached with dimensionals. I cut out a single oar from another piece of the Waterside Retreat & attached it with liquid glue and a small dimensional on the oar ends. I added the Loose Anchor Trinket with glue dots after adding a length of Linen Thread & tying it in a knot – all with glue dots. Then I cut three lengths of of card stock 1/2 x 2 1/4 (Basic White, Pool Party & Pecan Pie), created pointy ends layered then together with dabs of glue then slipped them under one end of the trinket attaching with a dab of glue. Oh – and the sentiment… from the Relaxing Waterside stamp set stamped in Pecan Pie ink.

Stampin' Up! Waterside Retreat DSP Masculine card

This is just a perfect masculine card for many occasions… could be birthday, retirement, promotion – just lots of opportunities. There are so many parts of this card that I like: the added trinket, the three (3) banners, the oar, the SCENE! It’s peaceful, calm, nothing demanding about it. It ‘rests’ easily. This DSP – Waterside Retreat – is just so special – it can be masculine or it could be feminine. While I called this a masculine card in a ‘tag’, it doesn’t have to be. This could be anyone who appreciates fishing, being on the water for any reason, relaxing, watching birds & the life of a place like this – a camp maybe..

Stampin' Up! Waterside Retreat inside card

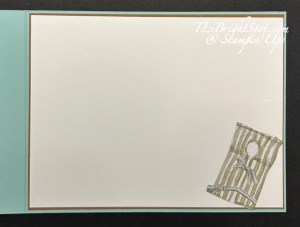
For the inside … a Basic White panel attached to Pecan Pie and added to the inside of the card base. Then a life vest fussy cut with paper snips added with liquid glue.

Stampin' Up! Waterside Retreat DSP card & envelope

The envelope … more of the Waterside Retreat DSP on the flap trimmed to fit. For the front seagulls were stamped in stamped off once Gray Granite ink.

Now – remember you can purchase all the products to make this car by viewing the information below – yes, scroll on down past the names.

Stampin' p! Hop button

Amy Koenders

Mary Deatherage

Karen Ksenzakovic

Tara Carpenter

Terry Lynn Bright

June Product Of The Month – Available Now With Orders of $75+ While Supplies Last

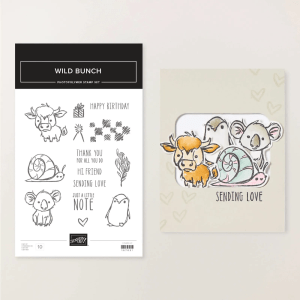
There is a new Product of the Month available to order now for $5 when you place an order of $75+ and it will be available while supplies last!!  The Product of the Month for June is the Wild Bunch Stamp Set!

Stampin' Up! POTM, Jun

Send smiles with the Wild Bunch Stamp Set! With hand-drawn animals like a koala, penguin, snail, and highland cow, plus versatile sentiments for birthdays, thank-yous, or just because, this set can help brighten anyone’s day. Add hearts, party hats, presents, or scribbled patterns to make each card or scrapbook page even more fun.

The Wild Bunch Stamp Set is the exclusive Product of the Month for June 2026! Only available until stocks run out—don’t wait to get yours! ORDER FROM ME HERE

Here are the details:14 photopolymer stamps

Suggested clear blocks (sold separately): b, c

Also available in French

Every month Stampin’ Up! will release a new item that is only available for purchase once per account. These items will be limited quantity and are likely to sell out quickly—once they’re sold out, they’re gone for good!

When ordering from me, you get Daisy Patch Rewards for every order. (See my REWARDS PAGE for details) and with those points comes an opportunity for a FREE STAMP SET or items valued up to $40. You will also receive the monthly online tutorial – which this month uses this fabulous Lily of the Valley suite of products.

Stampin' Up! June Tutorial

Want to JOIN MY TEAM and become a part of this fun crafty group? Lots of benefits there too. JOIN WITH ME HERE

Product List

Stampin’ Up! Violets Fun Fold for the Happy Inkin’ Thursday Blog Hop

Welcome, welcome. We have a wonderful floral challenge for us today & I’ve chosen a new, soon to be released July ONLINE Exclusive to use in this shutter card. The Framed Violets bundle is part of the Violet Dreams Suite of products: Adhesive-Backed Blooms, 1/4″ Satin Ribbon in Fresh Freesia, Violet Dreams 12×12 DSP & the Framed Violets bundle already mentioned.

Stampin' Up! Krew blog hop
Stampin' Up!Blog Hop challenge
Stampin' Up! Framed Violets Shutter fold card front

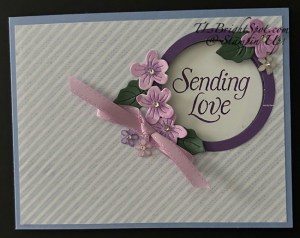
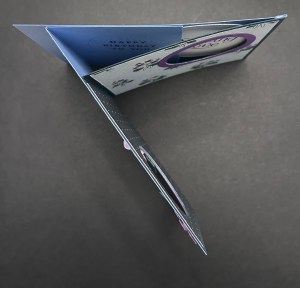
When looking at this card, notice the stamped sentiment on Basic White, then notice below the stamped sentiment on Hydrangea Hue – that’s all part of the slider mechanism. It is so cool in person!

Stampin' Up! Framed Violets shutter fun fold inside card

And here’s a top/ down view…

Stampin' Up! Framed Violets Shutter fun fold top/ down view

How to make this card… notice there are two colors used on this card, a light color (Hydrangea Hue) & a Basic White and there are two panels of the Hydrangea Hue.

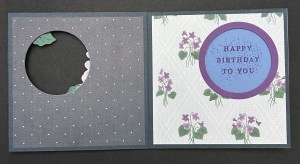
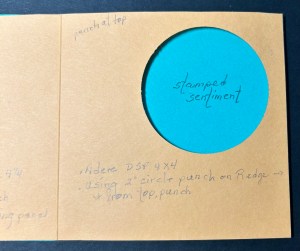
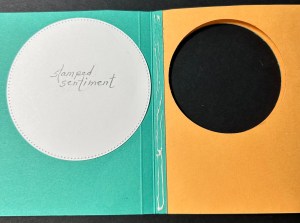
Front Panel: Color 1 – 4 14 x 8 1/4 scored at 5 1/2. The smaller section is what creates the shuttle or ‘slider’ of the card. Cover the larger section with DSP cut 4 x 5 1/4. Use a 2″ hole punch to create the opening on the front side. Center Panel: this is Secret Sea – 4 1/4 x 8 1/2 scored at 4 1/4. Add a 4 x 4 DSP to each side. With the fold to the left, place so this panel is flush with the right edge of the card front; hold in place, trace the 2″ circle, then punch the 2″ circle where marked. Close this Secret Sea piece & trace the circle to the right side of the Secret Sea (see the floral pattern in the open card), punch the 2″ circle again using the tracing to line up.. There should now be three circles: front and both sides of the Secret Sea inside panel. Adhere the backside of the left section of this folded panel to the inside of the front panel, matching edges so they are even. DO NOT TRY TO LINE UP WITH THE FOLD! Back Panel: The color of this panel should match that of the card front. In my case – Hydrangea Hue: 4 1/4 x 5 3/4 score at 5 1/2. Cut a Basic White piece about 3 1/4 x 3 1/4 and adhere close to the score line and that becomes the stamped sentiment we see with the card closed. Do not adhere just yet :O) First, burnish the score line well, fold it inwards and add adhesive along the 1/4″ fold. With the folded edge in, add to the center panel even with the right edge of that panel. It will look like the photo at left, below. Now add the Basic White piece so it fits behind the opening and can be stamped. (yes, mine is a circle cut with the Stitched Shapes Dies). Now add adhesive along that score line as shown in photo at right and close card. This keeps the card from being floppy.

Stampin' Up! template of shuttle card.1
Stampin' Up! template image of shuttle card

Now you may do your stamping sentiments. With the card closed, stamp on the Basic White panel – that’s what shows when the card is closed. For my car rd I stamped in Gorgeous Grape ink and used the sentiment from the Framed Violets stamp set. Open the card and stamp on the ‘slider’ portion. Again, Gorgeous Grape ink and the sentiment is from Framed Violets stamp set.

Now it’s time to decorate the various layers: To create the ‘frame’ around the circle I used a 2 3/8 circle punch and a 2″ circle punch and adhered it to the front & one on the right inside circle as well. card front: I used the Framed Violets Dies to die cut the violets from Basic White then colored the violets using Stampin’ Blends in Highland Heather. I used the tiniest of the Rhinestone Basic Jewels for the flower centers. The leaves arew die cut using the Framed Violets Dies and Peaceful Pine. I added the flowers & leaves with dabs of glue then added the bow with a glue dot: 1/4″ Satin Ribbon in Fresh Freesia (part of the suite). The additional gems are Adhesive-Backed Blooms that add that final touch of sparkle. Love these!

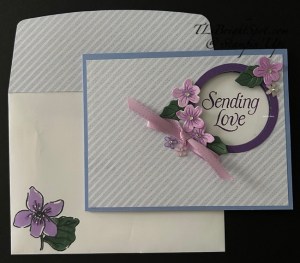
And below is the card & envelope – this sweet, sweet violet from the Framed Violets stamp set stamped in Memento ink then colored with Highland Heather & Peaceful Pine Stampin’ Blends. The same pattern of DSP from Violet Dreams 12×12 was added to flap & trimmed to fit. This becomes such a beautiful gift to a birthday gal – all by itself. Love!!

Stampin' Up! Framed Violets Shutter fun fold card & envelope

See below for information about ordering from me or becoming part of my stampin’ team 😀

Click on the next button to see what others have created for today’s hop!

Stampin' Up! Krew hop button

Amy Koenders

Mary Deatherage

Karen Ksenzakovic

Tara Carpenter

Terry Lynn Bright

Order or join my team right here

Stampin' Up! Free Shipping
  • All order types qualify for this promotion.
  • Free shipping is for three days only. You and your customers must place your orders between June 11 and 13 to qualify.
  • Free shipping automatically applies to the shopper’s cart after the qualifying amount has been met, which is $75 USD | $100 CAD (before tax).
  • All orders must meet the qualifying amount to be eligible for free shipping. Coupon codes and Stampin’ Rewards will lower the total amount of an order.
  • Craft Classes do not have shipping charges. Purchasing a Craft Class will increase the total cart amount but will not contribute to the free shipping qualifying amount.
  • The additional cost for expedited shipping is NOT covered by this promotion.

Stampin’ Up! Bloom Boutique SDSP & Scalloped Blooms Bundle for the Happy Inkin’ Thursday Blog Hop

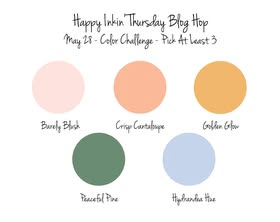
Welcome! It’s Thursday & time for our Happy Inkin’ hop 😀. There are some talented folks in the group so be sure to check out what they have created. We have a color challenge today & I made two very different cards; both use the Bloom Boutique SDSP & the Scalloped Blooms Bundle.

Stampin' Up! Blog Hop button
Stampin' Up! Blog Hop Color challenge

Below are the two cards I created for this color challenge. I would really like to know if you have a favorite!

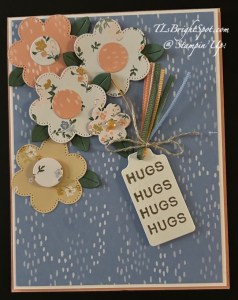
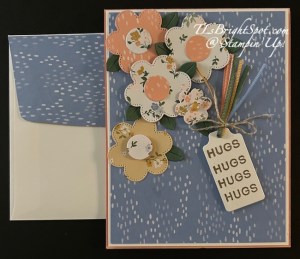
For the card on the left I used the Scalloped Blooms Dies to die cut flowers & centers from various papers in the Bloom Boutique Specialized Designer Series Paper (SDSP). I added them to the created card front: Crisp Cantaloupe card base (4 1/4 x 11 scored at 5 1/2) with a layer of Basic White (4 1/8 x 5 3/8) & Bloom Boutique SDSP (4 x 5 1/4) that were added to the card base with dimensionals. I die cut leaves from Peaceful Pine & slipped them around the flowers. In the smallest flower I added a single 2026-2028 In Color Dot in Golden Glow. The sentiment is stamped with VersaMark ink & sprinkled with Metallic WOW! embossing powder in Gold & heat set. I then die cut it with a die from Scalloped Blooms Dies. I snipped thin strips from each of the 2036-2028 In Color 3/8″ Bordered Ribbon & slipped them through the hole in the die cut, then tied a Linen Thread Bow to secure them in place. The sentiment was added to the front with dimensionals.

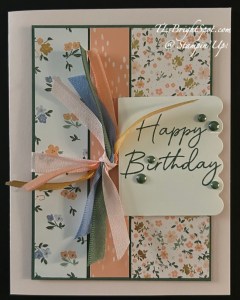
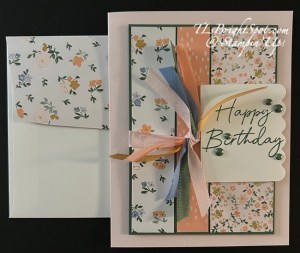
For the card on the right I cut strips from various papers in the Bloom Boutique SDSP: 1 x 4 3/4, 3/4 x 4 3/4 & 1 1/2 x 4 3/4. These were added to a Peaceful Pine laiyer 3 1/2 x 4 7/8. This was added to the Barely Blush card base (8 1/2 x 5 12 scored at 4 1/4). I wrapped a Barely Blush 3/8″ Bordered Ribbon around and secured it in back. I took the remaining bits of ribbon from the first card & tied each one in a kinot on the Barely Blush ribbon. I stamped the sentiment in Peaceful Pine ink from Scalloped Blooms satmp set on a Basic White scrap then die cut it with a Scalloped Blooms Die. I added dimensionals to the back & sdecured it in place. Final touch… five 2026-2028 In Color Dots in Peaceful Pine.

Stampin' Up! Bloom Boutique floral card front
Stampin' Up! Bloom Boutique Varied Papers Birthday card front

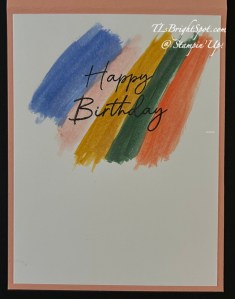
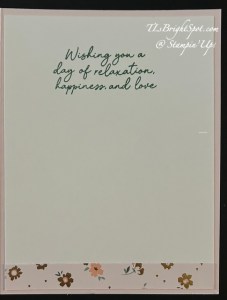
For the insides of these two cards… the card on the left has stripes added with the various In Color Shimmer Brushes found on page 77 in the May-August 2026 Catalog. Once these dried I stamped the sentiment from scalloped Blooms in Black ink. The card on the right has a simple 1/2″ x 4 strip of the Bloom Boutique SDSP at the bottom. The sentiment is stamped in Peaceful Pine ink and is from Scalloped Blooms stamp set.

Stampin' Up! Scalloped Blooms hugs card inside
Stampin' Up! Bloom Boutique Birthday card inside

Envelopes… Each envelope has a 2 1/4 x 6 strip of the Bloom Boutique SDSP added to the flap & trimmed to fit. And that’s it! So… what’s your favorite card? I’d love to know!

Stampin' Up! Scalloped Blooms Bundle hugs card
Stampin' Up! Bloom Boutique SDSP Birthday card

OK, time to make the rounds of those participating in today’s hop. More information is below in how to order the products to make these cards & to JOIN MY TEAM 😀 THANKS FOR STOPPING BY!

Stampin' Up! Blog hop button

Amy Koenders

Mary Deatherage

Karen Ksenzakovic

Tara Carpenter

Terry Lynn Bright

Shopping with me is easy peasy… simply click the link & you’ll find SU! ONLINE EXCLUSIVES (items not in any catalog!), kits of all sorts – for cards or household items, scrapbooking, catalog info & SU! craft classes. When your order is $50 or more you will receive my monthly tutorial & also get Daisy Patc h Rewards (see my rewards page for more info.

SHOP WITH ME HERE

Stampin’ Up! has a joining promotion that has awesome benefits though the end of May – just days away. Now, so you know… as a Demonstrator, we have the privilege/ opportunity to preorder from catalogs & ONLINE EXCLUSIVES before they are available to the public. Already the July preorder is available & I’ve made good use of that. You’ll see more new products coming soon. What I’m encouraging of course, is for you to seriously consider becoming a Demonstrator -with all the fabulous benefits… 20-25% off all products once you’re joined, opportunity to attend special workshops & conventions & a fabulous supportive community of crafters. Join as a demonstrator now & you’ll get our new 2026–2028 In Color Stampin’ Pads FREE along with their Starter Kit! Or if you’d rather have different products instead of ink pads, we’ve got that covered there, too—you can add an extra $35 USD | $50 CAD worth of products to your Starter Kit.

Stampin' Up! Joining Promotion

JOIN MY TEAM HERE

Thanks for stopping by. May you have a beautiful day. Make someone happy by sending them a handmade card filled with ❤️

Product List

Stampin’ Up! Fragrant Layers & Timeless Plaid Birthday Card

Good Saturday morning! We’re due for some warmer weather today – hoping some of the snow melts so we can get to our mailbox! I don’t remember if I mentioned our mailbox was plowed in and the snow packed down so tightly it became solid, solid. Our snow blowing neighbors couldn’t remove any of it! For now our mail is being delivered to our neighbors for a bit. Spring awaits… 🌺

Stampin' Up! Fragrant Layers & Timeless Plaid 6x6 birthday card front

The Fragrant Layers bundle is perfectly sweet and has so many possibilities. I had this on my desk & hadn’t completed it, & decided to do just that. I colored the flowers with Stampin’ Blends, Light Peach Pie then both Light & Dark Timid Tiger & Bronze for the center. I also added Wink of Stella to the center. The leaves got a light touch of stamped Old Olive ink. I added this to a Mossy Meadow layer then wrapped Old Olive Linen Thread around twice and tied a bow, securing with a glue dot. The card base is Mossy Meadow A2 size and layered with Timeless Plaid 6×6. I added the floral scene to the card front, with dimensionals, off-setting it to the left. My sentiment is stamped in Mossy Meadow ink & die cut with a banner die in this Fragrant Layers Dies. I added it next to the bow with dimensionals, then doubled up the dimensionals on the right end of the sentiment. Final touch… Natural Matte Dots available March 3 as part of our ONLINE EXCLUSIVES 😀.

Stampin' Up! Fragrant Layers b'day card inside

For the inside… I had this sweet flower already die cut & waiting for use… stamped in Memento ink & die cut with the Fragrant Layers Dies – added it to the Basic White panel. The little leaves were also waiting and come from this same Fragrant Layers bundle. This will make a perfect card – for a birthday or a simple hello – refreshing.

Stampin' Up! Fragrant Layers & Timeless Plaid card & envelope.

The envelope… more of the same Timeless Plaid 6×6 adhered to the flap & trimmed to fit. And a sweet flower on the front colored the same as the card front.

Today is THE LAST DAY to redeem those bonus days coupons. Do not let them go to waste!

Stampin' Up! Bonus Days - redeem!

Redemption Period: February 3–28, 2026. There is no limit to the number of coupon codes you can redeem on an order during the redemption period. If you’re redeeming multiple codes, you must put a space between each code.

You may only redeem coupon codes one time. You cannot redeem them after February 28.

You can redeem Bonus Days coupon codes for month-to-month Paper Pumpkin subscriptions and new prepaid subscriptions.

Some restrictions apply. Coupons can’t be redeemed towards Starter Kits and you cannot use them on exchanges.

Redemption period ends:  February 28, 2026, at 11:59 p.m. (MT)

When you shop with me, there are some fun benefits… I like to thank my customers.. When you spend $50 or more (before tax & shipping) you will also receive a copy of my monthly tutorial – and guess what – it’s Sweet Bugs for February! AND… keep track of your purchases using my Daisy Patch Rewards and get even more benefits! Visit my REWARDS Page for more info.

SHOP WITH ME HERE!

As a demonstrator, there are so MANY benefits: being able to preorder new products before they are available to the ‘open market’, having a supportive creative community that encourages & helps in various ways, being able to attend creative events via ZOOM or in person (CONVENTIONS!), 20% – 25% discount on all products after joining, monthly tutorials and lots, lots more.

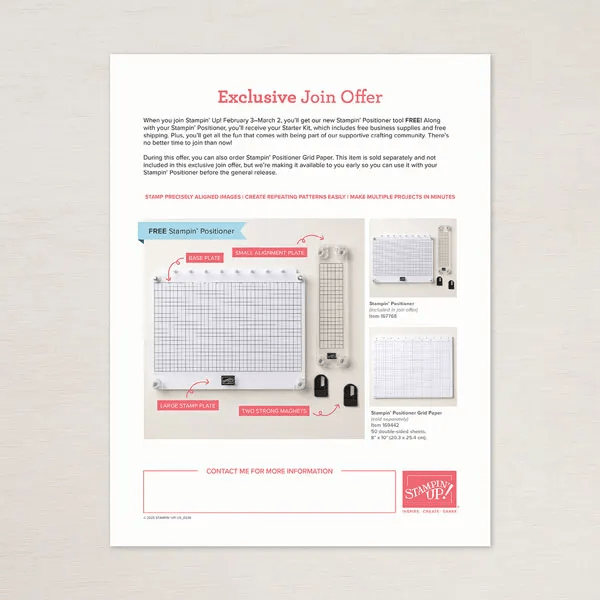
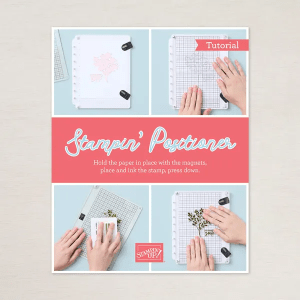
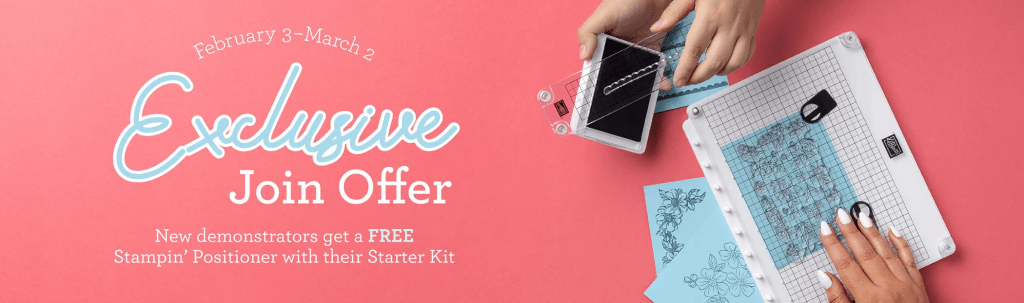
Want to thinking about JOINING MY TEAM? Check out how to do that HERE. What more could you ask for? well, let me just say… JOIN MY TEAM & get this awesome new Positioner Tool designed by our Stampin’ Up! TEAM!

Here are the details about the JOINING PROMOTION…New team members who purchase their Starter Kit February 3–March 2 will also receive our new Stampin’ Positioner*.

Stampin' Up! Joining Promo

Check out this video to learn more

Stampin' Up! Join offer

Thanks for stopping by. May you have a beautiful day. Make someone happy by sending them a handmade card made with ❤️

Product List

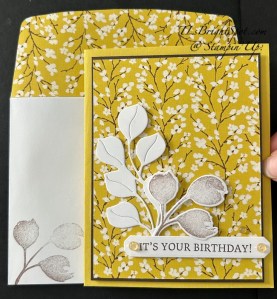
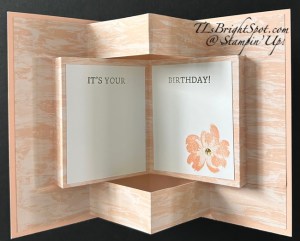
Stampin’ Up! Pop-Up Book Fun Fold with Brushed With Beauty DSP

Brushed With Beauty is one of my all-time favorites. I just love the colors and the vibrancy and the nature images. I came across this fun fold the other day on Pinterest and just had to give it a ‘go’ using this paper. It coordinates with Petals of Beauty bundle & Words of Beauty bundle, as an ONLINE EXCLUSIVE back in November. I’m surprised the other but the same I have any remaining paper! I’m sharing two cards today using different patterns in this paper pack – each so different from the other but the very same fun fold.

Stampin' Up! Pop-Up Book Fun Fold card 1 & envelope.
Stampin' Up! Pop-Up Book Fun Fold, inside card 1

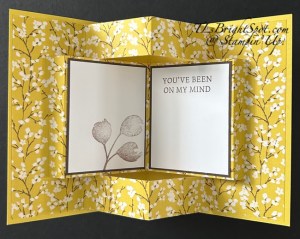
Card one is made with Darling Duckling for the card base and a layer of Early Espresso behind the DSP on the card front. I stamped and die cut leaf images using the Petals of Beauty bundle. The sentiment is from Words of Beauty stamp set & die cut using a Die from the coordinating bundle. The embellishments are Opal Rounds from the Mediterranean Blooms suite of products. On the inside, I again stamped in stamped off Early Espresso ink for the leaf image and full strength for the sentiment (Words of Beauty stamp set). I layered these Basic White ‘book pages’ with Early Espresso card stock.

Stampin' Up! Pop-Up Book Fun Fold
Stampin' Up! Pop-Up book fun fold, inside card 2

For card 2 – remember it’s still the same Brushed With Beauty DSP pack. The card base here is Petal Pink and the DSP is layered on Mossy Meadow. The flower is die cut using the Petals of Beauty Dies: I stamped the flower in Petal Pink ink directly on the DSP & die cut the that, then die cut the white separately. The words are from Words of Beauty and die cut with the Dies: mossy Meadow for the shadow and Brushed with Beauty for the words themselves. For embellishments I used Low Profile Dots from Mixed Media Florals suite of products. On the inside, the words are stamped in Mossy Meadow ink using the Words of Beauty stamp set and the flower in Petal Pink ink with the Petals of Beauty stamp set and more Low Profile Dots.

Instructions how to make this card:

  • card base is 8 1/2 x 5 1/2 scored at 4 1/4
  • DSP is 5 1/4 x 8 1/4:
    • with long side at top, score at 4 1/8, burnish gently
      • with short side at top, & DSP at 1″ mark, cut between 1″ & 7 1/4″, repeat for other side
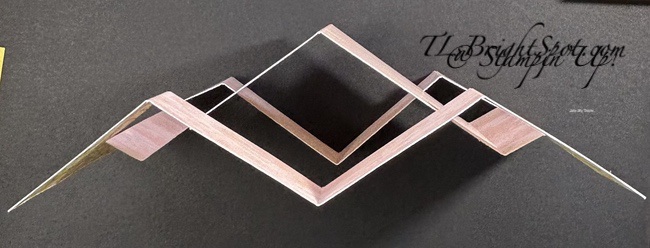
        • with long side at top again, line up at 1″ & score between the long cuts at 1″ & 1 1/2″: repeat for other side. With long side still at top, score at 2″ in the upper & lower 1″ sections. Repeat for other side. Burnish all score lines gently… valley (1″), mountain (1 1/2″), valley (2″), mountain (for 1″ section; valley for center section), valley (other 2″ score), mountain (other 1 1/2 score), valley (final 1″ score.) It should look like photo below
  • With card base flat, adhere one ‘end’ on the DSP (between the 2″ and 1″ score lines): repeat for other end.
  • Close card so all score lines fold as required – see photo below
Stampin' Up! Pop-Up book fun fold, closed

Now decorate:

  • Card front layers: card stock is 3 7/8 x 5 1/8; DSP layer is 3 3/4 x 5 & added to card front with dimensionals
  • Card inside layers: card stock is 2 1/2 x 3 1/8; Basic White is 2 3/8 x 3. ( I used a card stock layer only on the Darling Duckling card)

Envelopes…

Stampin' Up! Pop-Up Book Fun Fold card & envelope, card 1
Stampin' Up! Pop-Up Book Fun Fold card & envelope, card 2

Card 1 – Brushed with Beauty DSP 2 1/4 x 6 in Darling Duckling pattern, attached to flap & trimmed to fit. On the front, the small leaf image is stamped off once Early Espresso ink.

Card 2 – Brushed with Beauty DSP 2 1/4 x 6 in floral pattern, attached to flap & trimmed to fit. On the front, the flower is first stamped full strength in Petal Pink ink with the outline flower stamp, then stamped with the full flower in stamped off Petal Pink ink.

Love, love, love this new fun fold! If you try it, please send me a photo as I’d like to see your creation.

As a demonstrator, there are so MANY benefits: being able to preorder new products before they are available to the ‘open market’, having a supportive creative community that encourages & helps in various ways, being able to attend creative events via ZOOM or in person (CONVENTIONS!), 20% – 25% discount on all products after joining, monthly tutorials and lots, lots more.

Want to thinking about JOINING MY TEAM? Check out how to do that HERE. What more could you ask for? well, let me just say… JOIN MY TEAM & get this awesome new Positioner Tool designed by our Stampin’ Up! TEAM!

Here are the details about the JOINING PROMOTION…New team members who purchase their Starter Kit February 3–March 2 will also receive our new Stampin’ Positioner*.

New demonstrators who submit their Independent Demonstrator Agreement (IDA) before February 3 or after March 2 will not be eligible for this offer.

Joining deadline:  March 2, 2026, at 11:59 p.m. (MT)

Stampin' Up! Positioner Tool
Stampin' Up! Join Offer

Time to REDEEM those Bonus Days Coupons – time is running out to do that.

Stampin' Up! Redeem Coupons

Redemption Period: February 3–28, 2026There is no limit to the number of coupon codes you can redeem on an order during the redemption period. If you’re redeeming multiple codes, you must put a space between each code.

You may only redeem coupon codes one time. You cannot redeem them after February 28.

You can redeem Bonus Days coupon codes for month-to-month Paper Pumpkin subscriptions and new prepaid subscriptions.

Some restrictions apply. Coupons can’t be redeemed towards Starter Kits and you cannot use them on exchanges.

Redemption period ends:  February 28, 2026, at 11:59 p.m. (MT)

When you shop with me, there are some fun benefits… I like to thank my customers.. When you spend $50 or more (before tax & shipping) you will also receive a copy of my monthly tutorial – and guess what – it’s Sweet Bugs for February! AND… keep track of your purchases using my Daisy Patch Rewards and get even more benefits! Visit my REWARDS Page for more info.

SHOP WITH ME HERE!

Thanks for stopping by. May you have a beautiful day. Make someone happy by sending them a handmade card made with ❤️

Product List

Stampin’ Up! Brushed with Beauty for the Happy Inkin’ Thursday Blog Hop

Welcome to the weekly Happy Inkin’ Thursday Blog Hop. We have a sketch challenge today and if you have come from Tara or just hopped right in here – glad you stopped by! You will get some fun ideas today so let’s begin…

Stampin' Up! Brushed with Beauty for sketch challenge

I began with Very Vanilla A2 size card. The floral pattern of the Brushed with Beauty is 2 x 4 and I adhered a thin strip (!/2 x 4) of another pattern from this package of DSP to the left side of the floral piece and adhered it to the card base – a 1/4″ edge on three sides. I then cut a piece of Crumb Cake 1 1/4 x 5 1/2 and stamped it with this fun pattern using the Beautifully Celebrated stamp set and Crumb Cake ink. I then adhered a strip of Mossy Meadow 1/2 x 5 1/2 to create the same edge as the upper panel & adhered it in place. I die cut the leaf from Mossy Meadow and set it aside while I made the sCake ink on a Very Vanilla strip 1/2 x 3 3/4. The leaf was added to the back of the stripn with liquid glue, then the strip added to the card front with dimensionals. As a final touch – three Pressed Flower Motifs were attached to bring it all together. These embellishments are an ONLINE EXCLUSIVE item from the Beautiful Gallery Suite.

Stampin' Up! Brushed with Beauty card inside

For the inside… Crumb Cake ink and items in the Beautifully Celebrated stamp set were stamped on the Very Vanilla insert (4 x 5 1/4)

Stampin' Up! Brushed with Beauty card & envelope

For the envelope… more of the Brushed with. Beauty DSP was attached to the flap & trimmed to fit. On the envelope front, the same leaf as on the inside of the card was stamped on the front – also in Crumb Cake ink. And there you have it – finis!

Now… time to see what others have created for today’s hop. Remember to check below on how to order from me, get those Bonus Days coupons, see the Product of the month and MORE! Make sure you visit Nicole – next on the list!

Stampin' Up! Blog hop button

Amy Koenders

Mary Deatherage

Karen Ksenzakovic

Tara Carpenter

Terry Lynn Bright

Nicole Bloxom

First – BONUS DAYS…BONUS DAYS BONUS DAYS! Because do you know what’s a great deal? Getting rewarded for all the crafting supplies you’re already going to buy! When you shop between January 6 and February 2 and spend $50 USD | $60 CAD, you will earn a $5 USD | $6 CAD coupon! Make sure you save all your coupons because you can redeem them (and we mean ALL of them) between February 3 and 28. During the earning period, a shopping-cart notification will appear when an order qualifies for a Bonus Days coupon—an online store feature on both the demonstrator and customer websites.

Stampin' Up! Bonus Days

PRODUCT OF THE MONTH – only $5 with a $75 order (before shipping & taxes)

167972

FABULOUS SAYINGS PHOTOPOLYMER STAMP SET (ENGLISH)

$5.00

The Fabulous Sayings Stamp Set is the exclusive Product of the Month for January 2026! Only available until stocks run out—don’t wait to get yours!

This is a Two-Step Stampin’ set; it allows you to layer two or more images to create one final image with extra texture and dimension in the colors you want.

Jan-Apr 2026 Mini Catalog – click the image below to view the catalog

Stampin' Up! Jan-Apr 2026 Mini Catalogue

ONLINE EXCLUSIVES Several new stamp sets, dies, Designer Series Papers, embellishments and ribbons are available online that are not in any SU! Catalog. SHOP WITH ME HERE

KITS COLLECTION

Stampin’ Up released 3 new kits this month. 
  • Adopt A Pet Kit DETAILS 
    – Makes 4 projects: 1 each of 4 designs 
    – Largest box size: 4-3/8″ x 3-1/2″ x 4-1/2″
    – Colors: Basic Gray, Cajun Craze, Coastal Cabana, Crushed Curry, Secret Sea, Strawberry Slush
    – Sentiments printed in English, French, and German
  • Butterfly Garden Kit DETAILS
    – Makes 9 cards: 3 each of 3 designs
    – Folded card size: 5-1/2″ x 4-1/4″ (14 x 10.8 cm)
    – Colors: Crushed Curry, Flirty Flamingo, Garden Green, Misty Moonlight, Pretty Peacock, Timid Tiger
    – Also available in French
  • Lots To Love Kit Details
  • – Makes 9 cards: 3 each of 3 designs
    – Folded card size: 5-1/2″ x 4-1/4″ (14 x 10.8 cm)
    – Colors: Basic Beige, Darling Duckling, Fresh Freesia, Pretty Peacock, Strawberry Slush, Timid Tiger
    – Sentiments printed in English, French, and German

When shopping with me -.With a $50 order or more, receive my MONTHLY TUTORIAL – For January, that tutorial is all about the Lovely Arrangements bundle and Lovely Blossoms DSP – all part of the January ONLINE EXCLUSIVE Lovely Blossoms Suite Collection.

Thanks for stopping by. May you have a beautiful day. Make someone happy by sending them a handmade card made with ❤️

Stampin’ Up! Triple Panel Card with Thoughtful Journey DSP

Hello Saturday! I have two cards for you today – both Triple Panel Cards (my name for them :O) made with a single piece of the Thoughtful Journey DSP. Because of the colors that ebb and flow in this extraordinary DSP, each card has a different color card base – reflecting & highlighting the main ‘theme’ color. Again, these two cards are from the same panel of Thoughtful Journey DSP!

Stampin' Up! Thoughtful Journey in Misty Moonlight

Each of the triple panels are 1 x 4 layered on card stock 3 1/4 x 4 1/8. Another layer of Thoughtful Journey DSP (4 x 5 14) was added to the card base (4 1/4 x 11 scored at 5 1/2). The triple panel was attached to the card base with dimensionals. Each has a coordinating ribbon: 3/8″ Bordered Ribbon in Petunia Pop & 1/4″ Misty Moonlight Ribbon. Both also have Charming Shimmer Faceted Dots on appropriate cards: Berry Burst & Night of Navy. The sentiments are from The Right Words stamp set: Petunia Pop ink die cut with Traditional Labels Dies & Misty Moonlight ink, fussy cut. The sentiments were added with dimensionals over the ribbon.

Stampin' Up! Triple Panel card in Petunia Pop, inside
Stampin' Up! Triple Panel card in Misty Moonlight, inside

A strip of Thoughtful Journey was added to each inside panel, one is 1/2″, the other 5/8″. Again, sentiments are in Petunia Pop ink & Misty Moonlight ink using The Right Words stamp set.

What is so interesting about these two cards, is how totally different they are, yet the same design from the same 6×6 piece of Designer Series Paper. Stampin’ Up! just makes it so easy! Love, love.

Thanks for stopping by. May you have a beautiful day. Make someone happy by sending them a handmade card filled with ❤️

Stampin’ Up! has all manner of products available for crafters of various levels of need and creativity: kits that are quick and easy from cards to decorations; Paper Pumpkin, a box that arrives monthly and includes creations of cards to tags to boxes; scrapbooking supplies and layout ideas; annual catalogs and ONLINE EXCLUSIVES. Online Exclusives are those products that are never highlighted in a catalog. Want to shop and see more? Connect to my ONLINE STORE HERE.

To make the cards you see today – and to purchase those products, see below.

Product List