Stampin’ Up! Step card w/ Scenic Coast 6 x 6 DSP

Scenic Coast DSP is shiny on the lower half of the paper. It has stunning sunset/ sunrise type scenes over water and the colors are muted yet bright. That doesn’t make sense, right – but it’s true.. Let’s take a peek at this pretty card.

Stampin' Up! Step card front w/ Scenic Coast 6x6 DSP

Can you see the steps on the card front? They start narrow at the top & get wider each ‘step’. And using the Scenic Coast 6×6 DSP makes it easy to follow that pattern for the inside of the card. See the photo on the left below for that, then see the photo below on the right with the steps folded back – and the scene continues. You need at least 2 pieces of the DSP to make this work.

The Sunset Coast bundle works so well together with this DSP. I cut the sailboat and the seagulls from a scrap of the DSP with the Sunset Coast Dies, reversing the paper to create the red sailboat on the card front. The sentiment on the front & inside is stamped in Secret Sea ink using the Sunset Coast stamp set. I used Sunset Sparkle Sequins for embellishment. The card base is Balmy Blue 8 1/2 x 5 1/2 scored at 2 1/8 & 4 1/4.

Stampin' Up Step card w/ Scenic Coast, scene continues

Stampin' Up! Step card w/ Scenic Coast 6x6, folded back

This is what the card looks like from the top / down.

Stampin' Up! Step card, from the top

And here is my template with the proper measurements.

For the envelope, I used a scrap of the Scenic Coast 6×6 that shared similar colors. The small sailboats on the front are stamped in Secret Sea, Crushed Curry & Strawberry Slush – coordinating colors listed on the paper pack, and from the Sunset Coast stamp set.

Stampin' Up! Step card w/ Scenic Coast 6x6, card & envelope

Below is a list of the products to make this card. You will notice that there is a Scenic Coast Suite of Products included. Remember there is a paper sale through August 31 & last chance products too.
Stampin' Up! DSP & paper Sale
Stampin' Up!~Last Chance Products

Shop with me here

When shopping with me and your purchase is $50 & up (before S&H) you will receive the monthly tutorial & other benefits. Check my rewards page for more info.
Stampin' Up! Tutorial for shopping with me

Thanks for shopping with me. May you have a beautiful day! Make someone happy by sending them a handmade card filled with ❤️

Product List

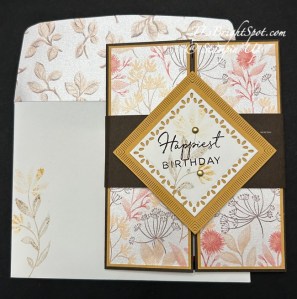
Stampin’ Up! Springy Inside Gatefold with Glow of Harvest DSP & NEW Tile Garden Bundle

It’s Friday – where did the week go? It’s been hot & humid in NJ this week, a perfect time to be inside & create 😀. In card class yesterday we made this fun gatefold card that has a ‘springy’ inside. It’s so fun to open! And I used the September Product of the Month – the Glow of Harvest SDSP – it’s sparkly!

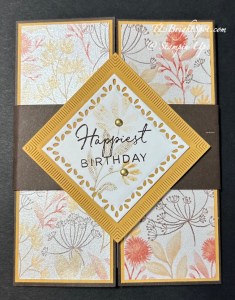
Stampin' Up! Springy inside gatefold w/ Glow of Harvest SDSP card front

This is a traditional gatefold card – 8 1/2 x 5 1/2 scored at 2 1/8 on one end then the other side brought over to meet it. The card base is Early Espresso with a layer of Golden Glow 2 x 5 3/8 on each front panel, then a layer of the Glow of Harvest SDSP 1 7/8 x 5 1/4.

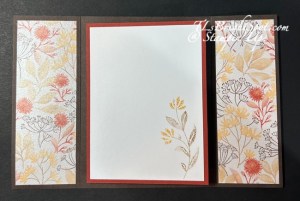
Stampin' Up! Springy inside Gatefold card inside

And here’s the finished inside. The center section is the ‘springy’ part. The inside panels are more of the same pattern of Glow of Harvest SDSP cut 1 7/8 x 5 1/4.

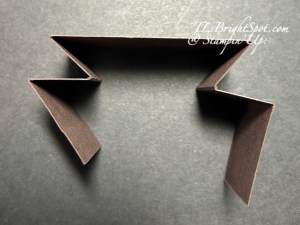
Stampin' Up! mechanism for 'springy' inside of gatefold

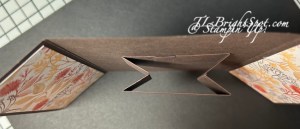
Stampin' Up! 'springy' mechanism  attached to inside card

To create the mechanism, cut a strip 8 x 1 1/2 and scored @ 1 ¼, 2, 2 ¾, 5 ¼, 6 & 6 ¾. Burnish all score lines making certain the strip edges are even. After scoring, fold it as shown above in the left photo. Attach this to the inside panel, centering it, and with the ends touching. It should look like the photo on the right.

The center panels are Cajun Craze 3 ¾ x 5 and Basic White 3 1/2 x 4 3/4. Stamp the Basic White panel prior to adhering it. I used Crumb Cake stamped off once for the leaves and Golden Glow stamped off once for the small flowers. These are from the NEW Sep-Dec 2026 Catalog that can be ordered from Sep 1! Don’t have a catalog? Let me know & I can fix that. 😀

The belly band is 1 3/4 x 10 (Early Espresso) and wrapped around the card to the front. Keep it loose enough so it easily slips on & off. Secure the ends of the belly band together while it is around the card – just be careful with the amount of adhesive!

Remove the belly band & create the front decor…I used the NEW Tile Garden Dies to create these two panels – Golden Glow (this is about 2 3/4 square) and Basic White (less than 2 1/4″ square) Stamp the sentiment in Early Espresso using the stamp in the Tile Garden stamp set, then stamp the floral image sort of as a background… again stamping off first each time – Crumb Cake for the leaves and Golden Glow for the flowers. Final touch – Gold Adhesive-Backed Dots also from the new catalog. I used them as centers to the flowers.

Stampin' Up! Springy inside Gatefold w/ Tile Garden & Glow of Harvest SDSP, card & envelope

For the envelope, I used another pattern of the Glow of Harvest SDSP to attach to the flap & trimmed to fit. And on the front this same flower image from the Tile Garden stamp set – Crumb Cake for the leaves and Golden Glow for the flowers, stamped off each time.

The Product of the Month is available for purchase when placing an order of $75 – and it’s only $5! This is stunning pearlized paper & will be available Sep 1 – same day you can order from the Sep-Dec 2026 Catalog.

While you wait for the new catalog to go live, today is the last day for Stampin’ Up! Double Rewards with a $25 & up purchase. With the current sale on paper products – 15% off select card stock & DSP + Last Chance Products – it’s easy to find items wanted & needed.

SHOP WITH ME HERE!

Stampin' Up! Double rewards
Stampin' Up! DSP & card stock sale
Stampin' Up! Last Chance Products

Thanks for stopping by. May you have a beautiful day! Make someone happy by sending them a handmade card filled with ❤️

Stampin’ Up! Pocket Card with Pop Up Petals & Timeless Plaid DSP

Hello wonderful stampers – it’s Monday Feb 16 & I’m placing my order today for those of you who shopped with me these past couple of weeks – all those adhesives that are available through Stampin’ Up! I’m also sharing this sweet card that will be included with the adhesives… as a thank you for shopping with me.

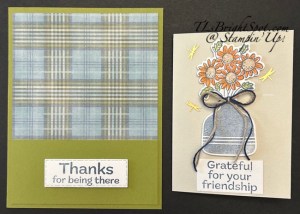
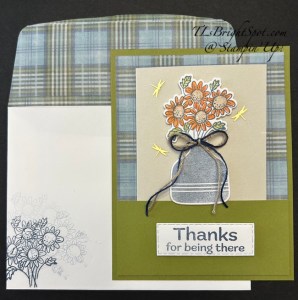
Stampin' Up! Pocket Card w/ Pop-Up Petals

The card base is 4 1/4 x 5 1/2 Old Olive layered with Timeless Plaid 6×6 DSP 4 x 5 1/4. I took another panel of Old Olive 1 3/4 x 4 and attached it on three sides to the card base – leaving the upper area open, as in an pocket. 😀 I stamped a sentiment from Pop-Up Petals stamp set in Misty Moonlight and die cut it with a Textured Notes Die and attached it to that lower panel with dimensionals. For the cute card for the pocket, I cut Basic Beige 6 x 4 1/4 & scored it at 3 (on the long side). I stamped the vase & flowers from Pop-Up Petals stamp set in Misty Moonlight. I colored the leaves with Old Olive Stampin’ Blends, the flowers with Timid Tiger & Crumb Cake using the stamps in the Pop-Up Petals stamp set – so easy! I then die cut both the vase & the flowers with the coordinating Pop-Up Petals Dies. I stamped a sentiment on a Basic White scrap with another sentiment in Pop-Up Petals stamp set and attached it at the bottom of the Basic Beige card front. I attached the vase with dimensionals, then the flowers, slipping the stems into the top of the vase and dimensionals behind the flowers. I added three metallic Adhesive-Backed Butterflies, then a bow tied with Bakers Twine Essentials Pack and Natural Tones Linen Thread in dark blue – a very sweet card front.

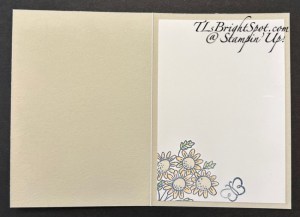
Stampin' Up! Pop-Up Petals pocket card inside

For the inside of this pocket insert… a Basic White panel 2 3/4 x 4 stamped with Misty Misty Moonlight ink – both the butterfly & the flowers are from Pop-Up Petals stamp set. Again, the same coloring as the card front: Timid Tiger & Crumb Cake inks & Stampin’ Blends Old Olive for the leaves. Now fold this in half and insirt into the pocket in the card base front – yay!

Stampin' Up! Pop-Up Petals card & envelope

For the envelope…n the flower bundle stamped on the card front, first full strength, then a couple more times without re-inking. This makes it look as though it is a large bouquet!! On the flap, another piece of the Timeless Plaid adhered & trimmed to fit.

Want to make this card? See the list of products below. Remember to REDEEM THOSE COUPONS now through Feb 28, then they go away if unused.

Stampin' Up! REDEEM those coupons

Redemption Period: February 3–28, 2026There is no limit to the number of coupon codes you can redeem on an order during the redemption period. If you’re redeeming multiple codes, you must put a space between each code.

You may only redeem coupon codes one time. You cannot redeem them after February 28.

You can redeem Bonus Days coupon codes for month-to-month Paper Pumpkin subscriptions and new prepaid subscriptions.

Some restrictions apply. Coupons can’t be redeemed towards Starter Kits and you cannot use them on exchanges.

Redemption period ends:  February 28, 2026, at 11:59 p.m. (MT)

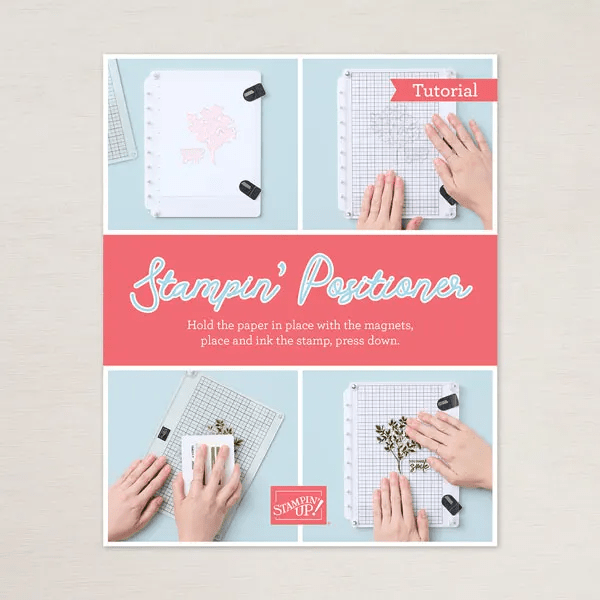
There’s a joining promotion too – with a fabulous new Positioner when you join between now & March 2

Here are the details about the JOINING PROMOTION…New team members who purchase their Starter Kit February 3–March 2 will also receive our new Stampin’ Positioner*. Joining deadline:  March 2, 2026, at 11:59 p.m. (MT)

JOIN MY TEAM HERE!

Thanks for stopping by. May you have a beautiful day. Make someone happy by sending them a handmade card filled with ❤️

Product List

Stampin’ Up! Peaceful Greenery EF with Traditions of Christmas DSP

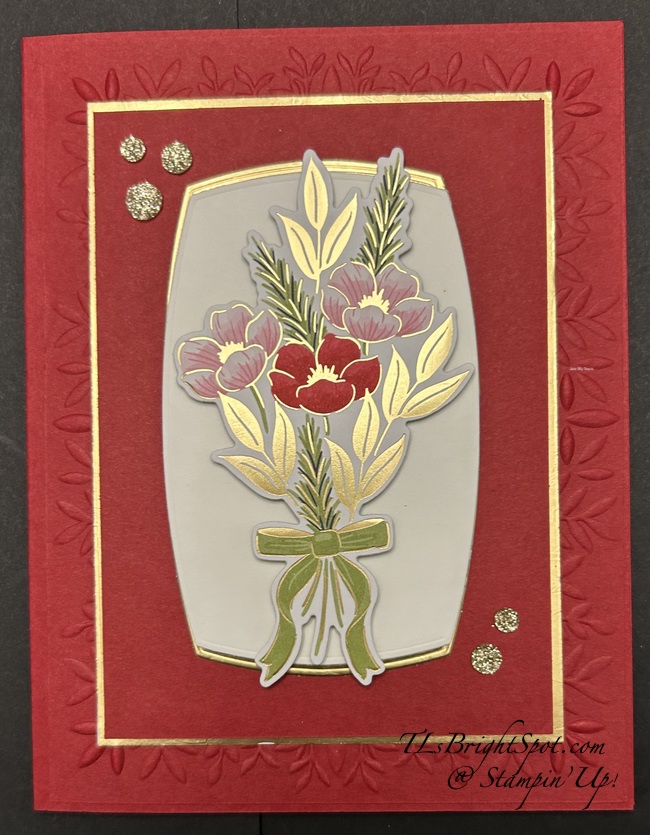
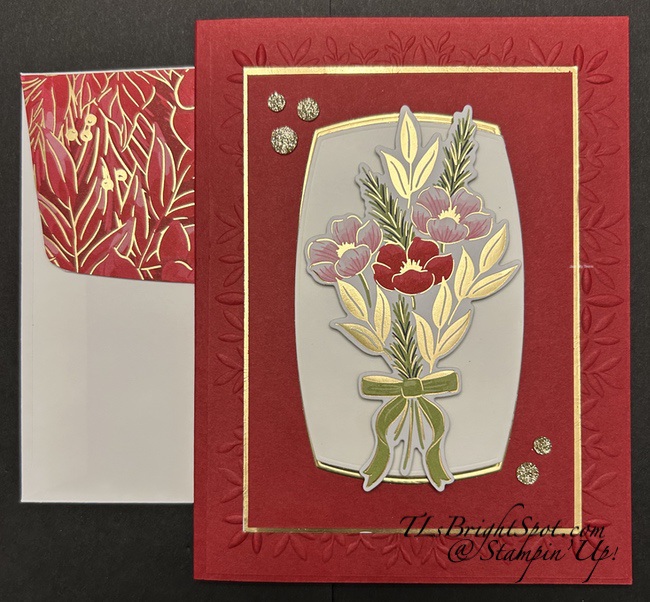
Embossing folders help create wonderful texture on a card and I’ve used the Peaceful Greenery embossing folder to do just that – it’s a great background embossing folder.

Stampin' Up! Peaceful Greenery w/ Traditions of C'mas card front

I’m leaving the photo in large format so you can really see the embossing folder & how that added texture really makes the. card – at least it does for me! Of course the wonderful die cut from the Traditions of Christmas SDSP is pretty special too. Add in the gold foil and the Traditional Sparkling Sequins and the card is a win/ win. To create the background the floral die cut sits on, I used the Label Me Grateful Dies to die cut from the center of the gold foil used to surround the Cherry Cobbler smaller panel. I cut it in half across the center and adhered a the Basic White die cut from the same Label Me Grateful Dies. The floral die cut is attached with dimensionals while everything else is added with adhesive directly to each layer. Those card cuts will be listed below.

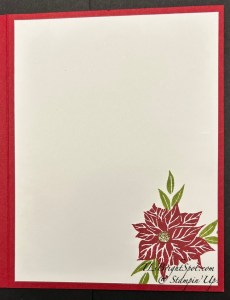
Stampin' Up! Christmas Gallery inside card

For the inside of the card, I used the Christmas Gallery stamp set to stamp this gorgeous poinsettia in Cherry Cobbler ink and the leaves in Old Olive ink. In the center of the flower is another Traditional Sparkling Sequin in Gold. The Basic White panel was added to the inside of the card.

Stampin' Up! Peaceful Greenery EF w/ Traditonals of Christmas SDSP card & envelope

For the envelope, another panel of the Traditions of Christmas SDSP was added to the flap and another poinsettia & leaves was stamped on the envelope front, which I forgot to photograph!

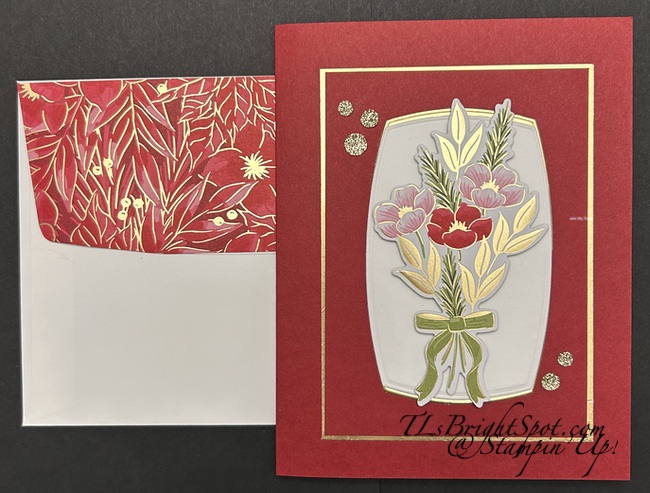
Here’s the 2nd card… no embossing folder used and while it’s nice, I really prefer the card with the embossing folder. The inside and envelope had the same treatment – and I’ve left them in large format so you can see the difference. :O) Just curious – do you prefer one over the other?

Stampin' Up! Traditions of Christmas SDSP card & envelope

Card cuts:

  • Cherry Cobbler 8 1/2 x 5 1/2 scored at 4 1/4; 4 1/8 x 5 3/8 (embossed); 3 18 x 4 3/8
  • Gold Foil 3 14 x 4 1/2 (center die cut banner)
  • Basic White 2 1/2 x 4 (banner); 4 x 5 1/4 (inside)
  • Traditions of Christmas SDSP – floral die cut from SDSP; 2 1/4 x 6 (envelope flap

Thanks for Stopping by. May you have a beautiful day. Make someone happy by sending them a handmade card filled with ❤️

Want these products) See the list below and simply click all to purchase. Want other Stampin’ Up! products in my shop – click here to shop with me and get anything from ONLINE EXCLUSIVES to Paper Pumpkin to last chance items. To JOIN MY TEAM – click the link. 😀 We have tons of fun, sharing projects, collaborating, learning new tricks. Would love to have you. 🎁


Product List

Stampin’ Up! September Fall For Toile Paper Pumpkin Alternates

Good morning happy people. Guess what today is – FRIDAY, for many it is their favorite day… We have a family reunion of sorts planned for Sunday late afternoon & that should be extra fun. I’m very much looking forward to it. 😀

For today, I’m focusing on the Paper Alternates that I made with this month’s kit. I’ll show the ‘planned’ card and then my alternates.

Stampin' Up! Sep Fall for Toile PP, card 1
Stampin' Up! Sep Fall for Toile PP card 2, partially open

The card to the left is as intended by Paper Pumpkin. The card to the right is my first alternate, a total CAS from another demonstrator. It uses Country Woods DSP and when lifting the DSP on the right – there is the place to write.

Stampin' Up! Sep Fall for Toile PP alternate card 2, inside
Stampin' Up! Sep Fall for Toile PP Alternate card 3, front
Stampin' Up! Sep Fall for Toile PP Alternate card 3 inside

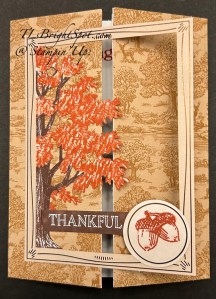
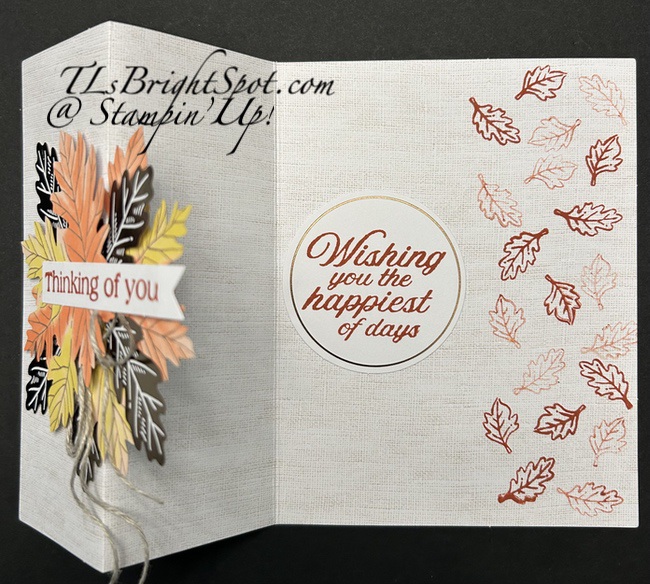
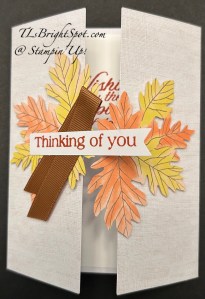
This is a gatefold card and when open again has the addition of Country Woods DSP adhered to the inside ‘gates’ & a piece of Basic White stamped using the stamps in the Sep. kit.

Above on the left is the card as ‘planned. The card on the right is another z-fold using the PP kit products and only adding a double Linen Thread bow.

Stampin' Up! Sep Fall for Toile PP Alternate card 6, front

Above is another alternate done in a gatefold. The only addition was a Basic White panel inside for the stamped sentiment. No other additional products were used.

Stampin' Up! Sep Fall for Toile PP card front 7

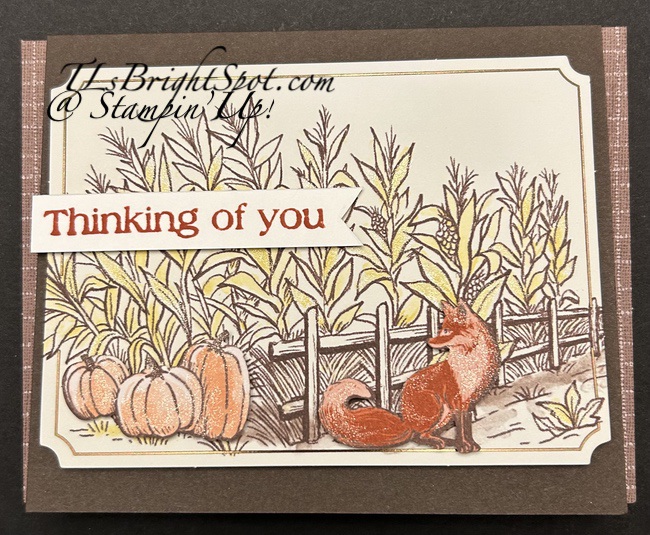
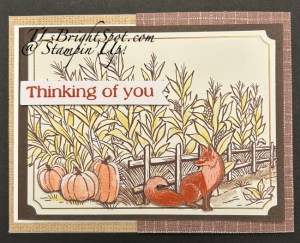
The original card as planned. The only addition is Wink of Stella on the pumpkins and the fox.

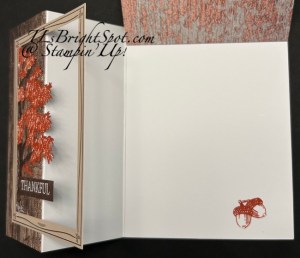
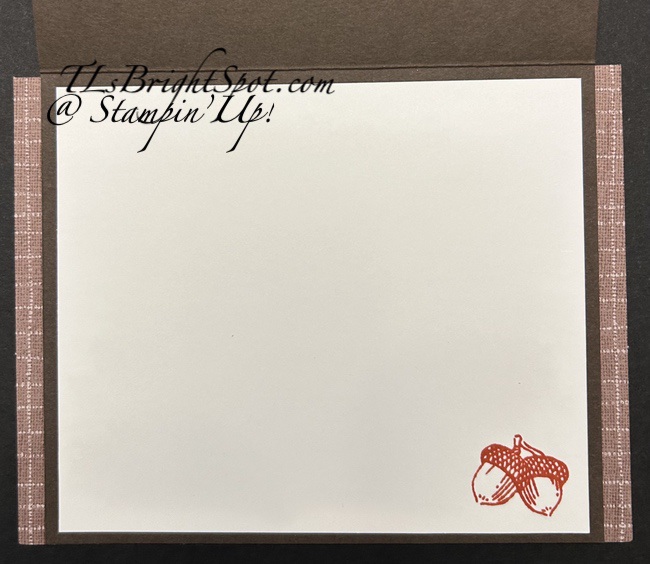
My next to last alternate and the inside – a flip front card. I cut the original Paper Pumpkin card base in half and added a piece of Early Espresso, adhered a Basic White piece to the inside and stamped the sweet acorn from the PP stamp set. With each of these last three cards i used Wink of Stella on the pumpkin and the fox for a bit of sparkle & fun.

Stampin' Up! Sep Fall for Toile PP alternate card 9, inside

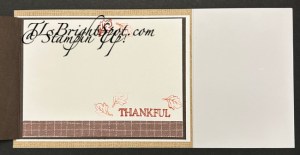
My last card is a joy fold card, and I used Early Espresso to mount the showcase field of corn & Gathering Together SDSP for the inside background. I thoroughly enjoyed playing with this kit. Refills are available if you wish to create these cards. The only thing is… in the refill there is no stamp set or ink spot.

Stazmpin’ Up! has a Paper Pumpkin each month and this next months is sure to fascinate. Here are the particulars – just remember, you must order by Oct 10!

Stampin' Up! October PP - Cozy Christmas

October
Velvety Flocking Adds a Hand-Stitched Effect

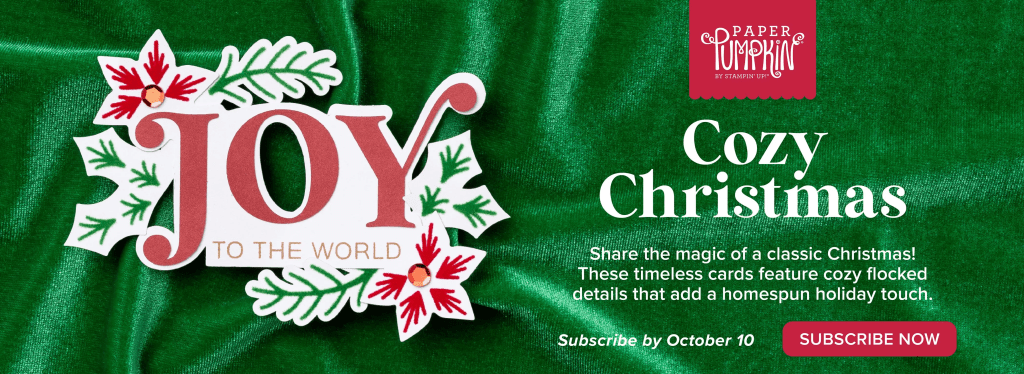
OCTOBER: Cozy Christmas
Subscribe September 11–October 10
Create heartfelt Christmas cards with classic charm and flocked accents.
• Makes 9 cards: 3 each of 3 designs with 9 coordinating envelopes
• Precut paper pieces with soft, stitched-look flocking
• Shiny red sequin embellishments
• Coordinating colors: Basic Beige, Cherry Cobbler, Garden Green, Pecan Pie
(Classic Stampin’ Spot), Real Red

And the coordinating dies for Paper Pumpkin October through December are these…

Stampin' Up! Oct - Dec add-on

JOINING PROMOTIO OCTOBER 1-31!

New team members who purchase their starter kit from October 1 to 31 will be able to choose between these two offers:

1) $125 USD | $165 CAD worth of products for just $35 USD | $48 CAD

2) $189 USD | $252 CAD worth of products for just $99 USD | $135 CAD

BENEFITS OF BECOMING A DEMONSTRATOR

  1. Stampin’ Up! offers a space where a community of crafters from all over the world can connect and create together. 
  2. Unlike customers, demonstrators get early access to the latest releases and catalogs, as well a 20–25% product discount and commission.
  3. Being a demonstrator can mean so much more than just crafting. It can also mean personal development and expanding your circle to include other people and new experiences.

Do you love people? Are you creative? Do you have a positive attitude?

come Oct 1 – JOIN MY TEAM to become the best you can be! 

Together we can make magic happen.

Thanks for stopping by. May you have a beautiful day. Make someone happy by sending them a handmade card filled with ❤️

To purchase products to make today’s alternates…

Product List

Stampin’ Up! Gift of Joy & Peaceful Garden Christmas Card

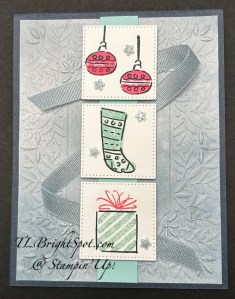
Good Wednesday – BIG DAY TODAY! Sep-Dec 2025 Mini Catalog LAUNCH and SEPTEMBER ONLINE EXCLUSIVE RELEASES. I’m sharing a card today that uses products from the Mini Catalog , mixing products. The stamped images come from the Gift of Joy stamp set onnpage 55. The embossed panel is done on Designer Series Paper from the Peaceful Garden Suite of products on pages 32-25. The embellishments are from that suite as well.

Stampin' Up! Gift of Joy & Peaceful Garden card front

I began by stamping the various images from the Gift of Joy stamp set in Secret Sea ink. I filled in the images using Pool Party and Strawberry Slush. I then die cut them with the Stitched Shapes Dies, second from smallest square. I added them to a Pool Party strip 3/4 x 5 1/4. Next I embossed a panel of Peaceful Garden DSP with the Peaceful Greenery 3D embossing folder. This gives a beautiful embossing and background. I adhered this embossed panel to Secret Sea card stock, then wove ribbon back & forth for movement and texture. The ribbon is Faux Linen Ribbon in Cloud Cover. I added the strip of Poll Party over top to hold the ribbon in place and added the stamped pieces with dimensionals. The final touch, several Hues of Blue Flowers from the Peaceful Garden Suite.

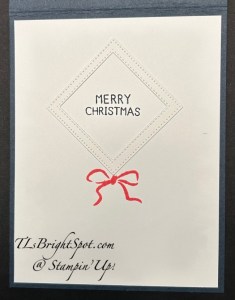
For the inside… When first die cutting the stamped images, I die cut the squares too large, so in cutting down to the appropriate size, I had a leftover ‘trim’ so used it to enhance the stamped sentiment 😀 The sentiment is from Gift of Joy stamp set and is stamped in Secret Sea ink. The gorgeous bow is stamped in Strawberry Slush and is from the Gift of Joy stamp set. This Basic White panel was added to the inside of the card & voila!

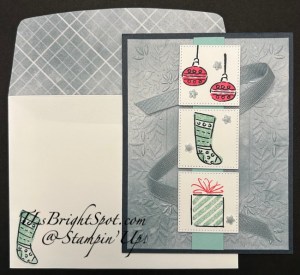
Stampin' Up! Gift of Joy & Peaceful Garden card & envelope

For the envelope, another piece of the Peaceful Garden DSP adhered to the flap & trimmed to fit. On the front, again the cute stocking first stamped in Secret Sea then stamped with Pool Party ink. Since this and the others are two-step images, this works well!.

This is not your traditional bright red & green for a Christmas card, but softer colors that still work. Stampin’ Up! does a great job of coordinating colors for doing just this kind of thing! Hope you like.Shop the products to make this card by clicking the images below.

For every order of $50 & above from today Sep. 3 to Sep 10, I will send not only the monthly tutorial, but a package of the Hues of Blue Flowers. Get double daisy patch rewards too. Daisy Patch rewards is my way of thinking my customers for shopping with me. For every single order of $50 or more before shipping & tax, and every full increment of $50n order (before shipping & tax), earn double the daisy patch rewards during this week Sep 3 – Sep 10, 2025. Those rewards add up, and when you have 8 daisy patch rewards you’ll receive $40 worth of Stampin’ Up! product from me. Got it? good!

Thanks for stopping by. May you have a beautiful day. Make someone happy sending them a handmade card filled with ❤️

Product List

Stampin’ Up! NEWS FLASH!

Stampin’ Up! is making some changes and they are coming SOON! I don’t want you to be left out or too surprised – so here’s the scoop…

Cling Stamps (Red Rubber)

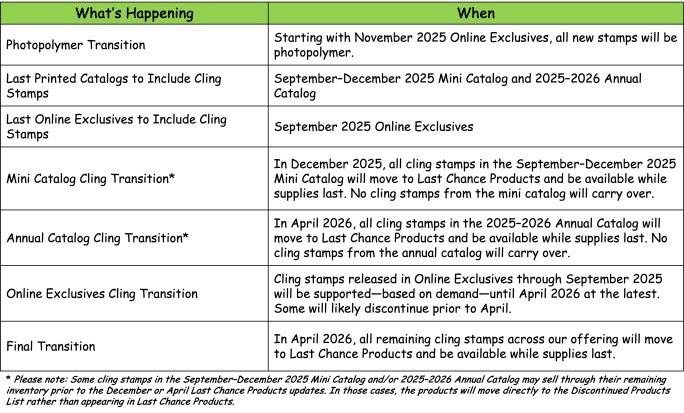
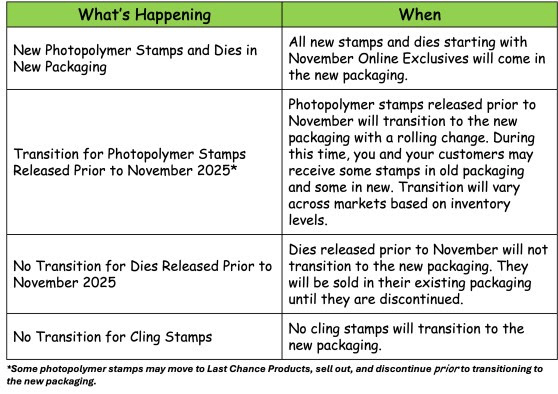
Stampin’ Up! has decided to discontinue their cling stamp line due to challenges in sourcing the necessary raw materials. While they currently have access to enough raw materials to continue production for the time being, the supply has become increasingly inconsistent, and certain key raw materials are no longer being manufactured. They’re choosing to make this change now to ensure a smoother, more strategic transition—with minimal disruption. They will continue to offer a wide range of photopolymer stamps to support various artistic styles and techniques.

Here are some specifics about the transition from cling stamps to photopolymer:

Stampin' Up! C
ling Stamp info

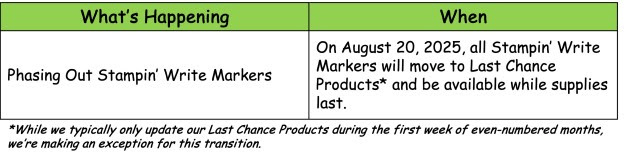
Stampin’ Write Markers – Discontinuing and Available While Supplies Last Starting Tomorrow, 20 Aug 2025!

Stampin’ Up! has also decided to discontinue Stampin’ Write Markers. With the growing popularity of Stampin’ Blends, they’ve seen a steady decline in sales of Stampin’ Write Markers. One of the primary techniques unique to Stampin’ Write Markers is coloring directly on cling stamps—a technique that will become less relevant as we transition away from cling stamps.

Here are a few details about the Stampin’ Write Markers:

Stampin' Up! Marker info

New And Improved Stamp And Die Packaging

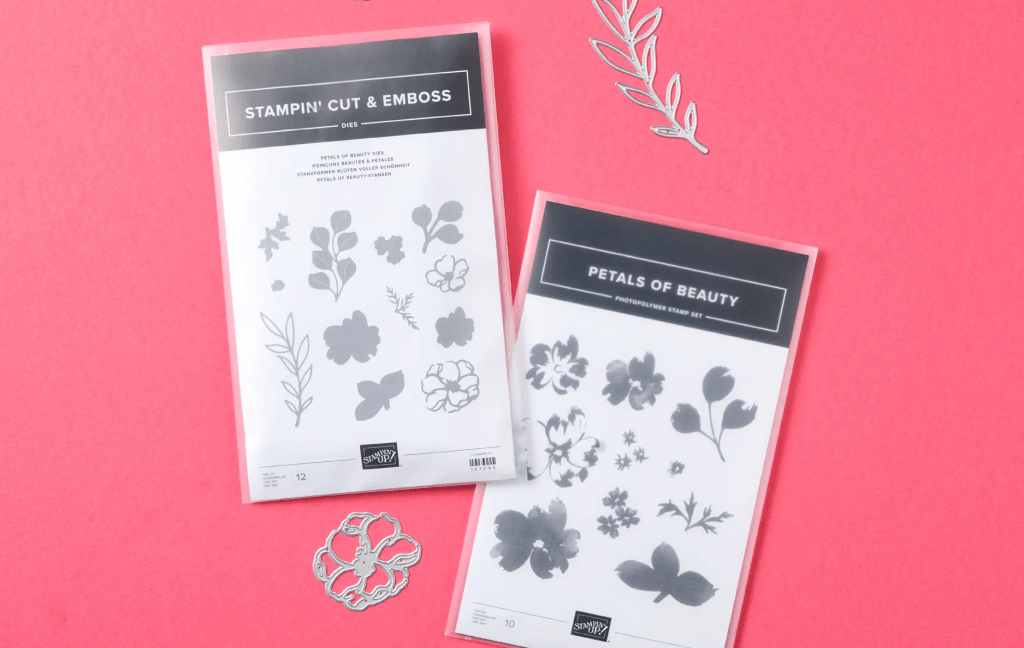
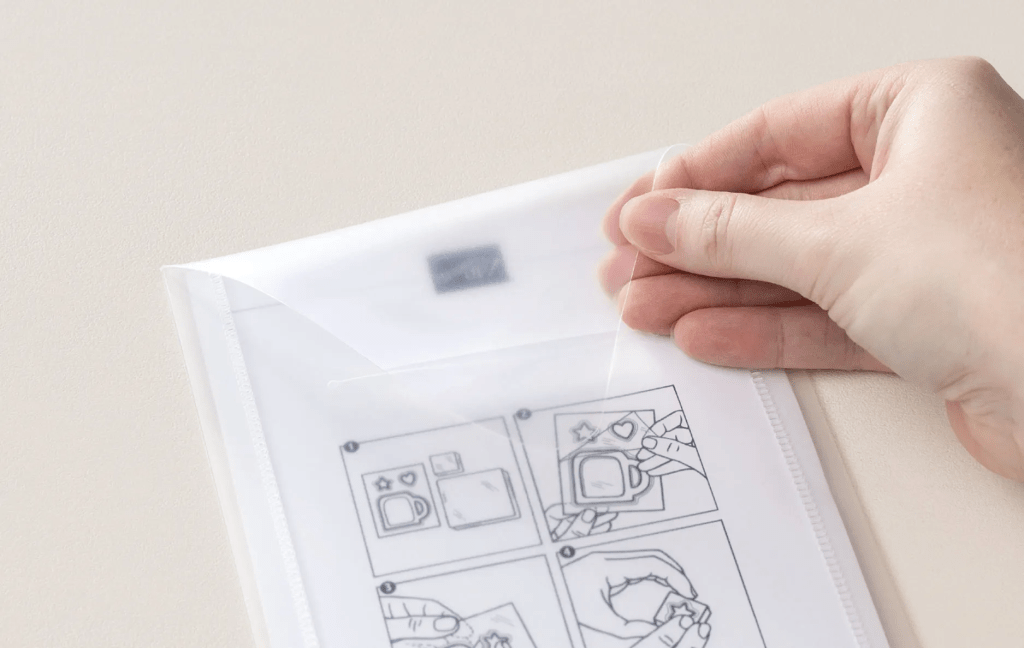
As part of Stampin’ Up!’s transition away from cling stamps, Stampin’ Up! is excited to introduce updated packaging for stamps and dies! Because photopolymer stamps are thinner, they’re able to offer sleeker, slimmer packaging that saves space. Both stamps and dies will now come in the same size and style of packaging, making it easier than ever to store bundles and coordinating products together (WooHoo!). The new packaging is similar to their current die packaging—durable, clear plastic envelopes—but with an exciting improvement: Die packaging will now feature printed artwork for quick and easy identification! Stamp packaging will continue to display artwork as well.

Stampin' Up! Packaging info

Packaging Details

– New packaging measures 5-5/8″ x 9″ (14.3 x 22.9 cm).
– Stamps and dies will now come in the same size and style of packaging, making it easy to store bundles and coordinating products together.
– Packaging is clear with an insert that displays stamp or die artwork for quick and easy identification—yes, both stamp and die packaging will now show artwork!
– Larger packaging dimensions allow us to showcase more stamp artwork at 100% on the insert.
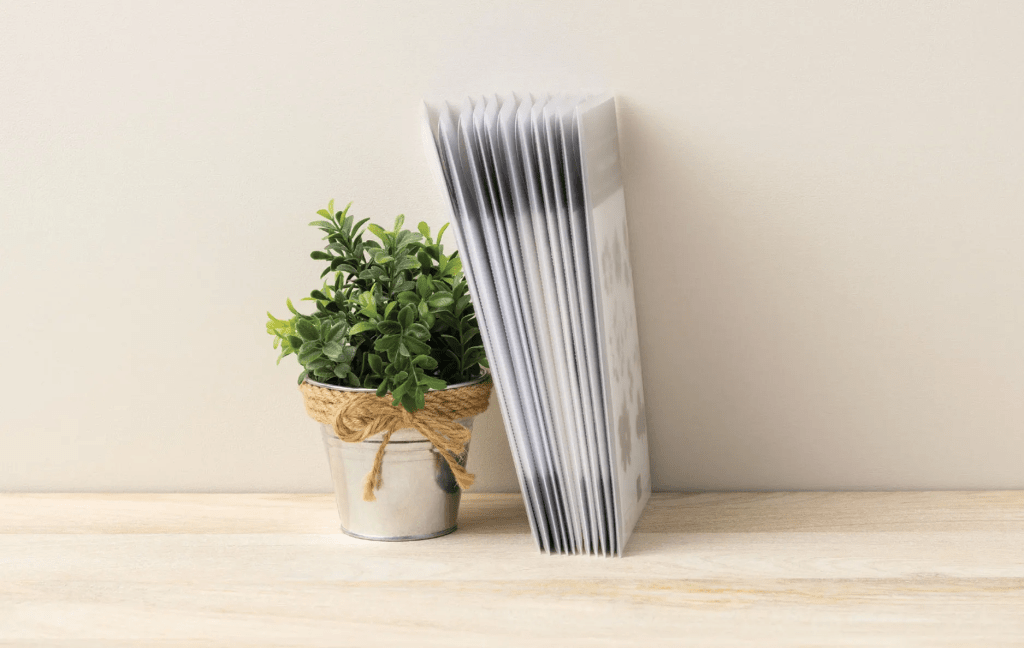
– Sleek, slim design will help you and your customers store more in less space.
– Envelope closure includes a tuck-in flap for quick and easy opening and closing.
– Packaging is sized to fit a variety of organization systems.

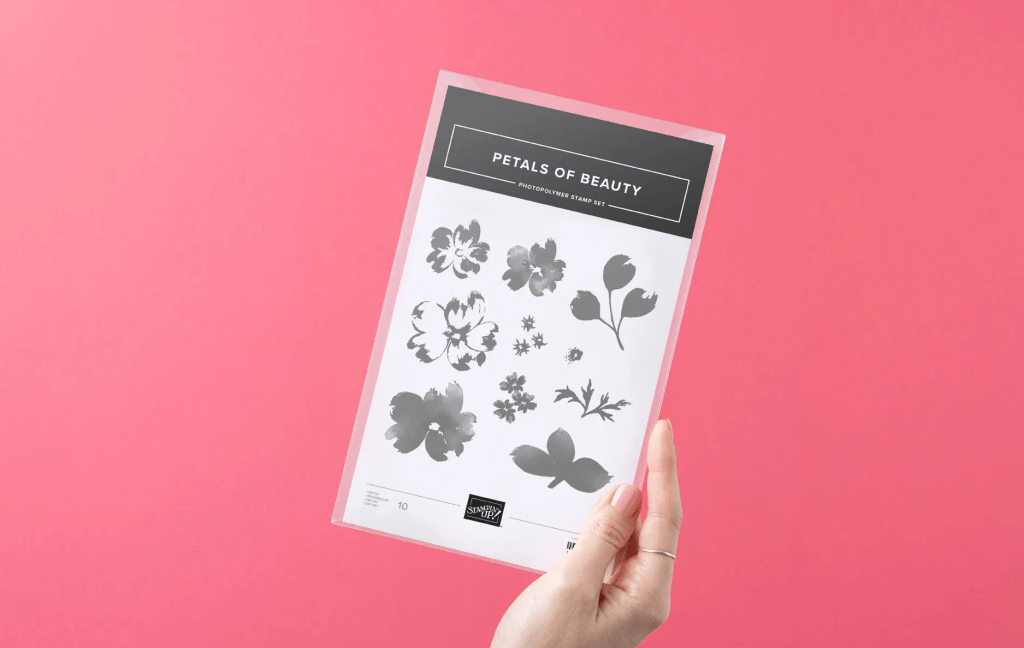
Here are a few photos of the new packaging AND a Nov. Online Exclusive.

Stampin' Up! New packaging & Nov. Online exclusive
Stampin' Up! Nov. Online Exclusive
Stampin' Up! side view of new packaging
Stampin' Up! back of new packaging

And here’s a video to hear it first hand from Stampin’ Up! headquarters 😀

I use Stampin’ Write Markers a lot – and if you want to get yours before they sell out, see below!


Product List

This is all exciting stuff happening in the Stampin’ Up! world of crafting. This new packaging will be available in the November ONLINE EXCLUSIVES – and yes, you will be able to purchase these packaging materials in sets of 10 when they become available. Again – woohoo!

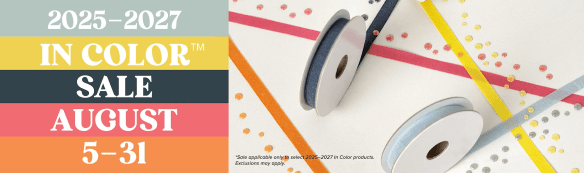
Remember too that the 2025-2027 In Color Sale is going on now. Click the image below to take you to this sale.

Stampin' Up! In Color Sale

Sale Dates: August 5–31

Ordering Deadline: August 31, 2025, at 11:59 p.m. (MT)

  • Sale includes select inks, cardstock, Designer Series Paper, embellishments, and other products that include these new In Colors.
  • Only products featured on the 2025–2027 In Colors page are included in this promotion.
  • Products are available only while supplies last.

If you have questions about any of this, please reach out to me – I’m here to help. And if you don’t have a demonstrator, I would love to connect with you.

Stampin’ Up! Side Flap Tuck Fun Fold

Hello crafters! I’ve a new fun fold for you today that I found on the Internet and had to give it a try. It has different names but this is what I’m calling it. 😀

Stampin' Up! Side Flap Tuck fun fold card front

I used Balmy Blue for my card base, embossing one of the pieces and another for the tucked in flap. The Berry Burst color comes from the Celebration Express Memories & More Pack and the sentiment from Greetings For All Mix & Match Ephmera Pack. The stamped flower, stem &N leaves is from the Impressions Abloom stamp set, And the embossing is Glass Garden Embossing Folder (this contains two embossing folders!) The stamped flower is fist stamped off Balmy Blue ink, then the second step is full strength Balmy Blue. The flower center is Lemon Lolly – again a two-step stamp using the same stamped-off procedure as for the flower. The stem & leaf are Soft Sea Foam, following the same two-step for the leaf. Additional pieces were used from the Celebration Expressions Memories & More Card Pack for the strip on the inside of the card, the strip on the inside of the flap and the envelope flap. Card cuts will be listed below.

Stampin' Up! Side Flap Tuck card & envelope

Step by step…

  • Balmy Blue card base 8 1/2 x 5 1/2 scored @ 4 1/4. Remove 2 1/8 x 5 1/2 from front and trim down to 1 3/4 x 5 1/8 (emboss this panel)
  • Add lBerry burst layer to embossed panel 1 7/8 x 5 1/4 – set aside
  • Cut another panel of Balmy Blue 1 1/4 x 3 1/4 and score on long side at 1/2 (this panel can be wider, depending on how you plan your inside, but the 1/2 score remains the same. Burnish.
  • Add this to the card base approximately 5/8″ from bottom of card back with the fold even with edge (again, depending on the plan for the inside of the card, this placement can be higher but should not be lower)
  • Add Berry Burst layer to inside of card base 4 x 5 1/4
  • Add decorative layer to back side of flap 1 1/2 x 2 3/4 (remember that if the flap is wider, this layer should also be 1/4″ wider)
  • Add Basic White panel for stamping 3 3/4 x 5
  • On this card I added a decorative strip behind the flap approximately 5/8 x 4
  • Stamp the inside: Here I used the Impressions Abloom stamp set
  • Add embossed + layer to left side of front panel with dimensionals… placement is important in order to tuck the flap in between dimensionals: dimensionals should be near bottom of panels to be attached, at top & at least 1/2″ from where flap tucks in.
  • Tuck in flap & add sentiment to tucked in flap. This sentiment is on dimensionals and is from the Greetings For All Mix & Match Ephmera Pack.
Stampin' Up! Side Tuck Flap Fun Fold card & envelope

For the envelope… Using the Celebration Expressions Memories & More Card Pack, I chose a coordinating piece to add to the envelope flap & trimmed it to fit. Done.. and ready to send to someone special. This card is going to a fellow teammate who needs a pick me up :O) I’m hoping she will love it.

Thanks so much for stopping by. May you have a beautiful day!

Make someone happy sending them a handmade card made with love.


Product List

Stampin’ Up! Sweeter With You Paper Pumpkin Alternates 2, 3

Hello stampin’ friends – today is Saturday and I am again sharing Paper Pumpkin alternatives with you. And I guess one of the things I want you to consider is that these projects/ alternatives can be applied to other Stampin’ Up products – NOT JUST Paper Pumpkin!

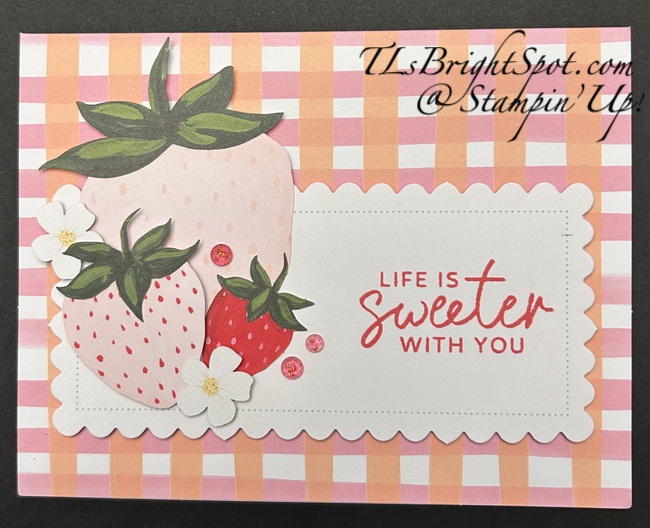
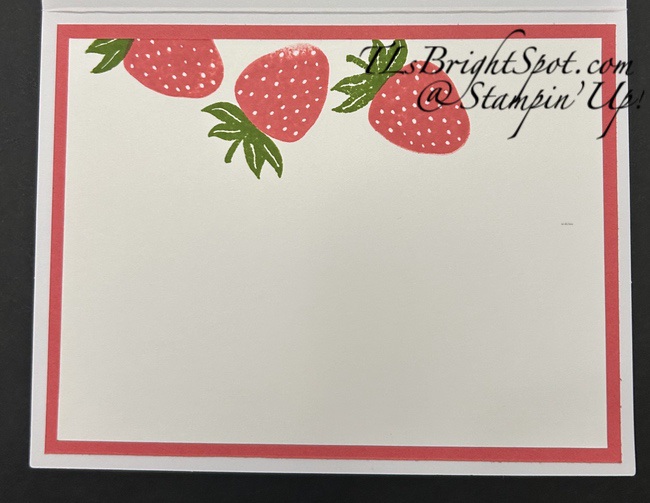
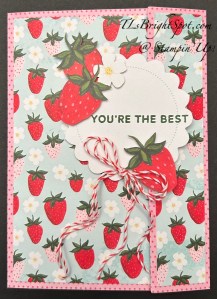
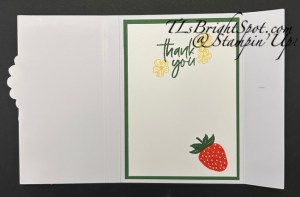
This card uses one of the card bases in the kit & is very similar to what the kit suggests. I used Strawberry Slush ink for the sentiment and added Strawberry Slush & Pretty In Pink Gems on the card front. On the inside, I stamped the strawberries in Poppy Parade (a coordinating color recommended by the kit) and Granny Apple Green ink for the top on a Basic White panel and adhered it to Strawberry Slush.

Stampin' Up! July 2025 PP Alternate 3
Stampin' Up! July 2025

This card uses an original card base & another which I cut up and is a fun fold. It’s a tucked in offset gatefold. The additional supplies for this card are the red & White Bakers Twine, Poppy Parade and Daffodil Delight inks. In addition, I used more of the strawberry card front to cover the flap of a medium envelope. And look at the last photo to see how the offset gatefold tucks in.

Stampin' Up!

Hopefully you can see how it fold in, slipping it under the circle.

See here to view the post about Alternate 1 of the July 2025 Paper Pumpkin

Click here to view all Stampin’ Up products and shop with me!

 Product List

Stampin’ Up! NEW Bauble Blooms with Regal Distressed Patterns

Wow – last day of June! Summer is moving right along…and fourth of July is fast approaching. Today’s card uses a brand new release (available Jul 1 – tomorrow!) called Bauble Blooms bundle. Here is a photo of the stamp set & dies.

Stampin' Up! Bauble Blooms bundle

And here’s my first card made with this bundle.

Stampin' Up! Bauble Blooms w/ Regal Distressed Patterns DSP 
card front

I began with a piece of the Cherry Cobbler in the Regal Distressed Patterns SDSP and cut it 4 x 5 1/4. I made a diagonal cut approximately 1/2″ in from the top and up the right side, but you can make this smaller or larger – as you desire. I added the larger panel to a Basic Beige 4 x 5 1/4. I die cut a border using the Fancy Border Dies and Gold Foil and attached it along the edge. I stamped the sentiment with VersaMark ink then sprinkled Metallic WOW! Embossing Powder over and heat set. Love the mix of fonts on this sentiment! I stamped two images from the stamp set to create the decoration for the ornament: the leaves in Pretty Peacock ink and the flowers in Lost Lagoon ink. I die cut the ornament and the flowers at the same time, then added the flowers with dimensionals to the ornament. I die cut the ornament top from Gold Foil – again using the Bauble Blooms Dies. I put this in place on the card front with dimesnionals then added a double bow using the Gold Twisted Thread and attached it with a glue dot. These were added to the card base of Pretty Peacock.

Stampin' Up! Bauble Blooms card inside

I used the reserved cut of the Regal Distressed Patterns DSP to attach to the upper corner of a Basic White panel (3 3/4 x 5). I added another strip of gold foil die cut from Fancy Borders Dies. I stamped the sentiments from Bauble Blooms stamp set in Pretty Peacock ink. This was added to Basic Beige 4 x 5 14 and added to the inside of the card.

Stampin' Up! Bauble Blooms card & envelope

For the envelope… more of the Regal Distressed Patterns SDSP in Cherry Cobbler was adhered to the flap & trimmed to fit.

Stampin' Up! Suite Sale

TODAY IS THE LAST DAY FOR THIS SUITE SALE! Starting June 3, all available suites and suite products from the 2025–2026 Annual Catalog and Online Exclusives are buy one, get one 50% off! If you’ve had your eye on a new suite from the annual catalog or you really like the look of a stamp set from an Online Exclusives suite, you don’t have to choose—you can get both!

Sales Period: June 3–30, 2025

Ordering Deadlines

Phone: June 30, 2025, at 6:59 p.m. (MT)

Online: June 30, 2025, at 11:59 p.m. (MT)

  • All available suites and suite products from the 2025–2026 Annual Catalog and Online Exclusives are buy one, get one 50% off.
  • When you shop the sale, the 50% off discount will apply to the lower-priced item (for example, if you buy a suite collection and a stamp set from a suite, the suite would be full price, and the stamp set would be 50% off).
  • Suite collections are available if all items are in stock; if all items are not in stock, you can still shop the available suite products.
  • You don’t have to buy a suite and suite products all from the same suite collection for the discount to apply. You can buy any suite products from any suite.
  • The discount will appear in your cart once you’ve added two items within the sale parameters to your cart.
  • Products are available only while supplies last.
  • See and shop all qualifying suites in the online store

SHOP LAST CHANCE PRODUCTS HERENEW ITEMS ADDED TO THE LIST… MAKE CERTAIN MY NAME IS LISTED AS YOUR DEMONSTRATOR WHEN YOU CHEVCK OUT! :O) REMEMBER…Browse the selection of Last Chance paper crafting products. Additional items are added every other month. These products are available only while supplies last so be sure to buy them before they are discontinued! Discounts vary and are subject to change.

Thanks for stopping by. May you have a beautiful day.

Make someone happy sending them a handmade card made with love. ❤️ Product List

/p>