Stampin’ Up! Springy Inside Gatefold with Glow of Harvest DSP & NEW Tile Garden Bundle

It’s Friday – where did the week go? It’s been hot & humid in NJ this week, a perfect time to be inside & create 😀. In card class yesterday we made this fun gatefold card that has a ‘springy’ inside. It’s so fun to open! And I used the September Product of the Month – the Glow of Harvest SDSP – it’s sparkly!

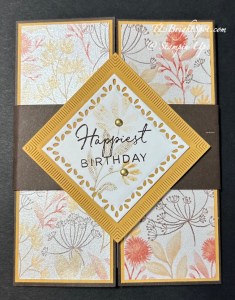
Stampin' Up! Springy inside gatefold w/ Glow of Harvest SDSP card front

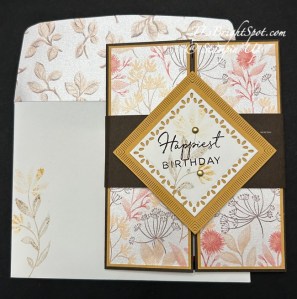
This is a traditional gatefold card – 8 1/2 x 5 1/2 scored at 2 1/8 on one end then the other side brought over to meet it. The card base is Early Espresso with a layer of Golden Glow 2 x 5 3/8 on each front panel, then a layer of the Glow of Harvest SDSP 1 7/8 x 5 1/4.

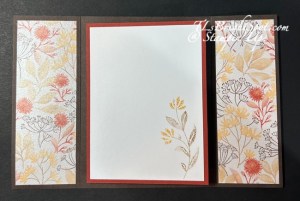
Stampin' Up! Springy inside Gatefold card inside

And here’s the finished inside. The center section is the ‘springy’ part. The inside panels are more of the same pattern of Glow of Harvest SDSP cut 1 7/8 x 5 1/4.

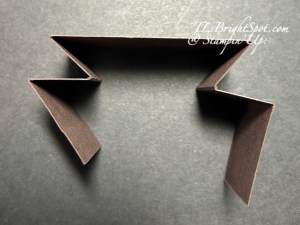
Stampin' Up! mechanism for 'springy' inside of gatefold

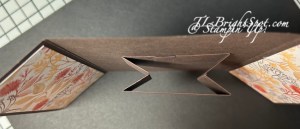
Stampin' Up! 'springy' mechanism  attached to inside card

To create the mechanism, cut a strip 8 x 1 1/2 and scored @ 1 ¼, 2, 2 ¾, 5 ¼, 6 & 6 ¾. Burnish all score lines making certain the strip edges are even. After scoring, fold it as shown above in the left photo. Attach this to the inside panel, centering it, and with the ends touching. It should look like the photo on the right.

The center panels are Cajun Craze 3 ¾ x 5 and Basic White 3 1/2 x 4 3/4. Stamp the Basic White panel prior to adhering it. I used Crumb Cake stamped off once for the leaves and Golden Glow stamped off once for the small flowers. These are from the NEW Sep-Dec 2026 Catalog that can be ordered from Sep 1! Don’t have a catalog? Let me know & I can fix that. 😀

The belly band is 1 3/4 x 10 (Early Espresso) and wrapped around the card to the front. Keep it loose enough so it easily slips on & off. Secure the ends of the belly band together while it is around the card – just be careful with the amount of adhesive!

Remove the belly band & create the front decor…I used the NEW Tile Garden Dies to create these two panels – Golden Glow (this is about 2 3/4 square) and Basic White (less than 2 1/4″ square) Stamp the sentiment in Early Espresso using the stamp in the Tile Garden stamp set, then stamp the floral image sort of as a background… again stamping off first each time – Crumb Cake for the leaves and Golden Glow for the flowers. Final touch – Gold Adhesive-Backed Dots also from the new catalog. I used them as centers to the flowers.

Stampin' Up! Springy inside Gatefold w/ Tile Garden & Glow of Harvest SDSP, card & envelope

For the envelope, I used another pattern of the Glow of Harvest SDSP to attach to the flap & trimmed to fit. And on the front this same flower image from the Tile Garden stamp set – Crumb Cake for the leaves and Golden Glow for the flowers, stamped off each time.

The Product of the Month is available for purchase when placing an order of $75 – and it’s only $5! This is stunning pearlized paper & will be available Sep 1 – same day you can order from the Sep-Dec 2026 Catalog.

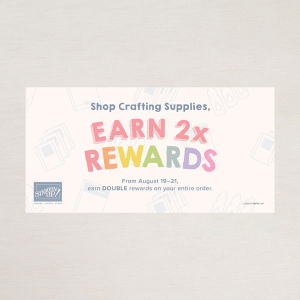
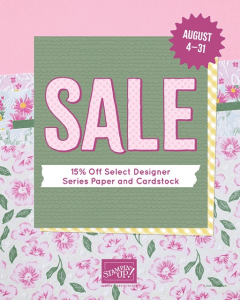
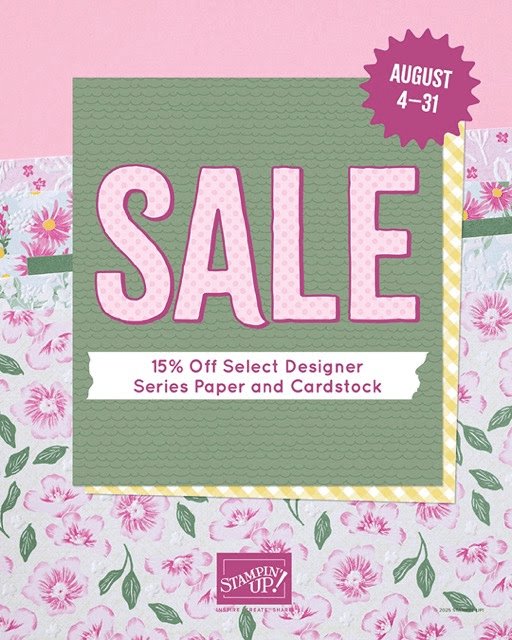
While you wait for the new catalog to go live, today is the last day for Stampin’ Up! Double Rewards with a $25 & up purchase. With the current sale on paper products – 15% off select card stock & DSP + Last Chance Products – it’s easy to find items wanted & needed.

SHOP WITH ME HERE!

Stampin' Up! Double rewards
Stampin' Up! DSP & card stock sale
Stampin' Up! Last Chance Products

Thanks for stopping by. May you have a beautiful day! Make someone happy by sending them a handmade card filled with ❤️
Stampin’ Up! Moonlit Flora for a Book Fold

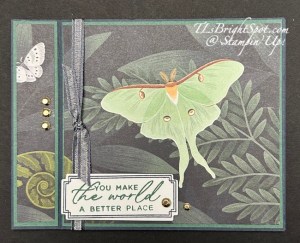
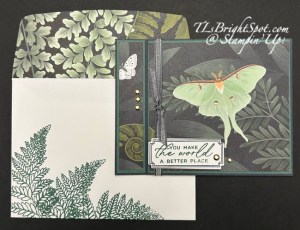
Good morning, good morning. The Moonlit Flora DSP has been super popular & I’m using it today to make a book fold card. That luna moth is in it’s glory & the focal point for this card.

Stampin' Up! Moonlit Flora DSP in a book fold

Measurements:

  • Card base: Secret Sea 11 x 4 1/4, score @ 5 1/2 & 4 1/2
  • Layer: Peaceful Pine 7/8 x 4 1/8; 4 3/8 x 4 1/8; inside 4 3/8 x 4 1/8
  • DSP: Moonlit Flora 3/4 x 4; 4 1/4 x 4; inside – 4 1/4 x 4 1/8; flap – 2 1/4 x 6
  • Basic White: inside – 4 1/4 x 4

When cutting the DSP, it’s helpful to have the ‘scene’ go all the way across., therefore the initial cut of the DSP should be 5 x 4, then trim left end to 3/4 leaving 4 1/4 for the right side. I added the 1/4″ Satin Ribbon in Secret Sea & Gold (available Sep to customers!) for focus and prior to adding the inside layer of DSP. The sentiment is from the Fern & Flora stamp set with the border in Secret Sea & the sentiment in Peaceful Pine. It was die cut with the coordinating Fern & Flora Dies and added with dimensionals. The extra elements are the Adhesive-backed Metallic Gems in gold – and there are five of them.

Stampin' Up! Moonlit Flora DSP book fold inside

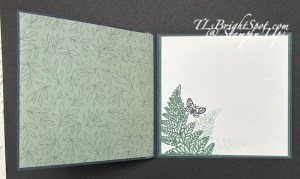
The inside… DSP on the left is from Moonlit Flora & just adds a nice touch to this card. On the right, the Basic White panel is with the fern leaf three times without re-inking – in Peaceful Pine. The butterfly is stamped in Secret Sea. Both are from the Fern & Flora stamp set.

Stampin' Up! Moonlit Flora DSP card & envelope

For the envelope… more Moonlit Flora DSP on the flap & trimmed to fit. The stamping on the front is in Peaceful Pine – the same fern stamp as on the inside, but this time re-inked each time before stamping again.

These products are all from the May-Aug 2026 Catalog (except for the ribbon).

Product List

Stampin’ Up! Floating Gatefold for the Happy Inkin’ Thursday Blog Hop

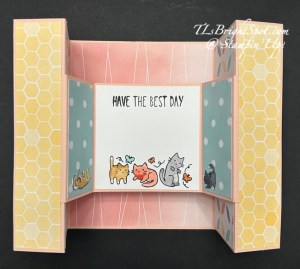
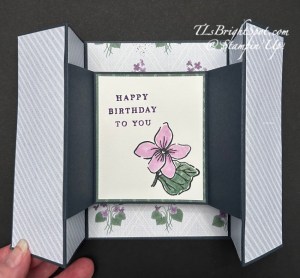
Good morning! Today is such a FUN FOLD blog hop 😀, I can’t wait to see what others on the team have created. I have two versions of the floating gatefold and will give you measurements for both. One is made with the Framed Violets bundle and it’s coordinating DSP called Violet Dreams. The other is with a bundle from an ONLINE EXCLUSIVE that is older and just too cute.. Cutest Crew – and Beautiful Ordinary Life 12×12 DSP. You can use so many different papers or bundles for this fun fold.

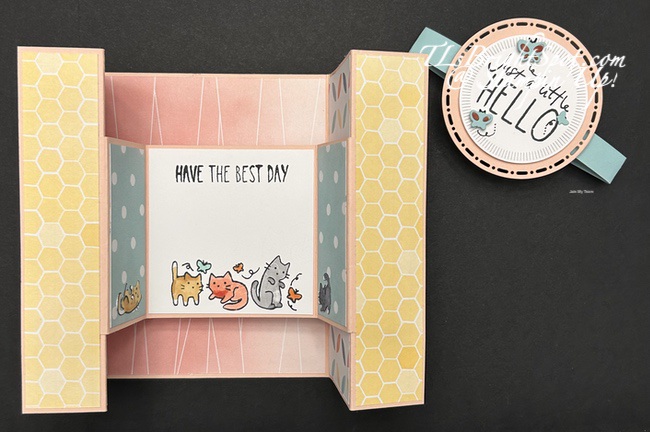
Stampin' Up! Cutest Crew Floating gatefold open
Card 1 – Cutest Crew/ Beautiful Ordinary Life DSP
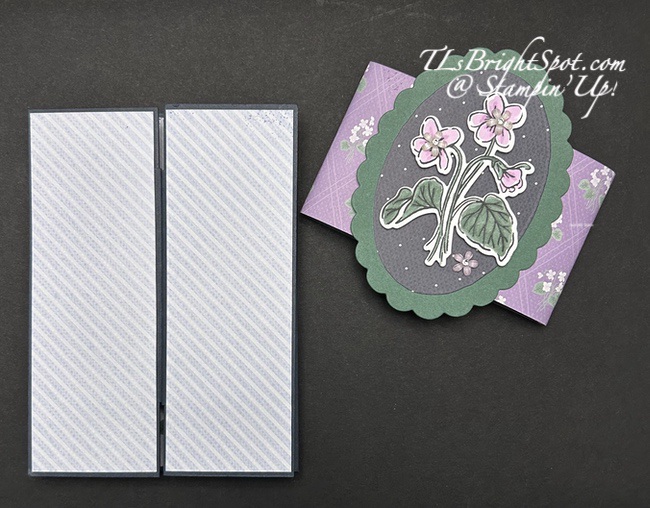
Stampin' Up! Framed Violets Floating Gatefold open
Card 2 – Framed Violets/ Violet Dreams DSP
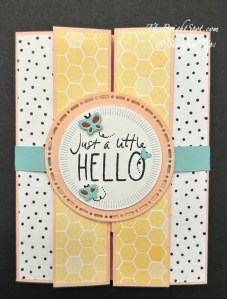
Stampin' Up!  Cutest Crew gatefold w/ belly band
Card 1 – Cutest Crew w/ belly band
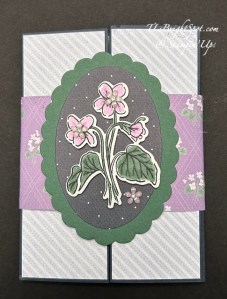
Stampin' Up! Framed Violets Floating Gatefold w/ belly band
Card 2 – closed w/ belly band

Notice how very different the fold lines are and the width of the belly band on each card.

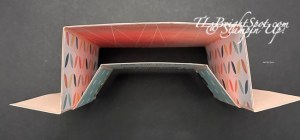
And here’s a photo taken from the top of this gatefold card. Both cards are the same in a top-down look, so only one photo is shown.

Dimensions for card #1:

  • Card base: 11 x 5 1/2 scored @ 1 1/4 & 3 3/8 from each end
  • Floating element: 8 x 3 scored @ 1, 2 1/2, 5 1/2 & 7
  • belly band: 10 x 3/4
  • DSP:
    • inside center of card base: 4 1/8 x 5 3/8
    • inside panels on either side of center piece: (2) 2 x 5 3/8
    • front: (2) 1 1/8 x 5 3/8
    • front outside: (2) 2 x 5 3/8
    • floating elements pieces: (2) 1 3/8 x 2 7/8
  • Basic White:
    • floating section center: 2 7/8 x 2 7/8
    • back: 4 1/8 x 5 3/8
  • Additional pieces for belly band decor

Dimensions for card #2:

  • Card base: 10 x 5 1/2 + 2 1/2 x 5 1/2 ~ score larger section @ 2, 4, & 8; score additional section@ 1/2 on long side. Attach this panel to the main section with the score on the inside of the end. This makes your final card base 12 x 5 1/2 with the scores @ 2, 4, 8 & 10
  • Floating element 8 x 3 1/2 ~ score @ 2 1/2, 5 1/2, 7 & 8
  • Belly band pieces as needed
  • DSP:
    • inside center panel of card base: 3 7/8 x 5 3/8
    • panels on either side of card base: (4) 1 7/8 x 5 3/8 (adhere only the 1st panel on either side of the center piece until after the floating panel is attached)
    • floating panel center: 2 3/4 x 3 1/4
    • belly band 10 x 2 1/2
  • Basic white:
    • floating panel center: 2 1/2 x 3
    • back: 4 1/8 x 5 3/8

Directions for putting this gate fold together…

  • Adhere DSP panels to both the card base & the floating section EXCEPT FOR FRONT PANELS (for card 1, that is the yellow strips/ for card 2 that is the very front panels)
  • Do stamping prior to attaching the Basic White pieces ~ for center panels & back (for writing your stuff!)
  • Burnish all score lines: card base ~ mountain, valley, valley, mountain; floating section ~ mountain, valley, valley, mountain.
  • Centering floating piece top to bottom, add to the last fold on right butting fold of floating section against fold of card base.
  • Do the same on the left side, centering top to bottom.
  • Add final piece of DSP over this attached floating element
  • Wrap belly band around closed card and add glue to each end to attach together. DO NOT LET IT STICK TO THE CARD!!! 😀
  • Decorate belly band

We’re making these two cards in card class today ~ both really quite easy & they give a real bang to the receiver. If you make this Floating gatefold – please share a photo with me!

Now on with the hop… be sure you note below all the fun goodies Stampin’ Up! has going on right now & how to purchase the products to make this card – from me of course!

Click the next button or click on a name to continue the hop.

Amy Koenders

Mary Deatherage

Karen Ksenzakovic

Tara Carpenter

Terry Lynn Bright

Please review this post to see all the goodies SU! has to offer RIGHT NOW!

Product List
Smoky Slate Stampin' Blends Markers Combo Pack [ 145058 ] (Retired)
Smoky Slate Stampin’ Blends Markers Combo Pack
[145058]
$9.00
Paper Snips [ 103579 ]
[103579]
$12.00

Thanks for stopping by! May you have a beautiful day. Make someone happy by sharing your cards – make one, send one, make lots of happy!

Shop with me here!

Stampin’ Up! Designer Series and Card Stock Paper Sale!!!

Details:

  • While supplies last.
  • You’ll find all qualifying items in one convenient location—the “Designer Series Paper and Cardstock Sale” page in the online store.
Stampin' Up! DSP SALE

Watch this video for more information…

Customers can get the Glow of Harvest 12″ x 12″ (30.5 x 30.5 cm) Specialty Designer Series Paper (168598) for only $5 USD | $7 CAD with a single purchase of $75 USD | $100 CAD or more. ORDER FROM ME HERE!

Stampin' Up! Product of the Month

AUGUST PRODUCT OF THE MONTH

Stampin' Up! August POTM

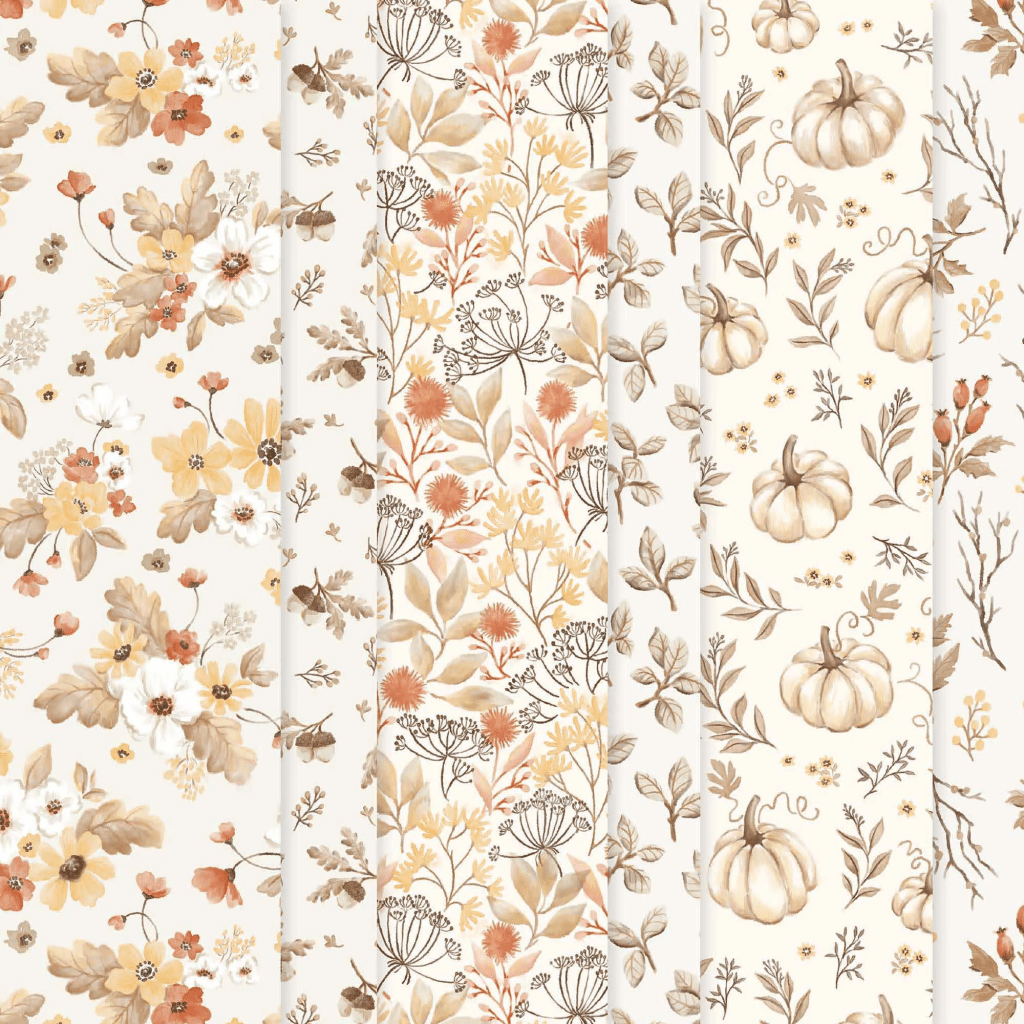
Glow of Harvest 12″ x 12″ (30.5 x 30.5 cm) Specialty Designer Series Paper (168598)

Celebrate abundance with this beautiful Designer Series Paper. This paper is photo safe, meaning you can add all the pictures you want to your scrapbook projects. But don’t use too many because then you’ll cover the pearlized finish, which adds a lovely shimmer to every page and can enhance the look of all your handmade projects. And this paper offers different patterns for multiple uses: the tighter patterns make great backgrounds while the looser patterns can be fussy cut for detailed centerpieces. Order must total $75 before Shipping & taxes to qualify for this product for $5.00!

NEW IN KITS COLLECTION Aug 4, 2026

STAMPIN' UP! Witchy Whimsy HAt kit
Stampin' Up! Crafted Blooms Kit

168672. 168671

WITCHY WHIMSY HAT KIT CRAFTED BLOOMS KIT

$28.00 $14.00

Stampin' Up! Last Chance Products

LAST CHANCE PRODUCTS SHOP HERE

When your order from me is over $50 you will receive by email, the tutorial of the month. For the month of August, that tutorial is for the Flowering Meadow bundle of products. Che ck my REWARDS PAGE for more information.

Stampin' Up! August Tutorial

HAPPY SHOPPING – WHILE SUPPLIESA LAST!

Stampin’ Up! Sneak Peek of Summer Happiness, July ONLINE Exclusive for the Happy Inkin’ Thursday Blog Hop

Welcome to Thursday and this fun hop! We have a sketch challenge today & I chose to work a brand new July ONLINE EXCLUSIVE bundle. It’s called Summer Happiness. 😀

Stampin' Up! Blog Hop
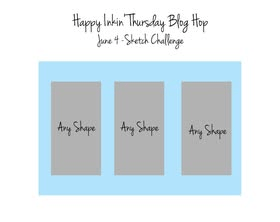
Stampin' Up! Sketch challenge

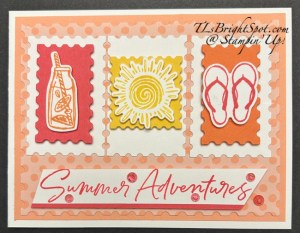
Stampin' Up! Summer Happiness card front

I began by stamping these fun summer images and using a different ink for each one: Timid Tiger, Daffodil Delight and Strawberry Slush. They are so absolutely typical summer! Then I took the Perennial Postage Dies to die cut the immediate background for each: under the drink is Summer Slush, under the sun is Daffodil Delight, and under the flip flops is Timid Tiger. Using the next larger die in Perennial Postage, I die cut three rectangles from Basic White. I adhered each of these layers together with dimensionals and set them aside to make the background for these cute images. The card base is Thick Basic White (11 x 4 1/4 scored @ 5 1/2) with a layer of Crisp cantaloupe (4 x 5 1/4). I used the largest die in Perennial Postage Dies to die cut the panel from 2026-2028 In Color Painted Patterns DSP. Each of these layers were added with liquid glue. Before placing my rectangles, I stamped the sentiment in Strawberry Sluch ink on a Basic White piece & adhered a narrow strip of Strawberry Slush to the back. I put dimensionals on the back and centered it on the bottom of the card. I then added the three rectangles, placing the center item first then the other two. These were attached with liquid adhesive. Final touch – a few embellishment in Strawberry Slush.

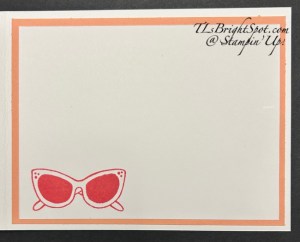
Stampin' Up! Summer Happiness card inside

For the inside… Another panel of Crisp Cantaloupe was added (4 x 5 1/4) then the Basic White panel (3 3/4 x 5). I stamped the sunglasses in Strawberry Slush ink and the card itself was complete!

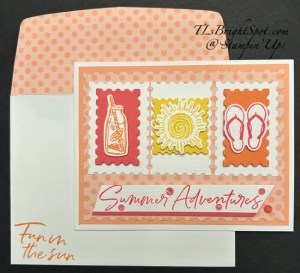
Stampin' Up! Summer Happiness card & envelope

For the envelope… I added the same Crisp Cantaloupe color of Painted Patterns DSP to the flap & trimmed to fit. I then stamped the sentiment on the front from Summer Happiness stamp set in Timid Tiger. Such a fun, light-hearted card!

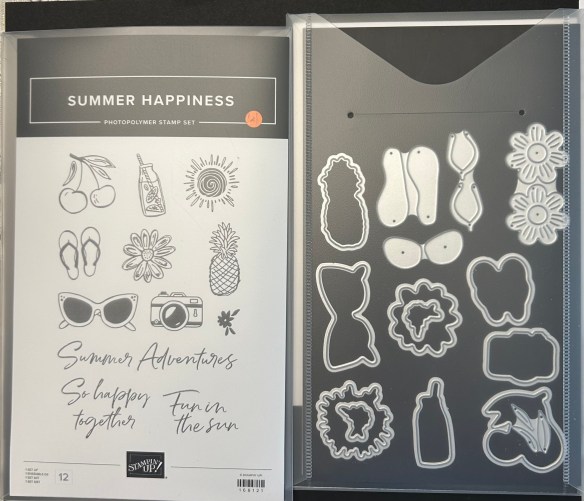
Below is the bundle used for today’s card. Aren’t these fun images & dies coordinate! I could have done this same challenge using the daisy stamp and three images of that – wouldn’t that be cute!

Stampin' Up! Summer Happiness bundle, July ONLINE EXCLUSIVE

Ok – on with the hop… Check out what everyone has created for this challenge – click on the next button or click on a name. And please note – more information from me below the list of names 👍

Stampin' Up! blog hop button

Amy Koenders

Mary Deatherage

Karen Ksenzakovic

Tara Carpenter

Terry Lynn Bright

If you are a demonstrator, you have access for a pre-order of the bundle used for today’s card. If you are interested in becoming a demonstrator, I would love to talk about that with you OR you can

JOIN MY TEAM HERE

Shopping with me is easy too… click the same link as above. And know that when your purchase is $50 or more there are benefits of a monthly tutorial and Daisy Patch rewards. 🌺

Stampin’ Up! Relaxing Waterside for the Happy Inkin’ Thursday Blog Hop

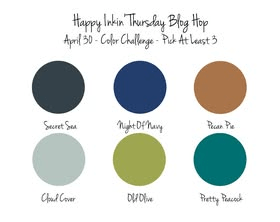
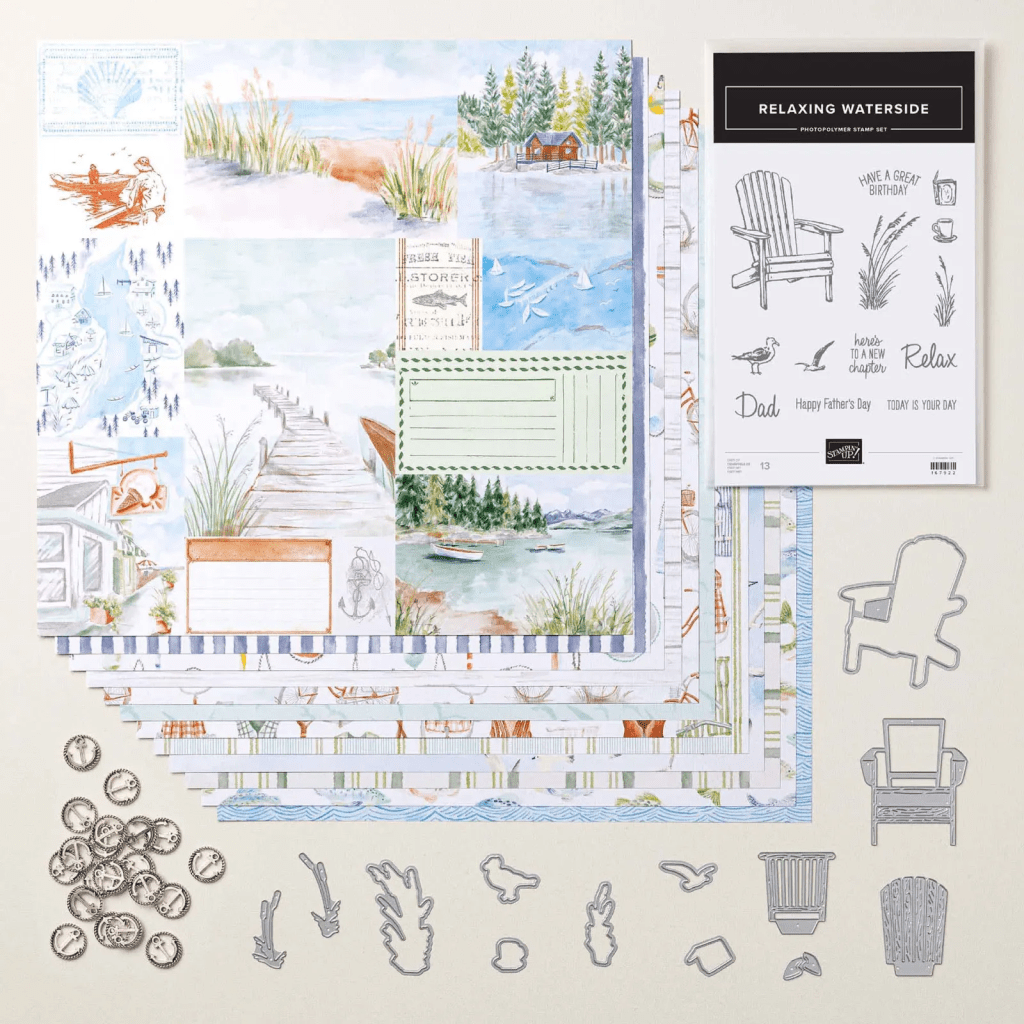
Welcome to our HOP! We have a color challenge today… I’m using a NEW product available May 5 called the Relaxing Waterside bundle & it’s coordinating Designer Paper called Waterside Retreat. Let’s take a peek…

Stampin' Up! Happy Inkin' Thursday Blog Hop
Stampin' Up! Hop Color challenge

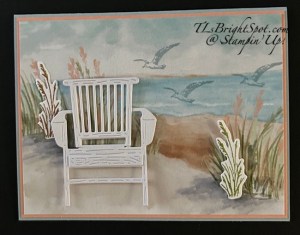
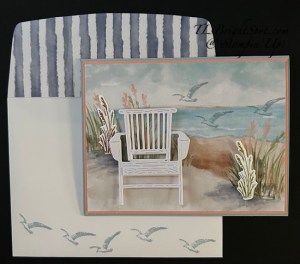
Stampin' Up! Relaxing Waterside card front

I used Cloud Cover for my card base (8 1/2 x 5 1/2 scored at 4 1/4) then layered a panel of a new IN Color called Crisp Cantaloupe (4 1/8 x 5 38) then a layer of the Waterside Retreat DSP. I die cut the chair from Wood Textured Specialty Paper & added it with dimensionals. I also stamped grass images in both Pecan Pie & Old Olive onto Basic White scraps & die cut them. They are part of the Relaxing Waterside bundle & just add wonderful dimension to the card. Last thing was to stamp the seagulls in Cloud Cover ink – and the card front was complete.

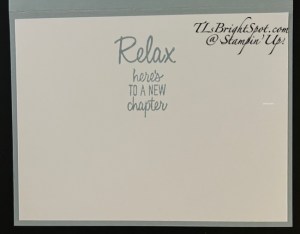
Stampin' Up! Relaxing Waterside card inside

For the inside – on a Basic White piece (4 x 5 1/4) I stamped these sentiments in Cloud Cover ink and attached the panel to the inside.

Stampin' Up! Relaxing Waterside card & envelope

For the envelope… On the backside of this particular sheet is this wonderful stripe pattern – I used that for the flap then stamped more seagulls on the front with Cloud Cover ink. Here on the East coast, seagulls swarm wherever there are people with food. They get quite aggressive in taking food, sometimes right out of one’s hand!!!

Stampin' Up! blog button

Amy Koenders

Mary Deatherage

Karen Ksenzakovic

Tara Carpenter

Terry Lynn Bright

To purchase the items to make this card, please see the two lists below… the second can be ordered beginning May 5!

Product List

167932

WATERSIDE RETREAT SUITE COLLECTION (ENGLISH)

$68.75

SHOP WITH ME HERE... FOR KITS, PAPER PRODUCTS, LAST CHANCE ITEMS – ALL OF IT!

Sales Period: May 2, 2026, from 12:00 a.m. to 11:59 p.m. (MT)

Ordering Deadlines

  • Online: May 2, 2026, at 11:59 p.m. (MT)

Note: Because this 24-hour sale takes place on a Saturday, Demonstrator Support will be closed and unavailable to answer questions or take phone orders.

Details:

  • 24 hours only
  • 20% off select memory keeping products
  • Items available while supplies last
  • See and shop all qualifying products in the online store

Stampin’ Up! Slider Card Fun Fold with Sneak Peek Products

Good morning! I’m so excited to share this card with you – it’s a beauty, I used some new products that will be coming out in the May-August 2026 Catalog that you can order on May 5.

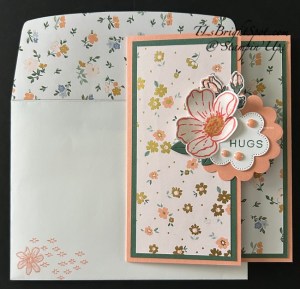
Stampin' Up! Slider Card fun fold, card front

The card base is Crisp Cantaloupe. Don’t you just love that name of a color? The layers are Peaceful Pine and various papers from the Bloom Boutique Specialty Paper Pack. The flowers & leaves come from a new bundle – Boutique Blossoms and the scalloped die cuts use the Scalloped Blooms bundle. Before I share all the details about how to make this card, let’s see the inside where the slider is.

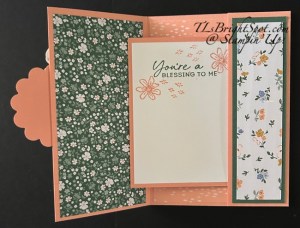
Stampin' Up! Slider card fun fold inside

More gorgeous paper shown here from the same Bloom Boutique SDSP. And the slider? That’s the sentiment panel – and it slips inside the panel on the right.

So, directions… I chose to do the inside first so let’s start there.

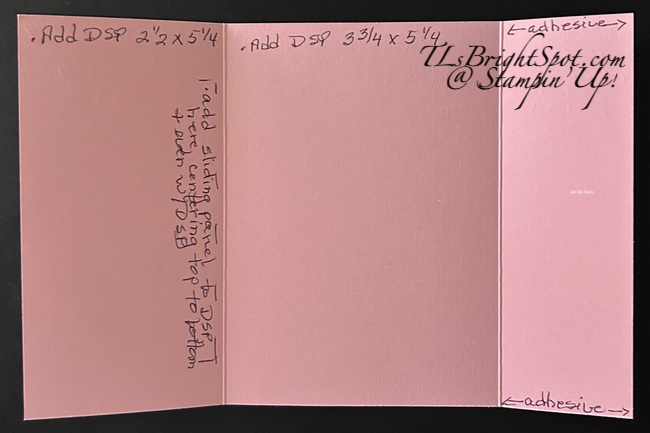
  • The card base is the standard 8 1/2 x 5 1/2 scored on the long side @ 2 3/4 & 6 3/4. Burnish the score lines as both will fold to the inside.
  • Cut the left DSP panel 2 1/2 x 5 1/4 and adhere
  • Cut the center DSP panel 3 3/4 x 5 1/4 and adhere
  • Fold the last panel inwards with a narrow line of adhesive at just the top & bottom (see photo)
Stampin' Up! Slider card template

Decorate this folded over section with contrasting card stock (Peaceful Pine 1 1/2 x 5 1/4) then an overlay of DSP (1 1/4 x 5)

Creating the Slider for the card:

  • Cut a piece of card stock same color as card base (Crisp Cantaloupe) 3 3/4 x 4 1/4 & score 1/2″ on short side. Burnish & add adhesive to the scored end
  • Add this to the left inside panel even with the DSP & equidistant top to bottom
  • Fold this to the right, add a stamped Basic White piece 3 x 4 to the ‘slider’ front, then slip it into the opening on the right (I stamped the sentiment in Peaceful Pine ink – new In Color! and the flowers in Crisp cantaloupe – also new In Color! The sentiment is from Scalloped Blooms & the flowers are from Boutique Blossoms)

Now let’s decorate the front, which is really only the left panel 😀 Cut a contrasting card stock (Peaceful Pine) 2 1/2 x 5 1/4 and a DSP panel 2 1/4 x 5. Add to card front.

  • Die cut two panels of Scalloped Blooms Dies (Crisp Cantaloupe & Basic White) Stamp the BW piece in Peace Pine ink using a stamp from the Scalloped Blooms stamp set
  • Stamp small flowers in Peaceful Pine ink & the medium flower outline stamp in Crisp Cantaloupe. Stamp the filler stamp for both flowers in Barely Blush ink (another new IN COLOR!) Use the Light Peaceful Pine Stampin’ Blend to add color to the leaves of the small flowers. Die cut & set aside.
  • Die cut the small group of leaves (Peaceful Pine)
  • Add each of these die cuts to the die cut scallops and attach to card front.
  • Final touch… add three (3) 2026-2028 In Color Dots

Envelope… Add another piece of the Bloom Boutique SDSP 2 1/4 x 6 to the flap & trim to fit. Stamp the front with flowers from the Bloom Boutique stamp set with Crisp Cantaloupe ink. YAY – this is ready to send to someone special!

To purchase the items shown to make this card look at pages. in the new May-August 2026 catalog.

Thanks for stopping by. Shop with me here!

SEND A CARD WITH ❤️

Stampin’ Up! Sneaky Peek of the Silly Old Bear Suite & a Card for the Happy Inkin’ Thursday Blog Hop

Do you remember the adorable stuffed animals of Winnie the Pooh, Eyeore and Piglet? There are others animals produced as well, but I have to say – I loved these animals and the stories that went with them. So when this suite of products became available to demonstrators, I had this suite at the top of my list.

Welcome to the Happy Inkin ‘ Thursday Blog Hop. We have a sketch challenge today & I chose to play with this Silly Old Bear Suite of products available to customers May 5.

Stampin' Up! Happy Inkin' Thursaday Blog Hop
Stampin' Up! Hop Sketch Challenge

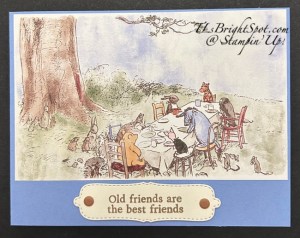
Stampin' Up! Silly Old Bear card front

I am really appreciating the new IN COLORS! This card base is Hydrangea Hue 4 1/4 x 11 scored at 5 1/2. I added this awesome picture panel, cut directly from the 12×12 Silly Old Bear Designer Series Paper. On the lower part of the card front is this stunning label, die cut from Very Vanilla card stock using the Sweet Words & Labels bundle. The sentiment? from the same stamp set – Sweet Words & Labels – stamped in Crumb Cake ink. The embellishments are Neutral Matte Dots.

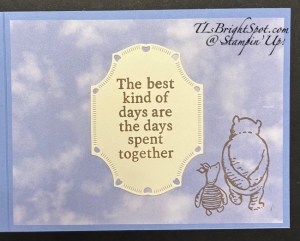
Stampin' Up! Silly Old Bear card inside

For the inside of the card I used another sentiment from the Sweet Words & Labels stamp aet, stamped in Crumb Cake ink on Very Vanilla card stock. It was die cut using the Sweet Words & Labels Dies. I adhered it to a the inside of the card after attaching a piece of the Silly Old Bear 12×12 DSP. I then stamped the image of Silly Old Bear & Piglet walking together – using the Sweet Old Friends stamp set. This set also has coordinating dies – and they die cut images straight from the DSP. You are so going to LOVE THIS suite of products. This suite is a May ONLINE EXCLUSIVE and will be available May 5.

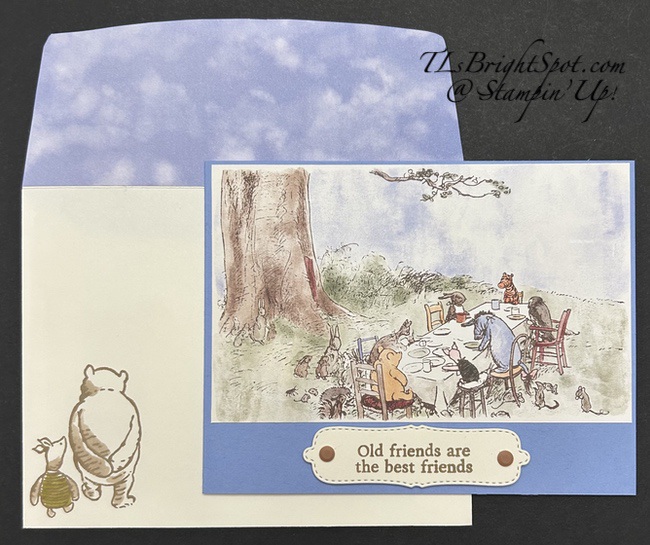
Stampin' Up! Silly Old Bear card & envelope

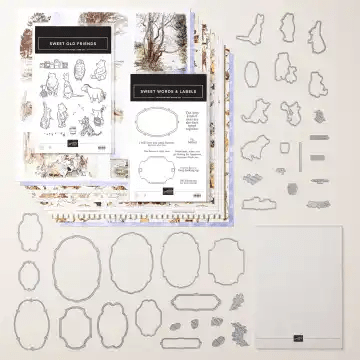
For the envelope, more of the Silly Old Bear DSP on the flap trimmed to fit and for the front, this sweet Pooh Bear & Piglet walking along. I did use Crumb Cake Stampin’ Blends to add some shading – and for Piglet a bit of Old Olive for the top he’s wearing. Below is an image of the suite collection – look at those fun dies! Oh my gosh… so much fun! This takes me back to earlier years for sure.

Stampin' Up! Silly Old Bear Suite of products

This is a suite you will definitely want to add to your wish list for ordering May 5. More info about ordering from me is listed below. For now, I want to encourage you to visit others participating in today’s hop. Get ready to see some fabulous creations.

Stampin' Up! Blog hop button

Amy Koenders

Mary Deatherage

Karen Ksenzakovic

Tara Carpenter

Terry Lynn Bright

Nicole Bloxom

If you do not have a demonstrator, connect with me – I can fix that, get you a catalog and set you up for success & fun! Even show you how to be a demonstrator 😀 You can, you know!

Shopping with me is easy.. click here to see all the goodies. What’s nice about a single link is you’re able to slip around the site, see the current Annual Catalog, Online Exclusives and Last Chance products – all in one link. And when you shop with me, not only do you receive extra Daisy Patch Points (visit my rewards page for more info), but Stampin’ Up! provides benefits as well. And when you decide to be a Demonstrator – oh my goodness – LOTS of benefits there… an automatic discount for every time you shop, you join a community of crafters that inspire & stimulate your creativity, view & have the opportunity to purchase new products before they are available to the general public – AND attend conventions. There’s more, there’s always more… JOIN MY TEAM HERE

Thanks for stopping by. Make someone’s day by sending them a handmade card filled with ❤️
Stampin’ Up! Celebrate for Amy’s Inkin’ Krew Blog Hop Group

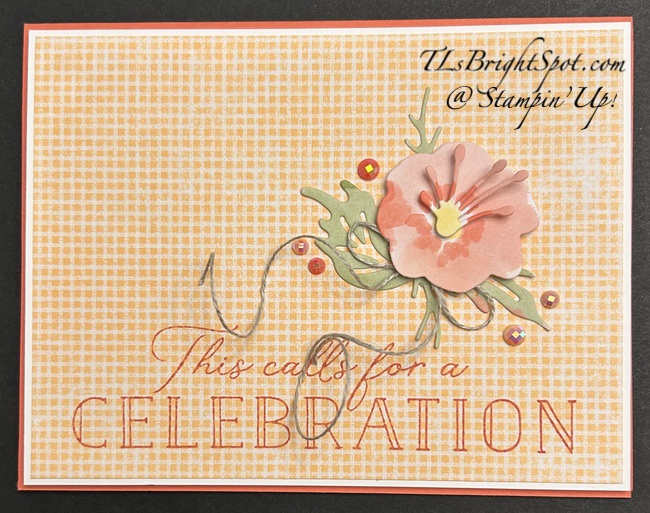
Our theme is ‘celebrate’ and we can interpret that any needed way. I have chosen to use the brand new products in the Lovely & Beautiful suite in the Jan-Apr 2026 Mini Catalog on pages 23-29. This is an absolutely gorgeous suite & I’m highlighting only a small bit of it.

The background is this fun checkered pattern & I’ve stamped this sentiment from the Beautifully Celebrated stamp set in Calypso Coral. I then die cut from the Lovely & Beautiful Specialty Designer Series Paper the flower & leaves using the Simply Beautiful Dies. The leaves & tiny pieces are adhered directly to the card front while the flower is on dimensionals as is the stamen (it’s on a mini dimensional cut in half!) I then added these gorgeous Pearlized Faceted Circles that are also a part of the suite. The Specialty DSP was added to a Basic panel slightly larger then attached to the Calypso Coral card base with dimensionals. I made a small Linen Thread bow and tucked it under the flower, adhering with a dab of glue.

Stampin' Up! Lovely &

For the inside of the card, I used yet another of the Simply Beautiful Dies to die cut this flower from the Lovely & Beautiful SDSP. Before attaching it in place I stamped this decorative design using a stamp from Beautifully Celebrated stamp set in Calypso Coral ink. I adhered the flower then stamped the sentiment – again in Calypso Coral ink – then adhered the panel to the inside of the card.

Stampin' Up! Lovely & Beautiful Suite card & envelope

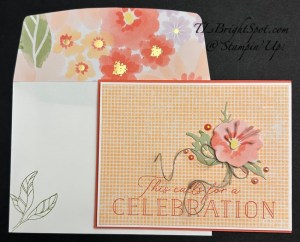
For the envelope… more of the Lovely & Beautiful SDSP was adhered to the flap & trimmed to fit. On the front is this leaf, stamped in Old Olive ink using the Beautifully Celebrated stamp set. While this is very springy in color, I’m using this as a birthday card for my friends birthday in December – something non traditional ‘Decemberish’ 😀 For information on how to get the new Jan-Apr 2026 Mini Catalog, see below. Also see below for other information about joining & purchasing products through my online store.

Please check the list of those participating in the hop today. Click on the ‘next’ button or click on a name to take you around the group. Have fun hopping!

Stampin' Up! Blog hop link
  1. Karen Ksenzakovic
  2. Mary Deatherage
  3. Nicole Bloxom
  4. Ann Louise Fodgaard
  5. Tara Carpenter
  6. Karen Finkle
  7. Terry Lynn Brightyou are here!
  8. Amy Koenders

FREE SHIPPING IS DECEMBER 10-12

Get FREE SHIPPING from December 10–12 when you spend $75 USD | $100 CAD or more.

Stampin' Up! FREE SHIPPING
  • All order types qualify for this promotion.
  • Free shipping is for three days only. Orders must be opened and closed from December 10–12.
  • Free shipping automatically applies to your cart after the qualifying amount has been met, which is $75 USD | $100 CAD (before tax).
  • Coupon codes and Stampin’ Rewards will lower your order’s retail amount. Orders must meet the qualifying amount to be eligible for free shipping.
  • The additional cost for expedited shipping is not covered by this promotion.
  • Prepaid 3-, 6-, and 12-month Paper Pumpkin subscriptions and month-to-month subscriptions do not qualify for free shipping. Refills, past kits, and add-ons do qualify toward free shipping, but you must be a subscriber to purchase. Subscriptions billed and shipped this month will be charged for the normal amount ($27.00 USD | $36.75 CAD shipping included) + tax.
  • Please keep in mind that due to the high volume of orders and the Christmas season, the distribution center may fall behind our typical shipping timeframes. We will do all we can to return to our regular service levels as quickly as possible. Any orders placed during this promotion are not guaranteed to arrive before or by December 25.
Stampin' Up! Last Chance Products

Click on the image above to see the products from the Last Chance list. There are updates and many products from the Sep-Dec 2025 Mini Catalog are included – don’t miss out!

Stampin' Up! Product of the month

167970

TRUE BLUE FLORALS 12″ X 12″ (30.5 X 30.5 CM) DESIGNER SERIES PAPER

$5.00

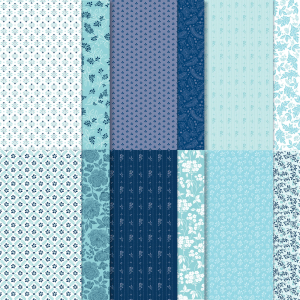
If you love exclusive products, you’re going to love Product of the Month, a promotion centered around a special product release every month. The Product of the Month items are specially designed to be some of the best items Stampin’ Up! has to offer that aren’t available in any of our catalogs or our Online Exclusives. Every month we’ll release a new item that is only available for purchase once per account. These items will be limited quantity and are likely to sell out quickly—once they’re sold out, they’re gone for good! The True Blue Florals 12″ x 12″ (30.5 x 30.5 cm) Designer Series Paper is the exclusive Product of the Month for December 2025! Only available until supplies run out—don’t wait to get yours! This product can be unlocked for just $5 with a single order over $75 (after discounts and rewards).

Paper Pumpkin Refills, Past Kits, and Add-Ons Sale

Big savings start tomorrow! From December 10–12, Paper Pumpkin subscribers can get up to 50% off on refills, past kits, and add-ons! Bonus: they can also qualify for FREE SHIPPING during the sale!

This sale is only open to active subscribers, so invite your customers to subscribe today! They’ll want to act quickly, because today, December 9, is the last day to save on prepaid Paper Pumpkin subscriptions with our Cyber Monday Sale! 

Key dates to keep in mind:

  • December 10: Refills, Past Kits, and Add-Ons Sale starts. This is the last day to subscribe to get the December Watercolor in Bloom Kit.
  • December 11: The first day to subscribe for the January Special Delivery Kit and shop the Beautiful Blooms Dies Add-On.
  • December 12: Refills, Past Kits, and Add-Ons Sale ends. 

Hurry—this sale is only while supplies last! Click here to see the great products you can snag!

Shop withhttps://www.stampinup.com/?demoid=2169800 me here

Thanks for stopping by. May you have a beautiful day. Make someone happy by sending them a handmade card filled with ❤️
Stampin’ Up! Sweet Bugs Sneak Peek for the Happy Inkin’ Thursday Blog Hop

Welcome to Thursday – Dec 4 – and the super fun blog hop. We have a sketch challenge today that is just perfect to show off a new January-April 2026 Mini Catalog product – some of the Cute As A Bug Suite. Just super, super cute! Thanks for joining me today.

Stampin' Up! Happy Inkin' Thursday Blog hop

Stampin' Up! Sweet Bugs card front

This super cute ‘bug’ is a die cut (from Sweet Bugs Dies) using the Designer Series Paper called Cute As A Bug 12×12. It may be found in the January-April 2026 Mini Catalog on pages 42-44. I added a Basic White backing for strength. The sentiment comes from the Sweet Bug stamp set. and the DSP these sit on is more of the Cute As A Bug 12×12 DSP. It was added to a Mossy Meadow panel just slightly larger. The embossing folder is also brand new – it’s called Lovely Stripes and is an ONLINE EXCLUSIVE coming in January. It was dry embossed on Crushed Curry card stock and added to as Crushed Curry card base.The embellishments I used are Low Profile Sparkle Dots in Mossy Meadow.

Stampin' Up! Sweet Bugs card inside

For the inside of the card I die cut another cute ‘fellow’ from the Cute As A Bug DSP and adhered it to a Basic White panel. I also stamped a sentiment from the Sweet Bug stamp set in Mossdy Meadow ink. This panel is attached to Mossy Meadow & both added to the inside of the card.

A super cute stamp of these ants mar ching along… from the Sweet Bug stamp set. I stamped in Pecan Pie ink – should have usede Memento Black ink. I colored with Stampin’ Blends Pecan Pie, Daffodil Delight & Real Red.

Stampin' Up! Sweet Bugs Card & envelope back

For the envelope back I attached more of the same design from the Cute As A Bug 12×12 DSP. Tuesday, the day I made this card ,was a dismal, dreary day outside – rained all day – 2 1/2″ plus – and making this card made me smile. Hope it makes you smile too. If you do not have a copy of the new January to April 2026 Mini Catalog, please reach out to me – I can fix that!

Shop with me here

When shopping through me & Stampin’ Up! you will earn 10% of your retail amount on all orders of $20 or greater – that’s deal #1! You will also be earning Daisy Patch Rewards from me – one Daisy Patch reward for each $25 of your order through my online store – that’s deal #2! When you have a total of 16 Daisy Patch Rewards – you will be able to select a $40 gift from me – that’s deal #3! 😀 When your order is $50 or greater, you will receive the monthly tutorial – and for December it’s the Pop-Up Petals tutorial – deal #4! See below for more fantastic deals.

Please see the lineup of those participating today – and make the rounds! Next is the creative Nicole.

Stampin' Up! Blog Hop button

Amy Koenders

Mary Deatherage

Karen Ksenzakovic

Tara Carpenter

Terry Lynn Brightyou are here!

Nicole Bloxom

Whether you’re looking for a last-minute Christmas present that sparks creativity or resolving to make time to craft in the new year, a Paper Pumpkin subscription is the gift that keeps on giving!

Stampin' Up! Paper Pumpkin SALE

From 1 – 9 December, prepaid Paper Pumpkin subscriptions will be discounted as follows:

-3-month prepaid: $61.00 (regular price $81.00)

– 6-month prepaid: $122.00 (regular price $162.00)

– 12-month prepaid: $244.00 (regular price $324.00)

Here are the details:

– Subscriptions purchased during this promotion start immediately with the December Watercolor in Bloom Kit. This kit cannot be skipped.

– Do not purchase multiple subscriptions for the same recipient. The subscriptions will ALL start with the Watercolor in Bloom Kit, so the recipient will end up receiving duplicates of the same kit each month.  SO – if you already have a subscription – Pause it (pre-paid) – or cancel it (month-to-month) before the 10th.  Sign up during the special (1 – 9 Dec) and then you’ll get December (for sure) and can get/skip future kits like always!

– Subscriptions purchased during the promotion will earn reduced rewards compared to full-priced subscriptions due to the discounted price, but they will still qualify for rewards once the threshold is met.

PRODUCT OF THE MONTH FROM STAMPIN’ UP!

If you love exclusive products, you’re going to love Product of the Month, a promotion centered around a special product release every month. The Product of the Month items are specially designed to be some of the best items Stampin’ Up! has to offer that aren’t available in any of our catalogs or our Online Exclusives. Every month we’ll release a new item that is only available for purchase once per account. These items will be limited quantity and are likely to sell out quickly—once they’re sold out, they’re gone for good! The True Blue Florals 12″ x 12″ (30.5 x 30.5 cm) Designer Series Paper is the exclusive Product of the Month for December 2025! Only available until supplies run out—don’t wait to get yours! This product can be unlocked for just $5 with a single order over $75 (after discounts and rewards).

167970

TRUE BLUE FLORALS 12″ X 12″ (30.5 X 30.5 CM) DESIGNER SERIES PAPER

$5.00

The Last Chance Products list has been updated!!! Click the image below to see the list and shop with me.

Stampin' Up! Last Chance Products