Stampin’ Up! Double Z-Fold for the Happy Inkin’ Thursday Blog Hop

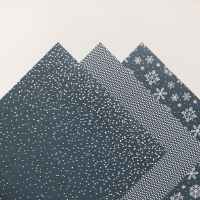
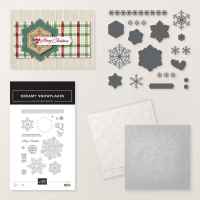
We have a theme challenge today… and I just realized I used t6he very same bundle last week for this hop – grrr. Well, I certainly used a totally different fun fold & Designer Series Paper 😀 This paper is called Winter Dreams & it is oerfect with the Dreamy Snowflakes bundle – and for this theme challenge.
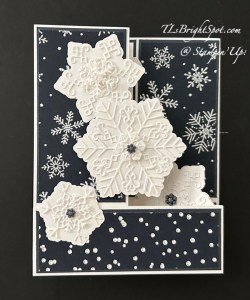
Stampin' Up! Double -Fold card front

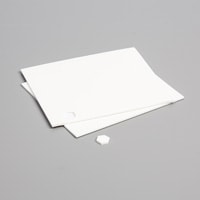
This is such an easy fun fold to create & it really shows off the snowflakes & the paper. I die cut several snowflake backgrounds then added Adhesive Sheets to more Basic White paper and die cut the intricate pieces. I just did lots so I could choose what to use. 😁 I put a few together then I cut the card stock pieces. Here are those dimensions…

Measurements:

  • Card base: Thick Basic White – 8 1/2 x 5 1/2 scored at 2 1/8 & 4 i/4. The first score is a mountain and the 2nd score is a valley.
    • Layers:
      • card stock – Secret Sea- (3) 2 x 3 7/8
      • DSP – Winter Dreams – (2) 1 7/8 x 3 3/4
      • Basic White – 1 7/8 x 3 3/4 for sentiment & stamping
  • The strip for the double Z is 8 1/2 x 1 1/2 scored at 4 1/4 & 2 1/8; scores are mountain, valley
    • Layers for the strip
      • card stock – Secret Sea – 4 1/8 x 1 3/8, (2) 2 x 1 3/8
        • DSP – Winter Dreams – 4 x 1 1/4, (2) 1 7/8 x 1 1/4
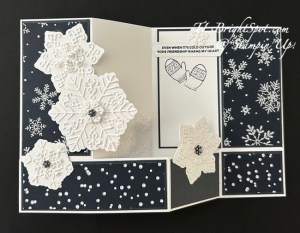
Stampin' Up! double z-fold inside

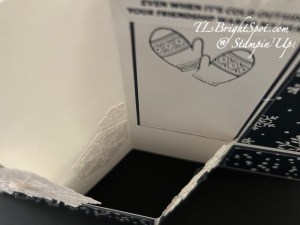
Here is the card put together. The largest snowflake is attached with dimensionals & the tiny snowflake on it also has a dimensional, a mini with an Adhesive-Backed Snowflake in the middle that is Secret Sea in color. The medium snowflake has a layer of delicate snowflake die cut with another layer of delicate snowflake on a dimensional & an Adhesive-Backed Snowflake in clear. The smaller snowflake that is on both the front & the strip has an intricate die cut with a small Adhesive-Backed Snowflake in Secret Sea.
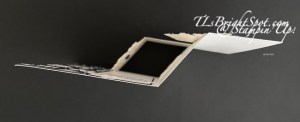
Stampin' Up! double z-fold from the top
Stampin' Up double z-fold inside look

The photo on the left shows the full double z fold of the card – a view from the top. The photo at right shows how I added two snowflakes to the inner second section. I added them fairly low so the sender could write a message. On the 3rd section of the strip I added a medium snowflake then because it shows the back side when closing the card, I added another layer of the snowflake & added an Adhesive-Backed Snowflake to that – therefore, the same on both sides :O)

The Basic White sentiment panel has an added srip as the sentiment I wanted to use was longer that the width of the two panels – yes, live & learn! I love the mittens! Both the sentiment & the mittens are stamped in Secret Sea ink.I added another snowflake above the sentiment because it was available :o)

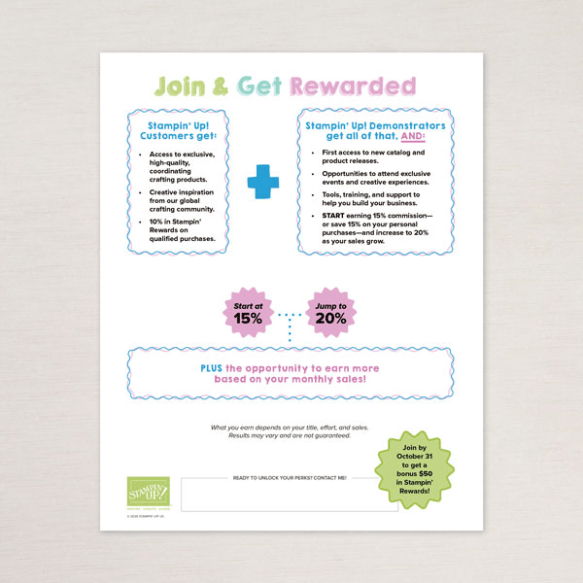
Time is running out for the join promotion… see below for more information! You can join any time, it’s just that sometimes it’s extra beneficial & that’s now – but it ends Oct 31!

More info below about ordering & other stuff. Make the rounds of those participating in this hop… click on the ‘next’ button or click on a name to make the rounds…

Amy Koenders

Mary Deatherage

Karen Ksenzakovic

Tara Carpenter

Terry Lynn Bright

Charlene Tackvic

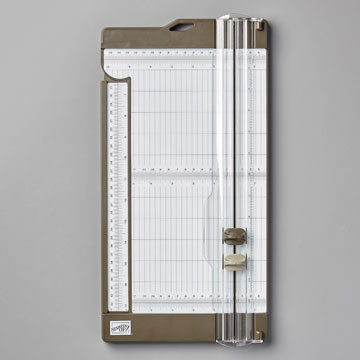
Product List

oin as a demonstrator in October for $100 USD | $135 CAD, they’ll get $50 USD | $70 CAD in Stampin’ Rewards along with a $125 USD | $170 CAD coupon code! Let me explain… When you join Stampin’ Up! – anytime– you’ll pay $100 plus tax to get signed up… Then – Stampin’ UP will send you a coupon code for $125 – which you can use toward whatever you want to purchase. There’s no limit and whatever is over and above the $125 will count towards your sales…AND you’ll get your discount on that amount as well Does that sound like a good deal or what???

When you join during this special offer (6 – 31 Oct) – you will ALSO get an EXTRA $50 in Stampin’ Rewards deposited immediately in your Stampin’ Up! account!! You can spend THOSE anytime within the first three months after you sign-up. Even better, right? if this is your first-time as a demonstrator – you’re ALSO going to receive a surprise Welcome Box right from Stampin’ UP!
Stampin' Up! Join Promotion

JOIN WITH ME HERE

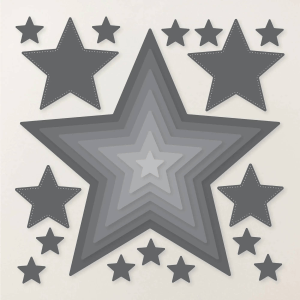
The Product of the Month is these awesome stars – 23 in all… $5 when placing a $75 order or more. This set is a STAR: 23 nesting star dies, from tiny twinkles to a big 5-1/4″ showstopper — perfect for layered star frames, shaker cards, treat packaging, ornaments, and “you’re a star” cards for every occasion, all year long.
Stampin' Up! POTM - October 2026

SHOP WITH ME HERE

Thanks for stopping by. May you have a beautiful day! Make someone happy by sending them a handmade card filled with ❤️

Heart Pop Up Card Revised

Some time ago I posted a picture of this fun pop up card and promised to give directions… never did that! Ugh, ugh and ugh… My apologies and thank you for your patience – or maybe you were ready to unscrew my head. Glad you didn’t do that, thank you very much. Here’s the card from then and a look at the inside as well.


And here’s the card I just created today:

  • Card base is 5 1/2″ x 8 1/2″,scored at 4 1/4″.
  • Prepare the card front first!
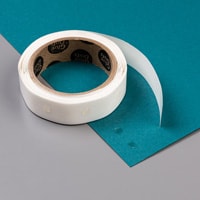
    • Adhere 20-22″ ribbon with tear n tape in the center of the card. I find it helps to mark the center of the card with pencil , to keep it straight. This ribbon is retired – so sorry but I liked the shiny look!
    • The DSP is cut at 4 1/4″ x 3″ and adhered with liquid glue. The DSP is from the 6 x 6 pack Dressed to Impress.
    • The next three layers are from the Stitched So Sweetly dies. The second and third layers are adhered together, then added to the card with dimensionals. The top layer with the sentiment (from So Sentimental ) is also on dimensionals. The tiny beads are From My Heart Faceted Gems and available right now.


Now do the inside:

  • Cut 2 pieces at 4″ square: score vertically @ 2″, then horizontally at 2″, then diagonally once. Burnish all fold lines. It should look like this:


  • Cut 2 pieces of 1 3/4″ squares in Whisper White. These are your sentiment pieces.
  • Cut 6 pieces of a contrasting color at 1 7/8″ square,  then cut 4 of those squares on the diagonal
  • Cut 4 pieces of Designer Series paper at 1 3/4″ and cut diagonally. Adhere to the solid triangles created in the previous step.
  • At this point I suggest paper clipping the 4″ squares together that create the center. Do this PRIOR to adhering anything to those 4″ squares. This will make it clear what gets glued together where. It should look like this:

  • Layer 1 7/8″ card stock on the square sections first; followed by the diagonally cut DSP in the folded area. It should look like this once those papers are adhered with liquid glue.
  • Stamp your sentiments on the Whisper White squares and adhere to the 1 7/8″ appropriate squares.
  • Adhere those paper clipped areas together with liquid glue, fold both sections closed, making certain they are well burnished. It should look like this.

  • Cut contrasting DSP at 4″ x 5 1/4″ and adhere to both inside areas.
  • Adhere the card insert on one side only, in the center of the card, near the fold. Again, making a pencil mark to locate the center will keep this pop up in the right place.
  • Use liquid glue on the remaining section and close the card to adhere the panel. This works really well and allows the card to open fully.
  • Decorate your center. Here I used the butterfly from Positive Thoughts (Mini Catalogue), colored with both the light and dark Lovely Lipstick blends and Daffodil Delight blends for the edge of the butterfly. It was cut with the matching dies called Nature’s Thoughts. I cut two small butterflies using Black Foil Sheets with the same dies. Each of these were adhered with liquid glue.i added one small black Faceted Dot to the large butterfly.
  • At this point I simply looked at the nearly completed card and felt something more was needed. Dressed To Impress and matching dies called All Dressed Up came to the rescue. The small flower is just plain cute and easily goes with this Best Dressed 6 x 6 DSP. I colored the flower with light and dark Lovely Lipstick blends and the leaves with light Old Olive blends. The center of the flower was colored with light Daffodil Delight blends.
  • Now the card is complete and I love the finished look. Just think of all the fun ideas you could do with this card.. bees, balloons, birthday cake, shoes, perfume, lipstick – oh my  gosh, the list goes on and on! Have fun creating – would love to see what you do with this.

When you order supplies, remember to use my

current HOST CODE -2TMMA9HX

If your order is $50 or over, you will receive

a free item of your choice not to exceed $10.

One item per customer/ month thank you.