Stampin’ Up! Woodland Wishes, July ONLINE EXCLUSIVE

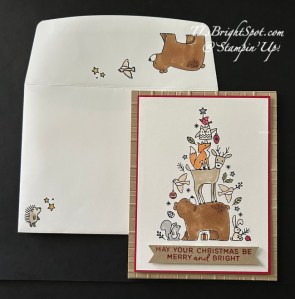
Good Sunday morning! It’s beautiful this morning, a refreshing 67 at 6 AM. So today is… a Christmas card using the very sweet Woodland Wishes stamp set. And if you enjoy coloring as I do, this is a fun stamp set to have in your Christmas stash.

Stampin' Up! Woodland Wishes C'mas Card

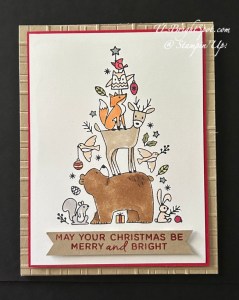
I used Memento ink to stamp the image on a Basic White panel and colored with several different Stampin’ Blends: Crumb Cake, Smoky Slate, Pecan Pie, Ivory, Light Pumpkin Pie,Petal Pink, Poppy Parade, Dark Cloud Cover, Light Old Olive & Light Mossy Meadow. I also used Shimmer Brush in Golden Glow and Wink of Stella. Once colored this was attached to a Real Red 3 7/8 x 5 1/8. I embossed a 4 1/4 x 5 1/2 Crumb Cake with the Forever Plaid embossing folder and attached it to the Crumb cake card base (4 1/4 x 11) The stamped images were then added with dimensionals.

I stamped the sentiment in Real Redink on a Crumb Cake strip, then again in VersaMark, sprinkled it with Clear embossing powder & heat set.It’s best to use the Stampin’ Positioner for this step! I angled the ends and attached with dimensionals.

Stampin' Up! Woodland Wishes inside card

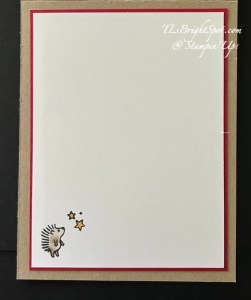
For the inside… I stamped this very cute porcupine in Memento ink & colored him with Stampin’ Blends using Crumb Cake. I stamped the stars also in Memento ink and used the Shimmer Brush in Golden Glow to color them. Theis 3 3/4 x 5 panel of Basic White was attached to Real Red 3 7/8 x 5 1/8 then added to the inside of the card.

Stampin' Up! Woodland Wishes card & envelope

For the envelope, I used the Woodland Wishes to stamp both the flap & the front with images from the Woodland Wishes stamp set – all in Memento ink. I colored them as well: Stampin’ Blends in Crumb Cake, Pecan Pie, Petal Pink and the Shimmer Brush inGolden Glow. What a peaceful scene this all creates!

Thanks for stopping by. May you have a beautiful day! Make someone happy by sending them a handmade card filled with ❤️

SHOP WITH ME HERE

Product List

Paper Snips [ 103579 ]
[103579]
$12.00

Stampin’ Up! Butterfly Flight Hot Foils, Card 2

Yep – another hot foils card using the Butterfly Flight Hot Foils Dies. 😀 In my post on 7/9, you say the die cuts made & colored… this time I used the foil left over from the transfer to create this card. Let nothing go to waste is the motto. hee hee. I took a panel of Basic White, Blending Brushes & Pool Party & Granny Apple Green and added color to the card stock panel. I then laid the ‘leftover’ foil on top after strategically adding Stampin’ Seal in various areas. This held the foil in place &allowed the colors to come through where the gold foil was transferred to something else. I used the piece with the die cuts removed, put dimensionals on the back & attached them together. The card base is Pool Party, standard A2 size (8 1/2 x 5 1/2 scored at 4 1/4) and the new card front was added with adhesive of choice. Because I had a remaining butterfly I added it as well with two Rhinestone Basic Jewels, then added more of the same to all the butterflies on the card front.

Stampin' Up! Butterfly Flight Hot Foil card 2

For the inside, I stamped the sweet lily from Lily of the Valley stamp set (yes, it comes with dies!) with Basic Gray ink and colored with Granny Apple Green Stampin’ Blends and Shimmer Brush in Barely Blush. The sentiment is from the Lily of the Valley stamp set in Granny Apple Green ink. The panel was added to the inside of the card.

Stampin' Up! Butterfly Flight inside card w/ Lily of the Valley

For the envelope… the same lily from Lily of the Valley stamp set was stamped on the front in basic Gray ink and colored with Stampin’ Blends Granny Apple Green and Shimmer Brush in Barely Blush. The flap got a 2 1/4 x 6 strip of the Valley In Bloom 12×12 DSP added & trimmed to fit. Love, love.

Stampin' Up! Butterfly Flight Hot Foil card & envelope

Oh my goodness… using the hot foil is so much fun… and adds another bit of elegance to any card. I keep learning.. & playing 😀

info about the hot foil system

– Included in the Stampin’ Hot Foil System & Craft Class:

– Metallic Magic Craft Class ($30 value—limited time only!)
– Stampin’ Hot Foil platform
– Stampin’ Hot Foil Shim & Spacer
– Stampin’ Hot Foil Magnetic Pick-Up Tool
– Silicone platform station
– Silicone cooling pad
– Power cord
– Instructions on how to use the system

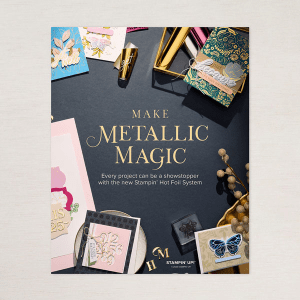
Stampin' Up! Metallic Magic class

– Hot Foil results are best with either White Willow or Two-Tone Cardstock. Smoother card stocks like the Two-Tone Cardstock and White Willow will achieve the best results when using the system, but you can use the regular card stocks too.

– The Hot Foil System, foil rolls and new hot foil dies and bundles will be available Friday, 10 July 2026 in the online Stampin’ Up! store.

– A FREE Hot Foil Online Class from Stampin’ Up! is included with your hot foil system purchase (a $30 value!), do not add the class separately to your cart (you’ll be charged for it if you do!). You’ll automatically get a link to it after you purchase the Stampin’ Hot Foil System.

– The Stampin’ Hot Foil system is $160.  Dies & foil are sold separately.

– Stampin’ Up! has let us know that if the Stampin’ Hot Foil system goes on backorder, it may take longer than normal to restock. So if you would like to order the system, order sooner rather than later!

– IMPORTANT NOTE: Cutting dies are not designed to be used with hot foiling. You cannot die cut using foiling dies. Doing so risks damaging the dies and the system.

For now – think about it – get excited – and – you can order it from me here

AND… while I had ended the double Daisy Rewards – I’m re-instituting that – so double your fun. DOUBLE REWARDS through July 13, 2026 + for orders $50 & up, the monthly tutorial.

Stampin' Up! Krew July Monthly Tutorial

Thanks for stopping by. May you have a beautiful day. Make someone happy by sending them a handmade card filled with heart! ♥️

Product List

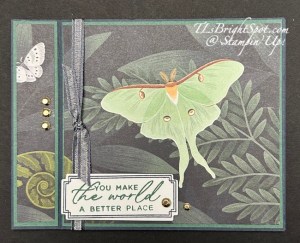
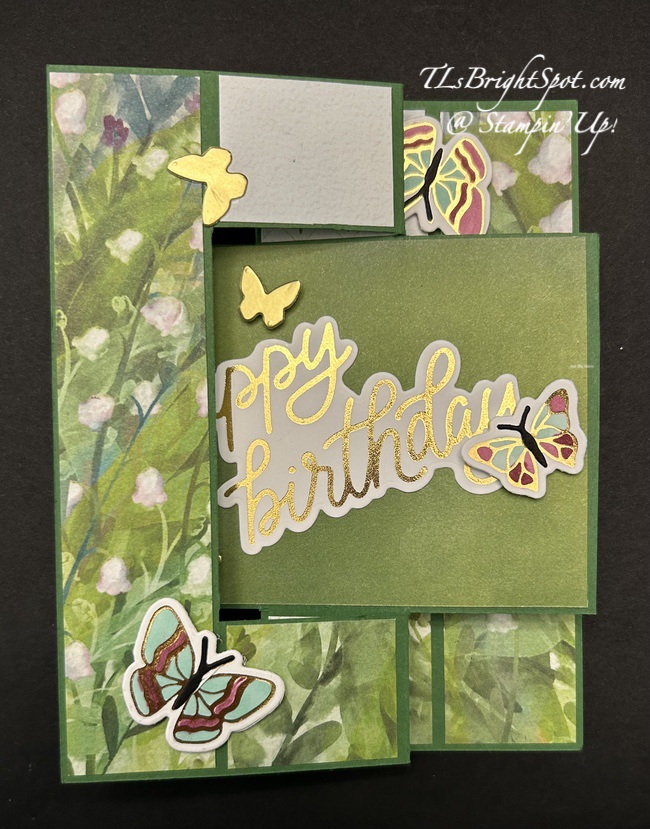
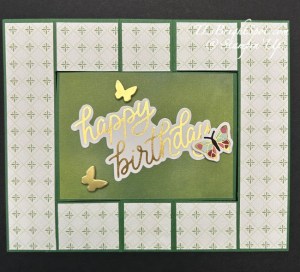
Stampin’ Up! Butterfly Hot Foils Fun Fold with Valley in Blooms DSP for the Happy Inkin’ Thursday Blog Hop

Welcome welcome. Oh it is so energizing to try new products and new fun folds, etc. etc. I think we have a treat for you today.

Stampin' Up! Blog Hop group
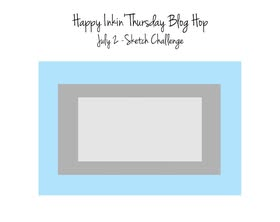
Stampin' UpHop  Theme Challenge

Let’s look more closely at this card with some other photos.

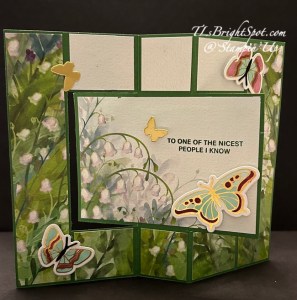
Stampin' Up! Butterfly Flight Hot Foil fun fold, flat
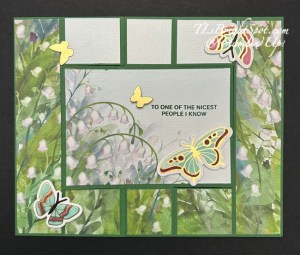
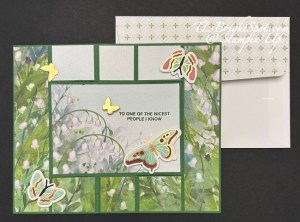
Stampin' Up! Butterfly Hot Foil fun fold, flat, other side

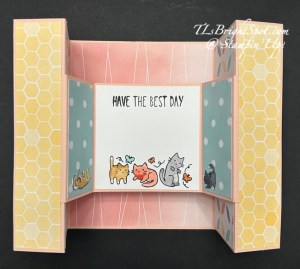
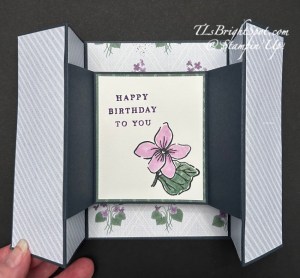
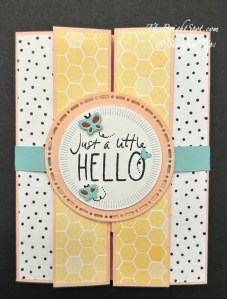
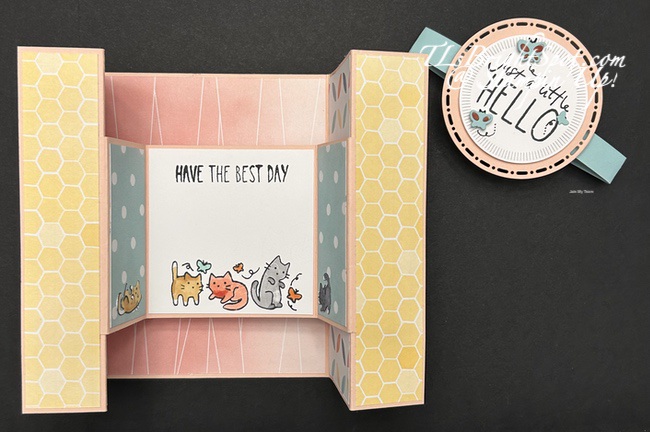
What’s neat about this fun fold is the way it opens and flips or flaps one way or the other while the center remains intact. It’s hard to describe, but it can close either way & it fits in a standard A2 envelope.

How to make this card… and it might help to do a template first! This is called a flip-flap card.

  • Card base is 6 3/4 x 5 1/2. Mark all four sides lightly with a pencil at the 1 1/4″ mark.
  • With the long side at top, score at 2 3/4 & 4″ both above & below the 1 1/4″ mark
  • With the long side at top and the right edge at the 1 1/4 mark on the right side of the paper trimmer, cut from 1 1/4″ to 4 1/4″ (or the pencil mark). Follow this with long side at top for the opposite side.
  • With short side at top & the right edge of paper at the 1 14″ mark on the right side of the trimmer, cut from 1 1/4″ to 2 3/4″. Flip paper over & with short side at top, do same on opposite end.
  • You have now connected the cuts, leaving the center held at top & bottom between the scored areas of 2 3/4″ & 4″ 😀
  • Burnish the scores as mountain & valley.
  • Now you may decorate! Be sure to erase your pencil lines prior to adding your DSP pieces 😁 Long panels on both right & left are 1 1/8 x 5 3/8 (cut 2 for front & 2 for back. Add these with adhesive of choice. Short sections at top & bottom are the same dimensions: 1 3/8 x 1 1/8, 1 1/8 x orate.1 1/8 & 1 3/8 x 1 1/8. Cut 4 of each for both front & back. Adhere appropriately. The center section is 4 1/8 x 2 7/8 (cut 2 – one for front & one for back). Adhere & decorate.
  • You can see I used the Valley In Bloom 12×12 DSP & the Lily of the Valley stamp set for the one sentiment (to one of the nicest people I know) stamped in Garden Green ink. The colored butterflies were done using the Hot Foil machine on Willow White paper then colored after the foil process with Stamp[in’ Blends: Blackberry Bliss & Pool Party. The small foil dies were die cut from Gold Foil using the Butterfly Flight Dies. The happy birthday sentiment was made with the hot foil system using White Will & of course the gold foil for the system & heated then die cut – Classic Greetings Hot Foil Dies. All butterflies were added with dimensionals.

For the envelope…only the flap was decorated – using a pattern from the Valley In Bloom 12×12 DSP.

Stampin' Up! Butterfly Flight Hot Foil fun fold card & envelope

The Stampin’ Up! Hot Foil System will be available for customer purchase on 7/10/2026 and you may order it from me (of course!). See my information below the list of names to learn how to do that!

Now… time to see what others on the hop have created for this birthday them challenge. See the list below, click on the next button or click on a name. Enjoy.

Stampin' Up! hop button

Amy Koenders

Mary Deatherage

Karen Ksenzakovic

Tara Carpenter

Terry Lynn Bright

info about the hot foil system

– Included in the Stampin’ Hot Foil System & Craft Class:

– Metallic Magic Craft Class ($30 value—limited time only!)
– Stampin’ Hot Foil platform
– Stampin’ Hot Foil Shim & Spacer
– Stampin’ Hot Foil Magnetic Pick-Up Tool
– Silicone platform station
– Silicone cooling pad
– Power cord
– Instructions on how to use the system

Stampin' Up! Hot Foil Magic!

– Hot Foil results are best with either White Willow or Two-Tone Cardstock. Smoother card stocks like the Two-Tone Cardstock and White Willow will achieve the best results when using the system, but you can use the regular card stocks too.

– The Hot Foil System, foil rolls and new hot foil dies and bundles will be available Friday, 10 July 2026 in the online Stampin’ Up! store.

– A FREE Hot Foil Online Class from Stampin’ Up! is included with your hot foil system purchase (a $30 value!), do not add the class separately to your cart (you’ll be charged for it if you

do!). You’ll automatically get a link to it after you purchase the Stampin’ Hot Foil System.

– The Stampin’ Hot Foil system is $160.  Dies & foil are sold separately.

– Stampin’ Up! has let us know that if the Stampin’ Hot Foil system goes on backorder, it may take longer than normal to restock. So if you would like to order the system, order sooner rather than later!

– IMPORTANT NOTE: Cutting dies are not designed to be used with hot foiling. You cannot die cut using foiling dies. Doing so risks damaging the dies and the system.

For now – think about it – get excited – and – you can order it from me here

AND… while I had ended the double Daisy Rewards – I’m re-instituting that – so double your fun. DOUBLE REWARDS + for orders $50 & up, the monthly tutorial.

Stampin' Up! Jly monthly tutorial

Thanks for stopping by. May you have a beautiful day. Make someone happy by sending them a handmade card filled with heart! ♥️

Stampin’ Up! Pretty Poinsettia for the Happy Inkin’ Thursday Blog Hop

Welcome to the Happy Inkin’ Thursday Blog Hop! We have a sketch challenge today & I’m using a new item in the JULY ONLINE EXCLUSIVES called Pretty Poinsettia. It’s wonderful & works for this sketch, at least I think so. Let’s have a look…

Stampin' Up! Happy Inkin' Thursday Blog hop
Stampin' Up! Hop sketch challenge
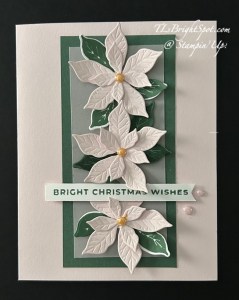
Stampin' Up! Pretty Poinsettia card front

I’ve turned the sketch so it’s vertical with Barely Blush card base, Peaceful Pine layer & Smoky Slate on that. I die cut three sets of the same size poinsettias from Pretty Poinsettia Dies & attached with dimensionals. Slipped under the flowers are leaves stamped from Pretty Poinsettia stamp set & die cut with the coordinating dies… on Basic White and on Peaceful Pine – all stamped in Peaceful Pine ink and added with liquid glue. The flower centers are embellishment – 2026-2028 In Color Dots in Golden Glow then Petal Pink by the sentiment.The sentiment is stamped using the Pretty Poinsettia stamp set in Peaceful Pine ink and attached with mini dimensionals on the ends only.

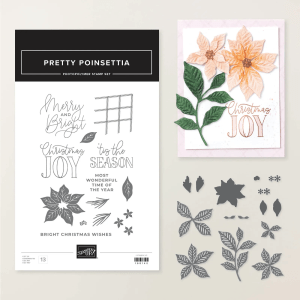
And here’s the bundle…

Stampin' Up! Pretty Poinsettia bundle

168147

Bundled Savings

PRETTY POINSETTIA BUNDLE (ENGLISH)

$50.25

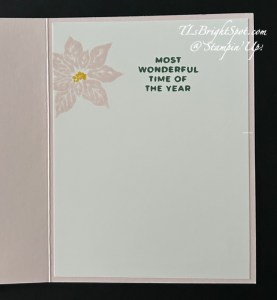
For the inside of the card – super simple – a single stamped poinsettia in Barely Blush using the Pretty Poinsettia stamp set, another stamp for the flower center in Golden Glow and the sentiment in Smoky Slate – all using the Pretty Poinsettia stamp set

Stampin' Up! Pretty Poinsettia card inside

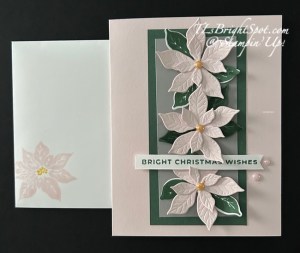
And the envelope… that same poinsettia stamped in Barely Blush with a Golden Glow center – all from Pretty Poinsettia stamp set.

Stampin' Up! Pretty Poinsettia card & envelope

LOTS going on in the Stampin’ Up! world… new kits available, new online exclusives (this is one of them!), new joining promotion, and double daisy rewards from me! Please see below for all that info.

Want to see more inspiration fom this fabulous Krew? Click the next button or click on a name to see all the new creations.

Stampin' Up! hop button

Amy Koenders

Mary Deatherage

Karen Ksenzakovic

Tara Carpenter

Terry Lynn Bright

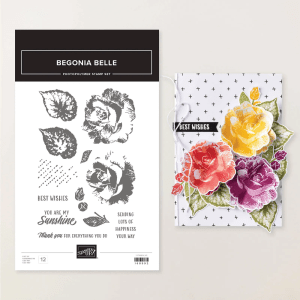
Stampin’ Up! has a new PRODUCT OF THE MONTH JUST RELEASED…the Begonia Belle Stamp Set (168592) for only $5 USD | $7 CAD with a single purchase of $75 USD | $100 CAD or more… NEW PRODUCTS IN THE ONLINE EXCLUSIVES

SHOP HERE FOR THE JULY RELEASES

Stamopin' Up! Begonia Belle POTM

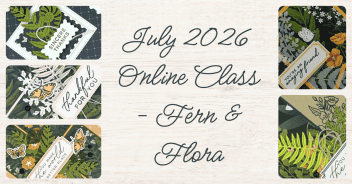
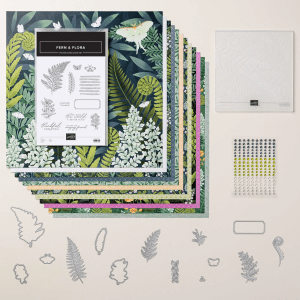
and we have a new monthly tutorial opportunity as well. When shopping with me & your order is over $50, you receive a monthly tutorial. This month of July that tutorial is Fern & Flora bundle – a gorgeous suite of products! The suite is currently unavailable, but the bundle (the stamp set & dies) is available! Shop with me now to get double points for the next 7 days – through July 5.

Fern & Flora – get thew bundle!

Stampin' Up! new Joining Experience

ntroducing the Welcome Box

As part of the new join process, we’re introducing an elevated onboarding experience. All first-time demonstrators (beginning July 1, 2026) will receive a surprise Welcome Box—a gesture of appreciation and a warm welcome into the global Stampin’ Up! creative community.

What’s Inside the Welcome Box

  • A handwritten welcome letter from Sara
  • Stampin’ Up!-branded swag:
    • Pen
    • Pop-up pencil case
    • Pop-up waste basket
  • An exclusive card kit including:
    • Kit-sized stamp set
    • Full-size clear block
    • Classic Stampin’ Spot
    • Supplies to create eight “hello” cards

New demonstrators are encouraged to make and share these cards—especially with the eight complimentary catalogs they receive—to help spread the word about their new demonstratorship. Watch the video below of the unboxing of the Welcome Box!

SHOP WITH ME HERE

Product List

Stampin’ Up! Moonlit Flora + Fern & Flora 3D Embossing Folder

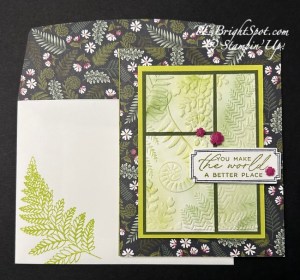
Good Saturday! I’m sharing a pretty card using the Moonlit Flora 12 x 12 DSP as the background and the Fern & Flora 3D embossing folder as thew focal point. It’s a wuick card to put together and this layout is one that can be used with just about any designer series paper.

Stampin' Up! Moonlit Flora DSP + Fern & Flora EF card front

The card base is Old Olive with a layer of the Moonlit Flora covering the entire front. I embossed a Basic White panel using the Fern & Flora 3D ef, then used various shades of green and Blending Brushes to add color to it: Lemon Lime Twist, Granny Apple Green and Old Olive. I then cut the panels: 1 3/4 x 1 1/2; 1 3/4 x 2 1/2; 1 x 2 1/2 & 1 x 1 1/2. These were adhered to a Mossy Meadow panel3 x 4 1/4 then a Granny Apple Green 3 1/4 x 4 1/2. This was added to the front with dimensionals. For the sentiment, I stamped the banner border in Secret Sea then the sentiment in Old Olive – both from the Fern & Flora stamp set. I die cut the banner using the Fern & Flora Dies. This was added, also with dimensionals then the super fun Dreamy Flowers for embellishment – Berry Burst in color.

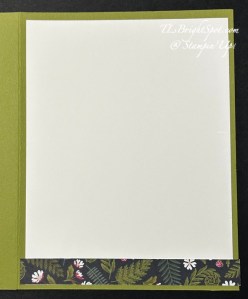
Stampin' Up! Moonlit Flora DSP inside card

For the inside… simple Basic White panel 4 x 5 1/4 with a strip of the Moonlit Flora DSP at the bottom.

Stampin' Up! Moonlit Flora DSP + Fern & Flora EF card & envelope

For the envelope, more of the Moonlit Flora DSP on the flap, trimmed to fit & a beautiful stamped fern on the front: Fern & Flora stamp set + Granny Apple Green ink. Someone is going to love receiving this card!

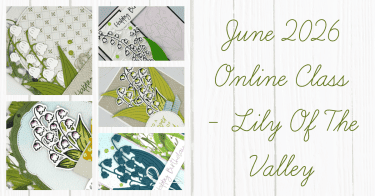
Want to purchase the products to make this lovely? See the info below for how to do that.When purchasing from me… And don’t forget all the benefits of being a demonstrator or ordering from me… When ordering from me, you get Daisy Patch Rewards for every order. (See my REWARDS PAGE for details) and with those points comes an opportunity for a FREE STAMP SET or items valued up to $40. You will also receive the monthly online tutorial – which this month uses this fabulous Lily of the Valley suite of products.

Stampin' Up! June Monthly Tutorial

Want to JOIN MY TEAM and become a part of this fun crafty group? Lots of benefits there too. JOIN WITH ME HERE

Thanks for stopping by – may you have a beautiful day! Make someone happy by sending them a handmade card filled with ❤️

Stampin’ Up! Quick Fun Fold w/ Bloom Boutique DSP

Oh I love this fun fold – it’s so easy & just pops with elegance or fun, depending on the Designer Series Paper used. As in the heading, I’ve used the soft colors of the Bloom Boutique DSP from the March ONLNE EXCLUSIVES. The paper is all in the new 2026-2028 In Colors and I primarily focused on Hydrangea Hue. I also used one pattern in the 2026-2028 In Color Painted Patterns DSP.

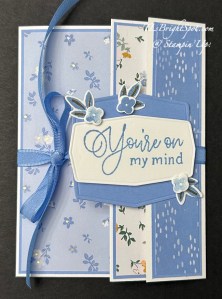
Stampin' Up! Quick Fun Fold w/ Bloom Boutique, card front

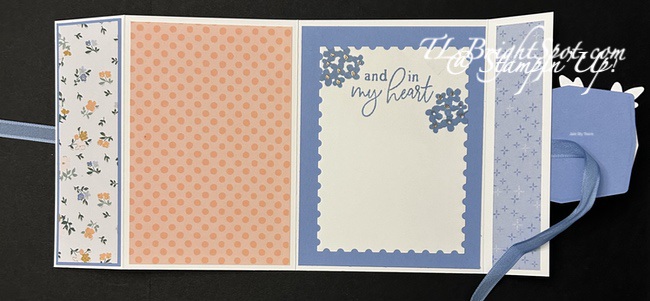
I began with Thick Basic White 11 x 5 1/2 scored @ 1 3/4, 5 1/2, and 9 3/4. Burnish these mountain(it folds back), valley, valley(this one folds over). Layer for front: 3 5/8 x 5 3/8; layer for the fold back panel 1 5/8 x 5 3/8 & layer for the fold over panel: 1 1/8 x 5 3/8 (I used Hydrangea Hue in each case). DSP pieces are coordinating but all different: 3 1/2 x 5 14, 1 1/2 x 5 14, & 1 x 5 1/4. Attach to the card base. Now cut for the inside of the card… 3 1/2 x 5 1/4 & 1 x 5 1/4; the sentiment panel has a layer 3 7/8 x 5 1/4 + Basic White 3 3/4 x 5 1/8 or cut with the 2nd largest Perennial Postage Dies. Stamp the Basic White with a sentiment – I used Forever Florals stamp set (also a March ONLINE EXCLUSIVE) & Hydrangea Hue ink + WOW! Metallic embossing powder in gold (heat set of course)

Stampin' Up! Quick Fun Fold w/ Bloom Boutique, inside card

Now let’s decorate the front. Sometimes, this quick fun fold card uses a belly band, this one uses a ribbon instead – 3/8″ Bordered Ribbon in Hydrangea Hue, about 21″ worth. It’s attached to the front fold-over panel with Stampin’ Seal and under the sentiment banner. Sentiment banner: using the largest of the banner dies in the Forever Floral Dies, cut from Hydrangea Hue. Using the rectangular banner die from Forever Florals Dies, cut from Basic White & stamp the sentiment from the Forever Florals stamp set in Hydrangea Hue ink. Stamp a couple of small leaves from this same stamp set in Hydrangea Hue, stamp the veins in VersaMark ink and sprinkle with WOW! Metallic Gold embossing powder & heat set. Die cut with the appropriate leaf die in Forever Florals Dies. Add the Basic White sentiment banner to the blue banner with dimensionals. Position the die cut leaves & adhere. Now stamp three flowers in Hydrangea Hue ink on a Basic White scrap & die cut. Add these with dimensionals to the leaves. Add the banner with liquid glue over the ribbon on the fold over panel. Tie the ribbon in a bow & done! Stunningly beautiful, easy on the eyes. With these particular colors and this DSP, this could not only be a thinking of you kind of card, but also a sympathy card.

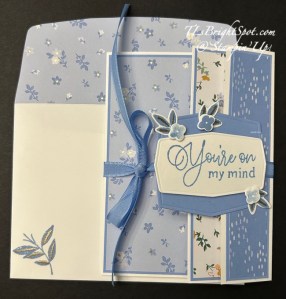
Stampin' Up! Quick Fun Fold card & envelope, Bloom Boutique DSP

Envelope… more of the Bloom Boutique DSP on the flap & trimmed to fit. On the front, another leaf stamp in the Forever Florals stamp set stamped in Hydrangea Hue, then the veins stamped in VersaMark ink, sprinkled with WOW! Metallic Gold embossing powder & heat set. YES! This card is ready to send!!!

YAY – love this card… gentle on the eyes & quick & easy fun fold. Want to make this card – you may order the supplies from me listed below to do that. And don’t forget all the benefits of being a demonstrator or ordering from me… When ordering from me, you get Daisy Patch Rewards for every order. (See my REWARDS PAGE for details) and with those points comes an opportunity for a FREE STAMP SET or items valued up to $40. You will also receive the monthly online tutorial – which this month uses this fabulous Lily of the Valley suite of products.

Stampin' Up! Monthly Tutorial - June

Want to JOIN MY TEAM and become a part of this fun crafty group? Lots of benefits there too. JOIN WITH ME HERE

Thanks for stopping by – may you have a beautiful day! Make someone happy by sending them a handmade card filled with ❤️

Product List


Stampin’ Up! Waterside Retreat DSP for the Happy Inkin’ Thursday Blog Hop

Welcome to Thursday and this fun Happy Inkin’ Thursday Blog Hop! You’ll see some creative stuff today I’m sure. We have a color challenge and it’s perfect for the Waterside Retreat DSP – all the colors in the challenge are used 😀.

Stampin' Up! Happy Inkin' Thursday Blog Hop
Stampin' Up! Hop Color Challenge

The cards front image was cut out directly from the patterned paper and added to a background of Pecan Pie. Another pattern in the Waterside Retreat DSP was added to the Pool Party card base., then the picture image pieces were attached with dimensionals. I cut out a single oar from another piece of the Waterside Retreat & attached it with liquid glue and a small dimensional on the oar ends. I added the Loose Anchor Trinket with glue dots after adding a length of Linen Thread & tying it in a knot – all with glue dots. Then I cut three lengths of of card stock 1/2 x 2 1/4 (Basic White, Pool Party & Pecan Pie), created pointy ends layered then together with dabs of glue then slipped them under one end of the trinket attaching with a dab of glue. Oh – and the sentiment… from the Relaxing Waterside stamp set stamped in Pecan Pie ink.

Stampin' Up! Waterside Retreat DSP Masculine card

This is just a perfect masculine card for many occasions… could be birthday, retirement, promotion – just lots of opportunities. There are so many parts of this card that I like: the added trinket, the three (3) banners, the oar, the SCENE! It’s peaceful, calm, nothing demanding about it. It ‘rests’ easily. This DSP – Waterside Retreat – is just so special – it can be masculine or it could be feminine. While I called this a masculine card in a ‘tag’, it doesn’t have to be. This could be anyone who appreciates fishing, being on the water for any reason, relaxing, watching birds & the life of a place like this – a camp maybe..

Stampin' Up! Waterside Retreat inside card

For the inside … a Basic White panel attached to Pecan Pie and added to the inside of the card base. Then a life vest fussy cut with paper snips added with liquid glue.

Stampin' Up! Waterside Retreat DSP card & envelope

The envelope … more of the Waterside Retreat DSP on the flap trimmed to fit. For the front seagulls were stamped in stamped off once Gray Granite ink.

Now – remember you can purchase all the products to make this car by viewing the information below – yes, scroll on down past the names.

Stampin' p! Hop button

Amy Koenders

Mary Deatherage

Karen Ksenzakovic

Tara Carpenter

Terry Lynn Bright

June Product Of The Month – Available Now With Orders of $75+ While Supplies Last

There is a new Product of the Month available to order now for $5 when you place an order of $75+ and it will be available while supplies last!!  The Product of the Month for June is the Wild Bunch Stamp Set!

Stampin' Up! POTM, Jun

Send smiles with the Wild Bunch Stamp Set! With hand-drawn animals like a koala, penguin, snail, and highland cow, plus versatile sentiments for birthdays, thank-yous, or just because, this set can help brighten anyone’s day. Add hearts, party hats, presents, or scribbled patterns to make each card or scrapbook page even more fun.

The Wild Bunch Stamp Set is the exclusive Product of the Month for June 2026! Only available until stocks run out—don’t wait to get yours! ORDER FROM ME HERE

Here are the details:14 photopolymer stamps

Suggested clear blocks (sold separately): b, c

Also available in French

Every month Stampin’ Up! will release a new item that is only available for purchase once per account. These items will be limited quantity and are likely to sell out quickly—once they’re sold out, they’re gone for good!

When ordering from me, you get Daisy Patch Rewards for every order. (See my REWARDS PAGE for details) and with those points comes an opportunity for a FREE STAMP SET or items valued up to $40. You will also receive the monthly online tutorial – which this month uses this fabulous Lily of the Valley suite of products.

Stampin' Up! June Tutorial

Want to JOIN MY TEAM and become a part of this fun crafty group? Lots of benefits there too. JOIN WITH ME HERE

Product List

Stampin’ Up! Sneak Peek of Summer Happiness, July ONLINE Exclusive for the Happy Inkin’ Thursday Blog Hop

Welcome to Thursday and this fun hop! We have a sketch challenge today & I chose to work a brand new July ONLINE EXCLUSIVE bundle. It’s called Summer Happiness. 😀

Stampin' Up! Blog Hop
Stampin' Up! Sketch challenge

Stampin' Up! Summer Happiness card front

I began by stamping these fun summer images and using a different ink for each one: Timid Tiger, Daffodil Delight and Strawberry Slush. They are so absolutely typical summer! Then I took the Perennial Postage Dies to die cut the immediate background for each: under the drink is Summer Slush, under the sun is Daffodil Delight, and under the flip flops is Timid Tiger. Using the next larger die in Perennial Postage, I die cut three rectangles from Basic White. I adhered each of these layers together with dimensionals and set them aside to make the background for these cute images. The card base is Thick Basic White (11 x 4 1/4 scored @ 5 1/2) with a layer of Crisp cantaloupe (4 x 5 1/4). I used the largest die in Perennial Postage Dies to die cut the panel from 2026-2028 In Color Painted Patterns DSP. Each of these layers were added with liquid glue. Before placing my rectangles, I stamped the sentiment in Strawberry Sluch ink on a Basic White piece & adhered a narrow strip of Strawberry Slush to the back. I put dimensionals on the back and centered it on the bottom of the card. I then added the three rectangles, placing the center item first then the other two. These were attached with liquid adhesive. Final touch – a few embellishment in Strawberry Slush.

Stampin' Up! Summer Happiness card inside

For the inside… Another panel of Crisp Cantaloupe was added (4 x 5 1/4) then the Basic White panel (3 3/4 x 5). I stamped the sunglasses in Strawberry Slush ink and the card itself was complete!

Stampin' Up! Summer Happiness card & envelope

For the envelope… I added the same Crisp Cantaloupe color of Painted Patterns DSP to the flap & trimmed to fit. I then stamped the sentiment on the front from Summer Happiness stamp set in Timid Tiger. Such a fun, light-hearted card!

Below is the bundle used for today’s card. Aren’t these fun images & dies coordinate! I could have done this same challenge using the daisy stamp and three images of that – wouldn’t that be cute!

Stampin' Up! Summer Happiness bundle, July ONLINE EXCLUSIVE

Ok – on with the hop… Check out what everyone has created for this challenge – click on the next button or click on a name. And please note – more information from me below the list of names 👍

Stampin' Up! blog hop button

Amy Koenders

Mary Deatherage

Karen Ksenzakovic

Tara Carpenter

Terry Lynn Bright

If you are a demonstrator, you have access for a pre-order of the bundle used for today’s card. If you are interested in becoming a demonstrator, I would love to talk about that with you OR you can

JOIN MY TEAM HERE

Shopping with me is easy too… click the same link as above. And know that when your purchase is $50 or more there are benefits of a monthly tutorial and Daisy Patch rewards. 🌺

Stampin’ Up! Waterside Retreat Father’s Day card for the Happy Inkin’ Thursday Blog Hop


It’s Thursday & time for another Blog Hop from this fabulous Krew! We have a sketch challenge today that is so versatile and can be used for lots of cards – birthdays, sympathy, you name it. I chose this Waterside Retreat DSP as this card is for a fisherman for Father’s Day. I think this fits well!

Stampin' Up! Blog logo
Stampin' Up! Blog sketch challenge
Stampin' Up! Waterside Retreat sketch challenge

Here’s what I did to create this card… I first cut a panel of the Waterside Retreat DSP 3 3/4 x 5 1/2 & added a slip margin of Azure Afternoon card stock to the one side. I set this aside and cut a 1 x 5 1/2 piece of the same DSP (it’s the reverse side of the fish images) and added it to the 8 1/2 x 5 1/2 Azure Afternoon card base (yep, scored at 4 1/4. I then added the set aside panel. These were all added with liquid glue. I stamped the sentiment in Azure Afternoon ink using the Relaxing Waterside stamp set, on the Azure Afternoon 5/8 x 2 1/2″ strip. I attached this to a Crisp Cantaloupe 3/4 x 2 1/2 strip & slipped a large Linen Thread bow between dimensionals & attached it with a glue dot to the strip. The strip was added to the card front with dimensionals as mentioned. Final touch – 2026-2028 In Color Dots in Crisp Cantaloupe.

Stampin' Up! Waterside Retreat inside card

For the inside… A 4 x 5 1/4 piece of Basic White with a strip of the Waterside Retreat DSP 3/4 x 5 1/4 was then stamped with na sentiment from the Relaxing Waterside stamp set in Azure Afternoon ink. This was added to the inside of the card.

Stampin' Up! Waterside Retreat card & envelope

For the envelope… a 2 1/4 x 6″ strip of the Waterside Retreat was added to the flapn & trimmed to fit. On the front a simple grass stamped in Old Olive ink three times without re-inking in between. This gives a sense of dimension to the image. Love the simplicity!

Stampin' Up! Blog next b utton

Amy Koenders

Mary Deatherage

Karen Ksenzakovic

Tara Carpenter

Terry Lynn Bright

Join as a demonstrator now & you’ll get our new 2026–2028 In Color Stampin’ Pads FREE along with their Starter Kit! Or if you’d rather have different products instead of ink pads, we’ve got that covered there, too—you can add an extra $35 USD | $50 CAD worth of products to your Starter Kit.

You’ll also enjoy all the perks that come with being a demonstrator, like a 20–25% product discount, early access to the latest products and catalogs, the opportunity to earn a modest commission, the chance to attend incredible training and crafting events, and so much more.

Stampin' Up!

JOIN WITH ME HERE

SHOP WITH ME BY CLICKING HERE

Stampin’ Up! has some beautiful new Online Exclusives that are available to order now!!  And they’ve created a printable flyer to make it MUCH easier to shop the new products!  WOOHOO!! You can get to the flyer for the newest Online Exclusives by clicking here

You won’t find the Online Exclusive products in any catalog, they’ll only be listed in the online store.  The Online Exclusive product releases will continue throughout the year so there will be new products to shop from, in addition to new catalogs!

Thanks for stopping by. May you have a beautiful day. Make someone happy by sending them a handmade card filled with ❤️

Product List

Stampin’ Up! Showing Off Velvet Meadows SDSP for the Happy Inkin’ Thursday Blog Hop

Welcome to our Happy Inkin’ Thursday Blog Hop! We have a sketch challenge today & I’m showing off a new Specialty Designer Series Paper for it. I’ve created three cards but the first is the first is my favorite. Why is it special – because it has raised areas that feel like velvet!!! Hence the name – Velvet Meadows

Stampin' Up! Velvet Meadow card front 1

This card began with one of the new IN COLOR card stocks – Peaceful Pine 11 x4 1/4 scored at 5 1/2 (side fold). I used a SDSP layer 4 x 5 1/4 from Velvet Meadows SDSP.. The next layer is another Peaceful Pine with the gorgeous velvet side of the Velvet Meadows SDSP – adhered together & added with dimensionals. I then die cut some of the flowers from the SDSP using the coordinating Flowering Meadows Dies. I fussy cut several leaves: leaves & flowers were added to the card front with dimensionals. Now we have two layers of dimensionals in total. The sentiment is stamped in Berry Burst using the Flowering Meadows stamp set and fussy cut, then added with dimesnionals. Final step – two stunning embellishments: Dreaming Flowers in whiten – yep, from the suite!

Stampin' Up! Velvet Meadow card 1 inside
Stampin' Up! Velvet Meadow card 1 & envelope

For the inside… I stamped this floral image from the Flowering Meadows stamp set in Berry Burst on a Basic White panel 4 x 5 1/4. This was attached to the inside side of the card.

For the envelope… I stamped this same image in Berry Burst on both the flap & the front of the envelope. This just ties everything together making it look so perfect!

Stampin' Up! Velvet Meadow card 2 front
Stampin' Up! Velvet Meadow Card 2 inside

My next card is again a card base of Peaceful Pine5 1/2 x 8 1/2 scored at 4 1/4 (top fold). I embossed a Basic White panel 4 x 5 14 with the Paradise Garden 3D embossing Folder & attached it to the card front. The next layer is Peaceful Pine with a layer of the Velvet Meadows SDSP & attached with dimensionals. In this suite of products is the Velveteen Assortment Special Paper – this one used is white. I die cut these gorgeous small leaves using the Flowering Meadows Dies. On Basic White I stamped the daisyin Peaceful Pine ink, then die cut the center with the Velveteen Assortment Specialty Paper in White and attached this by adhering the stem with liquid glue & a mini dimensional on the back of the daisy flower.

For the inside, I stamped off the stems & image in Peaceful Pine on the Basic White panel 4 x 5 14 & attached it – no sentiment!

Stampin' Up! Velvet Meadow card 3 front
Stampin' Up! Velvet Meadow card 3 inside

For this last card, I used Berry Burst for the card base (5 1/2 x 8 1/2 scored at 4 1/4 – top fold). I layered this with Velvet Meadows SDSP 4 x 5 1/4. The next is Berry Burst & another of the papers in Velvet Meadows SDSP – I LIKE this contrast! I’ve added no sentiment or any kind of embellishment. The SDSP speaks for itself.

For the inside, I stamped the double flower image in Berry Burst ink on the Basic White panel (5 1/4 x 4) & adhered this to the inside of the card. The sentiment is stamped in Peaceful Pine ink using the Flowering Meadows stamp set.

Stampin' Up! Velvet Meadow card 2 & envelope
Stampin' Up! Velvet Meadow card 3 & envelope

Here are the envelopes for the two additional cards: the left stamped with Peaceful Pine ink: full strength then stamped again & once more without re-inking. This was sone on the envelope front & the flap. The envelope on right is stamped off erry Burst ink and the same double flowers image from Flowering Meadows stamp set.

Now… check out what others on the hop are creating. I had extra fun making cards with the same layout but each with different layers/ embellishments or very simple & just paper, Each is so different from the next, which makes it extra fun. Click the ‘next’ button or click on a name to vist the other participants.

Stampin' Up! blog hop next button

Amy Koenders

Mary Deatherage

Karen Ksenzakovic

Tara Carpenter

Terry Lynn Bright

To purchase the products used to make this card – see below. 😀 If your order is $50 or more, you will qualify for the special tutorial of the month from me. See my page about Daisy Patch Rewards!

Also please note… SU! has a generous JOIN PROMOTION and I would love to have you JOIN MY TEAM. See that link below as well. All kinds of benefits & fun when you join with me.

Product List

Join my team…

Stampin' Up! JOIN Offer

Join as a demonstrator now & get our new 2026–2028 In Color Stampin’ Pads FREE along with your Starter Kit! Or if you’d rather have different products instead of ink pads, you’re covered there, too—you can add an extra $35 USD | $50 CAD worth of products to their Starter Kit.

As a Demonstrator, you will also enjoy all the perks that come with being a demonstrator, like a 20–25% product discount, early access to the latest products and catalogs, the opportunity to earn a modest commission, the chance to attend incredible training and crafting events, and so much more.

JOIN MY TEAM HERE!

Thanks for stopping by. May you have a beautiful day! Make someone happy by sending them a handmade card filled with ❤️