Stampin’ Up! Show off for the Happy Inkin’ Thursday Blog Hop

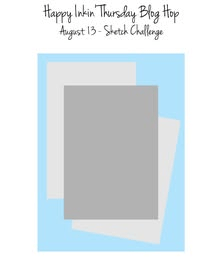
Welcome to today’s hop! We have a sketch challenge today and it was really hard for me to decide just what to showcase – so many new products I want to share. I had recently played with this DSP & well, it tugged at me.
Stampin' Up! Blog Hop logo
Stampin' Up! Hop Sketch challenge

This DSP is just so pretty! I love the colors, flowers (sunflowers & more) and checks – so perfectly fall. These are from a suite of products on page ___ in the Sep-Dec 2026 Catalog. The other product in the suite that I used are the Radiant Gems (there are 3). The sentiment is stamped in Pecan Pie on Very Vanilla then fussy cut w/ my paper snips. The backgrounds for all the designer series papers is Cajun Craze and the card base is Pecan Pie. Measurements may be found at the end of this post.
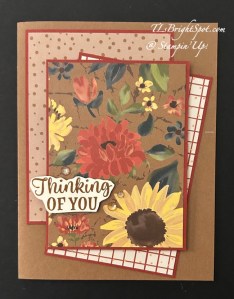
Stampin' Up! Sunflower Fields card front

And here’s the inside… look at that beautiful sunflower – that’s from the coordinating stamp set called Radiant Sunflowers – all from the Sep-Dec 2026 Catalog. The stamp set has coordinating dies but I did not use them on this card. The layers are Cajun Craze & Very Vanilla.
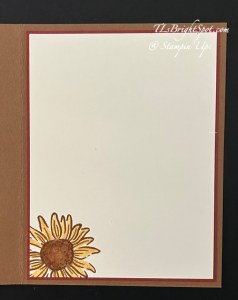
Stampin' Up! Sunflower Fields card inside

For the envelope… Here’s that beautiful sunflower again – on the envelope front. I stamped it in Pecan Pie then used the Golden Glow Shimmer Brush on the petals & light Pecan Pie for the center – same as the sunflower on the inside of the card.
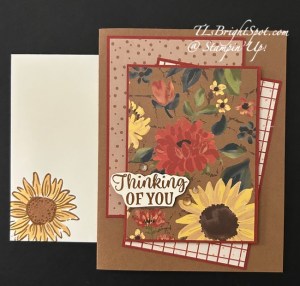
Stampin' Up! Sunflower Fields card & envelope

This could so easily be a masculine card even though there are flowers. The colors just fit! It could be sympathy or it could be birthday – just add the appropriate sentiment. 😀

Today is a hop – so check out what others on the team have created. Click on the next button to visit Charlene or click on a name to visit that post. Measurements for this card & how to order from me are listed below.
Stampin' Up! hop next button

Amy Koenders

Mary Deatherage

Karen Ksenzakovic

Tara Carpenter

Terry Lynn Bright

Charlene Tackvic

Stampin' Up! Sunflower Fields Suite
Sunflower Fields Suite 168365

Measurements:

  • Card base: Pecan Pie 8 1/2 x 5 12 scored @ 4 1/4
  • front Layers + DSP
    • Cajun Craze – 3 1/8 x 4 1/8 + DSP 3 x 4 (dots); 2 7/8 x 4 3/8 + DSP 2 3/4 x 4 1/4 (checks); 3 x 4 + DSP 2 7/8 x 3 7/8 (flowers)
    • Very Vanilla – 2 1/4 x 1 1/2 – sentiment
  • Inside: Cajun Craze – 4 x 5 1/4; Very Vanilla – 3 7/8 x 5 1/8

Product List

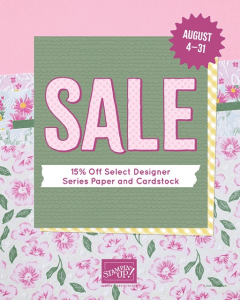
Stampin’ Up! has a wonder DSP & Card stock sale right now through the end of August. Click on the image below to see what’s on the sale list.

Stampin' Up! DSP & Card Stock Sale

Remember that when shopping with me, there is the opportunity for customer benefits – like the monthly tutorial when your purchase exceeds $50 before shipping & taxes, qualifying for Daisy Patch rewards, and like that. See my Rewards Page for up to date info! And Stampin’ Up! has LAST CHANCE PRODUCTS available right now and there are some awesome items you may not want to miss. Click the image to see what all is on the list!
Stampin' Up! Last Chance Products

Thanks for stopping by. May you have a beautiful day. Make someone happy by sending them a handmade card filled with ❤️
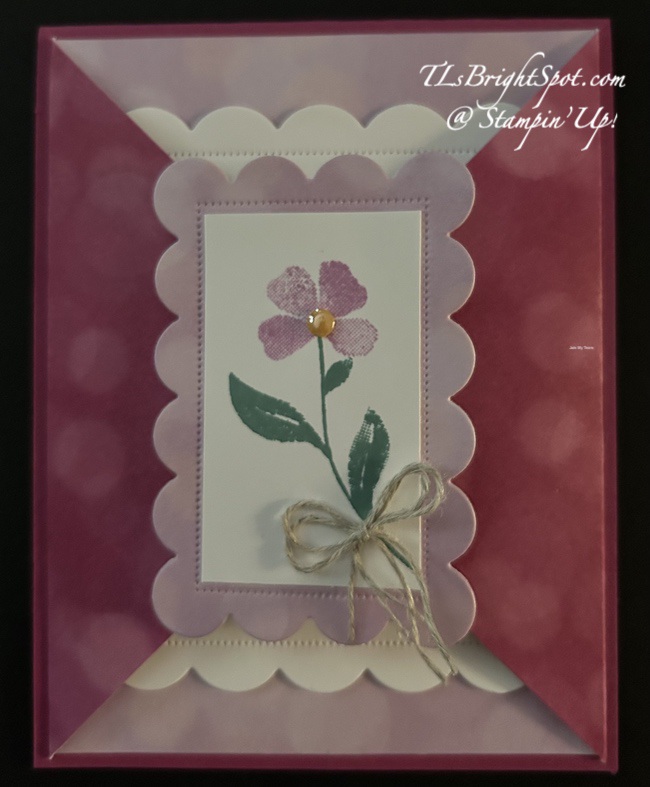
Stampin’ Up! Sneak Peek Scalloped Christmas Cheer Dies on Triangle Gatefold Flip-Up Card

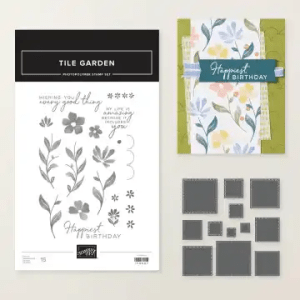
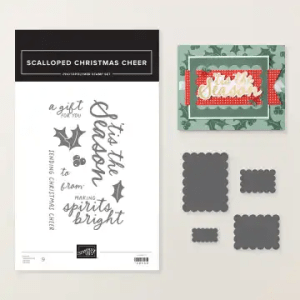
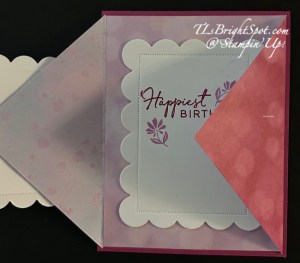
Happy Friday! Golly the week has gone f-a-s-t… I have a sneaky peek of two new items in the Sep-Dec 2026 Catalog: the Scalloped Christmas Cheer Dies AND the Tile Garden stamp set. Both of these come as separate bundles but this is how I paired them for this card – and it’s a fun fold too!

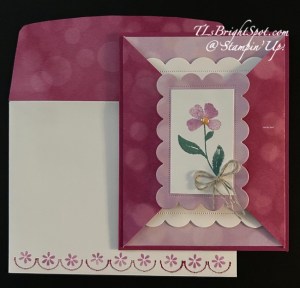
Stampin' Up! Scalloped Christmas Cheer Dies w/ Triangle Gatefold Flip-Up card & envelope

I used an old set of 6×6 papers called Bokeh, but you could use any papers that would compliment the dies and the stamp set – or change the stamp set!

Card cuts & how to:

  • Card base 4 1/4 x 11 scored at 5 1/2 – I used Berry Burst
  • mat: I used the Bokeh 6×6 DSP ~ 4 x 5 1/4
  • Cut 2 panels of Bokeh 6×6 DSP 3 3/4 x 3 3/4,
    • score on the diagonal, burnish folds and attach to backside of the 4 x 5 14 piece
    • Add to front of card base
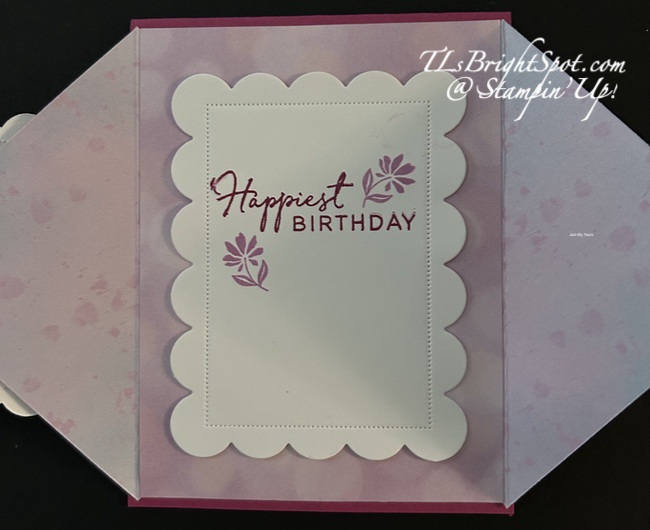
  • Add Basic White (2 1/2 x 3 1/2) to back of another piece of Bokeh 6×6 DSP for sturdiness (2 1/2 x 3 1/2) ~ die cut with 2nd smallest die in the Scalloped Christmas Cheer Dies
    • Cut Basic White (1 1/2 x 2 12) for stamping images from the Tile Garden stamp set ~ stamp leaves in Lost Lagoon and flower in Fresh Freesia. Add to die cut piece. Embellish w/ 2026-2028 In Color Dots in Golden Glow & a double Linen Thread bow; set aside
  • On the inside... cut another piece of Basic White w/ the 2nd largest Scalloped Christmas Cheer Dies: stamp the sentiment in Berry Burst ink and the flowers in Fresh Freesia ink from the Tile Garden stamp set; add to inside of gatefold on the large DSP panel
  • Add the set aside front die cut all stamped & ready – to the left side of the DSP triangle gatefold – with dimensionals, centering so it is centered with the inside Basic White scalloped piece
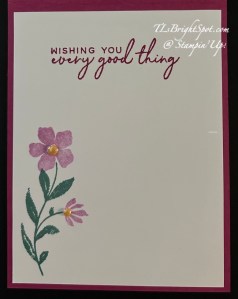
  • Flip the card open to create the final Basic White panel (4 x 5 1/4) … stamp the sentiment in Berry Burst ink, the leaves in Lost Lagoon and the flowers in Fresh Freesia – all using the Tile Garden stamp set. Add Golden Glow accents from the 2026-2028 In Color Dots. Attach to the inside of the card.
  • Envelope
    • Add the 2 12/4 x 6 strip of Bokeh 6×6 DSP to the flap, trimming to fit
    • Stamp the scallop stamp in Berry Burst ink three times, re-inking each time
    • Stamp the Flowers in Fresh Freesia ink three times, re-inking each time.
    • Both these stamps are from the Tile Garden stamp set

Yay! This card is ready to be sent to my grand niece! It’s such a feminine & lovely card. The stamp bundle and the die bundles are in the Sep-Dec. 2026 Catalog – available Sep 1. If you do not have a demonstrator, I would very much like to send a catalog to you so you can order from me. Please let me know how I can help with that opportunity.

Stampin' Up! Tile Garden bundle

Going on right now – Stampin’ Up! has a card stock & Designer Paper Sale through Aug 31, 2026. Shop the sale by clicking on the image below.

Last chance Stampin’ Up! products are also available. Click the image below to shop those items with me.

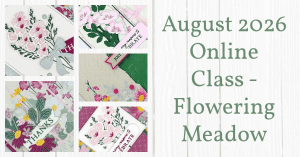
When shopping with me… when your purchase is over $50 before shipping & taxes, you will receive the current monthly tutorial. For the month of August, that tutorial using the Flowering Meadow Suite of products. See my customer rewards page for more benefits!

Thanks for shopping with me! Make one, share one, send one! Make someones day by sending them a handmade card made with ❤️

Product List

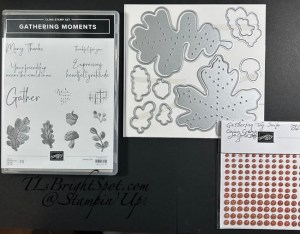
Stampin’ Up! NEW Gathering Moments

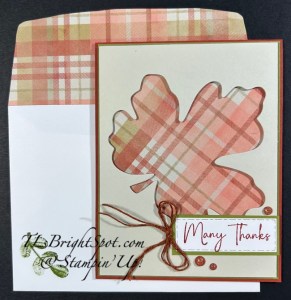
Good Friday – my goodness August is flittering away – Monday is LABOR DAY! Today’s card is all about fall and it uses a September Release ONLINE EXCLUSIVE. The bundle is Gathering Moments.

Stampin' Up! Gathering Moments bundle
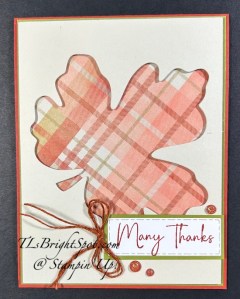
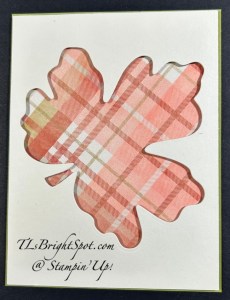
Stampin' Up! Gathering Moments card front

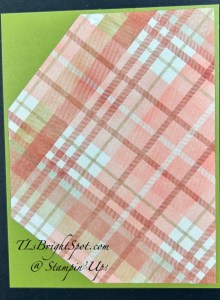
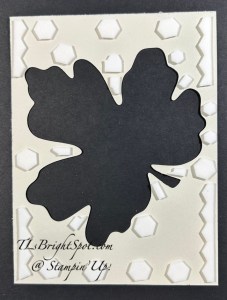
The card has a Basic Beige front from which I die cut the large leaf with Gathering Moments Dies. I wanted to use the Timeless Plaid 6×6 DSP behind the die cut but on an angle. This meant an odd shape for cutting the DSP and it needed to be slightly smaller than the Basic Beige card front. Once I cut the DSP I added it to an Old Olive panel and that to the card base of Cajun Craze.

Stampin' Up! Old Olive w/ Timeless Plaid 6x6 DSP
Stasmpin' Up! Gathering Moments die cut w/ dimensionals on back

I put dimensionals all over the back of the die cut panel and adhered it to the the card. I stamped the sentiment in Cajun Craze ink using the Gathering Moments stamp set and die cut the basic White with Textured Notes Dies. I cut a piece of Old Olive for a backing, adhered the two together and added them directly to the card front. I tied a double bow with Natural Tones Linen Thread then added three Cajun Craze and Gold Dots.

Stampin' Up! Gathering moments card front unfinished
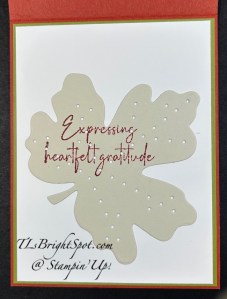
Stampin' Up! Gathering Moments inside card

For the inside… I used the die cut that came out of the front die cut to stamp the sentiment from Gathering Moments in Cajun Craze ink. I added this to a Basic White panel then both to Old Olive then to the inside of the card base..

Stampin' Up! Gathering moments card & envelope

For the envelope, more of the Timeless Plaid 6×6 DSP on the flap trimmed to fit, then a single leaf stamped on the front: Gathering Moments stamp set in Old Olive ink. Totally fall – good for a masculine card too!

These new products are ONLINE EXCLUSIVES to be released Wed Sep 3. For those products available today, see the list below. Today (the 29th), tomorrow the 30th and Sunday the 31st, I have a special deal going on as Stampin’ Up! has a promotion through end of August of 2025-2027 In Color SALE. When shopping with me, I am offering with a $50 order & up, a spool of Linen Thread in addition to my regular benefits. Other benefits… the monthly tutorial sent right to your inbox, daisy points to add together for a free item down the road, and having fun with the Stampin’ Up! products. Shop the In Color Sale by clicking the image below.

Stampin' Up! 2025-2027 In Color Sale

Last chance products are available through my store as well – click the image below to view those items, updated regularly by Stampin’ Up!

Stampin' Up! LAST CHANCE PRODUCTS

Thanks for stopping by. May you have a beautiful day. Make someone happy sending them a handmade card filled with ❤️
 

Product List

Stampin’ Up! Botanical Textures + Textured Notes Fun Fold

Hello Saturday! It’s beautiful here in New Jersey – and I’m INSIDE… attending a convention for a women’s organization. The great part is that I’m seeing folks I haven’t seen in a while; the unfortunate part is that I’m not out gardening or enjoying the sun. Having said all that – let me share today’s card…

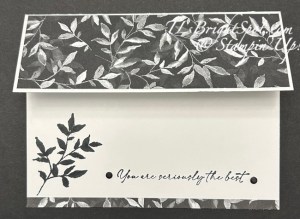
Stampin' Up! Botanical Textures & Textured Notes card front

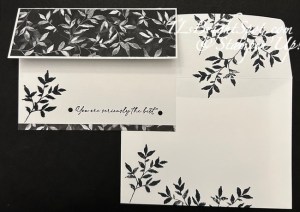
This card is made with items from the Botanical Textures Suite of products: the Botanical Textures 12×12 DSP and the Textured Notes stamp set (which is also a bundle with dies). Black & white cards stand out and this one is no different. It’s made with Thick Basic White card stock 8 1/2 x 5 12, scored at 4 1/4 then 2 1/4 removed. I cut a Botanical Textured DSP1 7/8 x 5 3/8 and adhere to the remaining top portion. Open the card & stamp the inside :O) This is an easy, easy card to make… just stamps, ink, paper!

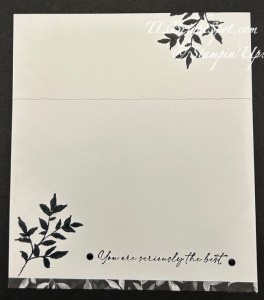
Stampin' Up! Textured Notes Stamp Set inside card

Using the Textured Notes stamp set and Memento ink, I stamped this stunning leaf on the upper right corner and the bottom left corner. I added a 3/8″ strip of the Botanical Textures DSPn to the bottom, then stamped this sentiment – also from the Textured Notes stamp set. LOVE THIS FONT! On each end of the sentiment I added black dots from … I forget which embellishments- maybe the Neutral embellishments from the suite?! And the card itself is done.

Stampin' Up! Botanical Textures + Textured Notes card & envelope

The envelope… Using Memento ink and another leaf stamp in this
Textured Notes stamp set, I stamped on the flap 3 times, reinking the stamp each time. I did the same on the front of the envelope – & boom, complete! Such a quick and gorgeous card. Well, maybe I shouldn’t say that since I made it 🙂

Stampin’ Up! Storybook Friends in a Bandstand Card

Good Tuesday January 7! Today is the day… the new Jan-Apr 2025 Mini Catalog goes LIVE and… benefits of the Jan-Feb 2025 Sale-a-bration Catalog also go into effect. What that means is when you make a purchase of any Stampin’ Up! items: Kits Collection, Last Chance items, the 2024-2025 Annual Catalog OR the new MINI Catalog, Sale-a-bration items are available. How cool is that! There are two levels: a $60 purchase and a $120 Purchase – each allowing different products that are FREE TO YOU. So, shop, shop, shop!

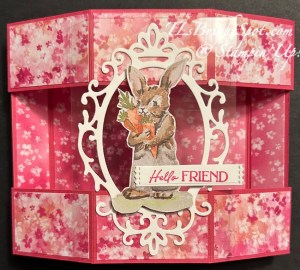
Today’s card is another fun fold, called the bandstand, and it used products from the two mini catalogs going live today. The Designer Series Paper DSP) is a free Sale-a-bration item, and the rabbit, sentiment and delicate frame die are from the Storybook Friends bundle and Storybook Moments 12×12 SDSP. Here ya go…

Stampin' Up! Storybook Friends in a Bandstand Card

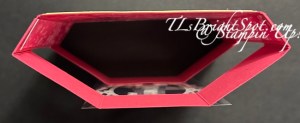
How sweet is that rabbit and how gorgeous that frame!!! I adhered the frame to a Window Sheet so all the DSP would show :O) The rabbit is fussy cut from the Storybook Moments SDSP and attached with dimensionals. The sentiment is stamped in Melon Mambo ink from the Storybook Friends stamp set and die cut with a die from Happy Little Things Dies, retiring. It is attached with a dimensional on the right end and liquid glue to the rabbit. And here’s the top-down view.

Stampin' Up! Bandstand card top-down view

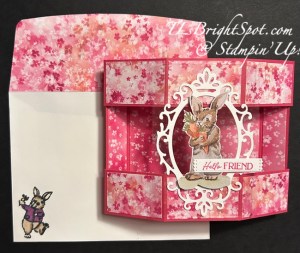
This card fold flat and works perfectly in a standard envelope. Here’s the envelope for the card

Stampin' Up! Storybook Friends card & envelope

That cute rabbit is from the Storybook Friends stamp set and is stamped in Memento ink and colored with Stampin/ Blends: Crumb Cake, Melon Mambo, Peach Pie and Old Olive.

Here’s how to make this card…

Card base, back: 4 1/4 x 5 3/8 scored on long side at 3/4 & 4 5/8. Burnish.

Card base, front: cut 2 – 1 1/4 x 4 1/8, score on long side 3/4, 2 1/2, 4 1/2 & 6 1/4. Burnish. These are the pop-out sections.

Decorate:

  • Cut DSP for inside back, 5/8 x 4 1/8, 3 3/4 x 4 1/8 and again 5/8 x 4 1/8 and adhere to the inside back.
  • For pop-out sections: cut a single strip 1 1/8 x 5 1/8 then trim to 1 5/8 x 1 1/8, 1 7/8 x 1 1/8 and lastly 1 5/8 x 1 1/8. By cutting this as a single strip and trimming down, this allows for a continuous pattern. Do this twice, then adhere to the pop-out strips, leaving the ends without DSP

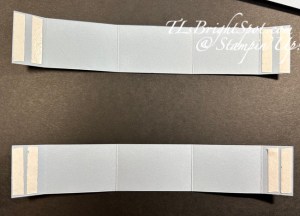
Turn strips over and adhere Tear n’ Tape to the ends as shown.

Stampin' Up! Bandstand Pop-Out strips

Putting together:

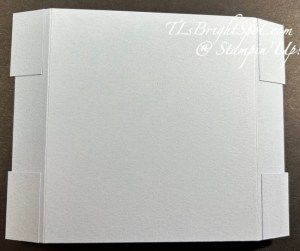
  • Leaving the strips face down, lay the decorated back panel, decoration side down and even at top of strip, centering the back panel between score lines. There will maybe be a 1/16″ between the score line and the back panel. Remoce cover on Tear n’ Tape & adhere to back panel. Do this again at the bottom. Notice there is ‘wiggle room’ on the ends in the photo – this is as it should be!
Stampin' Up! Bandstand card putting together

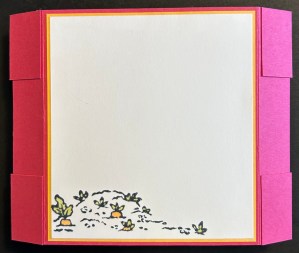
Now is the perfect time to decorate the back of the card where you can write your message.

Here I used Peach Pie as a nice contrasting color, 3 3/4 x 4 1/8, and adhered it to the back. I cut a Basic White 3 5/8 x 4 and stamped it with an image from Storybook Friends in Memento ink, coloring it with Stampin’ Blends: Peach Pie & Old Olive. I adhered this in place.

Decorate the front: the key here is to provide something to ‘stabilize’ the card and. to adhere it only to the center panel. It can extend beyond the center panel as the pop-out sections go back not forward.

  • Die cut from Basic White this gorgeous frame. With liquid glue adhere it to a Window Sheet.
  • Add Window Sheet to card front adhering only to the center panel with Stampin’ Seal
  • Fussy cut the bunny from the Storybook Moments SDSP OR use one of the fabulous pieces that can be punched out – 2 sheets of these are provided in the SDSP pack!

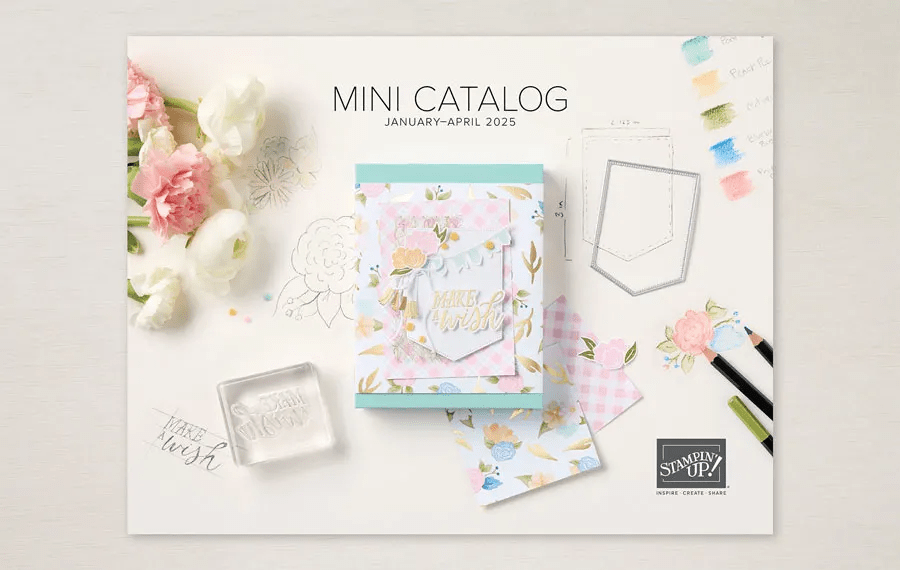
Fun, fun! And you can get these today – click the phot below to see what’s available in the Jan-April 2025 Mini Catalog.

Stampin' Up! Jan-Apr 2025 Mini Catalog

Click the Sale-a-bration image to learn what free products are available when ordering Jan-Feb.

Stampin' Up! 2025 Sale-a-bration

If you are a scrapbooker, there is a scrapbooking brochure – click here to see whats available beginning today!

New catalog, new Sale-a-bration, new Scrapbooking brocure, new Joining promotion – do it all here with me.

Join with me here! Starter Kit Special

If you’ve been thinking about becoming a Stampin’ Up! demonstrator, then there’s no better time than right now during Sale-A-Bration! When you join by February 28, 2025, you can choose between two fabulous offers:

Option 1: Get $125 worth of product PLUS a choice of two Stampin’ Write Marker Assortment packs AND the Handmade Designs Cling Stamp Set (an exclusive stamp set designed to work with the markers). That’s a $216 value for just $99!

Option 2: Get $125 worth of product PLUS an additional $30 worth of product when you join Stampin’ Up! That’s a $155 value for just $99!

Want to order these products from me? When you shop with me and your purchase is $50 or more – you will receive a free giftie valued up to $`10 that is a Stampin’ Up! item. You will also receive the monthly tutorial – January is the Toadstool and it has some really cute ideas.

Use my CURRENT HOST CODE WTGKS9DH

when purchasing and

make certain my name is listed as your demonstrator :O

To view the LAST CHANCE PRODUCTS – CLICK HERE

To view the ONLINE EXCLUSIVES – CLICK HERE

Want to see the 2024-2025 Annual Catalog? Click HERE

And finally – click HERE for the Kits Collection

Thanks for stopping by – may you have a beautiful day!