
Scenic Coast DSP is shiny on the lower half of the paper. It has stunning sunset/ sunrise type scenes over water and the colors are muted yet bright. That doesn’t make sense, right – but it’s true.. Let’s take a peek at this pretty card.

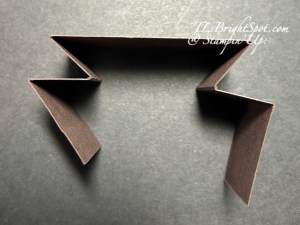
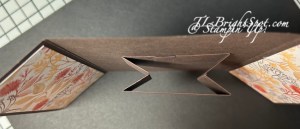
Can you see the steps on the card front? They start narrow at the top & get wider each ‘step’. And using the Scenic Coast 6×6 DSP makes it easy to follow that pattern for the inside of the card. See the photo on the left below for that, then see the photo below on the right with the steps folded back – and the scene continues. You need at least 2 pieces of the DSP to make this work.
The Sunset Coast bundle works so well together with this DSP. I cut the sailboat and the seagulls from a scrap of the DSP with the Sunset Coast Dies, reversing the paper to create the red sailboat on the card front. The sentiment on the front & inside is stamped in Secret Sea ink using the Sunset Coast stamp set. I used Sunset Sparkle Sequins for embellishment. The card base is Balmy Blue 8 1/2 x 5 1/2 scored at 2 1/8 & 4 1/4.


This is what the card looks like from the top / down.

And here is my template with the proper measurements.


For the envelope, I used a scrap of the Scenic Coast 6×6 that shared similar colors. The small sailboats on the front are stamped in Secret Sea, Crushed Curry & Strawberry Slush – coordinating colors listed on the paper pack, and from the Sunset Coast stamp set.

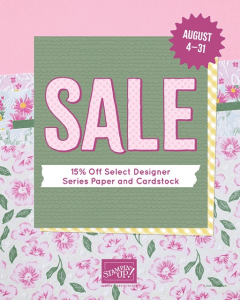
Below is a list of the products to make this card. You will notice that there is a Scenic Coast Suite of Products included. Remember there is a paper sale through August 31 & last chance products too.

When shopping with me and your purchase is $50 & up (before S&H) you will receive the monthly tutorial & other benefits. Check my rewards page for more info.
Thanks for shopping with me. May you have a beautiful day! Make someone happy by sending them a handmade card filled with ❤️
Product List![Sunset Coast Bundle (English) [ 167781 ]](https://assets1.tamsnetwork.com/images/EC042017NF/167781s.jpg "Sunset Coast Bundle (English) [ 167781 ]")
![Scenic Coast 6" X 6" (15.2 X 15.2 Cm) Specialty Designer Series Paper [ 167773 ]](https://assets1.tamsnetwork.com/images/EC042017NF/167773s.jpg "Scenic Coast 6\" X 6\" (15.2 X 15.2 Cm) Specialty Designer Series Paper [ 167773 ]")
![Sunset Sparkle Sequins [ 167785 ]](https://assets1.tamsnetwork.com/images/EC042017NF/167785s.jpg "Sunset Sparkle Sequins [ 167785 ]")
![Scenic Coast Suite Collection (English) [ 167786 ]](https://assets1.tamsnetwork.com/images/EC042017NF/167786s.jpg "Scenic Coast Suite Collection (English) [ 167786 ]")
![Secret Sea Classic Stampin' Pad [ 165285 ]](https://assets1.tamsnetwork.com/images/EC042017NF/165285s.jpg "Secret Sea Classic Stampin' Pad [ 165285 ]")
![Strawberry Slush Classic Stampin' Pad [ 165286 ]](https://assets1.tamsnetwork.com/images/EC042017NF/165286s.jpg "Strawberry Slush Classic Stampin' Pad [ 165286 ]")
![Crushed Curry Classic Stampin' Pad [ 147087 ]](https://assets1.tamsnetwork.com/images/EC042017NF/147087s.jpg "Crushed Curry Classic Stampin' Pad [ 147087 ]")
![Balmy Blue 8-1/2" X 11" Cardstock [ 146982 ]](https://assets1.tamsnetwork.com/images/EC042017NF/146982s.jpg "Balmy Blue 8-1/2\" X 11\" Cardstock [ 146982 ]")
![Basic White 8 1/2" X 11" Cardstock [ 166780 ]](https://assets1.tamsnetwork.com/images/EC042017NF/166780s.jpg "Basic White 8 1/2\" X 11\" Cardstock [ 166780 ]")
![Basic White Medium Envelopes [ 159236 ]](https://assets1.tamsnetwork.com/images/EC042017NF/159236s.jpg "Basic White Medium Envelopes [ 159236 ]")
![Take Your Pick [ 144107 ]](https://assets1.tamsnetwork.com/images/EC042017NF/144107s.jpg "Take Your Pick [ 144107 ]")
![Paper Trimmer [ 152392 ]](https://assets1.tamsnetwork.com/images/EC042017NF/152392s.jpg "Paper Trimmer [ 152392 ]")
![Paper Snips [ 103579 ]](https://assets1.tamsnetwork.com/images/EC042017NF/103579s.jpg "Paper Snips [ 103579 ]")
![Stampin' Dimensionals [ 104430 ]](https://assets1.tamsnetwork.com/images/EC042017NF/104430s.jpg "Stampin' Dimensionals [ 104430 ]")
![Multipurpose Liquid Glue [ 110755 ]](https://assets1.tamsnetwork.com/images/EC042017NF/110755s.jpg "Multipurpose Liquid Glue [ 110755 ]")
![Tuxedo Black Memento Ink Pad [ 132708 ]](https://assets1.tamsnetwork.com/images/EC042017NF/132708s.jpg "Tuxedo Black Memento Ink Pad [ 132708 ]")
![Stampin' Positioner [ 167768 ]](https://assets1.tamsnetwork.com/images/EC042017NF/167768s.jpg "Stampin' Positioner [ 167768 ]")
![Stampin' Cut & Emboss Machine [ 149653 ]](https://assets1.tamsnetwork.com/images/EC042017NF/149653s.jpg "Stampin' Cut & Emboss Machine [ 149653 ]")
![Mini Glue Dots [ 103683 ]](https://assets1.tamsnetwork.com/images/EC042017NF/103683s.jpg "Mini Glue Dots [ 103683 ]")
![White Gel Pens [ 166642 ]](https://assets1.tamsnetwork.com/images/EC042017NF/166642s.jpg "White Gel Pens [ 166642 ]")
![Clear Wink Of Stella Glitter Brush [ 141897 ]](https://assets1.tamsnetwork.com/images/EC042017NF/141897s.jpg "Clear Wink Of Stella Glitter Brush [ 141897 ]")
![Metallics Wow! Embossing Powder [ 165678 ]](https://assets1.tamsnetwork.com/images/EC042017NF/165678s.jpg "Metallics Wow! Embossing Powder [ 165678 ]")
![Basics Wow! Embossing Powder [ 165679 ]](https://assets1.tamsnetwork.com/images/EC042017NF/165679s.jpg "Basics Wow! Embossing Powder [ 165679 ]")
![Heat Tool (Us And Canada) [ 129053 ]](https://assets1.tamsnetwork.com/images/EC042017NF/129053s.jpg "Heat Tool (Us And Canada) [ 129053 ]")
![Embossing Additions Tool Kit [ 159971 ]](https://assets1.tamsnetwork.com/images/EC042017NF/159971s.jpg "Embossing Additions Tool Kit [ 159971 ]")
![Small Blending Brushes [ 160518 ]](https://assets1.tamsnetwork.com/images/EC042017NF/160518s.jpg "Small Blending Brushes [ 160518 ]")
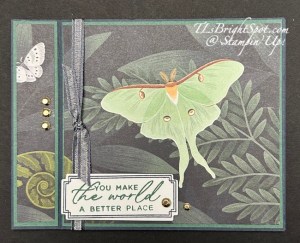
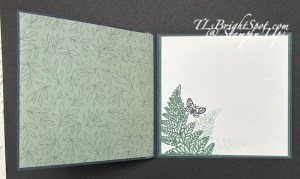
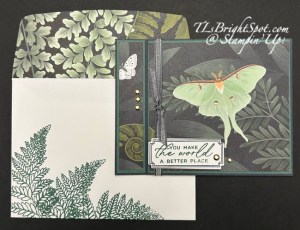
![Fern & Flora Bundle (English) [ 167745 ]](https://assets1.tamsnetwork.com/images/EC042017NF/167745s.jpg "Fern & Flora Bundle (English) [ 167745 ]")
![Moonlit Flora 12" X 12" (30.5 X 30.5 Cm) Designer Series Paper [ 167737 ]](https://assets1.tamsnetwork.com/images/EC042017NF/167737s.jpg "Moonlit Flora 12\" X 12\" (30.5 X 30.5 Cm) Designer Series Paper [ 167737 ]")
![Moonlit Flora Suite Collection (English) [ 167749 ]](https://assets1.tamsnetwork.com/images/EC042017NF/167749s.jpg "Moonlit Flora Suite Collection (English) [ 167749 ]")
![Secret Sea 8 1/2" X 11" Cardstock [ 165624 ]](https://assets1.tamsnetwork.com/images/EC042017NF/165624s.jpg "Secret Sea 8 1/2\" X 11\" Cardstock [ 165624 ]")
![Peaceful Pine 8 1/2" X 11" Cardstock [ 167691 ]](https://assets1.tamsnetwork.com/images/EC042017NF/167691s.jpg "Peaceful Pine 8 1/2\" X 11\" Cardstock [ 167691 ]")
![Peaceful Pine Classic Stampin Pad [ 167679 ]](https://assets1.tamsnetwork.com/images/EC042017NF/167679s.jpg "Peaceful Pine Classic Stampin Pad [ 167679 ]")
![Adhesive Backed Metallic Gems [ 163780 ]](https://assets1.tamsnetwork.com/images/EC042017NF/163780s.jpg "Adhesive Backed Metallic Gems [ 163780 ]")
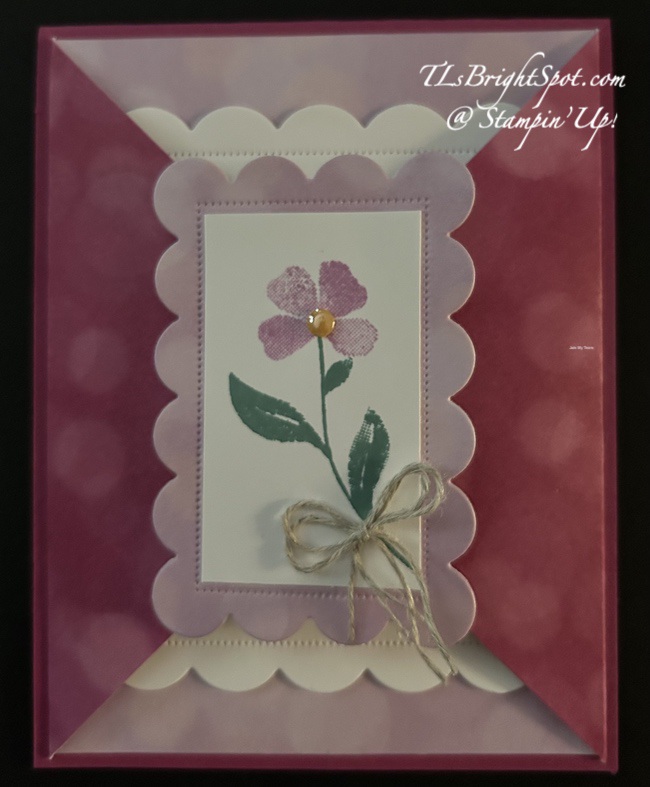

![Berry Burst 8-1/2" X 11" Cardstock [ 144243 ]](https://assets1.tamsnetwork.com/images/EC042017NF/144243s.jpg "Berry Burst 8-1/2\" X 11\" Cardstock [ 144243 ]")
![Beautiful Bokeh 6" X 6" (15.2 X 15.2 Cm) Designer Series Paper [ 164607 ]](https://assets1.tamsnetwork.com/images/EC042017NF/164607s.jpg "Beautiful Bokeh 6\" X 6\" (15.2 X 15.2 Cm) Designer Series Paper [ 164607 ]")
![2026–2028 In Color™ Dots [ 167546 ]](https://assets1.tamsnetwork.com/images/EC042017NF/167546s.jpg "2026–2028 In Color™ Dots [ 167546 ]")
![Linen Thread [ 104199 ]](https://assets1.tamsnetwork.com/images/EC042017NF/104199s.jpg "Linen Thread [ 104199 ]")
![Basic White 12" X 12" (30.5 X 30.5 Cm) Thick Cardstock [ 166782 ]](https://assets1.tamsnetwork.com/images/EC042017NF/166782s.jpg "Basic White 12\" X 12\" (30.5 X 30.5 Cm) Thick Cardstock [ 166782 ]")
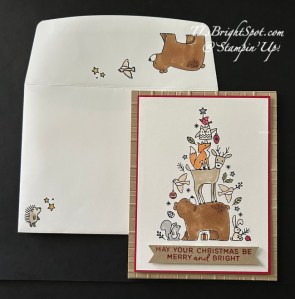
![Woodland Wishes Photopolymer Stamp Set (English) [ 168243 ]](https://assets1.tamsnetwork.com/images/EC042017NF/168243s.jpg "Woodland Wishes Photopolymer Stamp Set (English) [ 168243 ]")
![Crumb Cake 8-1/2" X 11" Cardstock [ 120953 ]](https://assets1.tamsnetwork.com/images/EC042017NF/120953s.jpg "Crumb Cake 8-1/2\" X 11\" Cardstock [ 120953 ]")
![Forever Plaid 3 D Embossing Folder [ 164049 ]](https://assets1.tamsnetwork.com/images/EC042017NF/164049s.jpg "Forever Plaid 3 D Embossing Folder [ 164049 ]")
![Real Red 8-1/2" X 11" Cardstock [ 102482 ]](https://assets1.tamsnetwork.com/images/EC042017NF/102482s.jpg "Real Red 8-1/2\" X 11\" Cardstock [ 102482 ]")
![Crumb Cake Stampin' Blends Combo Pack [ 154882 ]](https://assets1.tamsnetwork.com/images/EC042017NF/154882s.jpg "Crumb Cake Stampin' Blends Combo Pack [ 154882 ]")
![Pecan Pie Stampin’ Blends Combo Pack [ 161674 ]](https://assets1.tamsnetwork.com/images/EC042017NF/161674s.jpg "Pecan Pie Stampin’ Blends Combo Pack [ 161674 ]")
![Petal Pink Stampin' Blends Combo Pack [ 154893 ]](https://assets1.tamsnetwork.com/images/EC042017NF/154893s.jpg "Petal Pink Stampin' Blends Combo Pack [ 154893 ]")
![Smoky Slate Stampin' Blends Combo Pack [ 154904 ]](https://assets1.tamsnetwork.com/images/EC042017NF/154904s.jpg "Smoky Slate Stampin' Blends Combo Pack [ 154904 ]")
![Pumpkin Pie Stampin' Blends Combo Pack [ 154897 ]](https://assets1.tamsnetwork.com/images/EC042017NF/154897s.jpg "Pumpkin Pie Stampin' Blends Combo Pack [ 154897 ]")
![Poppy Parade Stampin' Blends Combo Pack [ 154958 ]](https://assets1.tamsnetwork.com/images/EC042017NF/154958s.jpg "Poppy Parade Stampin' Blends Combo Pack [ 154958 ]")
![Cloud Cover Stampin’ Blends Combo Pack [ 165287 ]](https://assets1.tamsnetwork.com/images/EC042017NF/165287s.jpg "Cloud Cover Stampin’ Blends Combo Pack [ 165287 ]")
![Old Olive Stampin' Blends Combo Pack [ 154892 ]](https://assets1.tamsnetwork.com/images/EC042017NF/154892s.jpg "Old Olive Stampin' Blends Combo Pack [ 154892 ]")
![Bronze & Ivory Stampin' Blends Combo Pack [ 154922 ]](https://assets1.tamsnetwork.com/images/EC042017NF/154922s.jpg "Bronze & Ivory Stampin' Blends Combo Pack [ 154922 ]")
![Golden Glow Shimmer Brush [ 167662 ]](https://assets1.tamsnetwork.com/images/EC042017NF/167662s.jpg "Golden Glow Shimmer Brush [ 167662 ]")
![Mossy Meadow Stampin' Blends Combo Pack [ 154890 ]](https://assets1.tamsnetwork.com/images/EC042017NF/154890s.jpg "Mossy Meadow Stampin' Blends Combo Pack [ 154890 ]")

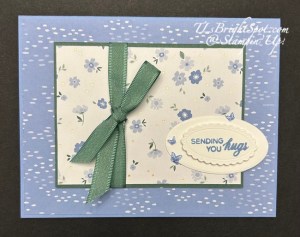
![Phrases & Frames Bundle (English) [ 167587 ]](https://assets1.tamsnetwork.com/images/EC042017NF/167587s.jpg "Phrases & Frames Bundle (English) [ 167587 ]")
![Bloom Boutique 12" X 12" (30.5 X 30.5 Cm) Specialty Designer Series Paper [ 167637 ]](https://assets1.tamsnetwork.com/images/EC042017NF/167637s.jpg "Bloom Boutique 12\" X 12\" (30.5 X 30.5 Cm) Specialty Designer Series Paper [ 167637 ]")
![2026–2028 In Color™ Butterflies [ 167656 ]](https://assets1.tamsnetwork.com/images/EC042017NF/167656s.jpg "2026–2028 In Color™ Butterflies [ 167656 ]")
![Hydrangea Hue 3/8" (1 Cm) Bordered Ribbon [ 167549 ]](https://assets1.tamsnetwork.com/images/EC042017NF/167549s.jpg "Hydrangea Hue 3/8\" (1 Cm) Bordered Ribbon [ 167549 ]")
![Hydrangea Hue 8 1/2" X 11" Cardstock [ 167687 ]](https://assets1.tamsnetwork.com/images/EC042017NF/167687s.jpg "Hydrangea Hue 8 1/2\" X 11\" Cardstock [ 167687 ]")
![Hydrangea Hue Classic Stampin' Pad [ 167677 ]](https://assets1.tamsnetwork.com/images/EC042017NF/167677s.jpg "Hydrangea Hue Classic Stampin' Pad [ 167677 ]")


![Night Of Navy 8-1/2" X 11" Cardstock [ 100867 ]](https://assets1.tamsnetwork.com/images/EC042017NF/100867s.jpg "Night Of Navy 8-1/2\" X 11\" Cardstock [ 100867 ]")
![Night Of Navy Classic Stampin' Pad [ 147110 ]](https://assets1.tamsnetwork.com/images/EC042017NF/147110s.jpg "Night Of Navy Classic Stampin' Pad [ 147110 ]")
![Melon Mambo Classic Stampin' Pad [ 147051 ]](https://assets1.tamsnetwork.com/images/EC042017NF/147051s.jpg "Melon Mambo Classic Stampin' Pad [ 147051 ]")
![Balmy Blue Classic Stampin' Pad [ 147105 ]](https://assets1.tamsnetwork.com/images/EC042017NF/147105s.jpg "Balmy Blue Classic Stampin' Pad [ 147105 ]")
![Lemon Lolly 8 1/2" X 11" Cardstock [ 161720 ]](https://assets1.tamsnetwork.com/images/EC042017NF/161720s.jpg "Lemon Lolly 8 1/2\" X 11\" Cardstock [ 161720 ]")
![Pecan Pie Classic Stampin' Pad [ 161665 ]](https://assets1.tamsnetwork.com/images/EC042017NF/161665s.jpg "Pecan Pie Classic Stampin' Pad [ 161665 ]")

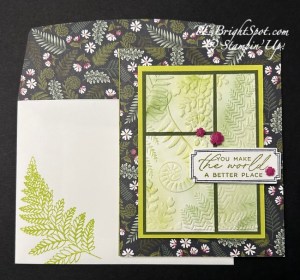
![Fern & Flora 3 D Embossing Folder [ 167744 ]](https://assets1.tamsnetwork.com/images/EC042017NF/167744s.jpg "Fern & Flora 3 D Embossing Folder [ 167744 ]")
![Dreamy Flowers [ 167916 ]](https://assets1.tamsnetwork.com/images/EC042017NF/167916s.jpg "Dreamy Flowers [ 167916 ]")
![Lemon Lolly Classic Stampin' Pad [ 161666 ]](https://assets1.tamsnetwork.com/images/EC042017NF/161666s.jpg "Lemon Lolly Classic Stampin' Pad [ 161666 ]")
![Granny Apple Green Stampin' Pad [ 147095 ]](https://assets1.tamsnetwork.com/images/EC042017NF/147095s.jpg "Granny Apple Green Stampin' Pad [ 147095 ]")
![Old Olive Classic Stampin' Pad [ 147090 ]](https://assets1.tamsnetwork.com/images/EC042017NF/147090s.jpg "Old Olive Classic Stampin' Pad [ 147090 ]")
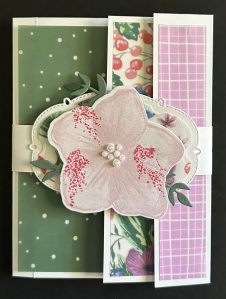
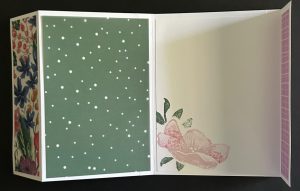
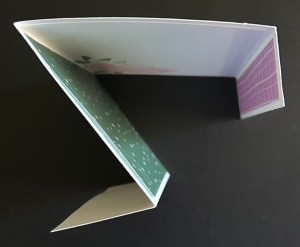
![Opulent Oasis Bundle (English) [ 167595 ]](https://assets1.tamsnetwork.com/images/EC042017NF/167595s.jpg "Opulent Oasis Bundle (English) [ 167595 ]")
![Berry Botanical Vellum 12" X 12" (30.5 X 30.5 Cm) Specialty Designer Series Paper [ 167985 ]](https://assets1.tamsnetwork.com/images/EC042017NF/167985s.jpg "Berry Botanical Vellum 12\" X 12\" (30.5 X 30.5 Cm) Specialty Designer Series Paper [ 167985 ]")
![Sweet Words & Labels Dies [ 167627 ]](https://assets1.tamsnetwork.com/images/EC042017NF/167627s.jpg "Sweet Words & Labels Dies [ 167627 ]")
![Sweet Words & Labels Bundle [ 167628 ]](https://assets1.tamsnetwork.com/images/EC042017NF/167628s.jpg "Sweet Words & Labels Bundle [ 167628 ]")
![Iridescent Pearl Basic Jewels [ 158987 ]](https://assets1.tamsnetwork.com/images/EC042017NF/158987s.jpg "Iridescent Pearl Basic Jewels [ 158987 ]")
![Bubble Bath Classic Stampin' Pad [ 161664 ]](https://assets1.tamsnetwork.com/images/EC042017NF/161664s.jpg "Bubble Bath Classic Stampin' Pad [ 161664 ]")
![Strawberry Slush Classic Stampin' Pad [ 131178 ] (Retired)](https://assets1.tamsnetwork.com/images/EC042017NF/131178s.jpg "Strawberry Slush Classic Stampin' Pad [ 131178 ] (Retired)")
 TLsBrightSpot