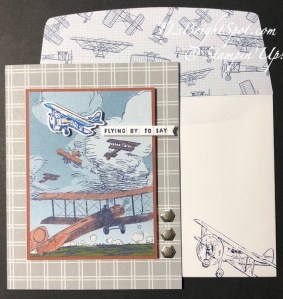
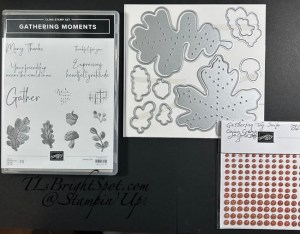
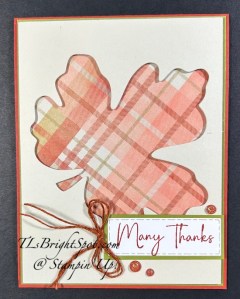
Good Friday – my goodness August is flittering away – Monday is LABOR DAY! Today’s card is all about fall and it uses a September Release ONLINE EXCLUSIVE. The bundle is Gathering Moments.
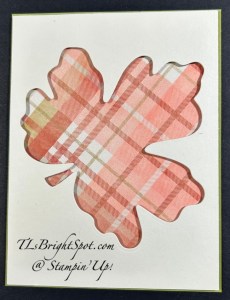
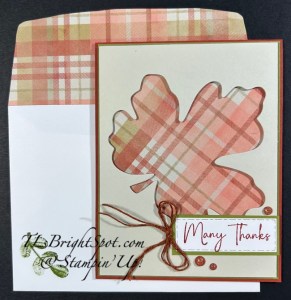
The card has a Basic Beige front from which I die cut the large leaf with Gathering Moments Dies. I wanted to use the Timeless Plaid 6×6 DSP behind the die cut but on an angle. This meant an odd shape for cutting the DSP and it needed to be slightly smaller than the Basic Beige card front. Once I cut the DSP I added it to an Old Olive panel and that to the card base of Cajun Craze.
I put dimensionals all over the back of the die cut panel and adhered it to the the card. I stamped the sentiment in Cajun Craze ink using the Gathering Moments stamp set and die cut the basic White with Textured Notes Dies. I cut a piece of Old Olive for a backing, adhered the two together and added them directly to the card front. I tied a double bow with Natural Tones Linen Thread then added three Cajun Craze and Gold Dots.
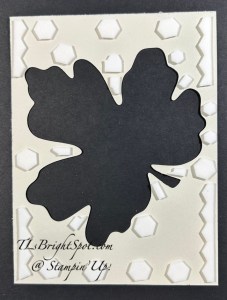
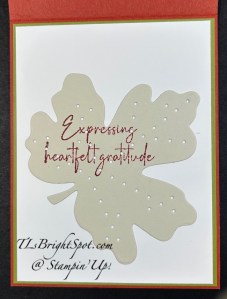
For the inside… I used the die cut that came out of the front die cut to stamp the sentiment from Gathering Moments in Cajun Craze ink. I added this to a Basic White panel then both to Old Olive then to the inside of the card base..
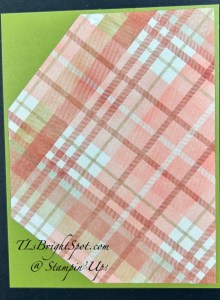
For the envelope, more of the Timeless Plaid 6×6 DSP on the flap trimmed to fit, then a single leaf stamped on the front: Gathering Moments stamp set in Old Olive ink. Totally fall – good for a masculine card too!
These new products are ONLINE EXCLUSIVES to be released Wed Sep 3. For those products available today, see the list below. Today (the 29th), tomorrow the 30th and Sunday the 31st, I have a special deal going on as Stampin’ Up! has a promotion through end of August of 2025-2027 In Color SALE. When shopping with me, I am offering with a $50 order & up, a spool of Linen Thread in addition to my regular benefits. Other benefits… the monthly tutorial sent right to your inbox, daisy points to add together for a free item down the road, and having fun with the Stampin’ Up! products. Shop the In Color Sale by clicking the image below.
Last chance products are available through my store as well – click the image below to view those items, updated regularly by Stampin’ Up!
Thanks for stopping by. May you have a beautiful day. Make someone happy sending them a handmade card filled with ❤️
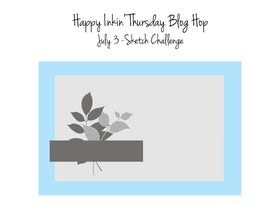
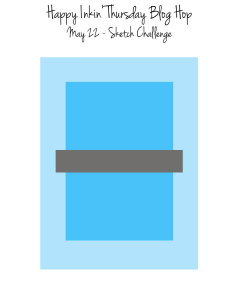
Wow – tomorrow is THE DAY – the Fourth of July – what are you doing special? Picnic? Fireworks? Friends? Welcome to the Happy Inkin’ Thursday Blog Hop! We have a sketch challenge today that offers so man y possibilities Let’s have a look….
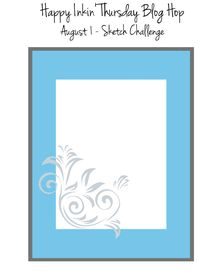
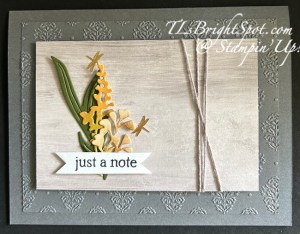
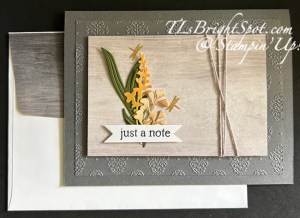
What do you think – does this work for the sketch? I used a few items in the Gallery Suite of products.. the Beautiful Gallery 6×6 DSP (the reverse side!) the Damask Designs embossing Folder, the Gallery Blooms Bundle (die cuts), and the Beautiful Motifs stamp set for the sentiment. In lieu of the embellishments in the suite, I used the Adhesive-Backed Birds & Dragonflies. Here’s how I created this…
Basic Gray card base 8 1/2 x 5 1/2 scored at 4 1/4
Basic Gray layer 5 x 3 3/4, embossed with Damask Designs embossing folder. Adhere directly to card base
Beautiful Gallery 6×6 DSP 3 x 4 1/4, backed with card stock for strength (to be added to card front with dimensionals once decorated)
Die cuts: created using the Gallery Blooms Dies… Mossy Meadow for the background leaves; Basic White colored with Blending Brushes using Peach Pie and Mossy Meadow then die cut for the middle flowers & a bit of Pecan Pie on the edges of the flowers after die cutting; die cut the front leaves from Basic White then use a Blending Brush & Pecan Pie ink to color lightly. These were layered as shown with liquid glue.
The sentiment is stamped in Secret Sea ink using the Beautiful Motifs stamp set, then the Basic White strip ‘bannered’ on the ends with paper snips. It was added with dimensionals.
I wrapped the one end with Basic Twine Essentials in gray, three times around and secured in back with Tear n Tape, creating a pattern of lines.
Final touch – two of the dragonflies from the Adhesive-Backed Birds & Dragonflies.
Attach this completed panel with dimensionals, centering.
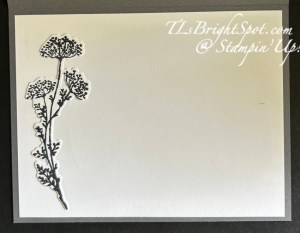
For the inside… I stamped & die cut this wonderful image in Secret Sea ink and was originally going to use it on the front, then decided not to use it. When it came time to do the inside, I decided to0add the die cut (Gallery Blooms Dies) to the 4 x 5 1/4 Basic White panel. And done!
For the envelope… I took the remaining piece of this DSP and added it to the envelope flap & trimmed to fit. To me, this seems like a perfect masculine card – could be used for thinking of you after an illness or sympathy, a thank you – just about anything!
Please enjoy the hop by clicking on the ‘next’ button to take you to Amy or click on a name if you wish to visit another’s blog.
You may shop the products to make this card by visiting the links below.
SHOP LAST CHANCE PRODUCTS HERE… NEW ITEMS ADDED TO THE LIST… MAKE CERTAIN MY NAME IS LISTED AS YOUR DEMONSTRATOR WHEN YOU CHEVCK OUT! :O) REMEMBER…Browse the selection of Last Chance paper crafting products. Additional items are added every other month. These products are available only while supplies last so be sure to buy them before they are discontinued! Discounts vary and are subject to change.
Thanks for stopping by. May you have a beautiful day!
Make someone happy by sending them a handmade card filled with love. ❤️
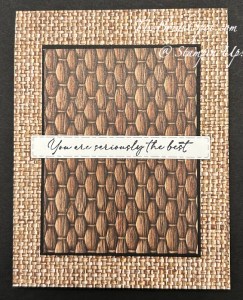
Hello again to this weekly Happy Inkin’ Thursday Blog hop! We have a sketch challenge today that is quick & easy and can be used for any sentiment or card needed – depending on the DSP (Designer Series Paper) used & the stamp set. I’ve used the Woven Textures 12×12 DSP and the Textured Notes Bundle for the sentiments & die cutting.
I hope you like the updates made to my blog – still a work in progress. Thanks to a special teammate for their help and my daughter Wendy as well. I have more work to do on it, but I’m liking what’s happening :O) I’m still recovering from a knee replacement on 5/5, so limited in what I can really do yet.
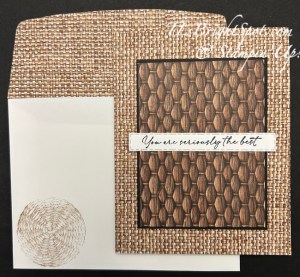
I began with an Early Espresso card base 84 1/4 x 11 and scored at 5 1/2. I added this gorgeous pattern directly to the card base, from the Woven Textures 12×12 DSP cut at 4 1/4 x 5 1/2. Use the adhesive of choice, but I tend to use liquid glue. I then cut a piece of Early Espresso 3 1/8 x 4 1/8 and added a different pattern from the Woven Textures DSP cut 3 x 4 to it – again with liquid glue. These were attached to the card front with dimensionals. I then stamped the sentiment from the Textured Notes Bundle on a scrap of Basic White using Early Espresso ink – then die cut it with the Textured Notes Dies. I added this to the card front with liquid glue. And while you cannot see them, I also added Adhesive-Backed Textured Dots – and the card front was complete.
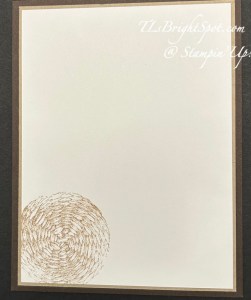
For the inside.. I cut a Crumb Cake piece 4 x 5 1/4 and added it to the inside of the card, trimmed a Basic White panel to 3 7/7 x 5 1/8, stamped it with the fun basket weave image from textured Notes stamp set with Crumb Cake ink. This was added to the Crumb Cake piece already attached to the inside of the card – and bingo – card is ready.
For the envelope… more of the Woven Textures 12×12 DSP was added to the flap & trimmed to fit. I again used the same basket weave stamp from the Textured Notes stamp set and Crumb Cake ink to stamp the front of the envelope. Yay! Such a nice masculine card – and can be a thank you, or thinking of you – again, versatility.
Below is information on how to purchase products from me, but please don’t forget to make your way around those participating in today’s hop. Click on the ‘next’ button to take you to Amy or click on a name to take you to another person’s blog.
Thanks to everyone already making the most of our newly added Notify Me feature in the online store. If selected, this tool sends an email notification when an out-of-stock item becomes available—it’s already proving helpful to streamline the ordering process for demonstrators. Unfortunately, the notification service experienced a disruption from May 6 to 11. As a result, back-in-stock emails weren’t sent for the following items:
Mixed Florals Dies (164641), Mixed Florals Bundle (164642), Mixed Florals Suite Collection (164659), and Fleurs et Techniques Mixtes Suite Collection (164660)
Elements of Text Cling Stamp Set (164774)
This issue was resolved on May 12. However, back-in-stock emails that should have sent during the impacted timeframe will not send for the items listed above. All messages moving forward should function properly. Just remember to ask for that option to be notified when placing the order if it comes up not currently available.
OK – info on ordering from me…. first of all – no more HOST CODE is needed – YAY! Instead for every order of $20 + Stampin’ Up! has it’s own rewards. And for every $30 order from me in my ONLINE STORE you will earn Darling Daisy Points – one Darling Daisy for every $30 purchase from me. Save those Darling Daisy Points up to 15points and you’ll be able to order a free gift from me valued to $40. And for that $30 purchase from me, you’ll also receive the monthly tutorial – and for May it features the Gallery Blooms bundle.
As you probably already know, the 2025-2026 Annual Catalog is now LIVE to customers AND there were two new kits unveiled in the Kits Collection, PLUS more ONLINE EXCLUSIVES released! Stampin’ Up! is ROCKIN’ IT. And here’s another thing – the JOINING PROMOTION. Become a demonstrator (would love to have you on my team!)
Starter Kit Special is NOW AVAILABLE!
Have you heard? From May 6–31, new demonstrators get $165 USD | $220 CAD worth of products in their Starter Kit for just $99 USD | $135 CAD. (That’s $66 USD | $85 CAD in extra products—our biggest Starter Kit Special yet!) As a bonus, new demonstrators also score FREE shipping on their Kit, FREE business supplies, and a FREE Paper Pumpkin kit! Become a demonstrator and enjoy all the perks that come with that, like a 20–25% product discount, exclusive early access to products, the opportunity to earn a modest supplemental income, the chance to attend incredible training and crafting events, and so much more!
Become a Stampin’ Up! demonstrator between May 6–31 and choose $165 worth of products for only $99! (And did we mention your Starter Kit comes with FREE shipping, FREE business supplies, AND a bonus, FREE Paper Pumpkin kit?) Clickthe link in the image above to join with me & create your Starter Kit! What’s to lose – 20% discount/ 20% commission on all orders.
See the list below of items used for this card. Questions? Connect with me! Thanks for stopping by today – may you have a beautiful day! Send a card – make someone happy. 😀
***************************************************************************************************************** Product List
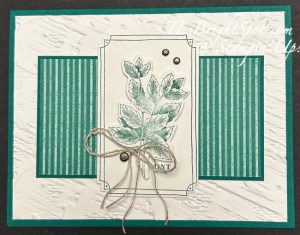
Online Exclusives are just that – items not in any of the Stampin’ Up! Catalogs. This Grow with Love bundle is perfect for cards for no specific reason. I like sending cards just for fun and it makes the receiver feel special.
The card base is a standard A2 size in Shaded Spruce. I layered an embossed Basic White panel 4 x 5 1/4. The embossing folder is another ONLINE EXCLUSIVE called Plaster Painting 3D embossing folder. It has lots of texture. The next layer is Shaded Spruce 2 3/8 x 4 3/8 with Regals 6×6 cut 2 1/4 x 4 1/4 adhered directly to the card front. The center Basic White panel is 2 1/4 x 3 3/4 stamped in Shaded Spruce ink with another of the stamps in Grow With Love, then die cut with the appropriate Grow With Love Dies. I really like the corner edges! Again, this was adhered directly to the card front, centering. The mint leaves were stamped again and die cut and attached with dimensionals over the stamped image. I tied a double Linen Thread and attached it with a glue dot. Lastly, Adhesive-Backed Dots were added for contrast.
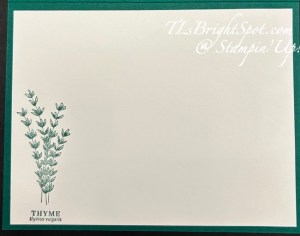
For the inside… another stamp in the Grow with Love is Thyme – and it’s stamped here in Shaded Spruce on the Basic White 4 x 5 1/4 panel.
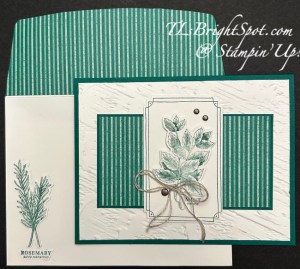
The envelope… more of the Regals 6×6 DSP in Shaded Spruce added to the flap & trimmed to fit (2 1/4 x 6) and on the front another image – this time it’s Rosemary :O). I messed up when stamping the image so did it again on a scrap, die cut it and adhered with liquid glue. When die cutting the image, it cuts off the name of the plant, so I fussy cut that with my paper snips and added it.
Fun, easy card, could be masculine if one is needed. It shows appreciation and care for another human being – which the world always needs.
You may this Grow With Love bundle in my store – look around at all the possibilities, kits, last chance products and more . When shopping with me and your purchase is $50 or more, you will receive a SU! item valued up to $10 and the current months fabulous tutorial – for April, it’s Memorable Blooms. And use my HOST CODE until April 12.
HOST CODE Y3TPZVYN
Remember the LAST CHANCE LIST I mentioned in an earlier post? Click here to shop that list.
Click this link to see all that’s available in the Stampin’ Up! world and make sure my name is at the top when checking out.
Thanks for stopping by. May you have a beautiful day!
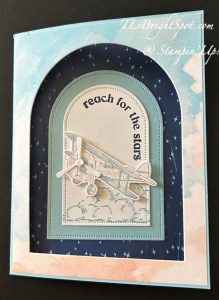
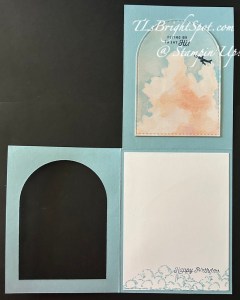
Hello Friday! Today’s card is a fun fold using the Everyday Arches Dies, the Everyday Skies 6×6 DSP and more. It begins with a full sheet of card stock scored at 4 1/4 on the short side, turn and score at 5 1/2 on the long side. Depending how you want the card to fold will determine which quadrant to remove. For this card, it is in portrait style and I removed the upper left quadrant along the score lines. Burnish all score lines. I trimmed an additional 1/16″ off the inside upper quadrant so it would fold nicely.
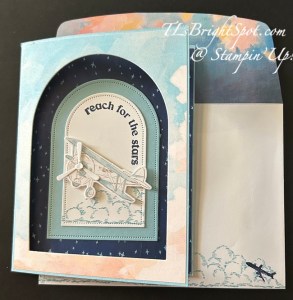
In the first photo you see the card closed and the image of the plane that peeks through the ‘window’. In the second photo, it shows the card fully open, with the upper left quadrant removed. :O)
Directions:
Adhere a 4 1/8 x 5 3/8 panel of DSP to the card front, inking only along the edges
Using the Everyday Arches Dies, 3rd from largest, center die on the front panel and die cut, creating this wonderful window.
Remove the DSP from the card stock die cut piece. This is a bit tricky as the holes in the die cut tend to hold the pieces together. Be careful not to tear either the DSP or the card stock.
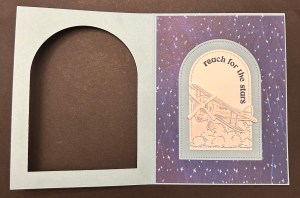
Adhere the DSP to the inside of the upper inside panel of the card as shown in photo 2. I stamped mine using the Adventurous Sky stamp set for the sentiment and the Everyday Arches stamp set for the airplane and Night of Navy ink.
With the upper flip flap closed, adhere another piece of the Everyday Skies DSP, 4 x 5 1/4, to the flip panel, closed – photo 3.
With that die cut card stock window that you saved, die cut it again, this time using the 5th from largest die in the Everyday Arches Dies, making it a smaller arch.
Close the card front and add arch to the ‘star’ covered panel, centering with the card front arch.
With Basic White card stock and the 7th from largest die in the Everyday Arches Dies, die cut a white arch.
Stamp this piece using the Adventurous Sky stamp set and Balmy blue ink for the clouds.
Stamp the sentiment using Night of Navy ink and the coordinating Everyday Arches stamp set. Adhere to the Balmy Blue panel, centering it.
Stamp the airplane in Smoky Slate ink on a scrap of Basic White, using the Adventurous Sky stamp set.
Add color to the plane with Stampin’ Blends Balmy Blue
Die cut propellers from Basic White scrap using the Adventurous Sky Dies. Add with dab of liquid glue.
Add plane to this panel with dimensionals.
The last panel – the sentiment panel… stamp the clouds from the Adventurous Sky stamp set in Balmy Blue ink. I did this twice overlapping just a tiny bit.
Stamp the sentiment in Night of Navy ink – also from Adventurous Sky stamp set.
Envelope…
Add another piece of the Everyday Skies DSP to the flap, trim.
Stamp the clouds on the lower portion of the envelope front with Balmy Blue ink and the Adventurous Sky stamp set.
Stamp the airplane from Everyday Arches stamp set in Night of Navy ink.
This is just a great masculine card! And a fun fold to boot just makes it all the more fun.
The Everyday Arches bundle and the Everyday Skies 6×6 DSP is available in my store through the Stampin’ Up! ONLINE EXCLUSIVES. Go to that link here.
The Adventurous Skies Bundle is in the 2024-2025 Annual Catalog and you can find that here.
And if you want to visit the Jan-April 2025 Mini Catalog – go here.
Thanks for stopping by. May you have a beautiful day!!!
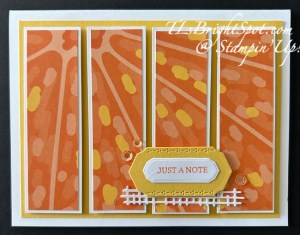
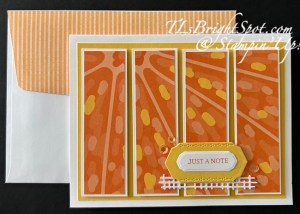
Hello, hello. My card begins with Thick Basic White 8 1/2 x 5 1/2 scored at 4 1/4. I added a layer directly to this with Daffodil Delight, 3 7/8 x 5 1/8. I set this aside to create the four panels using Fruit Salad 6×6 DSP, a free item during Sale-a-bration (only three days left!).
What I particularly like about this is the way it looks as though the sun was shining with rays extending. The panel is first cut 3 1/2 x 4 then trimmed to four panels of 1 x 3 1/2 strips. They were layered on Basic White each cut 1 1/8 x 3 5/8. Dimensionals were added to the backs and attached to the card. I used a scrap of Daffodil Delight to die cut the background for the sentiment using the Mixed Labels Dies. I used the Mixed Labels stamp set for the sentiment , Pumpkin Pie ink on Basic White and another of the Mixed Labels Dies to die cut it, then attached with dimensionals. The very fun die cut beneath is also from the Mixed Labels Dies and adhered directly beneath and to the card front. The final touch are three Adhesive-Backed Shiny Sequins. This is a perfect use of DSP – and a masculine card too – at least in my opinion. Of course that depends on the DSP used.
For the envelope, I added more DSP to the flap & trimmed it to fit.
To purchase the supplies to make this card, please use this link to take you to my Stampin’ Up! store – look around a bit: Online Exclusives, Kits Collections, 2024-2025 Annual Catalog – like that. And when you shop with me right now, Stampin’ Up! is in the ending stages of Sale-a-bration (Jan-Feb), but when you order prior to Feb 28, you will receive an opportunity to receive FREE items from Stampin’ Up! via the Sale-a-Bration offerings.
Sale-a-bration ends soon – Feb 28, 2025 and there are some FAB products you receive FREE with qualified purchases.
For purchases of $60 (level 1) – these items are FREE – click here
For purchases of $120 (level 2) – these items are FREE – click here
To view the ONLINE EXCLUSIVES, CLICK HERE. To see the items in the Jan-Apr 2025 Mini Catalog – click hereAnd if you do not have a demonstrator and need either of these catalogs, let me know! For all those coloring tools, the basics of card stock and embossing/ die cut machines, more stamps & dies, watercolor pencils, click this link for the 2024-2025 Annual Catalog. Remember that when purchasing from me, to use my current host code…and make certain my name is listed as your demonstrator :O)
When you shop with me and your purchase is $50 or more – you will receive a free giftie valued up to $10 that is a Stampin’ Up! item. You will also receive the monthly tutorial – February is the Delightful Wishes Bundle and it has some really clever ideas!
If you’ve been thinking about becoming a Stampin’ Up! demonstrator, then there’s no better time than right now during Sale-A-Bration! When you join by February 28, 2025, you can choose between two fabulous offers:
Option 1: Get $125 worth of product PLUS a choice of two Stampin’ Write Marker Assortment packs AND the Handmade Designs Cling Stamp Set (an exclusive stamp set designed to work with the markers). That’s a $216 value for just $99! I strongly recommend Option 1
Option 2: Get $125 worth of product PLUS an additional $30 worth of product when you join Stampin’ Up! That’s a $155 value for just $99!
If you’d like to join the team, we’d love to have you! Once you join, you’ll get at least a 20% discount on all of your Stampin’ Up! purchases and you can preorder from the upcoming catalogs!
Stampin’ Up! and our particular team welcome all types of Demonstrators – those only purchasing to get the discount for themselves
– those who want to run a business and…
– those anywhere in between! Let’s stamp and have fun doing it!
Demonstrators get lots of perks including at least a 20% discount on all orders that you place as a Demonstrator, invitations to Stampin’ Up! Demonstrator events and preordering from upcoming catalogs and promotions. And if joining this Jan-Feb makes sense to you, you will have the opportunity to view the new catalog early and preorder as well. Opportunity knocks! Click the image below to join with me now.
Thanks for visiting with me today. I’ll try to post a picture or two tomorrow. May you have a beautiful day!
1 We had a terrifically rainy day Thursday, which actually began Wednesday in the middle of the night. I don’t often make comments about the rain, but this was needed SO BADLY. the reservoirs were becoming quite low – and well it was a full on drought. We had 2 1/2″ Wednesday night and more rain on Thursday, so it’s starting to resolve.
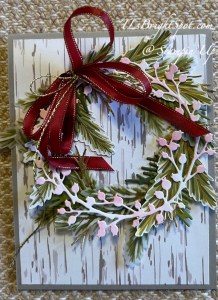
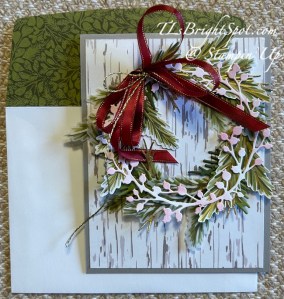
I have a multi-layered wreath card for you today – created with multiple Stampin’ Up! products. I had this Basic White berry wreath die cut on my desk and several die cuts from the Graceful Greenery Vellum (die cut with the Golden Greenery Dies). I began playing around and this is my final product.
The card base is Gray Granite with a layer of Nests of Winter DSP, a very wood grain kind of effect. I was thinking the side of a barn or door front. For a foundation for the wreath shape, I pulled out the Encircled in Nature Dies. There are two dies that form a circle like shape so I used those and Old Olive card stock for that particular die cut. There are pine bough dies in the Golden Greenery Dies and I used these to die cut from Old Olive & Mossy Meadow, – 3-4 of each just to have enough to play around. I ended up trimming some of these down as they were too long. I also die cut more pine boughs from the Season of Green & Gold SDSP I used pine dies from the Encircled in Nature Dies and Distressed Gold Specialty Paper for even more color and texture. I did a lot of moving things around til it suited me then glued things in place, trying to keep depth and looseness so as not to be too flat. I laid the Basic White berry wreath on top of all of it – too white! So, I pulled out my small Blending Brush & Cherry Cobbler ink and very gently added color to various berries. Again I laid it on top of the wreath – and oh so much better! I added a double bow using the 1/4″ Cherry Cobbler Satin Ribbon and Gold Twisted Thread (a new ONLINE EXCLUSIVE product!) and attached it in place with a glue dot. I thought about adding a sentiment and decided against it.
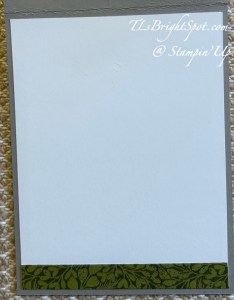
The inside of the card does not show up well in this photo – no sentiment, just a 1/2 x 4 inch strip of Season of Green & Gold SDSP at the bottom. Why no sentiment? I want to be able to say ‘thank you’ with this beautiful card, or ‘thinking of you’ or ‘Merry Christmas’, whatever is necessary at the time. And when time, I will probably stamp with Mossy Meadow ink.
For the envelope… More of the same Season of Green & Gold SDSP on the flap, trimmed to fit. This is the same as the small strip on the inside of the card. I love this card – and it could easily be a masculine card too!
Some fun options for purchases at Stampin’ Up! right now.
One of the benefits of being a demonstrator is being able to see & order Stampin’ Up! products before they go ‘live’ to the rest of the stamping community. As a matter of fact, my order is due to arrive, maybe tomorrow and I can’t wait to play!!! And while I’m talking the new Jan-Apr 2025 Mini Catalog, if you have been a customer of mine in the past nine months and placed an order of at least $50, I will be sending the catalog to you AND the famous Sale-a-bration catalog as well. Look for those in your mailbox SOON. If you are not certain if you qualify – give me a shout-out.
When shopping with me, please use the new host code listed below. This is good 11/20 – 12/11. Use it when your order is $50 to just less than $150 to receive a free gift from me + the monthly tutorial. If your order is over $150, SU! has it’s own rewards so don’t use my code… but I will still send that free SU! item to you valued up to $10. Got that? If not, connect with me to talk you through it. :O) I would love to have you join my team and we can create & have some fun together. Please make certain my name is on as your demonstrator when ordering :O)
HOST CODE Q4Y3MQEU
Thanks so much for joining me today. I hope you enjoyed my card and this hop. May you have a beautiful day!
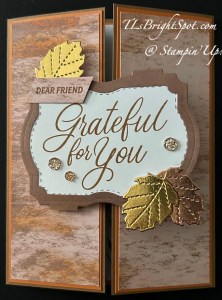
Welcome, welcome! Welcome to this blog hop group! Our theme this month is ‘Giving Thanks’ in whatever way that means for us… and I have lots for which to be thankful: people, support, this team and other teams, family, a roof over my head – just LOTS! I chose to use the Autumn Expressions bundle – beautiful script stamps, great dies (I’m a succor for leaf dies) and a host of other beautiful Stampin’ Up! products.
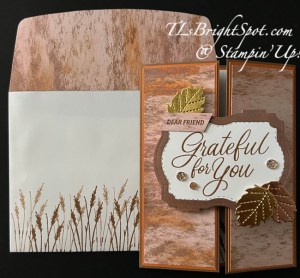
Stunning leaf die cut from Textured Metallic 12×12 Specialty DSP in both gold (2) and copper (1). And the very swirly script and framing – all from the Autumn Expressions bundle. Such a great set! The additional DSP is an online product – Meandering Meadows 6s6 DSP. I cut the front panels to look like sunset, the oranges and pinks streaking across the sky. The ‘frame’ is from another panel of the Meandering Meadows DSP.
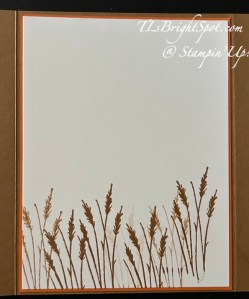
For the inside, I used this wonderful ‘grass’ stamp and Pecan Pie ink – first generation and 2nd generation – to stamp across the bottom. How to do that? Ink the stamp, stamp the paper, stamp again without re-inking. This second stamping is called second generation.
Card Cuts/ directions:
Pecan Pie for the card base – 8 1/2 x 5 1/2, scored at 2 1/8 on the long side. Burnish and fold other side to meet it, burnishing it as well. Why do I do this in lieu of scoring on each side at 2 1/8? ‘Cuz it doesn’t always come together in the middle – and I want them to. I have found this to be the easiest way to make sure that happens.
Cut Pumpkin Pie 2 x 5 3/8 (2) and adhere to each side front panel
Cut Meandering Meadows 6×6 DSP 1 7/8 x 5 1/4 (2) and adhere to the Pumpkin Pie
On Basic White 2 3/4 x 3 3/4, stamp the sentiment from Autumn Expressions stamp set in Pecan Pie ink. Die cut with the smaller ‘frame’ from Autumn Expressions Dies. Die cut the outside ‘frame’ for this using the larger ‘frame’ die. Attach together with dots of liquid glue.
Die cut the gorgeous leaves from 1 1/4 square Textured Metallic 12×12 SDSP – two in gold and one in copper. Attach one go0ld leaf to the top of the sentiment frame with liquid glue, then the copper leaf on the opposite corner also with liquid glue. Attache the other gold leaf with a dimensional. Add three Drusy Adhesive-Backed Embellishments on the sentiment panel. Add sentiment panel to the left side of the gate fold – and the card front is complete!
For the envelope… I added more of the same Meandering Meadows 6×6 DSP to the flap and trimmed to fit. Do the same stamping technique as before along the envelope front.
This can so easily be a masculine card if needed. I like that versatility! And many of these products may be found in the Sep-Dec 2024 Mini Catalog, Card Stocks & inks, acrylic blocks, paper trimmer – these ‘staples’ are in the Annual Catalog.
Time to continue the hop – click on a name or use the previous & next buttons to take you to specific folks. Thanks for dropping in!
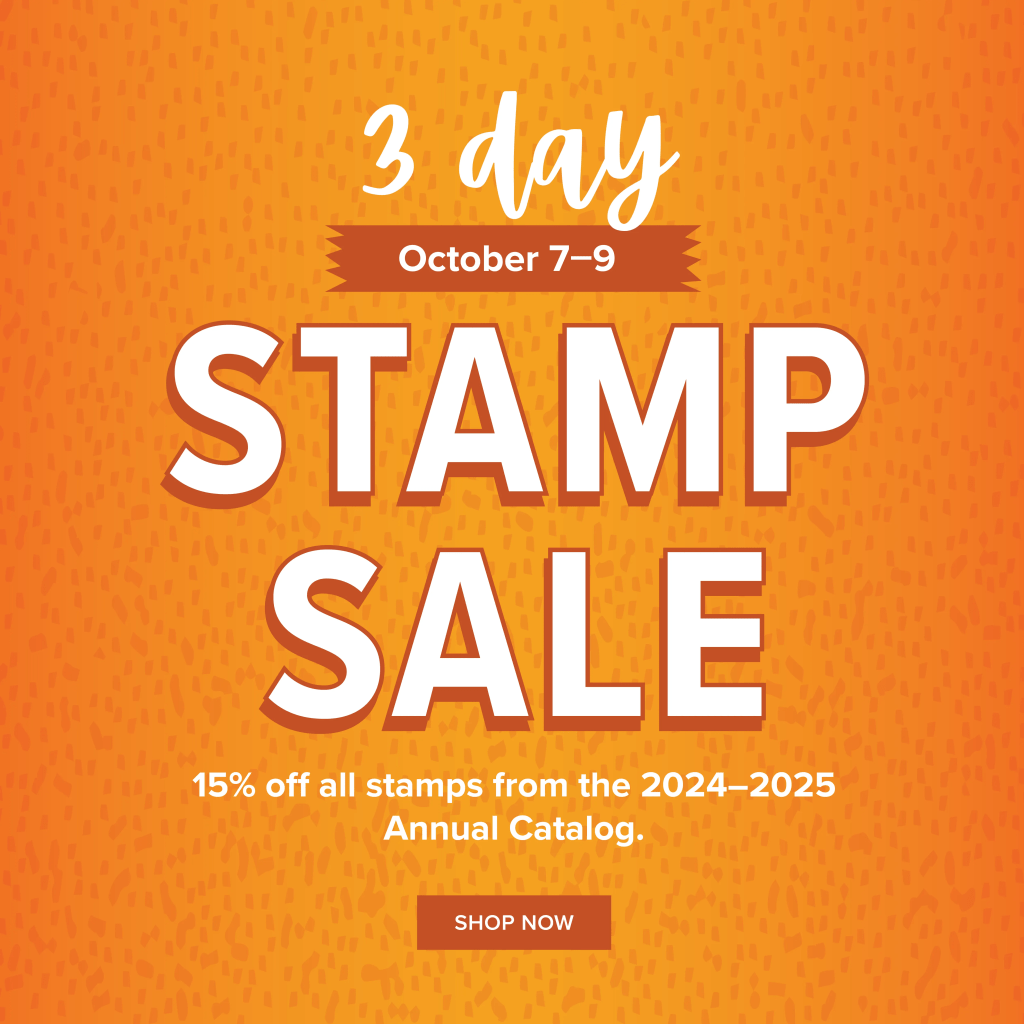
Click on the image above to shop the Stampin’ Up! stamp sale.
If you’ve had your eye on a certain stamp set or two (or ten) from the 2024–2025 Annual Catalog, then we have some exciting news! From October 7–9, all the stamp sets (excluding bundles) from the 2024–2025 Annual Catalog will be 15% off!
Here are the details:This stamp sale only happens once a year!
The sale will run for three days.
The 15% off discount will apply to all stamp sets (photopolymer and cling) from the 2024–2025 Annual Catalog.
Bundles are not included in this sale.
Stamp sets are available while supplies last.
Sales Period: October 7, 2024, at 12:00 a.m. to October 9, 2024, at 11:59 p.m. (MT)
Ordering Deadlines: By Phone – October 9, 2024, at 6:59 p.m. (MT), or Online – October 9, 2024, at 11:59 p.m. (MT)
Promotion Period: October 1–31
Ordering Deadlines
Phone: October 31 2024, at 6:59 p.m. (MT)
Online: October 31 2024, at 11:59 p.m. (MT)
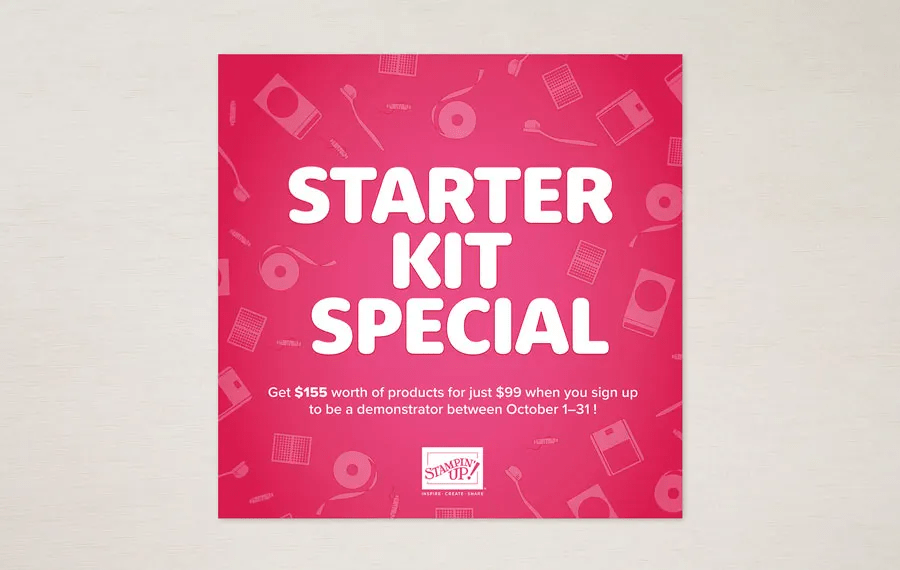
Become a demonstrator between October 1–31 can get $125 USD | $165 CAD$155 USD | $206 CAD worth of products for just $99 USD | $135 CAD.
Being a part of Stampin’ Up!’s creative community also comes with several perks, including early access to products, special discounts, a chance to earn product credits, access to exclusive trainings, demonstrator-only events, and so much more.
As a demonstrator, I am here to help you through the join process and beyond.Join with me here.
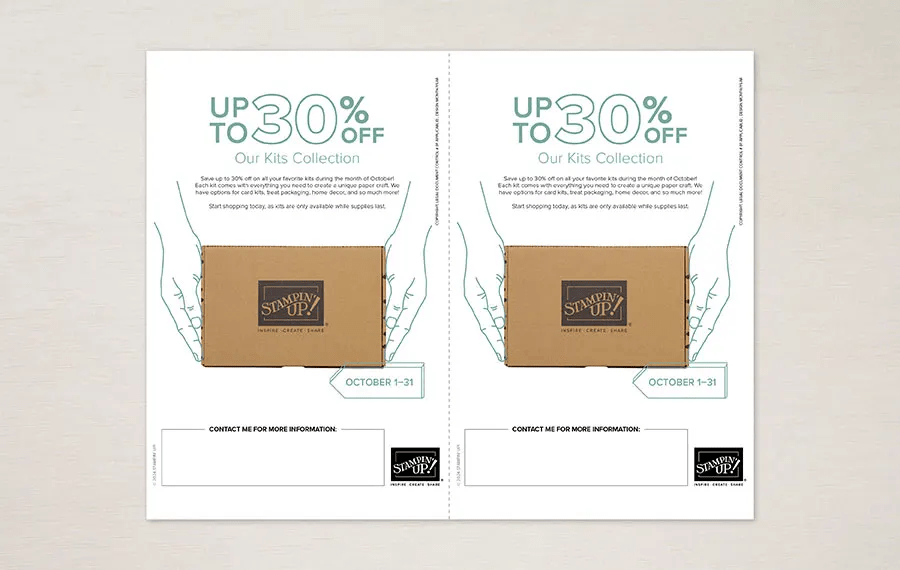
Kits Collection Salestarted Oct 1!
Exciting news! We’re having a huge sale on our Kits Collection beginning October 1! All kits will be available at a discounted price. Save up to 30% off on all your favorite kits October 1–31! Our kits come with everything you need to create a unique paper craft. We have crafting options for card kits, treat packaging, home decor, and so much more! Click here
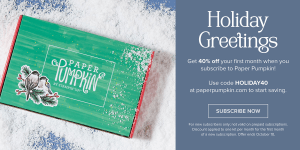
Santa Claus is comin’ to town a bit early this year—and he’s brought a holiday Paper Pumpkin sale! Starting September 11, 2024, at 12:01 a.m. (MT) until October 10, 2024, at 11:50 p.m. (MT), anyone who signs up for our monthly Paper Pumpkin subscription as a new subscriber will receive 40% off their first kit. That’s right, 40% OFF!
Where This Discount Is Applied This discount will be applied to one kit in the first kit shipment of the Paper Pumpkin subscription, which means new subscribers will get 40% off the October Nests of Christmas Paper Pumpkin Kit. After that, each month’s kit will return to the regular price of $25.00.
Qualifying for This Discount This offer is only for new month-to-month subscribers and is not valid on purchased or redeemed prepaid subscriptions.
Now that you’ve read through all the details, it’s time to head to paperpumpkin.com to subscribe and use code HOLIDAY40 to get 40% off.
Click the link above to take you to the ONLINE EXCLUSIVES!
I appreciate your business and welcome any questions regarding sales or creating or joining my team. Make sure when shopping with me, that you see my name at the top as your demonstrator. That way I can send you a Stampin’ Up! giftie and you can earn rewards – with a $50 order or more. You also receive the monthly tutorial for that particular month – for October, it is More Than Autumn bundle.
Click the image above to take you to the ONLINE EXCLUSIVES!
I appreciate your business and welcome any questions regarding sales or creating or joining my team. Make sure when shopping with me, that you see my name at the top as your demonstrator. That way I can send you a Stampin’ Up! giftie and you can earn rewards – with a $50 order or more. You also receive the monthly tutorial for that particular month – for October, it is More Than Autumn bundle.
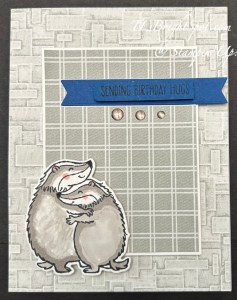
Hello folks – it’s Thursday and we have a sketch challenge today. Because I needed a birthday card I pulled out the very cute & fun Hearts & Hugs bundle to create this card.
The creatures in this Hearts & Hugs bundle are just so incredibly C-U-T-E! I used Stampin’ Blends to color them after stamping on Basic White scraps with Memento ink: Gray Granite and Light Smoky Slate & the Color Lifter. For the ears/ cheeks, just a bit of Pretty in Pink. I used the Basic Black Marker to darken the noses. Once all colored I die cut them with the coordinating die from the Hearts & Hugs Dies. After coloring, I pulled the rest of the card together.
Card base: Smoky Slate 8 1/2 x 5 1/2 scored at 4 1/4
Layer the card front with Take To The Sky DSP 4 1/4 x 5 1/2
To meet the sketch challenge, I cut a piece of Basic White 3 x 4 and added another layer of DSP from Take To The Sky DSP 2 7/8 x 3 7/8. These were added to the card front with dimensionals
I put dimensionals on the back of the two hugging beasts (what are they?) and added them to the lower left corner.
Using the banner die from Hearts & Hugs Dies, I die cut a Blueberry Bushel tag & added it to the card front with liquid glue. I stamped the sentiment in Memento ink – from Hearts & Hugs stamp set, trimmed it down and added it with dimensionals to the banner.
As a final touch, I added three 2023-2025 In Color Dots in Pebbled Path
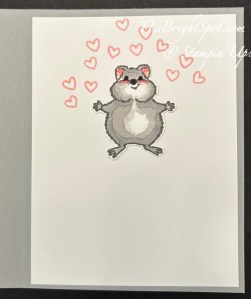
For the inside of the card, I stamped another cute beast – is this a chipmonk?) on a Basic White panel 4 x 5 14 and colored him similarly to the two on the card front
stamp in Memento ink
color with Stampin’ Blends – Gray Granite, Light Smoky Slate, Color Lifter and bits of Pretty in Pink for the ears and cheekbones. The nose & eyes I used Basic Black Marker to darken.
I stamped the hearts in Pretty In Pink ink – again from the hearts & Hugs stamp set
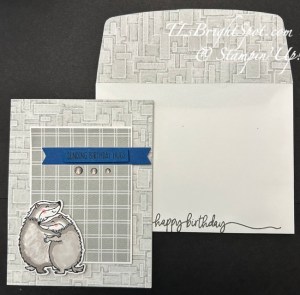
For the envelope… more of the Take To The Sky DSP adhered to the flap & trimmed to fit.
Along the bottom of the envelope front I stamped the sentiment from Sweetly Scripted stamp set in Pebbled Path ink.
Sweet birthday card – right? Today is August 1 – so time to redeem those coupons! Each coupon is valued so don’t let them slip through your fingers … See below for how to redeem with me as your demonstrator.
Now… time to see what the rest of the crew have created. Click the ‘next’ button or… click on a name. Be sure not to miss anyone :O)
Redemption Period: 1–31 August 2024 Ordering Deadlines Phone: 30 August 2024 at 6:59 p.m. (MT) Online: 31 August 2024 at 11:59 p.m. (MT)
There is no limit to the number of coupon codes participants can redeem on an order during the redemption period. If using multiple codes, they must be separated by a space.
Coupon codes may be redeemed one time only. They cannot be redeemed after the 31 August.
Coupon codes may be redeemed for any product (excluding Starter Kits and demonstrator supply items). They cannot be used on exchanges.
Bonus Days coupon codes can be applied to new prepaid Paper Pumpkin subscriptions.
Coupon codes will reduce the commissionable amount of an order
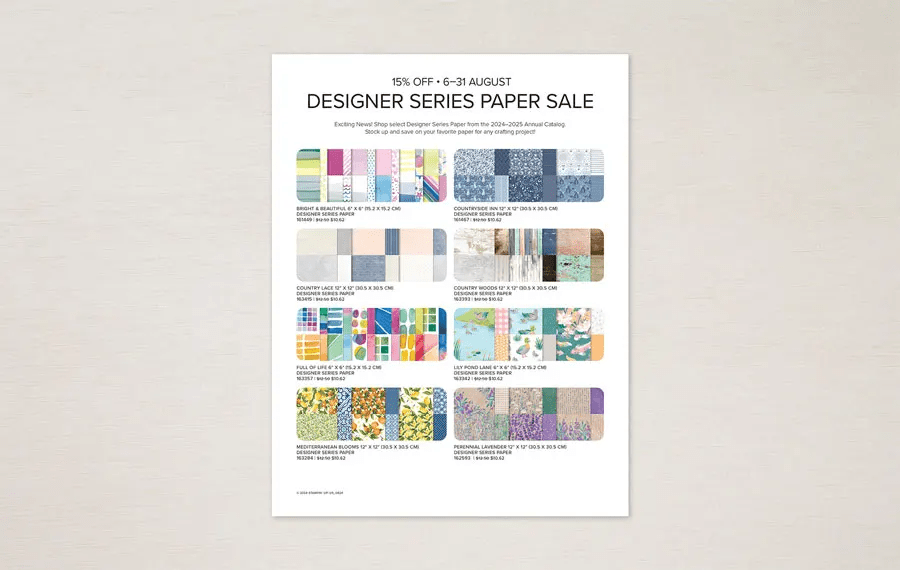
MORE BIG STAMPIN’ UP! NEWS… Aug 6 Designer Series Paper Sale… 15% off Designer Series Paper during the month of August
Sales Period: 6–31 August 2024
Ordering Deadlines
Phone: 30 August at 6:59 p.m. (MT)
Online: 31 August at 11:59 p.m. (MT)
Our Designer Series Paper is hand created in house. Our artists design, sketch, paint, etc. the patterns you see on the paper. Its durability and utility are perfect for all types of paper crafts. The following paper is part of the sale:
Bright & Beautiful
Countryside Inn
Country Lace
Country Woods
Full of Life
Lily Pond Lane
Mediterranean Blooms
Perennial Lavender
Take to the Sky
Thoughtful Journey
To Market
Unbounded Beauty
Wildly Flowering
Winter Meadow
Please note, the following paper is featured in the Annual Catalog, but is from previous product releases:
Bright & Beautiful
Countryside Inn
Perennial Lavender
Winter Meadow
Shop with me to earn fringe benefits to my customers: free tutorial of the month and a FREE Stampin’ Up! item valued to $10 – all for a $50 order, before shipping and taxes. Use my current host code to receive those benefits – especially when your order does not exceed $150. Make certain my name is listed as your demonstrator when checking out! :O) Shop here with me!
HOST CODE THNSVC2P
Thanks for stopping by. May you have a beautiful day. Make someone happy by sending them a handmade card filled with love.
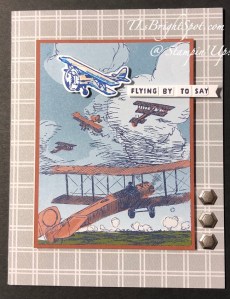
WELCOME TO AMY’S INKIN’ KREW TEAM BLOG HOP! We have a theme challenge for today – ‘for the boys/ men’ and we can interpret that any way we like. I chose to use the Take To The Sky Suite for the challenge.
The Take to T/he Sky 12×12 DSP is so perfect for the flyers in our lives or for anyone really. Here’s what I did for this card…
The card base is 8 1/2 x 5 1/2 Smoky Slate card stock scored at 4 1/4. I added the plaid pattern in Smoky Slate from the Take To The Sky 12×12 DSP cut 4 14 x 5 1/2. I then took a design from the Take to The Sky 12×12 cut 3 x 4 and added it to Cajun Craze card stock cut 3 1/8 x 4 1/8. This got dimensionals and was attached to the card front, centering it. I stamped an airplane in Blueberry Bushel ink from the Adventurous Sky stamp set on a Basic White scrap and die cut it with a coordinating die from Adventurous Sky Dies. I used a Cajun Craze Watercolor Pencil to add some color to the plane, then moved the color around with a Blender Pen. I added the plane with a couple of small dimensionals. I stamped the sentiment on a Basic White scrap with Night of Navy ink, cut it apart and adhered it to a 1/4″ strip of Basic White, cut the end, added trimmed dimensionals and attached it to the card front, making it look as though the plane were carrying a banner in the sky.. The final touch was three Industrial Trinkets attached with glue dots -and the card front was complete.
For the inside of the card… another panel of the Take To The Sky DSP 3 x 4 adhered to a Basic White 3 1/8 x 4 1/8 and attached with glue to the inside of the card. The sentiment was stamped in Boho Blue ink using a stamp from Adventurous Sky stamp set. This was die cut with a coordinating die from Adventurous Sky Dies and added with glue to the inside of the card. I offset it to make it look as though it too was being trailed behind the airplane.
For the envelope, I stamped another size plane from the Adventurous Sky stamp set, this time in Night of Navy ink – to the envelope front. On the flap I attached a piece of Take To The Sky 12×12 DSP and trimmed it to fit. And done! YAY! I love this card and it is so perfect for a special someone.
Now, click on the links below to visit thew other team members participating in today’s hop.
The 24-25 Annual Catalog is now live… here’s a link to take you directly to the items available in this catalog – specifically the Take to The Sky Suite of products. These particular embellishments are on page 114. Happy shopping!
Stampin’ Up! has a fabulous joining opportunity from May 1-31.
To join is $99 and what comes with joining, besides your 15-20% discount on every order… FOUR FREE IN COLOR PRODUCTS valued to $82 plus your choice of $125 worth of products. Those FREE items – the IN COLOR products – Classic stampin’ pad bundle – 5 of them, package of 8 1/2 x 11 cardstock – 5 of those, 6×6 Designer Series Paper – 5 colors in the pack, and the coordinating Stampin’ Write markers. You will also receive free shipping on these products + free business supplies. What’s not to like about this joining special – remember it begins May 1! Join with me by following this link...
To view all the available ONLINE EXCLUSIVES, click here.
While you’re looking around in my store, remember there are some stunning kits available, for all ages and all seasons – even Christmas! And while you’re shopping, I offer fringe benefits to my customers: free tutorial of the month and a FREE Stampin’ Up! item valued to $10 – all for a $50 order, before shipping and taxes. Use my current host code to receive those benefits – especially when your order does not exceed $150.
HOST CODE 4JF6ZWC9
Thanks for stopping by. May you have a beautiful day. Make someone happy when sending them a handmade card filled with love.

![Cajun Craze 8-1/2" X 11" Cardstock [ 119684 ]](https://assets1.tamsnetwork.com/images/EC042017NF/119684s.jpg "Cajun Craze 8-1/2\" X 11\" Cardstock [ 119684 ]")
![Timeless Plaid 6" X 6" (15.2 X 15.2 Cm) Designer Series Paper [ 164678 ]](https://assets1.tamsnetwork.com/images/EC042017NF/164678s.jpg "Timeless Plaid 6\" X 6\" (15.2 X 15.2 Cm) Designer Series Paper [ 164678 ]")
![Textured Notes Bundle (English) [ 165556 ]](https://assets1.tamsnetwork.com/images/EC042017NF/165556s.jpg "Textured Notes Bundle (English) [ 165556 ]")
![Old Olive 8-1/2" X 11" Cardstock [ 100702 ]](https://assets1.tamsnetwork.com/images/EC042017NF/100702s.jpg "Old Olive 8-1/2\" X 11\" Cardstock [ 100702 ]")
![Basic Beige 8 1/2" X 11" Cardstock [ 164511 ]](https://assets1.tamsnetwork.com/images/EC042017NF/164511s.jpg "Basic Beige 8 1/2\" X 11\" Cardstock [ 164511 ]")
![Basic White 8 1/2" X 11" Cardstock [ 159276 ]](https://assets1.tamsnetwork.com/images/EC042017NF/159276s.jpg "Basic White 8 1/2\" X 11\" Cardstock [ 159276 ]")
![Natural Tones Linen Thread [ 164071 ]](https://assets1.tamsnetwork.com/images/EC042017NF/164071s.jpg "Natural Tones Linen Thread [ 164071 ]")
![Stampin' Cut & Emboss Machine [ 149653 ]](https://assets1.tamsnetwork.com/images/EC042017NF/149653s.jpg "Stampin' Cut & Emboss Machine [ 149653 ]")
![Paper Trimmer [ 152392 ]](https://assets1.tamsnetwork.com/images/EC042017NF/152392s.jpg "Paper Trimmer [ 152392 ]")
![Stampin' Dimensionals [ 104430 ]](https://assets1.tamsnetwork.com/images/EC042017NF/104430s.jpg "Stampin' Dimensionals [ 104430 ]")
![Multipurpose Liquid Glue [ 110755 ]](https://assets1.tamsnetwork.com/images/EC042017NF/110755s.jpg "Multipurpose Liquid Glue [ 110755 ]")
![Mini Glue Dots [ 103683 ]](https://assets1.tamsnetwork.com/images/EC042017NF/103683s.jpg "Mini Glue Dots [ 103683 ]")
![Paper Snips [ 103579 ]](https://assets1.tamsnetwork.com/images/EC042017NF/103579s.jpg "Paper Snips [ 103579 ]")
![Basic White Medium Envelopes [ 159236 ]](https://assets1.tamsnetwork.com/images/EC042017NF/159236s.jpg "Basic White Medium Envelopes [ 159236 ]")

![Beautiful Gallery Suite Collection (English) [ 165217 ]](https://assets1.tamsnetwork.com/images/EC042017NF/165217s.jpg "Beautiful Gallery Suite Collection (English) [ 165217 ]")
![Beautiful Motifs Bundle (English) [ 165206 ]](https://assets1.tamsnetwork.com/images/EC042017NF/165206s.jpg "Beautiful Motifs Bundle (English) [ 165206 ]")
![Gallery Blooms Bundle [ 165213 ]](https://assets1.tamsnetwork.com/images/EC042017NF/165213s.jpg "Gallery Blooms Bundle [ 165213 ]")
![Damask Designs Embossing Folder [ 165214 ]](https://assets1.tamsnetwork.com/images/EC042017NF/165214s.jpg "Damask Designs Embossing Folder [ 165214 ]")
![Basic Gray 8-1/2" X 11" Cardstock [ 121044 ]](https://assets1.tamsnetwork.com/images/EC042017NF/121044s.jpg "Basic Gray 8-1/2\" X 11\" Cardstock [ 121044 ]")
![Baker's Twine Essentials Pack [ 155475 ]](https://assets1.tamsnetwork.com/images/EC042017NF/155475s.jpg "Baker's Twine Essentials Pack [ 155475 ]")
![Small Blending Brushes [ 160518 ]](https://assets1.tamsnetwork.com/images/EC042017NF/160518s.jpg "Small Blending Brushes [ 160518 ]")
![Peach Pie Classic Stampin Pad [ 163810 ]](https://assets1.tamsnetwork.com/images/EC042017NF/163810s.jpg "Peach Pie Classic Stampin Pad [ 163810 ]")
![Pecan Pie Classic Stampin' Pad [ 161665 ]](https://assets1.tamsnetwork.com/images/EC042017NF/161665s.jpg "Pecan Pie Classic Stampin' Pad [ 161665 ]")
![Early Espresso Classic Stampin' Pad [ 147114 ]](https://assets1.tamsnetwork.com/images/EC042017NF/147114s.jpg "Early Espresso Classic Stampin' Pad [ 147114 ]")
![Linen Thread [ 104199 ]](https://assets1.tamsnetwork.com/images/EC042017NF/104199s.jpg "Linen Thread [ 104199 ]")
![Clear Wink Of Stella Glitter Brush [ 141897 ]](https://assets1.tamsnetwork.com/images/EC042017NF/141897s.jpg "Clear Wink Of Stella Glitter Brush [ 141897 ]")
![Metallics Wow! Embossing Powder [ 165678 ]](https://assets1.tamsnetwork.com/images/EC042017NF/165678s.jpg "Metallics Wow! Embossing Powder [ 165678 ]")
![Versamark Pad [ 102283 ]](https://assets1.tamsnetwork.com/images/EC042017NF/102283s.jpg "Versamark Pad [ 102283 ]")
![Heat Tool (Us And Canada) [ 129053 ]](https://assets1.tamsnetwork.com/images/EC042017NF/129053s.jpg "Heat Tool (Us And Canada) [ 129053 ]")
![Embossing Additions Tool Kit [ 159971 ]](https://assets1.tamsnetwork.com/images/EC042017NF/159971s.jpg "Embossing Additions Tool Kit [ 159971 ]")
![Tuxedo Black Memento Ink Pad [ 132708 ]](https://assets1.tamsnetwork.com/images/EC042017NF/132708s.jpg "Tuxedo Black Memento Ink Pad [ 132708 ]")
![Basic White 8 1/2" X 11" Cardstock [ 166780 ]](https://assets1.tamsnetwork.com/images/EC042017NF/166780s.jpg "Basic White 8 1/2\" X 11\" Cardstock [ 166780 ]")
![Basic White 8 1/2" X 11" Thick Cardstock [ 159229 ]](https://assets1.tamsnetwork.com/images/EC042017NF/159229s.jpg "Basic White 8 1/2\" X 11\" Thick Cardstock [ 159229 ]")
![Stampin' Seal [ 152813 ]](https://assets1.tamsnetwork.com/images/EC042017NF/152813s.jpg "Stampin' Seal [ 152813 ]")
![Bone Folder [ 102300 ]](https://assets1.tamsnetwork.com/images/EC042017NF/102300s.jpg "Bone Folder [ 102300 ]")
![Take Your Pick [ 144107 ]](https://assets1.tamsnetwork.com/images/EC042017NF/144107s.jpg "Take Your Pick [ 144107 ]")

![Woven Textures 12" X 12" (30.5 X 30.5 Cm) Designer Series Paper [ 165560 ]](https://assets1.tamsnetwork.com/images/EC042017NF/165560s.jpg "Woven Textures 12\" X 12\" (30.5 X 30.5 Cm) Designer Series Paper [ 165560 ]")
![Early Espresso 8-1/2" X 11" Cardstock [ 119686 ]](https://assets1.tamsnetwork.com/images/EC042017NF/119686s.jpg "Early Espresso 8-1/2\" X 11\" Cardstock [ 119686 ]")
![Crumb Cake 8-1/2" X 11" Cardstock [ 120953 ]](https://assets1.tamsnetwork.com/images/EC042017NF/120953s.jpg "Crumb Cake 8-1/2\" X 11\" Cardstock [ 120953 ]")
![Adhesive Backed Textured Dots [ 163338 ]](https://assets1.tamsnetwork.com/images/EC042017NF/163338s.jpg "Adhesive Backed Textured Dots [ 163338 ]")