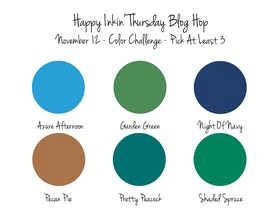
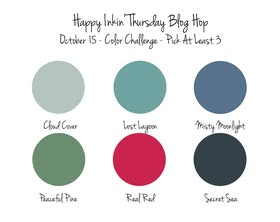
Welcome! We have a color challenge today for this fun hop. I like what I created but admit it was a challenge. I couldn’t figure out what I wanted to do 🥴
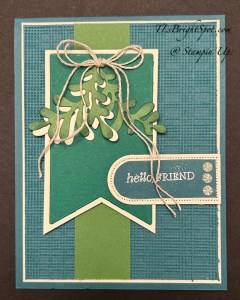
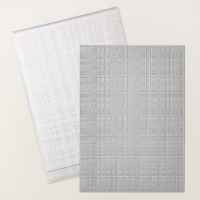
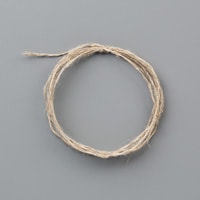
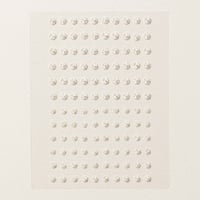
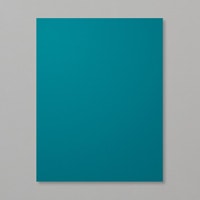
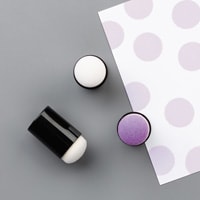
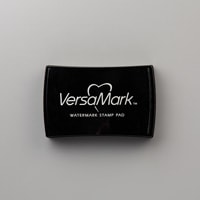
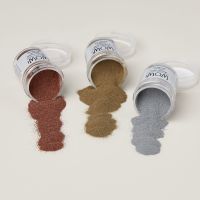
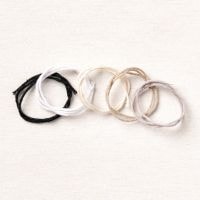
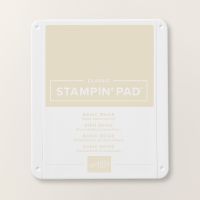
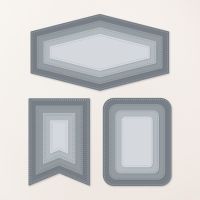
I chose to use Pretty Peacock for my card base 4 1/4 x 11 scored at 5 1/2. I then added Basic Beige 4 x 5 1/4 and an embossed layer of Pretty Peacock 3 7/8 x 5 1/8. The embossing folder used is the Softly Woven embossing folder. I added a Garden Green strip 1 1/8 x 5 1/8. I used the retiring Creative Haven dies to create the leaf die cuts & the banner: Basic Beige, Shaded Spruce & Garden Green. I addeds a bit of Shaded Spruce ink to the edges of the Garden Green leaves with a sponge dauber. They were attached with liquid adhesive directly to the banner with a double Linen Thread ribbon attached with a glue dot. The banner was added to the card front with dimensionals. I used the smallest of the ovals in the Arched Oval dies for the Basic Beige sentiment background. The Shaded Spruce sentiment piece I fussy cut. It was stamped with a sentiment from Delicate Whispers stamp set: VersaMark ink then sprinkled with WOW! Metallic embossing powder in silver & heat set. I added it to the Basic Beige die cut & attached this with dimensionals on the right end & liquid glue on the rounded edge. Final touch – three Pearl Adhesive-Backed Dots – a November ONLINE EXCLUSIVE.
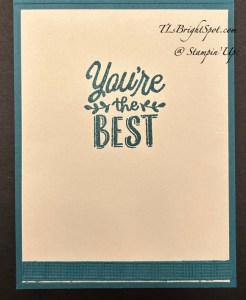
For the inside… I used the Creative Haven stamp set & Pretty Peacock ink to stamp the sentiment on a Basic Beige panel 4 x 5 1/4. I added an embossed strip at the bottom that was left over from the card front. And bingo – the card was complete. This could easily be a masculine card & I didn’t set out to make it that way! WooHoo! And there you have it.
To purchase the products to make this card – see below. Now – on with the hop. Click the ‘next’ button or click on a name to see what the others have created today.
Good sweet morning to all you folks out there! We have a blog hop today & I welcome you to see what everyone has created. We have a theme challenge today & I’m using a November ONLINE EXCLUSIVE set of products that you can order now. They are from a suite called Somewhere in Time.
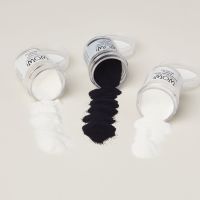
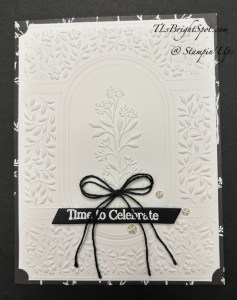
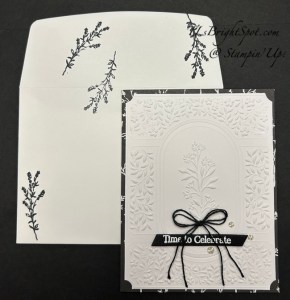
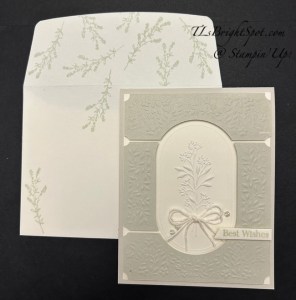
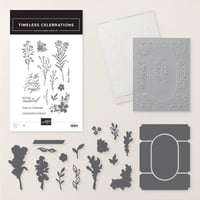
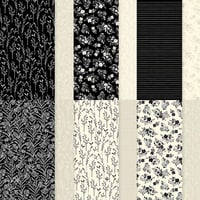
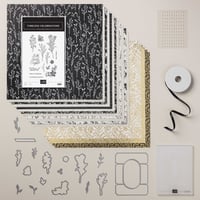
I have two cards for you today, made with the same bundle & hybrid embossing folder. The first is black & white – love the contrast. The DSP in the background is from the suite of products, Somewhere in Time DSP. It doesn’t show much. Here the Basic White panel is embossed & attached with dimensionals . I added the Baker’s Twine bow in black & three Adhesive-Backed Faceted Dots. The sentiment is heat embossed on black using the WOW! Basics embossing powder in white. The sentiment & the die for it come from this Timeless Celebrations set.
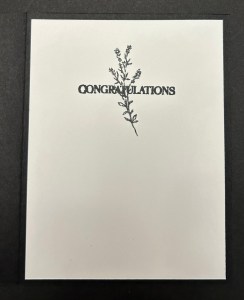
For the inside – on a Basic White panel I stamped the floral image in black, stamping off once, then overstamped the sentiment – again, both are from Timeless Celebrations – a new November ONLINE EXCLUSIVE.
For the envelope, I used the same floral stamp to stamp both the envelooe flap & the front in black ink
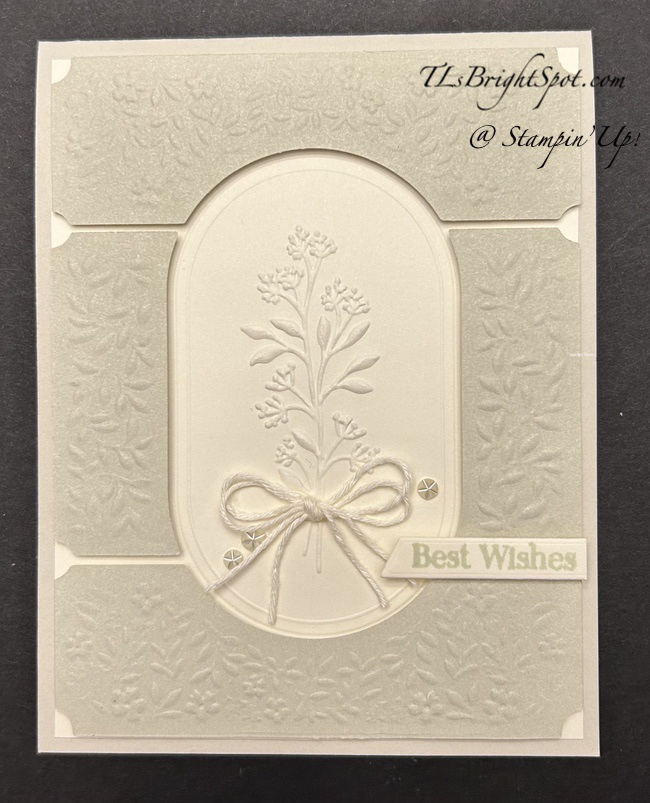
And here is the second card… the card base is Basic Beige, the next layer is Very vanilla embossed with the Timeless Celebrations Hybrid EF. The top layer is again Basic Beige & this time I used the Die to cut the embossed images, put them on dimensionals & attached. AS double Baker’s Twine bow & three Adhesive-Backed Faceted Dots. The sentiment is off-set, stamped in Basic Beige ink, cut with the same die as above, but trimmed one end.
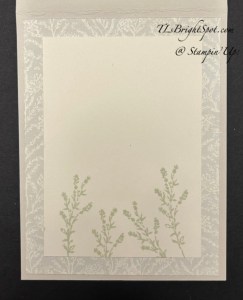
For the inside I added a background of the Somewhere In Time DSP (4 x 5 1/4) then a Very Vanilla panel (3 1/4 x 4 1/2) that I stamped in Basic Beige ink.
I sued the same stamp aas on the inside of the card & Basic Beige ink to stamp the flap & envelope front.
Both of these cards are so universal… congrats on any occasion – wedding, anniversary, birthday, baby. Love the versatility! You can purchase these products from me & others too – see below for how to do that.
Now – hop around to see what others have created for this challenge by clicking the links below.
See all the new items for the November ONLINE EXCLUSIVES, new kits available in the Kits Collection and from the Sep-Dec 2026 Catalog by viewing the SHOP WITH ME link! There is so much available!
Thanks for stopping by. May you have a beautiful day. Make someone happy by sending them a handmade card filled with ❤️
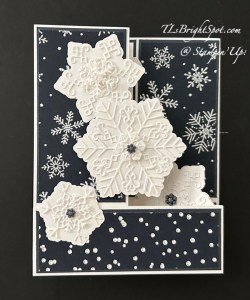
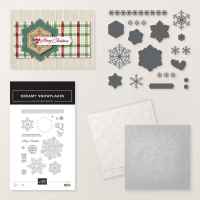
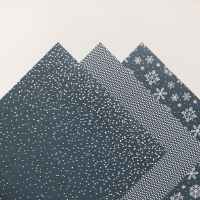
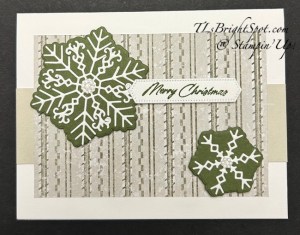
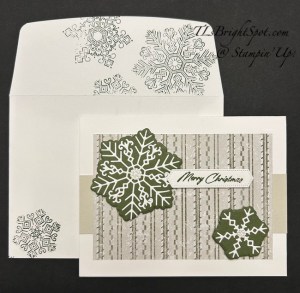
We have a theme challenge today… and I just realized I used t6he very same bundle last week for this hop – grrr. Well, I certainly used a totally different fun fold & Designer Series Paper 😀 This paper is called Winter Dreams & it is oerfect with the Dreamy Snowflakes bundle – and for this theme challenge.
This is such an easy fun fold to create & it really shows off the snowflakes & the paper. I die cut several snowflake backgrounds then added Adhesive Sheets to more Basic White paper and die cut the intricate pieces. I just did lots so I could choose what to use. 😁 I put a few together then I cut the card stock pieces. Here are those dimensions…
Measurements:
Card base: Thick Basic White – 8 1/2 x 5 1/2 scored at 2 1/8 & 4 i/4. The first score is a mountain and the 2nd score is a valley.
Layers:
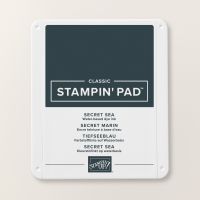
card stock – Secret Sea- (3) 2 x 3 7/8
DSP – Winter Dreams – (2) 1 7/8 x 3 3/4
Basic White – 1 7/8 x 3 3/4 for sentiment & stamping
The strip for the double Z is 8 1/2 x 1 1/2 scored at 4 1/4 & 2 1/8; scores are mountain, valley
Layers for the strip
card stock – Secret Sea – 4 1/8 x 1 3/8, (2) 2 x 1 3/8
DSP – Winter Dreams – 4 x 1 1/4, (2) 1 7/8 x 1 1/4
Here is the card put together. The largest snowflake is attached with dimensionals & the tiny snowflake on it also has a dimensional, a mini with an Adhesive-Backed Snowflake in the middle that is Secret Sea in color. The medium snowflake has a layer of delicate snowflake die cut with another layer of delicate snowflake on a dimensional & an Adhesive-Backed Snowflake in clear. The smaller snowflake that is on both the front & the strip has an intricate die cut with a small Adhesive-Backed Snowflake in Secret Sea.
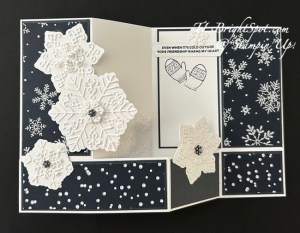
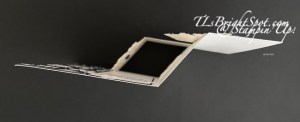
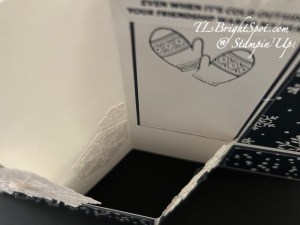
The photo on the left shows the full double z fold of the card – a view from the top. The photo at right shows how I added two snowflakes to the inner second section. I added them fairly low so the sender could write a message. On the 3rd section of the strip I added a medium snowflake then because it shows the back side when closing the card, I added another layer of the snowflake & added an Adhesive-Backed Snowflake to that – therefore, the same on both sides :O)
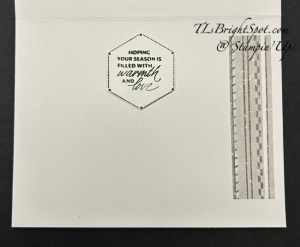
The Basic White sentiment panel has an added srip as the sentiment I wanted to use was longer that the width of the two panels – yes, live & learn! I love the mittens! Both the sentiment & the mittens are stamped in Secret Sea ink.I added another snowflake above the sentiment because it was available :o)
Time is running out for the join promotion… see below for more information! You can join any time, it’s just that sometimes it’s extra beneficial & that’s now – but it ends Oct 31!
More info below about ordering & other stuff. Make the rounds of those participating in this hop… click on the ‘next’ button or click on a name to make the rounds…
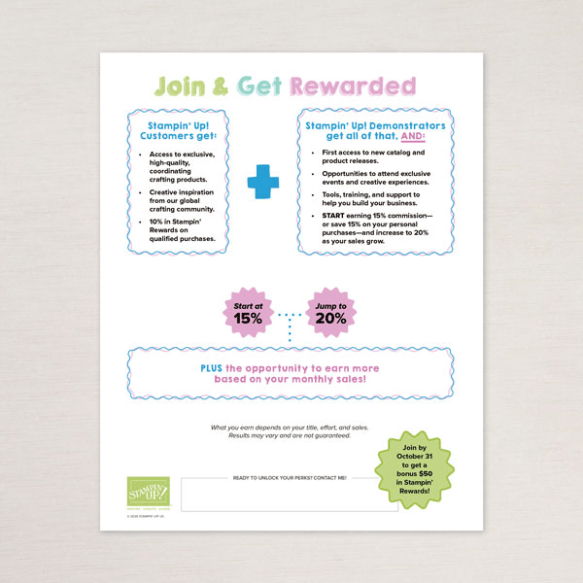
oin as a demonstrator in October for $100 USD | $135 CAD, they’ll get $50 USD | $70 CAD in Stampin’ Rewards along with a $125 USD | $170 CAD coupon code! Let me explain… When you join Stampin’ Up! – anytime– you’ll pay $100 plus tax to get signed up… Then – Stampin’ UP will send you a coupon code for $125 – which you can use toward whatever you want to purchase. There’s no limit and whatever is over and above the $125 will count towards your sales…AND you’ll get your discount on that amount as well Does that sound like a good deal or what???
When you join during this special offer (6 – 31 Oct) – you will ALSO get an EXTRA $50 in Stampin’ Rewards deposited immediately in your Stampin’ Up! account!! You can spend THOSE anytime within the first three months after you sign-up. Even better, right? if this is your first-time as a demonstrator – you’re ALSO going to receive a surprise Welcome Box right from Stampin’ UP!
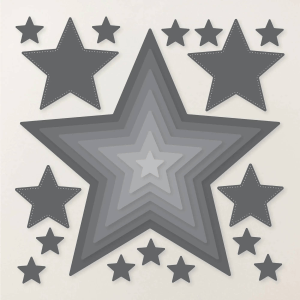
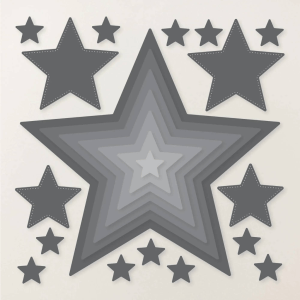
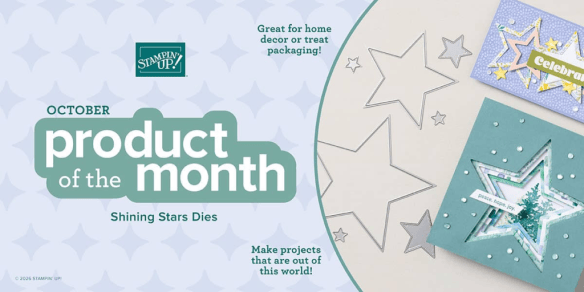
The Product of the Month is these awesome stars – 23 in all… $5 when placing a $75 order or more. This set is a STAR: 23 nesting star dies, from tiny twinkles to a big 5-1/4″ showstopper — perfect for layered star frames, shaker cards, treat packaging, ornaments, and “you’re a star” cards for every occasion, all year long.
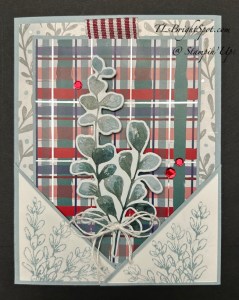
Fall turned into a hot summer day here on the East Coast & this weekend goes down to 35!!! What??? Our hop today is a color challenge & I’m playing with the All Wrapped Up Suite of products to make this fun fold.
Isn’t this just sweet? I love the colors! The All Wrapped UP 12 x 12 DSP is a one-sided paper that has metallic lines through it making it a strong heavier paper. The coordinating bundle that I used here is Wrapped Greenery and the die cut on the front is straight from the DSP. 😀
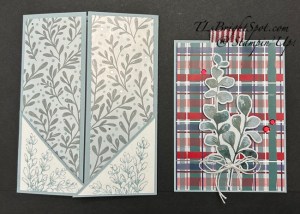
How to make this fun fold: The card base is 8 1/2 x 5. 1/2 scored at 2 1/8 with the long side at the top. (I used Cloud Cover.) To make sure they meet in the middle I simply take the opposite side and fold it over to meet the other panel. Cut four pieces of DSP (All Wrapped Up 12 x 12) 1 7/8 x 5 1/4 – 2 coordinating patterns – one set for the front & one set for the inside. Add these to your card. Cut a 2 1/2 square using same color as your card base then trim it diagonally, point to point. Cut a Basic White 2 1/4 square and cut it on the diagonal as well.
With the card closed, add the Cloud Cover diagonals to their respective sides, adding liquid glue to the card base at the edges (left & bottom; right & bottom. Set aside to dry making certain these are quite secure. Remember the long side in the middle is free of adhesive! Stamp the Basic White diagonal pieces and attach.
In the photo above, the insert – the plaid piece – is what keeps this gatefold closed securely, slipping it into the ‘pockets’ created by the diagonal pieces. The base is 3 3/8 x 4 5/8 (Cloud Cover) with a layer of DSP 3 1/4 x 4 1/2. Prior to adhering them together, I cut a length of Striped Grosgrain Ribbon about 3″, folded it in half and attached it to the inside of the Cloud Cover, then added the DSP layer. In lieu of a sentiment on the front, I die cut from one of the papers. in the All Wrapped Up DSP pack this wonderful image, added dimensionals to some of the leaves and liquid glue to the bottom and attached it to the plaid front. I used Baker’s Twine in White to tie a double bow & attached it with a glue dot. I also added three Adhesive-Backed Sparkle Sequins in Red
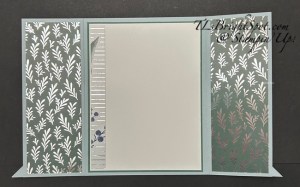
On the inside, Add a piece of Peaceful Pine 4 x 5 1/4 to the center. Add a Basic White 3 3/4 x 5 to this. Add a 1/2 x 5 strip of coordinating DSP to the side. Stamp a sentiment if desired. I left this card blank intentionally, but it could be a birthday card, a Christmas card or thinking of you – even a masculine card!
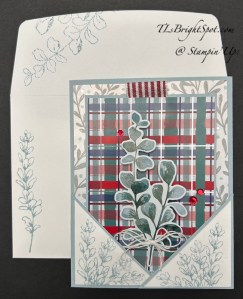
For the envelope I used two different stamps in the Wrapped Greenery stamp set to stamp images on the envelope front and the flap – using Cloud Cover ink.
To order the products to make this card… see the listings below. And please consider becoming a Stampin’ Up! Demonstrator. Right now, through the end of October, Stampin’ Up! has a joining promotion that is pretty awesome. See below for more details.
Now – take a spin around the folks participating in this hop today – click on the next button or click on a name. Have fun seeing the creative talent of this team!
Join as a demonstrator in October for $100 USD | $135 CAD, they’ll get $50 USD | $70 CAD in Stampin’ Rewards along with a $125 USD | $170 CAD coupon code! Let me explain… When you join Stampin’ Up! – anytime– you’ll pay $100 plus tax to get signed up… Then – Stampin’ UP will send you a coupon code for $125 – which you can use toward whatever you want to purchase. There’s no limit and whatever is over and above the $125 will count towards your sales…AND you’ll get your discount on that amount as well Does that sound like a good deal or what???
When you join during this special offer (6 – 31 Oct) – you will ALSO get an EXTRA $50 in Stampin’ Rewards deposited immediately in your Stampin’ Up! account!! You can spend THOSE anytime within the first three months after you sign-up. Even better, right? if this is your first-time as a demonstrator – you’re ALSO going to receive a surprise Welcome Box right from Stampin’ UP!
The Product of the Month is these awesome stars – 23 in all… $5 when placing a $75 order or more. This set is a STAR: 23 nesting star dies, from tiny twinkles to a big 5-1/4″ showstopper — perfect for layered star frames, shaker cards, treat packaging, ornaments, and “you’re a star” cards for every occasion, all year long.
Good morning, good morning & happy Thursday! We have cooler temps these days on the Jersey Shore and the treews are beginning to turn, some a yellow, some a gorgeous tinge of red and some orange. This time of year always fascinates me. Our hummingbirds have left for the season too – just prior to the Nor’easter that blew through. What’s going on in your part of the world?
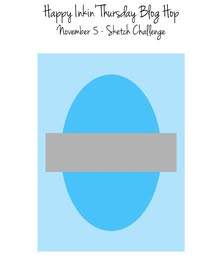
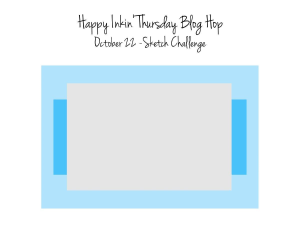
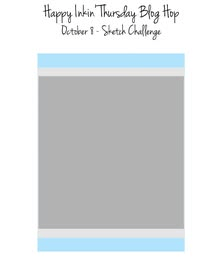
On with the hop! Thanks for stopping in. The sketch below indicates Oct 1, but it really is for Oct 8!
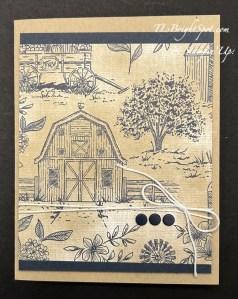
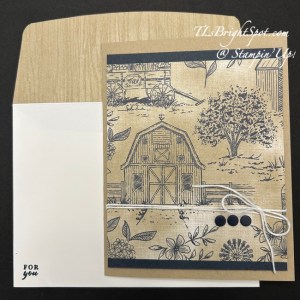
I began with a Crumb Cake card base and a Country Cottage DSP cut 4 x 4 1/2 layered on Secret Sea 4 x 5. I wrapped around the white Baker’s Twine (from the Essential pack) & tied a bow, securing this in place with a glue dot. I added the Secret Sea & DSP layer with dimensionals and attached it to the card base. I then added three Natural Mat Dots in Secret Sea.
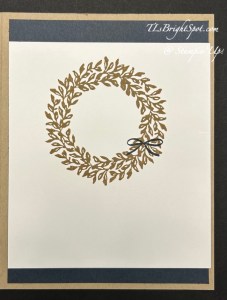
For the inside… I stamped this beautiful wreath from Cottage Kindness stamp set in Crumb Cake ink (and YES _ this has a coordinating die!!!) The sweet bow is also from Cottage Kindness stamp set & is stamped in Secret Sea ink. The Basic White panel is 4 x 4 1/2 and the Secret Sea layer is 4 x 5 1/4. The Cottage Kindness bundle are part of the November ONLINE EXCLUSIVES that will be available Nov 3. Gorgeous set! Gorgeous Suite of products!
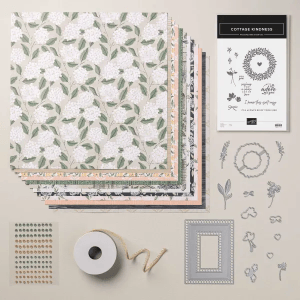
For the envelope… more of the Country Cottage 12 x 12 DSP on the flap & trimmed to fit. I needed a masculine kind of card and this works so well! I stamped the sentiment ‘for you’ on the envelope front in Secret Sea ink and it too is from the Cottage Kindness set. Below is an image of the suite.
There’s more info below in how to be able to order early and get discounts & be part of a very fun group of folks – such as JOIN MY TEAM. See below the list of name for all that info.
Now – on with the hop… click on a name or click the ‘next’ button – don’t miss a single entry!
Join as a demonstrator in October for $100 USD | $135 CAD, they’ll get $50 USD | $70 CAD in Stampin’ Rewards along with a $125 USD | $170 CAD coupon code! Let me explain… When you join Stampin’ Up! – anytime– you’ll pay $100 plus tax to get signed up… Then – Stampin’ UP will send you a coupon code for $125 – which you can use toward whatever you want to purchase. There’s no limit and whatever is over and above the $125 will count towards your sales…AND you’ll get your discount on that amount as well Does that sound like a good deal or what???
When you join during this special offer (6 – 31 Oct) – you will ALSO get an EXTRA $50 in Stampin’ Rewards deposited immediately in your Stampin’ Up! account!! You can spend THOSE anytime within the first three months after you sign-up. Even better, right? if this is your first-time as a demonstrator – you’re ALSO going to receive a surprise Welcome Box right from Stampin’ UP!
The new PRODUCT OF THE MONTH (better known as POTM) is a 23 package set of STAR DIES – they are incredible… your order must be $75 prior to shipping & taxes & this item can be added to your order for just $5 – while supplies last!
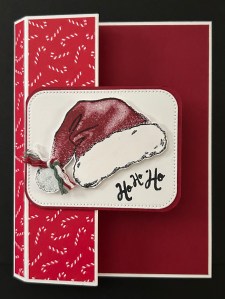
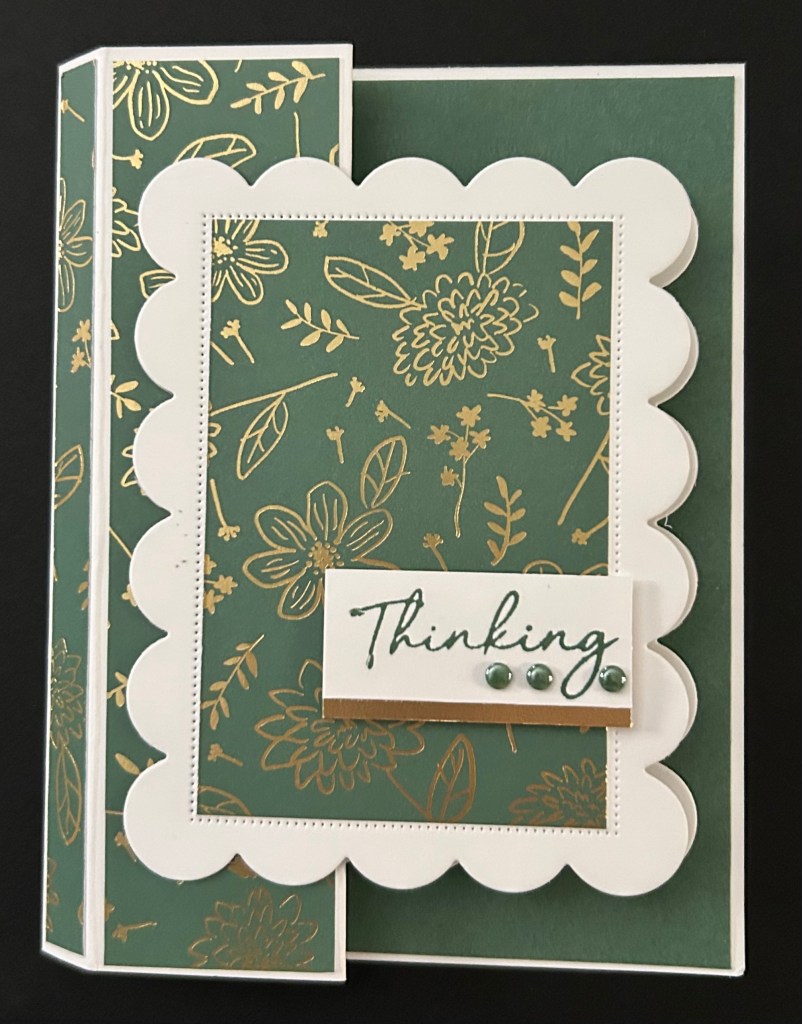
Good morning all you peeps! We have a theme challenge today – Christmas – and I’m using Santa’s Hat in a new for me fun fold (super easy too.) If you’ve come from Tara’s page, thank you for stopping by. If you hopped right in here – it’s good to have you. Be sure you make the rounds to see what everyone has created.
Dimensions & instructions:
Card base is Thick Basic White – 8 ½ x 5 ½ scored ¼, 1 ¾, 2 ¼, 3 ¾, 4 ¼ Burnish well.
DSP is A Stitched Season – 3 ½ x 5 3/8 then cut in this order – 3/8, 1 3/8, 3/8, 1 3/8
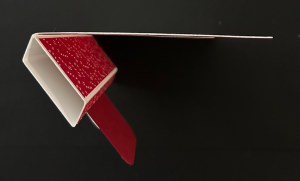
Attach DSP to scored areas, then add adhesive to smallest score, fold in @ 4 ¼ fold & close card. The box is now created. 😀
Add coordinating card stock to right side 4 1/8 x 5 3/8. Here I used Cherry Cobbler.
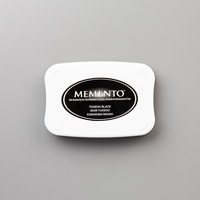
Decorate card front: For this card I used the largest rectangle in the Nested Essentials Dies w/ a Cherry Cobbler card stock layer behind it. I rounded the corners, stamped the sentiment in Memento ink & attached to the card front with dimensionals just on the left side. I stamped Santa’s hat outline in Memento ink, stamped the hat in Cherry Cobbler, then used Wink of Stella on the ball & brim and sprinkled this with White embossing powder before it dried & heat set. This added a really fun element to the hat! I fussy cut the hat & attached with more dimensionals. I cut a short length of the Christmas Baker’s Twine, tied a half knot and attached this with a glue dot.
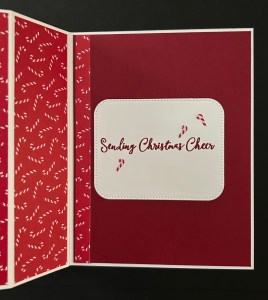
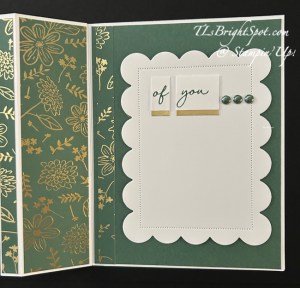
For the inside… another largest rectangle die cut from Nested Essential Dies in Basic White, stamped the sentiment in Cherry Cobbler, added candy canes from the Christmas Epoxy Shapes & attached this to the inside of the card, making certain it is ‘covered’ by the same die on the card front.
Here’s what the card looks like from the top.
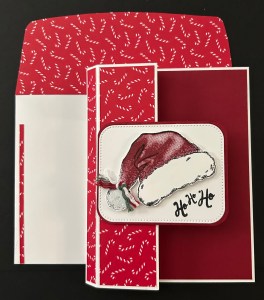
For the envelope… more of the same DSP attached to the flap & trimmed to fit. A very thin strip of the same DSP was added on the left side.
An additional card, same layout… just had to share so you can see how easy it is to ‘change things up’!
See below the list of names how to purchase the products to make Santa’s Hat. If you have questions, please reach out. Beginning Oct. 6 Stampin’ Up! has a joining promotion – I would enjoy having you join my team!
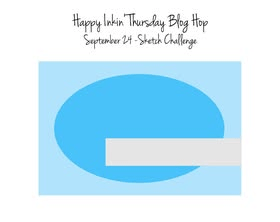
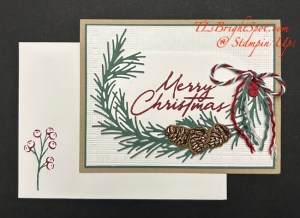
Good Thursday & WELCOME to our hop! It’s definitely fall here on the East Coast & here I have a Christmas card – the time moves on rapidly… If you’ve joined me from the fabulous Tara, I’m glad you linked in. If you jumped right in here first, thank you – be sure you see the other wonderful creations for this hop. We have a sketch challenge today and mine is a bit of a stretch, but here ya go..
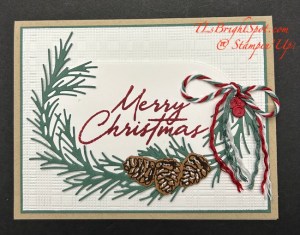
You will notice, this card doesn’t ‘perfectly fit’ the sketch, but I’m claiming it as is! My card base is Crumb Cake with alayer of Peaceful Pine 1/4″ smaller than the A2 card front and Basic. White, embossed with the Softly Woven 3D embossing folder.
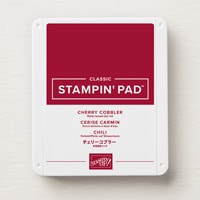
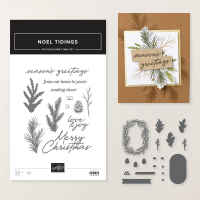
I die cut several items from the Noel Tidings Dies: the oval in Basic White, the pine boughs in Peaceful Pine, the acorns stamped in Early Espresso on Pecan Pie and berries in Cherry Cobbler. I stamped the sentiment in Cherry Cobbler then cut apart the pine boughs & adhered just portions of them to the edge of the oval. I tied a bow using the Multipack Christmas Baker’s Twine then untwirled the ends to give it more freedom. I then added the berries with dabs of liquid glue and a trimmed black dimensional on the last berry. The pinecones are donesimilarly – 2 adhered with liquid glue and the center on a black dimensional. The oval was added to the card front with dimensionals. All images are from the Noel Tidings bundle.
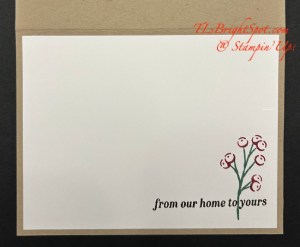
For the inside… I stamped the berry stem in Peaceful Pine ink then the berries in Cherry Cobbler on a Basic White 5 14 x 4 panel. The sentiment is stamped in Early Espresso. Everything comes from the Noel Tidings stamp set.
For the envelope… I recreated the berry stem same as the inside of the card: Peaceful Pine and Cherry Cobbler inks. On the flap is another piece of Basic White run through the Softly Woven 3D embossing folder, attached & trimmed to fit.
I love making cards, especially Christmas Cards. It just makes my heart sing. Maybe it’s the reconnection with folks I haven’t been in contact with for a bit. At any rate – it’s me. If you like what you see, let me know. There’s info below in how to shop with me.
Take a gander at the other creative ideas by teammates – click the link below to get you there. Enjoy the hop!
The November ONLINE EXCLUSIVES are going to be available pretty soon – and as a demonstrator I was able to order some fun new items. Stay tuned as I’ll be showing them off pretty soon. Want to be a demonstrator? Have you considered it? If so, connect with me & I’ll share information on how to JOIN MY TEAM 👍 See below for the list of products to make this card or SHOP WITH ME HERE to see ALL the items Stampin’ has available – new kits, ONLINE EXCLUSIVES, LOTS!
Thanks for stopping by. May you have a beautiful day. Make someone happy by sending them a handmade card filled with ❤️
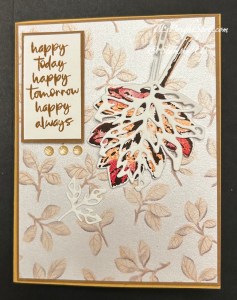
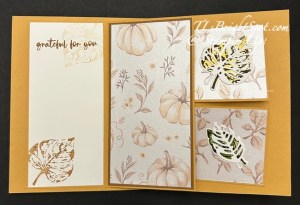
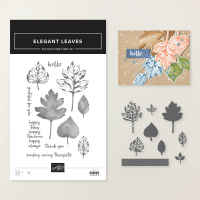
If you have joined me from the incredible Tara – welcome. If you’re just hopping in – great! Welcome to our fabulous hop! And how about the NEW Sep-Dec 2026 Catalog – pretty cool, right? What’s your favorite – or should I ask your ten (10) favorites? I would love to know. Today’s card shows one of my favorites.. the Elegant Leaves bundle. The delicate dies for the leaves are truly special.
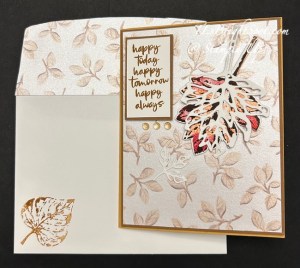
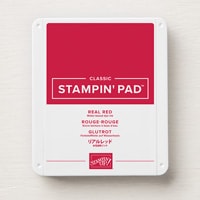
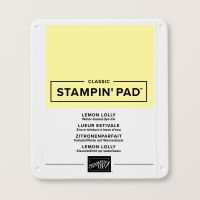
Where to begin??? I’ll begin with the stamps & dies – then move to the ‘how to’ of this fun fold. The above big leaf – I’m calling it a maple leaf – I inked the solid stamp with Timid Tiger, stamped it off, then added Real Red in various places with a sponge dauber and stamped this on Basic White. I then stamped the detail stamp in Early Espresso. I die cut the detail dies of this leaf from Basic White and attached it in various spots with dabs of liquid glue. I put dimensionals on the back & set it aside. I then proceeded to stamp several of the other leaves “just to have, in case’. They are… Lemon Lolly & Old Olive with the detail stamp being Early Espresso. I die cut each along with the detail die of each leaf – and that from Basic White. I adhered each of the intricate die cuts to the same leaf with liquid glue and set them aside. There is an additional very small detail leaf die on the card front that is nearly impossible to see – cut from Basic White – it’s there.
The sentiment for the front comes from the Elegant Leaves stamp set and is stamped in Pecan Pie ink on Basic White, then added to a Pecan Pie panel just 1/8″ larger I put dimensionals on the back & set it aside as well.
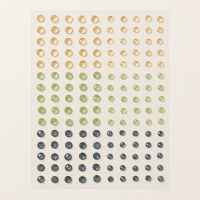
The card front… Pecan Pie 4 1/8 x 5 3/8 with a layer of the Glow of Harvest DSP 4 x 5 1/4 from the August POTM (product of the month). I added the maple leaf & the sentiment with the already attached dimensionals; the smallest leaf die cut is attached with liquid glue. I also added three embellishments of Radiant Gems. I set this aside to prepare the rest of the card & fun fold.
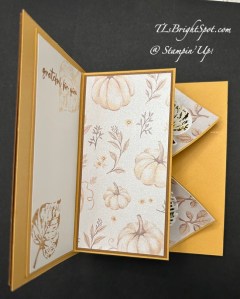
The Pop-Out Fun Fold directions… and then I’ll tell more about the ‘decorative parts’ of the card.
Card base: 8 1/2 x 5 1/2 scored @ 4 1/4. For this card – Golden Glow
Inside layer: 5 1/4 x 5 1/4 scored @ 2 1/2 – Golden Glow. Layers for this on the inside… left – Basic White for stamping 2 1/4 x 5; right – DSP 2 1/4 x 5 (I added an additional layer of card stock 2 3/8 x 5 1/8 in Pecan Pie)
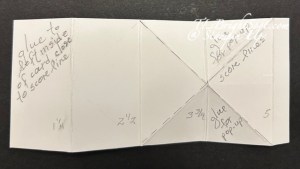
Pop-Up mechanism: 2 3/8 x 5 3/8 scored @ 1 1/4, 2 1/2, 3 3/4 & 5 Burnish well mountain, mountain, valley, valley. Make cross score lines creating an ‘x’ between score lines 2 1/2 & 5 & burnish well.
Pop-Out Squares: 2 3/8 x 2 3/8 (2) mine are Golden Glow card stock.
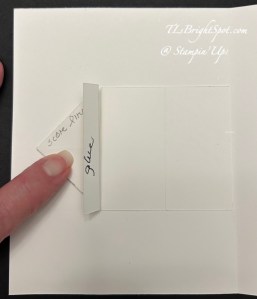
Attach the left end of the mechanism to the left inside of the card base, close to but not touching the center score, centering it top to bottom. See photo below.
Fold mechanism flat with small tab facing up. Add glue to tab & close right side of card over this. Rub well to secure.
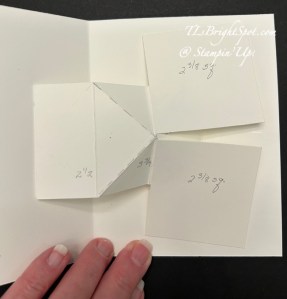
Attach the two 2 3/8″ squares to the mechanism, these will be the pop-ups. Refer to the mechanism photo for proper glue area.
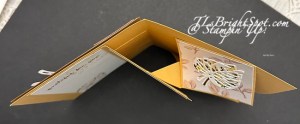
See the area in the photo above with the triangle & rectangle? Add adhesive to this and align the INSIDE LAYER – the right back side so the score line is close to the area where the glue is. Close the card, press firmly and allow glue to adhere well. Open & close the card several times to make certain it does so smoothly. Now add glue to the left side of the INSIDE LAYER and close card, rubbing to attach well. Now everything is secure.
Finish the card front by attaching the panels in place.
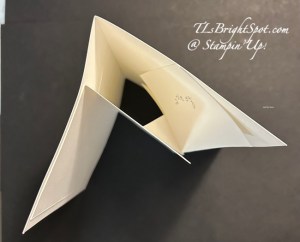
From the top, the card should look like this… remember, this is a template!
Below is my finished inside of the card… Glow of Harvest DSP on the squares are 2 1/4 x 2 14. The leaves on the squares (the pop-ups) are stamped in Lemon Lolly & Early Espresso for the top leaf, Old Olive and Early Espresso for the bottom leaf. The die cuts are Basic White – everything on these squares is added with liquid glue. The sentiment panel on the Basic White Inside Layer is Pecan Pie ink. The leaf is stamped off once.
The envelope… more of the Glow of Harvest DSP on the fl;ap & trimmed to fit. On the front is a leaf from the Elegant Leaves stamp set, stamped in Early Espresso after stamping off once – and… done!
Want to see more fall cards – treasures for sure. Click the next button or click on a name.
You may find all the items to make this card in my shop & below is a list. Order these – and more from me soon!
Good morning, good morning! We have a fun sketch challenge today and i’m so glad you have joined us! You may have come from the fabulous Tara or hopped right in nhere. Haowever you arrived, I hope you’ll check out what everyone has created.
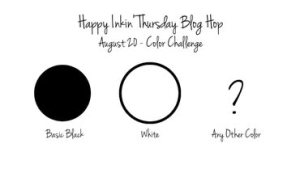
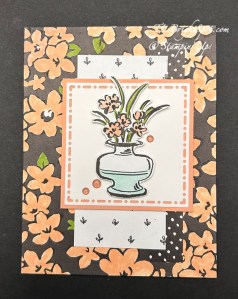
Our challenge today, as you can see is to create using Black & White plus one other color. I chose to work with Crisp Cantaloupe for this card & the wonderful Artisan Sketched Garden DSP from the May-Aug Catalog. The other big item is the NEW Tile Garden bundle from the Stampin’ Up! Sep-Dec 2026 Catalog that goes live Sep. 1! The dies in this bundle are all squares and haqve the same pattern as the Spotlight on Nature Dies, which are circles. Very cool!
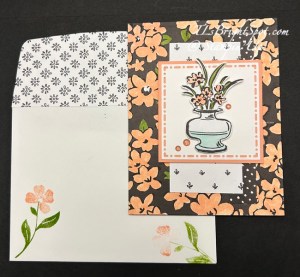
The Artisan Sketched Garden DSP is all black & white – the whole package of papers. And of course it can be used as is – or colored. As you can see, I colored the main front panel using the Crisp Cantaloup Shimmer brush. While the shiny doesn’t show in the photo, it does in real life. 😀 After coloring I added this to a Basic Black 4 1/4 x 11 scored at 5 1/2. To that I added a 3/4 x 4 3/4 polka dot strip to the much more white panel 2 x 4 1/4, & attached those to the card front. Next I die cut the white piece using the NEW Tile Garden Dies & added a Crisp Cantaloupe behind it 2 7/8 x 2 7/8. These were added to the card front with dimensionals. I already had this vase of flowers sitting on my desk that I had fussy cut after coloring with Stampin’ Blends: Crisp Cantaloup. Granny Apple Green & Pool Party. I added this to the front again with dimensionals then three Glossy Garden Dots (also from the new Sep-Dec 2026 catalog.)
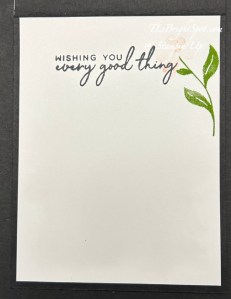
For the inside of the card I used the NEW Tile Garden stamp set for the sentiment (stamped in Memento ink) and the floral image (stamped in Granny Apple Green and Crisp Cantaloupe (this one stamped off once) This is such a sweet delicate flower. I’m loving the images in this set.
The envelope… more of the Tile Garden stamp set used on the front, stamping the leaves min Granny Apple Green and the flowers in stamped off Crisp Cantaloupe. The flap has yet another panel of the Artisan Sketched Garden DSP adhered & trimmed to fit.
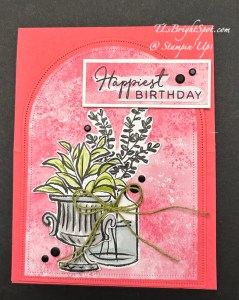
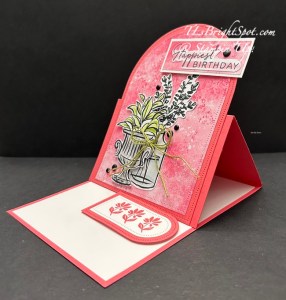
I made another card while I was at it – this time making an easel card with Strawberry Slush, the Everyday Arches Dies, Tile Garden stamp set for the sentiment and tiny flowers, more Artisan Sketched Garden DSP (for the black & white plus theme) and a couple of retired products 🥴 The point is, products can coordinate! It’s the Stampin’ Up! way!!!
Speaking of the Stampin’ Up! way – right now, today & tomorrow, Stampin’ Up! is offering DOUBLE REWARDS when making your purchases – the 19th-21st of August, 2026. See more information about that below.
Click the link below to see what others on the team have created!
Earn double Stampin’ Rewards (2x Rewards) for 3 days only, starting August 19 and ending August 21. That means 20% instead of the standard 10%! All orders qualify once the Stampin’ Rewards threshold of $20 USD | $25 CAD is met. Some exclusions apply. View the Stampin’ Rewards page to learn more.
This offer applies to ALL commissionable products! (Excludes existing Paper Pumpkin subscriptions.)
To participate, customers must have a Stampin’ Up! account and be opted in to the Stampin’ Rewards program. Encourage them to complete these steps before the offer begins.