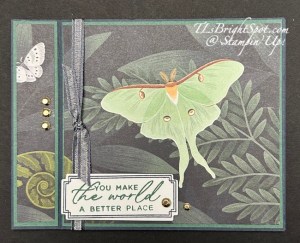
Good morning, good morning. The Moonlit Flora DSP has been super popular & I’m using it today to make a book fold card. That luna moth is in it’s glory & the focal point for this card.
Layer: Peaceful Pine 7/8 x 4 1/8; 4 3/8 x 4 1/8; inside 4 3/8 x 4 1/8
DSP: Moonlit Flora 3/4 x 4; 4 1/4 x 4; inside – 4 1/4 x 4 1/8; flap – 2 1/4 x 6
Basic White: inside – 4 1/4 x 4
When cutting the DSP, it’s helpful to have the ‘scene’ go all the way across., therefore the initial cut of the DSP should be 5 x 4, then trim left end to 3/4 leaving 4 1/4 for the right side. I added the 1/4″ Satin Ribbon in Secret Sea & Gold (available Sep to customers!) for focus and prior to adding the inside layer of DSP. The sentiment is from the Fern & Flora stamp set with the border in Secret Sea & the sentiment in Peaceful Pine. It was die cut with the coordinating Fern & Flora Dies and added with dimensionals. The extra elements are the Adhesive-backed Metallic Gems in gold – and there are five of them.
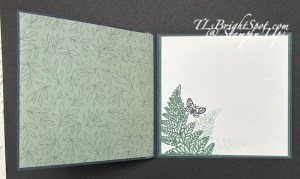
The inside… DSP on the left is from Moonlit Flora & just adds a nice touch to this card. On the right, the Basic White panel is with the fern leaf three times without re-inking – in Peaceful Pine. The butterfly is stamped in Secret Sea. Both are from the Fern & Flora stamp set.
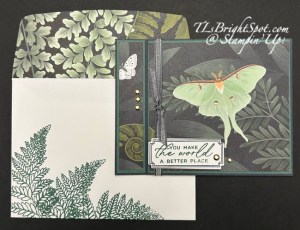
For the envelope… more Moonlit Flora DSP on the flap & trimmed to fit. The stamping on the front is in Peaceful Pine – the same fern stamp as on the inside, but this time re-inked each time before stamping again.
These products are all from the May-Aug 2026 Catalog (except for the ribbon).
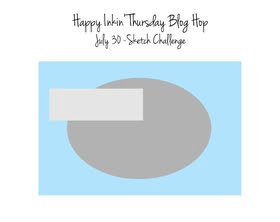
Welcome to Thursday & the wonderful Happy Inkin’ Thursday Blog Hop! If you hopped right in, hello, hello. If you’ve joined me after visiting Tara, I’m glad you are making the rounds. We have a sketch challenge today and I had everything planned as to what I wanted to share… then my pre-order for the 2026 Sep-Dec Catalog arrived on my doorstep. 😀 I simply could not wait to share. This Designer Series Paper – the Sunflower Fields 12 x 12 is stunning… I love every piece, both front & back.
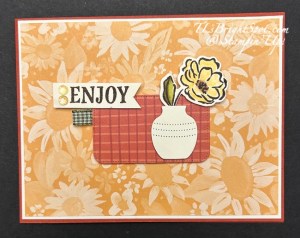
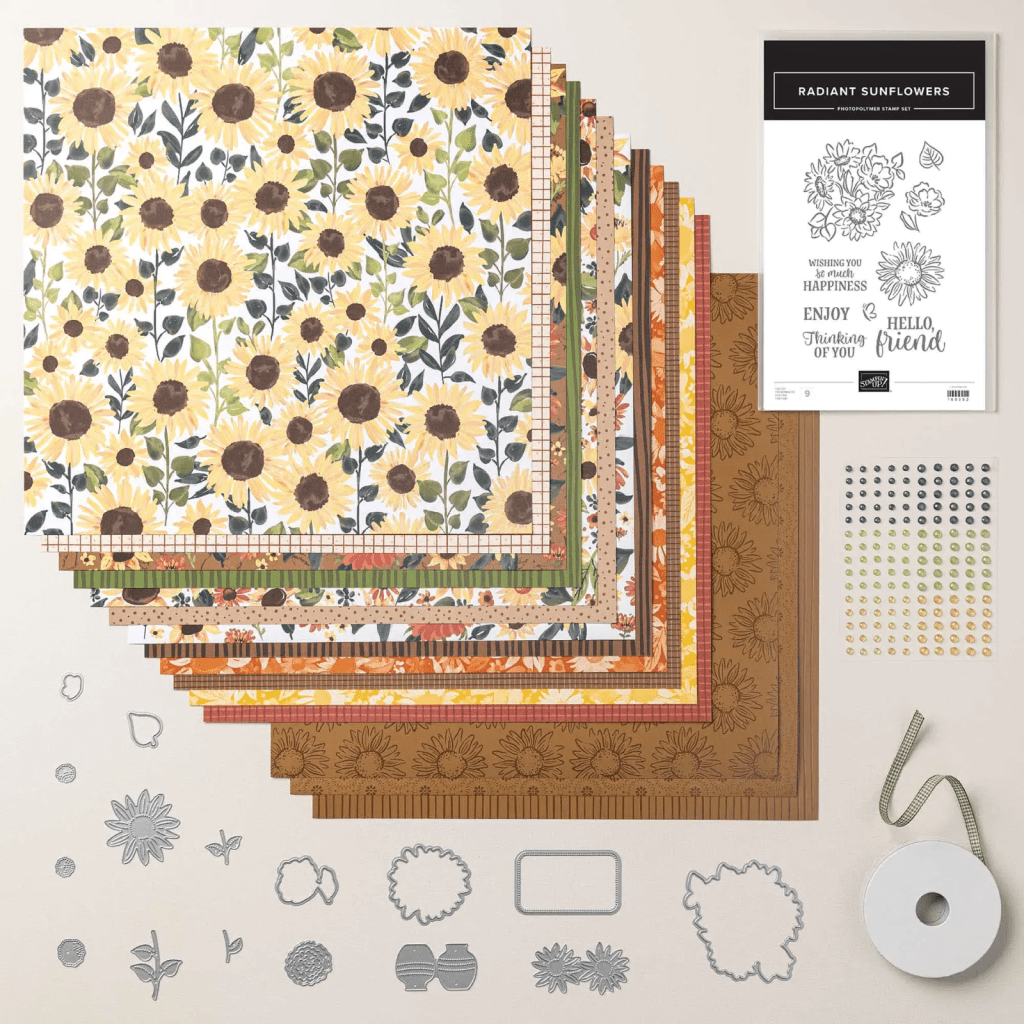
The card base is Cajun Craze with a layer of Very Vanilla then a layer of one of one the papers in the pack. Next I turned the paper over & using a die in the Radiant Sunflowers Dies, cut the rectangle. On a scrap of Very Vanilla I die cut the vase using the Radiant Sunflower Dies then stamped the flower using the coordinating Radiant Sunflowers stamp set. I colored the flower with Old Olive Stampin’ Blends on the leaf and the Shimmer brush in Golden Glow on the flower. The vase & flower were lightly attached to the rectangle with dimensionals and the rectangle was added to the card front with dimensionals. I stamped the sentiment on a scrap of Very Vanilla in Early Espresso ink using the same Radiant Sunflowers stamp set, cut a banner end and attached it with dimensionals. I slipped a Gingham Ribbon to bring out the green on the leaves, then added Radiant Gems to the sentiment. Everything from the Sunflower Fields Suite in the new 2026 Sep-Dec Catalog – items available beginning of Sep. Stay tuned!
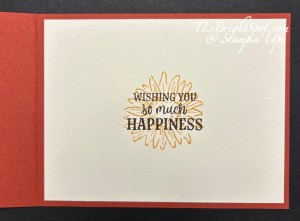
For the inside… On a Very Vanilla panel I stamped the sunflower in Golden Glow then the sentiment over it in Early Espresso.
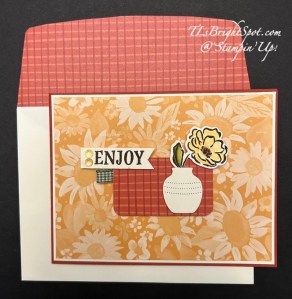
For the envelope – more of the Sunflower Fields 12×12 on the flap and another sunflower stamped on the front in Golden Glow. What a gorgeous suite of products! You are going to love it!
Want to be able to order early, have some fringe benefits to being a Demonstrator? See information below in how to JOIN MY TEAM. Now.. on with the hop. Let’s see what Amy has to share today – and all the others too. Amy is next on the sequence though 😀 Click on the next button or… click on a name.
Below is an image of the suite, Radiant Sunflowers. Gorgeous papers – did I mention that already??? 👍 Want to be able to pre-order ONLINE EXCLUSIVES, or from the newest catalog, or attend SU! conventions? These are amazing opportunities to learn more, create more, meet more folks who are encouraging and sharing their ideas & designs. Feel free to connect with me about JOINING MY TEAM – click the link to learn more.
Want to just shop… you can do that too… same link will allow you to see all the goodies Stampin’ Up! has to offer – do that here When shopping with me and when your order is $50 & up, you will receive the monthly tutorial – for July it is all about Fern & Flora. There are other benefits too – see my page for more info.
Stamp. Create. Share. Make a difference in someones life. Send a card filled with ❤️
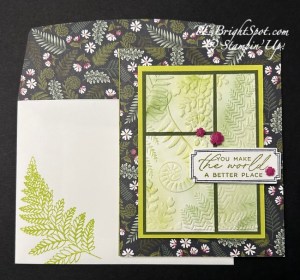
Good Saturday! I’m sharing a pretty card using the Moonlit Flora 12 x 12 DSP as the background and the Fern & Flora 3D embossing folder as thew focal point. It’s a wuick card to put together and this layout is one that can be used with just about any designer series paper.
The card base is Old Olive with a layer of the Moonlit Flora covering the entire front. I embossed a Basic White panel using the Fern & Flora 3D ef, then used various shades of green and Blending Brushes to add color to it: Lemon Lime Twist, Granny Apple Green and Old Olive. I then cut the panels: 1 3/4 x 1 1/2; 1 3/4 x 2 1/2; 1 x 2 1/2 & 1 x 1 1/2. These were adhered to a Mossy Meadow panel3 x 4 1/4 then a Granny Apple Green 3 1/4 x 4 1/2. This was added to the front with dimensionals. For the sentiment, I stamped the banner border in Secret Sea then the sentiment in Old Olive – both from the Fern & Flora stamp set. I die cut the banner using the Fern & Flora Dies. This was added, also with dimensionals then the super fun Dreamy Flowers for embellishment – Berry Burst in color.
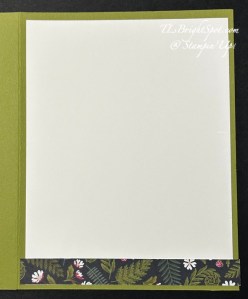
For the inside… simple Basic White panel 4 x 5 1/4 with a strip of the Moonlit Flora DSP at the bottom.
For the envelope, more of the Moonlit Flora DSP on the flap, trimmed to fit & a beautiful stamped fern on the front: Fern & Flora stamp set + Granny Apple Green ink. Someone is going to love receiving this card!
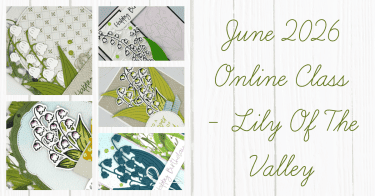
Want to purchase the products to make this lovely? See the info below for how to do that.When purchasing from me… And don’t forget all the benefits of being a demonstrator or ordering from me… When ordering from me, you get Daisy Patch Rewards for every order. (See my REWARDS PAGE for details) and with those points comes an opportunity for a FREE STAMP SET or items valued up to $40. You will also receive the monthly online tutorial – which this month uses this fabulous Lily of the Valley suite of products.
Want to JOIN MY TEAM and become a part of this fun crafty group? Lots of benefits there too. JOIN WITH ME HERE
Thanks for stopping by – may you have a beautiful day! Make someone happy by sending them a handmade card filled with ❤️
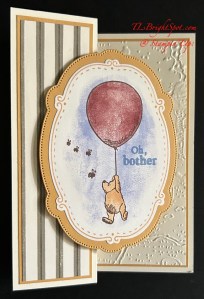
Good morning, good morning! It is a bleak looking day here today – cloudy, overcast, 55 degrees. Of course 2 days ago it was 94! We made this card two weeks ago in card class & I forgot to post it 😖. It is so cute… Silly Old Bear DSP, Hundred Acre Woods embossing Folder & coordinating Sweet Words & Lab els bundle. These are all from the May ONLINE EXCLUSIVES.
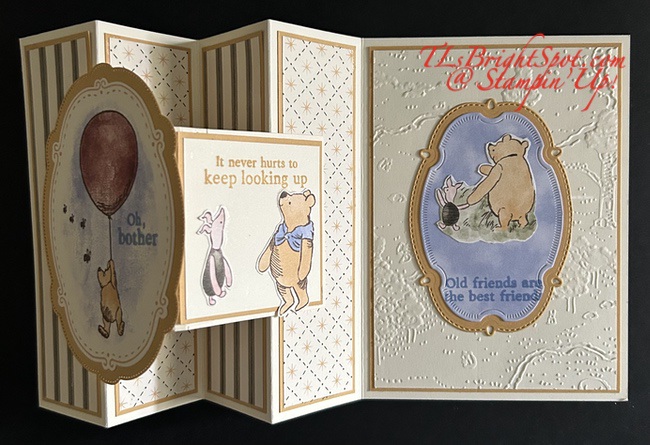
I used the dies from Sweet Words & Labels to die cut this image straight from the Silly Old Bear DSP. The layer behind the DSP is Golden Glow card stock, one of the new In Colors for 2026-2028. I used Wink of Stella on the Balloon & Hydrangea Hue for stamping the sentiment from Sweet Words & Labels stamp set. Let’s look at the inside of the card so you can see the whole image.
The DSP layers here are all from the Silly Old Bear DSP – gorgeous aren’t they? And the card stock layers are Golden Glow. The card base is Very Vanilla and the embossed panel is also Very Vanilla, embossed with Hundred Acre Woods 3D embossing Folder as I mentioned earlier. The images for the V panel were fussy cut from the Silly Old Bear DSP & stamped with the Sweet Words & Labels stamp set: either Golden Glow or Hydrangea Hue.
Directions for a W/V fun fold:
The card base is 11 x 5 1/2 scored on the long side @ 1 3/4, 3 1/2, 5 1/4, & 7
Card stock layers 1 1/2 x 5 1/4 – cut 4; 3 3/4 x 5 1/4 + embossed panel 3 5/8 x 5 1/8
DSP layers 1 3/8 x 5 1/8 – cut 4, 2 different patterns
Die cut images from Silly Old Bear DSP using the Sweet Words & Labels Dies; die cut card stock layer for behind each image with next size larger die
Embossed the largest panel for the inside back – Hundred Acre Woods EF
Adhere Layers together & attach to card base
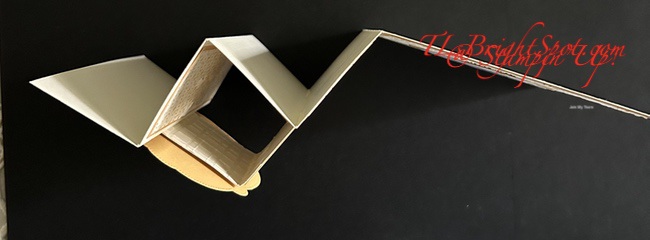
Cut another panel of card stock (here it is Very Vanilla) 6 x 3 & score on long side @ 3″; attache to front panel & last scored panel to create the V – see photo below. Decorate the right panel w/ card stock layer 2 3/4 x 2 3/4 then Very Vanilla layer 2 5/8 x 2 5/8. This last layer is stamped & decorated prior to attaching.
Attach die cuts from DSP; add additional fussy cut layer for inside back panel & stamp sentiment in Hydrangea Hue
I love how this card turned out! And it can used for all kinds of reasons. I’m sending this to a friend who needs a little ‘pick me up’.
Stampin’ Up! has some beautiful new Online Exclusives that are available to order now!! And they’ve created a printable flyer to make it MUCH easier to shop the new products! WOOHOO!! You can get to the flyer for the newest Online Exclusives by clicking here
You won’t find the Online Exclusive products in any catalog, they’ll only be listed in the online store. The Online Exclusive product releases will continue throughout the year so there will be new products to shop from, in addition to new catalogs!
Now, just so you know… as a Demonstrator, we have the privilege/ opportunity to preorder from catalogs & ONLINE EXCLUSIVES before they are available to the public. Already the July preorder is available & I’vc made good use of that. You’ll see more new products coming soon. What I’m encouraging of course, is for you to seriously consider becoming a Demonstrator –
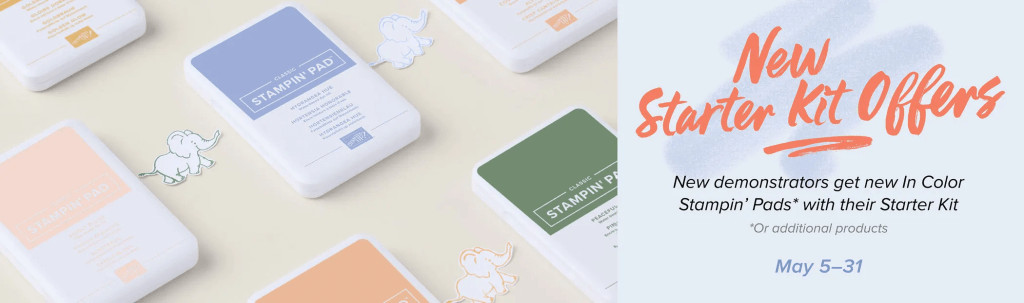
with all the fabulous benefits… 20-25% off all products once you’re joined, opportunity to attend special workshops & conventions & a fabulous supportive community of crafters. Join as a demonstrator now & you’ll get our new 2026–2028 In Color Stampin’ Pads FREE along with their Starter Kit! Or if you’d rather have different products instead of ink pads, we’ve got that covered there, too—you can add an extra $35 USD | $50 CAD worth of products to your Starter Kit.
Thanks for stopping by. May you have a beautiful day. Make someone happy by sending them a handmade card filled with ❤️
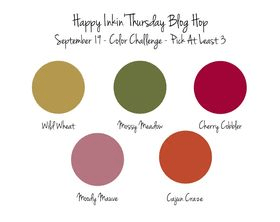
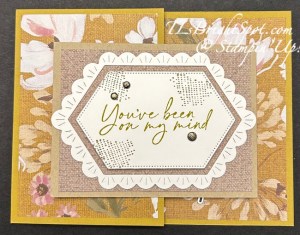
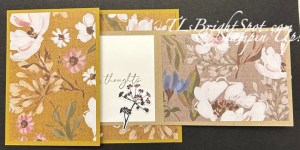
It’s Thursday and you know what that means – a VERY FUN HOP! We have a color challenge today and I’ve chosen to use the Wildly Flowering DSP as my focus and the coordinating suite to highlight this fun fold card.
This is called a JOY FOLD card – and is two cards in one so to speak. The colors are mostly Wild Wheat, Mossy Meadow and Moody Mauve. This is just gorgeous Designer Series Paper – Wildly Flowering 12 x 12 DSP. And here’s how we put this together…
Build your card base first: Wild Wheat 4 1/4 x 8 1/2 scored @ 3
Add DSP layers: 4 x 5 1/4 (inside right panel) and 2 3/4 x 4 (inside flap – I embossed this panel in the Dashing Designs 3D EF) and another flower panel on the left front 2 3/4 x 4
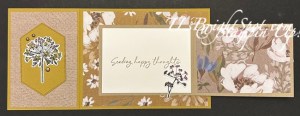
On the inside front panel, die cut from Wild Wheat the hexagon using the Wildflower Designs Dies; add to panel.
Stamp this larger flower on a Basic White scrap in Memento ink using the Wildflower Designs stamp set. Color with Stampin’ Blends Wild Wheat, Moody Mauve and Mossy Meadow. Add to hexagon and embellish with Adhesive-Backed Textured Dots.
Create the ‘mini’ card: Crumb Cake 3 x 8 and scored @ 4.
Add to card base, centering it on the right card base panel
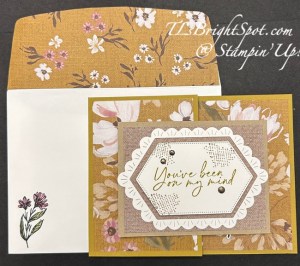
Add DSP to inside right mini card 2 3/4 x 4 and to mini card front 2 3/4 x 4 (embossed with Dashing Designs 3D EF)
Decorate mini card front: die cut from Basic White both the scalloped hexagon and the stamped hexagon using the Wildflower Designs Dies. Adhere the scalloped design directly to the mini card front. Stamp the remaining hexagon with Wildflower Designs stamps – the sentiment in Wild Wheat ink and the dots in Crumb Cake ink. Add to mini card front with dimensionals and embellish with Adhesive-Backed Textured Dots, part of this suite of products.
To the inside of the mini card… stamp the sentiment on a Basic White panel (2 3/4 x 4) in Crumb Cake ink using the Wildflower Designs stamp set. Add a stamped & die cut flower: stamped with Memento ink and colored with Moody Mauve Stampin’ Blends & die cut with Wildflower Designs Dies.
With the card complete… time to decorate the envelope… add another panel of Wildly Flowering DSP 2 1/4 x 6 to the flap and trim to fit. On the front, stamp another of the flowers from the Wildflower Designs stamp set in Memento ink and color with Stampin’ Blends Moody Mauve and Mossy Meadow.
Now… time to visit the others participating in this fun hop. Don’t miss a one! Click on the ‘next’ button or click on a name to take you around to visit everyone. Enjoy!!!
Use this link to take you to the mini catalog and view all the awesome items available.
I appreciate your business and welcome any questions regarding sales or creating or joining my team. Make sure when shopping with me, that you see my name at the top as your demonstrator. That way I can send you a Stampin’ Up! giftie and you can earn rewards – with a $50 order or more. You also receive the monthly tutorial for that particular month – September is Autumn Expressions.
There are new kits available beginning Sep 4 – check by clicking here.
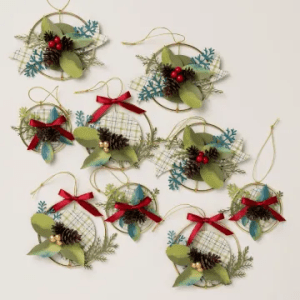
Christmas Ornaments kit – NEW!
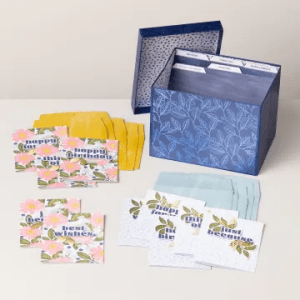
Card Keeper kit – NEW!
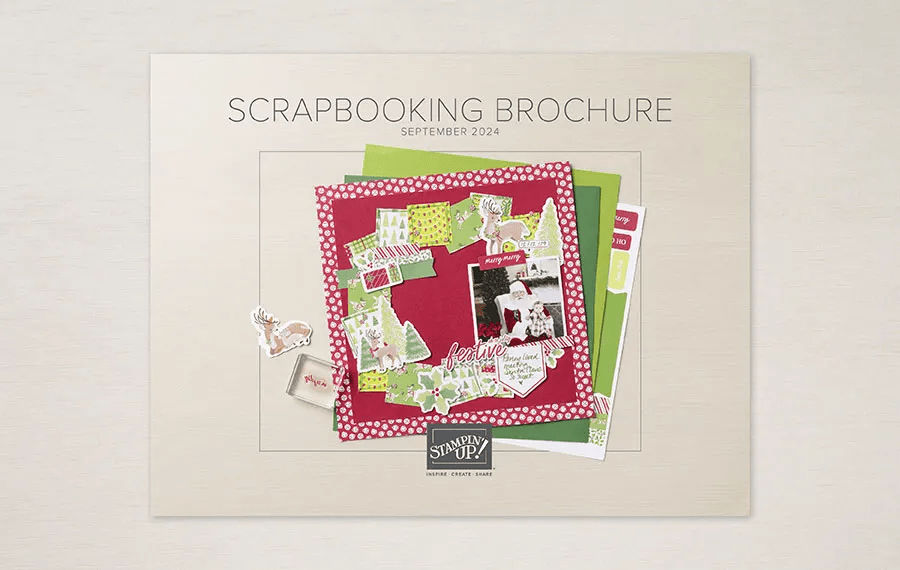
There are new scrapbooking supplies available, click here! Also – click on the brochure for other information. This is a digital-only scrapbooking brochure, full of scrapbooking essentials and exciting new products. As a companion brochure to the September–December 2024 Mini Catalog, the products inside coordinate with products from the mini catalog (and some online only products, too!). With Workshop Kits and some new product releases *hint* Two-Tone Cardstock *hint*, we hope this adds variety and inspiration to your and your customers’ holiday crafts this year!
Products will be available like our Online Exclusive releases, meaning that some products will be reordered when inventory is low, and others will only be available while supplies last.
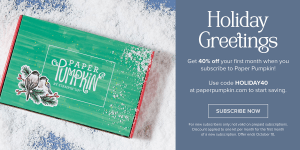
Santa Claus is comin’ to town a bit early this year—and he’s brought a holiday Paper Pumpkin sale! Starting September 11, 2024, at 12:01 a.m. (MT) until October 10, 2024, at 11:50 p.m. (MT), anyone who signs up for our monthly Paper Pumpkin subscription as a new subscriber will receive 40% off their first kit. That’s right, 40% OFF!
Where This Discount Is Applied This discount will be applied to one kit in the first kit shipment of the Paper Pumpkin subscription, which means new subscribers will get 40% off the October Nests of Christmas Paper Pumpkin Kit. After that, each month’s kit will return to the regular price of $25.00.
Qualifying for This Discount This offer is only for new month-to-month subscribers and is not valid on purchased or redeemed prepaid subscriptions.
Now that you’ve read through all the details, it’s time to head to paperpumpkin.com to subscribe and use code HOLIDAY40 to get 40% off your first month!
Click the image above to see that’s available in the ONLINE EXCLUSIVES!
Use my HOST CODE so I recognize you!
host code ZBAU6PKX
Thanks for stopping by. May you have a beautiful day. Make someone happy sending them a handmade card filled with love
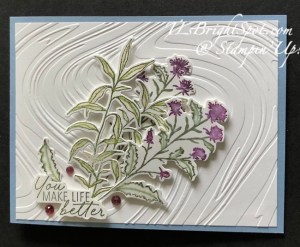
Good Thursday morning! You KNOW what Thursday means, right? A blog hop by this awesome group. You may have come from the creative team member Tara or just hopped right in here – however you got here, welcome. We have a theme challenge of outdoors today – and I have chosen to work with the Thoughtful Wishes bundle and the Thoughtful Journey 6×6 DSP – and created a fun fold for you :O)
Not sure what to call this fun fold, Center Pleat maybe – it was inspired by Susan Campfield who did a multi-pleat with 12 x 12 DSP. Thoughtful Journey DSP is 6×6 and I did not purchase the tutorial from Susan – just played around with this until it worked :O)
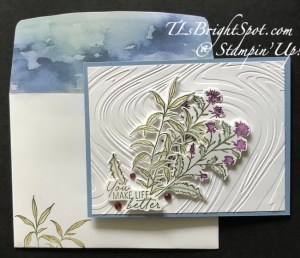
Begin with a card base 4 1/4 x 11 scored at 5 1/2 – this particular card is Boho Blue. For the card front, I wanted to use the new So Swirly dry embossing folder and ran a 4 x 5 1/4 Basic panel through it and adhered it to the card front. I stamped three images of the floral stamp from Thoughtful Wishes stamp set on Basic White – coloring the stamp with Stampin’ Write Markers to do so… Blackberry Bliss for the flower and Mossy Meadow for the stem/ leaves. I added these colors after each stamping. Because of the inside DSP I chose, I wanted these to look like a water color – soft and less defined images – so… I took my Water Painter, squeezed it until the brush was wet, then added just brush strokes of water on the flowers and then the leaves. I really like the effect it gave. I had tried spritzing the inked stamp but it didn’t give me what I was looking for, that’s why the water painter. Then I die cut the images with the coordinating Thoughtful Wishes Dies. I also stamped the leaf/weed image in Mossy Meadow ink and mov ed the ink on all the leaves with the water painter – die cut it with a coordinating die as well. I adhered the one flower image directly to the card front with liquid glue, attaching it at an angle to make it look as though it were being blown over by the swirling wind :O) I added trimmed down dimensionals to both the leaf image and the remaining flower image and added them as you see them. I stamped the sentiment in Mossy Meadow ink and fussy cut it with my paper snips, adding dimensionals to it as well. I had an extra leaf and slipped it under the sentiment, attaching with a dab of adhesive. Finally – three Purple Fine Shimmer Gems to complete complete the card front.
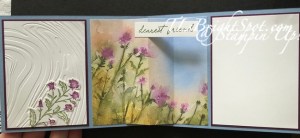
The inside… this is so pretty – well, I think so anyway… the Thoughtful Journey DSP is just so, so pretty – with a definite watercolor appeal n- maybe as though it were raining outside and looking through a wet windowpane. :O) Anyway – this is the image I chose, cut 4 x 4 1/2, scored at 1 1/4, 2 1/4 and 3 1/4. Burnish as valley, mountain, valley. Adhere only the end portions of this folded piece, keeping the center fold in the middle. The two end panels are: Blackberry Bliss cut 2 7/8 x 3 7/8 and adhered with even margins on each side. The Basic White panels are 2 3/4 x 3 3/4 with the piece on the left run through the So Swirly dry embossing folder then adhered. Again, the remaining die cut flower was attached with liquid glue. The other panel is left plain for writing your message. The sentiment is stamped on a Basic White strip with Mossy meadow ink and adhered with Stampin’ Seal just on the left side. The card doesn’t really need it but I added it nonetheless.
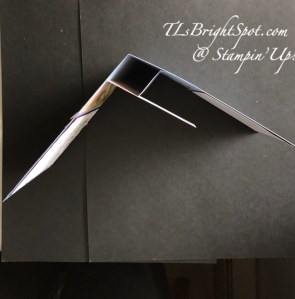
This is what the card looks like looking down from the top. It stands for display to show off that gorgeous inside.
The envelope got more of the Thoughtful Journey DSP attached to the flap and trimmed to fit. The front got this same leaves stamp in Mossy Meadow ink and the ink ‘moved around’ with a water painter. I love this look!
Now – don’t forget to look below the list of names to learn how to purchase the items shown to make this card! But for now – click on a name or the ‘next’ button to take you to each p[articipant. Enjoy the hop!
The 24-25 Annual Catalog is now live… here’s a link to take you directly to the items available in this catalog – specifically the Take to The Sky Suite of products. These particular embellishments are on page 114. Happy shopping!
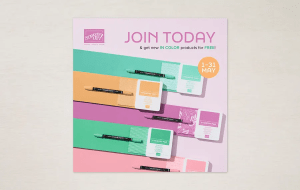
Stampin’ Up! has a fabulous joining opportunity from May 1-31.
To join is $99 and what comes with joining, besides your 15-20% discount on every order… FOUR FREE IN COLOR PRODUCTS valued to $82 plus your choice of $125 worth of products. Those FREE items – the IN COLOR products – Classic stampin’ pad bundle – 5 of them, package of 8 1/2 x 11 cardstock – 5 of those, 6×6 Designer Series Paper – 5 colors in the pack, and the coordinating Stampin’ Write markers. You will also receive free shipping on these products + free business supplies. What’s not to like about this joining special – remember it begins May 1! Join with me by following this link...
To view all the available ONLINE EXCLUSIVES, click here.
While you’re looking around in my store, remember there are some stunning kits available, for all ages and all seasons – even Christmas! And while you’re shopping, I offer fringe benefits to my customers: free tutorial of the month and a FREE Stampin’ Up! item valued to $10 – all for a $50 order, before shipping and taxes. Use my current host code to receive those benefits – especially when your order does not exceed $150.
HOST CODE 4JF6ZWC9
Thanks for stopping by. May you have a beautiful day. Make someone happy when sending them a handmade card filled with love.
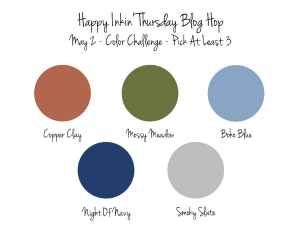
Welcome to Thursday and another fun and Happy Inkin’ Krew Blog Hop! We have a color challenge today – can you figure out what colors I used? HA! I’ve used new 2024-2025 Annual Catalog products – Take to the Sky DSPand the Adventurous Sky Bundle plus Industrial Trinkets – all from the Suite :0)
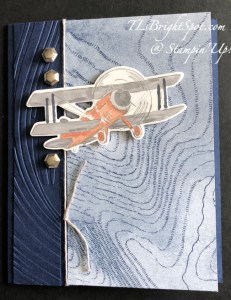
I began with a Night of Navy cardstock cut 5 1/2 x 6 and scored on the long side @ 4 1/4. I cut apiece of Take To The Sky DSP 31/2 it to the x 5 1/2 and adhered to the 1 1/2x 5 1/2″ side. Cut anther piece of Night of Navy 1 x 5 1/2 and run it through an embossing folder – I used a new So Swirly EF. I added it to the front of the Night of Navy card, equidistant between the fold and the DSP. I wrapped a length of Baker’s Twine in gray around the cardstock and tied a knot. I used the wonderful biplane stamp and Smoky Slate ink to stamp on Basic White. I die cut it with the coordinating die from Adventurous Sky Dies. I colored the plane with Stampin’ Blends Copper Clay & Smoky Slate, and a bit of Basic Black. I added it ti the card front with dimensionals. I added three Industrial Trinkets – and the card front was complete.
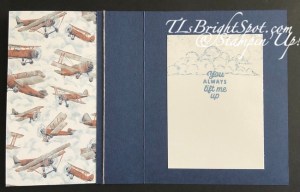
For the inside… I cut a piece of Basic White, stamped the clouds from the Take To The Sky stamp set in Boho Blue and the sentiment from the same stamp set and same ink. I adhered this to the inside of the card. Notice how the back side of the DSP shows so very clearly – I like this business of the DSP sharing both sides.
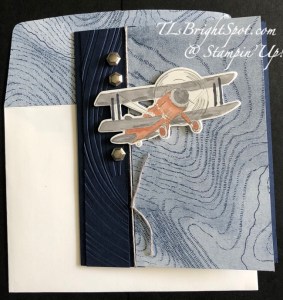
For the envelope, I wanted to keep it very simple – similar to the card – so only used the same Take To The Sky DSP to the flap & trimmed it to fit. And that was it.
Now, it’s time to see what the others on the team have created. Click on the ‘next’ button or click on a name to take you somewhere else. Enjoy the hop!
JOIN MY TEAM! – click here. Stampin’ Up! has a joining promotion going on right now – May 1-31. For $99, you will be able to select your own products worth $125 PLUS Stampin’ Up! is including products in the 24-26 NEW IN COLORS, which are gorgeous: FIVE (5) In Color Classic Stampin’ Pad bundle; In Color 8 1/2 x 11 Cardstock; In Color 6×6 DSP pack; AND FIVE (5) In Color Stampin’ Write Markers – all these are $82 in value and they are FREE when you sign up to be a demonstrator. You will also receive FREE SHIPPING and FREE business supplies – all for the $99 and the decision to move forward. 15-20% off every order after joining – why wait? click here to join my team.
I offer fringe benefits to my customers: free tutorial of the month and a FREE Stampin’ Up! item valued to $10 – all for a $50 order, before shipping and taxes. Use my current host code to receive those benefits – especially when your order does not exceed $150.
HOST CODE 4JF6ZWC9
Thanks for Stopping by. May you have a beautiful day!

![Fern & Flora Bundle (English) [ 167745 ]](https://assets1.tamsnetwork.com/images/EC042017NF/167745s.jpg "Fern & Flora Bundle (English) [ 167745 ]")
![Moonlit Flora 12" X 12" (30.5 X 30.5 Cm) Designer Series Paper [ 167737 ]](https://assets1.tamsnetwork.com/images/EC042017NF/167737s.jpg "Moonlit Flora 12\" X 12\" (30.5 X 30.5 Cm) Designer Series Paper [ 167737 ]")
![Moonlit Flora Suite Collection (English) [ 167749 ]](https://assets1.tamsnetwork.com/images/EC042017NF/167749s.jpg "Moonlit Flora Suite Collection (English) [ 167749 ]")
![Secret Sea 8 1/2" X 11" Cardstock [ 165624 ]](https://assets1.tamsnetwork.com/images/EC042017NF/165624s.jpg "Secret Sea 8 1/2\" X 11\" Cardstock [ 165624 ]")
![Peaceful Pine 8 1/2" X 11" Cardstock [ 167691 ]](https://assets1.tamsnetwork.com/images/EC042017NF/167691s.jpg "Peaceful Pine 8 1/2\" X 11\" Cardstock [ 167691 ]")
![Secret Sea Classic Stampin' Pad [ 165285 ]](https://assets1.tamsnetwork.com/images/EC042017NF/165285s.jpg "Secret Sea Classic Stampin' Pad [ 165285 ]")
![Peaceful Pine Classic Stampin Pad [ 167679 ]](https://assets1.tamsnetwork.com/images/EC042017NF/167679s.jpg "Peaceful Pine Classic Stampin Pad [ 167679 ]")
![Adhesive Backed Metallic Gems [ 163780 ]](https://assets1.tamsnetwork.com/images/EC042017NF/163780s.jpg "Adhesive Backed Metallic Gems [ 163780 ]")
![Basic White 8 1/2" X 11" Cardstock [ 166780 ]](https://assets1.tamsnetwork.com/images/EC042017NF/166780s.jpg "Basic White 8 1/2\" X 11\" Cardstock [ 166780 ]")
![Basic White Medium Envelopes [ 159236 ]](https://assets1.tamsnetwork.com/images/EC042017NF/159236s.jpg "Basic White Medium Envelopes [ 159236 ]")
![Tuxedo Black Memento Ink Pad [ 132708 ]](https://assets1.tamsnetwork.com/images/EC042017NF/132708s.jpg "Tuxedo Black Memento Ink Pad [ 132708 ]")
![Stampin' Positioner [ 167768 ]](https://assets1.tamsnetwork.com/images/EC042017NF/167768s.jpg "Stampin' Positioner [ 167768 ]")
![Stampin' Cut & Emboss Machine [ 149653 ]](https://assets1.tamsnetwork.com/images/EC042017NF/149653s.jpg "Stampin' Cut & Emboss Machine [ 149653 ]")
![Paper Trimmer [ 152392 ]](https://assets1.tamsnetwork.com/images/EC042017NF/152392s.jpg "Paper Trimmer [ 152392 ]")
![Stampin' Dimensionals [ 104430 ]](https://assets1.tamsnetwork.com/images/EC042017NF/104430s.jpg "Stampin' Dimensionals [ 104430 ]")
![Multipurpose Liquid Glue [ 110755 ]](https://assets1.tamsnetwork.com/images/EC042017NF/110755s.jpg "Multipurpose Liquid Glue [ 110755 ]")
![Mini Glue Dots [ 103683 ]](https://assets1.tamsnetwork.com/images/EC042017NF/103683s.jpg "Mini Glue Dots [ 103683 ]")
![Paper Snips [ 103579 ]](https://assets1.tamsnetwork.com/images/EC042017NF/103579s.jpg "Paper Snips [ 103579 ]")
![Take Your Pick [ 144107 ]](https://assets1.tamsnetwork.com/images/EC042017NF/144107s.jpg "Take Your Pick [ 144107 ]")
![White Gel Pens [ 166642 ]](https://assets1.tamsnetwork.com/images/EC042017NF/166642s.jpg "White Gel Pens [ 166642 ]")
![Clear Wink Of Stella Glitter Brush [ 141897 ]](https://assets1.tamsnetwork.com/images/EC042017NF/141897s.jpg "Clear Wink Of Stella Glitter Brush [ 141897 ]")
![Metallics Wow! Embossing Powder [ 165678 ]](https://assets1.tamsnetwork.com/images/EC042017NF/165678s.jpg "Metallics Wow! Embossing Powder [ 165678 ]")
![Basics Wow! Embossing Powder [ 165679 ]](https://assets1.tamsnetwork.com/images/EC042017NF/165679s.jpg "Basics Wow! Embossing Powder [ 165679 ]")
![Heat Tool (Us And Canada) [ 129053 ]](https://assets1.tamsnetwork.com/images/EC042017NF/129053s.jpg "Heat Tool (Us And Canada) [ 129053 ]")
![Embossing Additions Tool Kit [ 159971 ]](https://assets1.tamsnetwork.com/images/EC042017NF/159971s.jpg "Embossing Additions Tool Kit [ 159971 ]")
![Small Blending Brushes [ 160518 ]](https://assets1.tamsnetwork.com/images/EC042017NF/160518s.jpg "Small Blending Brushes [ 160518 ]")


![Fern & Flora 3 D Embossing Folder [ 167744 ]](https://assets1.tamsnetwork.com/images/EC042017NF/167744s.jpg "Fern & Flora 3 D Embossing Folder [ 167744 ]")
![Dreamy Flowers [ 167916 ]](https://assets1.tamsnetwork.com/images/EC042017NF/167916s.jpg "Dreamy Flowers [ 167916 ]")
![Lemon Lolly Classic Stampin' Pad [ 161666 ]](https://assets1.tamsnetwork.com/images/EC042017NF/161666s.jpg "Lemon Lolly Classic Stampin' Pad [ 161666 ]")
![Granny Apple Green Stampin' Pad [ 147095 ]](https://assets1.tamsnetwork.com/images/EC042017NF/147095s.jpg "Granny Apple Green Stampin' Pad [ 147095 ]")
![Old Olive Classic Stampin' Pad [ 147090 ]](https://assets1.tamsnetwork.com/images/EC042017NF/147090s.jpg "Old Olive Classic Stampin' Pad [ 147090 ]")
![Basic White 12" X 12" (30.5 X 30.5 Cm) Thick Cardstock [ 166782 ]](https://assets1.tamsnetwork.com/images/EC042017NF/166782s.jpg "Basic White 12\" X 12\" (30.5 X 30.5 Cm) Thick Cardstock [ 166782 ]")
![Silly Old Bear Suite Collection [ 167634 ]](https://assets1.tamsnetwork.com/images/EC042017NF/167634s.jpg "Silly Old Bear Suite Collection [ 167634 ]")
![Very Vanilla 8 1/2" X 11" Cardstock [ 166784 ]](https://assets1.tamsnetwork.com/images/EC042017NF/166784s.jpg "Very Vanilla 8 1/2\" X 11\" Cardstock [ 166784 ]")
![Golden Glow 8 1/2" X 11" Cardstock [ 167685 ]](https://assets1.tamsnetwork.com/images/EC042017NF/167685s.jpg "Golden Glow 8 1/2\" X 11\" Cardstock [ 167685 ]")
![Golden Glow Classic Stampin' Pad [ 167676 ]](https://assets1.tamsnetwork.com/images/EC042017NF/167676s.jpg "Golden Glow Classic Stampin' Pad [ 167676 ]")
![Hydrangea Hue Classic Stampin' Pad [ 167677 ]](https://assets1.tamsnetwork.com/images/EC042017NF/167677s.jpg "Hydrangea Hue Classic Stampin' Pad [ 167677 ]")
![Very Vanilla Medium Envelopes [ 107300 ]](https://assets1.tamsnetwork.com/images/EC042017NF/107300s.jpg "Very Vanilla Medium Envelopes [ 107300 ]")




 TLsBrightSpot