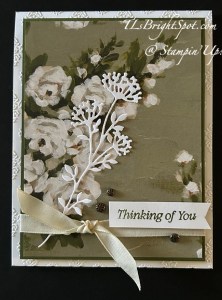
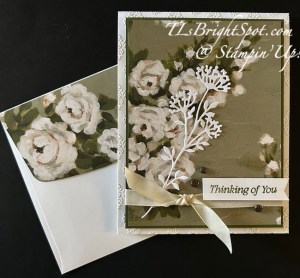
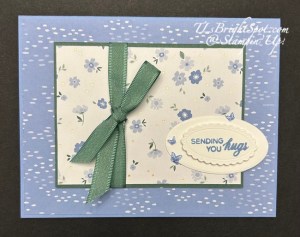
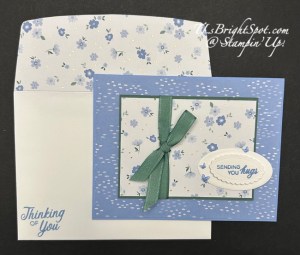
Oh my – June is almost gone – what happened to the days??? I have a sympathy card for you today using the pretty Phrases & Frames Bundle with the Bloom Boutique 12×12 DSP.
The card base is Hydrangea Hue with a layer of Bloom Boutique 12×12 DSP just slightly smaller than the card front. The double layer is Peaceful Pine 4 x 3 with another pattern of the Bloom Boutique DSP 3 7/8 x 2 7/8. I wrapped a Peaceful Pine 3/8″ Bordered Ribbon around and secured in back, then took another length to tie a half bow. I secured this under the knot with a glue dot then affixed the panel to the card front with dimensionals. The sentiment ovals are die cuts using the Phrases & Frames Dies – so delicate & sweet. The sentiment is from the coordinating stamp set in Hydrangea Hue ink. The larger oval is affixed with liquid adhesive and the smaller one is on dimensionals. Final touch – those wonderful 2026-2028 In Color Butterflies – in Hydrangea Hue.
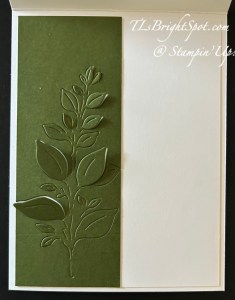
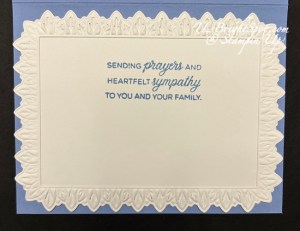
For the inside… another stunning die cut using the Phrases & Frames Dies – the largest one. I adhered a panel of Basic White behind it 4 3/4 x 3 3/8. This sentiment is also from the coordinating stamp set – in Hydrangea Hue ink.
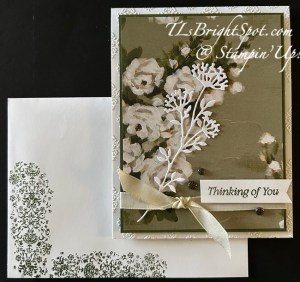
For the envelope… a piece of the Bloom Boutique 12 x 12 DSP adhered to the flap & trimmed to fit. And another sentiment from the Phrases & Frames stamp set stamped in Hydrangea Hue ink. This card will be sent today… to a dear friend who lost her hubby.
Today is the next to last day before the end of June and the possibility of the monthly tutorial with a $50 or above order. See below for a way to order from me. To order the products to make this card, see the list below. When purchasing from me… And don’t forget all the benefits of being a demonstrator or ordering from me… When ordering from me, you get Daisy Patch Rewards for every order. (See my REWARDS PAGE for details) and with those points comes an opportunity for a FREE STAMP SET or items valued up to $40. You will also receive the monthly online tutorial – which this month uses this fabulous Lily of the Valley suite of products.
Want to JOIN MY TEAM and become a part of this fun crafty group? Lots of benefits there too. JOIN WITH ME HERE
Thanks for stopping by – may you have a beautiful day! Make someone happy by sending them a handmade card filled with ❤️
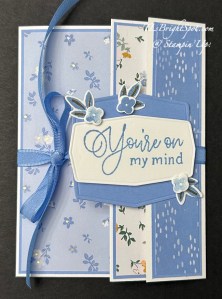
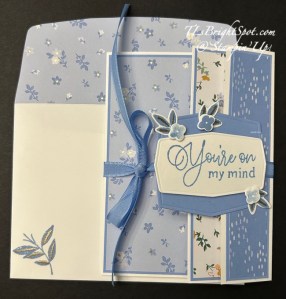
Oh I love this fun fold – it’s so easy & just pops with elegance or fun, depending on the Designer Series Paper used. As in the heading, I’ve used the soft colors of the Bloom Boutique DSP from the March ONLNE EXCLUSIVES. The paper is all in the new 2026-2028 In Colors and I primarily focused on Hydrangea Hue. I also used one pattern in the 2026-2028 In Color Painted Patterns DSP.
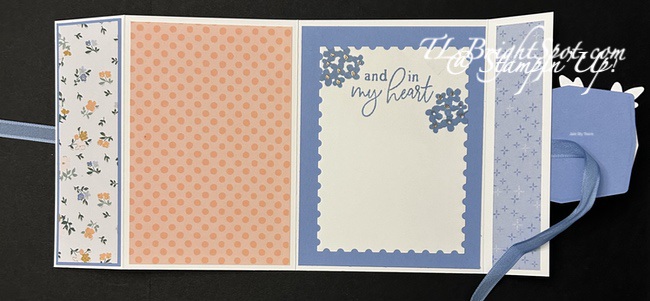
I began with Thick Basic White 11 x 5 1/2 scored @ 1 3/4, 5 1/2, and 9 3/4. Burnish these mountain(it folds back), valley, valley(this one folds over). Layer for front: 3 5/8 x 5 3/8; layer for the fold back panel 1 5/8 x 5 3/8 & layer for the fold over panel: 1 1/8 x 5 3/8 (I used Hydrangea Hue in each case). DSP pieces are coordinating but all different: 3 1/2 x 5 14, 1 1/2 x 5 14, & 1 x 5 1/4. Attach to the card base. Now cut for the inside of the card… 3 1/2 x 5 1/4 & 1 x 5 1/4; the sentiment panel has a layer 3 7/8 x 5 1/4 + Basic White 3 3/4 x 5 1/8 or cut with the 2nd largest Perennial Postage Dies. Stamp the Basic White with a sentiment – I used Forever Florals stamp set (also a March ONLINE EXCLUSIVE) & Hydrangea Hue ink + WOW! Metallic embossing powder in gold (heat set of course)
Now let’s decorate the front. Sometimes, this quick fun fold card uses a belly band, this one uses a ribbon instead – 3/8″ Bordered Ribbon in Hydrangea Hue, about 21″ worth. It’s attached to the front fold-over panel with Stampin’ Seal and under the sentiment banner. Sentiment banner: using the largest of the banner dies in the Forever Floral Dies, cut from Hydrangea Hue. Using the rectangular banner die from Forever Florals Dies, cut from Basic White & stamp the sentiment from the Forever Florals stamp set in Hydrangea Hue ink. Stamp a couple of small leaves from this same stamp set in Hydrangea Hue, stamp the veins in VersaMark ink and sprinkle with WOW! Metallic Gold embossing powder & heat set. Die cut with the appropriate leaf die in Forever Florals Dies. Add the Basic White sentiment banner to the blue banner with dimensionals. Position the die cut leaves & adhere. Now stamp three flowers in Hydrangea Hue ink on a Basic White scrap & die cut. Add these with dimensionals to the leaves. Add the banner with liquid glue over the ribbon on the fold over panel. Tie the ribbon in a bow & done! Stunningly beautiful, easy on the eyes. With these particular colors and this DSP, this could not only be a thinking of you kind of card, but also a sympathy card.
Envelope… more of the Bloom Boutique DSP on the flap & trimmed to fit. On the front, another leaf stamp in the Forever Florals stamp set stamped in Hydrangea Hue, then the veins stamped in VersaMark ink, sprinkled with WOW! Metallic Gold embossing powder & heat set. YES! This card is ready to send!!!
YAY – love this card… gentle on the eyes & quick & easy fun fold. Want to make this card – you may order the supplies from me listed below to do that. And don’t forget all the benefits of being a demonstrator or ordering from me… When ordering from me, you get Daisy Patch Rewards for every order. (See my REWARDS PAGE for details) and with those points comes an opportunity for a FREE STAMP SET or items valued up to $40. You will also receive the monthly online tutorial – which this month uses this fabulous Lily of the Valley suite of products.
Want to JOIN MY TEAM and become a part of this fun crafty group? Lots of benefits there too. JOIN WITH ME HERE
Thanks for stopping by – may you have a beautiful day! Make someone happy by sending them a handmade card filled with ❤️
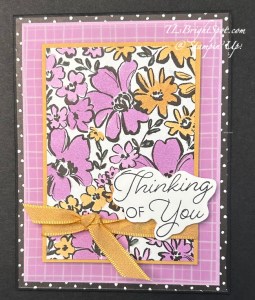
Hello Saturday! We are in full rain for the next 48 hours mode… Maybe I can play in my craft room 😀 or… get some other projects completed. Today I have a sympathy card made with Artisan Sketched Garden and some Stampin’ Blends and oh yes, some Berry Botanical Vellum.
I began by coloring the pretty floral images on the Artisan Sketched Garden DSP: Peaceful Pine for the leaves, Fresh Freesia & Golden Glow for the flowers. Interesting combination, right? I took my cue for this combination by looking at the Berry Botanical Vellum which has an even larger mix of colors. I backed this with a panel of Golden Glow card stock then wrapped it with 3/8″ Bordered Ribbon in Golden Glow. I took another short length and slipped it under the ribbon & tied a knot. I stamped the sentiment in Memento Black ink on Basic White scrap & fussy cut it & placed it on the front with dimensionals. I cut a piece of the grid vellum from the Berry Botanical Vellum pack & backed it with Fresh Freesia. This was adhered directly to the polka dot pattern of the Artisan Sketched Garden that was already on a Card base of Basic Black.
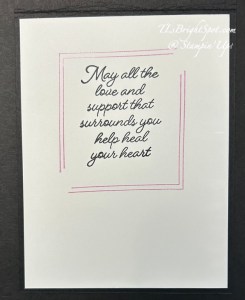
For the inside… I stamped the sentiment using the Framed All Around stamp set & Memento Black ink then stamped the ‘frame’ in two places with Fresh Freesia ink. The Basic White was secured to the card base & the card was complete.
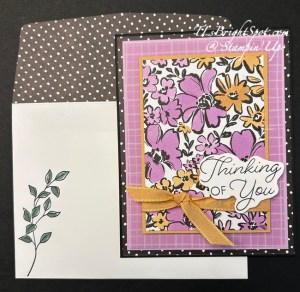
For the envelope… I stamped this leaf image in Memento Black ink & colored the leaves with Peaceful Pine Stampin’ Blends. On the flap is another of the Artisan Sketched Garden DSP in the polka dot pattern used for the card front. I love how this card turned out, sweet to look at and gentle thoughts. This card goes in the mail today.
Shopping with me is easy peasy… simply click the link & you’ll find SU! ONLINE EXCLUSIVES (items not in any catalog!), kits of all sorts – for cards or household items, scrapbooking, catalog info & SU! craft classes. When your order is $50 or more you will receive my monthly tutorial & also get Daisy Patc h Rewards (see my rewards page for more info.
Stampin’ Up! has a joining promotion that has awesome benefits though the end of May – jsut days away. Now, just so you know… as a Demonstrator, we have the privilege/ opportunity to preorder from catalogs & ONLINE EXCLUSIVES before they are available to the public. Already the July preorder is available & I’vc made good use of that. You’ll see more new products coming soon. What I’m encouraging of course, is for you to seriously consider becoming a Demonstrator -with all the fabulous benefits… 20-25% off all products once you’re joined, opportunity to attend special workshops & conventions & a fabulous supportive community of crafters. Join as a demonstrator now & you’ll get our new 2026–2028 In Color Stampin’ Pads FREE along with their Starter Kit! Or if you’d rather have different products instead of ink pads, we’ve got that covered there, too—you can add an extra $35 USD | $50 CAD worth of products to your Starter Kit.
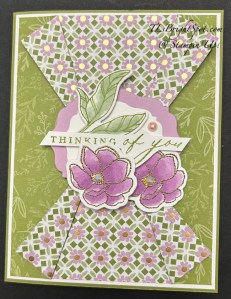
Good Friday morning! It’s 18 degrees this morning but nice & brightly sunny 😀 My inspiration came from one of my card class students who passed along info about making this cute fun fold. That led me to watch a video by Rachel Tessman. Let’s look at my creation.
This begins with a Basic White panel 4 x 5 14 and adhering a strip of the Lovely & Beautiful SDSP 2 1/2 x 5 1/4 to the center of the panel. Now cut two more strips from the same pattern 1 3/4 x 5 1/4. Adhere those strips in this fashion: the left strip – add adhesive only to the left edge & attach; the right strip – add adhesive to the right edge and attach.
Folding: fold back the top right side of the left strip to approximately the center of the card, but the fold should not allow any of the Basic White to show. Turn the card upside down and do the same for that same panel to create the bottom fold. Now, do the same for the right strip; fold back the top left side of the right strip just to the edge of the center strip pattern to a center point. Turn the card upside down again and do the same on the bottom right side. Burnish those folded back sections.
TIP: this folding back does not necessarily have to be to the center; it could be more toward the top or toward the bottom, but both sides do need to be uniform – to the same point.
Create the center pieces to cover where the papers come together. I pulled out my Beautifully Celebrated Dies, Fresh Freesia card stock and Basic White, die cut the two pieces and adhered them together. ( I used the smallest & next size up). I then stamped this sweet leaf image in Old Olive ink from the Beautifully Celebrated stamp set and colored it with Soft Sea Foam Stampin’ Blends. I die cut it with coordinating dies (Beautifully Celebrated) and set it aside. I used the Simply Beautiful stamp set and Old Olive ink for the sentiment and fussy cut it, adhered the leaf to the back of the sentiment then attached the sentiment with mini dimentionals to the two die cut banners. W ith the Simply Beautiful stamp set, I stamped the small flower in VersaMark ink (twice) on a Basic White piece, sprinkled those with WOW? Metallic Gold embossing Powder & heat set them. I colored both with Fresh Freesia Stampin’ Blends for the flowers and Daffodil Delight for the center of the flowers. I die cut these with the coordinating die from Simply Beautiful Dies and adhered them to the same banner: one adhered directly to the and one on dimensionals (yes, it slightly covers some of the sentiment) I attached the banners to the front of the card with dimensionals and added three Pearlized Faceted Circles.
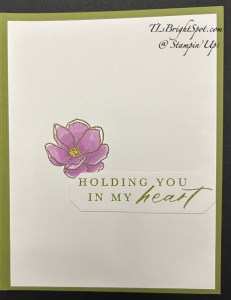
For the inside of the card, I stamped the same small flower from Simply Beautiful stamp set in VersaMark ink on a 4 x 5 1/4 Basic White panel, sprinkled it with WOW! Metallic Gold embossing powder & heat set it. Again I colored it with Stampin’ Blends Fresh Freesia and Daffodil Delight. I stamped the sentiment in Old Olive ink on a nother piece of Basic White and die cut it with Words of Beauty Dies. I adhered this just beneath the flower – and finis! This could easily be a sympathy card or get well card or simply ‘hello friend’ kind of card. But I love the simplicity of the fun fold and the extra charm it creates. Hope you like!
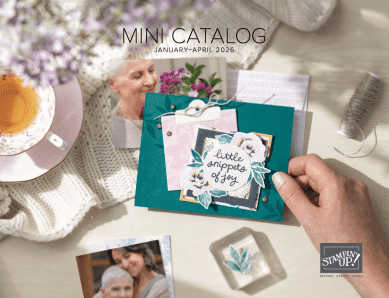
Wasnt to purchase the products to make this card? They may be found in the Jan-Apr 2026 Mini Catalog and you may SHOP WITH ME HERE!
Thanks for stopping by. May you have a beautiful day. Make someone happy by sending them a handmade card filled with ❤️
Stampin’ Up! is currently sponsoring BONUS DAYS: Because do you know what’s a great deal? Getting rewarded for all the crafting supplies you’re already going to buy! When you shop between January 6 and February 2 and spend $50 USD | $60 CAD, you will earn a $5 USD | $6 CAD coupon! Make sure you save all your coupons because you can redeem them (and we mean ALL of them) between February 3 and 28. During the earning period, a shopping-cart notification will appear when an order qualifies for a Bonus Days coupon—an online store feature on both the demonstrator and customer websites.
PRODUCT OF THE MONTH – only $5 with a $75 order (before shipping & taxes)
167972
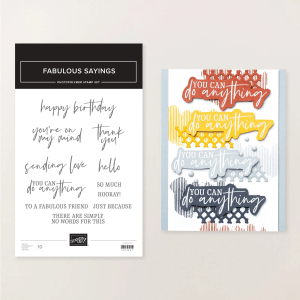
FABULOUS SAYINGS PHOTOPOLYMER STAMP SET (ENGLISH)
$5.00
The Fabulous Sayings Stamp Set is the exclusive Product of the Month for January 2026! Only available until stocks run out—don’t wait to get yours! This is a Two-Step Stampin’ set; it allows you to layer two or more images to create one final image with extra texture and dimension in the colors you want.
Jan-Apr 2026 Mini Catalog – click the image below to view the catalog
ONLINE EXCLUSIVES Several new stamp sets, dies, Designer Series Papers, embellishments and ribbons are available online that are not in any SU! Catalog. SHOP WITH ME HERE
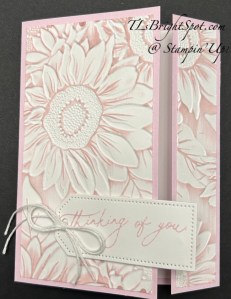
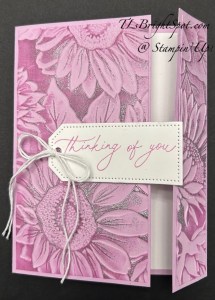
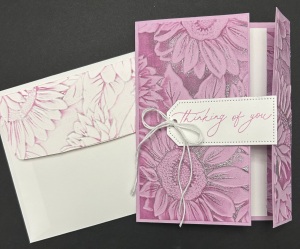
Good morning – it’s Friday and I have two cards for you this morning using the debossed side of paper run through this fabulous Sunflower 3D embossing folder. And, it’s an off-set gatefold card. In a traditional gatefold card, both closing sides are the same width; this off-set means one side (the right side in this case) is more narrow. Let’s take a peek…
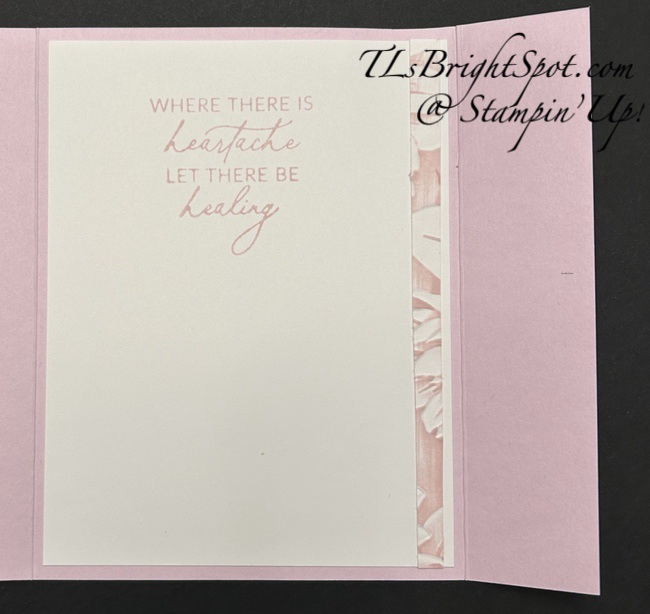
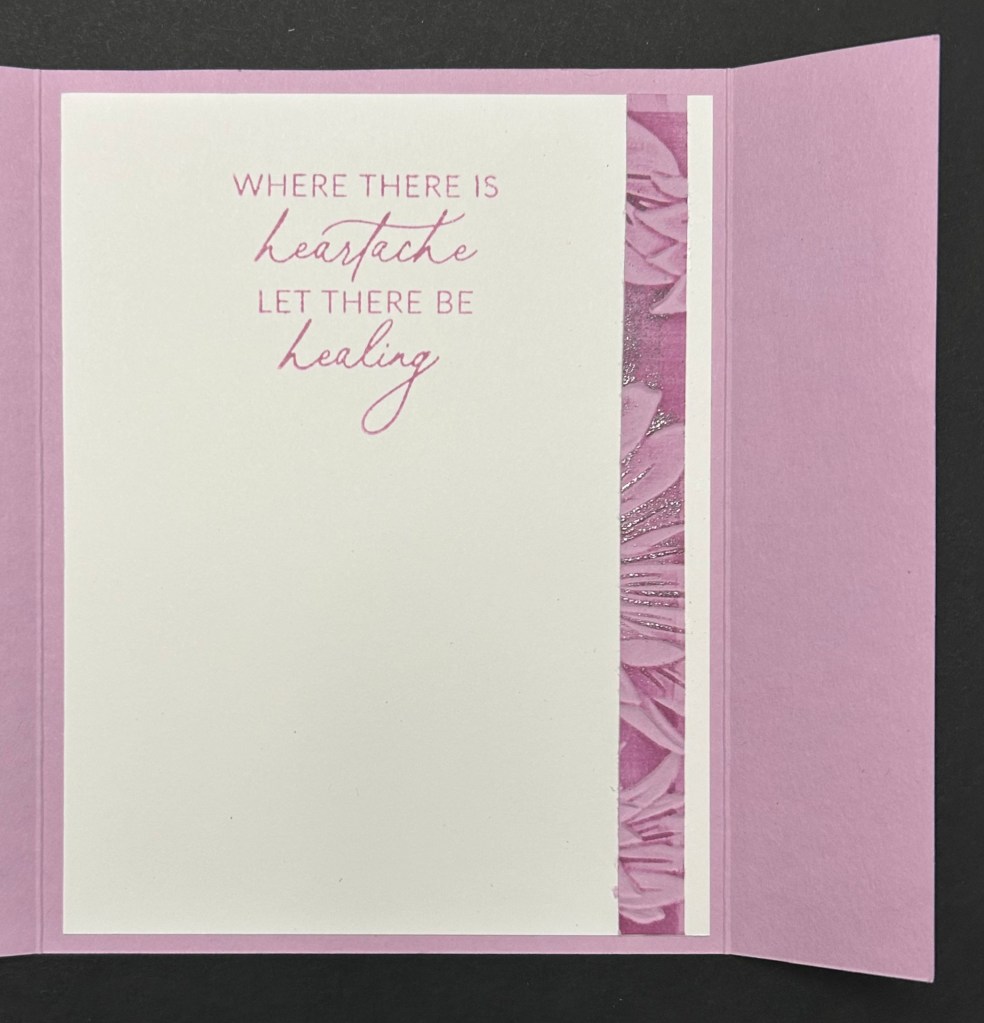
The card on the left is made with a Bubble Bath card base, embossed Basic White card stock, and Bubble Bath ink. The card on the right is made with Fresh Freesia card stock and a layer of embossed Fresh Freesia sprinkled with WOW! Metallic Embossing Powder in silver and heat set with the heat tool. It gives this card a real element of elegance. The sentiment on each card is from the Everday Greetings stamp set die cut with the Tailor Made Tags Dies. White Basic Twine was run through the hole in the tag and tied into a bow. The tag was adhered with dimensionals to the larger side of the card front.
For the inside of the card… I had started with a 4 x 5 1/4 Basic White panel to emboss with the Sunflower Embossing folder. After inking the debossed side, I trimmed it down and there was a narrow remaining piece – which I adhered to the Basic White insert. I also stamped the sentiment: Bubble Bath for the first card and Fresh Freesia for the second. These were adherred and the cards were complete.
For the envelope… I took another strip of Basic White, ran it through the Sunflower 3D embossing folder, inked the debossed side: again, Bubble Bath ink for the first card and Fresh Freesia for the second card. For the second card I again sprinkled it with WOW! Metallic embossing powder in silver and heat set it. Each was adhered to a Basic White envelope and trimmed to fit. Card cuts are listed below.
Just a word about inking an embossed panel… if you saw yesterday’s post, it indicated a 45 degree angle when running the ink pad along the embossed piece. For these cards, the angle was more like a 20 degree angle and I liked it much better. Practice, right?!
Card cuts:
Card bass 8 1/2 x 5 1/2 scored on long side @ 1 1/4 & 5 1/2
Embossed layer 4 x 5 1/4 trimmed to 2 7/8 x 5 14, 1 x 5 1/4, remainder used for inside
Basic White for inside 4 x 5 1/4
Envelope flap 2 1/4 x 6, adhered & trimmed to fit
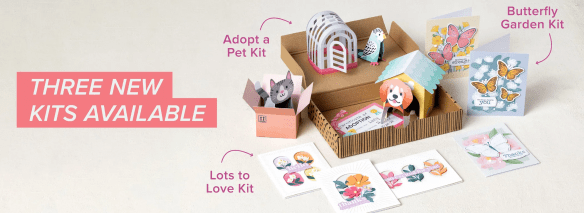
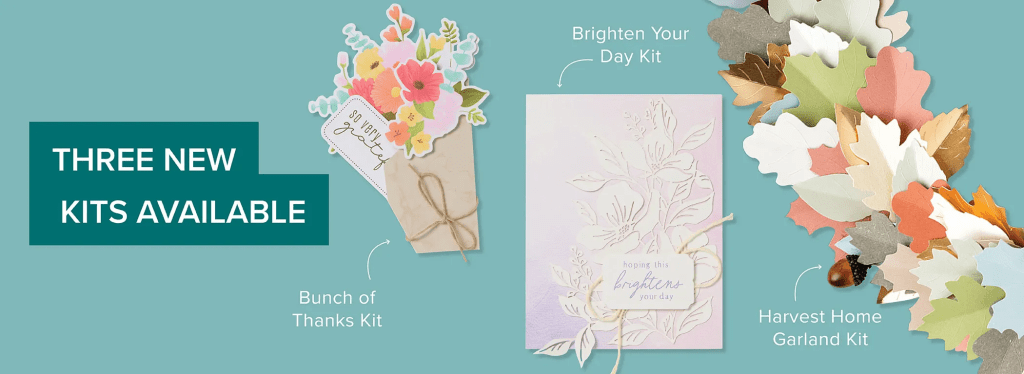
Stampin’ Up! has some fabulous updates: 2025-2027 IN COLOR SALE; LAST CHANCE PRODUCTS LIST UPDATED; and 3 new kits available. CLICK HERE TO VIEW ALL!
Thanks for stopping by. May you have a beautiful day.
Make someone happy sending them a handmade card filled with love ❤️
Welcome to our Thursday hop! If yo have joined me from the fabulous tara, glad you stopped by. If you jumped in right here – love that too! We have a theme challenge today – BIRDS… and I have chosen the new & wonderful Peaceful Garden Suite, available in the Sep-Dec Mini Catalog. Visit this post to learn more about this suite of products. The only item I did not use was the ribbon – I substituted the 1/2″ Sheer Ribbon, Silver & White. Let’s take a look-see.
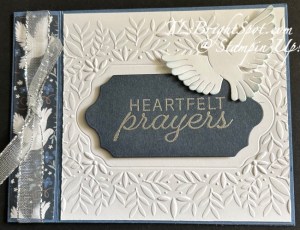
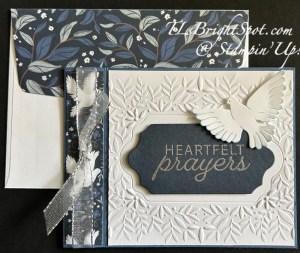
I began with a Misty Moonlight card base 4 1`/4 x 11 scored at 4 1/2 then 5 1/2 – to create a bookfold card.Next I cut a 7/8 x 4 1/8 piece of the Peaceful Garden 12×12 DSP and attached it tot he area between the two score lines. I then used the Silver & White 1/2″ Sheer ribbon to wrap over the DSP, securing with Tear n’ Tape. I then adhered that section to the card base, creating the bookfold. :O) I then tied a length of the same ribbon with a single knot around the ribbon and secured the knot with a glue dot. Next, I took a piece of Basic White 4 1/8 x 4 3/8 & ran it through the Peaceful Greenery 3D embossing folder. Gorgeousness! I adhered this to the remaining card front. With Secret Sea I cut the sentiment panel using the smaller label die in the Peace On Earth Dies. I used an embossing buddy to remove any specks, stamped the sentiment in VersaMark ink with a stamp from the Peace On Earth Stamp set,, sprinkled it with Metallic WOW! Embossing Powder in Polished Silver & heat set with the heat tool. I mounted this to the card front with dimensionals. This stunning dove is cut from Basic White with the Peace on Earth Dies. I used a dauber & Cloud Cover ink to add just a hint of color to the edges of the wings & tail. Attach with dimesnionals under the right wing & the bird body.
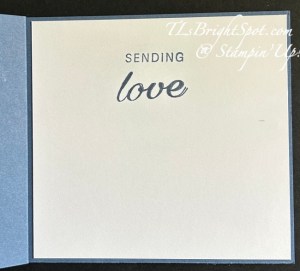
For the inside… I stamped the sentiments in Misty Moonlight ink on top of a bit of color of Cloud Cover added with the sponge dauber – these on a 4 1/8 x 4 3/8 Basic White panel.
For the envelope, a different pattern from the Peaceful Garden 12×12 DSP adhered to the flap & trimmed to fit. For information on how to order products to make this card, see below.
Thanks for stopping by my blog. Follow along the links below to visit others in this blog hop – click the next button to take you to Amy K or click on a name. Whatever you do – see them all – enjoy the hop!
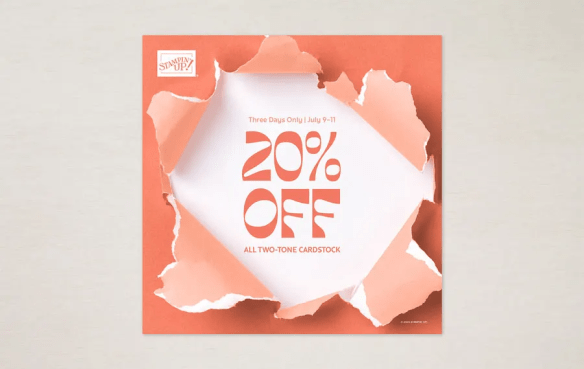
Remember that the SALE IS ON for Two-Tone cardstock, 20% off Jul 9-11 – while supplies last.
All two-tone cardstock is now 20% off! Now is the time to stock up on this versatile crafting essential that’s perfect for both card making and scrapbooking. This sale only lasts three days, so make sure you visit the online store to shop a wide variety of colors before they’re gone!
106 Color Variations. Our two-tone cardstock offers 53 lighter and darker Stampin’ Up! colors on double-sided sheets. It’s available in single or mixed-color packs for harmonious colorful or monochromatic projects. Encourage your customers to stock up on favorites or try new colors with no regrets!
A Crafting Necessity. Two-tone cardstock has so much to offer! It’s an ideal layering option without adding bulk and its white core means you can tear, crumple, sand, and emboss your way to fun effects whatever your crafting skill level. Its smooth texture is great for stamping, clean cuts, crisp folds, and seamless color applications. And because it’s 12″ x 12″ (30.5 x 30.5 cm), you can use it as a scrapbook base, or you can cut it to use as part of your card-making projects.
Sales Period: July 9–11
– Sale ends: July 11, 2025, at 11:59 p.m. (MT)
– Single-pack and multipack two-tone cardstock is 20% off.
– Some colors might sell out sooner than others.
– Available while supplies last.
Thanks for stopping by. May you have a beautiful day.
Make someone happy sending them a handmade card made with love. ❤️
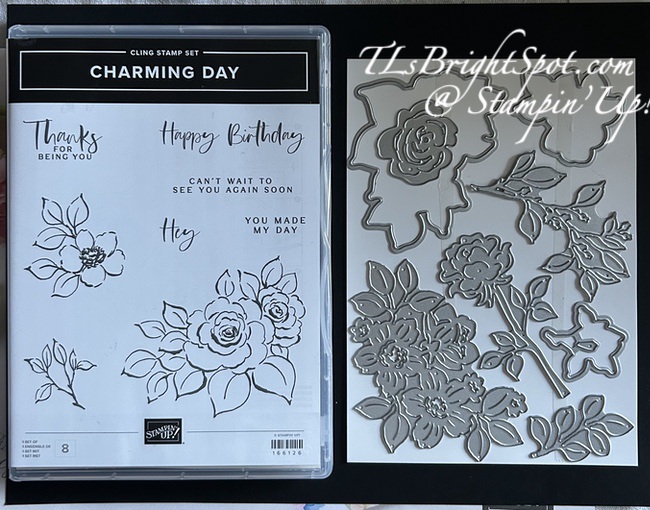
This is a suite of products that will be available Jul 1 to customers – and I am using only a couple of the items to make this card: the Charming Day bundle and Floral Charm 12×12 DSP. Let’s take a look at the bundle and the card.
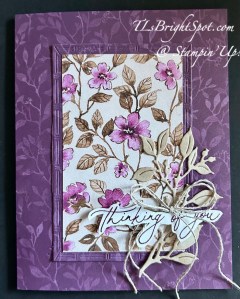
The card base is Blackberry Bliss with a panel of the Floral Charm DSP covering the entire front of the base. Next i took the Textured Notes Dies and die cut another piece of the same pattern of the DSP using the third largest of the dies.. I cut another piece of the Floral Charm DSP 2 3/8 x 3 7/8 and attached it to the die cut piece. Both of these were adhered directly to the card front. I used Basic Beige card stock and a stunning leaf die from the Charming Day Diesnto cut a leaf, then nused Early Espresso ink and anBlending Brush to very gently add some color to the leaf die cut. I then added this to the card front with dabs of liquid adhesive. I stamped the sentiment with Blackberry Bliss ink and Everyday Greetings stamp set, then fussy cut it. I sued mini dimensionals to add to the back & attach to the card front. I tied a double bow with Linen Thread & attached with a glue dot.
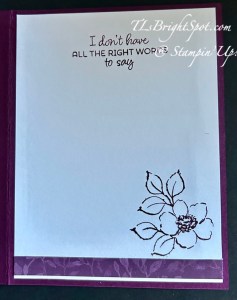
For the inside… I added a stgrip of 3/8 x 4 Floral Charm DSP to the bottom of the Basic White panel. I stamped the floral image in Blackberry Bliss ink using the Charming Day stamp set, then added the sentiment – again, Blackberry Bliss ink but this time using the Comforting Thoughts stamp set. This is obviously a sympathy card – and mentally a tough one because it’s so personal.
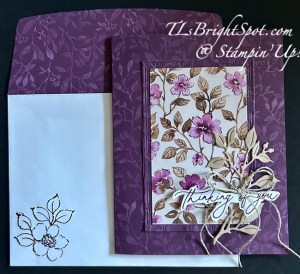
For the envelope… more of the same Floral Charm 12×12 DSP on the flap and trimmed to fit. On the front the same gorgeous floral stamp as used on the inside of the card in Blackberry Bliss ink from the Charming Day stamp set.
ONLY DAYS LEFT FOR THIS SALE!!! Starting June 3, all available suites and suite products from the 2025–2026 Annual Catalog and Online Exclusives are buy one, get one 50% off! If you’ve had your eye on a new suite from the annual catalog or you really like the look of a stamp set from an Online Exclusives suite, you don’t have to choose—you can get both!
Sales Period: June 3–30, 2025
Ordering Deadlines
Phone: June 30, 2025, at 6:59 p.m. (MT)
Online: June 30, 2025, at 11:59 p.m. (MT)
All available suites and suite products from the 2025–2026 Annual Catalog and Online Exclusives are buy one, get one 50% off.
When you shop the sale, the 50% off discount will apply to the lower-priced item (for example, if you buy a suite collection and a stamp set from a suite, the suite would be full price, and the stamp set would be 50% off).
Suite collections are available if all items are in stock; if all items are not in stock, you can still shop the available suite products.
You don’t have to buy a suite and suite products all from the same suite collection for the discount to apply. You can buy any suite products from any suite.
The discount will appear in your cart once you’ve added two items within the sale parameters to your cart.
Products are available only while supplies last.
See and shop all qualifying suites in the online store.
SHOP LAST CHANCE PRODUCTS HERE… NEW ITEMS ADDED TO THE LIST… MAKE CERTAIN MY NAME IS LISTED AS YOUR DEMONSTRATOR WHEN YOU CHEVCK OUT! :O) REMEMBER…Browse the selection of Last Chance paper crafting products. Additional items are added every other month. These products are available only while supplies last so be sure to buy them before they are discontinued! Discounts vary and are subject to change.
VIRTUAL ALBUM RETREAT!!!
Who: Crafters who love to scrapbook!
When: July 16–18, 2025, 2:00–10:30 p.m. (MT)
Where: Private Facebook Group
Registration: There is no registration for this event! By purchasing the Month by Month Album Retreat 2025 kit, you’ll get access to an exclusive Facebook group where the live event will stream.
Price of Month by Month Album Retreat 2025 kit: $250
Language of Event: This event will be presented in English only.
After the Event: You can access the recorded event videos on the Virtual Album Retreat Facebook group page.
CONTACT ME FOR INFORMATION RE: ADDITIONAL SUPPLY LIST
Click HERE to join with me & create your Starter Kit! What’s to lose – 20% discount/ 20% commission on all orders.
THANKS FOR STOPPING BY. MAY YOU HAVE A BEAUTIFUL DAY. MAKE SOMEONE HAPPY SENDING THEM A HANDMADE CARD FILLED WITH LOVE. ❤️ Product List
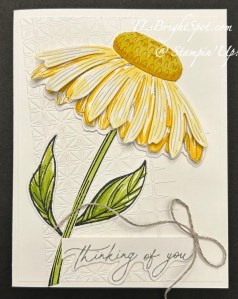
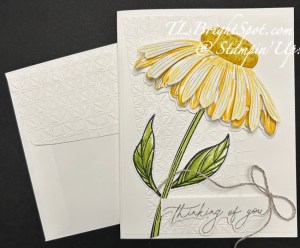
I’m sharing a card today made with the amazing Coneflower Celebrations bundle in the new 2025-2026 Annual Catalog. I’ve made it looking more like a white daisy with bits of color.
The card base is Thick Basic White with an attached Basic White layer run through with one of the Glass Gardens embossing folders (there are two in this package!). I offset the embossing folder for added interest, putting on an angle on the sheet. Then I began creating the flower using the Coneflower Celebration Dies. The top layer is from one die and has light color with the Light Daffoldil Delight Stampin’ Blends; and the other two are from another die. I stamped on one of those bottom layers with stamped off Smoky Slate then added color with Daffodil Delight Stampin’ Blends. I adhered these together creating layers, so slightly offset. The center of the flower is a gorgeous little die cut from Darling Duckling card stock with added color with the Dark Daffodil Delight Stampin’ Blends & Wink of Stella. This too was added to the flower then attached to the card front. The stems and leaves were stamped in Memento ink and colored lightly with Granny Apple Green Stampin blends, then added in place. The sentiment is from the Everyday Greetings stamp set and is stamped in Smoky Slate then fussy cut at the bottom & attached with dimensionals. The final touch is a Linen Thread bow.
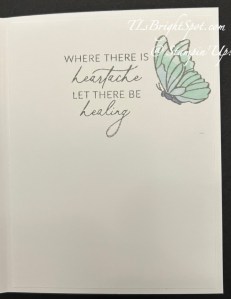
For the inside… again the sentiment is from Everyday Greetings stamp set and stamped in Smoky Slate ink. The butterfly is from the Coneflower Celebrations stamp and stamped in Smoky Slate and colored with Light Balmy Blue, Light Pool Party and Light Misty Moonlight – and of course Wink of Stella. The Basic White panel was added to the inside of the card.
For the envelope… I embossed a piece of Basic White with the same Glass Gardens embossing folder, adhered to the flap & trimmed to fit – done!
BUY ONE GET ONE 50% OFF has begun
On All SUITES and SUITE PRODUCTS!
Starting June 3, all available suites and suite products from the 2025–2026 Annual Catalog and Online Exclusives are buy one, get one 50% off! If you’ve had your eye on a new suite from the annual catalog or you really like the look of a stamp set from an Online Exclusives suite, you don’t have to choose—you can get both!
Sales Period: June 3–30, 2025
Ordering Deadlines
Phone: June 30, 2025, at 6:59 p.m. (MT)
Online: June 30, 2025, at 11:59 p.m. (MT)
All available suites and suite products from the 2025–2026 Annual Catalog and Online Exclusives are buy one, get one 50% off.
When you shop the sale, the 50% off discount will apply to the lower-priced item (for example, if you buy a suite collection and a stamp set from a suite, the suite would be full price, and the stamp set would be 50% off).
Suite collections are available if all items are in stock; if all items are not in stock, you can still shop the available suite products.
You don’t have to buy a suite and suite products all from the same suite collection for the discount to apply. You can buy any suite products from any suite.
The discount will appear in your cart once you’ve added two items within the sale parameters to your cart.
Products are available only while supplies last.
See and shop all qualifying suites in the online store.
SHOP LAST CHANCE PRODUCTS HERE… NEW ITEMS ADDED TO THE LIST… MAKE CERTAIN MY NAME IS LISTED AS YOUR DEMONSTRATOR WHEN YOU CHEVCK OUT! :O) REMEMBER…Browse the selection of Last Chance paper crafting products. Additional items are added every other month. These products are available only while supplies last so be sure to buy them before they are discontinued! Discounts vary and are subject to change.
VIRTUAL ALBUM RETREAT!!!
Who: Crafters who love to scrapbook!
When: July 16–18, 2025, 2:00–10:30 p.m. (MT)
Where: Private Facebook Group
Registration: There is no registration for this event! By purchasing the Month by Month Album Retreat 2025 kit, you’ll get access to an exclusive Facebook group where the live event will stream.
Price of Month by Month Album Retreat 2025 kit: $250
Language of Event: This event will be presented in English only.
After the Event: You can access the recorded event videos on the Virtual Album Retreat Facebook group page.
CONTACT ME FOR INFORMATION RE: ADDITIONAL SUPPLY LIST
Click HERE to join with me & create your Starter Kit! What’s to lose – 20% discount/ 20% commission on all orders.
Thanks for stopping by. May you have a beautiful day. Make someone happy sending them a handmade card filled with love. ❤️
Good Saturday morning. I’v e been under the weather this week – got a full blown head cold, lost my voice, all those things. Ugh… I’m beginning to feel better and hoping to be able to play in my craft room. Today’s card is a sympathy card made with products that as demonstrators we can order early before they become available to the general population. It helps build excitement and give you, the customer a chance to see new products. These will become available May 6 as ONLINE EXCLUSIVES.
This is stunningly beautiful DSP that is called Beautiful Gallery 6×6 DSP. This photo doesn’t show the colors very well (hmmm) but they are Mossy Meadow & other similar shades of green, Basic White, Basic Beige.
I’ve cut the DSP 3 3/4 x 5 and layered it on Mossy Meadow 3 7/8 x 5 1/8. I wrapped a 3/8″ Classic Ribbon in Basic Beige around this, securing it in back with Tear n’ Tape. I took another length and tied a half knot around the ribbon and secured it in place with a glue dot. I die cut this fabulous flower in Basic White using the Beautiful Motifs Dies and slipped it under the ribbon and secured it in place with dots of liquid glue. It’s quite delicate and next time I’ll use Adhesive Sheets adhered to the card stock prior to die cutting. :O) The sentiment also comes from the Beautiful Motifs stamp set and is stamped in Mossy Meadow ink. I adhered this in place with dimensionals. I took another piece of Basic White 4 1/4 x 5 1/2 and ran it through a new embossing folder (part of this fantastic suite!) called the Damask Designs embossing folder and adhered it to the Thick Basic White card base 4 1/4 x 11 scored at 5 1/2. The entire card front was attached to the card base over the embossed front, with dimensionals. As a final touch I added three Pressed Flower Motif embellishments.
For the inside… I was playing with the gorgeous dies in this set and this leaf die fascinated me. It die cuts edges but not the entire piece, so sections can be raised. Really cool! It would be a fabulous card front – but that’s for another day… Anyway – this Mossy Meadow panel is 2 x 5 1/4 and adhered to a 4 x 51/4 Basic White and added to the inside of the card.
More Beautiful Gallery 6×6 DSP adhered to the flap & trimmed to fit. On the envelope front is this very fun stamp from the Beautiful Motifs stamp set, stamped in Mossy Meadow ink.
Stampin’ Up! is doing much more of an online presence these days, adding new products about every 2 months. Want early access to see what’s being added? For $99 get $125 worth of products when joining my team. Do that here… AND after joining, get 20% off all orders. Connecting with other demonstrators is part of the fun of being on a team- there’s always something new to learn. Want to look around in my store? Do that here.
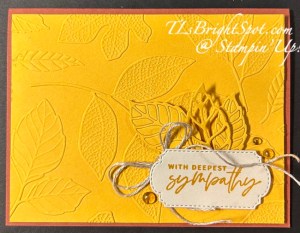
It’s funny how things come about…. I needed a sympathy card and on my desk was a 4 x 5 1/4 panel already embossed with the Changing Leaves Hybrid embossing folder – and I said, why not! And here’s how it turned out…
Gosh, this photo is not the best! Yes, the embossed panel is Crushed Curry as are the die cut leaves, and from the Changing Leaves Dies. The panel is set on dimensionals on a Copper Clay card base 8 1/2 x 5 1/2 scored at 4 1/4. The two outside leaves are attached with dimensionals asa well and the middle leaf simply tucked in and adhered at the stem end, which you cannot see. The sentiment panel is Basic Beige stamped in Crushed Curry ink and die cut with a die from Thoughtful Expressions Dies. The sentiment comes from Something Fancy stamp set. And the Linen Thread is a double bow slipped just under the corner of the sentiment with a glue dot. My final touch was the Gold Textured Adhesive-Backed Dots. I love all the texture and elegance of this card.
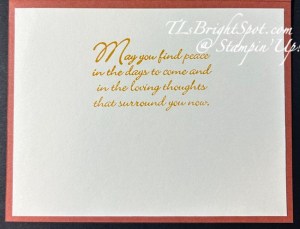
For the inside, I stamped the sentiment in crushed Curry ink but the message is from Hope You Know stamp set – and on a Basic Beige 4 x 5 1/4 panel.
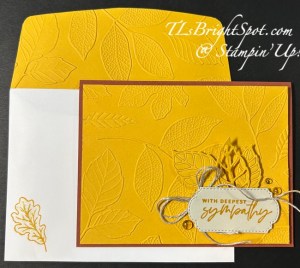
For the envelope… I embossed a 2 1/4 x 6 panel of Crushed Curry card stock with the Changing Leaves Hybrid embossing folder, adhered it and trimmed to fit the flap. The leaf on the front of the envelope is from Autumn Expressions stamp set, stamped in Crushed Curry ink, then added Wink of Stella to the inside of the leaf. It looks very cool – again a bit of texture and glam too. And even though this is a sympathy card, the glam is not overdone. I’ve already passed this card on to the person for whom it was made – and they loved it.
Use this link to take you to the mini catalog and view all the awesome items available.
I appreciate your business and welcome any questions regarding sales or creating or joining my team. Make sure when shopping with me, that you see my name at the top as your demonstrator. That way I can send you a Stampin’ Up! giftie and you can earn rewards – with a $50 order or more. You also receive the monthly tutorial for that particular month – September is Autumn Expressions.
There are new kits available beginning Sep 4 – check by clicking here.
Upcoming Kits Collection Sale
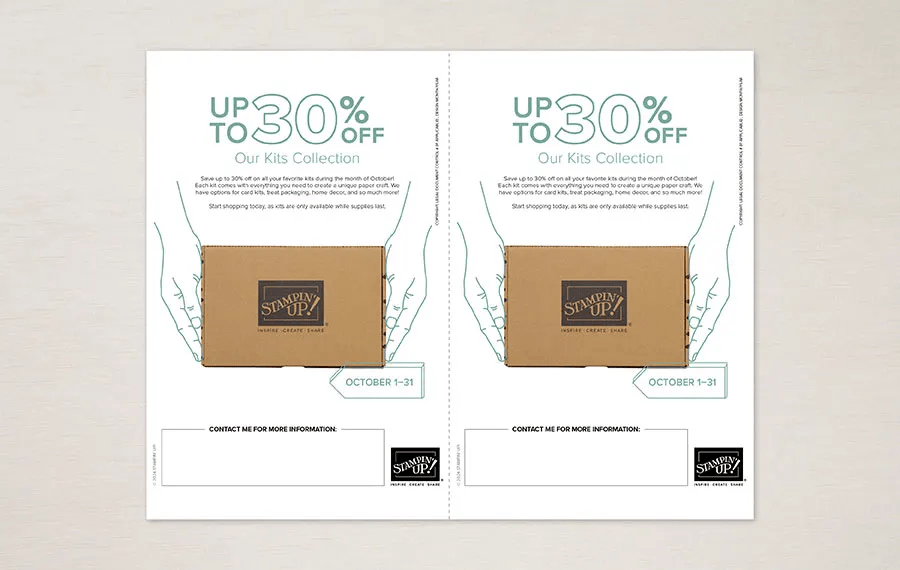
Exciting news! We’re having a huge sale on our Kits Collection beginning October 1! All kits will be available at a discounted price. Save up to 30% off on all your favorite kits October 1–31! Our kits come with everything you need to create a unique paper craft. We have crafting options for card kits, treat packaging, home decor, and so much more!
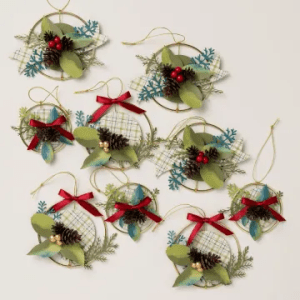
Christmas Ornament Kit – NEW!
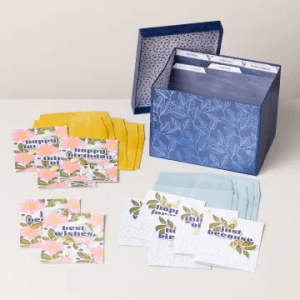
Card Keeper Kit – NEW!
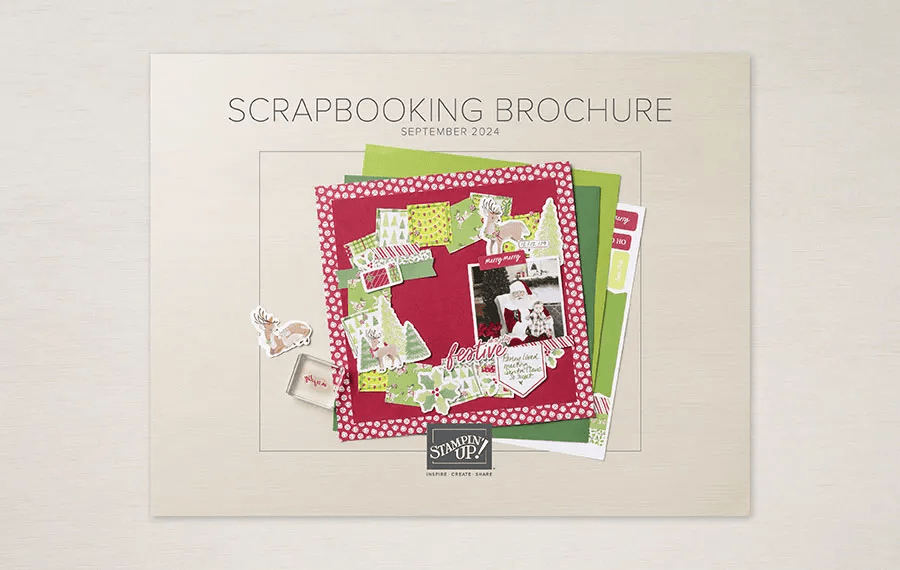
There are new scrapbooking supplies available, click here! Also – click on the brochure for other information. This is a digital-only scrapbooking brochure, full of scrapbooking essentials and exciting new products. As a companion brochure to the September–December 2024 Mini Catalog, the products inside coordinate with products from the mini catalog (and some online only products, too!). With Workshop Kits and some new product releases *hint* Two-Tone Cardstock *hint*, we hope this adds variety and inspiration to your and your customers’ holiday crafts this year!
Products will be available like our Online Exclusive releases, meaning that some products will be reordered when inventory is low, and others will only be available while supplies last.
Santa Claus is comin’ to town a bit early this year—and he’s brought a holiday Paper Pumpkin sale! Starting September 11, 2024, at 12:01 a.m. (MT) until October 10, 2024, at 11:50 p.m. (MT), anyone who signs up for our monthly Paper Pumpkin subscription as a new subscriber will receive 40% off their first kit. That’s right, 40% OFF!
Where This Discount Is Applied This discount will be applied to one kit in the first kit shipment of the Paper Pumpkin subscription, which means new subscribers will get 40% off the October Nests of Christmas Paper Pumpkin Kit. After that, each month’s kit will return to the regular price of $25.00.
Qualifying for This Discount This offer is only for new month-to-month subscribers and is not valid on purchased or redeemed prepaid subscriptions.
Now that you’ve read through all the details, it’s time to head to paperpumpkin.com to subscribe and use code HOLIDAY40 to get 40% off your first month!
Click the image above to see that’s available in the ONLINE EXCLUSIVES!
Shop the Clearance Rack for Great Products at a Fantastic Discount!
September 24
We’ve added new items to the Clearance Rack in our online store. Reach out to your customers so they can shop and save up to 60% off select products.
As we evaluated inventory levels from our 2024 Sale-A-Bration offering, we decided to provide you and your customers with a second chance to add different products to your craft supplies.
These items are only available while supplies last, so act quickly to spread the word! Visit the CLEARANCE RACK store to start shopping.
NEW HOST CODE … SEP 26- OCT 15 NDADFHMR
Thanks for stopping by. May you have a beautiful day!

![Phrases & Frames Bundle (English) [ 167587 ]](https://assets1.tamsnetwork.com/images/EC042017NF/167587s.jpg "Phrases & Frames Bundle (English) [ 167587 ]")
![Bloom Boutique 12" X 12" (30.5 X 30.5 Cm) Specialty Designer Series Paper [ 167637 ]](https://assets1.tamsnetwork.com/images/EC042017NF/167637s.jpg "Bloom Boutique 12\" X 12\" (30.5 X 30.5 Cm) Specialty Designer Series Paper [ 167637 ]")
![2026–2028 In Color™ Butterflies [ 167656 ]](https://assets1.tamsnetwork.com/images/EC042017NF/167656s.jpg "2026–2028 In Color™ Butterflies [ 167656 ]")
![Hydrangea Hue 3/8" (1 Cm) Bordered Ribbon [ 167549 ]](https://assets1.tamsnetwork.com/images/EC042017NF/167549s.jpg "Hydrangea Hue 3/8\" (1 Cm) Bordered Ribbon [ 167549 ]")
![Hydrangea Hue 8 1/2" X 11" Cardstock [ 167687 ]](https://assets1.tamsnetwork.com/images/EC042017NF/167687s.jpg "Hydrangea Hue 8 1/2\" X 11\" Cardstock [ 167687 ]")
![Hydrangea Hue Classic Stampin' Pad [ 167677 ]](https://assets1.tamsnetwork.com/images/EC042017NF/167677s.jpg "Hydrangea Hue Classic Stampin' Pad [ 167677 ]")
![Peaceful Pine 8 1/2" X 11" Cardstock [ 167691 ]](https://assets1.tamsnetwork.com/images/EC042017NF/167691s.jpg "Peaceful Pine 8 1/2\" X 11\" Cardstock [ 167691 ]")
![Small Blending Brushes [ 160518 ]](https://assets1.tamsnetwork.com/images/EC042017NF/160518s.jpg "Small Blending Brushes [ 160518 ]")
![Basic White 12" X 12" (30.5 X 30.5 Cm) Thick Cardstock [ 166782 ]](https://assets1.tamsnetwork.com/images/EC042017NF/166782s.jpg "Basic White 12\" X 12\" (30.5 X 30.5 Cm) Thick Cardstock [ 166782 ]")
![Basic White Medium Envelopes [ 159236 ]](https://assets1.tamsnetwork.com/images/EC042017NF/159236s.jpg "Basic White Medium Envelopes [ 159236 ]")
![Basic White 8 1/2" X 11" Cardstock [ 166780 ]](https://assets1.tamsnetwork.com/images/EC042017NF/166780s.jpg "Basic White 8 1/2\" X 11\" Cardstock [ 166780 ]")
![Clear Wink Of Stella Glitter Brush [ 141897 ]](https://assets1.tamsnetwork.com/images/EC042017NF/141897s.jpg "Clear Wink Of Stella Glitter Brush [ 141897 ]")
![Stampin' Cut & Emboss Machine [ 149653 ]](https://assets1.tamsnetwork.com/images/EC042017NF/149653s.jpg "Stampin' Cut & Emboss Machine [ 149653 ]")
![Paper Trimmer [ 152392 ]](https://assets1.tamsnetwork.com/images/EC042017NF/152392s.jpg "Paper Trimmer [ 152392 ]")
![Stampin' Dimensionals [ 104430 ]](https://assets1.tamsnetwork.com/images/EC042017NF/104430s.jpg "Stampin' Dimensionals [ 104430 ]")
![Multipurpose Liquid Glue [ 110755 ]](https://assets1.tamsnetwork.com/images/EC042017NF/110755s.jpg "Multipurpose Liquid Glue [ 110755 ]")
![Mini Glue Dots [ 103683 ]](https://assets1.tamsnetwork.com/images/EC042017NF/103683s.jpg "Mini Glue Dots [ 103683 ]")
![Paper Snips [ 103579 ]](https://assets1.tamsnetwork.com/images/EC042017NF/103579s.jpg "Paper Snips [ 103579 ]")
![Take Your Pick [ 144107 ]](https://assets1.tamsnetwork.com/images/EC042017NF/144107s.jpg "Take Your Pick [ 144107 ]")
![Metallics Wow! Embossing Powder [ 165678 ]](https://assets1.tamsnetwork.com/images/EC042017NF/165678s.jpg "Metallics Wow! Embossing Powder [ 165678 ]")
![Heat Tool (Us And Canada) [ 129053 ]](https://assets1.tamsnetwork.com/images/EC042017NF/129053s.jpg "Heat Tool (Us And Canada) [ 129053 ]")
![Embossing Additions Tool Kit [ 159971 ]](https://assets1.tamsnetwork.com/images/EC042017NF/159971s.jpg "Embossing Additions Tool Kit [ 159971 ]")
![Forever Florals Bundle (English) [ 167444 ]](https://assets1.tamsnetwork.com/images/EC042017NF/167444s.jpg "Forever Florals Bundle (English) [ 167444 ]")
![2026–2028 In Color™ Painted Patterns 12" X 12" (30.5 X 30.5 Cm) Designer Series Paper [ 167755 ]](https://assets1.tamsnetwork.com/images/EC042017NF/167755s.jpg "2026–2028 In Color™ Painted Patterns 12\" X 12\" (30.5 X 30.5 Cm) Designer Series Paper [ 167755 ]")
![Artisan Sketched Garden 12" X 12" (30.5 X 30.5 Cm) Designer Series Paper [ 167752 ]](https://assets1.tamsnetwork.com/images/EC042017NF/167752s.jpg "Artisan Sketched Garden 12\" X 12\" (30.5 X 30.5 Cm) Designer Series Paper [ 167752 ]")
![Golden Glow Stampin’ Blends Combo Pack [ 167682 ]](https://assets1.tamsnetwork.com/images/EC042017NF/167682s.jpg "Golden Glow Stampin’ Blends Combo Pack [ 167682 ]")
![Fresh Freesia Stampin' Blends Combo Pack [ 155518 ]](https://assets1.tamsnetwork.com/images/EC042017NF/155518s.jpg "Fresh Freesia Stampin' Blends Combo Pack [ 155518 ]")
![Peaceful Pine Stampin’ Blends Combo Pack [ 167668 ]](https://assets1.tamsnetwork.com/images/EC042017NF/167668s.jpg "Peaceful Pine Stampin’ Blends Combo Pack [ 167668 ]")
![Berry Botanical Vellum 12" X 12" (30.5 X 30.5 Cm) Specialty Designer Series Paper [ 167985 ]](https://assets1.tamsnetwork.com/images/EC042017NF/167985s.jpg "Berry Botanical Vellum 12\" X 12\" (30.5 X 30.5 Cm) Specialty Designer Series Paper [ 167985 ]")
![Framed All Around Photopolymer Stamp Set (English) [ 167221 ]](https://assets1.tamsnetwork.com/images/EC042017NF/167221s.jpg "Framed All Around Photopolymer Stamp Set (English) [ 167221 ]")
![Golden Glow 8 1/2" X 11" Cardstock [ 167685 ]](https://assets1.tamsnetwork.com/images/EC042017NF/167685s.jpg "Golden Glow 8 1/2\" X 11\" Cardstock [ 167685 ]")
![Golden Glow 3/8" (1 Cm) Bordered Ribbon [ 167548 ]](https://assets1.tamsnetwork.com/images/EC042017NF/167548s.jpg "Golden Glow 3/8\" (1 Cm) Bordered Ribbon [ 167548 ]")
![Basic Black 8-1/2" X 11" Cardstock [ 121045 ]](https://assets1.tamsnetwork.com/images/EC042017NF/121045s.jpg "Basic Black 8-1/2\" X 11\" Cardstock [ 121045 ]")
![Fresh Freesia 8 1/2" X 11" Cardstock [ 155613 ]](https://assets1.tamsnetwork.com/images/EC042017NF/155613s.jpg "Fresh Freesia 8 1/2\" X 11\" Cardstock [ 155613 ]")

![Lovely & Beautiful 12" X 12" (30.5 X 30.5 Cm) Specialty Designer Series Paper [ 166957 ]](https://assets1.tamsnetwork.com/images/EC042017NF/166957s.jpg "Lovely & Beautiful 12\" X 12\" (30.5 X 30.5 Cm) Specialty Designer Series Paper [ 166957 ]")
![Beautifully Celebrated Bundle (English) [ 166975 ]](https://assets1.tamsnetwork.com/images/EC042017NF/166975s.jpg "Beautifully Celebrated Bundle (English) [ 166975 ]")
![Lovely & Beautiful Suite Collection (English) [ 166981 ]](https://assets1.tamsnetwork.com/images/EC042017NF/166981s.jpg "Lovely & Beautiful Suite Collection (English) [ 166981 ]")
![Simply Beautiful Bundle (English) [ 166965 ]](https://assets1.tamsnetwork.com/images/EC042017NF/166965s.jpg "Simply Beautiful Bundle (English) [ 166965 ]")
![Pearlized Faceted Circles [ 166978 ]](https://assets1.tamsnetwork.com/images/EC042017NF/166978s.jpg "Pearlized Faceted Circles [ 166978 ]")
![Words Of Beauty Dies (English) [ 167089 ]](https://assets1.tamsnetwork.com/images/EC042017NF/167089s.jpg "Words Of Beauty Dies (English) [ 167089 ]")
![Soft Sea Foam Stampin' Blends Combo Pack [ 154902 ]](https://assets1.tamsnetwork.com/images/EC042017NF/154902s.jpg "Soft Sea Foam Stampin' Blends Combo Pack [ 154902 ]")
![Old Olive Classic Stampin' Pad [ 147090 ]](https://assets1.tamsnetwork.com/images/EC042017NF/147090s.jpg "Old Olive Classic Stampin' Pad [ 147090 ]")
![Versamark Pad [ 102283 ]](https://assets1.tamsnetwork.com/images/EC042017NF/102283s.jpg "Versamark Pad [ 102283 ]")


![Sunflower 3 D Embossing Folder [ 166145 ]](https://assets1.tamsnetwork.com/images/EC042017NF/166145s.jpg "Sunflower 3 D Embossing Folder [ 166145 ]")
![Everyday Greetings Photopolymer Stamp Set (English) [ 165084 ]](https://assets1.tamsnetwork.com/images/EC042017NF/165084s.jpg "Everyday Greetings Photopolymer Stamp Set (English) [ 165084 ]")
![Tailor Made Tags Dies [ 155563 ]](https://assets1.tamsnetwork.com/images/EC042017NF/155563s.jpg "Tailor Made Tags Dies [ 155563 ]")
![Baker's Twine Essentials Pack [ 155475 ]](https://assets1.tamsnetwork.com/images/EC042017NF/155475s.jpg "Baker's Twine Essentials Pack [ 155475 ]")
![Bubble Bath 8 1/2" X 11" Cardstock [ 161718 ]](https://assets1.tamsnetwork.com/images/EC042017NF/161718s.jpg "Bubble Bath 8 1/2\" X 11\" Cardstock [ 161718 ]")
![Bubble Bath Classic Stampin' Pad [ 161664 ]](https://assets1.tamsnetwork.com/images/EC042017NF/161664s.jpg "Bubble Bath Classic Stampin' Pad [ 161664 ]")
![Fresh Freesia Classic Stampin' Pad [ 155611 ]](https://assets1.tamsnetwork.com/images/EC042017NF/155611s.jpg "Fresh Freesia Classic Stampin' Pad [ 155611 ]")
![Bone Folder [ 102300 ]](https://assets1.tamsnetwork.com/images/EC042017NF/102300s.jpg "Bone Folder [ 102300 ]")
![Linen Thread [ 104199 ]](https://assets1.tamsnetwork.com/images/EC042017NF/104199s.jpg "Linen Thread [ 104199 ]")
![Stampin' Seal [ 152813 ]](https://assets1.tamsnetwork.com/images/EC042017NF/152813s.jpg "Stampin' Seal [ 152813 ]")

![Cloud Cover Classic Stampin' Ink Refill [ 165279 ]](https://assets1.tamsnetwork.com/images/EC042017NF/165279s.jpg "Cloud Cover Classic Stampin' Ink Refill [ 165279 ]")
![Uninked Stampin' Spots [ 141822 ]](https://assets1.tamsnetwork.com/images/EC042017NF/141822s.jpg "Uninked Stampin' Spots [ 141822 ]")
![Sponge Daubers [ 133773 ]](https://assets1.tamsnetwork.com/images/EC042017NF/133773s.jpg "Sponge Daubers [ 133773 ]")
![Silver & White 1/2" (1.3 Cm) Sheer Ribbon [ 162149 ]](https://assets1.tamsnetwork.com/images/EC042017NF/162149s.jpg "Silver & White 1/2\" (1.3 Cm) Sheer Ribbon [ 162149 ]")
![Journaling Pens [ 145480 ]](https://assets1.tamsnetwork.com/images/EC042017NF/145480s.jpg "Journaling Pens [ 145480 ]")
![Tuxedo Black Memento Ink Pad [ 132708 ]](https://assets1.tamsnetwork.com/images/EC042017NF/132708s.jpg "Tuxedo Black Memento Ink Pad [ 132708 ]")
![Basic White 8 1/2" X 11" Thick Cardstock [ 159229 ]](https://assets1.tamsnetwork.com/images/EC042017NF/159229s.jpg "Basic White 8 1/2\" X 11\" Thick Cardstock [ 159229 ]")
![Blackberry Bliss 8-1/2" X 11" Cardstock [ 133675 ]](https://assets1.tamsnetwork.com/images/EC042017NF/133675s.jpg "Blackberry Bliss 8-1/2\" X 11\" Cardstock [ 133675 ]")
![Blackberry Bliss Classic Stampin' Pad [ 147092 ]](https://assets1.tamsnetwork.com/images/EC042017NF/147092s.jpg "Blackberry Bliss Classic Stampin' Pad [ 147092 ]")
![Comforting Thoughts Photopolymer Stamp Set (English) [ 163691 ]](https://assets1.tamsnetwork.com/images/EC042017NF/163691s.jpg "Comforting Thoughts Photopolymer Stamp Set (English) [ 163691 ]")
![Basic Beige 8 1/2" X 11" Cardstock [ 164511 ]](https://assets1.tamsnetwork.com/images/EC042017NF/164511s.jpg "Basic Beige 8 1/2\" X 11\" Cardstock [ 164511 ]")
![Early Espresso Classic Stampin' Pad [ 147114 ]](https://assets1.tamsnetwork.com/images/EC042017NF/147114s.jpg "Early Espresso Classic Stampin' Pad [ 147114 ]")
![Coneflower Celebration Bundle (English) [ 165251 ]](https://assets1.tamsnetwork.com/images/EC042017NF/165251s.jpg "Coneflower Celebration Bundle (English) [ 165251 ]")
![Glass & Gardens Embossing Folders [ 165597 ]](https://assets1.tamsnetwork.com/images/EC042017NF/165597s.jpg "Glass & Gardens Embossing Folders [ 165597 ]")
![Smoky Slate Classic Stampin' Pad [ 147113 ]](https://assets1.tamsnetwork.com/images/EC042017NF/147113s.jpg "Smoky Slate Classic Stampin' Pad [ 147113 ]")
![Daffodil Delight Stampin' Blends Combo Pack [ 154883 ]](https://assets1.tamsnetwork.com/images/EC042017NF/154883s.jpg "Daffodil Delight Stampin' Blends Combo Pack [ 154883 ]")
![Balmy Blue Stampin' Blends Combo Pack [ 154830 ]](https://assets1.tamsnetwork.com/images/EC042017NF/154830s.jpg "Balmy Blue Stampin' Blends Combo Pack [ 154830 ]")
![Pool Party Stampin' Blends Markers Combo Pack [ 144605 ] (Retired)](https://assets1.tamsnetwork.com/images/EC042017NF/144605s.jpg "Pool Party Stampin' Blends Markers Combo Pack [ 144605 ] (Retired)")
![Misty Moonlight Stampin' Blends Combo Pack [ 153108 ]](https://assets1.tamsnetwork.com/images/EC042017NF/153108s.jpg "Misty Moonlight Stampin' Blends Combo Pack [ 153108 ]")