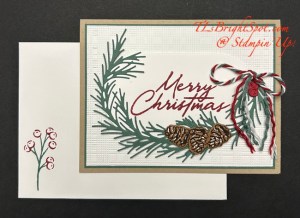
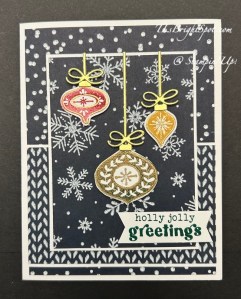
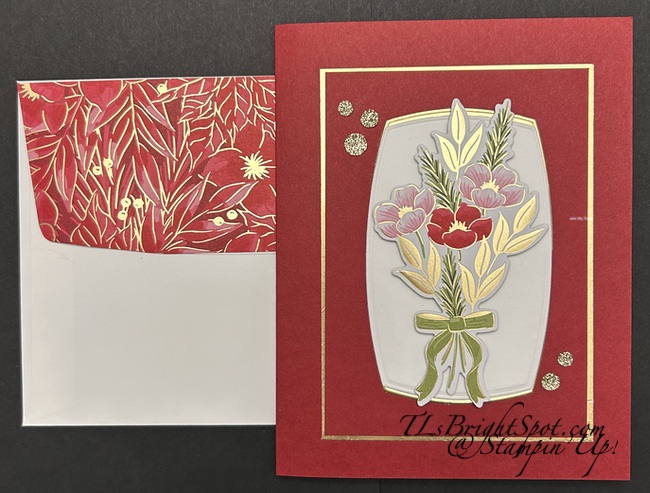
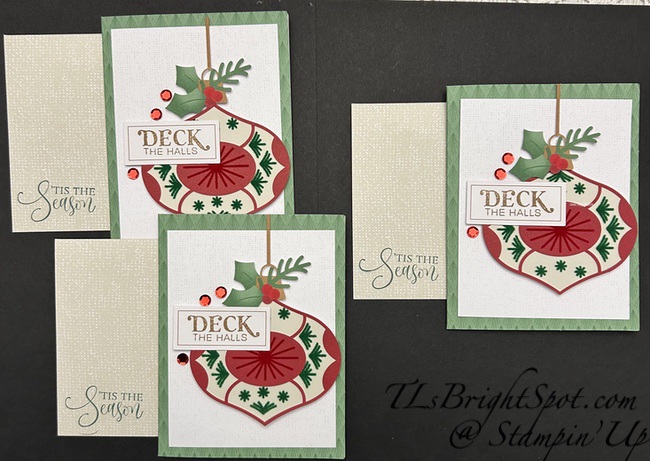
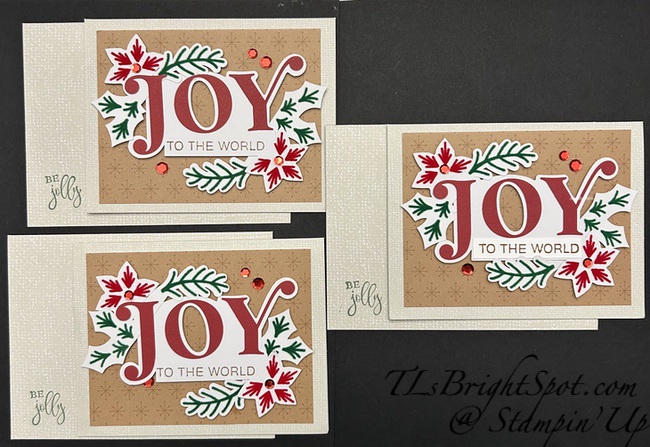
Stampin’ Up! Winter Dreams SDSP & Festive Cheer Bundle for the Happy Inkin’ Thursday Blog Hop

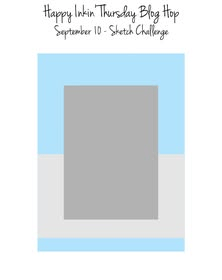
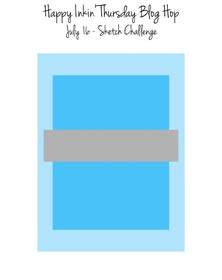
Good Thursday & WELCOME to our hop! We have a sketch challenge today that I’ve taken some liberties to create. I hope you like the result 😀 If you’ve come from the fabulous & creative Tara, I’m glad you stopped by. If you hopped right in here – yay! Enjoy the hop.

Stampin' Up! Blog hop logo
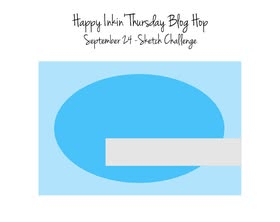
Stampin' Up! Hop Sketch Challenge
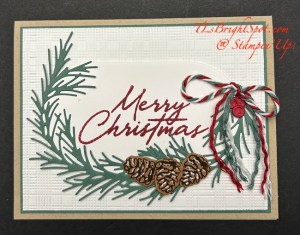
Stampin' Up! Winter Dreams SDSP & Festive Cheer card front

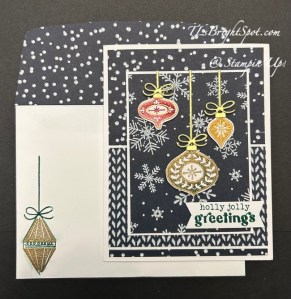
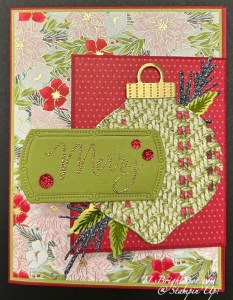
Gosh this is gorgeous flocked paper! I love the feel AND the images AND the flocking. My card base is a standard A2 with the fold on the left in Thick Basic White. The various layers of the SDSP are 4 x 5 1/4, 4 x 2 1/2, & 3 x 4. Thin strips of Basic White are behind the 4 x 2 1/2 panel; 3 1/8 x 4 1/8 Basic White is attached to the 3 x 4 and attached with dimensionals. The ornaments are stamped and WOW! Metallic gold heat embossed on Basic White scraps and also attached with dimensionals. The hangars & bows for the ornaments are die cut from Gold Foil and attached with liquid glue. The sentiment is stamped with Shaded Spruce ink on Basic White 2 x 5/8 and attached with dimensionals. The ornaments are also stamped with ink… stamped off Cherry Cobbler and full strength Golden Glow. Everything is from the phenomenal Festive Cheer stamp set and dies.

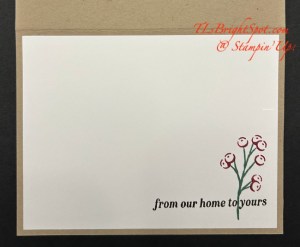
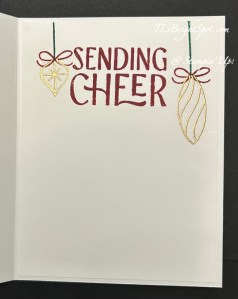
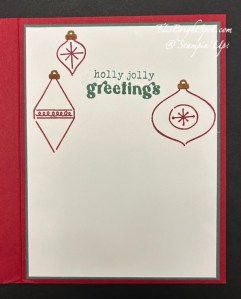
Stampin' Up! Festive Cheer inside card

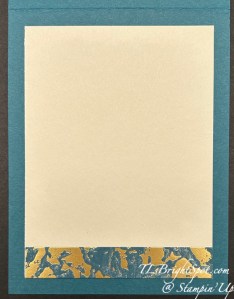
For the inside, I started by stamping the sentiment in Cherry Cobbler on a Basic White 4 x 5 1/4 panel. I then stamped the ornaments with VersaMark and sprinkled them with Wow! Metallic embossing powder, gold, and heat set. I stamped the ‘strings’ in Shaded Spruce and the bows in Cherry Cobbler.

Stampin' Up! Winter Dreams SDSP & Festive Cheer card & envekope

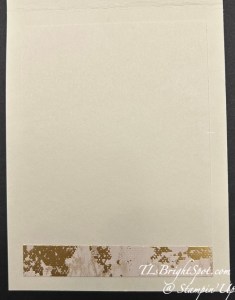
For the envelope, more of the Winter Dream SDSP on the flap & trimmed to fit. On the front I stamped the ornament with VersaMark, sprinkled it with Wow! Metallic embossing powder in gold and heat set. The string & bow are stamped in Shaded Spruce ink. These images are from the Festive Cheer stamp set.

To purchase these items from me, see the images below with a link. Both the SDSP & the bundle are ONLINE EXCLUSIVES and fun products!

To continue on the hop, click the next button or click on a name. Enjoy the all the creativity!

Stampin' Up! Hop button

Amy Koenders

Mary Deatherage

Karen Ksenzakovic

Tara Carpenter

Terry Lynn Bright

Charlene Tackvic

Thanks for stopping by. May you have a beautiful day. Make someone happy by sending them a handmade card filled with ❤️

Product List

Stampin’ Up! Festive Cheer Christmas Card for the Happy Inkin’ Thursday Blog Hop

Welcome to our hop! It’s Thursday & we have a sketch challenge this week. I’m using a ‘new to me’ stamp bundle called Festive Cheer. I’m loving all the images & dies in the set :O)

Stampin' Up! Blog Hop group
Stampin' Up! blog hop challenge
Stampin' Up! Festive Cheer card front

My card begins with a Cherry Cobbler card base 8 1/2 x 5 1/2 scored at 4 1/4. Two layers were added: Peaceful Pine & 2026-2028 In Color Gingham Gallery 12×12. I set these aside to do stamping & die cuts using the Festive Cheer bundle from the July ONLINE EXCLUSIVES. Yes, I have begun that Christmas card plunge! Die cuts were made using the Festive Cheer Dies and Velveteen Assortment 12×12 Specialty Paper for two pine fronds; Cherry Cobbler card stock with a backing of Adhesive Sheet for the NOEL; Gold foil for the berries. I stamped the ornament in VersaMark, sprinkled it with WOW! Metallic gold embossing powder & heat set then die cut once cooled. I also die cut from gold foil, the hanger and the ornament top.

The letters NOEL were attached to a Basic White strip that had Peaceful Pine behind it for definition. These we4re added with dimensionals. The pine frond was added with a dimensional at the left end and liquid glue on the stem end. The berries were added with dots of liquid glue. The ornament was added with liquid glue and a mini dimensional at the top.

Stampin' Up! Festive Cheer inside card

For the inside I stamped the sentiment from Festive Cheer in Peaceful {ine ink, then the ornamets in Cherry Cobbler ink and the ornament top in Pecan Pie ink. This Basic White panel was added to a Peaceful Pine then to the inside of the card. Voila! Ready to send, but of course it is only July!!! In the stack it goes. 😀

Stampin' Up! Festive Cheer card & envelope

For the envelope, more of the 2026-2028 In Color Gingham Gallery attached with Stampin’ Seal to the flap & trimmed to fit. On the front the sentiment was stamped three times in Peaceful Pine ink. Interestingly I only used the Festive Cheer bundle for this card – no additional sentiments from another set. So, love that!

Now, time to see what the others in our group have created for today – I’ll bet they are fab! Click the next button to take you to Amy, or click on a name to visit someone else. Enjoy the hop!

Stamp[in' Up! blog hop button

Amy Koenders

Mary Deatherage

Karen Ksenzakovic

Tara Carpenter

Terry Lynn Bright

SHOP ALL STAMPIN’ UP! ITEMS WITH ME HERE!

Thanks for stopping by. May you have a beautiful day. Make someone happy by sending them a handmade card filled with ❤️

Product List

Stampin’ Up! Woodland Wishes, July ONLINE EXCLUSIVE

Good Sunday morning! It’s beautiful this morning, a refreshing 67 at 6 AM. So today is… a Christmas card using the very sweet Woodland Wishes stamp set. And if you enjoy coloring as I do, this is a fun stamp set to have in your Christmas stash.

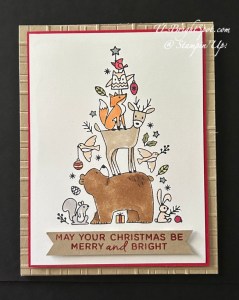
Stampin' Up! Woodland Wishes C'mas Card

I used Memento ink to stamp the image on a Basic White panel and colored with several different Stampin’ Blends: Crumb Cake, Smoky Slate, Pecan Pie, Ivory, Light Pumpkin Pie,Petal Pink, Poppy Parade, Dark Cloud Cover, Light Old Olive & Light Mossy Meadow. I also used Shimmer Brush in Golden Glow and Wink of Stella. Once colored this was attached to a Real Red 3 7/8 x 5 1/8. I embossed a 4 1/4 x 5 1/2 Crumb Cake with the Forever Plaid embossing folder and attached it to the Crumb cake card base (4 1/4 x 11) The stamped images were then added with dimensionals.

I stamped the sentiment in Real Redink on a Crumb Cake strip, then again in VersaMark, sprinkled it with Clear embossing powder & heat set.It’s best to use the Stampin’ Positioner for this step! I angled the ends and attached with dimensionals.

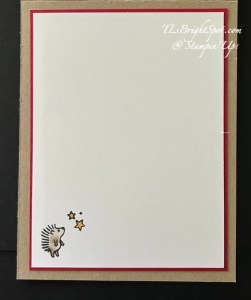
Stampin' Up! Woodland Wishes inside card

For the inside… I stamped this very cute porcupine in Memento ink & colored him with Stampin’ Blends using Crumb Cake. I stamped the stars also in Memento ink and used the Shimmer Brush in Golden Glow to color them. Theis 3 3/4 x 5 panel of Basic White was attached to Real Red 3 7/8 x 5 1/8 then added to the inside of the card.

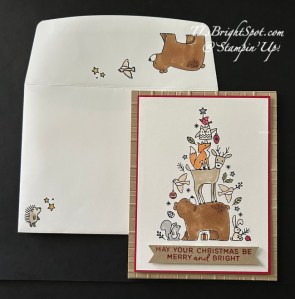
Stampin' Up! Woodland Wishes card & envelope

For the envelope, I used the Woodland Wishes to stamp both the flap & the front with images from the Woodland Wishes stamp set – all in Memento ink. I colored them as well: Stampin’ Blends in Crumb Cake, Pecan Pie, Petal Pink and the Shimmer Brush inGolden Glow. What a peaceful scene this all creates!

Thanks for stopping by. May you have a beautiful day! Make someone happy by sending them a handmade card filled with ❤️

SHOP WITH ME HERE

Product List

Paper Snips [ 103579 ]
[103579]
$12.00

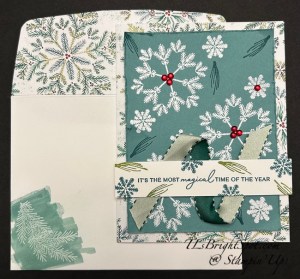
Stampin’ Up! Delicate Pines & Snowflakes for the Happy Inkin’ Thursday Blog Hop

Good morning sweet friends – HAPPY THANKSGIVING! My prayer for you is that you are able to be thankful & grateful for your life and those in your life. Life is short – love fully & completely. Our life changes when we support one another & give back. Special blessings!

It’s hop time in the Inkin’ Krew world… and our theme is winter/ snow I had all kinds of ideas going through my head and ended with doing something quite traditional.

Stampin' Up! Delicate Pines & Snowflakes

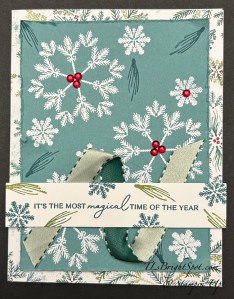
The card base is Thick Basic White with a layer of Elegant Pines DSP covering the front of the card base. I then pulled out Lost Lagoon card stock & removed any particles with my embossing buddy and proceeded to stamp several snowflake images in VersaMark ink. I sprinkled these with WOW! White Embossing Powder & heat set it with my heat tool. I let that cool and stamped the pine needles in Lost Lagoon ink. I roughed the edges of the Lost Lagoon with my scissors and bent & curled some edges & attached it to the card front with dimensionals. I also stamped a Basic White strip with a sentiment from Delicate Pines in Lost Lagoon ink & snowflake & pine needles in Lost Lagoon and Old Olive inks. I added this fun Bordered Ribbon to the b ack of the sentiment strip & attached it to the Lost Lagoon front with dimesnionals. As a final touch I added these embellishments to the centers of several snowflakes.

Stampin' Up! Delicate Pines inside of card

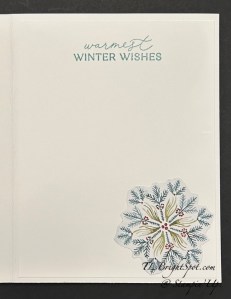
For the inside… I fussy cut this snowflake from the Elegant Pines DSP and adhered it with liquid glue to a Basic White panel then stamped the sentiment from Delicate Pines stamp set in Lost Lagoon ink and adhered the panel to the inside of the card.

Stampin' Up! Delicate Pines & snowflakes card & envelope

For the envelope I stamped this wonderful pine branch in VersaMark ink, sprinkled it with WOW! White embossing powder and heat set it with my heat tool. When dry I used my Lost Lagoon Stampin’ Blend to color the area over the snowflake for an emboss resist look. :O) I buffed it gently to remove ink from the embossing.

And now – continue viewing what others have created by following the links below… click on next or a name. Happy hopping!

Stampin' Up! hop link

Amy Koenders

Mary Deatherage

Karen Ksenzakovic

Tara Carpenter

Terry Lynn Bright

Nicole Bloxom

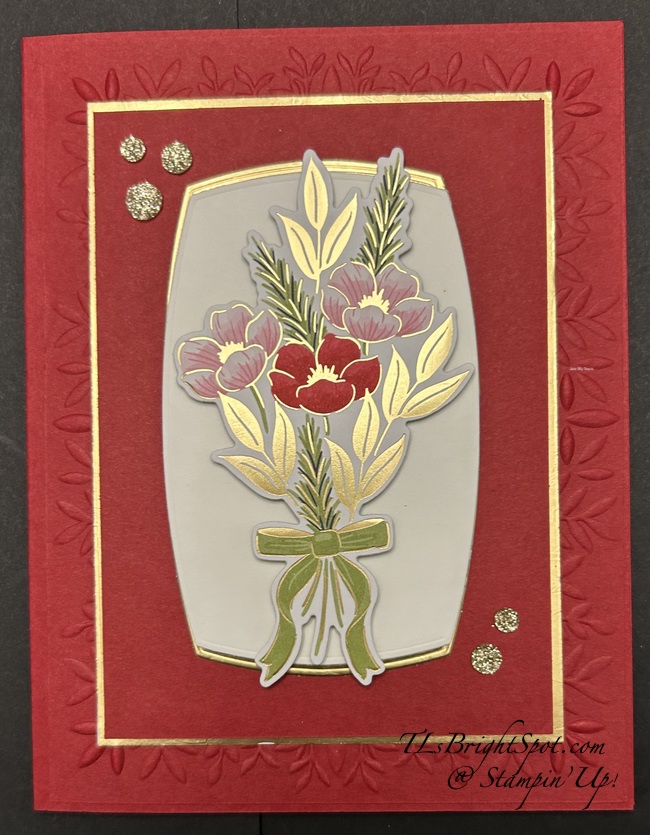
Stampin’ Up! Peaceful Greenery EF with Traditions of Christmas DSP

Embossing folders help create wonderful texture on a card and I’ve used the Peaceful Greenery embossing folder to do just that – it’s a great background embossing folder.

Stampin' Up! Peaceful Greenery w/ Traditions of C'mas card front

I’m leaving the photo in large format so you can really see the embossing folder & how that added texture really makes the. card – at least it does for me! Of course the wonderful die cut from the Traditions of Christmas SDSP is pretty special too. Add in the gold foil and the Traditional Sparkling Sequins and the card is a win/ win. To create the background the floral die cut sits on, I used the Label Me Grateful Dies to die cut from the center of the gold foil used to surround the Cherry Cobbler smaller panel. I cut it in half across the center and adhered a the Basic White die cut from the same Label Me Grateful Dies. The floral die cut is attached with dimensionals while everything else is added with adhesive directly to each layer. Those card cuts will be listed below.

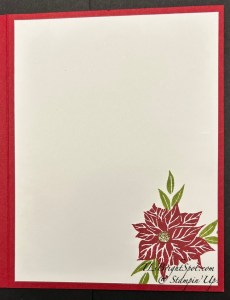
Stampin' Up! Christmas Gallery inside card

For the inside of the card, I used the Christmas Gallery stamp set to stamp this gorgeous poinsettia in Cherry Cobbler ink and the leaves in Old Olive ink. In the center of the flower is another Traditional Sparkling Sequin in Gold. The Basic White panel was added to the inside of the card.

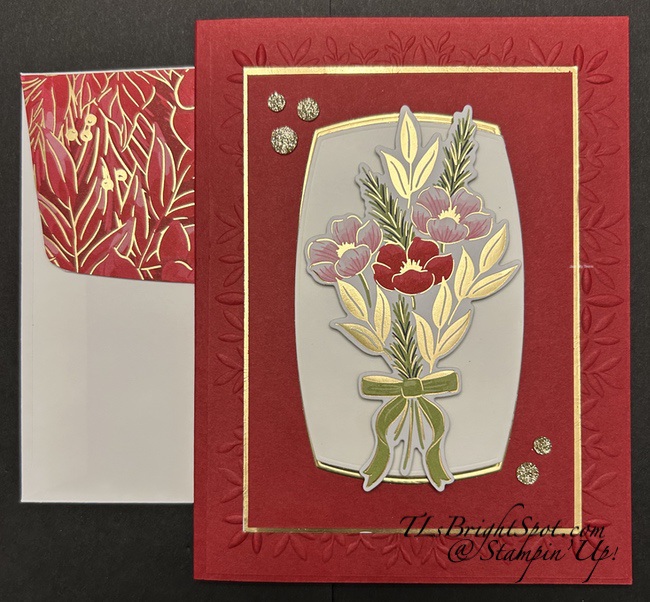
Stampin' Up! Peaceful Greenery EF w/ Traditonals of Christmas SDSP card & envelope

For the envelope, another panel of the Traditions of Christmas SDSP was added to the flap and another poinsettia & leaves was stamped on the envelope front, which I forgot to photograph!

Here’s the 2nd card… no embossing folder used and while it’s nice, I really prefer the card with the embossing folder. The inside and envelope had the same treatment – and I’ve left them in large format so you can see the difference. :O) Just curious – do you prefer one over the other?

Stampin' Up! Traditions of Christmas SDSP card & envelope

Card cuts:

  • Cherry Cobbler 8 1/2 x 5 1/2 scored at 4 1/4; 4 1/8 x 5 3/8 (embossed); 3 18 x 4 3/8
  • Gold Foil 3 14 x 4 1/2 (center die cut banner)
  • Basic White 2 1/2 x 4 (banner); 4 x 5 1/4 (inside)
  • Traditions of Christmas SDSP – floral die cut from SDSP; 2 1/4 x 6 (envelope flap

Thanks for Stopping by. May you have a beautiful day. Make someone happy by sending them a handmade card filled with ❤️

Want these products) See the list below and simply click all to purchase. Want other Stampin’ Up! products in my shop – click here to shop with me and get anything from ONLINE EXCLUSIVES to Paper Pumpkin to last chance items. To JOIN MY TEAM – click the link. 😀 We have tons of fun, sharing projects, collaborating, learning new tricks. Would love to have you. 🎁


Product List

Stampin’ Up! Nests of Winter DSP & Sketch

WOW – November! Halloween is behind us & Thanksgiving is coming soon. What a time to be be thankful & grateful… yes, yes. I’m thankful for all of you & grateful for this fun craft which I so enjoy. So MANY blessings… lest I get sappy… let me share today’s card.

Stampin' Up! Nests of Winter DSP card front

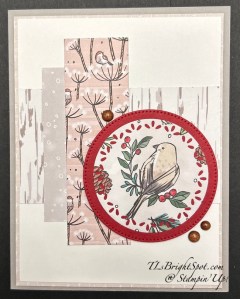
This cute little bird has been sitting on my desk for a bit. He was supposed to be used on another project & well, I got busy with other cards, designs & stuff. He was die cut using a Spotlight on Nature Die, cut directly from the Nests of Winter DSP. I mounted him on a Cherry Cobbler circle die cut with the Stitched Shapes Dies. Then I pulled various papers from the Nests of Winter DSP pack.

  • the cross panel is 2 1/4 x 3 7/8
  • the two vertical panels are 1 x 3 & 1 1/4 x 4

These were adhered on the Basic White 3 7/8 x 5 1/8 pice which was attached to yet another panel of DSP 4 x 5 1/4. These were added to the Gray Granite card base (8 1/2 x 5 1/2 scored at 4 1/4) with dimensionals. The circles were also added to the card with dimesnionals. Then these wonderful Streaked Dots were scattered for additional charm.

Stampin' Up! Nests of Winter DSP, inside card

For the inside of the card I fussy cut with my paper snips this adorable bird & adhered it with liquid glue to the Basic White insert (4 x 5 1/4).

Stampin' Up! Nests of Winter DSP card & envelope

For the envelope… more of the Nests of Winter DSP attached to the flap & trimmed to fit. DONE! Cut the DSP panels ahead of time & this card layout is a quick 1, 2, 3. Add a sentiment depending on the front focal point, or not, as I didn’t here. It’s easy to add a message inside when this card is needed for something special.

Want to purchase these products – see the info below for the easy shopping experience. OR …

SHOP WITH ME HERE

to view ALL the stampin’ Up! products available: kits’, ONLINE EXCLUSIVES, SU! classes & more.

Thanks for stopping by. Masy you have a beautiful day. Make someone happy by sending them a handmade card filled with ❤️

Product List

Stampin’ Up! Happy Inkin’ Thursday Blog Hop Christmas Fun Fold

We have a perfect challenge to get us excited about Christmas! Welcome to the Happy Inkin’ Thursday Blog Hop 😀 I’m using the Bauble Blooms bundle to create this fun fold today.

Stampin' Up! Blog Hop
Stampin' Up! Hop Challenge
Stampin' Up! Bauble Blooms card front

I’m using a couple of different coordinating Designer Series papers for my card today: the bauble is die cut from Need for Tweed 12 x 12, the front layer on the flap & the card front is Traditions of Christmas. I love how they work together, brining together both gold & rustic patterns. Now let’s open & see the flap open then the entire card.

Stampin' Up! Bauble Blooms flap card,
Stampin' Up! Bauble Blooms flap card, open

Above you can see all the various papers used to create a really eye-catching card. And, it really is not terribly bulky. Using Designer Series Papers that are lighter weight for layers help keep the card light for traditional postage. Let’s do a quick step by step…

Directions:

  • Die cut the bauble with the Bauble Blooms Dies from both DSP & Old Olive card stock – this creates strength to put on dimensionals. If you so desire, you can adhere the two panels together, then die cut – it works well!
  • Cut layers for card base: Cherry cobbler 8 1/2 x 5 1/2 scored at 4 1/4; flap is 3 5/8 x 3 5/8 scored on one side at 1/2″: add to card base centering top to bottom with score line at edge. You must make certain you can close the flap over the closedc card. If necessary you can trim 1/16 from card front.
  • Decorate as shown: layers are 3 x 3 1/2 for flap front & inside flap; card front layers are 2 tone card stock 4 x 5 1/4, DSP 3 7/8 x 5 1/8
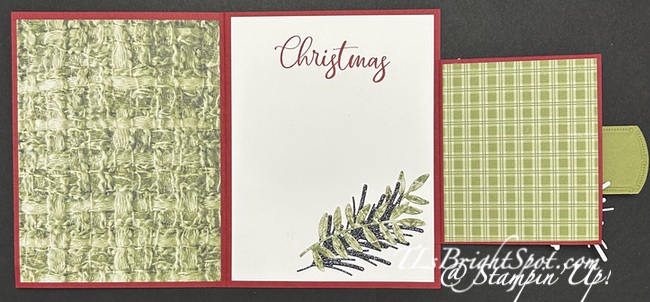
  • Inside layers are: front inside left – DSP 4 x 5 1/4; stamped section – 4 x 5 1/4
  • Additional decorations were die cut from: Peaceful Gardens Glimmer Paper & Need for Tweed, plus Old Olive card stock & gold foil
  • Embellishments are Traditional Sparkling Sequins

Thanks for joining me on this hop. Be sure to check what others are creating today by following the links below.

Stampin' Up! Hop button

Amy Koenders

Mary Deatherage

Karen Ksenzakovic

Akiko Sudano

Tara Carpenter

Terry Lynn Bright – you are here!

Nicole Bloxom

Thanks for stopping by. May you have a beautiful day. Make someone happy by sending them a handmade card filled with ❤️

Product List

Stampin’ Up! FREE SHIPPING PLUS Dressing Up the October PP Cozy Christmas

SEE BELOW FOR INFORMATION ABOUT FREE SHIPPING

OCT 22-24!

Stampin' Up! Free Shipping offer

Good Tuesday morning. Do you participate in the Paper Pumpkin program – getting this fun box each month to create what’s inside? I do, and sometimes I make alternatives and sometimes I don’t. This months October Cozy Christmas is one of those I didn’t do alternatives, but I did dress up the envelopes and the inside of each card.

Stampin' Up! Oct PP Cozy C'mas

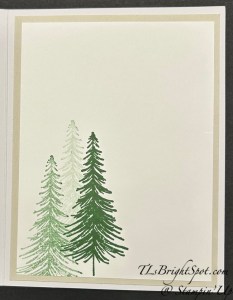
For this card… on the envelope – as you can see – I stamped this tree image from the Ornamental Christmas stamp set. Just as an FYI, this also comes with dies. For the inside, I layered a piece of Basic Beige, then added a stamped layer of Basic White. The stamp used is the same as the envelope – Ornamental Christmas.

Stampin' Up! Oct. PP Cozy C'mas card set 1 inside

For the 2nd set of cards in the October Paper Pumpkin, I stamped the envelopes with another of the stamps in Ornamental Christmas stamp set.

Stampin' Up! Oct PP Cozy C'mas card set 2

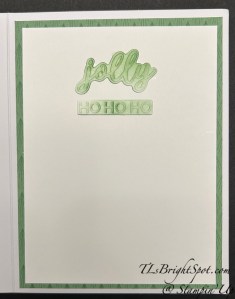
For the inside of the cards… in my box was an extra green card base so I used that for the background on two cards then a strip for the third card. For an inside sentiment I used the Christmas Word Collage in Basic White. I highlighted each with Garden Green ink and a Blending Brush. Here they are.

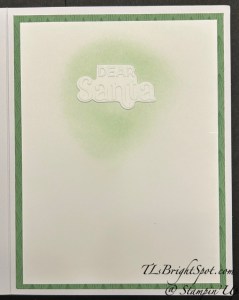
Stampin' Up! Oct PP Cozy C'mas card 2 inside, Dear Santa
Stampin' Up! Oct PP Cozy C'mas card 2 inside

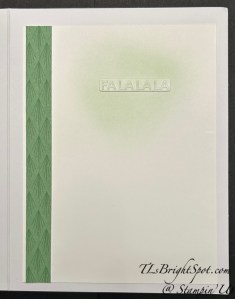
Stampin' Up! Oct PP Cozy Christmas card 2, Fa La La La

Joy to the World is the theme for the third set of cards in this October Paper Pumpkin Cozy Christmas box.

Stampin' Up! Oct PP Cozy C'mas third set of cards

The same sentiment is stamped on all three of these envelopes and it comes from the stamp set Ornamental Christmas using Garden Green ink. On the inside I used sentiments from the Greetings For All Mix & Match Ephmera Pack on a Basic White panel that had been adhered to a Crumb Cake piece slightly larger.

Stampin' Up! Oct PP cozy C'mas, 3rd set, large Merry C'mas

Such a wonderful set of Christmas cards and all ready to be mailed – all from Paper Pumpkin! If you would like to subscribe to Paper Pumpkin, please do that here. There are different ways to do that – 3 month, 6 month subscriptions and a yearly one. Check them all and see what works best for you. And while you are at it, consider becoming a Stampin’ Up! demonstrator. This is the perfect opportunity as Stampin’ Up! has a joining special right now that is the best ever! Joining is a great way to meet new people, connecting with fellow crafters, being a part of a wonderful community of supporting your creativity. It’s also an opportunity for discounts on every order after joining.

Stampin' Up! Joining Promo

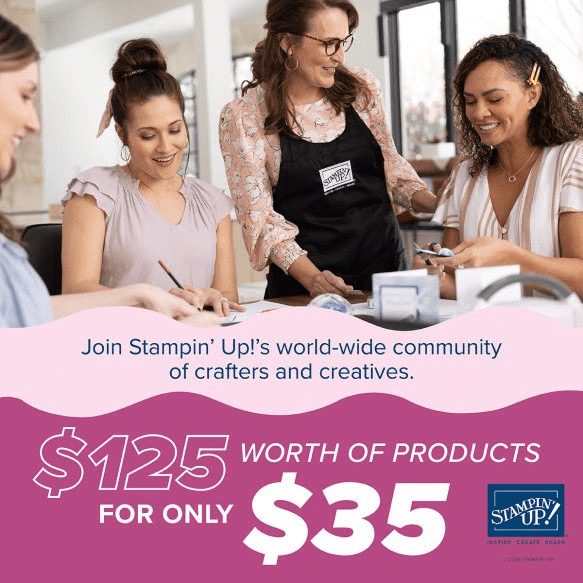
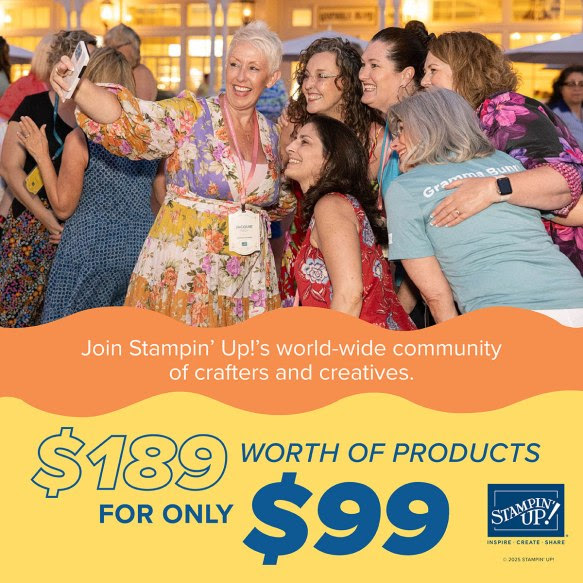
If you are interested in becoming a Demonstrator, NOW IS THE PERFECT TIME! Stampin’ Up! has an exclusive offer/ promotion during the month of October. From October 1 to 31, anyone who purchases the Starter Kit can choose between two amazing offers.  In addition to FREE shippingFREE business supplies, and a FREE Paper Pumpkin kit, you can either get $125 worth of products for just $35, an amazing first time ever offer, OR $189 worth of products for just $99

What are some of the benefits of becoming a demo?

  • Crafting is even more fun with community
  • Become a demonstrator and enjoy all the perks that come with that:

1) a 20–25% product discount

2) exclusive early access to the latest releases online and in catalogs

3) the opportunity to earn a modest supplemental income

4) the chance to attend incredible training and crafting events

5) Scrapbooking has never been better in Stampin’ Up! history. Have you seen all the new scrapbook products Stampin’ Up! has? It’s amazing…

6) There’s never an obligation to sell, you can join to enjoy the discount for yourself.

It’s also fun to learn new skills, develop new crafting techniques & share your passion for crafting. If you’re like me, it’s really fun to meet new people & connect with fellow crafters. How can I help & support you – lots of ways… through connection, team meetings, our team facebook page, updates. Feel free to connect with me – ask questions – get excited.

JOIN WITH ME HERE

Stampin' Up! Scrapbooking brochure

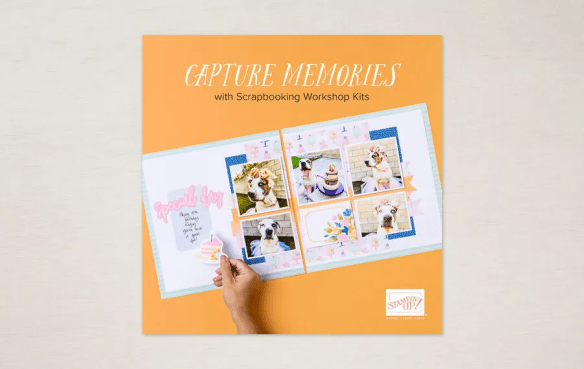
Are you a scrapbooker? Take a look at our new Scrapbooking Workshop Kits now available from the January 2025 Scrapbooking Brochure. Check out supplies available by clicking the image above.

Thanks for stopping by. May you have a beautiful day. Make someone happy by sending them a handmade card filled with ❤️

Stampin' Up! Free Shipping

Sales Period: October 22–24

Ordering Deadlines

  • Phone: October 24 at 6:59 p.m. (MT)
  • Online: October 24 at 11:59 p.m. (MT)
  • All order types qualify for this promotion.
  • Free shipping is for three days only. Orders must be opened and closed from October 22–24.
  • Free shipping automatically applies to your cart after the qualifying amount has been met, which is $75 USD | $100 CAD (before tax).
  • Coupon codes and Stampin’ Rewards will lower your order’s retail amount. Orders must meet the qualifying amount to be eligible for free shipping.
  • The additional cost for expedited shipping is not covered by this promotion.
  • Prepaid 3-, 6-, and 12-month Paper Pumpkin subscriptions and month-to-month subscriptions do not qualify for free shipping. Refills, past kits and add-ons do qualify toward free shipping, but you must be a subscriber to purchase. Subscriptions billed and shipped this month will be charged for the normal amount ($27.00 USD | $36.75 CAD shipping included) + tax.

Stampin’ Up! Ornamental Christmas Cards

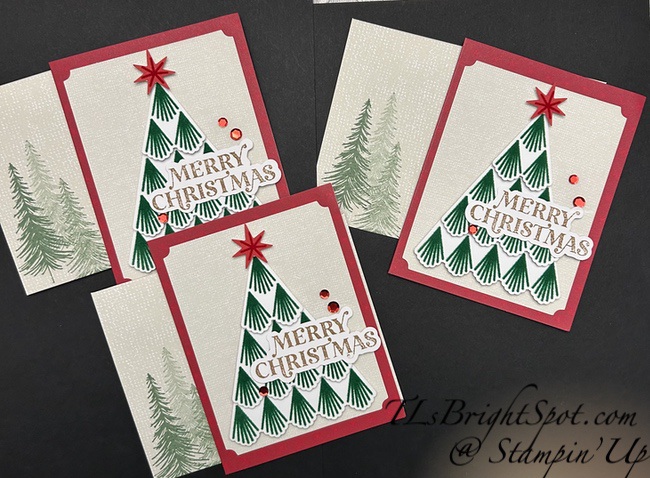
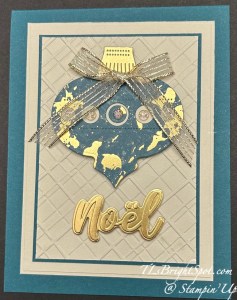
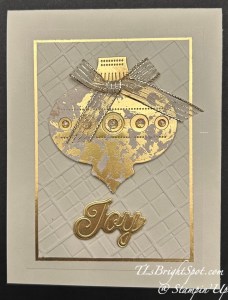
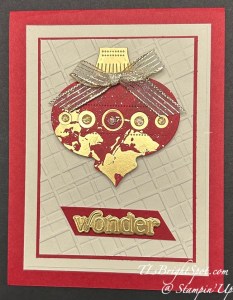
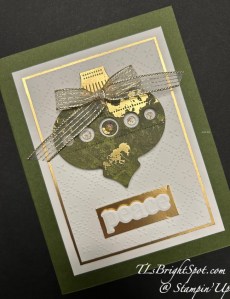
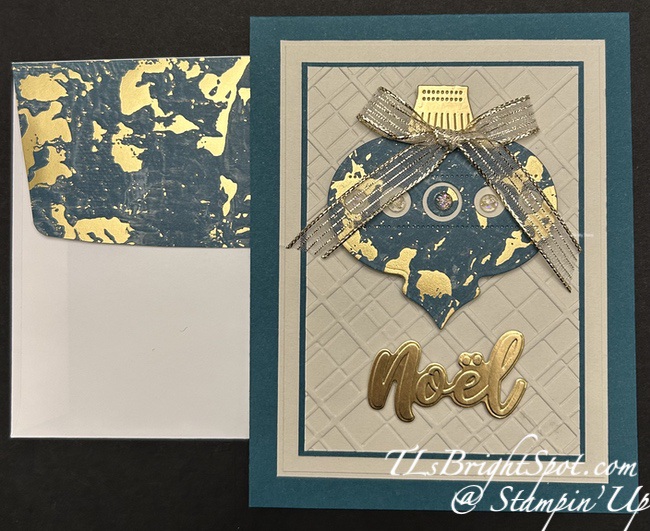
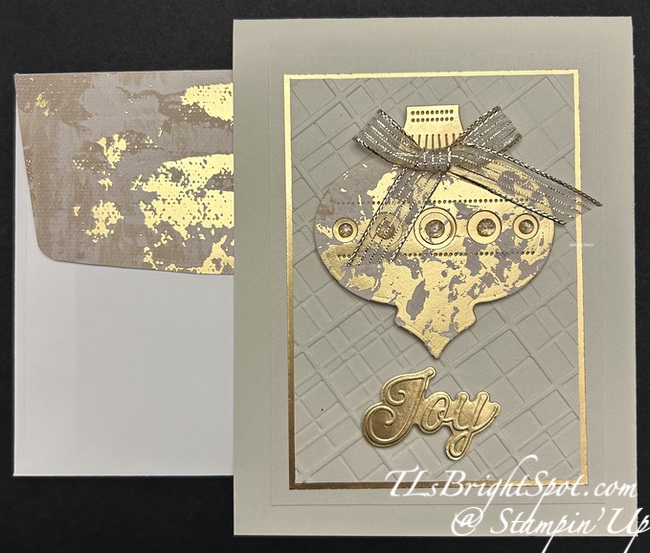
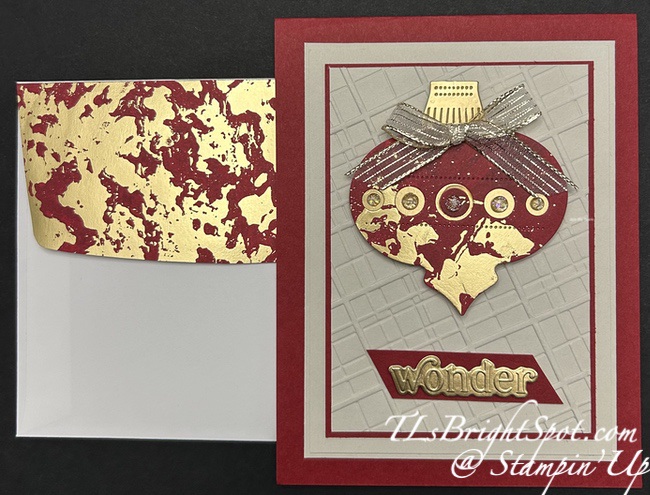
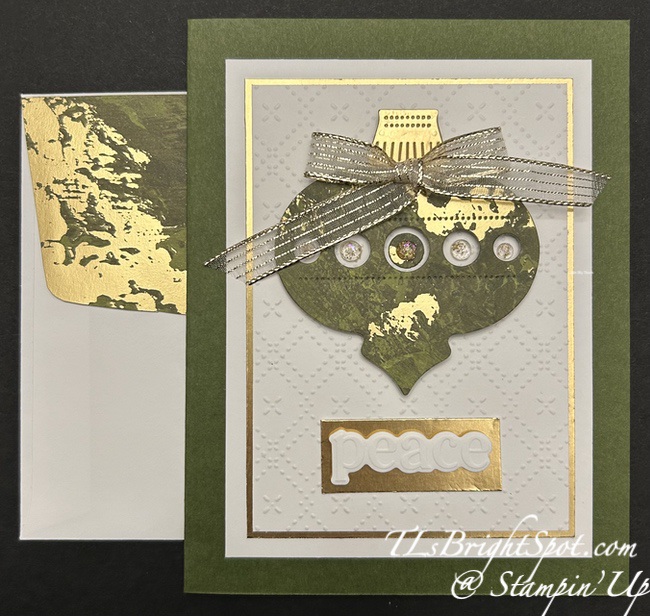
Good Morning Monday! Whew – the start of another week in October… Where has the month gone? For me, it has flown by – how about for you? I have a pretty set of cards for you today, all the same layout, same dies, same ribbon, same embellishments, just different colors in the Season of Elegance SDSP. I simply couldn’t quit making these. I was inspired by another demonstrator, Julie Gilson.

Stampin' Up! Ornamental Christmas card 1
Stampin' Up! Ornamental Christmas card 2

Card 1 is in Pretty Peacock. Card 2 is in Basic Beige. Card 3 is in Cherry Cobbler. All three use the same Forever Plaid 3D embossing folder and similar layers.

Card 4 uses a brand new Beautiful Pattern embossing folder, coming in the November ONLINE EXCLUSIVE release – available Nov 4. It also has similar layers and comes in Mossy Meadow.

Stampin' Up! Ornamental Christmas card 3
Stampin' Up! Ornamental Christmas card 4

For sentiments on the card fronts I used the Christmas Words Collage bundle die cut from Gold Foil and also Basic White (for the word peace). This set embosses the words & die cuts at the same time, so it’s quite easy to have a bunch words at the ready 😀

Here are the insides of each of those cards – a simple strip of the Season of Elegance DSP added to the bottom of the inside panel.

Stampin' Up! Oranmental C'mas inside card 1
Stampin' Up! Ornamental C'mas inside card 2

Stampin' Up! Ornamental C'mas inside card 3
Stampin' Up! Ornamental C'mas inside card 4

And below… the envelopes for these beautiful cards – more of the same Season of Elegance SDSP adhered & trimmed to fit the flap. Simple, elegant finish to these stunning cards.

You will notice some of these are on card bases 4 1/4 x 11 scored at 5 1/2 while others are on card bases of 8 1/2 x 5 1/2 scored at 4 1/4. It honestly didn’t matter either way, so if I had that already cut, that’s what I used. Super fun cards to make multiples of while also making them unique in color & words.

How to purchase the products to make these beautiful cards may be found below. And while you are at it, consider becoming a Stampin’ Up! demonstrator. This is the perfect opportunity as Stampin’ Up! has a joining special right now that is the best ever! Joining is a great way to meet new people, connecting with fellow crafters, being a part of a wonderful community of supporting your creativity. It’s also an opportunity for discounts on every order after joining.

Stampin' Up! Starter kit offers

If you are interested in becoming a Demonstrator, NOW IS THE PERFECT TIME! Stampin’ Up! has an exclusive offer/ promotion during the month of October. From October 1 to 31, anyone who purchases the Starter Kit can choose between two amazing offers.  In addition to FREE shippingFREE business supplies, and a FREE Paper Pumpkin kit, you can either get $125 worth of products for just $35, an amazing first time ever offer, OR $189 worth of products for just $99

What are some of the benefits of becoming a demo?

  • Crafting is even more fun with community
  • Become a demonstrator and enjoy all the perks that come with that:

1) a 20–25% product discount

2) exclusive early access to the latest releases online and in catalogs

3) the opportunity to earn a modest supplemental income

4) the chance to attend incredible training and crafting events

5) Scrapbooking has never been better in Stampin’ Up! history. Have you seen all the new scrapbook products Stampin’ Up! has? It’s amazing…

6) There’s never an obligation to sell, you can join to enjoy the discount for yourself.

It’s also fun to learn new skills, develop new crafting techniques & share your passion for crafting. If you’re like me, it’s really fun to meet new people & connect with fellow crafters. How can I help & support you – lots of ways… through connection, team meetings, our team facebook page, updates. Feel free to connect with me – ask questions – get excited.

JOIN WITH ME HERE

Stampin' Up! Scrapbooking brochure

Are you a scrapbooker? Take a look at our new Scrapbooking Workshop Kits now available from the January 2025 Scrapbooking Brochure.

Thanks for stopping by. May you have a beautiful day. Make someone happy by sending them a handmade card filled with ❤️

Product List

Stampin’ Up! Peaceful Garden DSP Fun Fold for the Happy Inkin’ Thursday Blog Hop

Welcome to Thursday and this wonderful group of ‘hoppers’! We have a color challenge today and I have chosen to work with the Peaceful Garden DSP, the Peaceful Garden Glimmer Paper & a bundle called Ornamental Christmas to create a fun fold.

Stampin' Up! Blog Hop Color Challenge
Stampin' Up! Peaceful Garden DSP Fun Fold card front

I started with a Secret Sea card base 4 1/4 x 5 1/2 & cut two strips of the Peaceful Garden DSP 1 1/2 x 4 1/8 and attached to each end leaving equal borders at top, bottom & side. I then took another piece of Secret Sea cut 4 1/4 x 5 12 & scored it on the long side @ 1 3/8 x 2 3/4. Burnish it well so it makes a nice ‘Z’ fold.

Stampin' Up! Peaceful Garden Z fun fold, top view

Before attaching it to the card base, I added another strip of Peaceful Garden DSP to the inside middle panel of the ‘Z’. I attached it to the card base, centering it. I stamped a Basic White panel 2 5/8 x 4 1/8 using the Ornamental Christmas stamp set & Misty Moonlight ink then added it to the inside panel of the ‘Z’.

Stampin' Up! Peaceful Garden Z fold inside

I took yet another panel of Secret Sea 2 3/4 x 4 1/4, layered it with Peaceful Garden DSP 2 5/8 x 4 1/8 then attached it to the left panel of the z- fold. I cut a circle from Basic White using the Ornamental Christmas Dies, used Cloud Cover & a sponge dauber to add color to the edges, then flicked it with my Light Secret Sea Stampin’ Blends. I die cut the wonderful star from Peaceful Garden Glimmer paper, popped it on dimensionals & added it to the circle, centering it. For extra glam I die cut the diamond shape for the center of the star from Silver Foil Sheets & attached it with glue. I attached the circle in place on the card front with glue. For the sentiment… a stamp from Peace on Earth stamp set stamped in Misty Moonlight ink, die cut with a die from Ornamental Christmas Dies & added it to the card front with dimensionals.

Stampin' Up! Peaceful Garden DSP fun fold card & envelope

For the envelope, more of the Peaceful Garden DSP was added to the flap & trimmed to fit. Below is a list of the products to create this card & info to consider about becoming a demonstrator as part of my team 😀

Now – time to see what others have created for this color challenge. Click the next button or click on a name to take you around. Happy hopping!

Stampin' Up! Blog Hop button

Amy Koenders

Mary Deatherage

Karen Ksenzakovic

Akiko Sudano

Tara Carpenter

Terry Lynn Brightyou are here!

Nicole Bloxom

Stampin' Up! Starter kit offers

From October 1 to 31, anyone who purchases the Starter Kit can choose between two amazing offers.  In addition to FREE shippingFREE business supplies, and a FREE Paper Pumpkin kit, you can either get $125 worth of products for just $35, an amazing first time ever offer, OR $189 worth of products for just $99

What are some of the benefits of joining…

  • Crafting is even more fun with community
  • Become a demonstrator and enjoy all the perks that come with that:

1) a 20–25% product discount

2) exclusive early access to the latest releases online and in catalogs

3) the opportunity to earn a modest supplemental income

4) the chance to attend incredible training and crafting events

5) Scrapbooking has never been better in Stampin’ Up! history. Have you seen all the new scrapbook products Stampin’ Up! has? It’s amazing…

6) There’s never an obligation to sell, you can join to enjoy the discount for yourself.

It’s also fun to learn new skills, develop new crafting techniques & share your passion for crafting. If you’re like me, it’s really fun to meet new people & connect with fellow crafters. How can I help & support you – lots of ways… through connection, team meetings, our team facebook page, updates. Feel free to connect with me – ask questions – get excited.

JOIN WITH ME HERE

Stampin' Up! Scrapbooking workshop kits

Are you a scrapbooker? Take a look at our new Scrapbooking Workshop Kits now available from the January 2025 Scrapbooking Brochure.

Thanks for stopping by. May you have a beautiful day. Make someone happy by sending them a handmade card filled with ❤️

Product List

Card Cuts:

Secret Sea: 4 1/4 x 5 1/2 (2), score one of these @ 1 3/8, 2 3/4 on the long side; 2 3/4 x 4 1/4 (front panel)

Basic White: 2 5/8 x 4 1/8 (inside); 3 1/4 x 3 1/4 (circle die cut); 5/8 x 3 1/2 (sentiment)

DSP: Peaceful Garden – 1 1/2 x 4 1/8 (cut 2); 1 1/4 x 4 1/8 (middle inside ‘Z’ fold); 2 5/8 x 4 1/8 (front panel)

Peaceful Garden Glimmer Paper 3 x 3 1/2 (star die cut)

Silver Foil sheet: scrap (1″ x 1″ at most!)