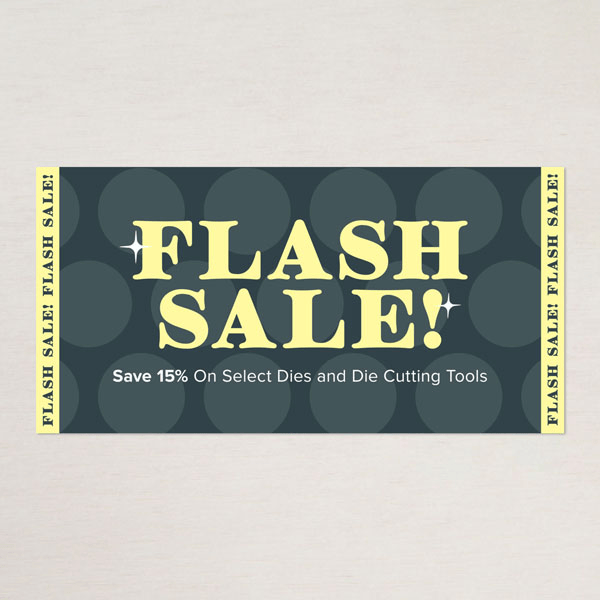
The 15% discount will apply to select dies and die cutting tools, which are only available while supplies last. See and shop all qualifying products in the online store.
The discount does not include the Stampin’ Cut & Emboss Machine or any items from the November Online Exclusives preorder.
From October 21–23, you can get select dies and die cutting tools at 15% off! Grab dies that have been on your wish list or use this opportunity to grab some new tools. But act fast—this sale only lasts for three days!
And while you’re at it, remember this is the perfect time to consider becoming a demonstrator!
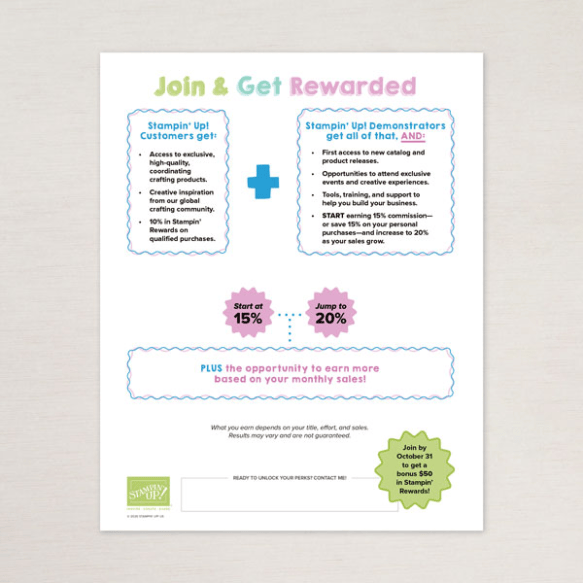
When you join as a demonstrator in October, you’ll get $50 in Stampin’ Rewards along with the $125 coupon code!
You’ll also enjoy all the perks that come with being a demonstrator, like a 15–20% product discount, early access to the latest products and catalogs, the opportunity to earn a modest commission, the chance to attend incredible training and crafting events, and so much more!
Here are the details:
Promotion Period:October 6–31, 2026 (note that this does not start until October 6)
Ordering Deadlines: October 31, 2026, at 11:59 p.m. (MT)
New team members who join between October 6–31 will receive $50 in Stampin’ Rewards in their Stampin’ Up! account immediately after signing up as a demonstrator. These rewards are only available for three months after their sign-up date.
New demonstrators who submit their Independent Demonstrator Agreement (IDA) before October 6 or after October 31 will not be eligible for this offer.
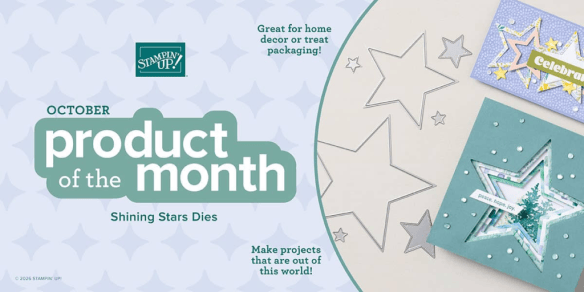
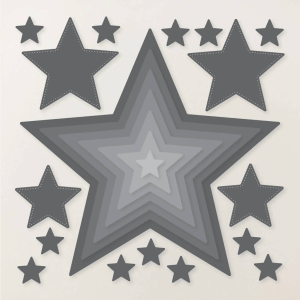
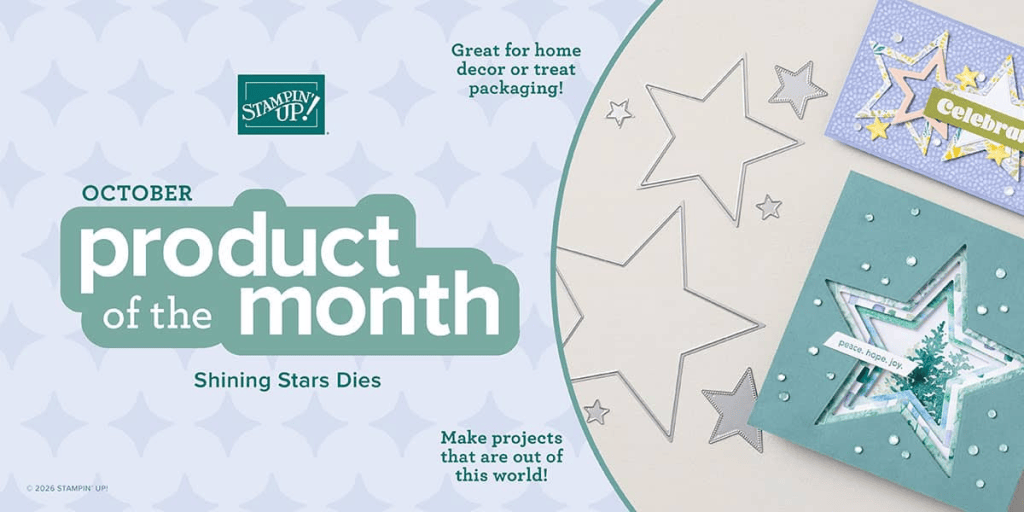
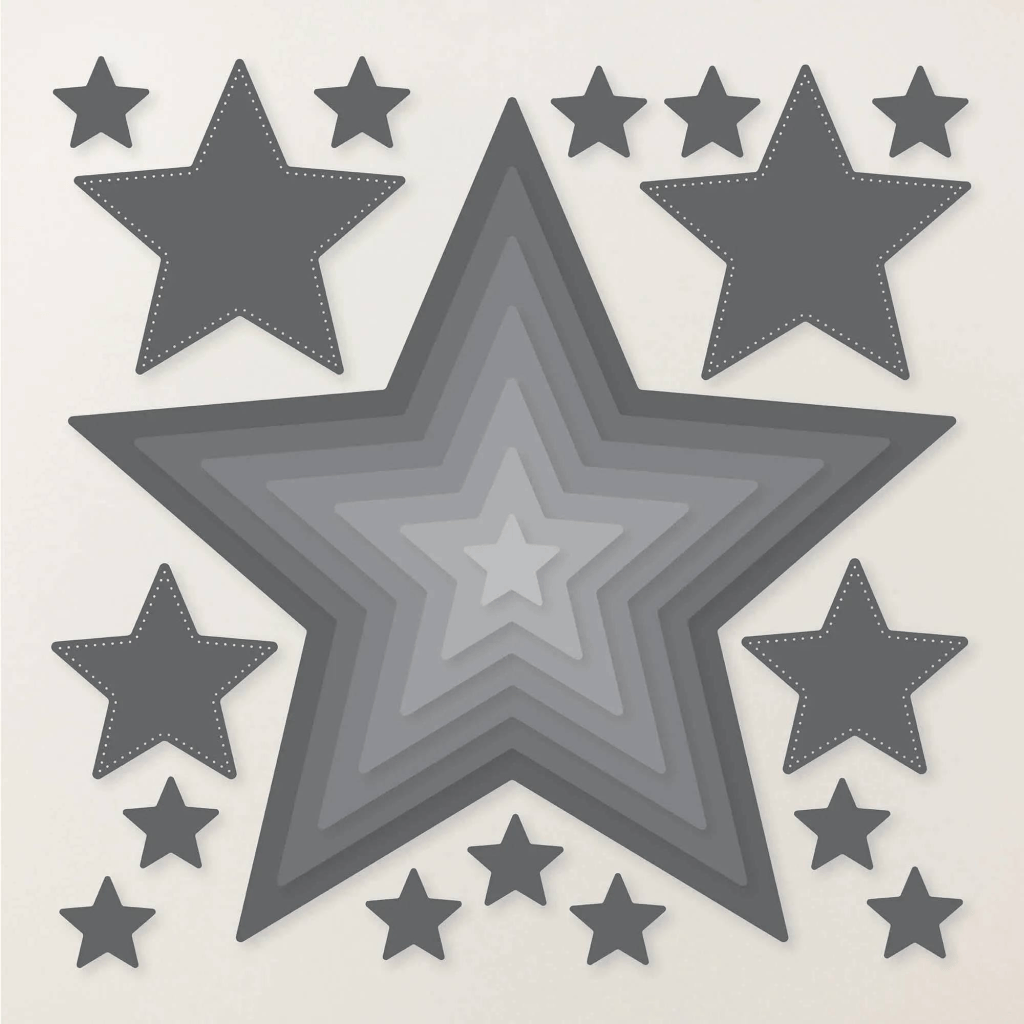
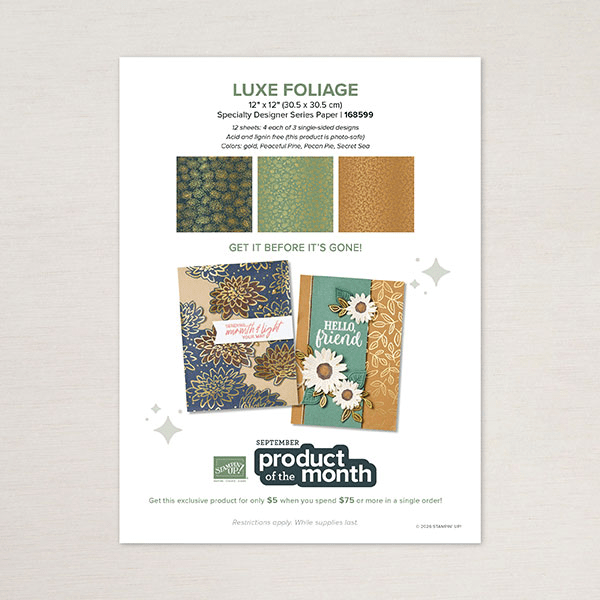
Tomorrow (Tuesday, October 6), Stampin’ Up! releases October’s Product of the Month: the Shining Stars Dies (168600) — and you can add all 23 of them to your order for just $5 when your single order reaches $75.
This set is a STAR: 23 nesting star dies, from tiny twinkles to a big 5-1/4″ showstopper — perfect for layered star frames, shaker cards, treat packaging, ornaments, and “you’re a star” cards for every occasion, all year long.
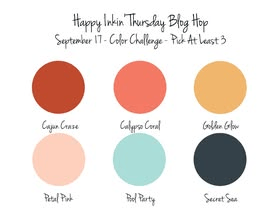
Welcome to our fabulous hop. There is some serious creativity going on so be sure to check out what everyone has done. We have a color challenge today and so perfect for fall. Let’s take a look see…
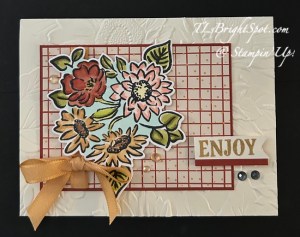
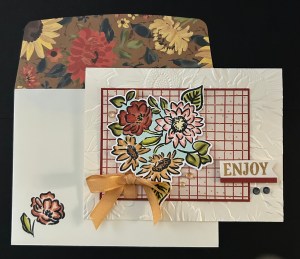
I began by running a 5 1/2 x 4 1/4 Vary Vanilla through the Sunflower 3D embossing folder. This folder is just stunning and I love using it. I attached that to a Very Vanilla card base. I then cut a panel of Sunflower Fields DSP 4 x 3 wrapped a 3/8″ Golden Glow Bordered ribbon around it and secured it in place on the back with Stampin’ Seal+I then stamped this wonderful image from the Radiant Sunflowers stamp set with Memento ink & colored it with various Stampin’ Blends: Pool Party for the background, Calypso Coral, Petal Pink & Light Daffodil Delight for one of the flowers, Golden Glow & Pecan Pie for another flower, Cajun Craze & Golden Glow for another flowerOld Olive & Light Lemon Lime Twist for the leaves. I die cut the image with the coordinating Radiant Sunflowers Dies. I stamped & die cut a couple more small leaves, coloring as mentioned. The large image was added to the card front with dimensionals. The small leaves were adhered, slipping them behind the image. I tied a bow and secured it in place with a glue dot. I then stamped the sentiment on a scrap of Very Vanilla in Golden Glow ink, and added a narrow strip of Cajun Craze behind it. This panel was added to the card front with dimensionals off-center. This I also added with dimensionals. Embellishments – all are from the Radiant Gems – in both Golden Glow around the large image and Secret Sea under the sentiment.
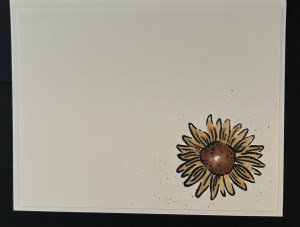
For the inside… I stamped this gorgeous sunflower in Memento ink on a 4 x 5 1/4 panel of Very Vanilla . It is colored with Stampin’ Blends Golden Glow & Pecan Pie. I then took my Pecan Pie Blends & tapped it against an acrylic block so I could splatter dots over the image. I hope you can see them!! This panel was added to the inside of the card & finis! This could be a Birthday or get well or thinking of you card – very generic without an inside sentiment!
For the envelope… I stamped this very cute flower in Memento ink & colored it with Stampin’ Blends – Petal Pink and Light Calypso Coral, Old Olive & Light Lemon Lime Twist. The flap got a piece of the Sunflower Fields DSP that just brings everything together.
Here’s the thing – RIGHT NOW – THIS STAMP SET IS ON A 15% OFF SALE!!! WooHoo! See information below to see ALL the stamps on sale Sep16-18. Grab yours now!
Check out what everyone else has created for this hop – click the next button or click on a name to get you there. Enjoy!
The 15% discount will apply to select stamp sets, which are only available while supplies last. See and shop all qualifying stamp sets in the online store.
Ordering Deadline: September 18, 2026, at 11:59 p.m. (MT)
The 15% discount will apply to select stamp sets, which are only available while supplies last. See and shop all qualifying stamp sets in the online store during the sale.
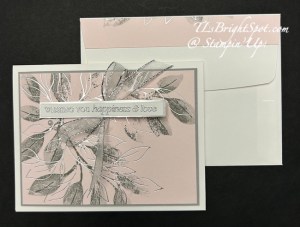
This ‘in stages’ card has been on my desk for a bit. Funny how that happens… we start one item and get distracted & complete something else. I didn’t need this just yet so that’s probably why I didn’t ‘finish the job’ at the time. That ‘s my justification & I’m sticking to it! 😀 Here’s my card.
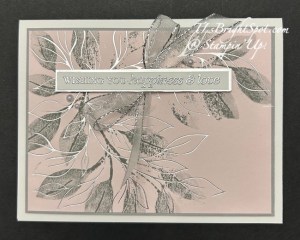
Gosh, I just realized how difficult it is to see the hot foiling! UGH!!! My light was b-a-d. This paper is two-tone Petal Pink that I did the Hot Foiling in silver then I stamped the image from the same Botanical Glow stamp set – in Smoky Slate.. Note the stamp set & the silver from the hot foiling do not match – and that’s the bundle – they are not intended to ‘match’. I cut the panel 5 x 3 3/4 and added it to a Smoky Slate backing 5 1/8 x 3 7/8. I added these to a Thick Basic White card base 5 1/2 x 8 1/2 scored at 4 1/4. The sentiment for this card used the Delicate Whispers stamp set and WOW? Metallic Embossing Powder in silver. I heat set the sentiment and attached it to a Smoky Slate backing. Next I made a bow using the Silver & White 1/” Sheer Ribbon and attached it with a glue dot. I added dimensionals to the sentiment strip and placed it over the ribbon. Final step – Iridescent Pearls Basic Jewels – three of them. Love this card!!!
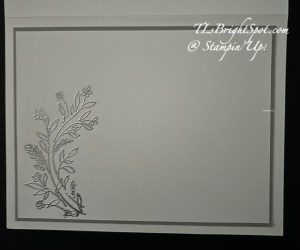
Oh my goodness – this photo is even worse! But let me tell what it is anyway… On the Basic White panel 5 x 3 3/4 I stamped the image from Delicate Whispers stamp set in VersaMark ink then sprinkled it with the same WOW! Metallic Embossing powder in silver & heat set. I attached this to Smoky Slate % 1/8 x 3 7/8 and then added these to the inside of the card. YAY!
For the envelope, when I trimmed down the original card stock piece that I had run through the Hot Foil machine, I saved the strip & attached it to the flap & trimmed to fit the area. It doesn’t cover the entire flap, but I like the looks of it. It has the hint of the foiling and maybe that’s enough.
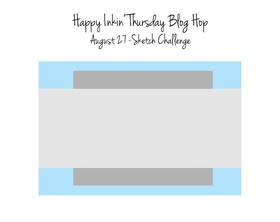
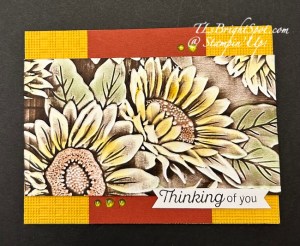
Welcome to our hop! We have a sketch challenge today and I decided to work with the amazing Sunflower 3D embossing folder – on the de-bossed side!
After running the Basic White panel through the Sunflower 3d embossing folder, I used sponge daubers & various inks to add color to the flowers & leaves: Old Olive, Crushed Curry and Cajun Craze. I think opened my Early Espresso ink pad and very gently ran it across the entire folder. This added amazing highlights! I cut this down to 3 x 5 1/2 and set it aside.
My card base is Crushed Curry and I added a panel of the same that I ran through a NEW embossing folder available Sep 1 – the Softly Woven 3D embossing folder. This added a wonderful background texture. My additional layer is Cajun Craze2 5/8 x 4 1/4, centered. Then I added the Sunflower embossed & colored strip with dimensionals. Two final things… a sentiment stamped in Early Espresso from the Simply Leaves stamp set – again available Sep 1. I punched the ends using the 3 Banner Punch as the sentiment was too long. This is also on dimensionals & just overlapping the embossed panel. The embellishments are another new item – Glossy Garden Dots available Sep 1. They may be found in the Mosaic Garden Suite of products in the Stampin’ Up! Sep-Dec 2026 Catalog.
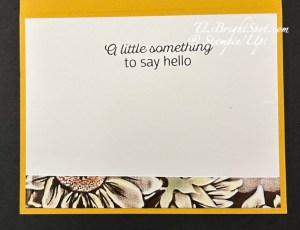
For the inside… another sentiment stamped in Early espresso ink from the Simply Leaves stamp set and a leftover strip of the embossed panel from the front of the card. This is about 5/8 x 5 1/2.
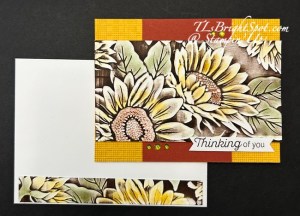
For the envelope… on the front another leftover strip from the embossing on the card front. This strip is about 3/4 x 5 1/2. And there you have it. What a fun technique and so easy.
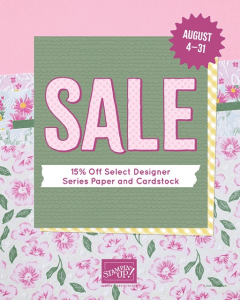
Today is the 27 of August – the fabulous card stock & DSP sale ends on the 31st. Got everything you need to keep crafting? Check out what’s still available. Click the image below.
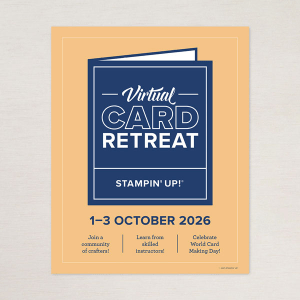
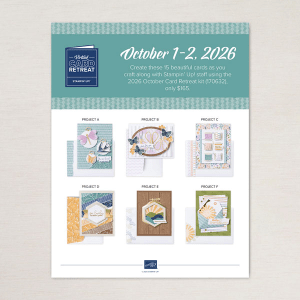
This year, celebrate World Card Making Day with customers and fellow demonstrators during the Virtual Card Retreat. Experience the joy of crafting when you join this two-day virtual retreat for people who love card making and community. During the retreat, we’ll build creative confidence as we make 15 beautiful, technique-focused cards and craft along with Stampin’ Up! staff using the 2026 October Card Retreat kit. We’ll even have some fun giveaways!
When: October 1–2; We’ll craft for up to seven hours each day, starting at 2:00 p.m. (MT) both days.
Celebrate World Card Making Day (October 3) during this event!
Price of 2026 October Card Retreat kit: $165 USD |$225 CAD
2026 October Card Retreat Kit Available for Purchase: September 1
Where: This retreat will take place in a private Facebook Group.
We’ll post step-by-step instructions as well as a preparation video in this group two weeks before the retreat.
To join this group, you’ll need to fully complete the group admission form, which includes agreeing to the group rules and providing your name, the email address you used when you purchased the kit, and your 2026 October Card Retreat kit order number, which you can find in your confirmation email. With this information, the group administrator can admit you.
You can watch the live event and the on-demand videos in this group.
Registration: The 2026 October Card Retreat kit is your ticket to the retreat. There is no registration. The kit includes a card with a personalized link through which you can join the exclusive Facebook group where the live retreat will stream.
Language: This live event will be presented in English. Video recordings with English, French, German, and Dutch captioning will be available through the Facebook group within two weeks of the livestream.
Hashtag: Make a card, then share a smile when you post your creations on social media. Be sure to use the hashtag #VirtualCardRetreatOct26.
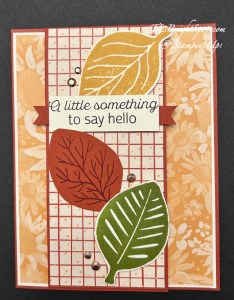
Fall is in the air! Well, not really… but we DO have a theme challenge for our blog hop today – ‘fall frenzy’ – so here ya go… WELCOME top our hop! I’ve chosen to work with the Simply Leaves bundle (it includes the leaf punch) and Sunflower Fields 12 x 12 DSP with wonderful fall colors. The bundle is part of the Sep ONLINE EXCLUSIVES & the DSP is in the Sep-Dec 2026 Catalog.
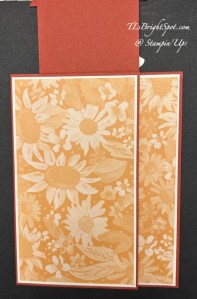
This fun fold is a flip front type. In other words, the front flips up and the next flap opens to the left. The leaves are stamped using the Simply Leaves stamp set in Old Olive on Very Vanilla, Cajun Craze on Cajun Craze and Golden Glow on Very Vanilla, then punched with the leaf punch that coordinates to make the bundle. These are available in the new Sep-Dec 2026 Catalog. The designer Series Papers used are also from this catalog and are called Sunflower Fields 12×12 DSP. There are some stunning patterns in this package – perfectly fall themed!
Measurements…
card base 7 1/2 x 5 1/2 scored at 3 1/4 (Cajun Craze)
flap 2 1/2 x 6 1/4 scored at 5 1/2 (Cajun Craze)
add the flap to the back right section of the card base practically centering. The score should be slightly above the cut edge so the flap can fall in place appropriately.
Decorate
Front flap – DSP 2 3/8 x 5 3/8 – Sunflower Fields DSP; punched leaves as mentioned above, on dimensionals; sentiment on Very Vaniila, stamped in Early Espresso ink 3/4 x 2 1/4 using the Simply Leaves stamp set; attach to Cajun Craze 3/8 x 3 then add dimensionals & attach. Final touch on the flip front – five (5) Adhesive-Backed Metallic Gems
front left panel – Very Vanilla 3 1/8 x 5 3/8 + DSP 3 x 5 1/4 – – Sunflower Fields DSP
inside – Very Vanilla4 1/8 x 5 3/8 + 1 x 5 1/4 DSP attached to it. Stamp in Golden Glow the checkered leaves – from Simply Leaves stamp set
For the envelope… More of the Sunflower Fields 12×12 DSP on the flap trimmed to fit. For the front, the same checkered leaf stamped in Golden Glow ink.
Click the links below to see what other great items folks have created for our ‘fall frenzy’ blog hop!
Stampin’ Up! has an awesome DSP & card stock sale going on right now… 15% off! Click the image below to check it all out…
And while you are at it, remember that when you purchase from me is over $50 – not including shipping & taxes, you receive right away the monthly tutorial through your email. For August that is the Flowering Meadow Suite of products. There are other benefits as well – check my rewards page to get up-to-date info.
Purchasing products from Stampin’ Up! (and me) has tons of benefits… check out the last chance products (click the image to take you to those items) and the PRODUCT of the MONTH (available when your order is $75 & above – again not including taxes & shipping
THANKS FOR STOPPING BY. MAY YOU HAVE A BEAUTIFUL DAY! MAKE SOMEONE HAPPY BY SENDING THEM A HANDMADE CARD FILLED WITH ❤️
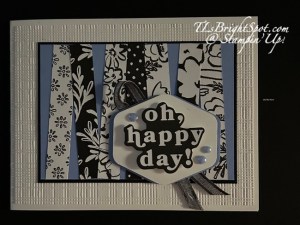
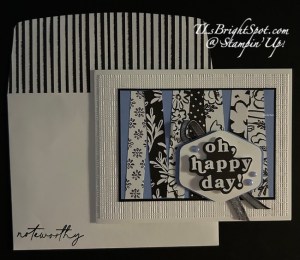
New week – new item in the Sep-Dec 2026 Catalog and a fun layout. The layout uses 1/2″ strips of DSP – I chose the Artisan Sketched Garden 12×12 DSP and backed it with Hydrangea Hue and Basic Black and layered these right to the NEW Softly Woven 3D embossing folder. These are all added to the Basic White Thick card base. Before we go any further, let’s take a peek at the card.
See that wonderful texture in the background? And the sentiment is from the Greeting For All Mix & Match set. I popped in on dimensionals to the Basic White punched sentiment base (Heartfelt Hexagon Punch). Using the same punch I created another in Hydrangea Hue then cut it in half & layered it to the back of the Basic White piece. Behind that is a NEW 1/4″ Satin Ribbon in Secret Sea & Gold. Final touch for the front… three 2026-2028 In Color Dots in Hydrangea Hue.
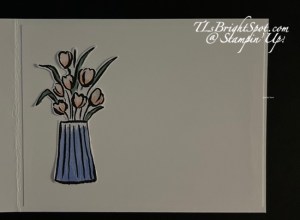
For the inside… I colored the image of the vase (from one of the sheets in the Artisan Garden 12×12 DSP) with Shimmer pens: Hydrangea Hue, Barely Blush and Peaceful Pine. After fussy cutting it from the paper, I added dots of liquid glue and attached it to a Basic White panel.
For the envelope… another piece of Artisan Garden 12×12 DSP was added to the flap & trimmed to fit. The simple sentiment is from the Extraordinary Life stamp set. I love the simplicity of this card – and the layout could be used for so many of the Designer Series Papers Stampin’ Up! offers.
Measurements:
Card base 11 x 4 1/4 scored @ 5 1/2
Embossed layer 4 x 5 1/4
layer 4 3/8 x 3 1/8
layer 4 1/4 x 3
strips – 7, 1/2 x 3 1/2, trim after adding to layer
inside – 4 x 5 1/4
envelope flap 2 1/4 x 6
Stampin’ Up! has an awesome DSP & card stock sale going on right now… 15% off! Click the image below to check it all out…
And while you are at it, remember that when you purchase from me is over $50 – not including shipping & taxes, you receive right away the monthly tutorial through your email. For August that is the Flowering Meadow Suite of products. There are other benefits as well – check my rewards page to get up-to-date info.
Purchasing products from Stampin’ Up! (and me) has tons of benefits… check out the last chance products (click the image to take you to those items) and the PRODUCT of the MONTH (available when your order is $75 & above – again not including taxes & shipping
THANKS FOR STOPPING BY. MAY YOU HAVE A BEAUTIFUL DAY! MAKE SOMEONE HAPPY BY SENDING THEM A HANDMADE CARD FILLED WITH ❤️
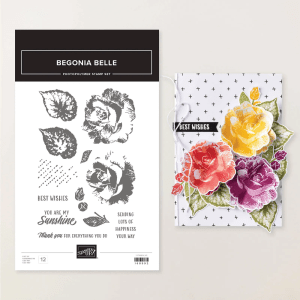
WOW! It’s July – and Stampin’ Up! has a new PRODUCT OF THE MONTH JUST RELEASED…the Begonia Belle Stamp Set (168592) for only $5 USD | $7 CAD with a single purchase of $75 USD | $100 CAD or more… NEW PRODUCTS IN THE ONLINE EXCLUSIVES
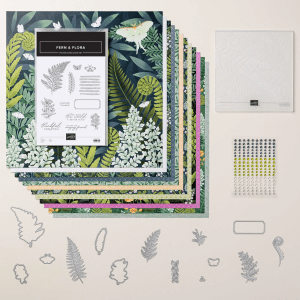
and we have a new monthly tutorial opportunity as well. When shopping with me & your order is over $50, you receive a monthly tutorial. This month of July that tutorial is Fern & Flora bundle – a gorgeous suite of products! The suite is currently unavailable, but the bundle (the stamp set & dies) is available! Shop with me now to get double points for the next 7 days – through July 5.
OK – on to my card for today… it’s a birthday card and by all rights should be red, white & blue to celebrate our 250th.except it isn’t. Let’s take a peek.
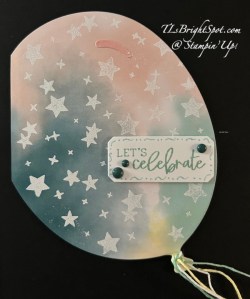
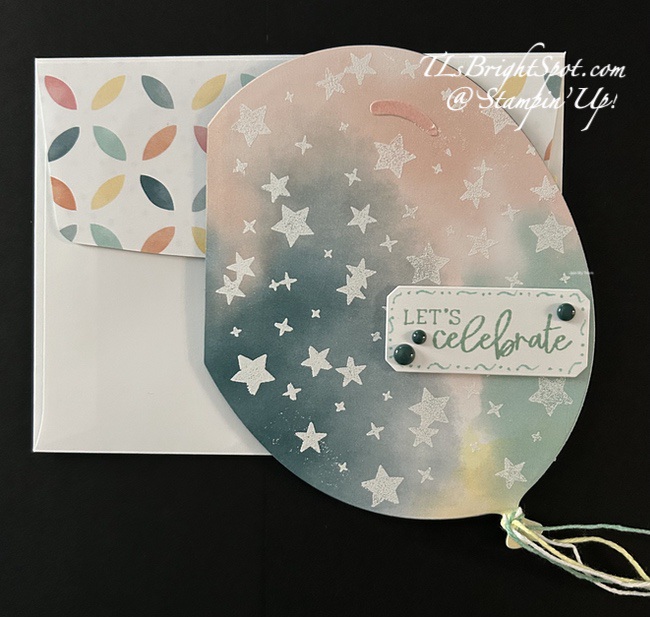
I used Beautiful Ordinary Life DSP to give this card a look of a real balloon. Of course it’s stamped with stars all over the front, WOW! Basics embossing powder in white then heat set. I made it off-center too – and it’s a shaped card so it opens. I tied three twine on the bottom – colored with Stampin’ Blends in Lemon Lolly & Pool Party. The sentiment banner is die cut using the Bordered in Beauty Dies but stamped with Balloon Festoon stamp set. I took my Pool Party marker & outlined it with squigles & dots. 😀 The embellishments Array of Dots in Pretty Peacock.
How to do the shaped card trick? Have the die over the fold line & die cut both card stock layers together.
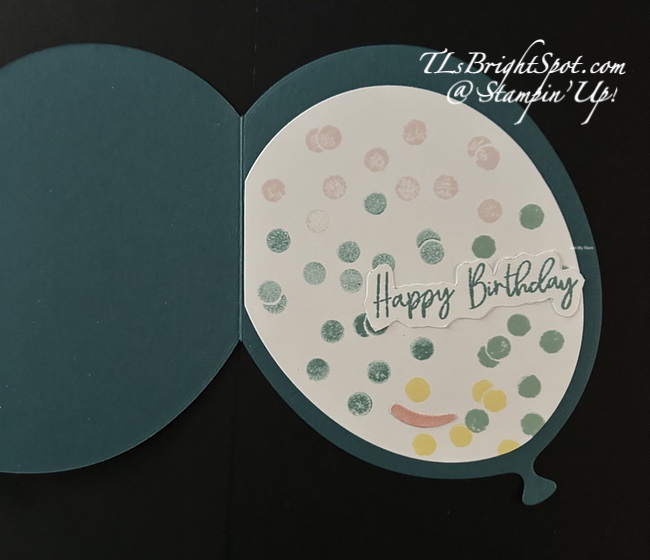
You can see in the photo above left, the inside of the card. I used the next smaller balloon die & Basic White, then trimmed off the balloon end. Then I stamped all over in various color inks: Lost Lagoon, Lemon Lolly, Barely Blush & Pool Party. These follow the colors on the balloon front. The sentiment is from Balloon Festoon stamp[ set in Pool Party ink & fussy cut with paper snips.
The photo above right shows the envelope back – another paper in the pack of Beautiful Ordinary Life DSP. Such a fun shaped card! We’re doing this & other shaped cards in my card class July 2
THANKS FOR STOPPING BY. MAKE SOMEONE HAPPY BY SENDING THEM A CARD FILLED WITH ❤️
Hello, hello! Happy Mother’s Day to all you Mothers out there – and if you have cats, dogs, horses, pets of any sort – you’re a mother of those pets! So enjoy your day – maybe even do something special ❤️
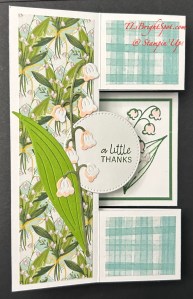
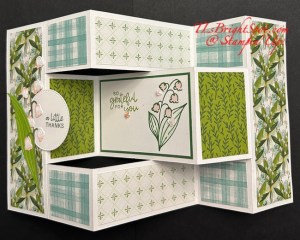
My card today is a really fun, fun fold called a tri-fold shutter card, and I’ve used some gorgeous new Valley In Bloom DSP and it’s coordinating bundle Lily of the Valley stamps & dies & adorable 2026-2028 In Color Butterflies. Let’s look.
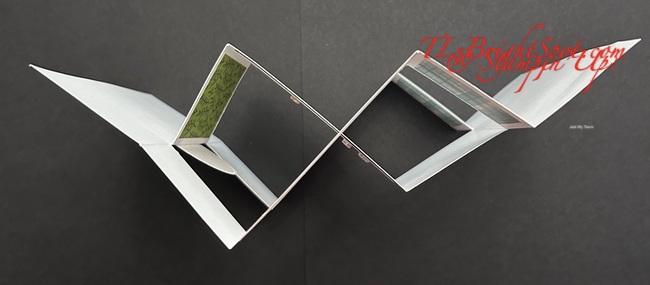
And here’s how we do this… begin with your card base 10 1/2 x 5 1/2 with score lines at 1 3/4, 3 1/2, 7 & 8 3/4. With the short side at top on your paper trimmer & at 1 1/2″ cut from the first score to the last score. Now move the paper to 4″ & cut again for the fist score line to the last. Burnish well valley, mountain, valley, mountain. For the canter area, it will be mountain, valley, mountain, valley… so just the opposite. It will look like the photo below.
Now decorate… I used Valley In Bloom DSP… 2 strips 1 1/2 x 5 1/4; 4 strips 1 1/2 x 1 1/4; 2 strips 1 1/4 x 3 1/4; 2 strips 1 1/2 x 2 1/4. The sentiment area is Mossy Meadow 3 1/4 x 2 1/4 & stamped Basic White 3 1/8 x 2 1/8.This was stamped in Gardewn Green ink for the sentiment itself & Mossy Meadow for the lilies. I colored the lily flowers with Light Barely Blush Stampin’ Blends & moved the ink on the leaves with a Blender Pen. I then added the three Butterflies (2026-2028 In Color Butterflies)
On the left front panel I added this die cut lily and leaf. The leaf is die cut from Granny Apple Green card stock. The lilies were die cut from Basic White then I used Mossy Meadow to color the stem and Light Barely Blush to add color to the flowers. These use the Lily of the Valley Dies. The circle is from Stylish shapes stamped with a sentiment from Lily of the Valley stamp set in Garden Geen ink.
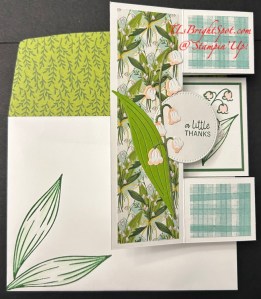
The envelope… more Valley in Bloom DSP on the flap and the leaves stamped in Mossy Meadow ink and ‘moved’ using a Blender Pen.
Thanks for joining me today. May you have a beautiful day! Make someone happy by sending them a handmade card filled with ❤️
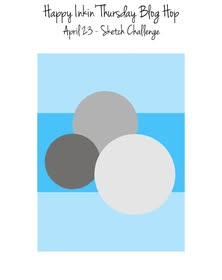
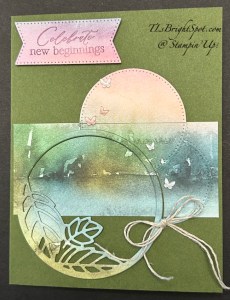
Welcome, welcome to our Happy Inkin’ Thursday blog hop. We have some fun creations for you to see today – and we have a sketch challenge. I’m giving some love to a bundle I haven’t used called Springtime Scenes – an ONLINE EXCLUSIVE from March (which seems like ages ago already!). It has some wonderful images & dies. And I’m using a retiring 6×6 Designer Series Paper called Thoughtful Journey.
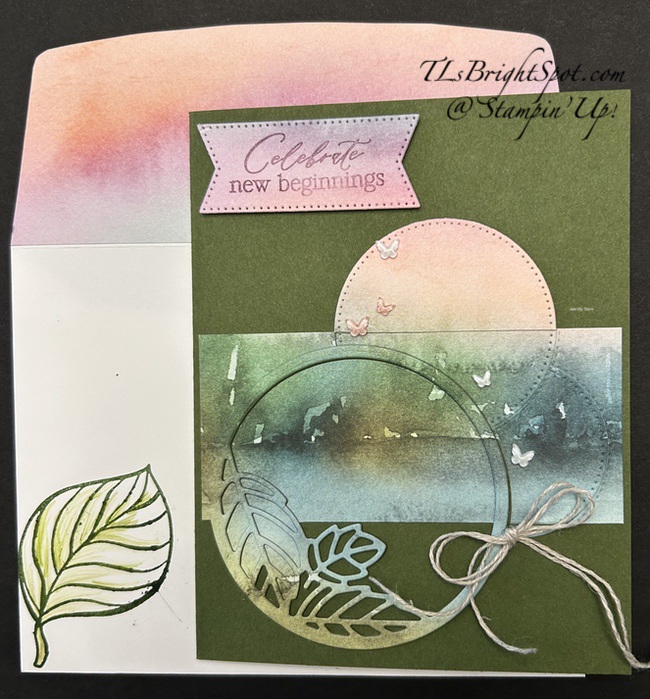
Feel free to use 2 pieces of the DSP in order to capture everything you want in your images. On one layer, die cut the largest circle that has leaves from the Springtime Scenes Dies. Add several layers of card stock behind it to build up layers and adhere them together. Cut the other piece of Thoughtful Journey to 4 1/8 x 5 3/8 then position the leaf circle die cut and note where it fits , then cut this second panel so the strip is 1 7/8 x 4 1/8 and the leaf image can fit perfectly in alignment. Now cut two circles using the Stylish Shapes Dies from both the first panel of Thoughtful Journey 6×6 DSP and from card stock & layer these together. When I cut these, they butted up against the original die cut. I adhered these to the card. The banner is stamped with Blackberry Bliss ink from a scrap of this same panel of Thoughtful Journey 6×6 DSP then die cut with a banner die from Stylish Shapes Dies. I added it with dimensionals. Final steps: a double Linen Thread bow attached with a glue dot and five 2026-2028 In Color butterflies. I love, love, love these butterflies.
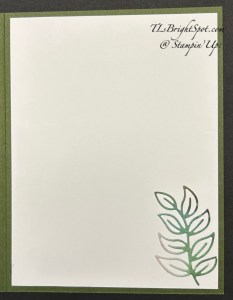
For the inside of the card I took this fabulous leaf die from Springtime Scenes Dies and a scrap of this same Thoughtful Journey 6×6 DSP & die cut the leaves, added liquid glue and attached it to a Basic White 4 x 5 1/4 panel and adhered this to the inside of the card. Done!
For the envelope – two things… another piece of Thoughtful Journey 6×6 DSP cut 2 14 x 6 & attached to the flap and trimmed to fit. For the front I stamped this gorgeous single leaf in Mossy Meadow & used a Blender Pen to move the ink. 😀 Fun, huh? And this card is ready to send!
May 5 is a BIG DAY for Stampin’ Up! & those of us who are Demonstrators. What happens you ask? 😀 The May-August 2026 Catalog will go live & you, the audience and our customers can order. WooHoo!!!
Below is a list of supplies to make this card. The only item that cannot be ordered just yet are the 2026-2028 In Color Butterflies – you have to wait until May 5 to do that.
Thanks for stopping by. May you have a beautiful day. Make someone happy by sending them a card filled with ❤️








![Cajun Craze 8-1/2" X 11" Cardstock [ 119684 ]](https://assets1.tamsnetwork.com/images/EC042017NF/119684s.jpg "Cajun Craze 8-1/2\" X 11\" Cardstock [ 119684 ]")
![Very Vanilla 8-1/2" X 11" Cardstock [ 101650 ]](https://assets1.tamsnetwork.com/images/EC042017NF/101650s.jpg "Very Vanilla 8-1/2\" X 11\" Cardstock [ 101650 ]")
![Cajun Craze Classic Stampin' Pad [ 147085 ]](https://assets1.tamsnetwork.com/images/EC042017NF/147085s.jpg "Cajun Craze Classic Stampin' Pad [ 147085 ]")
![Early Espresso Classic Stampin' Pad [ 147114 ]](https://assets1.tamsnetwork.com/images/EC042017NF/147114s.jpg "Early Espresso Classic Stampin' Pad [ 147114 ]")
![Golden Glow Classic Stampin' Pad [ 167676 ]](https://assets1.tamsnetwork.com/images/EC042017NF/167676s.jpg "Golden Glow Classic Stampin' Pad [ 167676 ]")
![Old Olive Classic Stampin' Pad [ 147090 ]](https://assets1.tamsnetwork.com/images/EC042017NF/147090s.jpg "Old Olive Classic Stampin' Pad [ 147090 ]")
![Adhesive Backed Metallic Gems [ 163780 ]](https://assets1.tamsnetwork.com/images/EC042017NF/163780s.jpg "Adhesive Backed Metallic Gems [ 163780 ]")
![Very Vanilla Medium Envelopes [ 107300 ]](https://assets1.tamsnetwork.com/images/EC042017NF/107300s.jpg "Very Vanilla Medium Envelopes [ 107300 ]")
![Basic White 8 1/2" X 11" Cardstock [ 166780 ]](https://assets1.tamsnetwork.com/images/EC042017NF/166780s.jpg "Basic White 8 1/2\" X 11\" Cardstock [ 166780 ]")
![Basic White Medium Envelopes [ 159236 ]](https://assets1.tamsnetwork.com/images/EC042017NF/159236s.jpg "Basic White Medium Envelopes [ 159236 ]")
![Tuxedo Black Memento Ink Pad [ 132708 ]](https://assets1.tamsnetwork.com/images/EC042017NF/132708s.jpg "Tuxedo Black Memento Ink Pad [ 132708 ]")
![Stampin' Positioner [ 167768 ]](https://assets1.tamsnetwork.com/images/EC042017NF/167768s.jpg "Stampin' Positioner [ 167768 ]")
![Stampin' Cut & Emboss Machine [ 149653 ]](https://assets1.tamsnetwork.com/images/EC042017NF/149653s.jpg "Stampin' Cut & Emboss Machine [ 149653 ]")
![Paper Trimmer [ 152392 ]](https://assets1.tamsnetwork.com/images/EC042017NF/152392s.jpg "Paper Trimmer [ 152392 ]")
![Stampin' Dimensionals [ 104430 ]](https://assets1.tamsnetwork.com/images/EC042017NF/104430s.jpg "Stampin' Dimensionals [ 104430 ]")
![Multipurpose Liquid Glue [ 110755 ]](https://assets1.tamsnetwork.com/images/EC042017NF/110755s.jpg "Multipurpose Liquid Glue [ 110755 ]")
![Mini Glue Dots [ 103683 ]](https://assets1.tamsnetwork.com/images/EC042017NF/103683s.jpg "Mini Glue Dots [ 103683 ]")
![Paper Snips [ 103579 ]](https://assets1.tamsnetwork.com/images/EC042017NF/103579s.jpg "Paper Snips [ 103579 ]")
![Take Your Pick [ 144107 ]](https://assets1.tamsnetwork.com/images/EC042017NF/144107s.jpg "Take Your Pick [ 144107 ]")
![White Gel Pens [ 166642 ]](https://assets1.tamsnetwork.com/images/EC042017NF/166642s.jpg "White Gel Pens [ 166642 ]")
![Clear Wink Of Stella Glitter Brush [ 141897 ]](https://assets1.tamsnetwork.com/images/EC042017NF/141897s.jpg "Clear Wink Of Stella Glitter Brush [ 141897 ]")
![Metallics Wow! Embossing Powder [ 165678 ]](https://assets1.tamsnetwork.com/images/EC042017NF/165678s.jpg "Metallics Wow! Embossing Powder [ 165678 ]")
![Basics Wow! Embossing Powder [ 165679 ]](https://assets1.tamsnetwork.com/images/EC042017NF/165679s.jpg "Basics Wow! Embossing Powder [ 165679 ]")
![Heat Tool (Us And Canada) [ 129053 ]](https://assets1.tamsnetwork.com/images/EC042017NF/129053s.jpg "Heat Tool (Us And Canada) [ 129053 ]")
![Embossing Additions Tool Kit [ 159971 ]](https://assets1.tamsnetwork.com/images/EC042017NF/159971s.jpg "Embossing Additions Tool Kit [ 159971 ]")
![Small Blending Brushes [ 160518 ]](https://assets1.tamsnetwork.com/images/EC042017NF/160518s.jpg "Small Blending Brushes [ 160518 ]")

![Artisan Sketched Garden 12" X 12" (30.5 X 30.5 Cm) Designer Series Paper [ 167752 ]](https://assets1.tamsnetwork.com/images/EC042017NF/167752s.jpg "Artisan Sketched Garden 12\" X 12\" (30.5 X 30.5 Cm) Designer Series Paper [ 167752 ]")
![Greetings For All Mix & Match Ephemera Pack (English) [ 164862 ]](https://assets1.tamsnetwork.com/images/EC042017NF/164862s.jpg "Greetings For All Mix & Match Ephemera Pack (English) [ 164862 ]")
![Extraordinary Life Bundle (English) [ 167719 ]](https://assets1.tamsnetwork.com/images/EC042017NF/167719s.jpg "Extraordinary Life Bundle (English) [ 167719 ]")
![Hydrangea Hue 8 1/2" X 11" Cardstock [ 167687 ]](https://assets1.tamsnetwork.com/images/EC042017NF/167687s.jpg "Hydrangea Hue 8 1/2\" X 11\" Cardstock [ 167687 ]")
![Basic Black 8-1/2" X 11" Cardstock [ 121045 ]](https://assets1.tamsnetwork.com/images/EC042017NF/121045s.jpg "Basic Black 8-1/2\" X 11\" Cardstock [ 121045 ]")
![Basic White 12" X 12" (30.5 X 30.5 Cm) Thick Cardstock [ 166782 ]](https://assets1.tamsnetwork.com/images/EC042017NF/166782s.jpg "Basic White 12\" X 12\" (30.5 X 30.5 Cm) Thick Cardstock [ 166782 ]")
![Heartfelt Hexagon Punch [ 162888 ]](https://assets1.tamsnetwork.com/images/EC042017NF/162888s.jpg "Heartfelt Hexagon Punch [ 162888 ]")
![Barely Blush Shimmer Brush [ 167664 ]](https://assets1.tamsnetwork.com/images/EC042017NF/167664s.jpg "Barely Blush Shimmer Brush [ 167664 ]")
![Hydrangea Hue Shimmer Brush [ 167663 ]](https://assets1.tamsnetwork.com/images/EC042017NF/167663s.jpg "Hydrangea Hue Shimmer Brush [ 167663 ]")
![Peaceful Pine Shimmer Brush [ 167665 ]](https://assets1.tamsnetwork.com/images/EC042017NF/167665s.jpg "Peaceful Pine Shimmer Brush [ 167665 ]")
![2026–2028 In Color™ Dots [ 167546 ]](https://assets1.tamsnetwork.com/images/EC042017NF/167546s.jpg "2026–2028 In Color™ Dots [ 167546 ]")
![Balloon Festoon Bundle (English) [ 167606 ]](https://assets1.tamsnetwork.com/images/EC042017NF/167606s.jpg "Balloon Festoon Bundle (English) [ 167606 ]")
![Beautiful Ordinary Life Designer Series Paper & Sticker Sheet (English) [ 167560 ]](https://assets1.tamsnetwork.com/images/EC042017NF/167560s.jpg "Beautiful Ordinary Life Designer Series Paper & Sticker Sheet (English) [ 167560 ]")
![Array Of Dots [ 167559 ]](https://assets1.tamsnetwork.com/images/EC042017NF/167559s.jpg "Array Of Dots [ 167559 ]")
![Pretty Peacock 8-1/2" X 11" Cardstock [ 150880 ]](https://assets1.tamsnetwork.com/images/EC042017NF/150880s.jpg "Pretty Peacock 8-1/2\" X 11\" Cardstock [ 150880 ]")
![Pool Party Classic Stampin' Pad [ 147107 ]](https://assets1.tamsnetwork.com/images/EC042017NF/147107s.jpg "Pool Party Classic Stampin' Pad [ 147107 ]")
![Barely Blush Classic Stampin Pad [ 167678 ]](https://assets1.tamsnetwork.com/images/EC042017NF/167678s.jpg "Barely Blush Classic Stampin Pad [ 167678 ]")
![Lemon Lolly Classic Stampin' Pad [ 161666 ]](https://assets1.tamsnetwork.com/images/EC042017NF/161666s.jpg "Lemon Lolly Classic Stampin' Pad [ 161666 ]")
![Lost Lagoon Classic Stampin' Pad [ 161678 ]](https://assets1.tamsnetwork.com/images/EC042017NF/161678s.jpg "Lost Lagoon Classic Stampin' Pad [ 161678 ]")
![Lemon Lolly Stampin’ Blends Combo Pack [ 161673 ]](https://assets1.tamsnetwork.com/images/EC042017NF/161673s.jpg "Lemon Lolly Stampin’ Blends Combo Pack [ 161673 ]")
![Pool Party Stampin' Blends Combo Pack [ 154894 ]](https://assets1.tamsnetwork.com/images/EC042017NF/154894s.jpg "Pool Party Stampin' Blends Combo Pack [ 154894 ]")
![Valley In Bloom Suite Collection (English) [ 167951 ]](https://assets1.tamsnetwork.com/images/EC042017NF/167951s.jpg "Valley In Bloom Suite Collection (English) [ 167951 ]")
![2026–2028 In Color™ Butterflies [ 167656 ]](https://assets1.tamsnetwork.com/images/EC042017NF/167656s.jpg "2026–2028 In Color™ Butterflies [ 167656 ]")
![Basic White 8 1/2" X 11" Thick Cardstock [ 159229 ]](https://assets1.tamsnetwork.com/images/EC042017NF/159229s.jpg "Basic White 8 1/2\" X 11\" Thick Cardstock [ 159229 ]")
![Granny Apple Green 8-1/2" X 11" Cardstock [ 146990 ]](https://assets1.tamsnetwork.com/images/EC042017NF/146990s.jpg "Granny Apple Green 8-1/2\" X 11\" Cardstock [ 146990 ]")
![Mossy Meadow Classic Stampin' Pad [ 147111 ]](https://assets1.tamsnetwork.com/images/EC042017NF/147111s.jpg "Mossy Meadow Classic Stampin' Pad [ 147111 ]")
![Barely Blush Stampin’ Blends Combo Pack [ 167667 ]](https://assets1.tamsnetwork.com/images/EC042017NF/167667s.jpg "Barely Blush Stampin’ Blends Combo Pack [ 167667 ]")
![Mossy Meadow Stampin' Blends Combo Pack [ 148547 ] (Retired)](https://assets1.tamsnetwork.com/images/EC042017NF/148547s.jpg "Mossy Meadow Stampin' Blends Combo Pack [ 148547 ] (Retired)")
![Blender Pens [ 102845 ]](https://assets1.tamsnetwork.com/images/EC042017NF/102845s.jpg "Blender Pens [ 102845 ]")


![Springtime Scenes Bundle (English) [ 167461 ]](https://assets1.tamsnetwork.com/images/EC042017NF/167461s.jpg "Springtime Scenes Bundle (English) [ 167461 ]")
![Stylish Shapes Dies [ 159183 ]](https://assets1.tamsnetwork.com/images/EC042017NF/159183s.jpg "Stylish Shapes Dies [ 159183 ]")
![Thoughtful Journey 6" X 6" (15.2 X 15.2 Cm) Designer Series Paper [ 163303 ]](https://assets1.tamsnetwork.com/images/EC042017NF/163303s.jpg "Thoughtful Journey 6\" X 6\" (15.2 X 15.2 Cm) Designer Series Paper [ 163303 ]")
![Linen Thread [ 104199 ]](https://assets1.tamsnetwork.com/images/EC042017NF/104199s.jpg "Linen Thread [ 104199 ]")
![Mossy Meadow 8-1/2" X 11" Cardstock [ 133676 ]](https://assets1.tamsnetwork.com/images/EC042017NF/133676s.jpg "Mossy Meadow 8-1/2\" X 11\" Cardstock [ 133676 ]")
![Blackberry Bliss Classic Stampin' Pad [ 147092 ]](https://assets1.tamsnetwork.com/images/EC042017NF/147092s.jpg "Blackberry Bliss Classic Stampin' Pad [ 147092 ]")

