Stampin’ Up! Artisan Sketched Garden DSP + Framed All Around Sympathy Card

Hello Saturday! We are in full rain for the next 48 hours mode… Maybe I can play in my craft room 😀 or… get some other projects completed. Today I have a sympathy card made with Artisan Sketched Garden and some Stampin’ Blends and oh yes, some Berry Botanical Vellum.

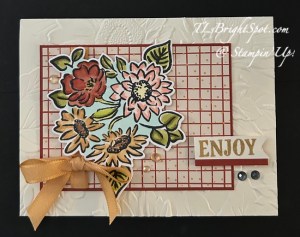
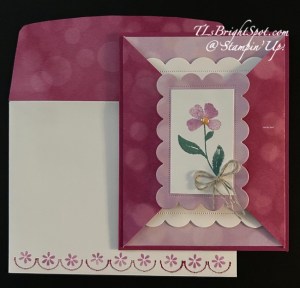
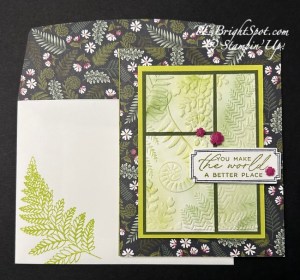
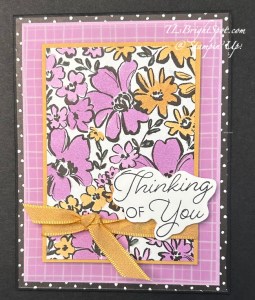
Stampin' Up! Artisan Sketched Garden & Framed All Around Sympathy card front

I began by coloring the pretty floral images on the Artisan Sketched Garden DSP: Peaceful Pine for the leaves, Fresh Freesia & Golden Glow for the flowers. Interesting combination, right? I took my cue for this combination by looking at the Berry Botanical Vellum which has an even larger mix of colors. I backed this with a panel of Golden Glow card stock then wrapped it with 3/8″ Bordered Ribbon in Golden Glow. I took another short length and slipped it under the ribbon & tied a knot. I stamped the sentiment in Memento Black ink on Basic White scrap & fussy cut it & placed it on the front with dimensionals. I cut a piece of the grid vellum from the Berry Botanical Vellum pack & backed it with Fresh Freesia. This was adhered directly to the polka dot pattern of the Artisan Sketched Garden that was already on a Card base of Basic Black.

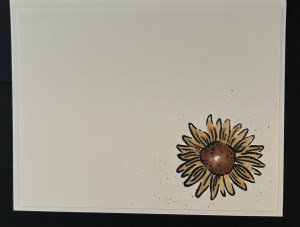
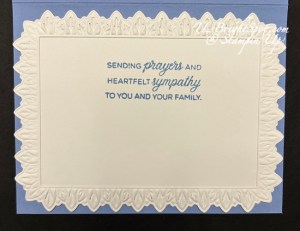
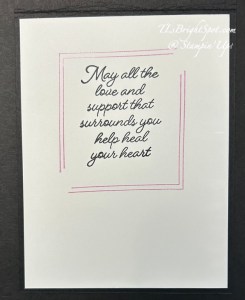
Stampin' Up! Artisan Sketched Garden & Framed All Around Sympathy card inside

For the inside… I stamped the sentiment using the Framed All Around stamp set & Memento Black ink then stamped the ‘frame’ in two places with Fresh Freesia ink. The Basic White was secured to the card base & the card was complete.

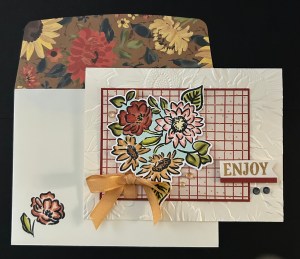
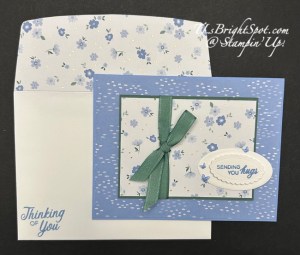
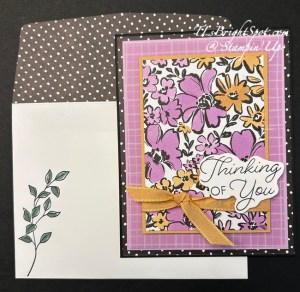
Stampin' Up! Artisan Sketched Garden & Framed All Around sympathy card & envelope

For the envelope… I stamped this leaf image in Memento Black ink & colored the leaves with Peaceful Pine Stampin’ Blends. On the flap is another of the Artisan Sketched Garden DSP in the polka dot pattern used for the card front. I love how this card turned out, sweet to look at and gentle thoughts. This card goes in the mail today.

Shopping with me is easy peasy… simply click the link & you’ll find SU! ONLINE EXCLUSIVES (items not in any catalog!), kits of all sorts – for cards or household items, scrapbooking, catalog info & SU! craft classes. When your order is $50 or more you will receive my monthly tutorial & also get Daisy Patc h Rewards (see my rewards page for more info.

SHOP WITH ME HERE

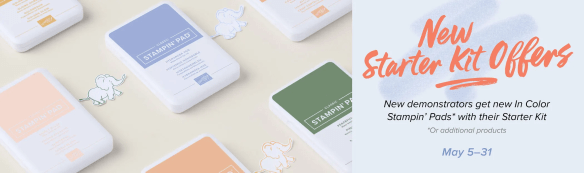
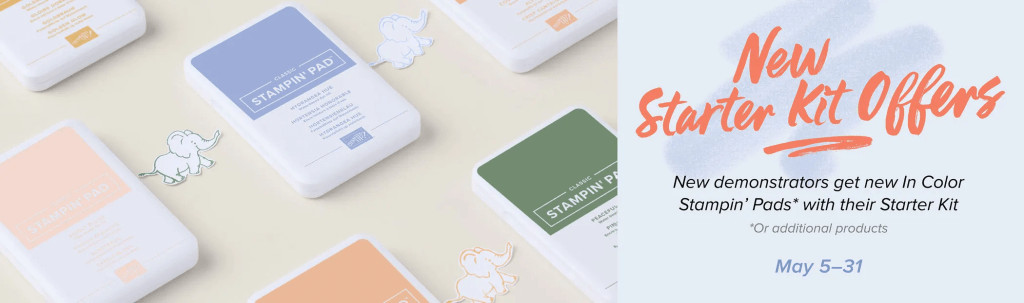
Stampin’ Up! has a joining promotion that has awesome benefits though the end of May – jsut days away. Now, just so you know… as a Demonstrator, we have the privilege/ opportunity to preorder from catalogs & ONLINE EXCLUSIVES before they are available to the public. Already the July preorder is available & I’vc made good use of that. You’ll see more new products coming soon. What I’m encouraging of course, is for you to seriously consider becoming a Demonstrator -with all the fabulous benefits… 20-25% off all products once you’re joined, opportunity to attend special workshops & conventions & a fabulous supportive community of crafters. Join as a demonstrator now & you’ll get our new 2026–2028 In Color Stampin’ Pads FREE along with their Starter Kit! Or if you’d rather have different products instead of ink pads, we’ve got that covered there, too—you can add an extra $35 USD | $50 CAD worth of products to your Starter Kit.

Stampin' Up! Joining Promotion

JOIN MY TEAM HERE

Thanks for stopping by. May you have a beautiful day. Make someone happy by sending them a handmade card filled with ❤️

Product List

Stampin’ Up! W/V Fun Fold with Silly Old Bear

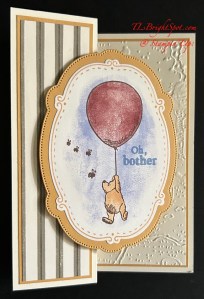
Good morning, good morning! It is a bleak looking day here today – cloudy, overcast, 55 degrees. Of course 2 days ago it was 94! We made this card two weeks ago in card class & I forgot to post it 😖. It is so cute… Silly Old Bear DSP, Hundred Acre Woods embossing Folder & coordinating Sweet Words & Lab els bundle. These are all from the May ONLINE EXCLUSIVES.

Stampin' Up! Silly Old Bear May ONLINE W/V Fun Fold

I used the dies from Sweet Words & Labels to die cut this image straight from the Silly Old Bear DSP. The layer behind the DSP is Golden Glow card stock, one of the new In Colors for 2026-2028. I used Wink of Stella on the Balloon & Hydrangea Hue for stamping the sentiment from Sweet Words & Labels stamp set. Let’s look at the inside of the card so you can see the whole image.

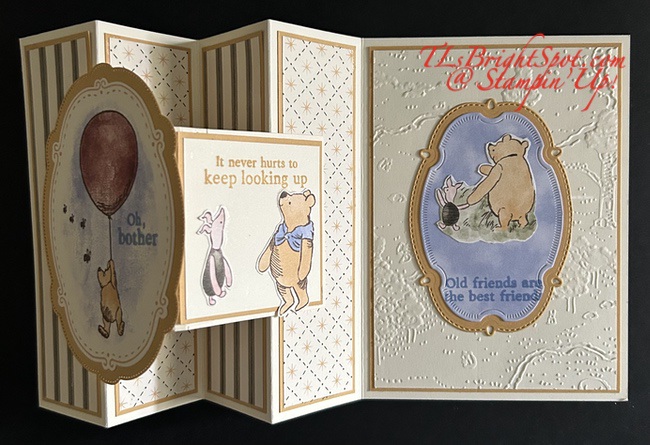
Stampin' Up! Silly Old Bear W/V Fun Fold inside card

The DSP layers here are all from the Silly Old Bear DSP – gorgeous aren’t they? And the card stock layers are Golden Glow. The card base is Very Vanilla and the embossed panel is also Very Vanilla, embossed with Hundred Acre Woods 3D embossing Folder as I mentioned earlier. The images for the V panel were fussy cut from the Silly Old Bear DSP & stamped with the Sweet Words & Labels stamp set: either Golden Glow or Hydrangea Hue.

Directions for a W/V fun fold:

  • The card base is 11 x 5 1/2 scored on the long side @ 1 3/4, 3 1/2, 5 1/4, & 7
  • Card stock layers 1 1/2 x 5 1/4 – cut 4; 3 3/4 x 5 1/4 + embossed panel 3 5/8 x 5 1/8
  • DSP layers 1 3/8 x 5 1/8 – cut 4, 2 different patterns
  • Die cut images from Silly Old Bear DSP using the Sweet Words & Labels Dies; die cut card stock layer for behind each image with next size larger die
  • Embossed the largest panel for the inside back – Hundred Acre Woods EF
  • Adhere Layers together & attach to card base
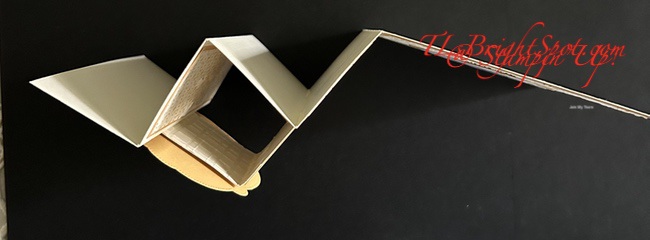
  • Cut another panel of card stock (here it is Very Vanilla) 6 x 3 & score on long side @ 3″; attache to front panel & last scored panel to create the V – see photo below. Decorate the right panel w/ card stock layer 2 3/4 x 2 3/4 then Very Vanilla layer 2 5/8 x 2 5/8. This last layer is stamped & decorated prior to attaching.
  • Attach die cuts from DSP; add additional fussy cut layer for inside back panel & stamp sentiment in Hydrangea Hue
Stampin' Up! W/V Fun Fold from the top

I love how this card turned out! And it can used for all kinds of reasons. I’m sending this to a friend who needs a little ‘pick me up’.

Stampin’ Up! has some beautiful new Online Exclusives that are available to order now!!  And they’ve created a printable flyer to make it MUCH easier to shop the new products!  WOOHOO!! You can get to the flyer for the newest Online Exclusives by clicking here

You won’t find the Online Exclusive products in any catalog, they’ll only be listed in the online store.  The Online Exclusive product releases will continue throughout the year so there will be new products to shop from, in addition to new catalogs!

SHOP WITH ME BY CLICKING HERE

Now, just so you know… as a Demonstrator, we have the privilege/ opportunity to preorder from catalogs & ONLINE EXCLUSIVES before they are available to the public. Already the July preorder is available & I’vc made good use of that. You’ll see more new products coming soon. What I’m encouraging of course, is for you to seriously consider becoming a Demonstrator –

JOIN MY TEAM HERE

with all the fabulous benefits… 20-25% off all products once you’re joined, opportunity to attend special workshops & conventions & a fabulous supportive community of crafters. Join as a demonstrator now & you’ll get our new 2026–2028 In Color Stampin’ Pads FREE along with their Starter Kit! Or if you’d rather have different products instead of ink pads, we’ve got that covered there, too—you can add an extra $35 USD | $50 CAD worth of products to your Starter Kit.

Stampin' Up! Joining offer

Thanks for stopping by. May you have a beautiful day. Make someone happy by sending them a handmade card filled with ❤️

Product List

Stampin’ Up! Painted Illusions with Pop-Up Cross Card

Good Wednesday… Last week in card class we made this pretty pop-up cross card – perfect for Easter. I used the February POTM (Product of the Month) DSP and Wood Textured 12×12 Specialized Paper. Let’s take a peek.

Stampin' Up! Pop-Up Cross card front

And here’s what it looks like from the top…

Stampin' Up! Pop-Up Cross card, top view

It folds flat to go into the envelope. Directions are simple.

  • Cut card base 8 1/2 x 5 12 & score along long side at 4 1/4 (Lost Lagoon) Burnish
  • Basic White – 5 x 5 1/4, score on short side 1 3/8, 1 7/8, 3 1/8 & 5 3/8. Burnish folds in valley, mountain, mountain, valley – as shown in above photo
  • Basic White – 1 1/4 x 3 1/4 (this is the horizontal strip for the cross)
  • DSP…
    • 1 1/4 x 5 (cut 2) for front outside panels; 2 1/4 x 6 (envelope flap) Painted Illusions 12 x 12
    • 1 x 5 (vertical strip for cross) Wood Textured 12 x 12
    • 1 x 3 (horizontal strip for cross) Wood Textured 12 x 12
  • Stamp & die cut elements are from Delicate Wishes Bundle – an ONLINE EXCLUSIVE
    • Die cut leaves from Pretty Peacock using Delicate Wishes dies
    • Stamp floral image from Delicate Wishes stamp set in Memento Black ink & color with Blends: Granny Apple Green & Berry Burst. Die cut with dies from Delicate Wishes dies

Add Painted Illusions panels to the front of the Basic White scored piece. Add the Wood Textured vertical panel to the center of this same Basic White scored piece. Add the Wood Textured horizontal piece to the Basic White horizontal piece and set aside. Add the scored Basic White panel to the card front… left side first creating equal borders on three sides. Now add the right side to the card front, again creating equal borders. Remember – this is a pop-up cross and the only two sections being attached to the card front are the two panels with added DSP. Now add the horizontal piece creating the cross by flattening the pop-up to the right and attaching the horizontal panel so it is even with the card base on the right. Now fold to the left and the horizontal panel should also be at the fold edge.

Add the die cut leaves directly to the cross, then attach the floral die cut with dimensionals. I did not want to add a sentiment or embellishments as I really like the simplicity as shown.

Stampin' Up! Pop-Up Cross card inside

For the inside of the card I stamped the grass image from Delicate Wishes stamp set in Granny Apple Green ink to the Basic White 4 x 5 1/4 panel, then attached it to the inside of the card. For the envelope… no picture of that BTW! … I stamped the same grass image to the front of the envelope in Granny Apple Green ink and covered the flap in the same Patterned Illusions DSP.

New products are arriving soon! The May-August 2026 catalog is on it’s way to me & I’ll be sending those to my customers right away – so keep a look out in your mailbox. New in-colors will be showcased on a little gift card enclosed in the catalog. I think you are going to like going through the catalog – I know I had a good time seeing all the new products – and I can’t wait to play!!! Excitement is building with the new magnetic ink pads AND the new Hybrid Black ink pad. These are wonderful new additions and i’m anxious to share them with you.

Please see below the list of products to make this card & shop with me.

Thanks for stopping by. May you have a beautiful day. Send a hug through the mail! with ❤️

Product List

Stampin’ Up! Beautiful Gallery Off-Set Gatefold

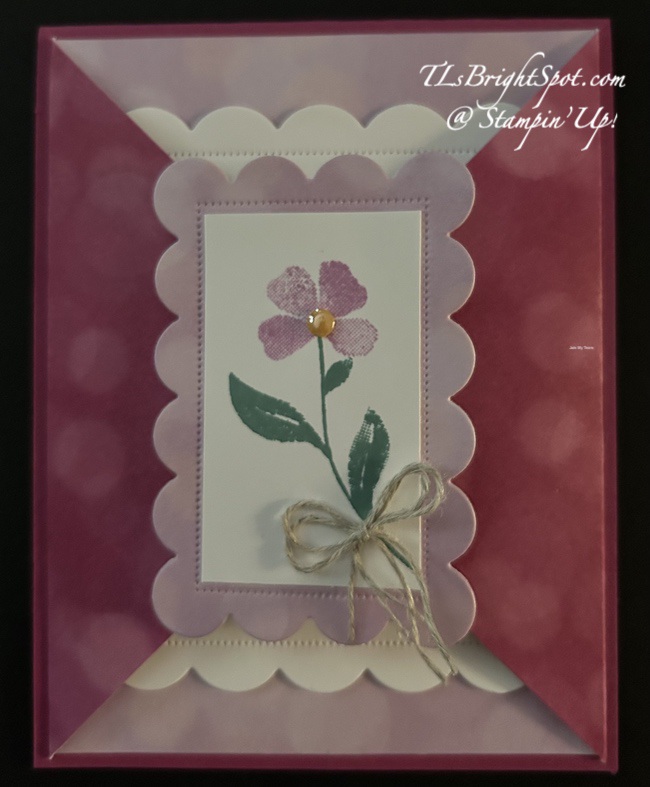
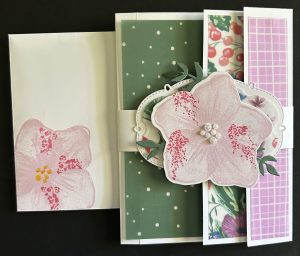
Good morning and happy Tuesday! I have a fun set of cards to share today. And yes, you heard that right – a ‘set’ of cards. I needed several for folks that need a pick-me-up, a thinking of you if they are feeling kind of down. I enjoy the off-set gatefold more than the regular – I have no idea why. At any rate… I was playing with the Beautiful Gallery 6×6 DSP and got on a roll. Here are the four cards.

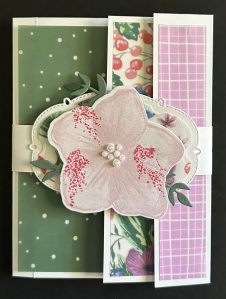
Stampin' Up! Beautiful Gallery off-set gatefold
Stampin' Up! Beautiful Gallery off-set gatefold, card 2
Stampin' Up! Beautiful Gallery off-set gatefold, card 3
Stampin' Up! Beautiful Gallery off-set gatefold, card 4

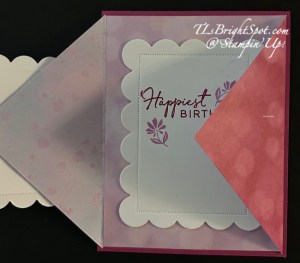
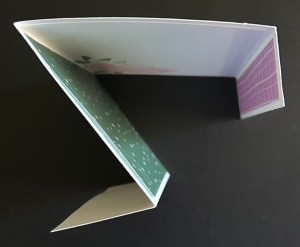
Didn’t these turn out beautifully- all because of the DSP! Each card is 8 1/2 x 5 1/2 and scored on the long side at 1 1/4 & 5 1/2. After that it simply depends on how you burnish the fold as to which direction it becomes. 😀 Card 2 is off-set to the right while the other three are off-set to the left. And either way works.

Card 1 sentiment is stamped in Old Olive ink on Basic White & uses the Grow with Love stamp set & die cut with Scalloped Wishes Dies. Embellishments are Pearls of Beauty.

Cards 2 & 3 are both stamped in Secret Sea ink using the Courage & Faith sentiment and Branching Out Dies. Card 2 uses Charming Shimmer Dots. Card 3 uses Natural Matte Dots & Secret Sea 3/8″ Faux Linen Ribbon.

Card 4 sentiment is stamped in Early Espresso ink using the Grow with Love stamp set. It uses other dies in the Scalloped Wishes Dies set. And the embellishments are again the Pearls of Beauty.

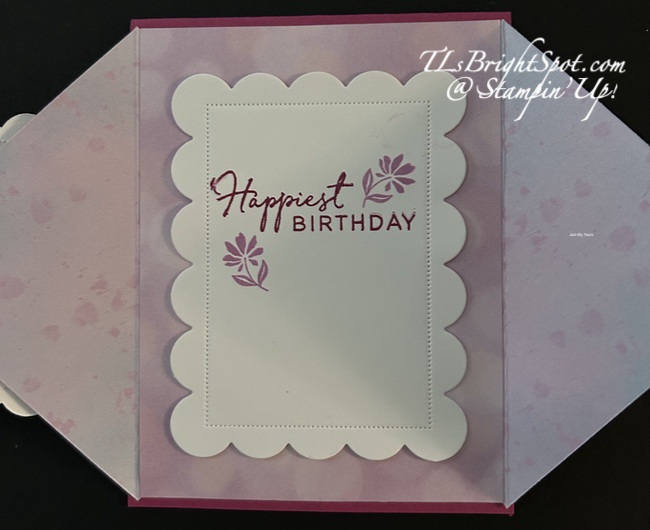
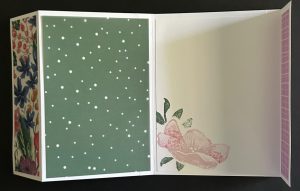
On two cards I added an extra card stock layer behind the DSP: 1 1/8 x 5 1/8; 2 7/8 x 5 3/8. The DSP layers are all the same: 1 1/4 x 51/4 & 2 3/4 x 5 1/4. You will see in the next photos that I also lined the inside of the cards with those same DSP measurements. The stamped Basic White layer on the inside is 4 x 5 1/4.

Stampin' Up! Beautiful Gallery off-set gatefold, inside card 1
Stampin' Up! Beautiful Gallery off-set gatefold, inside card 2
Stampin' Up! Beautiful Gallery off-set gatefold, inside card 3
Stampin' Up! Beautiful Gallery off-set gatefold, inside card 4

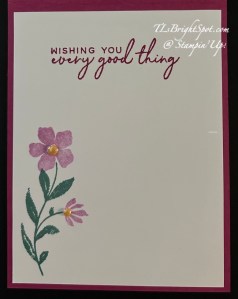
Stunning on the inside too, right? It really makes this card extra special. The stamped images on the inside use the Gallery Blooms stamp set: card 1 is stamped in Old Olive ink; cards 2 & 3 are stamped in Secret Sea ink; and card 4 is stamped in Early Espresso ink.

Stampin' Up! Beautiful Gallery off-set gatefold card & envelope 1
Stampin' Up! Beautiful Gallery off-set gatefold card & envelope 2
Stampin' Up! Beautiful gallery off-set gatefold card & envelope 3
Stampin' Up! Beautiful Gallery off-set gatefold card & envelope 4

And there you have it. I love this set of cards! Hope you do as well. Products to make these cards may be found below. Take a peek at my Daisy Patch rewards for benefits of shopping with me.

Thanks for stopping by. May you have a beautiful day. Make someone happy by sending them a handmade card filled with ❤️

Product List

Stampin’ Up! Mixed Florals with Lazy Daisy Embossing Folder

Good Monday! I’ve a pretty daisy card for you that just shouts spring. I’ve been working in my craft room for a while now, purging, cleaning up, reorganizing. It’s coming together but isn’t quite ‘there’ yet. So, back to this card… it uses the new March ONLINE EXCLUSIVE Lazy Daisy 3D embossing folder. Let’s take a peek.

Stampin' Up! Mixed Florals card front

This card has lots of layers 👍 Absolutely love this floral image. I stamped it in Memento ink then added color with Stampin’ Blends: Daffodil Delight & Shy Shamrock, then used my fine tip Basick Black Marker to add lines to the flower petals and dots under the flower center. If your marker tip is of the newer variety and doesn’t have that fine tip, you can use a Journaling Pen. I die cut this image with Branching Out Dies then cut out another from Pool Party card stock & layered them together. I ran a panel of Basic White 3 3/4 x 5 through the new Lazy Daisy 3D embossing folder. I cut a piece of Floral & Gingham Vellum SDSP using the checkered pattern – 4 x 5 1/4 and layered this to a Pool Party same size. I added these to the Thick Basic White card base (4 1/4 x 11 scored @ 5 1/2). The Branching out pieces were attached to the card front with dimensionals. Final step… three Shades of Green Hexagons were added to the card front.

Stampin' Up! Mixed Florals card inside

For the inside… I kept this quite simple… only the sentiment stamped in Memento Black ink – and this sentiment is from You Are Remarkable stamp set.

Again using a stamp from the Mixed Florals stamp set & Memento Black ink, I added this sweet floral image to the envelope front and colored the flowers with Stampin’ Blends Light Daffodil Delight.

Let’s discuss for a minute what’s coming soon… changes to that Memento ink pad. It’s going to be new & different & fabulous – no need to have a certain black ink pad for certain processes. This new pad will do it all! No Stazon or cleaner… just this new ink pad. Cannot WAIT!!! This is coming in the new catalog that will be available soon (May 4 to be exact!) – along with lots of other goodies… five new In Colors in all new magnetic ink pads that will be so easy to open – you’re going to love them. In lieu of one new catalog that runs for a full year, Stampin’ Up! will be releasing three catalogs per year beginning with the May-August 2026 Catalog. I’m excited about this change. This new catalog is fewer pages but lots of new products & ideas & I can’t wait to share them with you.

For now… if you want to order items to make the above card, see the products below to do that.

Thanks for stopping by. May you have a beautiful day. Send a card with lots of ❤️

Product List

Stampin’ Up! Delicate Whispers Feel Better Card

Good Tuesday! It’s March 3 and do you know what that means… new ONLINE EXCLUSIVES AVAILABLE! This bundle & papers are simply stunning and perfect for either masculine or feminine cards.

Stampin' Up! Delicate Wishes Feel Better Card front

I began with a Crumb Cake card base 8 1/2 x 5 1/2 scored at 4 1/4. I used two dies from the Delicate Whispers Dies to die cut these two images. I added a strip of the Delicate Designs Specialty Designer Series Paper to a Wood Grain Wonders, wrapped Linen Thread around the two papers, twice, & tied a bow. I attached these to the card front. On a scrap of Basic White, I stamped the sentiment in VersaMark ink, sprinkled Wow! Metallic Embossing Powder in Copper & heat set. Once this was cool, I attached it to a piece of Wood Grain Wonders DSP cut with Perennial Postage Dies and attached it with dimensionals over the Linen Thread. I then added the two die cuts under the bow & secured with a glue dot.

Stampin' Up! Delicate Wishes feel better card inside

For the inside, an additional styrip of the Delicate Designs SDSP was added to the edge of the Basic White 4 x 5 1/4 panel and attached to the inside of the card. I’ve stamped no inside sentiment as this card is being signed by lots of folks to let them know we’re thinking of them. I love this card and I think the person receiving it will also!

Stampin' Up! Delicate Wishes card & envelope

For the envelope, another piece of the Delicate Designs SDSP was attached to the flap & trimmed to fit. On the front another image from Delicate Wishes stamp set stamped in Crumb Cake ink to bring everything together.

Want to purchase this bundle & Designer Series Paper? There are several new products available today in the online exclusives – so check them out. Remember that when shopping with me and your purchased is $50 & up, you will receive my monthly tutorial, Daisy Patch Rewards from me and more. Visit my Rewardes Page for more details!

SHOP WITH ME HERE!

Thanks for stopping by. May you have a beautiful day. Make someone happy by sending them a handmade card made with ❤️

Product List

Stampin’ Up! Pop Up Slider Fun Fold with Scalloped Wishes Bundle

Good morning stampin’ friends. It was an amazing snow day yesterday, here in the Northeast. I’m guessing we got about 28″ and today is 20 degrees so that snow is frozen solid. It’s supposed to be sunny today so some will melt. 😀

I have a very fun pop up slider card today, which I haven’t done before. I was playing with a new bundle that’s a March Online Exclusive – available March 3 to customers. It’s so sweet. And Vellum seems to be popular these days, so I’ve used some of that too.

Stampin' Up! Pop Up Slider Fun Fold w/ Scalloped Wishes, card front

The card base is a standard 4 1/4 x 11 scored at 5 1/2. I cut a piece of Country Wood 12×12 DSP 4 x 5 1/4 and added it to the card front. I embossed a Vellum panel 4 1/8 x 5 3/8 using the Damask Designs embossing folder. I pulled out Crumb Cake card stock and stamped a lacy border image in Crumb Cake ink then die cut it and a Basic White lacy die that fits this banner. I stamped the sentiment using the Prayers & Promises stamp set (from the Jan-Apr 2026 Mini Catalog) in Misty Moonlight ink, then added the lacy die cut to the Crumb Cake with dabs of liquid glue. I attached this to the Vellum panel, then adhered the Vellum to the card front, adding glue only behind the banner. The reason is, the glue can b e seen through the Vellum if it’s added where there is no paper on the front. To complete the card front, I added three Pearls of Beauty in White.

For the inside… Cut two more panels of Country Woods 12×12 DSP (4 x 5 1/4) and add to the inside of the card. For the mechanism cut two pieces of Basic White: 2 x 5 1/4 scored on each end at 1/2″; 1 1/2 x 9 3/4 scored at 3/4, 5 1/4, 7, 7 1/2 & 9 1/4. Burnish all score lines. Add a piece of Country Woods DSP to the smaller Basic White piece (1 3/4 x 4) – set this aside to work on the ‘slider’. This long piece… the 3/4 score should be folder under while the rest of the score lines are burnished to come back up & over itself. Attach the 3/4 scored end to the right edge of the left inside panel centering it top to bottom – see photo.

Stampin' Up! Popp Up Slider Fun Fold.1

Add glue to those folded back ends of the decorated 2 x 5 1/4 piece & attach to the right inside of the card,over the mechanism and approximately 1/4″ from the next score line of the slider mechanism. You are attaching this to the card base, over the mechanism -see photo.

Stampin' Up! Pop Up Slider Fun Fold.2

Final step of the mechanism… adhere the last scored portion of the long strip to the left edge of the decorated 2 x 5 1/4 panel. See photo.

Stampin' Up! Pop Up Slider Fun Fold.3

Close the card to make the mechanism work properly and allow glue to set. Now, add adhesive to that thin part standing up & add the decorated element.

Stampin' Up! Pop Up Slider Fun Fold.4

In the above photo, I stamped the image of this gorgeous flower using the Simply Beautiful stamp set & Memento ink on a Basic White piece. I colored it with Stampin’ Blends Petal Pink and Light Timid Tiger. I die cut the flower & attached it with liquid glue to that thin standing up piece of the mechanism. I die cut the stamen of the flower from Country Woods DSP, added Wink of Stella to it & attached it to the center of the flower. The sentiment is stamped in Misty Moonlight ink with a sentiment from Simply Beautiful stamp set. I fussy cut the sentiment and attached it with mini dimensionals to the flower.

Stampin' Up! Pop Up Slider card.5

Final touches… I die cut these stunning dragonflies from Country Woods DSP and attached them to two places on the card. I embellished them with Pearls of Beauty in white – same as used on the card front. Open & close this card several times and the slider works perfectly! I am so excited about this new fun fold and can’t wait to try it with some other bundles in my stash… stay tuned!

As a demonstrator, there are so MANY benefits: being able to preorder new products before they are available to the ‘open market’, having a supportive creative community that encourages & helps in various ways, being able to attend creative events via ZOOM or in person (CONVENTIONS!), 20% discount on all products after joining, monthly tutorials and lots, lots more.

Want to thinking about JOINING MY TEAM? Check out how to do that HERE. What more could you ask for? well, let me just say… JOIN MY TEAM & get this awesome new Positioner Tool designed by our Stampin’ Up! TEAM!

Here are the details about the JOINING PROMOTION…New team members who purchase their Starter Kit February 3–March 2 will also receive our new Stampin’ Positioner*.

New demonstrators who submit their Independent Demonstrator Agreement (IDA) before February 3 or after March 2 will not be eligible for this offer.

Joining deadline:  March 2, 2026, at 11:59 p.m. (MT)

When you shop with me, there are some fun benefits… I like to thank my customers.. When you spend $50 or more (before tax & shipping) you will also receive a copy of my monthly tutorial – and guess what – it’s Sweet Bugs for February! AND… keep track of your purchases using my Daisy Patch Rewards and get even more benefits! Visit my REWARDS Page for more info.

Redemption Period: February 3–28, 2026There is no limit to the number of coupon codes you can redeem on an order during the redemption period. If you’re redeeming multiple codes, you must put a space between each code.

You may only redeem coupon codes one time. You cannot redeem them after February 28.

You can redeem Bonus Days coupon codes for month-to-month Paper Pumpkin subscriptions and new prepaid subscriptions.

Some restrictions apply. Coupons can’t be redeemed towards Starter Kits and you cannot use them on exchanges.

Redemption period ends:  February 28, 2026, at 11:59 p.m. (MT)

SHOP WITH ME HERE!

Thanks for stopping by. May you have a beautiful day. Make someone happy by sending them a handmade card made with ❤️

Product List

Stampin’ Up! Triple Hearts w/ Endless Love Bundle, Redeeming Day, SU! Joining Promo & Daisy Bonus

Today is the day you can start redeeming those BONUS DAYS COUPONS! And there’s no time like the present to make heart cards – cards for the heart. I’ve strung these together loosely with Linen Thread and love the banner type look on this Notecard.

Stampin' Up! Endless Love card front

The heart on the left is cut from Flirty Flamingo; the second heart is stamped with Real Red ink and the third heart is die cut from Real Red. The arrow is lengthened by cutting it in the middle and adhering each piece to the back of the center heart – die cut from Basic Black. The XO is also die cut from Basic White – all the die cuts use the Endless Love Dies. The tiny red hearts are leftover die cuts from a previous Endless Love project. On the Basic White Notecard, I used Strawberry Slush & a Blending Brush to create a bit of background color, then adhered the hearts: heart 1 – liquid glue & a dimensional under the left top of the heart; center heart is attached with dimensionals only; and the last heart is added with liquid glue and a dimensional under the upper right of the heart.

Stampin' Up! Endless Love notecard, inside

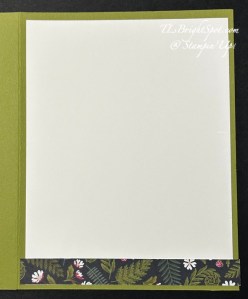
I kept this very simple by adding a strip of the Made with Love 12×12 DSP, same pattern I used for the envelope flap. This card is going to have lots of signatures as it’s coming from a group, so it needed to be plain on the inside.

Stampin' Up! Redeem Bonus Coupons
  • Redemption Period: February 3–28, 2026
    • There is no limit to the number of coupon codes you can redeem on an order during the redemption period. If you’re redeeming multiple codes, you must put a space between each code.
    • You may only redeem coupon codes one time. You cannot redeem them after February 28.
    • You can redeem Bonus Days coupon codes for month-to-month Paper Pumpkin subscriptions and new prepaid subscriptions.
    • Some restrictions apply. Coupons can’t be redeemed towards Starter Kits and you cannot use them on exchanges.
    • Redemption period ends:  February 28, 2026, at 11:59 p.m. (MT)

This is my birth month – February – and with that in mind and all the awesome SU! promotions, I’m also offering Daisy Birthday Bash Bonuses …

For all orders of $50 or greater (before shipping and taxes and after coupons) placed through me between now and Saturday, February 14, you’ll get your choice of a free adhesive! 
This can be anything that Stampin’ Up! sells that could be used as an adhesive!  And for the adhesives that are $5 or under, two packs will equal one choice (see the items with the (2) on the list below) so if you select those, you’ll get double!!
Here is a list of the adhesives to choose:
  • Adhesive Sheets – 152334
  • Multipurpose Liquid Glue – 110755
  • Mini Glue Dots – 103683
  • Tear & Tape Adhesive – 154031
  • Stampin’ Seal – 152813
  • Stampin’ Seal Refill – 152814
  • Stampin’ Seal + – 149699
  • Stampin’ Seal + Refill – 152812
  • Fine-Tip Glue Pen – 138309
  • Foam Adhesive Strips – 141825
  • Stampin’ Dimensionals (2) – 104430
  • Mini Stampin’ Dimensionals (2) – 144108
  • Black Stampin’ Dimensionals Combo Pack – 150893
  • Foam Adhesive Sheets – 152815
  • Silicone Craft Sheet– 127853 (although it’s not an adhesive, it’s one of favorite tools for keeping my surface clean & free of ‘sticky’)

I’ll be placing the order the following Monday, that’s Feb 16, so be sure to let me know your item of choice – or… I’ll pick one for you 🥴 With Stampin’ Up!’s backorder policy where numbers are turned off for ordering if they go on backorder, if the adhesive that you pick is turned off for ordering when I place the order on the 16th, I’ll order Stampin’ Dimensionals for you instead. Deal?

You can place that order right here!

Here are the details about the JOINING PROMOTION…

  • New team members who purchase their Starter Kit February 3–March 2 will also receive our new Stampin’ Positioner*.
  • New demonstrators who submit their Independent Demonstrator Agreement (IDA) before February 3 or after March 2 will not be eligible for this offer.
  • Joining deadline:  March 2, 2026, at 11:59 p.m. (MT)

JOIN MY TEAM HERE

Product List

Stampin’ Up! Fragrant Layers with Nature Walk DSP

Welcome to February – BRRR. Flowers remind me of spring and warmer weather… This little gem of white die cut has been on my desk fo a bit – and I finally pulled it all together. Fragrant Layers is a beautiful bundle and this piece of the die is perfect for layering. I punched out several of the pieces in this die cut, then taped in the others so they wouldn’t fall out of place. I mounted it on a soft green of the Nature Walk 12×12 DSP about 2 5/8 x 3 5/8 and set it aside. My card base is a standard A2 (* 1/2 x 5 1/2 scored at 4 1/4) in Lost Lagoon. The three strips are 1 x 5. I added the front panel to this with dimensionals. I stamped one of the flowers with Secret Sea ink, die cut it, punched out all the pieces and used a mjini dimensional to attach it to one of the flowers. I stamped the sentiment in Secret Sea & die cut it with the banner die in the Fragrant Layers Dies. I added it with dimensionals then the Low Profile Sparkle Dots in Secret Sea.

Stampin' Up! Fragrant Layers card front

On the inside, I used the large floral stamp in Fragrant Layers to stamp just a portion of the flower in the two corners – Secret Sea ink of course, and used Soft Sea Foam Stampin’ Blends to color just the leaves. I layered this on another panel of the Nature Walk 12×12 DSP (4 x 5 1/4) and the inside was complete!

Stampin' Up! Fragrant Layers inside card

For the envelope… another piece of the Nature Walk 12×12 DSP was added to the flap & trimmed to fit. and finis!

Stampin' Up! Fragrant Layers w/ Nature Walk DSP card & envelope

Today is the last of the BONUS DAYS… HERE’S THE SCOOP…

Stampin' Up! Bonus Days

From January, 6 to Febraury 2, Stampin’ Up! is offering BONUS DAYS. Because do you know what’s a great deal? Getting rewarded for all the crafting supplies you’re already going to buy! When you shop between January 6 and February 2 and spend $50 USD | $60 CAD, you will earn a $5 USD | $6 CAD coupon! Make sure you save all your coupons because you can redeem them (and we mean ALL of them) between February 3 and 28. During the earning period, a shopping-cart notification will appear when an order qualifies for a Bonus Days coupon—an online store feature on both the demonstrator and customer websites.

Shopping with me could not be easier. Click this link to visit my shop.., note the ONLINE EXCLUSIVE, the new kits available, the Jan-Apr 2026 Mini Catalog and of course the 2025-2026 Annual Catalog.

PRODUCT OF THE MONTH – only $5 with a $75 order (before shipping & taxes)

167972

FABULOUS SAYINGS PHOTOPOLYMER STAMP SET (ENGLISH)

$5.00

The Fabulous Sayings Stamp Set is the exclusive Product of the Month for January 2026! Only available until stocks run out—don’t wait to get yours! This is a Two-Step Stampin’ set; it allows you to layer two or more images to create one final image with extra texture and dimension in the colors you want.

When shopping with me -.With a $50 order or more, receive my MONTHLY TUTORIAL – For February that tutorial is all about the Sweet Bugs Bundle – all part of the Cute As A Bug Suite found in the January- April 2026 Mini Catalog Earn 10% of your retail amount on all orders of $20 or greater! And you’ll be earning Daisy Patch Rewards – one daisy for each $25 you spend thru my Online Store!  When you gather up 16 Daisy Rewards, you’ll be able to select a $40 gift right from me! Check out my rewards page.

Stampin' Up!Feb. ONLINE CLASS- Sweet Bugs

And… if you’re thinking about JOINING… there’s a special offer from Stampin’ Up! that begins February 3 – a Starter Kit Promotion. The Starter Kit is $99 + tax (and it ships for free!) and you get to pick $125 Stampin’ Up! merchandise in your kit! AND – as an added bonus, when you join between 3 February – 2 March, you’ll get the Stampin’ Positioner for FREE with your Starter Kit Purchase!

Do you have questions? Please connect with me so I can help.

Thanks for stopping by. May you have a beautiful day. Make someone happy by sending them a handmade card made with ❤️

Product List

Stampin’ Up! Expanding & Angled Fun Fold with Endless Love Bundle

Good morning! The wind chill is minus 8 degrees this morning – definitely not typical NJ weather. I have a super sweet heart card for you today… just you wait. The directions and inspiration came from http://www.lisasstampstudio.com. This was much easier to create than it looks and I love the mix of patterns in the Made with Love 12×12 DSP.

Stampin' Up! Expanding & Angled Fun Fold w/ Endless Love bundle, card front

In the photo above, you can see how it is shaped like a w with the angled cuts. In the photo at right, you can see the various decorated angles – all die cuts are from the Endless Love Dies. You can also see that on the last panel, left an opening for the heart insert.

In the two photos above, you can see the heart insert. These were die cut with the Endless Love Dies and tied together with ribbons ( 1/2″ Iridescent Ribbon that I cut in half lengthwise, the 1/8″ Bubble Bath Faux Linen Ribbon and Linen Thread.

Just to be clear, the hearts are not symmetrical on each side, so the large front heart appears cock-eyed, but it isn’t. I wove the two ribbons through the open holes (1/8′ Bubble Bath Faux Linen Ribbon + Linen Thread) & tied a bow. For a bit of extra sweetness, I added hearts to the tails of the Bubble Bath ribbon, die cuts from small heart dies in the bundle. The heart is added to the front angle with dimensionals.

I used Flirty Flamingo for the card base and expanding angles, Real Red for various heart die cuts, and Basic White for additional die cuts. The DSP is Made with Love 12×12 DSP. I adhered in various places the Loose Valentine Assortments. Stamping was done with Real Red ink. Ribbons: Linen Thread, 1/8″ Bubble Bath Faux Linen Thread and 1/2″ Iridescent Ribbon cut in half lengthwise.

Basic Measurements:

Card base – 5 1/2 x 6 1/4 scored on long side at 1″ & 2″

Angled base – 5 1/2 x 8 1/2 scored in half at 4 1/4; leave folded and cut from the top score line to the bottom right tip. Reserve cut panels

DSP:

  • inside back – 4 1/8 x 5 3/8; strips – 7/8 x 5 3/8
  • expanding angle – cut 3, 4 x 5 1/4, cut diagonally
  • inside triangle – 4 x 5 1/4 cut diagonally

Basic White: 4 x 5 1/4, cut diagonally (for the expanding angle – see photos)

Additional card stock: Real Red, Basic White for die cuts

Below is a list of the products to purchase to make this fun fold card. I encourage you to give it a try. There are two more days – well, maybe 3 to get those BONUS DAYS COUPONS.

Stampin' Up! Bonus Days

From January, 6 to Febraury 2, Stampin’ Up! is offering BONUS DAYS. Because do you know what’s a great deal? Getting rewarded for all the crafting supplies you’re already going to buy! When you shop between January 6 and February 2 and spend $50 USD | $60 CAD, you will earn a $5 USD | $6 CAD coupon! Make sure you save all your coupons because you can redeem them (and we mean ALL of them) between February 3 and 28. During the earning period, a shopping-cart notification will appear when an order qualifies for a Bonus Days coupon—an online store feature on both the demonstrator and customer websites.

Shopping with me could not be easier. Click this link to visit my shop.., note the ONLINE EXCLUSIVE, the new kits available, the Jan-Apr 2026 Mini Catalog and of course the 2025-2026 Annual Catalog.

PRODUCT OF THE MONTH – only $5 with a $75 order (before shipping & taxes)

Stampin' Up! January POM

167972

FABULOUS SAYINGS PHOTOPOLYMER STAMP SET (ENGLISH)

$5.00

The Fabulous Sayings Stamp Set is the exclusive Product of the Month for January 2026! Only available until stocks run out—don’t wait to get yours! This is a Two-Step Stampin’ set; it allows you to layer two or more images to create one final image with extra texture and dimension in the colors you want.

When shopping with me -.With a $50 order or more, receive my MONTHLY TUTORIAL – For January, that tutorial is all about the Lovely Arrangements bundle and Lovely Blossoms DSP – all part of the January ONLINE EXCLUSIVE Lovely Blossoms Suite Collection. Earn 10% of your retail amount on all orders of $20 or greater! And you’ll be earning Daisy Patch Rewards – one daisy for each $25 you spend thru my Online Store!  When you gather up 16 Daisy Rewards, you’ll be able to select a $40 gift right from me! Check out my rewards page.

And… if you’re thinking about JOINING… there’s a special offer from Stampin’ Up! that begins February 3 – a Starter Kit Promotion. The Starter Kit is $99 + tax (and it ships for free!) and you get to pick $125 Stampin’ Up! merchandise in your kit! AND – as an added bonus, when you join between 3 February – 2 March, you’ll get the Stampin’ Positioner for FREE with your Starter Kit Purchase!

Do you have questions? Please connect with me so I can help.

Thanks for stopping by. May you have a beautiful day. Make someone happy by sending them a handmade card made with ❤️