
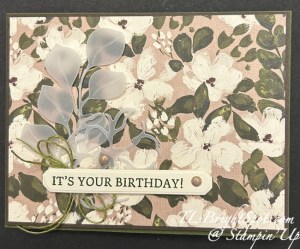
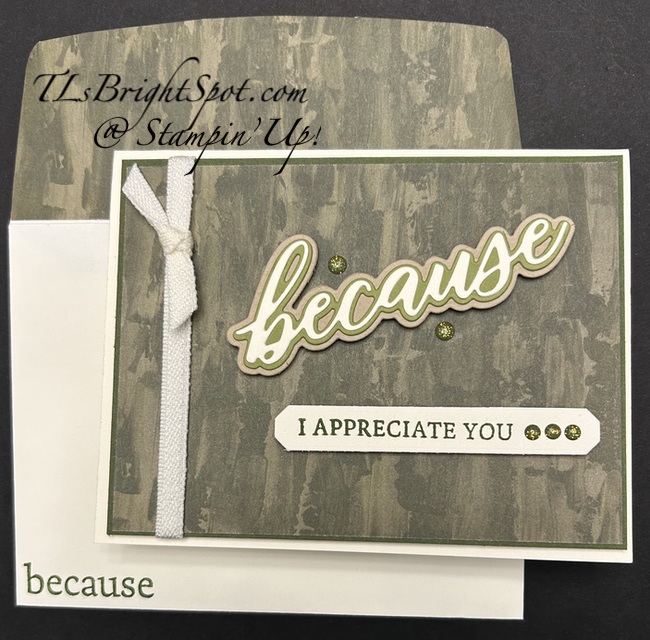
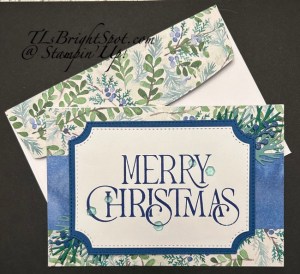
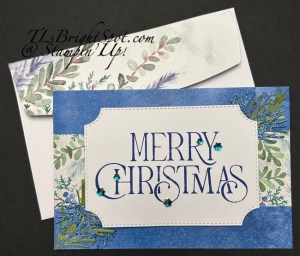
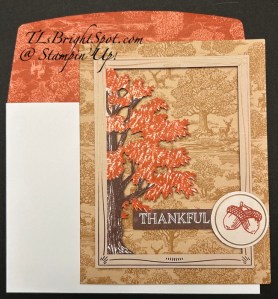
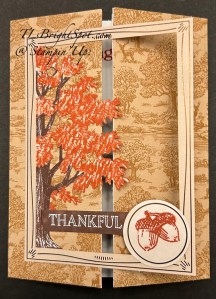
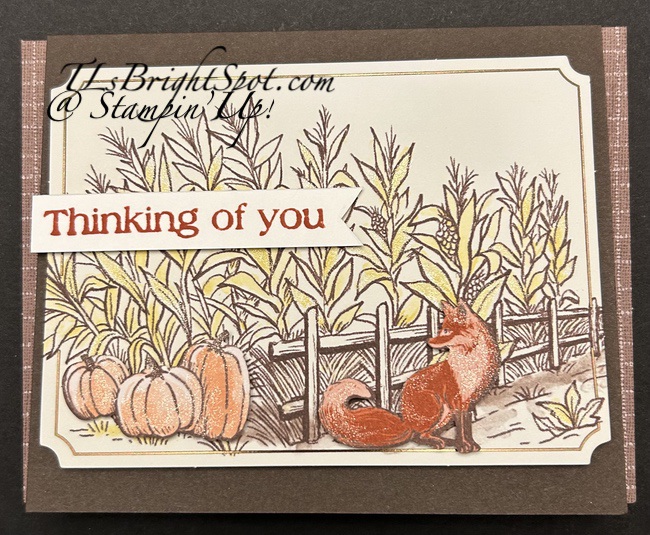
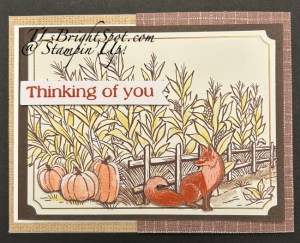
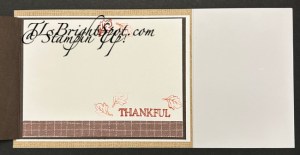
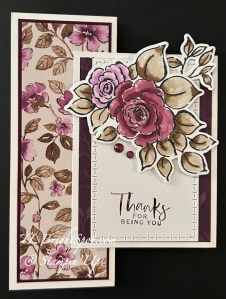
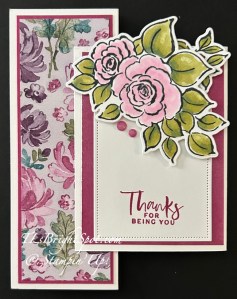
Good Morning Monday! Whew – the start of another week in October… Where has the month gone? For me, it has flown by – how about for you? I have a pretty set of cards for you today, all the same layout, same dies, same ribbon, same embellishments, just different colors in the Season of Elegance SDSP. I simply couldn’t quit making these. I was inspired by another demonstrator, Julie Gilson.
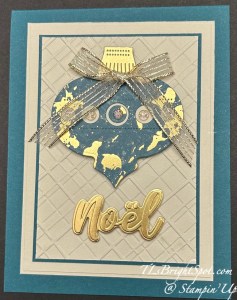
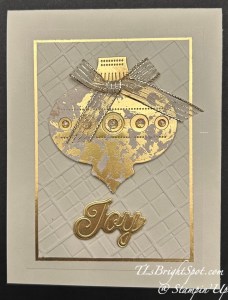
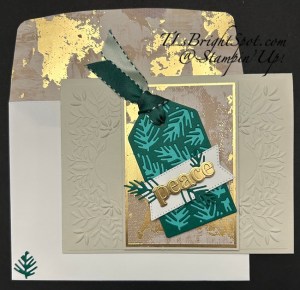
Card 1 is in Pretty Peacock. Card 2 is in Basic Beige. Card 3 is in Cherry Cobbler. All three use the same Forever Plaid 3D embossing folder and similar layers.
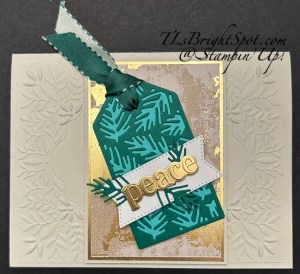
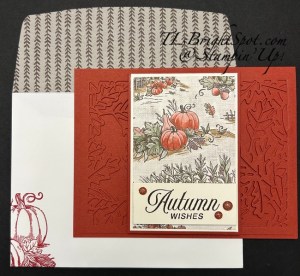
Card 4 uses a brand new Beautiful Pattern embossing folder, coming in the November ONLINE EXCLUSIVE release – available Nov 4. It also has similar layers and comes in Mossy Meadow.
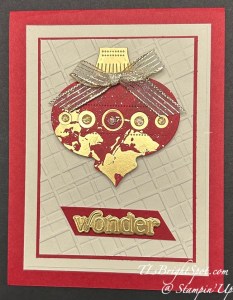
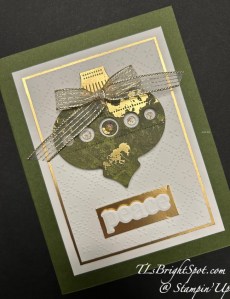
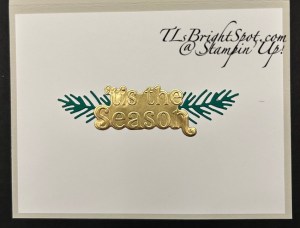
For sentiments on the card fronts I used the Christmas Words Collage bundle die cut from Gold Foil and also Basic White (for the word peace). This set embosses the words & die cuts at the same time, so it’s quite easy to have a bunch words at the ready 😀
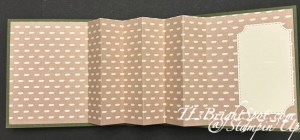
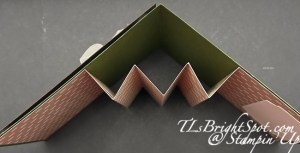
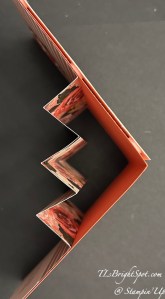
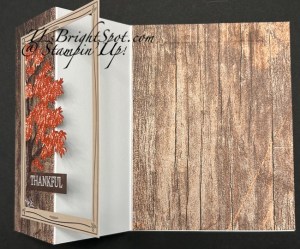
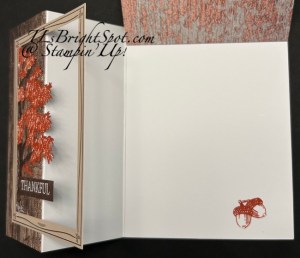
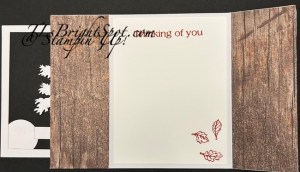
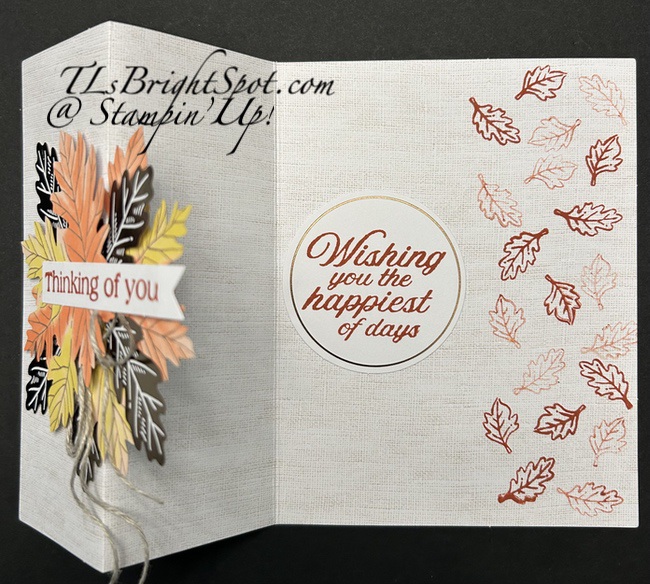
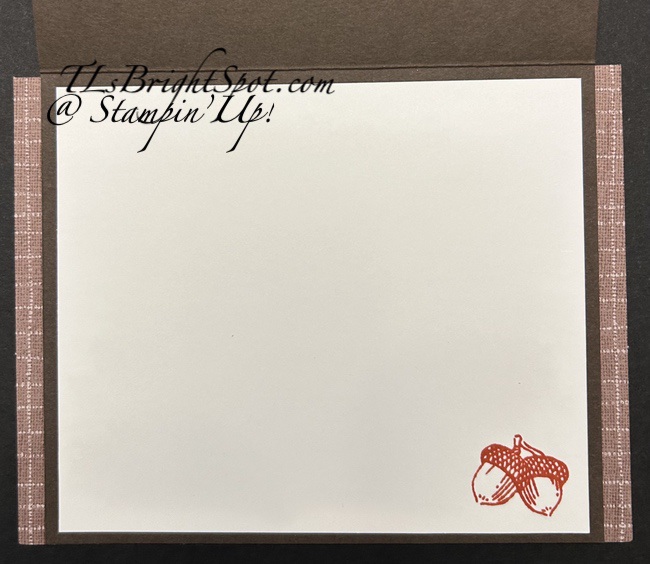
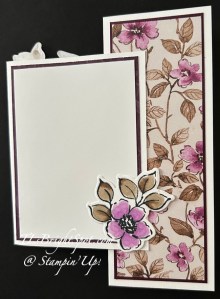
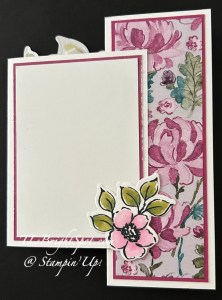
Here are the insides of each of those cards – a simple strip of the Season of Elegance DSP added to the bottom of the inside panel.
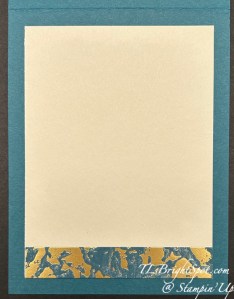
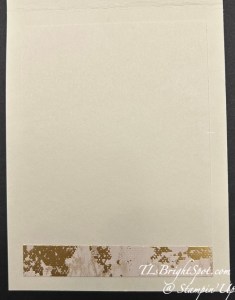
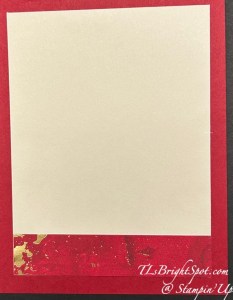
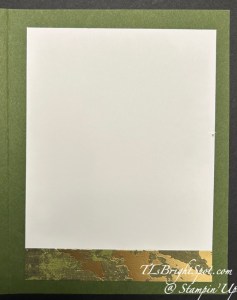
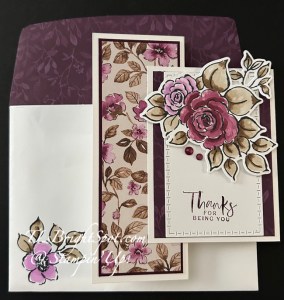
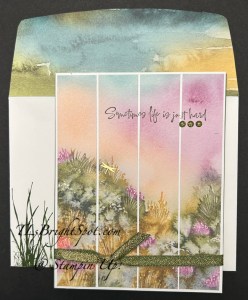
And below… the envelopes for these beautiful cards – more of the same Season of Elegance SDSP adhered & trimmed to fit the flap. Simple, elegant finish to these stunning cards.
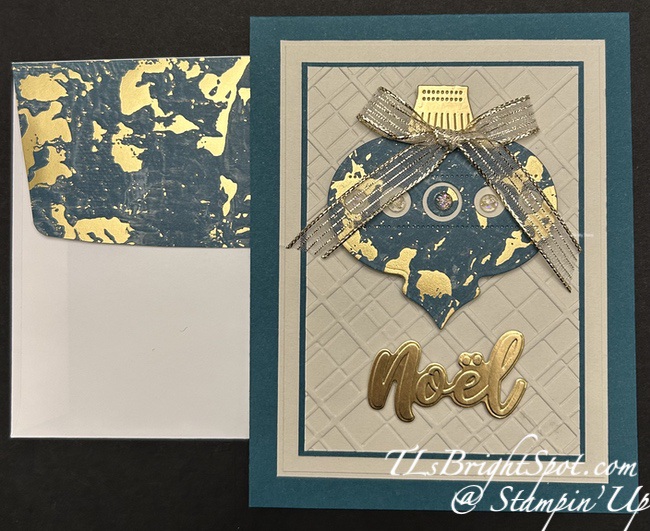
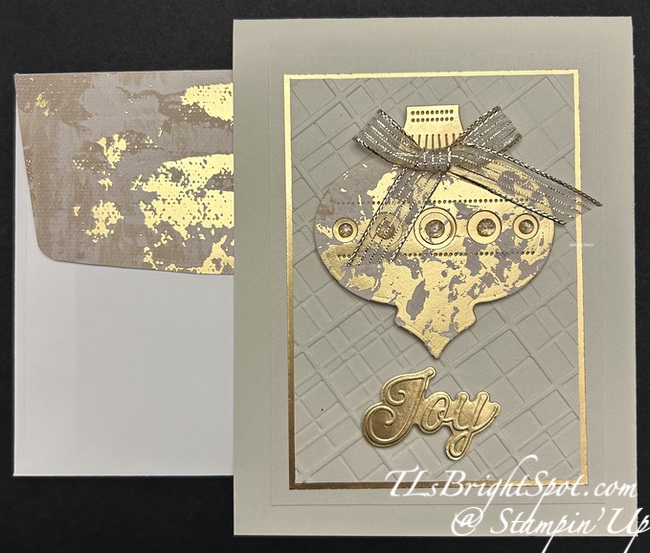
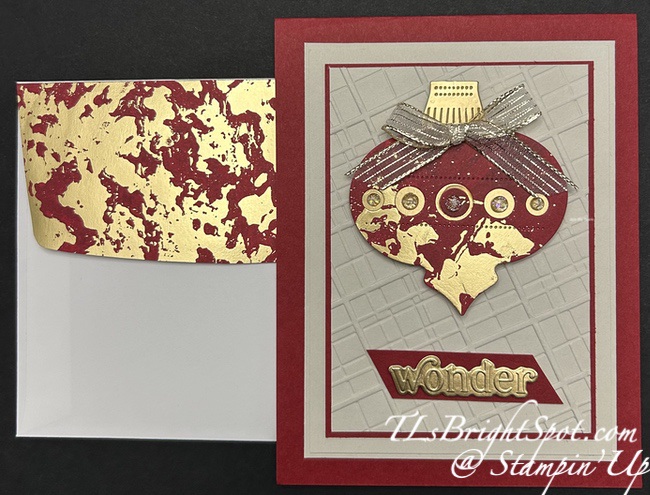
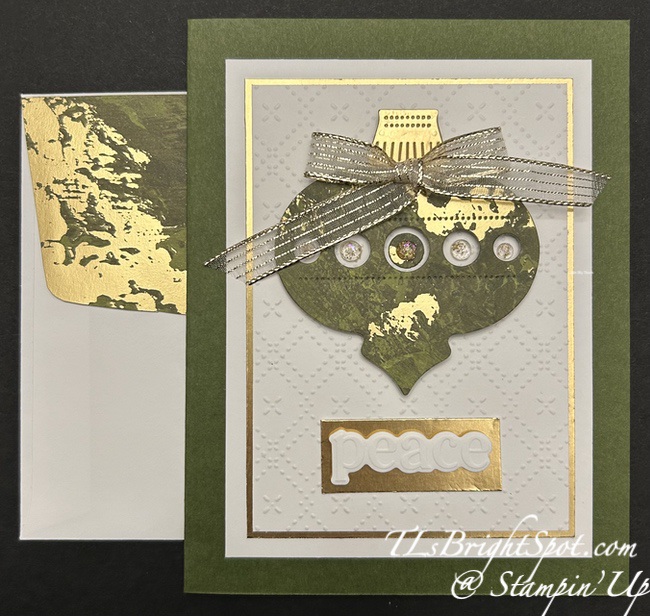
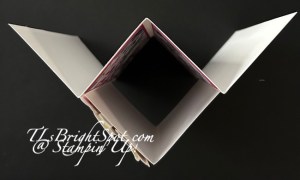
You will notice some of these are on card bases 4 1/4 x 11 scored at 5 1/2 while others are on card bases of 8 1/2 x 5 1/2 scored at 4 1/4. It honestly didn’t matter either way, so if I had that already cut, that’s what I used. Super fun cards to make multiples of while also making them unique in color & words.
How to purchase the products to make these beautiful cards may be found below. And while you are at it, consider becoming a Stampin’ Up! demonstrator. This is the perfect opportunity as Stampin’ Up! has a joining special right now that is the best ever! Joining is a great way to meet new people, connecting with fellow crafters, being a part of a wonderful community of supporting your creativity. It’s also an opportunity for discounts on every order after joining.

If you are interested in becoming a Demonstrator, NOW IS THE PERFECT TIME! Stampin’ Up! has an exclusive offer/ promotion during the month of October. From October 1 to 31, anyone who purchases the Starter Kit can choose between two amazing offers. In addition to FREE shipping, FREE business supplies, and a FREE Paper Pumpkin kit, you can either get $125 worth of products for just $35, an amazing first time ever offer, OR $189 worth of products for just $99!


What are some of the benefits of becoming a demo?
- Crafting is even more fun with community
- Become a demonstrator and enjoy all the perks that come with that:
1) a 20–25% product discount
2) exclusive early access to the latest releases online and in catalogs
3) the opportunity to earn a modest supplemental income
4) the chance to attend incredible training and crafting events
5) Scrapbooking has never been better in Stampin’ Up! history. Have you seen all the new scrapbook products Stampin’ Up! has? It’s amazing…
6) There’s never an obligation to sell, you can join to enjoy the discount for yourself.
It’s also fun to learn new skills, develop new crafting techniques & share your passion for crafting. If you’re like me, it’s really fun to meet new people & connect with fellow crafters. How can I help & support you – lots of ways… through connection, team meetings, our team facebook page, updates. Feel free to connect with me – ask questions – get excited.

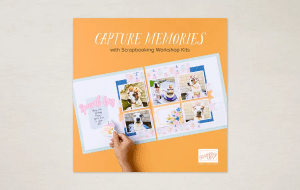
Are you a scrapbooker? Take a look at our new Scrapbooking Workshop Kits now available from the January 2025 Scrapbooking Brochure.
Thanks for stopping by. May you have a beautiful day. Make someone happy by sending them a handmade card filled with ❤️
Product List![Ornamental Christmas Bundle (English) [ 166001 ]](https://assets1.tamsnetwork.com/images/EC042017NF/166001s.jpg "Ornamental Christmas Bundle (English) [ 166001 ]")
![Season Of Elegance 12" X 12" (30.5 X 30.5 Cm) Specialty Designer Series Paper [ 164144 ]](https://assets1.tamsnetwork.com/images/EC042017NF/164144s.jpg "Season Of Elegance 12\" X 12\" (30.5 X 30.5 Cm) Specialty Designer Series Paper [ 164144 ]")
![Gold Foil Sheets [ 132622 ]](https://assets1.tamsnetwork.com/images/EC042017NF/132622s.jpg "Gold Foil Sheets [ 132622 ]")
![Gold Striped 3/8" (1 Cm) Mesh Ribbon [ 165599 ]](https://assets1.tamsnetwork.com/images/EC042017NF/165599s.jpg "Gold Striped 3/8\" (1 Cm) Mesh Ribbon [ 165599 ]")
![Forever Plaid 3 D Embossing Folder [ 164049 ]](https://assets1.tamsnetwork.com/images/EC042017NF/164049s.jpg "Forever Plaid 3 D Embossing Folder [ 164049 ]")
![Iridescent Foil Gems [ 162842 ]](https://assets1.tamsnetwork.com/images/EC042017NF/162842s.jpg "Iridescent Foil Gems [ 162842 ]")
![Christmas Words Collage Hybrid Embossing Folder (English) [ 165912 ]](https://assets1.tamsnetwork.com/images/EC042017NF/165912s.jpg "Christmas Words Collage Hybrid Embossing Folder (English) [ 165912 ]")
![Pretty Peacock 8-1/2" X 11" Cardstock [ 150880 ]](https://assets1.tamsnetwork.com/images/EC042017NF/150880s.jpg "Pretty Peacock 8-1/2\" X 11\" Cardstock [ 150880 ]")
![Basic Beige 8 1/2" X 11" Cardstock [ 164511 ]](https://assets1.tamsnetwork.com/images/EC042017NF/164511s.jpg "Basic Beige 8 1/2\" X 11\" Cardstock [ 164511 ]")
![Cherry Cobbler 8-1/2" X 11" Cardstock [ 119685 ]](https://assets1.tamsnetwork.com/images/EC042017NF/119685s.jpg "Cherry Cobbler 8-1/2\" X 11\" Cardstock [ 119685 ]")
![Mossy Meadow 8-1/2" X 11" Cardstock [ 133676 ]](https://assets1.tamsnetwork.com/images/EC042017NF/133676s.jpg "Mossy Meadow 8-1/2\" X 11\" Cardstock [ 133676 ]")
![Basic White 8 1/2" X 11" Cardstock [ 166780 ]](https://assets1.tamsnetwork.com/images/EC042017NF/166780s.jpg "Basic White 8 1/2\" X 11\" Cardstock [ 166780 ]")
![Tuxedo Black Memento Ink Pad [ 132708 ]](https://assets1.tamsnetwork.com/images/EC042017NF/132708s.jpg "Tuxedo Black Memento Ink Pad [ 132708 ]")
![Basic White Medium Envelopes [ 159236 ]](https://assets1.tamsnetwork.com/images/EC042017NF/159236s.jpg "Basic White Medium Envelopes [ 159236 ]")
![Stampin' Cut & Emboss Machine [ 149653 ]](https://assets1.tamsnetwork.com/images/EC042017NF/149653s.jpg "Stampin' Cut & Emboss Machine [ 149653 ]")
![Clear Wink Of Stella Glitter Brush [ 141897 ]](https://assets1.tamsnetwork.com/images/EC042017NF/141897s.jpg "Clear Wink Of Stella Glitter Brush [ 141897 ]")
![Paper Trimmer [ 152392 ]](https://assets1.tamsnetwork.com/images/EC042017NF/152392s.jpg "Paper Trimmer [ 152392 ]")
![Stampin' Dimensionals [ 104430 ]](https://assets1.tamsnetwork.com/images/EC042017NF/104430s.jpg "Stampin' Dimensionals [ 104430 ]")
![Multipurpose Liquid Glue [ 110755 ]](https://assets1.tamsnetwork.com/images/EC042017NF/110755s.jpg "Multipurpose Liquid Glue [ 110755 ]")
![Mini Glue Dots [ 103683 ]](https://assets1.tamsnetwork.com/images/EC042017NF/103683s.jpg "Mini Glue Dots [ 103683 ]")
![Paper Snips [ 103579 ]](https://assets1.tamsnetwork.com/images/EC042017NF/103579s.jpg "Paper Snips [ 103579 ]")
![Take Your Pick [ 144107 ]](https://assets1.tamsnetwork.com/images/EC042017NF/144107s.jpg "Take Your Pick [ 144107 ]")


![Merry Christmas Photopolymer Stamp Set (English) [ 165831 ]](https://assets1.tamsnetwork.com/images/EC042017NF/165831s.jpg "Merry Christmas Photopolymer Stamp Set (English) [ 165831 ]")
![Gift Of Joy Photopolymer Stamp Set (English) [ 165964 ]](https://assets1.tamsnetwork.com/images/EC042017NF/165964s.jpg "Gift Of Joy Photopolymer Stamp Set (English) [ 165964 ]")
![Branching Out Bundle (English) [ 165776 ]](https://assets1.tamsnetwork.com/images/EC042017NF/165776s.jpg "Branching Out Bundle (English) [ 165776 ]")
![Winter Meadow 12" X 12" (30.5 X 30.5 Cm) Designer Series Paper [ 162133 ]](https://assets1.tamsnetwork.com/images/EC042017NF/162133s.jpg "Winter Meadow 12\" X 12\" (30.5 X 30.5 Cm) Designer Series Paper [ 162133 ]")
![Peaceful Garden 12" X 12" (30.5 X 30.5 Cm) Glimmer Paper [ 165929 ]](https://assets1.tamsnetwork.com/images/EC042017NF/165929s.jpg "Peaceful Garden 12\" X 12\" (30.5 X 30.5 Cm) Glimmer Paper [ 165929 ]")
![Shaded Spruce 8-1/2" X 11" Cardstock [ 146981 ]](https://assets1.tamsnetwork.com/images/EC042017NF/146981s.jpg "Shaded Spruce 8-1/2\" X 11\" Cardstock [ 146981 ]")
![Blueberry Bushel 8-1/2" X 11" Cardstock [ 146968 ]](https://assets1.tamsnetwork.com/images/EC042017NF/146968s.jpg "Blueberry Bushel 8-1/2\" X 11\" Cardstock [ 146968 ]")
![Misty Moonlight 8-1/2" X 11" Cardstock [ 153081 ]](https://assets1.tamsnetwork.com/images/EC042017NF/153081s.jpg "Misty Moonlight 8-1/2\" X 11\" Cardstock [ 153081 ]")
![Real Red 8-1/2" X 11" Cardstock [ 102482 ]](https://assets1.tamsnetwork.com/images/EC042017NF/102482s.jpg "Real Red 8-1/2\" X 11\" Cardstock [ 102482 ]")
![Misty Moonlight Classic Stampin' Pad [ 153118 ]](https://assets1.tamsnetwork.com/images/EC042017NF/153118s.jpg "Misty Moonlight Classic Stampin' Pad [ 153118 ]")
![Blueberry Bushel Classic Stampin' Pad [ 147138 ]](https://assets1.tamsnetwork.com/images/EC042017NF/147138s.jpg "Blueberry Bushel Classic Stampin' Pad [ 147138 ]")
![Traditional Sparkling Sequins [ 165875 ]](https://assets1.tamsnetwork.com/images/EC042017NF/165875s.jpg "Traditional Sparkling Sequins [ 165875 ]")
![Shades Of Green Hexagons [ 165233 ]](https://assets1.tamsnetwork.com/images/EC042017NF/165233s.jpg "Shades Of Green Hexagons [ 165233 ]")
![Faceted Snowflakes [ 166077 ]](https://assets1.tamsnetwork.com/images/EC042017NF/166077s.jpg "Faceted Snowflakes [ 166077 ]")


![Paper Pumpkin Subscription [ 166815 ]](https://assets1.tamsnetwork.com/images/EC042017NF/166815s.jpg "Paper Pumpkin Subscription [ 166815 ]")
![Autumn Toile 12" X 12" (30.5 X 30.5 Cm) Designer Series Paper [ 165882 ]](https://assets1.tamsnetwork.com/images/EC042017NF/165882s.jpg "Autumn Toile 12\" X 12\" (30.5 X 30.5 Cm) Designer Series Paper [ 165882 ]")
![Country Woods 12" X 12" (30.5 X 30.5 Cm) Designer Series Paper [ 163393 ]](https://assets1.tamsnetwork.com/images/EC042017NF/163393s.jpg "Country Woods 12\" X 12\" (30.5 X 30.5 Cm) Designer Series Paper [ 163393 ]")
![Gathering Together 12" X 12" (30.5 X 30.5 Cm) Specialty Designer Series Paper [ 165969 ]](https://assets1.tamsnetwork.com/images/EC042017NF/165969s.jpg "Gathering Together 12\" X 12\" (30.5 X 30.5 Cm) Specialty Designer Series Paper [ 165969 ]")
![Early Espresso 8-1/2" X 11" Cardstock [ 119686 ]](https://assets1.tamsnetwork.com/images/EC042017NF/119686s.jpg "Early Espresso 8-1/2\" X 11\" Cardstock [ 119686 ]")
![Linen Thread [ 104199 ]](https://assets1.tamsnetwork.com/images/EC042017NF/104199s.jpg "Linen Thread [ 104199 ]")

![Charming Day Bundle (English) [ 166136 ]](https://assets1.tamsnetwork.com/images/EC042017NF/166136s.jpg "Charming Day Bundle (English) [ 166136 ]")
![Floral Charm 12" X 12" (30.5 X 30.5 Cm) Designer Series Paper [ 166125 ]](https://assets1.tamsnetwork.com/images/EC042017NF/166125s.jpg "Floral Charm 12\" X 12\" (30.5 X 30.5 Cm) Designer Series Paper [ 166125 ]")
![Charming Shimmer Faceted Dots [ 166139 ]](https://assets1.tamsnetwork.com/images/EC042017NF/166139s.jpg "Charming Shimmer Faceted Dots [ 166139 ]")
![Floral Charm Suite Collection (English) [ 166141 ]](https://assets1.tamsnetwork.com/images/EC042017NF/166141s.jpg "Floral Charm Suite Collection (English) [ 166141 ]")
![Purple Fine Shimmer Gems [ 162611 ]](https://assets1.tamsnetwork.com/images/EC042017NF/162611s.jpg "Purple Fine Shimmer Gems [ 162611 ]")
![Everyday Arches Dies [ 164629 ]](https://assets1.tamsnetwork.com/images/EC042017NF/164629s.jpg "Everyday Arches Dies [ 164629 ]")
![Textured Notes Dies [ 165555 ]](https://assets1.tamsnetwork.com/images/EC042017NF/165555s.jpg "Textured Notes Dies [ 165555 ]")
![Basic White 8 1/2" X 11" Thick Cardstock [ 159229 ]](https://assets1.tamsnetwork.com/images/EC042017NF/159229s.jpg "Basic White 8 1/2\" X 11\" Thick Cardstock [ 159229 ]")
![Blackberry Bliss 8-1/2" X 11" Cardstock [ 133675 ]](https://assets1.tamsnetwork.com/images/EC042017NF/133675s.jpg "Blackberry Bliss 8-1/2\" X 11\" Cardstock [ 133675 ]")
![Berry Burst 8-1/2" X 11" Cardstock [ 144243 ]](https://assets1.tamsnetwork.com/images/EC042017NF/144243s.jpg "Berry Burst 8-1/2\" X 11\" Cardstock [ 144243 ]")
![Blackberry Bliss Classic Stampin' Pad [ 147092 ]](https://assets1.tamsnetwork.com/images/EC042017NF/147092s.jpg "Blackberry Bliss Classic Stampin' Pad [ 147092 ]")
![Berry Burst Classic Stampin' Pad [ 147143 ]](https://assets1.tamsnetwork.com/images/EC042017NF/147143s.jpg "Berry Burst Classic Stampin' Pad [ 147143 ]")
![Crumb Cake Stampin' Blends Combo Pack [ 154882 ]](https://assets1.tamsnetwork.com/images/EC042017NF/154882s.jpg "Crumb Cake Stampin' Blends Combo Pack [ 154882 ]")
![Fresh Freesia Stampin' Blends Combo Pack [ 155518 ]](https://assets1.tamsnetwork.com/images/EC042017NF/155518s.jpg "Fresh Freesia Stampin' Blends Combo Pack [ 155518 ]")
![Blackberry Bliss Stampin' Blends Combo Pack [ 154877 ]](https://assets1.tamsnetwork.com/images/EC042017NF/154877s.jpg "Blackberry Bliss Stampin' Blends Combo Pack [ 154877 ]")
![Bubble Bath Stampin’ Blends Combo Pack [ 161675 ]](https://assets1.tamsnetwork.com/images/EC042017NF/161675s.jpg "Bubble Bath Stampin’ Blends Combo Pack [ 161675 ]")
![Old Olive Stampin' Blends Combo Pack [ 154892 ]](https://assets1.tamsnetwork.com/images/EC042017NF/154892s.jpg "Old Olive Stampin' Blends Combo Pack [ 154892 ]")
![Pretty Peacock Stampin’ Blends Combo Pack [ 161676 ]](https://assets1.tamsnetwork.com/images/EC042017NF/161676s.jpg "Pretty Peacock Stampin’ Blends Combo Pack [ 161676 ]")
![Stampin’ Blends Medium Combo [ 159462 ]](https://assets1.tamsnetwork.com/images/EC042017NF/159462s.jpg "Stampin’ Blends Medium Combo [ 159462 ]")
![Stampin' Blends Color Lifter [ 144608 ]](https://assets1.tamsnetwork.com/images/EC042017NF/144608s.jpg "Stampin' Blends Color Lifter [ 144608 ]")
![Patterned Tags Dies [ 165910 ]](https://assets1.tamsnetwork.com/images/EC042017NF/165910s.jpg "Patterned Tags Dies [ 165910 ]")
![Stitched Shapes Dies [ 152323 ]](https://assets1.tamsnetwork.com/images/EC042017NF/152323s.jpg "Stitched Shapes Dies [ 152323 ]")
![Peaceful Greenery 3 D Embossing Folder [ 165928 ]](https://assets1.tamsnetwork.com/images/EC042017NF/165928s.jpg "Peaceful Greenery 3 D Embossing Folder [ 165928 ]")
![Shaded Spruce & Soft Sea Foam 1/2" (1.3 Cm) Ribbon [ 165234 ]](https://assets1.tamsnetwork.com/images/EC042017NF/165234s.jpg "Shaded Spruce & Soft Sea Foam 1/2\" (1.3 Cm) Ribbon [ 165234 ]")
![Summer Splash 8 1/2" X 11 Cardstock [ 163797 ]](https://assets1.tamsnetwork.com/images/EC042017NF/163797s.jpg "Summer Splash 8 1/2\" X 11 Cardstock [ 163797 ]")

![Prairie Grass Cling Stamp Set (English) [ 166168 ]](https://assets1.tamsnetwork.com/images/EC042017NF/166168s.jpg "Prairie Grass Cling Stamp Set (English) [ 166168 ]")
![Thoughtful Journey 6" X 6" (15.2 X 15.2 Cm) Designer Series Paper [ 163303 ]](https://assets1.tamsnetwork.com/images/EC042017NF/163303s.jpg "Thoughtful Journey 6\" X 6\" (15.2 X 15.2 Cm) Designer Series Paper [ 163303 ]")
![Mossy Meadow Classic Stampin' Pad [ 147111 ]](https://assets1.tamsnetwork.com/images/EC042017NF/147111s.jpg "Mossy Meadow Classic Stampin' Pad [ 147111 ]")
![Mossy Meadow & Gold 1/4" (6.4 Mm) [ 166158 ]](https://assets1.tamsnetwork.com/images/EC042017NF/166158s.jpg "Mossy Meadow & Gold 1/4\" (6.4 Mm) [ 166158 ]")
![Low Profile Sparkle Dots [ 166157 ]](https://assets1.tamsnetwork.com/images/EC042017NF/166157s.jpg "Low Profile Sparkle Dots [ 166157 ]")
![Adhesive Backed Dragonflies & Birds [ 162743 ]](https://assets1.tamsnetwork.com/images/EC042017NF/162743s.jpg "Adhesive Backed Dragonflies & Birds [ 162743 ]")
