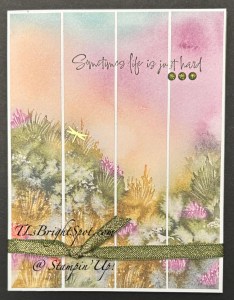
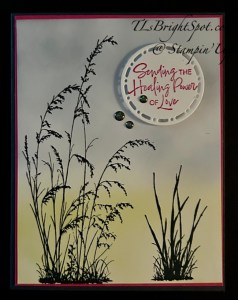
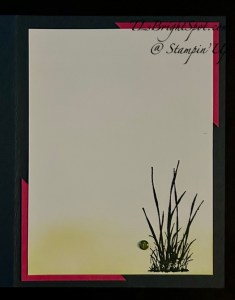
Good Tuesday, Sep 2 and 55 degrees here at the shore in NJ – not typical weather for this early in the month. When the kids return to school it is usually hot as blazes. But not this year… My card today is more than just thinking of you; it’s recognizing that life is not always easy. I used the Prairie Grass stamp set from the ONLINE EXCLUSIVES – it’s available to customers now. It’s become a favorite for things peaceful, restful, reassuring.
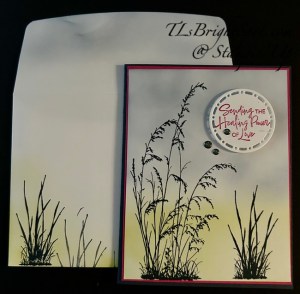
I cut 1″ strips of Thoughtful Journey 6×6 DSP (1 x 5 3/8) and added them to a Basic White background. Next I stamped the sentiment in Mossy Meadow ink using the Prairie Grass stamp set. I took a length of Mossy Meadow & Gold trim, wrapped it around and tied a knot, securing it with a glue dot. I then added three Low Profile Sparkle Dtos under the sentiment. Finally, I added a single Adhesive-Backed Dragonfly. This completed front panel was added to a Mossy Meadow card base.
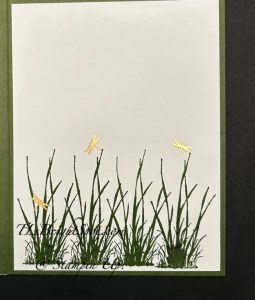
For the inside of the card, I stamped this grassy image four times across the bottom with Mossy Meadow ink. And yes, the stamp comes from Prairie Grass stamp set. I added three more of the Adhesive-Backed Dragonflies as they are very flat and so appropriate for this grassy scene. I adhered the Basic White panel to the inside of the card and voila – this card is ready to send.
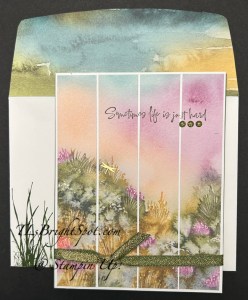
For the envelope… yet another panel of the Thoughtful Journey 6×6 was adhered to the flap & trimmed to fit. Again on the front, I stamped the same grassy image in Mossy Meadow ink from Prairie Grass stamp set to carry out the theme. This card will be sent today to a friend of mine who lives near the beach and diagnosed with ALS. Such an awful disease….
Tomorrow, Wednesday Sep 3, the Sep-Dec 2025 Mini Catalog will be open to ordering by customers – AND – there are some fabulous new ONLINE EXCLUSIVE products that can be ordered as well. If you do not have a demonstrator, I’d love to help you find your creative side. Click the image below to take you to my shop for purchases.
Thanks for stopping by – may you have a beautiful day. Make someone happy by sending them a handmade card filled with ❤️
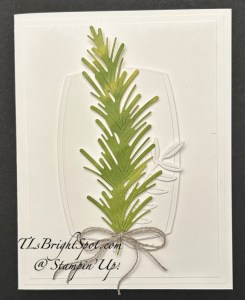
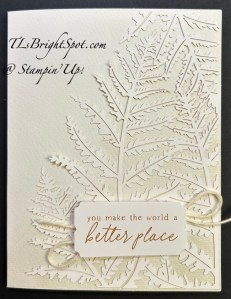
It’s Labor Day! Do you have plans to labor – or will you use this as a day to gather w/ friends & family? I have a card today made with lots of Basic White and just a bit of color. I used watercolor paper to create the focal green branch and the stunning Christmas Greenery Dies. The leaves are die cut from simple Basic White, using the Label Me Grateful Dies. But I get ahead of myself – let’s look at the card.
The card base is Thick Basic White with two layers of regular weight Basic White added to create depth. Using the Label Me Grateful Dies, I die cut two same size labels, cut one in half and adhered it behind the other. This was attached, centered on the card front, with dimensionals. I die cut the branch of leaves in white and attached it with liquid glue. The watercolor pine bough is attached with dimensionals. I added a simple double Linen Thread bow with a glue dot – and that was it!
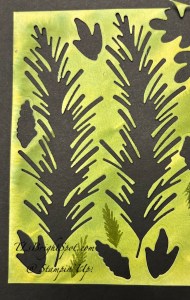
To create color on the watercolor paper…. I wet the entire piece with water, squeezed each ink pad container to get some ink in the lid, added a bit of water to that and simply added it to the watercolor paper. I used three colors – Granny Apple Green, Old Olive and Mossy Meadow. Once dry I die cut two of the pine boughs and some other things too. Bur for our purposes today – it’s just the pine bough that’s important. Here’s the watercolor paper after die cutting.
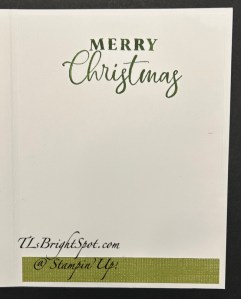
for the inside of the card…I stamped the sentiment in Mossy Meadow ink using the Traditional Labels stamp set and added a 1/2 x 4 strip of Old Olive from Floral Delight DSP. I added the Basic White panel to the inside of the card and bam – all done.
For the envelope, some of the same Floral Delight DSP in Old Olive for the flap, trimmed to fit.
These items will be available Wednesday Sep 3 and are in the Sep-Dec 2025 Mini Catalog showcased on pages 21-27 as parts of the Traditions of Christmas Suite. They may be purchased as a suite or individually. Click the catalog image below to shop with me.
Thanks for stopping by. May you have a beautiful day! Make someone happy by sending them a handmade card filled with ❤️
Card cuts:
Thick Basic White – card base: 8 1/2 x 5 1/2 scored @ 4 1/4
Basic White – layers: 4 x 5 1/4 (2), one for card front, one for inside; 3 3/4 x 5
Basic White – labels: 2 1/2 x 7 1/2; leaves 1 1/4 x 3
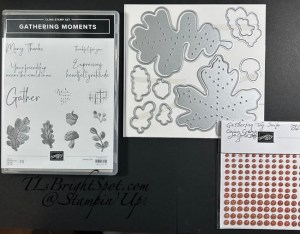
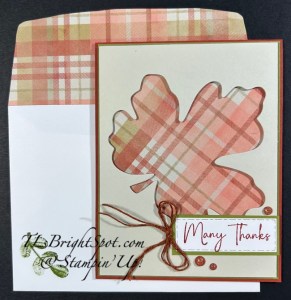
Good Friday – my goodness August is flittering away – Monday is LABOR DAY! Today’s card is all about fall and it uses a September Release ONLINE EXCLUSIVE. The bundle is Gathering Moments.
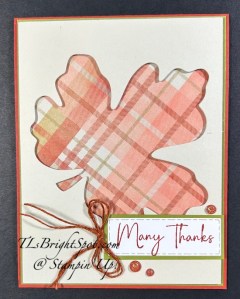
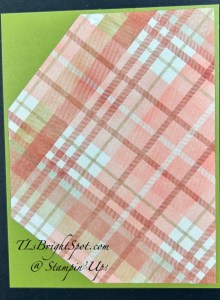
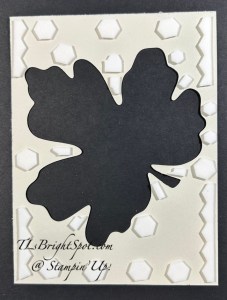
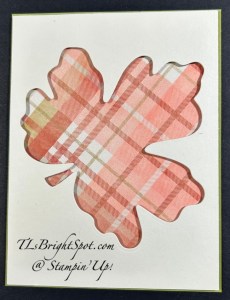
The card has a Basic Beige front from which I die cut the large leaf with Gathering Moments Dies. I wanted to use the Timeless Plaid 6×6 DSP behind the die cut but on an angle. This meant an odd shape for cutting the DSP and it needed to be slightly smaller than the Basic Beige card front. Once I cut the DSP I added it to an Old Olive panel and that to the card base of Cajun Craze.
I put dimensionals all over the back of the die cut panel and adhered it to the the card. I stamped the sentiment in Cajun Craze ink using the Gathering Moments stamp set and die cut the basic White with Textured Notes Dies. I cut a piece of Old Olive for a backing, adhered the two together and added them directly to the card front. I tied a double bow with Natural Tones Linen Thread then added three Cajun Craze and Gold Dots.
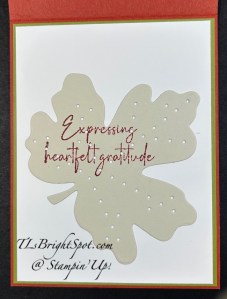
For the inside… I used the die cut that came out of the front die cut to stamp the sentiment from Gathering Moments in Cajun Craze ink. I added this to a Basic White panel then both to Old Olive then to the inside of the card base..
For the envelope, more of the Timeless Plaid 6×6 DSP on the flap trimmed to fit, then a single leaf stamped on the front: Gathering Moments stamp set in Old Olive ink. Totally fall – good for a masculine card too!
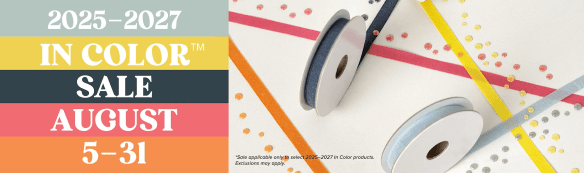
These new products are ONLINE EXCLUSIVES to be released Wed Sep 3. For those products available today, see the list below. Today (the 29th), tomorrow the 30th and Sunday the 31st, I have a special deal going on as Stampin’ Up! has a promotion through end of August of 2025-2027 In Color SALE. When shopping with me, I am offering with a $50 order & up, a spool of Linen Thread in addition to my regular benefits. Other benefits… the monthly tutorial sent right to your inbox, daisy points to add together for a free item down the road, and having fun with the Stampin’ Up! products. Shop the In Color Sale by clicking the image below.
Last chance products are available through my store as well – click the image below to view those items, updated regularly by Stampin’ Up!
Thanks for stopping by. May you have a beautiful day. Make someone happy sending them a handmade card filled with ❤️
Our Internet is quite spotty & intermittent today so not sure if this will publish appropriately. I’ve been trying all morning.
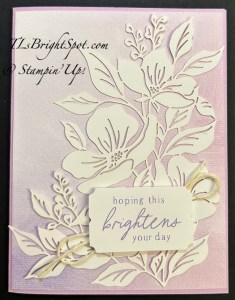
This is such a beautiful kit and I had promised to share photos of my completed cards a few days ago. I had a difficult reaction to a vaccine that really set me back for two straight days. Thanks goodness that is behind me!
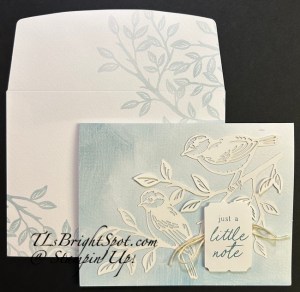
Each card in this kit has a laser-cut delicate design – so three designs for nine cards, make sense? I made one each of the ‘prescribed’ card designs and here they are
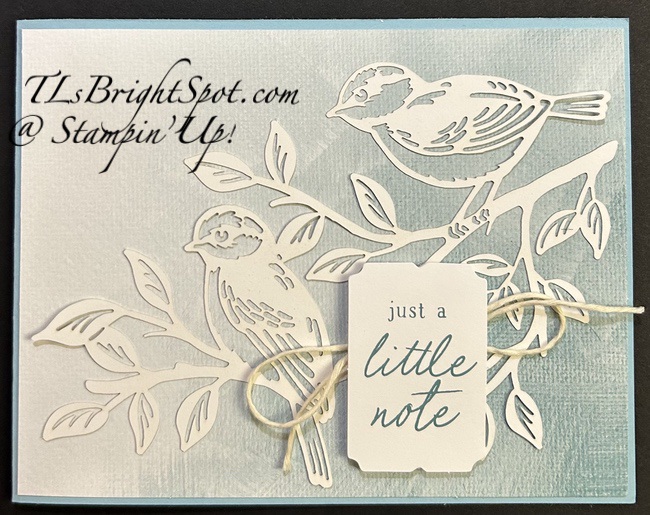
These first three cards are the original ‘plan’ of the kit and they show Fresh Freesia, Basic Beige and Balmy Blue. These next two images are of the birds with a card base of Balmy Blue on the left and Lost Lagoon on the right, both using what had been the original base as part of a layer for the card front.
With the remaining cards bases, I trimmed each down to 41/8 x 5 3/8, thereby making a card front panel and an inside panel with each supplied card base. Here are my completed cards – nothing fancy or over the top done, just incorporated an additional card base.
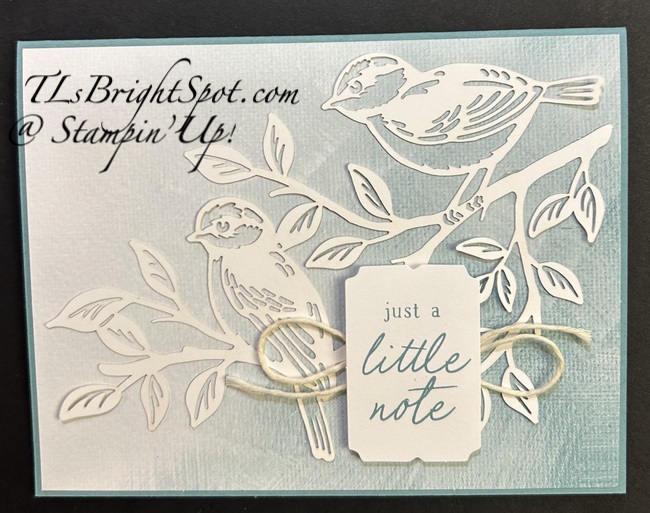
Below left has a card base of Balmy Blue with the original card base as a layer for the laser-cut image. Below right uses Lost Lagoon as the card base
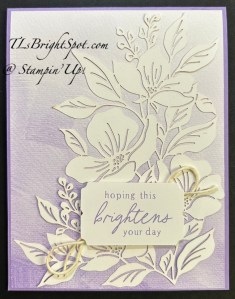
These two cards show card bases in Highland Heather for the left card and Fresh freesia for the right card, again using the original card base as a front layer.
I took a LOT more pictures but they just didn’t turn out that well so I have not included them – bummer!
OK – so this is one of the fabulous kits Stampin’ Up! is offering. There is always something going on… remember there are changes coming to the packaging for both photopolymer stamps and dies. Also, rubber stamps are being discontinued. Both of these will take effect at the end of each catalog. What that means is at the end of both the Sep-Dec 2025 catalog and the 2025-2026 Annual Catalog, no more rubber stamps. For full disclosure, check this post. It will give you measurements of the new packaging and you’ll see a glimpse of a new bundle available in the ONLINE EXCLUSIVES for November. There is also a video you can access.
Other items of interest… the In Color Sale ends Aug 31 and here it is the 22nd. Click the link in the image below to shop those products!
If you do not have a demonstrator and need the Sep-Dec 2025 Mini Catalog – please give me a shout-out. I’m here to help you have fun in this crafting world! And if you see LOTS of items on your wish list, consider joining my team, become apart of the Stampin’ Up! party, craft with others, learn new techniques, receive at least 20% off each order, attend a convention or two, or three 😀, get catalogs early to play with new products, JOIN HERE with me.
Thanks for stopping by today. Make this a beautiful day for others – send a card made with ❤️!
Stampin’ Up! is making some changes and they are coming SOON! I don’t want you to be left out or too surprised – so here’s the scoop…
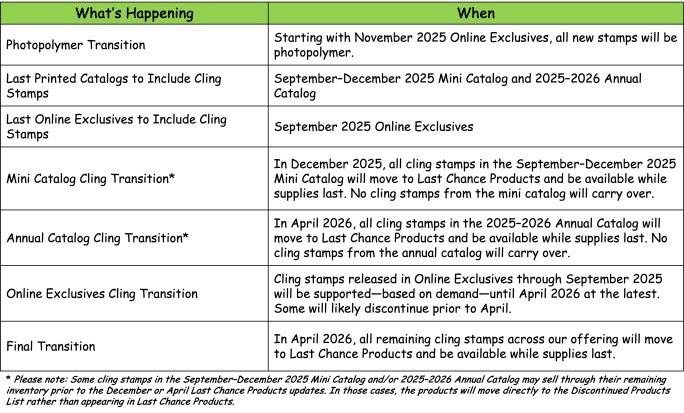
Cling Stamps (Red Rubber)
Stampin’ Up! has decided to discontinue their cling stamp line due to challenges in sourcing the necessary raw materials. While they currently have access to enough raw materials to continue production for the time being, the supply has become increasingly inconsistent, and certain key raw materials are no longer being manufactured. They’re choosing to make this change now to ensure a smoother, more strategic transition—with minimal disruption. They will continue to offer a wide range of photopolymer stamps to support various artistic styles and techniques.
Here are some specifics about the transition from cling stamps to photopolymer:
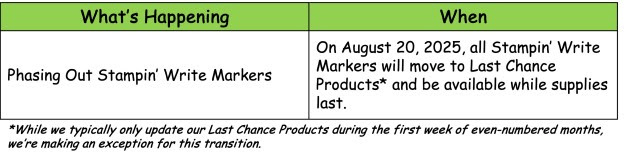
Stampin’ Write Markers – Discontinuing and Available While Supplies Last Starting Tomorrow, 20 Aug 2025!
Stampin’ Up! has also decided to discontinue Stampin’ Write Markers. With the growing popularity of Stampin’ Blends, they’ve seen a steady decline in sales of Stampin’ Write Markers. One of the primary techniques unique to Stampin’ Write Markers is coloring directly on cling stamps—a technique that will become less relevant as we transition away from cling stamps.
Here are a few details about the Stampin’ Write Markers:
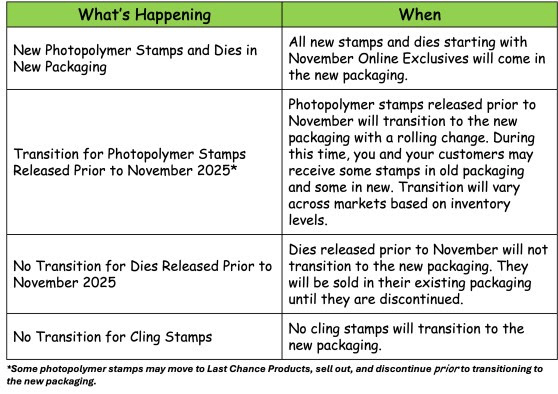
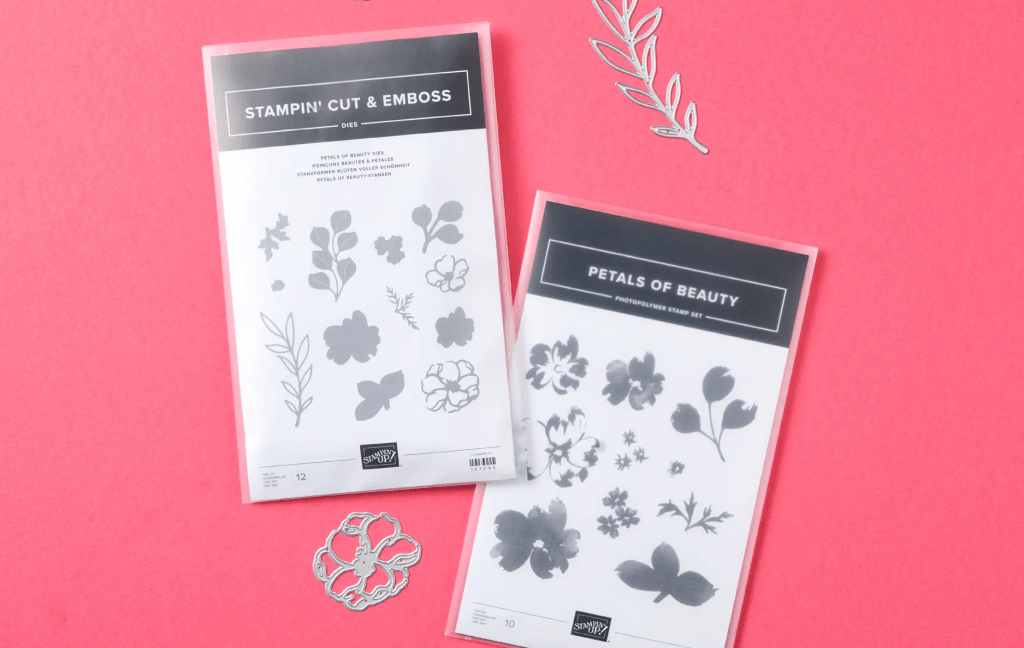
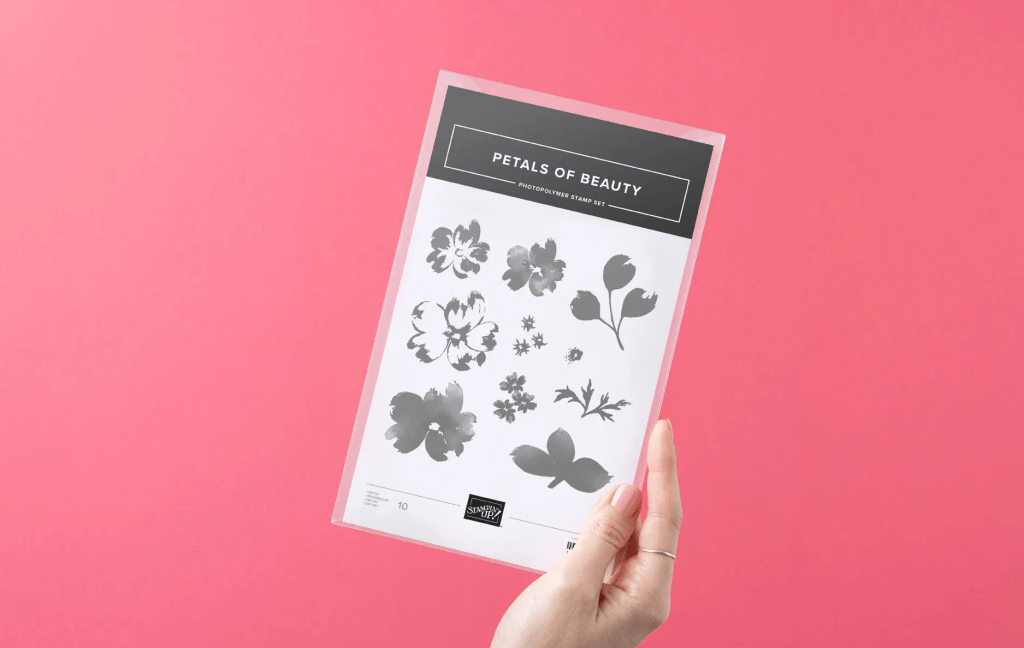
New And Improved Stamp And Die Packaging
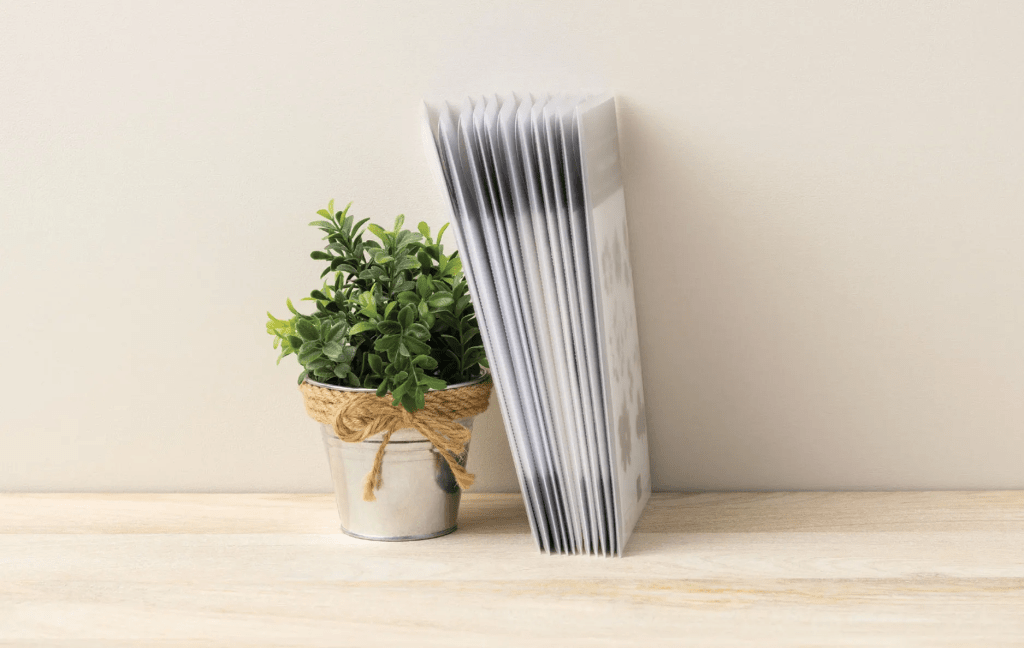
As part of Stampin’ Up!’s transition away from cling stamps, Stampin’ Up! is excited to introduce updated packaging for stamps and dies! Because photopolymer stamps are thinner, they’re able to offer sleeker, slimmer packaging that saves space. Both stamps and dies will now come in the same size and style of packaging, making it easier than ever to store bundles and coordinating products together (WooHoo!). The new packaging is similar to their current die packaging—durable, clear plastic envelopes—but with an exciting improvement: Die packaging will now feature printed artwork for quick and easy identification! Stamp packaging will continue to display artwork as well.
Packaging Details
– New packaging measures 5-5/8″ x 9″ (14.3 x 22.9 cm). – Stamps and dies will now come in the same size and style of packaging, making it easy to store bundles and coordinating products together. – Packaging is clear with an insert that displays stamp or die artwork for quick and easy identification—yes, both stamp and die packaging will now show artwork! – Larger packaging dimensions allow us to showcase more stamp artwork at 100% on the insert. – Sleek, slim design will help you and your customers store more in less space. – Envelope closure includes a tuck-in flap for quick and easy opening and closing. – Packaging is sized to fit a variety of organization systems.
Here are a few photos of the new packaging AND a Nov. Online Exclusive.
And here’s a video to hear it first hand from Stampin’ Up! headquarters 😀
I use Stampin’ Write Markers a lot – and if you want to get yours before they sell out, see below!
This is all exciting stuff happening in the Stampin’ Up! world of crafting. This new packaging will be available in the November ONLINE EXCLUSIVES – and yes, you will be able to purchase these packaging materials in sets of 10 when they become available. Again – woohoo!
Remember too that the 2025-2027 In Color Sale is going on now. Click the image below to take you to this sale.
Sale Dates: August 5–31
Ordering Deadline: August 31, 2025, at 11:59 p.m. (MT)
Sale includes select inks, cardstock, Designer Series Paper, embellishments, and other products that include these new In Colors.
Only products featured on the 2025–2027 In Colors page are included in this promotion.
Products are available only while supplies last.
If you have questions about any of this, please reach out to me – I’m here to help. And if you don’t have a demonstrator, I would love to connect with you.
Hello Monday! It’s hot here again in NJ – up to 93 today with very high humidity – not a day for being outside much. Guess I’ll just have to play in my stamp room – after doing chores of course 😀
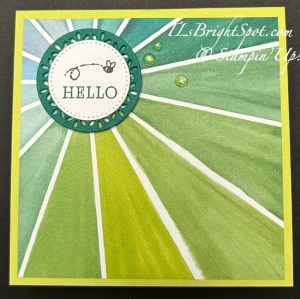
Prairie Grass is a fairly new stamp set for me and I am loving the grasses and the fonts for the sentiments. It’s an ONLINE EXCLUSIVE stamp set. I got out my Blending Brushes and a couple of inks and went to work… Misty Moonlight and a hint of Secret Sea for the sky then Lemon Lime Twist for the lower portion. I stamped the grasses in Secret Sea. I used my color wheel to bring in a contrasting color – Melon Mambo ink for the sentiment – and yes, it comes from the Prairie Grass stamp set. I die cut it with Spotlight On Nature Dies, put it on dimensionals and added it to the card front. I used the Low Profile Sparkle Dots in Secret Sea for a bit of glam. These come from the Perfectly Pear suite of products. This front panel was added to Melon Mambo then adhered to the Secret Sea card base.
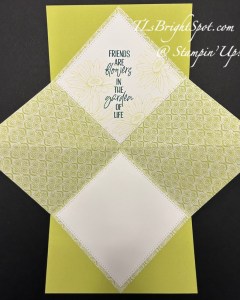
For the inside… I again used the Lemon Lime Twist and a Blending Brush to add color to the bottom of the Basic White. I then stamped one of the grasses in Secret Sea ink. I adhered two triangles in corners for a background border, bringing in the color from the front of the card. I gives a very modern look.
For the envelope… I again added Lemon Lime Twist with my Blending Brush to the front, then stamped full strength the tallest grass, then stamped twice more without reinking – with Secret Sea ink. On the flap I added Misty Moonlight and a bit of Secret Sea with a Blending Brush.
See how to order these products below.
Cards cuts are as follows:
Card base – Secret Sea 8 1/2 x 5 1/2 scored at 4 1/4
Layer Melon Mambo 4 1/8 x 5 3/8 (front), 2 x 2 cut on diagonal (inside)
Basic White 4 x 5 12/4 (front, 3 3/4 x 5 (inside), 2″ scrap for circle die cut
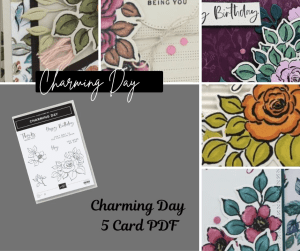
Get your FREE card tutorial using Stampin’ UP Charming Days Bundle this month with a $50 purchase at my online store.
Paper Pumpkin for August
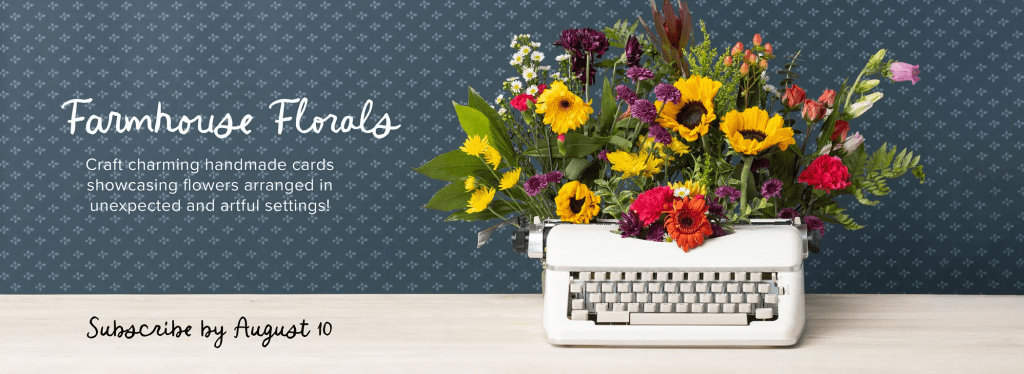
Kit Name: Farmhouse Florals
This kit includes:
Makes 9 cards: 3 each of 3 designs with 9 coordinating envelopes
Precut paper pieces and linen thread
Sentiment stamps for the outside and inside of the cards
Coordinating colors: Calypso Coral, Darling Duckling, Gray Granite, Lost Lagoon,
Pecan Pie, Secret Sea (Classic Stampin’ Spot)
Subscribe by August 10 to get this awesome kit!
For more information and to sign up for the monthly or to check out the prepaid subscription options, click here… Paper Pumpkin is now all in one place! And here’s the add-on for June/ July and August that coordinates with the Paper Pumpkin kits for these months.
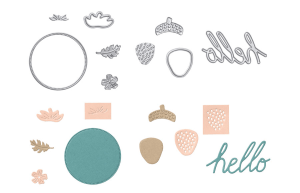
Circle of Season Dies
Thanks for stopping by. May you have a beautiful day. Make someone happy sending them a handmade card filled with love. ❤️
Hello stampin’ friends – today is Saturday and I am again sharing Paper Pumpkin alternatives with you. And I guess one of the things I want you to consider is that these projects/ alternatives can be applied to other Stampin’ Up products – NOT JUST Paper Pumpkin!
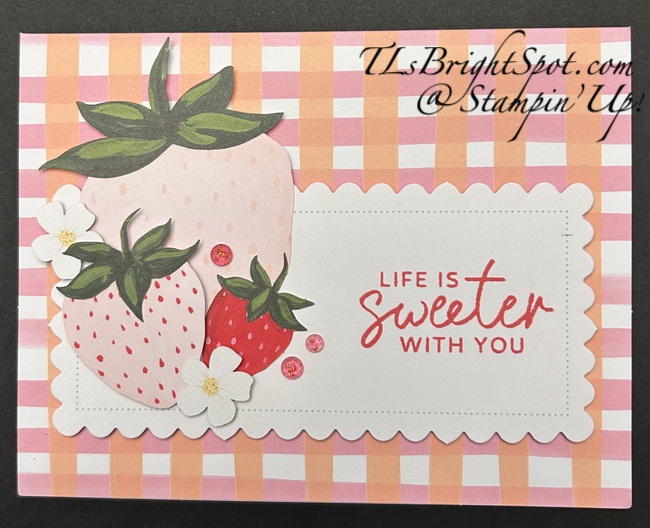
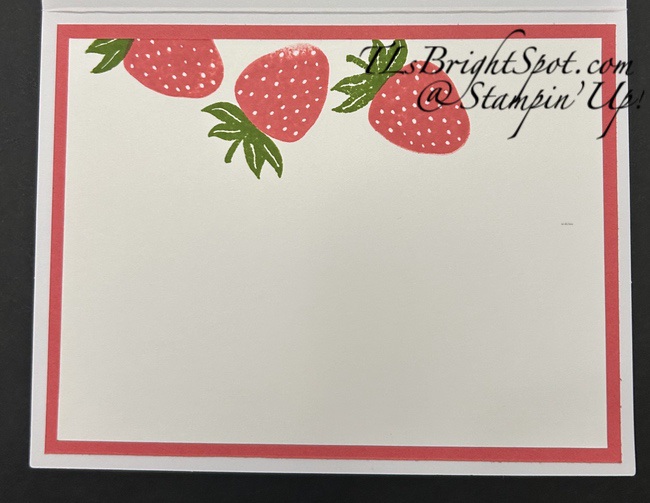
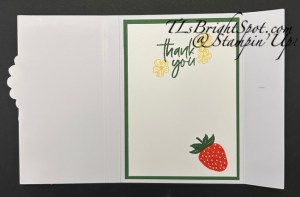
This card uses one of the card bases in the kit & is very similar to what the kit suggests. I used Strawberry Slush ink for the sentiment and added Strawberry Slush & Pretty In Pink Gems on the card front. On the inside, I stamped the strawberries in Poppy Parade (a coordinating color recommended by the kit) and Granny Apple Green ink for the top on a Basic White panel and adhered it to Strawberry Slush.
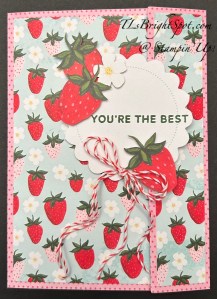
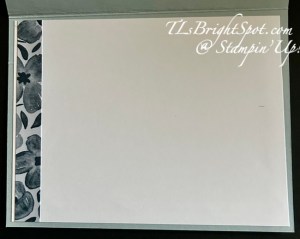
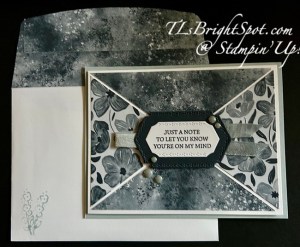
This card uses an original card base & another which I cut up and is a fun fold. It’s a tucked in offset gatefold. The additional supplies for this card are the red & White Bakers Twine, Poppy Parade and Daffodil Delight inks. In addition, I used more of the strawberry card front to cover the flap of a medium envelope. And look at the last photo to see how the offset gatefold tucks in.
Hopefully you can see how it fold in, slipping it under the circle.
See here to view the post about Alternate 1 of the July 2025 Paper Pumpkin
Click here to view all Stampin’ Up products and shop with me!
Good morning! Paper Pumpkin is a monthly box of refreshing goodies, mostly to make cards but sometimes to make gift bags or boxes. Today I am using the Sweeter Than You July PP and creating a fun fold. Here is what comes in your kit for July 2025
DETAILS – Makes 8 cards: 2 each of 4 designs – Colors: Daffodil Delight, Garden Green, Granny Apple Green, Pool Party, Strawberry Slush, Timid Tiger
Refill includes one of each item listed below. – 8 printed card bases: 2 each of 4 designs – Folded card size: 5-1/2″ x 4-1/4″ (14 x 10.8 cm) – 8 printed envelopes – Precut paper and vellum pieces – Adhesive
There’s a stamp set in the original kit, just not in the refill! And here’s my first Alternate card.
I used the card base differently, scoring it at 2 3/4 & 5 1/2 and folding it as shown. I added a Basic White panel behind the vellum & added a Twine double bow, Wink of Stella to flower centers. On the inside, I cut a Garden Green then stamped a Basic White using stamps from the stamp set, Garden Green ink (supplied in the kit) and Daffodil Delight ink from my own stash for the stamped flowers. Everything else is part of the kit.
August Paper Pumpkin info…
Kit Name: Farmhouse Florals
This kit includes:
Makes 9 cards: 3 each of 3 designs with 9 coordinating envelopes
Precut paper pieces and linen thread
Sentiment stamps for the outside and inside of the cards
Coordinating colors: Calypso Coral, Darling Duckling, Gray Granite, Lost Lagoon,
Pecan Pie, Secret Sea (Classic Stampin’ Spot)
Subscribe by August 10 to get this awesome kit!
For more information and to sign up for the monthly or to check out the prepaid subscription options, click here… Paper Pumpkin is now all in one place! And here’s the add-on for June/ July and August that coordinates with the Paper Pumpkin kits for these months.
Good morning Friends… NJ has had a couple of days respite from the heat – a drop of 30 degrees to the 70’s! These are welcome temperatures! Today’s card is made with the new In Colors Secret Sea and Cloud Cover – and could be duplicated using all the new In Colors.
I began with the 2025-2027 In Color 6×6 DSP cut 3 1/2 x 4 3/4 and cut it on the diagonal, then turned the pieces 90 degrees holding them together, to cut on the other diagonal. (NOTE: This works with DSP that has a reverse side that is coordinating in color/ pattern, not conflicting. So choose carefully 😀) After cutting the DSP, decide which sections should be primary showing the pattern desired. Here I chose the left and right panels to be dominant and simply turned the other two panels to the reverse side. These were adhered to Basic White cut 4 x 5 1/4, dimensionals added to the back and attached to a Cloud Cover card base 8 1/2 x 5 1/2 scored at 4 1/4. On the front I added a length of 3/8″ Faux Linen Ribbon with Stampin’ Seal. Using the Mixed Labels Dies, I cut two labels, the larger in Secret Sea, the smaller in Basic White. I stamped the sentiment using the Mixed Labels stamp set in Secret Sea ink. I layered the two together with adhesive, popped dimensionals across the back on top & bottom and adhered it over the ribbon. The final touch was adding several 2025-2027 In Color Flat Pearls in Cloud Cover.
For the inside… simple… a 1/2 x 4 strip of the same 25-27 In Color DSP as used on the card front, and attached to the side of a Basic White 4 x 5 1/4 panel
For the envelope, more of the 25-27 In Color DSP on the flap trimmed to fit. On the front, using Cloud Cover ink and an image in the Mixed Labels stamp set, I stamped twice on the lower left corner. This gives a completed look and could even be used as a masculine card, despite the flowers.
See below for ways to purchase the products to make this card.
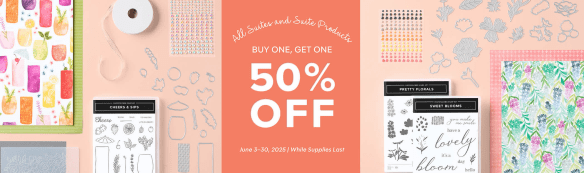
ONLY DAYS LEFT FOR THIS SALE!!! Starting June 3, all available suites and suite products from the 2025–2026 Annual Catalog and Online Exclusives are buy one, get one 50% off! If you’ve had your eye on a new suite from the annual catalog or you really like the look of a stamp set from an Online Exclusives suite, you don’t have to choose—you can get both!
Sales Period: June 3–30, 2025
Ordering Deadlines
Phone: June 30, 2025, at 6:59 p.m. (MT)
Online: June 30, 2025, at 11:59 p.m. (MT)
All available suites and suite products from the 2025–2026 Annual Catalog and Online Exclusives are buy one, get one 50% off.
When you shop the sale, the 50% off discount will apply to the lower-priced item (for example, if you buy a suite collection and a stamp set from a suite, the suite would be full price, and the stamp set would be 50% off).
Suite collections are available if all items are in stock; if all items are not in stock, you can still shop the available suite products.
You don’t have to buy a suite and suite products all from the same suite collection for the discount to apply. You can buy any suite products from any suite.
The discount will appear in your cart once you’ve added two items within the sale parameters to your cart.
Products are available only while supplies last.
See and shop all qualifying suites in the online store.
SHOP LAST CHANCE PRODUCTS HERE… NEW ITEMS ADDED TO THE LIST… MAKE CERTAIN MY NAME IS LISTED AS YOUR DEMONSTRATOR WHEN YOU CHEVCK OUT! :O) REMEMBER…Browse the selection of Last Chance paper crafting products. Additional items are added every other month. These products are available only while supplies last so be sure to buy them before they are discontinued! Discounts vary and are subject to change.
VIRTUAL ALBUM RETREAT!!!
Who: Crafters who love to scrapbook!
When: July 16–18, 2025, 2:00–10:30 p.m. (MT)
Where: Private Facebook Group
Registration: There is no registration for this event! By purchasing the Month by Month Album Retreat 2025 kit, you’ll get access to an exclusive Facebook group where the live event will stream.
Price of Month by Month Album Retreat 2025 kit: $250
Language of Event: This event will be presented in English only.
After the Event: You can access the recorded event videos on the Virtual Album Retreat Facebook group page.
CONTACT ME FOR INFORMATION RE: ADDITIONAL SUPPLY LIST
Click HERE to join with me & create your Starter Kit! What’s to lose – 20% discount/ 20% commission on all orders.
THANKS FOR STOPPING BY. MAY YOU HAVE A BEAUTIFUL DAY. MAKE SOMEONE HAPPY SENDING THEM A HANDMADE CARD FILLED WITH LOVE. ❤️
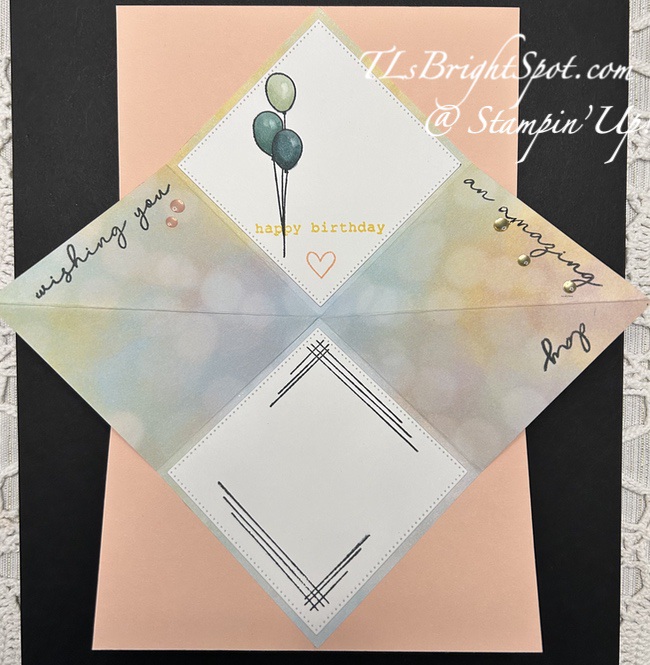
Explosion cards are just that – meant to WOW when opening them. I’ve two of them for you today 0ne is a 4 1/4 square card and the other is a standard A2 card with a finished size of 5 1/2 x 4 1/4. There are advantages to both sizes… both have the same size inside explosion 😀
card one – made with Full of Life 6×6 DSP, Spotlight On Nature Dies, Stitched Shapes Dies, You Are Remarkable stamp set, Beautiful Motifs stamp, Tinsel Gems , Lemon Lime Twist card base, Lemon Lime Twist, Shaded Spruce & Memento inks. Card base is 4 1/4 x 8 1/2 scored at 4 1/4
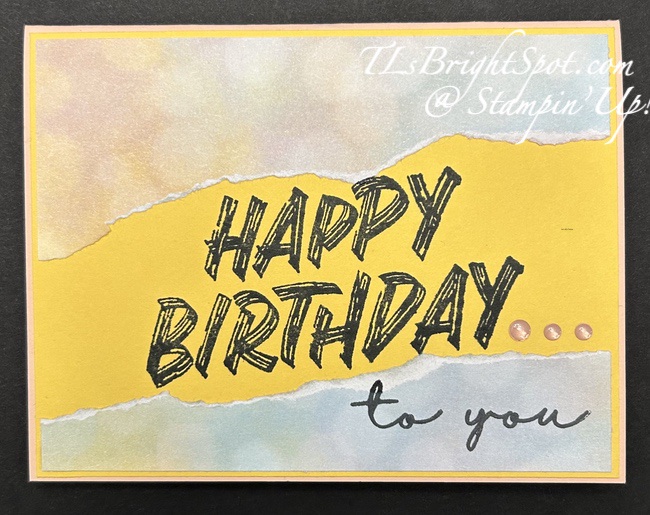
card two – made with Beautiful Bokeh 6×6 DSP, Spring Corners stamp set, Layered Thoughts stamp, Stitched Shapes Dies, Low Profile Dots, Stampin’ Blends Soft Sea Foam, Lost Lagoon & Pretty Peacock, Petal Pink card base with an overlay of Daffodil Delight, Petal Pink & Memento inks. Card base is 5 1/2 x 8 1/2 scored at 4 1/4
Basic directions…
With the side you wish to have showing most, fold a 6×6 piece of DSP in half, open & turn 90 degrees and fold in half again. Burnish well & open
Turn this piece over and fold in half in a diagonal fashion only once. Burnish and open. This creates the fold across the middle
The white panels on this are made with the largest of the Stitched Squares Dies, stamped and attached with adhesive of choice
Be sure to do all stamping, coloring, decorating before attaching to card base
To attach to card base…
Mark the center point both at the bottom of the card base and close to the center fold of the base
With ‘explosion’ piece completely closed, line up points on the diagonal with center points on card base and adhere to bottom half of card base. Make certain the card base will open and close easily.
Add adhesive to remaining portion of closed ‘explosion’ and close card front. Bingo –
NOTE: Decorate card front before attaching the ‘explosion’ piece.
Thanks for stopping by. I hope you give this explosion card a try – super easy and gives a real wow! to a card. May you have a beautiful day!
Products to make these two cards are listed below. Be sure my name is listed as your demonstrator so you get credit (from me) for purchases. 😀


![Prairie Grass Cling Stamp Set (English) [ 166168 ]](https://assets1.tamsnetwork.com/images/EC042017NF/166168s.jpg "Prairie Grass Cling Stamp Set (English) [ 166168 ]")
![Thoughtful Journey 6" X 6" (15.2 X 15.2 Cm) Designer Series Paper [ 163303 ]](https://assets1.tamsnetwork.com/images/EC042017NF/163303s.jpg "Thoughtful Journey 6\" X 6\" (15.2 X 15.2 Cm) Designer Series Paper [ 163303 ]")
![Mossy Meadow Classic Stampin' Pad [ 147111 ]](https://assets1.tamsnetwork.com/images/EC042017NF/147111s.jpg "Mossy Meadow Classic Stampin' Pad [ 147111 ]")
![Basic White 8 1/2" X 11" Cardstock [ 166780 ]](https://assets1.tamsnetwork.com/images/EC042017NF/166780s.jpg "Basic White 8 1/2\" X 11\" Cardstock [ 166780 ]")
![Mossy Meadow & Gold 1/4" (6.4 Mm) [ 166158 ]](https://assets1.tamsnetwork.com/images/EC042017NF/166158s.jpg "Mossy Meadow & Gold 1/4\" (6.4 Mm) [ 166158 ]")
![Low Profile Sparkle Dots [ 166157 ]](https://assets1.tamsnetwork.com/images/EC042017NF/166157s.jpg "Low Profile Sparkle Dots [ 166157 ]")
![Adhesive Backed Dragonflies & Birds [ 162743 ]](https://assets1.tamsnetwork.com/images/EC042017NF/162743s.jpg "Adhesive Backed Dragonflies & Birds [ 162743 ]")
![Paper Trimmer [ 152392 ]](https://assets1.tamsnetwork.com/images/EC042017NF/152392s.jpg "Paper Trimmer [ 152392 ]")
![Stampin' Dimensionals [ 104430 ]](https://assets1.tamsnetwork.com/images/EC042017NF/104430s.jpg "Stampin' Dimensionals [ 104430 ]")
![Multipurpose Liquid Glue [ 110755 ]](https://assets1.tamsnetwork.com/images/EC042017NF/110755s.jpg "Multipurpose Liquid Glue [ 110755 ]")
![Mini Glue Dots [ 103683 ]](https://assets1.tamsnetwork.com/images/EC042017NF/103683s.jpg "Mini Glue Dots [ 103683 ]")
![Paper Snips [ 103579 ]](https://assets1.tamsnetwork.com/images/EC042017NF/103579s.jpg "Paper Snips [ 103579 ]")
![Basic White Medium Envelopes [ 159236 ]](https://assets1.tamsnetwork.com/images/EC042017NF/159236s.jpg "Basic White Medium Envelopes [ 159236 ]")

![Basic White 8 1/2" X 11" Thick Cardstock [ 159229 ]](https://assets1.tamsnetwork.com/images/EC042017NF/159229s.jpg "Basic White 8 1/2\" X 11\" Thick Cardstock [ 159229 ]")
![Basic White 8 1/2" X 11" Cardstock [ 159276 ]](https://assets1.tamsnetwork.com/images/EC042017NF/159276s.jpg "Basic White 8 1/2\" X 11\" Cardstock [ 159276 ]")
![Fluid 100 Watercolor Paper [ 149612 ]](https://assets1.tamsnetwork.com/images/EC042017NF/149612s.jpg "Fluid 100 Watercolor Paper [ 149612 ]")
![Granny Apple Green Stampin' Pad [ 147095 ]](https://assets1.tamsnetwork.com/images/EC042017NF/147095s.jpg "Granny Apple Green Stampin' Pad [ 147095 ]")
![Old Olive Classic Stampin' Pad [ 147090 ]](https://assets1.tamsnetwork.com/images/EC042017NF/147090s.jpg "Old Olive Classic Stampin' Pad [ 147090 ]")
![Linen Thread [ 104199 ]](https://assets1.tamsnetwork.com/images/EC042017NF/104199s.jpg "Linen Thread [ 104199 ]")
![Stampin' Cut & Emboss Machine [ 149653 ]](https://assets1.tamsnetwork.com/images/EC042017NF/149653s.jpg "Stampin' Cut & Emboss Machine [ 149653 ]")
![Cajun Craze 8-1/2" X 11" Cardstock [ 119684 ]](https://assets1.tamsnetwork.com/images/EC042017NF/119684s.jpg "Cajun Craze 8-1/2\" X 11\" Cardstock [ 119684 ]")
![Timeless Plaid 6" X 6" (15.2 X 15.2 Cm) Designer Series Paper [ 164678 ]](https://assets1.tamsnetwork.com/images/EC042017NF/164678s.jpg "Timeless Plaid 6\" X 6\" (15.2 X 15.2 Cm) Designer Series Paper [ 164678 ]")
![Textured Notes Bundle (English) [ 165556 ]](https://assets1.tamsnetwork.com/images/EC042017NF/165556s.jpg "Textured Notes Bundle (English) [ 165556 ]")
![Old Olive 8-1/2" X 11" Cardstock [ 100702 ]](https://assets1.tamsnetwork.com/images/EC042017NF/100702s.jpg "Old Olive 8-1/2\" X 11\" Cardstock [ 100702 ]")
![Basic Beige 8 1/2" X 11" Cardstock [ 164511 ]](https://assets1.tamsnetwork.com/images/EC042017NF/164511s.jpg "Basic Beige 8 1/2\" X 11\" Cardstock [ 164511 ]")
![Natural Tones Linen Thread [ 164071 ]](https://assets1.tamsnetwork.com/images/EC042017NF/164071s.jpg "Natural Tones Linen Thread [ 164071 ]")

![Brighten Your Day Kit [ 166460 ]](https://assets1.tamsnetwork.com/images/EC042017NF/166460s.jpg "Brighten Your Day Kit [ 166460 ]")
![Pecan Pie 8 1/2" X 11" Cardstock [ 161717 ]](https://assets1.tamsnetwork.com/images/EC042017NF/161717s.jpg "Pecan Pie 8 1/2\" X 11\" Cardstock [ 161717 ]")
![Balmy Blue 8-1/2" X 11" Cardstock [ 146982 ]](https://assets1.tamsnetwork.com/images/EC042017NF/146982s.jpg "Balmy Blue 8-1/2\" X 11\" Cardstock [ 146982 ]")
![Lost Lagoon 8-1/2" X 11" Cardstock [ 133679 ]](https://assets1.tamsnetwork.com/images/EC042017NF/133679s.jpg "Lost Lagoon 8-1/2\" X 11\" Cardstock [ 133679 ]")
![Fresh Freesia 8 1/2" X 11" Cardstock [ 155613 ]](https://assets1.tamsnetwork.com/images/EC042017NF/155613s.jpg "Fresh Freesia 8 1/2\" X 11\" Cardstock [ 155613 ]")
![Highland Heather 8-1/2" X 11" Cardstock [ 146986 ]](https://assets1.tamsnetwork.com/images/EC042017NF/146986s.jpg "Highland Heather 8-1/2\" X 11\" Cardstock [ 146986 ]")

![2024–2026 In Color™ Stampin' Write Markers [ 163829 ]](https://assets1.tamsnetwork.com/images/EC042017NF/163829s.jpg "2024–2026 In Color™ Stampin' Write Markers [ 163829 ]")
![2025–2027 In Color™ Stampin' Write Markers [ 165292 ]](https://assets1.tamsnetwork.com/images/EC042017NF/165292s.jpg "2025–2027 In Color™ Stampin' Write Markers [ 165292 ]")
![Basic Black Stampin' Write Marker [ 162481 ]](https://assets1.tamsnetwork.com/images/EC042017NF/162481s.jpg "Basic Black Stampin' Write Marker [ 162481 ]")
![Brights Stampin' Write Markers [ 161696 ]](https://assets1.tamsnetwork.com/images/EC042017NF/161696s.jpg "Brights Stampin' Write Markers [ 161696 ]")
![Neutrals Stampin' Write Markers [ 161697 ]](https://assets1.tamsnetwork.com/images/EC042017NF/161697s.jpg "Neutrals Stampin' Write Markers [ 161697 ]")
![Regals Stampin' Write Markers [ 161699 ]](https://assets1.tamsnetwork.com/images/EC042017NF/161699s.jpg "Regals Stampin' Write Markers [ 161699 ]")
![Subtles Stampin' Write Markers [ 161698 ]](https://assets1.tamsnetwork.com/images/EC042017NF/161698s.jpg "Subtles Stampin' Write Markers [ 161698 ]")
![Stampin' Write Markers Collection [ 163136 ]](https://assets1.tamsnetwork.com/images/EC042017NF/163136s.jpg "Stampin' Write Markers Collection [ 163136 ]")
![Spotlight On Nature Bundle [ 163581 ]](https://assets1.tamsnetwork.com/images/EC042017NF/163581s.jpg "Spotlight On Nature Bundle [ 163581 ]")
![Secret Sea 8 1/2" X 11" Cardstock [ 165624 ]](https://assets1.tamsnetwork.com/images/EC042017NF/165624s.jpg "Secret Sea 8 1/2\" X 11\" Cardstock [ 165624 ]")
![Melon Mambo Classic Stampin' Pad [ 147051 ]](https://assets1.tamsnetwork.com/images/EC042017NF/147051s.jpg "Melon Mambo Classic Stampin' Pad [ 147051 ]")
![Melon Mambo 8-1/2" X 11" Cardstock [ 115320 ]](https://assets1.tamsnetwork.com/images/EC042017NF/115320s.jpg "Melon Mambo 8-1/2\" X 11\" Cardstock [ 115320 ]")
![Secret Sea Classic Stampin' Pad [ 165285 ]](https://assets1.tamsnetwork.com/images/EC042017NF/165285s.jpg "Secret Sea Classic Stampin' Pad [ 165285 ]")
![Lemon Lime Twist Classic Stampin' Pad [ 147145 ]](https://assets1.tamsnetwork.com/images/EC042017NF/147145s.jpg "Lemon Lime Twist Classic Stampin' Pad [ 147145 ]")
![Misty Moonlight Classic Stampin' Pad [ 153118 ]](https://assets1.tamsnetwork.com/images/EC042017NF/153118s.jpg "Misty Moonlight Classic Stampin' Pad [ 153118 ]")
![Small Blending Brushes [ 160518 ]](https://assets1.tamsnetwork.com/images/EC042017NF/160518s.jpg "Small Blending Brushes [ 160518 ]")
![Sponge Daubers [ 133773 ]](https://assets1.tamsnetwork.com/images/EC042017NF/133773s.jpg "Sponge Daubers [ 133773 ]")
![Baker's Twine Essentials Pack [ 155475 ]](https://assets1.tamsnetwork.com/images/EC042017NF/155475s.jpg "Baker's Twine Essentials Pack [ 155475 ]")
![Journaling Pens [ 145480 ]](https://assets1.tamsnetwork.com/images/EC042017NF/145480s.jpg "Journaling Pens [ 145480 ]")
![Uninked Stampin' Spots [ 141822 ]](https://assets1.tamsnetwork.com/images/EC042017NF/141822s.jpg "Uninked Stampin' Spots [ 141822 ]")
![Clear Wink Of Stella Glitter Brush [ 141897 ]](https://assets1.tamsnetwork.com/images/EC042017NF/141897s.jpg "Clear Wink Of Stella Glitter Brush [ 141897 ]")
![Metallics Wow! Embossing Powder [ 165678 ]](https://assets1.tamsnetwork.com/images/EC042017NF/165678s.jpg "Metallics Wow! Embossing Powder [ 165678 ]")
![Versamark Pad [ 102283 ]](https://assets1.tamsnetwork.com/images/EC042017NF/102283s.jpg "Versamark Pad [ 102283 ]")
![Heat Tool (Us And Canada) [ 129053 ]](https://assets1.tamsnetwork.com/images/EC042017NF/129053s.jpg "Heat Tool (Us And Canada) [ 129053 ]")
![Embossing Additions Tool Kit [ 159971 ]](https://assets1.tamsnetwork.com/images/EC042017NF/159971s.jpg "Embossing Additions Tool Kit [ 159971 ]")
![Tuxedo Black Memento Ink Pad [ 132708 ]](https://assets1.tamsnetwork.com/images/EC042017NF/132708s.jpg "Tuxedo Black Memento Ink Pad [ 132708 ]")
![Stampin' Seal [ 152813 ]](https://assets1.tamsnetwork.com/images/EC042017NF/152813s.jpg "Stampin' Seal [ 152813 ]")
![Bone Folder [ 102300 ]](https://assets1.tamsnetwork.com/images/EC042017NF/102300s.jpg "Bone Folder [ 102300 ]")
![Take Your Pick [ 144107 ]](https://assets1.tamsnetwork.com/images/EC042017NF/144107s.jpg "Take Your Pick [ 144107 ]")


![Daffodil Delight Classic Stampin' Pad [ 147094 ]](https://assets1.tamsnetwork.com/images/EC042017NF/147094s.jpg "Daffodil Delight Classic Stampin' Pad [ 147094 ]")
![Poppy Parade Classic Stampin' Pad [ 119782 ] (Retired)](https://assets1.tamsnetwork.com/images/EC042017NF/119782s.jpg "Poppy Parade Classic Stampin' Pad [ 119782 ] (Retired)")
![Strawberry Slush Classic Stampin' Pad [ 165286 ]](https://assets1.tamsnetwork.com/images/EC042017NF/165286s.jpg "Strawberry Slush Classic Stampin' Pad [ 165286 ]")
![Strawberry Slush 8 1/2" X 11" Cardstock [ 165625 ]](https://assets1.tamsnetwork.com/images/EC042017NF/165625s.jpg "Strawberry Slush 8 1/2\" X 11\" Cardstock [ 165625 ]")
![Strawberry Slush & Pretty In Pink Gems [ 165615 ]](https://assets1.tamsnetwork.com/images/EC042017NF/165615s.jpg "Strawberry Slush & Pretty In Pink Gems [ 165615 ]")
![Real Red & White Baker's Twine [ 164051 ]](https://assets1.tamsnetwork.com/images/EC042017NF/164051s.jpg "Real Red & White Baker's Twine [ 164051 ]")


![Mixed Labels Bundle (English) [ 164653 ]](https://assets1.tamsnetwork.com/images/EC042017NF/164653s.jpg "Mixed Labels Bundle (English) [ 164653 ]")
![Mixed Media Florals Suite Collection (English) [ 164659 ]](https://assets1.tamsnetwork.com/images/EC042017NF/164659s.jpg "Mixed Media Florals Suite Collection (English) [ 164659 ]")
![2025–2027 In Color™ 6" X 6" (15.2 X 15.2 Cm) Designer Series Paper [ 165300 ]](https://assets1.tamsnetwork.com/images/EC042017NF/165300s.jpg "2025–2027 In Color™ 6\" X 6\" (15.2 X 15.2 Cm) Designer Series Paper [ 165300 ]")
![Cloud Cover 8 1/2" X 11" Cardstock [ 165621 ]](https://assets1.tamsnetwork.com/images/EC042017NF/165621s.jpg "Cloud Cover 8 1/2\" X 11\" Cardstock [ 165621 ]")
![Cloud Cover 3/8" (1 Cm) Faux Linen Ribbon [ 165271 ]](https://assets1.tamsnetwork.com/images/EC042017NF/165271s.jpg "Cloud Cover 3/8\" (1 Cm) Faux Linen Ribbon [ 165271 ]")
![2025–2027 In Color™ Flat Pearls [ 165192 ]](https://assets1.tamsnetwork.com/images/EC042017NF/165192s.jpg "2025–2027 In Color™ Flat Pearls [ 165192 ]")
![Cloud Cover Classic Stampin' Ink Refill [ 165279 ]](https://assets1.tamsnetwork.com/images/EC042017NF/165279s.jpg "Cloud Cover Classic Stampin' Ink Refill [ 165279 ]")
![Full Of Life 6" X 6" (15.2 X 15.2 Cm) Designer Series Paper [ 163357 ]](https://assets1.tamsnetwork.com/images/EC042017NF/163357s.jpg "Full Of Life 6\" X 6\" (15.2 X 15.2 Cm) Designer Series Paper [ 163357 ]")
![Lemon Lime Twist 8-1/2" X 11" Cardstock [ 144245 ]](https://assets1.tamsnetwork.com/images/EC042017NF/144245s.jpg "Lemon Lime Twist 8-1/2\" X 11\" Cardstock [ 144245 ]")
![Spotlight On Nature Dies [ 163580 ]](https://assets1.tamsnetwork.com/images/EC042017NF/163580s.jpg "Spotlight On Nature Dies [ 163580 ]")
![Stitched Shapes Dies [ 152323 ]](https://assets1.tamsnetwork.com/images/EC042017NF/152323s.jpg "Stitched Shapes Dies [ 152323 ]")
![You Are Remarkable Photopolymer Stamp Set (English) [ 165445 ]](https://assets1.tamsnetwork.com/images/EC042017NF/165445s.jpg "You Are Remarkable Photopolymer Stamp Set (English) [ 165445 ]")
![Beautiful Motifs Bundle (English) [ 165206 ]](https://assets1.tamsnetwork.com/images/EC042017NF/165206s.jpg "Beautiful Motifs Bundle (English) [ 165206 ]")
![Tinsel Gems Four Pack [ 161623 ]](https://assets1.tamsnetwork.com/images/EC042017NF/161623s.jpg "Tinsel Gems Four Pack [ 161623 ]")
![Shaded Spruce 8-1/2" X 11" Cardstock [ 146981 ]](https://assets1.tamsnetwork.com/images/EC042017NF/146981s.jpg "Shaded Spruce 8-1/2\" X 11\" Cardstock [ 146981 ]")
![Shaded Spruce Classic Stampin' Pad [ 147088 ]](https://assets1.tamsnetwork.com/images/EC042017NF/147088s.jpg "Shaded Spruce Classic Stampin' Pad [ 147088 ]")
![Spring Corners Photopolymer Stamp Set (English) [ 164738 ]](https://assets1.tamsnetwork.com/images/EC042017NF/164738s.jpg "Spring Corners Photopolymer Stamp Set (English) [ 164738 ]")
![Spring Corners Bundle (English) [ 164743 ]](https://assets1.tamsnetwork.com/images/EC042017NF/164743s.jpg "Spring Corners Bundle (English) [ 164743 ]")
![Beautiful Bokeh 6" X 6" (15.2 X 15.2 Cm) Designer Series Paper [ 164607 ]](https://assets1.tamsnetwork.com/images/EC042017NF/164607s.jpg "Beautiful Bokeh 6\" X 6\" (15.2 X 15.2 Cm) Designer Series Paper [ 164607 ]")
![Layered Thoughts Photopolymer Stamp Set (English) [ 165346 ]](https://assets1.tamsnetwork.com/images/EC042017NF/165346s.jpg "Layered Thoughts Photopolymer Stamp Set (English) [ 165346 ]")
![Low Profile Dots [ 164658 ]](https://assets1.tamsnetwork.com/images/EC042017NF/164658s.jpg "Low Profile Dots [ 164658 ]")
![Soft Sea Foam Stampin' Blends Combo Pack [ 154902 ]](https://assets1.tamsnetwork.com/images/EC042017NF/154902s.jpg "Soft Sea Foam Stampin' Blends Combo Pack [ 154902 ]")
![Lost Lagoon Stampin’ Blends Combo Pack [ 161680 ]](https://assets1.tamsnetwork.com/images/EC042017NF/161680s.jpg "Lost Lagoon Stampin’ Blends Combo Pack [ 161680 ]")
![Pretty Peacock Stampin' Blends Combo Pack [ 149560 ] (Retired)](https://assets1.tamsnetwork.com/images/EC042017NF/149560s.jpg "Pretty Peacock Stampin' Blends Combo Pack [ 149560 ] (Retired)")
![Petal Pink 8-1/2" X 11" Cardstock [ 146985 ]](https://assets1.tamsnetwork.com/images/EC042017NF/146985s.jpg "Petal Pink 8-1/2\" X 11\" Cardstock [ 146985 ]")
![Petal Pink Classic Stampin' Pad [ 147108 ]](https://assets1.tamsnetwork.com/images/EC042017NF/147108s.jpg "Petal Pink Classic Stampin' Pad [ 147108 ]")
![Daffodil Delight 8-1/2" X 11" Cardstock [ 119683 ]](https://assets1.tamsnetwork.com/images/EC042017NF/119683s.jpg "Daffodil Delight 8-1/2\" X 11\" Cardstock [ 119683 ]")
