Good morning sweet friends – HAPPY THANKSGIVING! My prayer for you is that you are able to be thankful & grateful for your life and those in your life. Life is short – love fully & completely. Our life changes when we support one another & give back. Special blessings!
It’s hop time in the Inkin’ Krew world… and our theme is winter/ snow I had all kinds of ideas going through my head and ended with doing something quite traditional.
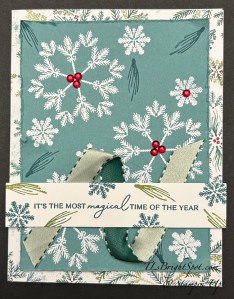
The card base is Thick Basic White with a layer of Elegant Pines DSP covering the front of the card base. I then pulled out Lost Lagoon card stock & removed any particles with my embossing buddy and proceeded to stamp several snowflake images in VersaMark ink. I sprinkled these with WOW! White Embossing Powder & heat set it with my heat tool. I let that cool and stamped the pine needles in Lost Lagoon ink. I roughed the edges of the Lost Lagoon with my scissors and bent & curled some edges & attached it to the card front with dimensionals. I also stamped a Basic White strip with a sentiment from Delicate Pines in Lost Lagoon ink & snowflake & pine needles in Lost Lagoon and Old Olive inks. I added this fun Bordered Ribbon to the b ack of the sentiment strip & attached it to the Lost Lagoon front with dimesnionals. As a final touch I added these embellishments to the centers of several snowflakes.
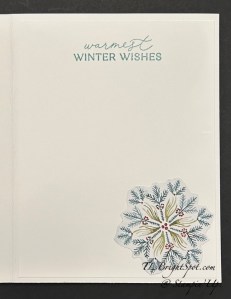
For the inside… I fussy cut this snowflake from the Elegant Pines DSP and adhered it with liquid glue to a Basic White panel then stamped the sentiment from Delicate Pines stamp set in Lost Lagoon ink and adhered the panel to the inside of the card.
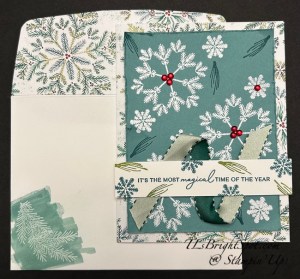
For the envelope I stamped this wonderful pine branch in VersaMark ink, sprinkled it with WOW! White embossing powder and heat set it with my heat tool. When dry I used my Lost Lagoon Stampin’ Blend to color the area over the snowflake for an emboss resist look. :O) I buffed it gently to remove ink from the embossing.
And now – continue viewing what others have created by following the links below… click on next or a name. Happy hopping!
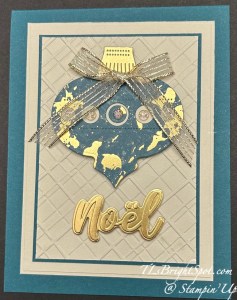
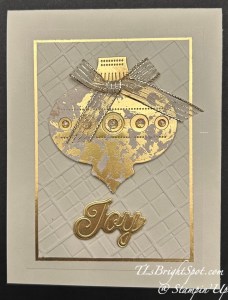
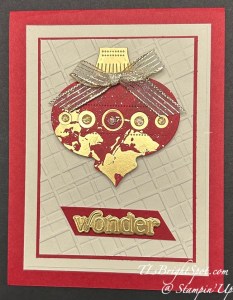
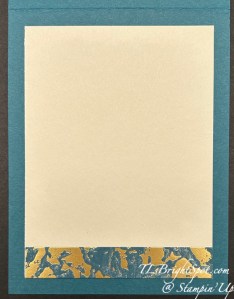
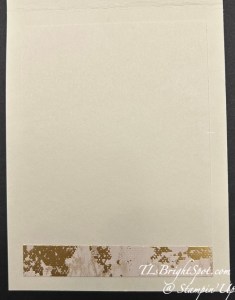
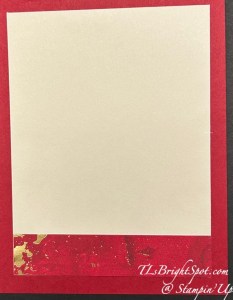
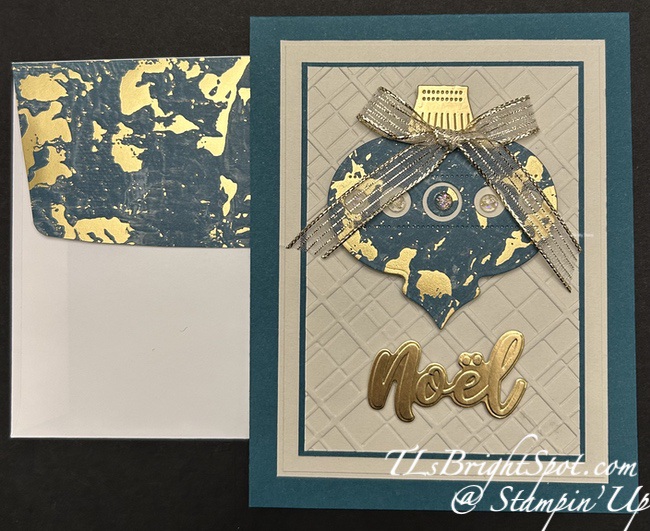
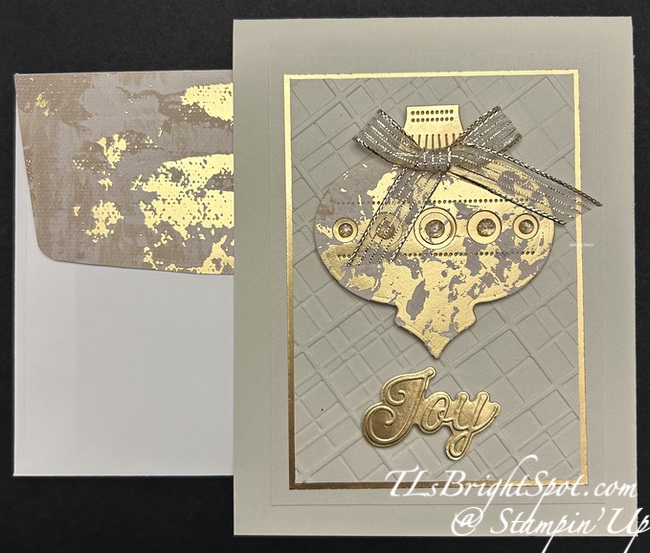
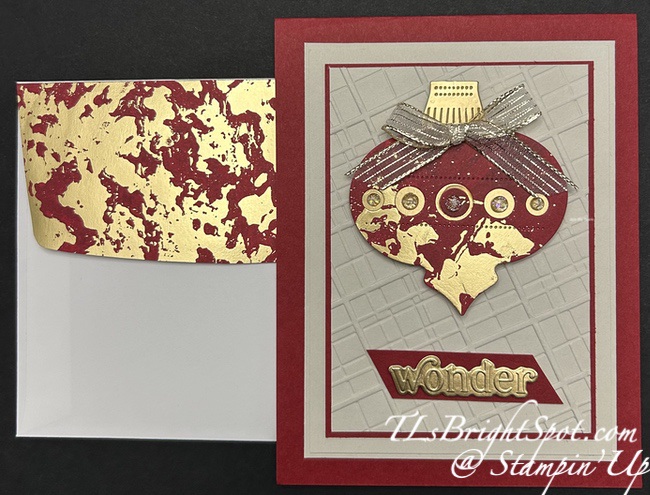
Good Morning Monday! Whew – the start of another week in October… Where has the month gone? For me, it has flown by – how about for you? I have a pretty set of cards for you today, all the same layout, same dies, same ribbon, same embellishments, just different colors in the Season of Elegance SDSP. I simply couldn’t quit making these. I was inspired by another demonstrator, Julie Gilson.
Card 1 is in Pretty Peacock. Card 2 is in Basic Beige. Card 3 is in Cherry Cobbler. All three use the same Forever Plaid 3D embossing folder and similar layers.
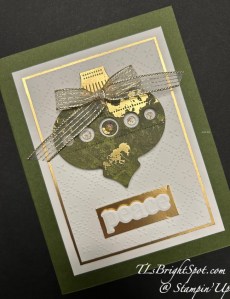
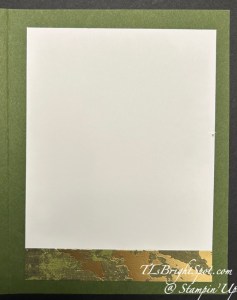
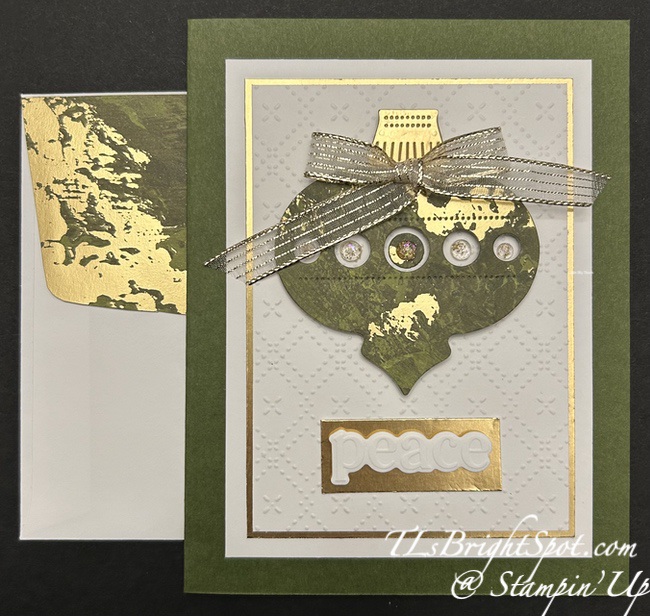
Card 4 uses a brand new Beautiful Pattern embossing folder, coming in the November ONLINE EXCLUSIVE release – available Nov 4. It also has similar layers and comes in Mossy Meadow.
For sentiments on the card fronts I used the Christmas Words Collage bundle die cut from Gold Foil and also Basic White (for the word peace). This set embosses the words & die cuts at the same time, so it’s quite easy to have a bunch words at the ready 😀
Here are the insides of each of those cards – a simple strip of the Season of Elegance DSP added to the bottom of the inside panel.
And below… the envelopes for these beautiful cards – more of the same Season of Elegance SDSP adhered & trimmed to fit the flap. Simple, elegant finish to these stunning cards.
You will notice some of these are on card bases 4 1/4 x 11 scored at 5 1/2 while others are on card bases of 8 1/2 x 5 1/2 scored at 4 1/4. It honestly didn’t matter either way, so if I had that already cut, that’s what I used. Super fun cards to make multiples of while also making them unique in color & words.
How to purchase the products to make these beautiful cards may be found below. And while you are at it, consider becoming a Stampin’ Up! demonstrator. This is the perfect opportunity as Stampin’ Up! has a joining special right now that is the best ever! Joining is a great way to meet new people, connecting with fellow crafters, being a part of a wonderful community of supporting your creativity. It’s also an opportunity for discounts on every order after joining.
If you are interested in becoming a Demonstrator, NOW IS THE PERFECT TIME! Stampin’ Up! has an exclusive offer/ promotion during the month of October. From October 1 to 31, anyone who purchases the Starter Kit can choose between two amazing offers. In addition to FREE shipping, FREE business supplies, and a FREE Paper Pumpkin kit, you can either get $125 worth of products for just $35, an amazing first time ever offer, OR $189 worth of products for just $99!
What are some of the benefits of becoming a demo?
Crafting is even more fun with community
Become a demonstrator and enjoy all the perks that come with that:
1) a 20–25% product discount
2) exclusive early access to the latest releases online and in catalogs
3) the opportunity to earn a modest supplemental income
4) the chance to attend incredible training and crafting events
5) Scrapbooking has never been better in Stampin’ Up! history. Have you seen all the new scrapbook products Stampin’ Up! has? It’s amazing…
6) There’s never an obligation to sell, you can join to enjoy the discount for yourself.
It’s also fun to learn new skills, develop new crafting techniques & share your passion for crafting. If you’re like me, it’s really fun to meet new people & connect with fellow crafters. How can I help & support you – lots of ways… through connection, team meetings, our team facebook page, updates. Feel free to connect with me – ask questions – get excited.
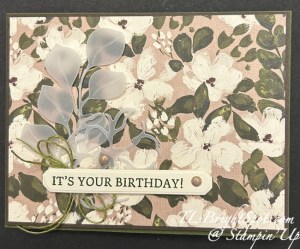
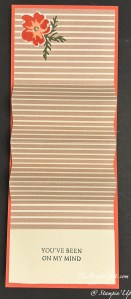
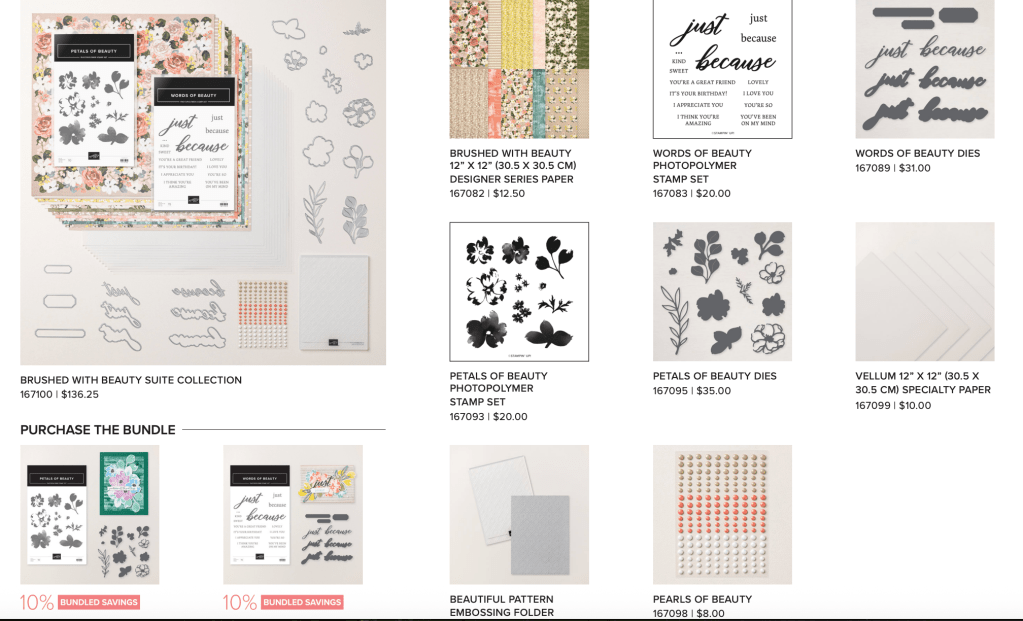
Good morning – it’s Saturday & cool in this part of New Jersey – 40 degrees! Blanket time and possibly time to bring in firewood for a fire tonight. We’ll see. I have two cards for you today, using products from the November ONLINE EXCLUSIVE release. As a Demonstrator, I am privileged to be able to preorder products before they become available to the public. This is a beautiful suite of two bundles, DSP & Vellum, embellishments and an embossing folder. For today’s cards I did not use the embossing folder. I have two cards to share; one in landscape & one in portrait.
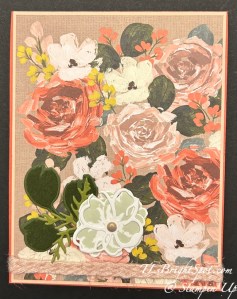
Aren’t these papers stunning – Brushed with Beauty DSP. Love, love. On the landscape card are die cuts in vellum, using the Petals of Beauty Dies. The sentiment & banner die cut use items from the two bundles: Petals of Beauty and Words of Beauty. The bow is Old Olive Linen Thread – a September ONLINE EXCLUSIVE that comes in a two pack – Early Espresso is the other color of Linen Thread in the duo pack. The portrait card again shows die cuts, this time in card stock. I love this flower with the delicate edge! I stamped the flower image twice in Basic Beige ink, layered them then added the delicate die cut in Basic White. A single Pearls of Beauty embellishment is in the flower center. The ribbon is Braided Trim from the Floral Charm Suite (July ONLINE EXCLUSIVES) And here’s the inside of each.
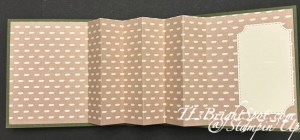
In the landscape card above I added a Branching Out die cut, the smallest, and no stamping. (It is available in the September to December 2025 Mini Catalog) The inside looks a bit plain, so I’m going to add something for sure. On the portrait card, I stamped the two step floral image on Basic White, using Petal Pink & Calypso Coral inks, then die cut it with the Petals of Beauty Dies. This comes from the Petals of Beauty stamp set & coordinating dies in the suite of products. The leaf image is die cut from Mossy Meadow. I did add the Pearls of Beauty embellishment to the flower center. It’s fairly flat & doesn’t add a lot of bulk. The sentiment is stamped in Mossy Meadow ink & comes from Words of Beauty stamp set – part of the suite of products. Below is a top down view of each of the cards.
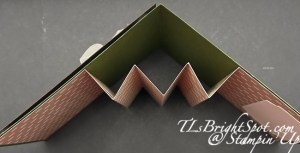
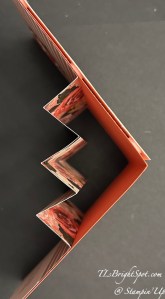
Time for instructions in how to make this fun fold accordion design.
Basic Directions for this Accordion Fun Fold:
cut the card base 4 1/4 x 5 1/2 and score @ 5 1/2
cut the DSP 4 x 12 & score @ 3, 4, 5, 6, 7, 8, & 9
adhere one end of the DSP to the inside of the card base with equal borders on three sides
adhere opposite end in the same fashion
for the front…
cut a card stock panel in a coordinating color 4 1/8 x 5 3/8
cut a DSP layer 4 x 5 1/4 & adhere to coordinating card stock
attach these two with dimensionals to the card front
decorate as desired
Brushed with BeautySuite – November ONLINE EXCLUSIVE
If you are interested in becoming a Demonstrator, NOW IS THE PERFECT TIME! Stampin’ Up! has an exclusive offer/ promotion during the month of October. From October 1 to 31, anyone who purchases the Starter Kit can choose between two amazing offers. In addition to FREE shipping, FREE business supplies, and a FREE Paper Pumpkin kit, you can either get $125 worth of products for just $35, an amazing first time ever offer, OR $189 worth of products for just $99!
What are some of the benefit of becoming a Demo:
Crafting is even more fun with community
Become a demonstrator and enjoy all the perks that come with that:
1) a 20–25% product discount
2) exclusive early access to the latest releases online and in catalogs
3) the opportunity to earn a modest supplemental income
4) the chance to attend incredible training and crafting events
5) Scrapbooking has never been better in Stampin’ Up! history. Have you seen all the new scrapbook products Stampin’ Up! has? It’s amazing…
6) There’s never an obligation to sell, you can join to enjoy the discount for yourself.
It’s also fun to learn new skills, develop new crafting techniques & share your passion for crafting. If you’re like me, it’s really fun to meet new people & connect with fellow crafters. How can I help & support you – lots of ways… through connection, team meetings, our team facebook page, updates. Feel free to connect with me – ask questions – get excited.
Welcome to Thursday and this wonderful group of ‘hoppers’! We have a color challenge today and I have chosen to work with the Peaceful Garden DSP, the Peaceful Garden Glimmer Paper & a bundle called Ornamental Christmas to create a fun fold.
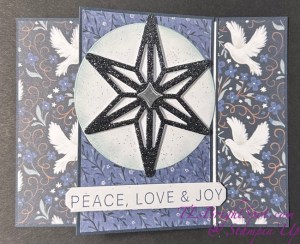
I started with a Secret Sea card base 4 1/4 x 5 1/2 & cut two strips of the Peaceful Garden DSP 1 1/2 x 4 1/8 and attached to each end leaving equal borders at top, bottom & side. I then took another piece of Secret Sea cut 4 1/4 x 5 12 & scored it on the long side @ 1 3/8 x 2 3/4. Burnish it well so it makes a nice ‘Z’ fold.
Before attaching it to the card base, I added another strip of Peaceful Garden DSP to the inside middle panel of the ‘Z’. I attached it to the card base, centering it. I stamped a Basic White panel 2 5/8 x 4 1/8 using the Ornamental Christmas stamp set & Misty Moonlight ink then added it to the inside panel of the ‘Z’.
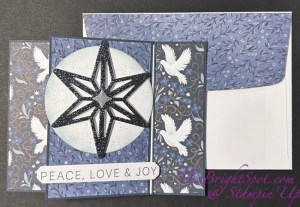
I took yet another panel of Secret Sea 2 3/4 x 4 1/4, layered it with Peaceful Garden DSP 2 5/8 x 4 1/8 then attached it to the left panel of the z- fold. I cut a circle from Basic White using the Ornamental Christmas Dies, used Cloud Cover & a sponge dauber to add color to the edges, then flicked it with my Light Secret Sea Stampin’ Blends. I die cut the wonderful star from Peaceful Garden Glimmer paper, popped it on dimensionals & added it to the circle, centering it. For extra glam I die cut the diamond shape for the center of the star from Silver Foil Sheets & attached it with glue. I attached the circle in place on the card front with glue. For the sentiment… a stamp from Peace on Earth stamp set stamped in Misty Moonlight ink, die cut with a die from Ornamental Christmas Dies & added it to the card front with dimensionals.
For the envelope, more of the Peaceful Garden DSP was added to the flap & trimmed to fit. Below is a list of the products to create this card & info to consider about becoming a demonstrator as part of my team 😀
Now – time to see what others have created for this color challenge. Click the next button or click on a name to take you around. Happy hopping!
From October 1 to 31, anyone who purchases the Starter Kit can choose between two amazing offers. In addition to FREE shipping, FREE business supplies, and a FREE Paper Pumpkin kit, you can either get $125 worth of products for just $35, an amazing first time ever offer, OR $189 worth of products for just $99!
What are some of the benefits of joining…
Crafting is even more fun with community
Become a demonstrator and enjoy all the perks that come with that:
1) a 20–25% product discount
2) exclusive early access to the latest releases online and in catalogs
3) the opportunity to earn a modest supplemental income
4) the chance to attend incredible training and crafting events
5) Scrapbooking has never been better in Stampin’ Up! history. Have you seen all the new scrapbook products Stampin’ Up! has? It’s amazing…
6) There’s never an obligation to sell, you can join to enjoy the discount for yourself.
It’s also fun to learn new skills, develop new crafting techniques & share your passion for crafting. If you’re like me, it’s really fun to meet new people & connect with fellow crafters. How can I help & support you – lots of ways… through connection, team meetings, our team facebook page, updates. Feel free to connect with me – ask questions – get excited.
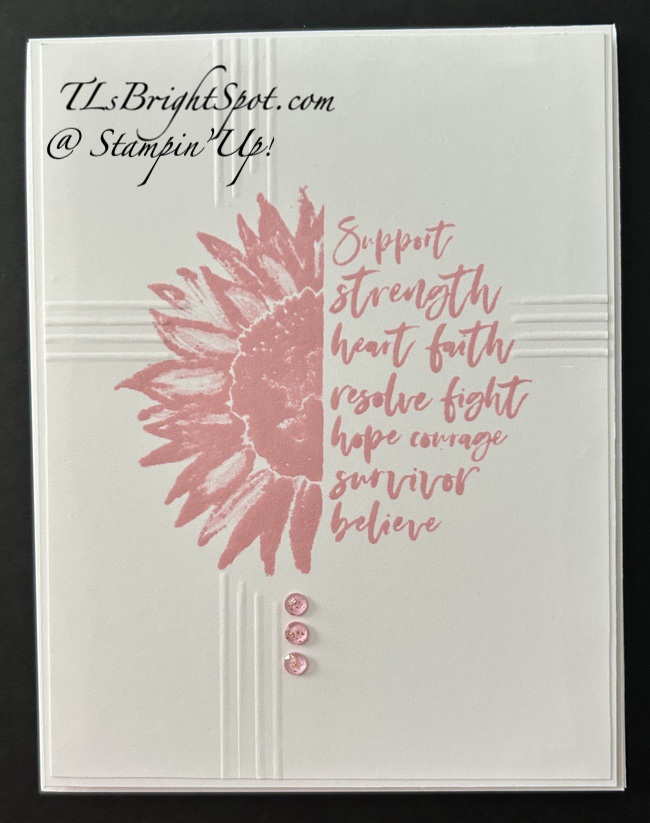
Welcome to Thursday & our fabulous hop! We have a theme challenge today called “Clean & Simple” and I confess… this was not easy for me. I made a card but it used a die & ribbon, but was a step ‘up’ so to speak. And actually I like this card better. 😀
Do you see what I did here? I created a cross with score lines. So, stamp first (Pretty In Pink was used here), turn the card over & with your scoring tool, score lines where you want them. And why flip the card over? I wanted the score lines to be raised on the front, not indented. Make sense? After scoring, I added the stamped piece to a larger layer, then attached those to the card front with dimensionals. Final touch – Strawberry Slush & Pretty in Pink Gems. So so easy…
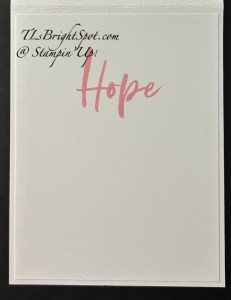
For the inside… another stamp in the Love & Courage stamp set is the single word HOPE – – it’s stamped in Pretty In Pink on a Basic White insert piece then added to the inside of the card.
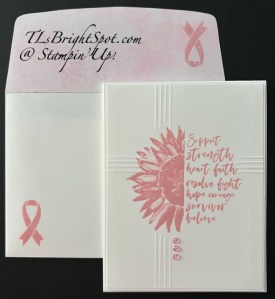
For the envelope… a piece of Subtles 6×6 DSP in Petal Pink was added to the flap & trimmed to fit. The traditional cancer ribbon from Love & Courage stamp set was stamped in Pretty in Pink on the flap & on the envelope front.
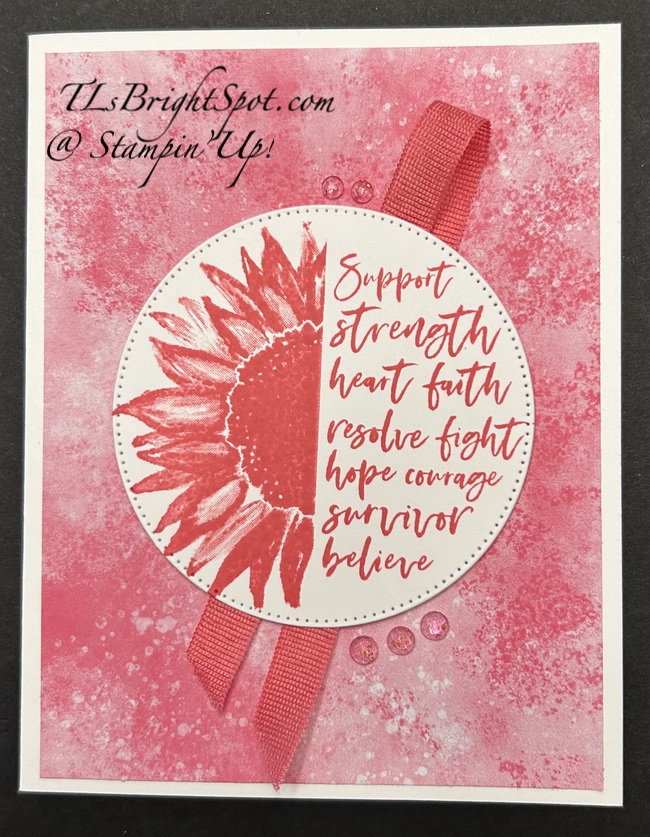
This is the first card I mentioned that I made that didn’t seem to fit the ‘clean & simple’ challenge. The DSP in the background is 2025-2027 In Color 6×6 in Strawberry Slush and the ribbon & inking is also Strawberry Slush.
Time to hop around – see what others on the team have created… click the ‘next’ button or click on a name. Either way, check them all. 😀 Enjoy the hop!
It has officially begun – the extraordinary Stampin’ Up! Joining Promotion…
JOINING PROMOTION BEGINS OCTOBER 1-31, 2025!
New team members who purchase their starter kit from October 1 to 31 will be able to choose between these two offers:
1) $125 USD | $165 CAD worth of products for just $35 USD | $48 CAD
2) $189 USD | $252 CAD worth of products for just $99 USD | $135 CAD
Benefits of becoming a Demonstrator:
Stampin’ Up! offers a space where a community of crafters from all over the world can connect and create together.
Unlike customers, demonstrators get early access to the latest releases and catalogs, as well a 20–25% product discount and commission.
Being a demonstrator can mean so much more than just crafting. It can also mean personal development and expanding your circle to include other people and new experiences.
Crafting is even more fun with community, and there’s never been a better time to join. Become a demonstrator and enjoy all the perks that come with that, like a 20–25% product discount, exclusive early access to the latest releases and catalogs, the opportunity to earn a modest supplemental income, the chance to attend incredible training and crafting events, and so much more! Have you ever thought about joining the Stampin’ Up! community? Are you into scrapbooking and have you seen all the new scrapbook products Stampin’ Up! has? Wouldn’t you love to get all these products at a discount? Consider joining the Stampin’ Up! community between October 1-31, and save on everything you buy ❤️ Are you new to stamping and don’t know where to start, but would like to join to save? Connect with me… I’m here to help and assist you anyway that I can. OCTOBER is the best time ever to join!! The best part is you can put November Online Exclusive preorder items in yourStarter Kit. Contact me and we can talk about how to proceed. There’s never an obligation to sell, you can join to enjoy the discount for yourself. 😀
Do you love people? Are you creative? Do you have a positive attitude?
Oct 1 – JOIN MY TEAM to become the best you can be!
Together we can make magic happen.
Thanks for stopping by. May you have a beautiful day. Make someone happy sending them a handmade card filled with ❤️
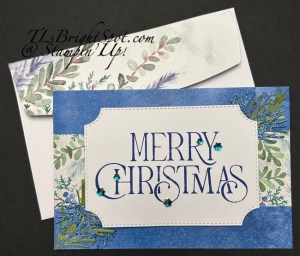
Hello folks… it’s Sunday and going to be another hot & humid day here on the East Coast The trees are beginning to turn but the weather remains h-o-t! So we adjust, right? But to my card…actually cards – I have three, all with the same layout but with different papers from the Winter Meadows Designer Series Papers. I was on a roll and absolutely loving this new (to me) stamp set. I bought it during the 15% off stamp sale 😀
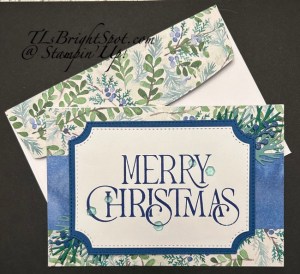
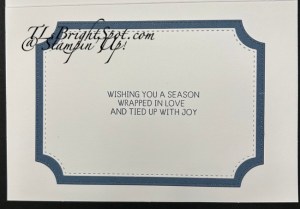
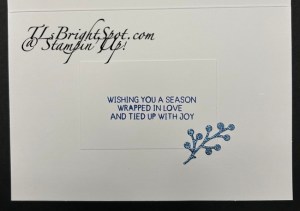
Card 1: Here I used the patterned paper to cover the card base and to create the strip. For Coordinating colors I used Blueberry Bushel and the 2nd largest of the Branching Out Dies to layer the Basic White sentiment layer. The large Merry Christmas was stamped in Blueberry Bushel ink. With this sentiment label on dimensionals I was able to add die cuts of pine boughs & berries die cut in Shaded Spruce, Lost Lagoon and the berries in Blueberry Bushel. I added Wink of Stella to the berries. The embellishments are Shades of Green Hexagons. On the inside, I die cut the same size panel of Basic White as the white panel on front and stamped the sentiment in Blueberry Bushel ink using the Gift of Joy stamp set.
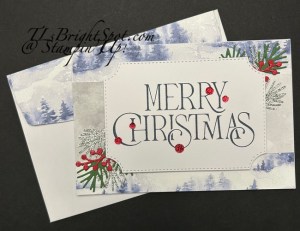
Card 2: For this card, I used another of the papers in the Winter Meadow DSP pack for the background and the strip. I used Peaceful Garden Glimmer Paper in silver and Garden green for the pine bough die cuts and Real Red for the berries. Wink of Stellas was added to the berries. The ink for the Basic White sentiment panel (Branching Out Dies of course) is Misty Moonlight. The embellishment here is the Traditional Sparkling Sequins. For the inside, I used Misty Moonlight card stock for the layer of the Basic White sentiment panel. The sentiment is stamped in Misty Moonlight ink and is from the Gift of Joy stamp set.
Card 3: This may be my favorite card… I simply reversed where I used the papers from card 1 – the background paper being the blue and the strip being the patterned side of the Winter Meadow DSP. I again used Peaceful Garden Glimmer paper (this time in blue) to die cut pine boughs and Blueberry Bushel for the berries (yes, Wink of Stella on these berries too!) The embellishments are the Sparkling Snowflakes in green. For the inside… another die cut of the berries from Branching Out Dies, this time using the Peaceful Garden Glimmer Paper in blue – was added to a simple trimmed rectangle stamped in Blueberry Bushel ink using the Gift of Joy stamp set.
These are all larger than usual cards as I used a retired set of cards & envelopes to decorate. This layout was part of our Thursday sketch challenge for the blog hop and is a total CASE of the card by Amy Koenders. I want to give her credit after all! As I mentioned earlier – love this new Merry Christmas stamp set! Products to make this card may be found below.
JOINING PROMOTION BEGINS OCTOBER 1-31, 2025!
New team members who purchase their starter kit from October 1 to 31 will be able to choose between these two offers:
1) $125 USD | $165 CAD worth of products for just $35 USD | $48 CAD
2) $189 USD | $252 CAD worth of products for just $99 USD | $135 CAD
BENEFITS OF BECOMING A DEMONSTRATOR
Stampin’ Up! offers a space where a community of crafters from all over the world can connect and create together.
Unlike customers, demonstrators get early access to the latest releases and catalogs, as well a 20–25% product discount and commission.
Being a demonstrator can mean so much more than just crafting. It can also mean personal development and expanding your circle to include other people and new experiences.
Do you love people? Are you creative? Do you have a positive attitude?
come Oct 1 – JOIN MY TEAM to become the best you can be!
Together we can make magic happen.
Thanks for stopping by. May you have a beautiful day. Make someone happy sending them a handmade card filled with ❤️
Good morning happy people. Guess what today is – FRIDAY, for many it is their favorite day… We have a family reunion of sorts planned for Sunday late afternoon & that should be extra fun. I’m very much looking forward to it. 😀
For today, I’m focusing on the Paper Alternates that I made with this month’s kit. I’ll show the ‘planned’ card and then my alternates.
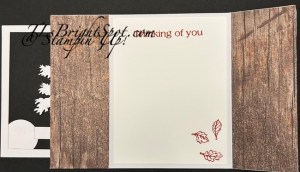
The card to the left is as intended by Paper Pumpkin. The card to the right is my first alternate, a total CAS from another demonstrator. It uses Country Woods DSP and when lifting the DSP on the right – there is the place to write.
This is a gatefold card and when open again has the addition of Country Woods DSP adhered to the inside ‘gates’ & a piece of Basic White stamped using the stamps in the Sep. kit.
Above on the left is the card as ‘planned. The card on the right is another z-fold using the PP kit products and only adding a double Linen Thread bow.
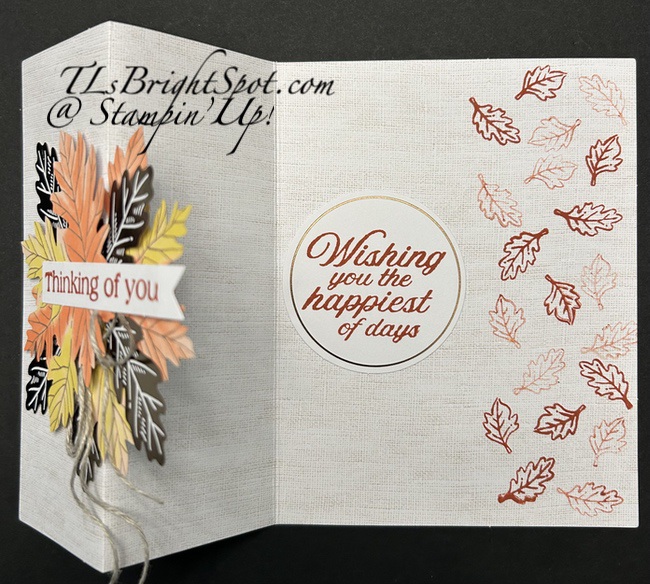
Above is another alternate done in a gatefold. The only addition was a Basic White panel inside for the stamped sentiment. No other additional products were used.
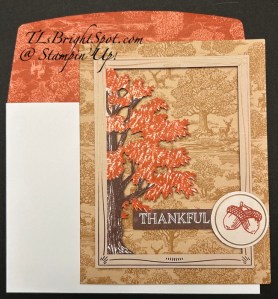
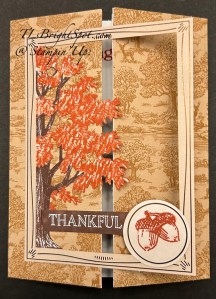
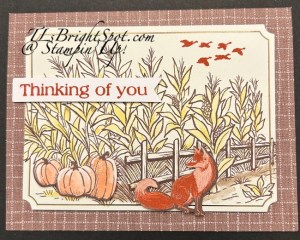
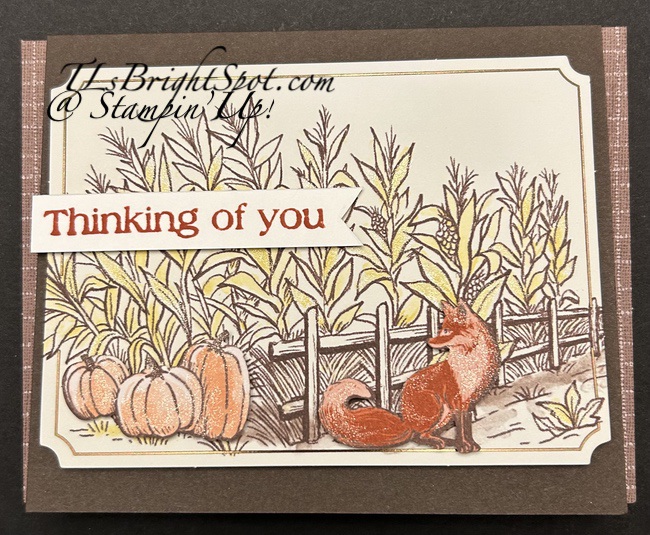
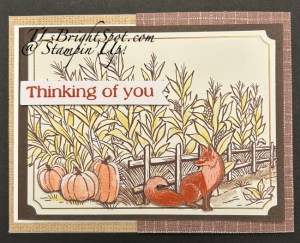
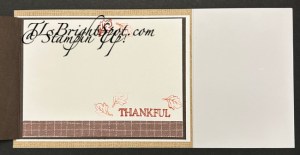
The original card as planned. The only addition is Wink of Stella on the pumpkins and the fox.
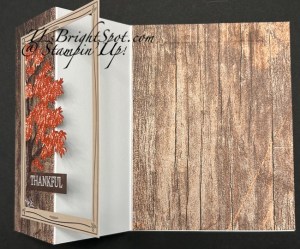
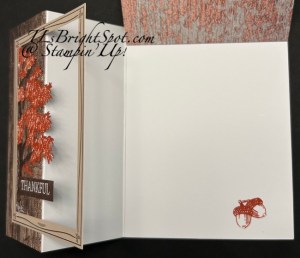
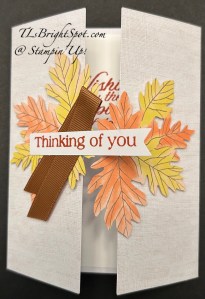
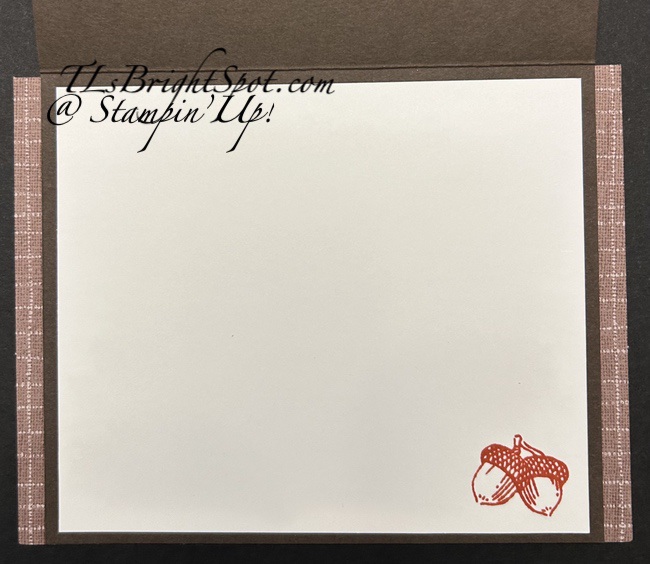
My next to last alternate and the inside – a flip front card. I cut the original Paper Pumpkin card base in half and added a piece of Early Espresso, adhered a Basic White piece to the inside and stamped the sweet acorn from the PP stamp set. With each of these last three cards i used Wink of Stella on the pumpkin and the fox for a bit of sparkle & fun.
My last card is a joy fold card, and I used Early Espresso to mount the showcase field of corn & Gathering Together SDSP for the inside background. I thoroughly enjoyed playing with this kit. Refills are available if you wish to create these cards. The only thing is… in the refill there is no stamp set or ink spot.
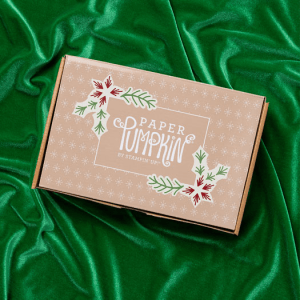
Stazmpin’ Up! has a Paper Pumpkin each month and this next months is sure to fascinate. Here are the particulars – just remember, you must order by Oct 10!
October Velvety Flocking Adds a Hand-Stitched Effect
OCTOBER: Cozy Christmas Subscribe September 11–October 10 Create heartfelt Christmas cards with classic charm and flocked accents. • Makes 9 cards: 3 each of 3 designs with 9 coordinating envelopes • Precut paper pieces with soft, stitched-look flocking • Shiny red sequin embellishments • Coordinating colors: Basic Beige, Cherry Cobbler, Garden Green, Pecan Pie (Classic Stampin’ Spot), Real Red
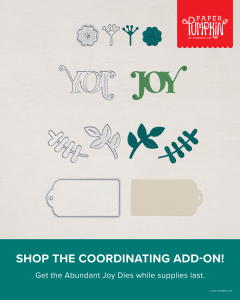
And the coordinating dies for Paper Pumpkin October through December are these…
JOINING PROMOTIO OCTOBER 1-31!
New team members who purchase their starter kit from October 1 to 31 will be able to choose between these two offers:
1) $125 USD | $165 CAD worth of products for just $35 USD | $48 CAD
2) $189 USD | $252 CAD worth of products for just $99 USD | $135 CAD
BENEFITS OF BECOMING A DEMONSTRATOR
Stampin’ Up! offers a space where a community of crafters from all over the world can connect and create together.
Unlike customers, demonstrators get early access to the latest releases and catalogs, as well a 20–25% product discount and commission.
Being a demonstrator can mean so much more than just crafting. It can also mean personal development and expanding your circle to include other people and new experiences.
Do you love people? Are you creative? Do you have a positive attitude?
come Oct 1 – JOIN MY TEAM to become the best you can be!
Together we can make magic happen.
Thanks for stopping by. May you have a beautiful day. Make someone happy by sending them a handmade card filled with ❤️
Welcome to our Thursday blog hop! You may have come from the fabulous Tara and seen her fun creation – & now you are here. We have a sketch challenge today & I have chosen to use the Snowflake Kisses bundle and Peaceful Garden Glimmer paper to show off the beautiful snowflakes. I hope you like!
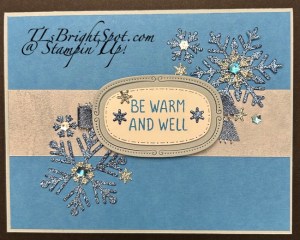
I began by die cutting several snowflakes from the Peaceful Garden Glimmer Paper. It has three colors: silver, blue and gray – I’m using the first two – the silver & blue. I’ve also chosen to use the Traditional Labels Dies for the center die cuts in Cloud Cover & Basic White. The sentiment is stamped in Azure Afternoon with the Snowflake Kisses stamp set. The ribbon is Silver Edged Ribbon in Misty moonlight.
The card base is Cloud Cover with an added layer of Azure Afternoon just a bit smaller. Then I added a strip of Peaceful Garden DSP upon which I layered the snowflakes & the sentiment panel in the center. Only this sentiment banner is on dimensionals. As you can see, I layered the larger die cut snowflakes and I also colored three of the Faceted Snowflakes with a Stampin’ Blends Dark Azure Afternoon. The other two I left uncolored.
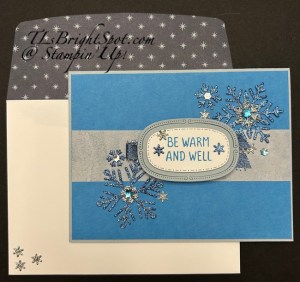
For the inside… I added a strip of the same Peaceful Garden DSP as is on the front to a Basic white panel & adhered an additional die cut snowflake from the Peaceful Garden Glimmer Paper. I added the extra little bits of die cuts from one of the snowflakes – simply because they were available & I wanted to use them. 😀
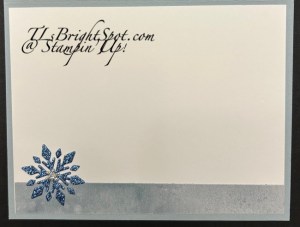
For the envelope… I adhered the last of the die cut snowflakes from the the Peaceful Garden Glimmer paper (in silver) to the front of the envelope & added a starry piece of Peaceful Garden DSP to the flap & trimmed to fit. Finis!
This is another one of those cards that is so flexible – this time because of the sentiment on the front & no sentiment on the inside. If needed, I could stamp – ‘thinking of you’ or ‘happy birthday’ or ‘just because’ – and it is easily a masculine card as well. Don’t you love the versatility??? Thanks so much for stopping by.
Now… on with the hop… choose the next button or click on a name – either one, be sure to visit everyone! Happy Hopping.
New team members who purchase their starter kit from October 1 to 31 will be able to choose between these two offers:
1) $125 USD | $165 CAD worth of products for just $35 USD | $48 CAD
2) $189 USD | $252 CAD worth of products for just $99 USD | $135 CAD
Benefits of becoming a Demonstrator:
Stampin’ Up! offers a space where a community of crafters from all over the world can connect and create together.
Unlike customers, demonstrators get early access to the latest releases and catalogs, as well a 20–25% product discount and commission.
Being a demonstrator can mean so much more than just crafting. It can also mean personal development and expanding your circle to include other people and new experiences.
Do you love people? Are you creative? Do you have a positive attitude?
Then …
come Oct 1 – JOIN MY TEAM to become the best you can be!
Together we can make magic happen.
Thanks for stopping by. May you have a beautiful day. Make someone happy by sending them a handmade card filled with ❤️
To purchase the products used to make today’s card – see the information below…
Card cuts for today:
Cloud Cover: 8 1/2 x 5 12 scored at 4 1/4; 2 3/4 x 1 3/4
Azure Afternoon: 4 1/8 x 5 3/8
Peaceful Garden DSP: 1 1/2 x 5 3/8; 5/8 x 5 3/8 (inside strip)
Peaceful Garden Glimmer Paper: 2 1/4 x 4(blue); scraps (silver)
This is my first post today – because of the sale 😀 My card goes live as part of our Happy Inkin’ Thursday Blog Hop @ 9 AM (ET)
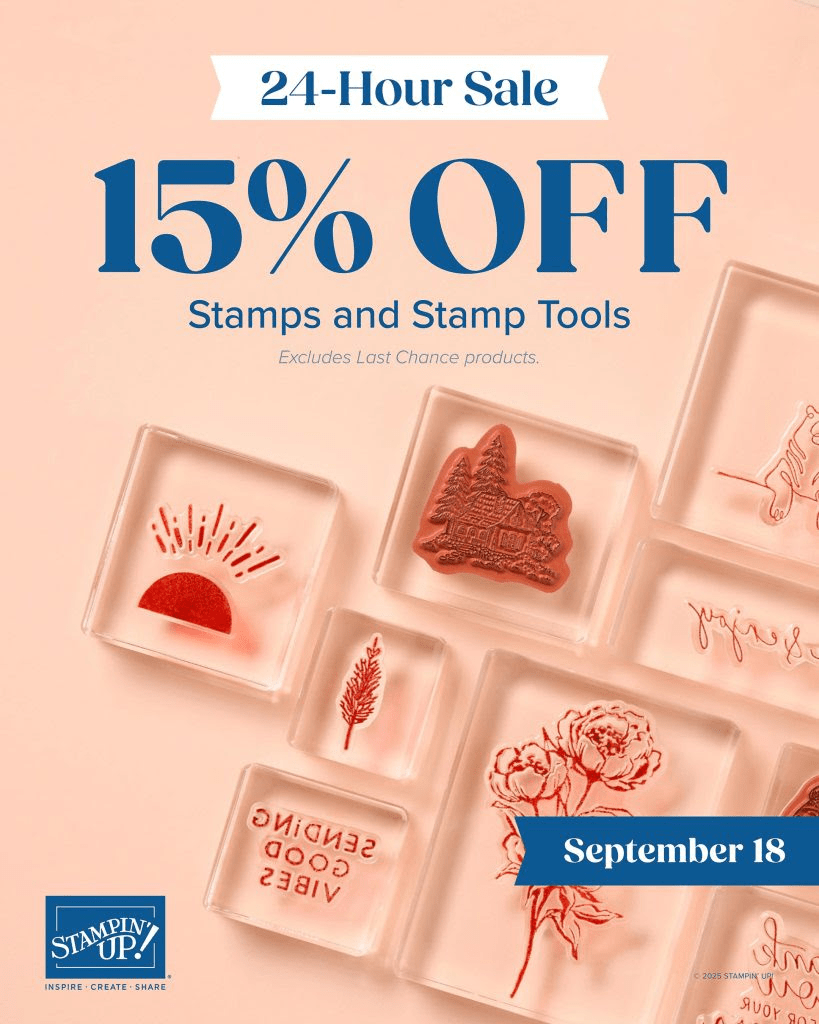
Stampin’ Up is having a great sale TODAY ONLY – September 18th, 2025!
You’ll find Stamp Sets and Stamping Tools included, so it’s the perfect time to grab something you’ve been wanting.Shop here with me. And.. when shopping with me today – receive double the daisy rewards for every $50 purchase (before shipping & taxes). Double your pleasure, double your fun.
And here’s more fun news… WORLD CARD MAKING DAY is fast approaching – Oct 4. here are the details…World Card Making Day- Mark your calendar for this special event!
Who: Everyone!!!
When: October 4, 2025, from 2:00 to 3:00 p.m. (MT)
Where: Online
Price of Event: Free
Registration Dates: September 3–October 3, 2025, until 2:00 p.m. (MT)
Registration for this event is free. You must register to receive a link to view the event. Also, those who register will receive a gift after the event ends. Free event & a prize to boot! Yippee!
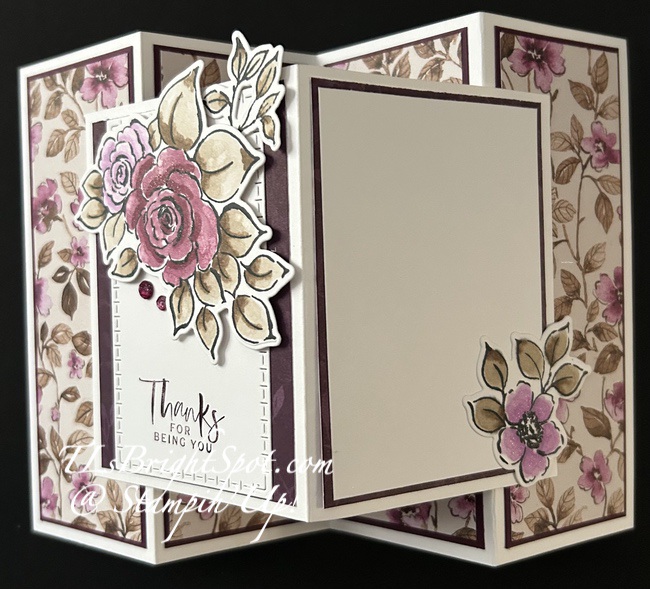
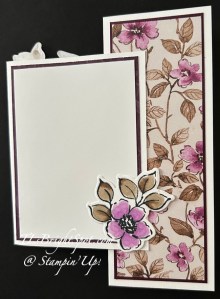
Hello, hello – It’s Saturday and an absolutely gorgeous day. I’m hoping to get some yard work done – yay! So… my cards for today are a fun fold and use the Charming Day bundle and it’s coordinating Designer Series Paper – Floral Charm 12×12. I really like how they turned out – hope you do as well. I’m going to share both cards and in the info at the bottom of the post I’ll list the different colors & embellishments, Stampin’ Blends – like that. The directions are exactly the same for both.
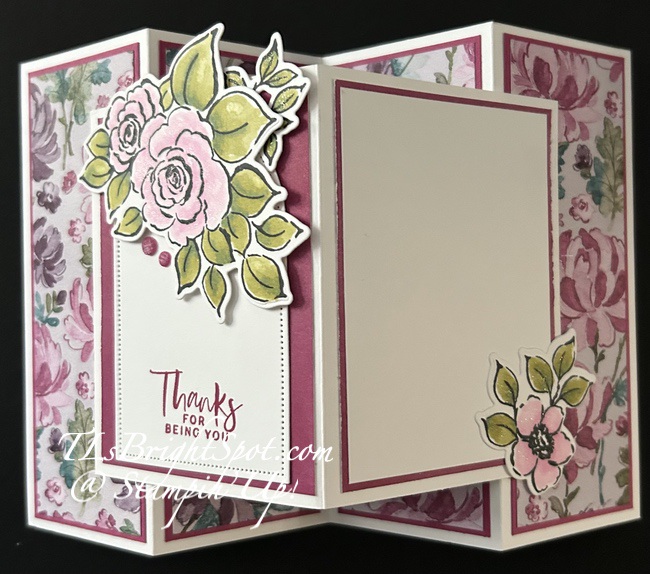
Card 1.Card 2
The card base is 8 1/2 x 5 1/2 scored at 2 1/8, 4 1/4 and 6 3/8. This creates four panels all the same width. Burnish these score lines mountain, valley, mountain. Decorate each panel with a card stock layer then a DSP layer: cs layer1 7/8 x 5 1/4 (cut 4); DSP layer1 3/4 x 5 1/8 (cut 4). When cutting the designer series paper, I make certain it’s a flow of the design that creates a picture. Set this aside and work on the front section.
The front… this card stock is cut 6 x 4 & scored at 3, creating two even sections. Burnish score line. Decorate both with a coordinating DSP layer 2 3/4 x 3 3/4. The left section is the side with the added layers of decoration while the right is used for your written message. The section on the right, add a Basic White piece cut 2 5/8 x 3 5/8. Let’s work on further decorating these two sections.
Stamp the large floral image using the Charming Day stamp set with Memento ink, stamping two images. Also stamp the small leaf image two times.
Color w/ Stampin’ Blends:
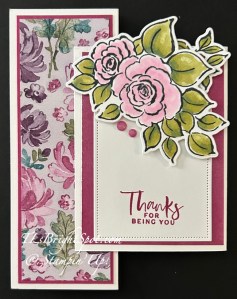
Card 1 – Blackberry Bliss & Fresh Freesia for the flowers; Light Crumb Cake & SU 300 on the leaves. I used these colors to coordinate with the background DSP. I added Wink of Stella to the flowers, die cut the image and set aside. Color one of the small leaf images using the same colors, die cut & set aside.
Stamp the small flower w/ leaves from the Charming Day stamp set – stamping twice in Memento ink.
For card 1 – color the flower in Fresh Freesia Stampin’ Blends, and the leaves in Light Crumb cake & SU! 300. Add Wink of Stella to the flower. Die cut & set aside.
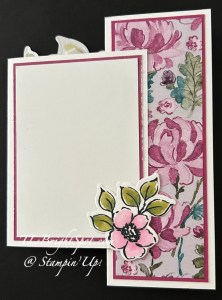
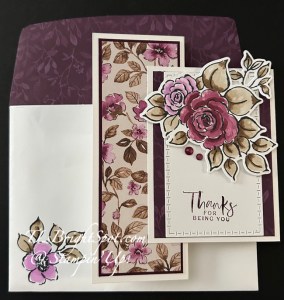
Card 2 – large floral image: Bubble Bath for the flowers, Light Old Olive and Light Pretty Peacock for the leaves. TIP: for the leaf color combination I colored one leaf with both colors before moving on to the next leaf. This way the inks were still wet and blended really well. Add Wink of Stella to the flowers, die cut & set aside. Color the 2nd small leaf image using the same comb & same combination of Light Old olive & Light Pretty Peacock, die cut & set aside. Remember the tip of coloring one leaf at a time!
Card 2 – small floral image: color flower with Bubble Bath & leaves in same combination of Light Old Olive & Light Pretty Peacock – and remember the tip… add Wink of Stella to the flower, die cut & set aside.
Attach front panels to each card:
With the larger card base folded on itself, add the front section. I used my grid paper to make certain the finished card was no wider than 4 1/4″, so it would fit in the standard A2 envelope. Adhere one side down, then the other side.
Add extras… Card 1 – I used Everyday Arches Dies to cut a Basic White piece to make the flowers stand out and adhered. The large floral bouqwuet was attached w/ dimensionals and the small leaf spray was added with liquid glue. I stamped the sentiment from Charming Day stamp set in Blackberry Bliss ink, then added two Purple Fine Shimmer Gems. For the other side of this card, I added the small single flower w/ leaves w/ liquid glue.
Card 2 was done in the very same fashion – except that I used Textured Notes Dies for the Basic White panel, Berry Burst ink for the sentiment and Charming Shimmer Faceted Dots for added embellishment.
Envelope… Coordinating DSP on flaps were added & trimmed to fit. On the front O stamped that sweet small flower and colored each as described above for the individual card. Creating two cards at once was really easy & fun as well. Same layout just different colors.
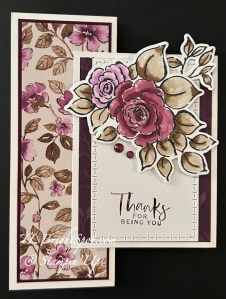
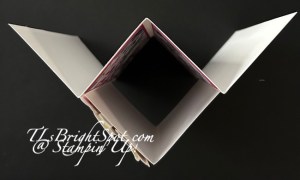
This is what the card looks like from the top. It stand beautifully for display.
Questions about how to make this card? Connect with me… but I think you will find this a pretty easy card to make. This design/ layout would make a great masculine card – in other DSP patterns & different bundle of course. It would also make a fabulous Christmas card.
Ok – so what’s next… how about purchasing SU! products – need to do that? Stampin’ Up! has kits available for purchase, ONLINE EXCLUSIVES, a Sep-Dec 2025 Mini Catalog full of SU! products – and of course the 2025-2026 Annual Catalog. If you’re looking for a demonstrator – I would be happy to support your crafty needs. Shop with me here.
When shopping with me, I like to thank my customers with a tutorial of the month and Daisy Patch points when the order is $50 or above (before tax & shipping). And being a demonstrator also has it’s benefits: team work, support, pre-ordering new items, at least 20% off every order, plus attending workshops & conventions! Join with me here!
Thanks for stopping by. May you have a beautiful day. Make someone happy by sending them a handmade card filled with ❤️


![Ornamental Christmas Bundle (English) [ 166001 ]](https://assets1.tamsnetwork.com/images/EC042017NF/166001s.jpg "Ornamental Christmas Bundle (English) [ 166001 ]")
![Season Of Elegance 12" X 12" (30.5 X 30.5 Cm) Specialty Designer Series Paper [ 164144 ]](https://assets1.tamsnetwork.com/images/EC042017NF/164144s.jpg "Season Of Elegance 12\" X 12\" (30.5 X 30.5 Cm) Specialty Designer Series Paper [ 164144 ]")
![Gold Foil Sheets [ 132622 ]](https://assets1.tamsnetwork.com/images/EC042017NF/132622s.jpg "Gold Foil Sheets [ 132622 ]")
![Gold Striped 3/8" (1 Cm) Mesh Ribbon [ 165599 ]](https://assets1.tamsnetwork.com/images/EC042017NF/165599s.jpg "Gold Striped 3/8\" (1 Cm) Mesh Ribbon [ 165599 ]")
![Forever Plaid 3 D Embossing Folder [ 164049 ]](https://assets1.tamsnetwork.com/images/EC042017NF/164049s.jpg "Forever Plaid 3 D Embossing Folder [ 164049 ]")
![Iridescent Foil Gems [ 162842 ]](https://assets1.tamsnetwork.com/images/EC042017NF/162842s.jpg "Iridescent Foil Gems [ 162842 ]")
![Christmas Words Collage Hybrid Embossing Folder (English) [ 165912 ]](https://assets1.tamsnetwork.com/images/EC042017NF/165912s.jpg "Christmas Words Collage Hybrid Embossing Folder (English) [ 165912 ]")
![Pretty Peacock 8-1/2" X 11" Cardstock [ 150880 ]](https://assets1.tamsnetwork.com/images/EC042017NF/150880s.jpg "Pretty Peacock 8-1/2\" X 11\" Cardstock [ 150880 ]")
![Basic Beige 8 1/2" X 11" Cardstock [ 164511 ]](https://assets1.tamsnetwork.com/images/EC042017NF/164511s.jpg "Basic Beige 8 1/2\" X 11\" Cardstock [ 164511 ]")
![Cherry Cobbler 8-1/2" X 11" Cardstock [ 119685 ]](https://assets1.tamsnetwork.com/images/EC042017NF/119685s.jpg "Cherry Cobbler 8-1/2\" X 11\" Cardstock [ 119685 ]")
![Mossy Meadow 8-1/2" X 11" Cardstock [ 133676 ]](https://assets1.tamsnetwork.com/images/EC042017NF/133676s.jpg "Mossy Meadow 8-1/2\" X 11\" Cardstock [ 133676 ]")
![Basic White 8 1/2" X 11" Cardstock [ 166780 ]](https://assets1.tamsnetwork.com/images/EC042017NF/166780s.jpg "Basic White 8 1/2\" X 11\" Cardstock [ 166780 ]")
![Tuxedo Black Memento Ink Pad [ 132708 ]](https://assets1.tamsnetwork.com/images/EC042017NF/132708s.jpg "Tuxedo Black Memento Ink Pad [ 132708 ]")
![Basic White Medium Envelopes [ 159236 ]](https://assets1.tamsnetwork.com/images/EC042017NF/159236s.jpg "Basic White Medium Envelopes [ 159236 ]")
![Stampin' Cut & Emboss Machine [ 149653 ]](https://assets1.tamsnetwork.com/images/EC042017NF/149653s.jpg "Stampin' Cut & Emboss Machine [ 149653 ]")
![Clear Wink Of Stella Glitter Brush [ 141897 ]](https://assets1.tamsnetwork.com/images/EC042017NF/141897s.jpg "Clear Wink Of Stella Glitter Brush [ 141897 ]")
![Paper Trimmer [ 152392 ]](https://assets1.tamsnetwork.com/images/EC042017NF/152392s.jpg "Paper Trimmer [ 152392 ]")
![Stampin' Dimensionals [ 104430 ]](https://assets1.tamsnetwork.com/images/EC042017NF/104430s.jpg "Stampin' Dimensionals [ 104430 ]")
![Multipurpose Liquid Glue [ 110755 ]](https://assets1.tamsnetwork.com/images/EC042017NF/110755s.jpg "Multipurpose Liquid Glue [ 110755 ]")
![Mini Glue Dots [ 103683 ]](https://assets1.tamsnetwork.com/images/EC042017NF/103683s.jpg "Mini Glue Dots [ 103683 ]")
![Paper Snips [ 103579 ]](https://assets1.tamsnetwork.com/images/EC042017NF/103579s.jpg "Paper Snips [ 103579 ]")
![Take Your Pick [ 144107 ]](https://assets1.tamsnetwork.com/images/EC042017NF/144107s.jpg "Take Your Pick [ 144107 ]")


![Peaceful Garden 12" X 12" (30.5 X 30.5 Cm) Designer Series Paper [ 165917 ]](https://assets1.tamsnetwork.com/images/EC042017NF/165917s.jpg "Peaceful Garden 12\" X 12\" (30.5 X 30.5 Cm) Designer Series Paper [ 165917 ]")
![Peaceful Garden 12" X 12" (30.5 X 30.5 Cm) Glimmer Paper [ 165929 ]](https://assets1.tamsnetwork.com/images/EC042017NF/165929s.jpg "Peaceful Garden 12\" X 12\" (30.5 X 30.5 Cm) Glimmer Paper [ 165929 ]")
![Peace On Earth Bundle (English) [ 165925 ]](https://assets1.tamsnetwork.com/images/EC042017NF/165925s.jpg "Peace On Earth Bundle (English) [ 165925 ]")
![Silver 12" X 12" (30.5 X 30.5 Cm) Foil Sheets [ 163387 ]](https://assets1.tamsnetwork.com/images/EC042017NF/163387s.jpg "Silver 12\" X 12\" (30.5 X 30.5 Cm) Foil Sheets [ 163387 ]")
![Secret Sea 8 1/2" X 11" Cardstock [ 165624 ]](https://assets1.tamsnetwork.com/images/EC042017NF/165624s.jpg "Secret Sea 8 1/2\" X 11\" Cardstock [ 165624 ]")
![Misty Moonlight Stampin' Blends Combo Pack [ 153108 ]](https://assets1.tamsnetwork.com/images/EC042017NF/153108s.jpg "Misty Moonlight Stampin' Blends Combo Pack [ 153108 ]")
![Cloud Cover Classic Stampin' Ink Refill [ 165279 ]](https://assets1.tamsnetwork.com/images/EC042017NF/165279s.jpg "Cloud Cover Classic Stampin' Ink Refill [ 165279 ]")
![Sponge Daubers [ 133773 ]](https://assets1.tamsnetwork.com/images/EC042017NF/133773s.jpg "Sponge Daubers [ 133773 ]")


![Love & Courage Cling Stamp Set (English) [ 165935 ]](https://assets1.tamsnetwork.com/images/EC042017NF/165935s.jpg "Love & Courage Cling Stamp Set (English) [ 165935 ]")
![Pretty In Pink Classic Stampin Pad [ 163807 ]](https://assets1.tamsnetwork.com/images/EC042017NF/163807s.jpg "Pretty In Pink Classic Stampin Pad [ 163807 ]")
![Strawberry Slush & Pretty In Pink Gems [ 165615 ]](https://assets1.tamsnetwork.com/images/EC042017NF/165615s.jpg "Strawberry Slush & Pretty In Pink Gems [ 165615 ]")
![Subtles 6" X 6" (15.2 X 15.2 Cm) Designer Series Paper [ 163776 ]](https://assets1.tamsnetwork.com/images/EC042017NF/163776s.jpg "Subtles 6\" X 6\" (15.2 X 15.2 Cm) Designer Series Paper [ 163776 ]")
![Strawberry Slush Classic Stampin' Pad [ 165286 ]](https://assets1.tamsnetwork.com/images/EC042017NF/165286s.jpg "Strawberry Slush Classic Stampin' Pad [ 165286 ]")
![2025–2027 In Color™ 6" X 6" (15.2 X 15.2 Cm) Designer Series Paper [ 165300 ]](https://assets1.tamsnetwork.com/images/EC042017NF/165300s.jpg "2025–2027 In Color™ 6\" X 6\" (15.2 X 15.2 Cm) Designer Series Paper [ 165300 ]")
![Strawberry Slush 3/8" (1 Cm) Faux Linen Ribbon [ 165274 ]](https://assets1.tamsnetwork.com/images/EC042017NF/165274s.jpg "Strawberry Slush 3/8\" (1 Cm) Faux Linen Ribbon [ 165274 ]")
![Stitched Shapes Dies [ 145372 ] (Retired)](https://assets1.tamsnetwork.com/images/EC042017NF/145372s.jpg "Stitched Shapes Dies [ 145372 ] (Retired)")
![Basic White 8 1/2" X 11" Thick Cardstock [ 159229 ]](https://assets1.tamsnetwork.com/images/EC042017NF/159229s.jpg "Basic White 8 1/2\" X 11\" Thick Cardstock [ 159229 ]")

![Merry Christmas Photopolymer Stamp Set (English) [ 165831 ]](https://assets1.tamsnetwork.com/images/EC042017NF/165831s.jpg "Merry Christmas Photopolymer Stamp Set (English) [ 165831 ]")
![Gift Of Joy Photopolymer Stamp Set (English) [ 165964 ]](https://assets1.tamsnetwork.com/images/EC042017NF/165964s.jpg "Gift Of Joy Photopolymer Stamp Set (English) [ 165964 ]")
![Branching Out Bundle (English) [ 165776 ]](https://assets1.tamsnetwork.com/images/EC042017NF/165776s.jpg "Branching Out Bundle (English) [ 165776 ]")
![Winter Meadow 12" X 12" (30.5 X 30.5 Cm) Designer Series Paper [ 162133 ]](https://assets1.tamsnetwork.com/images/EC042017NF/162133s.jpg "Winter Meadow 12\" X 12\" (30.5 X 30.5 Cm) Designer Series Paper [ 162133 ]")
![Shaded Spruce 8-1/2" X 11" Cardstock [ 146981 ]](https://assets1.tamsnetwork.com/images/EC042017NF/146981s.jpg "Shaded Spruce 8-1/2\" X 11\" Cardstock [ 146981 ]")
![Blueberry Bushel 8-1/2" X 11" Cardstock [ 146968 ]](https://assets1.tamsnetwork.com/images/EC042017NF/146968s.jpg "Blueberry Bushel 8-1/2\" X 11\" Cardstock [ 146968 ]")
![Misty Moonlight 8-1/2" X 11" Cardstock [ 153081 ]](https://assets1.tamsnetwork.com/images/EC042017NF/153081s.jpg "Misty Moonlight 8-1/2\" X 11\" Cardstock [ 153081 ]")
![Real Red 8-1/2" X 11" Cardstock [ 102482 ]](https://assets1.tamsnetwork.com/images/EC042017NF/102482s.jpg "Real Red 8-1/2\" X 11\" Cardstock [ 102482 ]")
![Misty Moonlight Classic Stampin' Pad [ 153118 ]](https://assets1.tamsnetwork.com/images/EC042017NF/153118s.jpg "Misty Moonlight Classic Stampin' Pad [ 153118 ]")
![Blueberry Bushel Classic Stampin' Pad [ 147138 ]](https://assets1.tamsnetwork.com/images/EC042017NF/147138s.jpg "Blueberry Bushel Classic Stampin' Pad [ 147138 ]")
![Traditional Sparkling Sequins [ 165875 ]](https://assets1.tamsnetwork.com/images/EC042017NF/165875s.jpg "Traditional Sparkling Sequins [ 165875 ]")
![Shades Of Green Hexagons [ 165233 ]](https://assets1.tamsnetwork.com/images/EC042017NF/165233s.jpg "Shades Of Green Hexagons [ 165233 ]")
![Faceted Snowflakes [ 166077 ]](https://assets1.tamsnetwork.com/images/EC042017NF/166077s.jpg "Faceted Snowflakes [ 166077 ]")


![Paper Pumpkin Subscription [ 166815 ]](https://assets1.tamsnetwork.com/images/EC042017NF/166815s.jpg "Paper Pumpkin Subscription [ 166815 ]")
![Autumn Toile 12" X 12" (30.5 X 30.5 Cm) Designer Series Paper [ 165882 ]](https://assets1.tamsnetwork.com/images/EC042017NF/165882s.jpg "Autumn Toile 12\" X 12\" (30.5 X 30.5 Cm) Designer Series Paper [ 165882 ]")
![Country Woods 12" X 12" (30.5 X 30.5 Cm) Designer Series Paper [ 163393 ]](https://assets1.tamsnetwork.com/images/EC042017NF/163393s.jpg "Country Woods 12\" X 12\" (30.5 X 30.5 Cm) Designer Series Paper [ 163393 ]")
![Gathering Together 12" X 12" (30.5 X 30.5 Cm) Specialty Designer Series Paper [ 165969 ]](https://assets1.tamsnetwork.com/images/EC042017NF/165969s.jpg "Gathering Together 12\" X 12\" (30.5 X 30.5 Cm) Specialty Designer Series Paper [ 165969 ]")
![Early Espresso 8-1/2" X 11" Cardstock [ 119686 ]](https://assets1.tamsnetwork.com/images/EC042017NF/119686s.jpg "Early Espresso 8-1/2\" X 11\" Cardstock [ 119686 ]")
![Linen Thread [ 104199 ]](https://assets1.tamsnetwork.com/images/EC042017NF/104199s.jpg "Linen Thread [ 104199 ]")


![Snowflake Kisses Bundle (English) [ 166023 ]](https://assets1.tamsnetwork.com/images/EC042017NF/166023s.jpg "Snowflake Kisses Bundle (English) [ 166023 ]")
![Peaceful Garden Designer Series Paper & Sticker Sheet (English) [ 167363 ]](https://assets1.tamsnetwork.com/images/EC042017NF/167363s.jpg "Peaceful Garden Designer Series Paper & Sticker Sheet (English) [ 167363 ]")
![Cloud Cover 8 1/2" X 11" Cardstock [ 165621 ]](https://assets1.tamsnetwork.com/images/EC042017NF/165621s.jpg "Cloud Cover 8 1/2\" X 11\" Cardstock [ 165621 ]")
![Azure Afternoon 8 1/2" X 11" Cardstock [ 161719 ]](https://assets1.tamsnetwork.com/images/EC042017NF/161719s.jpg "Azure Afternoon 8 1/2\" X 11\" Cardstock [ 161719 ]")
![Misty Moonlight & Silver Edged 1/2" (1.3 Cm) Ribbon [ 165931 ]](https://assets1.tamsnetwork.com/images/EC042017NF/165931s.jpg "Misty Moonlight & Silver Edged 1/2\" (1.3 Cm) Ribbon [ 165931 ]")
![Azure Afternoon Stampin’ Blends Combo Pack [ 161672 ]](https://assets1.tamsnetwork.com/images/EC042017NF/161672s.jpg "Azure Afternoon Stampin’ Blends Combo Pack [ 161672 ]")


![Charming Day Bundle (English) [ 166136 ]](https://assets1.tamsnetwork.com/images/EC042017NF/166136s.jpg "Charming Day Bundle (English) [ 166136 ]")
![Floral Charm 12" X 12" (30.5 X 30.5 Cm) Designer Series Paper [ 166125 ]](https://assets1.tamsnetwork.com/images/EC042017NF/166125s.jpg "Floral Charm 12\" X 12\" (30.5 X 30.5 Cm) Designer Series Paper [ 166125 ]")
![Charming Shimmer Faceted Dots [ 166139 ]](https://assets1.tamsnetwork.com/images/EC042017NF/166139s.jpg "Charming Shimmer Faceted Dots [ 166139 ]")
![Floral Charm Suite Collection (English) [ 166141 ]](https://assets1.tamsnetwork.com/images/EC042017NF/166141s.jpg "Floral Charm Suite Collection (English) [ 166141 ]")
![Purple Fine Shimmer Gems [ 162611 ]](https://assets1.tamsnetwork.com/images/EC042017NF/162611s.jpg "Purple Fine Shimmer Gems [ 162611 ]")
![Everyday Arches Dies [ 164629 ]](https://assets1.tamsnetwork.com/images/EC042017NF/164629s.jpg "Everyday Arches Dies [ 164629 ]")
![Textured Notes Dies [ 165555 ]](https://assets1.tamsnetwork.com/images/EC042017NF/165555s.jpg "Textured Notes Dies [ 165555 ]")
![Blackberry Bliss 8-1/2" X 11" Cardstock [ 133675 ]](https://assets1.tamsnetwork.com/images/EC042017NF/133675s.jpg "Blackberry Bliss 8-1/2\" X 11\" Cardstock [ 133675 ]")
![Berry Burst 8-1/2" X 11" Cardstock [ 144243 ]](https://assets1.tamsnetwork.com/images/EC042017NF/144243s.jpg "Berry Burst 8-1/2\" X 11\" Cardstock [ 144243 ]")
![Blackberry Bliss Classic Stampin' Pad [ 147092 ]](https://assets1.tamsnetwork.com/images/EC042017NF/147092s.jpg "Blackberry Bliss Classic Stampin' Pad [ 147092 ]")
![Berry Burst Classic Stampin' Pad [ 147143 ]](https://assets1.tamsnetwork.com/images/EC042017NF/147143s.jpg "Berry Burst Classic Stampin' Pad [ 147143 ]")
![Crumb Cake Stampin' Blends Combo Pack [ 154882 ]](https://assets1.tamsnetwork.com/images/EC042017NF/154882s.jpg "Crumb Cake Stampin' Blends Combo Pack [ 154882 ]")
![Fresh Freesia Stampin' Blends Combo Pack [ 155518 ]](https://assets1.tamsnetwork.com/images/EC042017NF/155518s.jpg "Fresh Freesia Stampin' Blends Combo Pack [ 155518 ]")
![Blackberry Bliss Stampin' Blends Combo Pack [ 154877 ]](https://assets1.tamsnetwork.com/images/EC042017NF/154877s.jpg "Blackberry Bliss Stampin' Blends Combo Pack [ 154877 ]")
![Bubble Bath Stampin’ Blends Combo Pack [ 161675 ]](https://assets1.tamsnetwork.com/images/EC042017NF/161675s.jpg "Bubble Bath Stampin’ Blends Combo Pack [ 161675 ]")
![Old Olive Stampin' Blends Combo Pack [ 154892 ]](https://assets1.tamsnetwork.com/images/EC042017NF/154892s.jpg "Old Olive Stampin' Blends Combo Pack [ 154892 ]")
![Pretty Peacock Stampin’ Blends Combo Pack [ 161676 ]](https://assets1.tamsnetwork.com/images/EC042017NF/161676s.jpg "Pretty Peacock Stampin’ Blends Combo Pack [ 161676 ]")
![Stampin’ Blends Medium Combo [ 159462 ]](https://assets1.tamsnetwork.com/images/EC042017NF/159462s.jpg "Stampin’ Blends Medium Combo [ 159462 ]")
![Stampin' Blends Color Lifter [ 144608 ]](https://assets1.tamsnetwork.com/images/EC042017NF/144608s.jpg "Stampin' Blends Color Lifter [ 144608 ]")
