
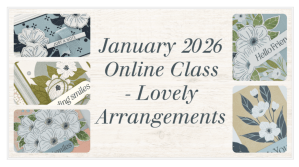
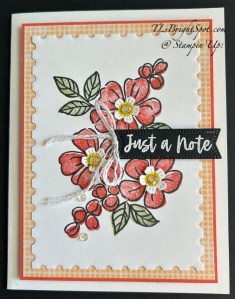
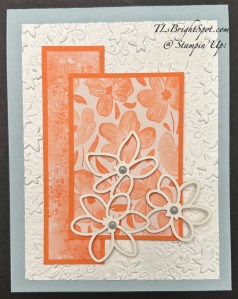
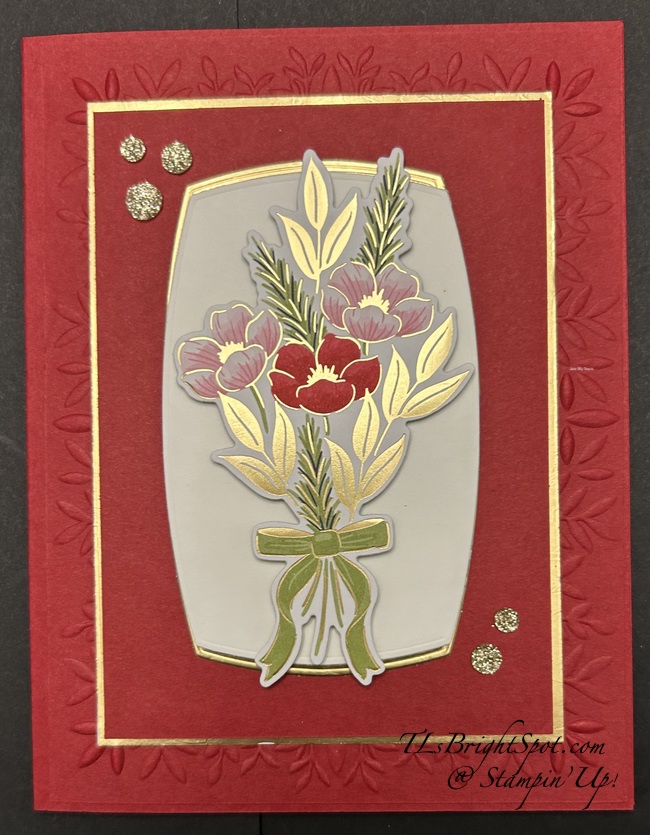
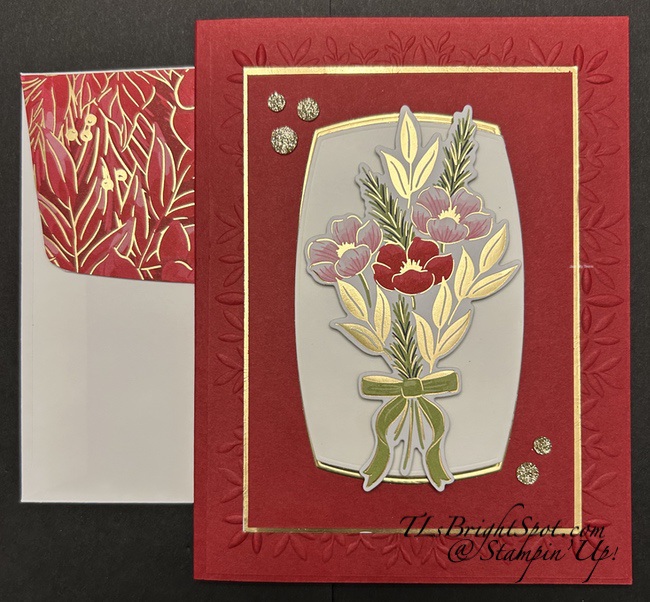
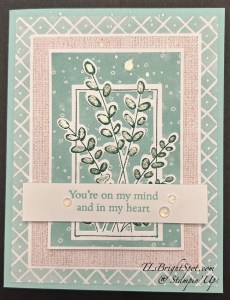
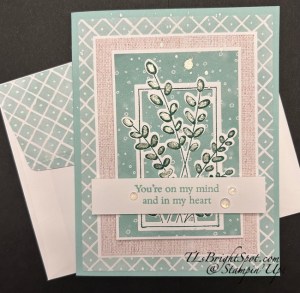
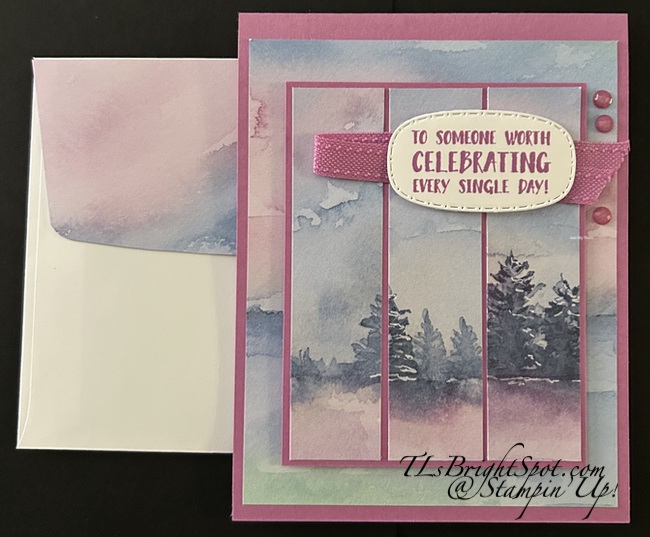
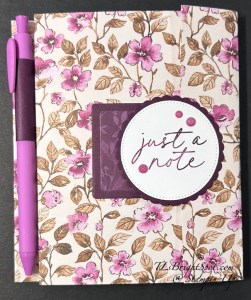
Today is card class and we are making a fun & easy double flap card. I’m always watching card videos and this idea came from those many views. I’m using one of my favorite floral bundles to make this card – Petals of Beauty, an ONLINE EXCLUSIVE bundle released in November.
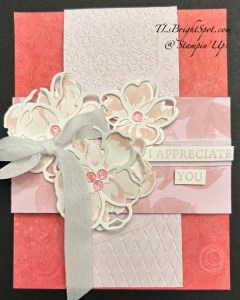
Are those stamped & die cut florals gorgeous or what! And, stamped in Bubble Bath ink is just so soft and delicate, and that overlay in Basic White just adds to the charm. The card base is Strawberry Slush 4 1/4 x 11 scored at 5 1/2. I then trimmed 1″ from each side of the card front, (cutting it to the score line) & removing those pieces. This allows us to see the beauty of the DSP underneath – Mixed Up Patterns, also an ONLINE EXCLUSIVE item. Before adding DSP panels we need that extra flap that folds over (this holds the flower die cuts & sentiment). This panel can really be any width, but because of the large flowers this panel is 2 1/4 x 6, then scored at one end at 4 1/4. This will be attached to the card base, centering it so the scorer line is at the right edge of the card base.Now add a panel of DSP 4 1/4 x 5 1/2. Here I used a Strawberry Slush pattern from this delicious Mixed Up Patterns paper. Now we decorate!
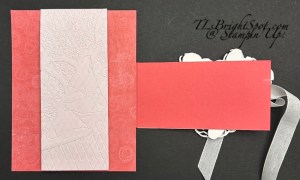
Cut a piece of coordinating DSP (here I chose a Bubble Bath pattern from Mixed Up Patterns 12×12 pack) 2 1/4 x 5 1/2. I embossed this panel prior to adhering it, using the Kintsugi Embossing folder, then attached it to that upper flap. For the side flap I cut a panel of Bubble Bath 2 1/4 x 4 1/4 and stamped it using the Petals of Beauty stamp set and stamped the leaves.. I wrapped this with a 1/2″ Basic White Woven Ribbon from the Everyday Skies suite collection, also an ONLINE EXCLUSIVE. I love this ribbon! It ties bows so beautifully. Once that ribbon was in place around the Bubble Bath stamped panel, I adhered it to that other front flap. I stamped the flowers from Petals of Beauty in Bubble Bath ink on Basic White. This is a two-step stamp: the outline stamp and the filler stamp (that’s what I call it anyway). The outline stamp is full strength Bubble Bath; the filler stamp is stamped off once Bubble Bath. I die cut these from the Petal of Beauty Dies, then die cut the ‘overlay’ from Basic White – two large flowers and one smaller one. I stamped my sentiment in Bubble Bath ink and cut it apart, putting both portions on dimensionals and added them to this ribboned panel. Then I placed my flowers, putting dimensionals on those as well. Final touch… Strawberry Slush & Pretty in Pink Gems, another ONLINE EXCLUSIVE.
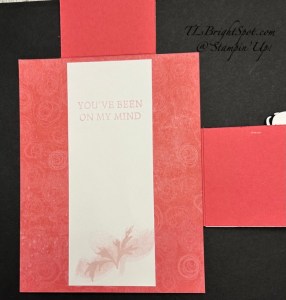
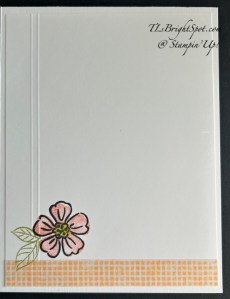
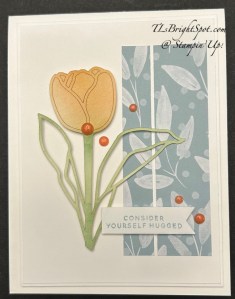
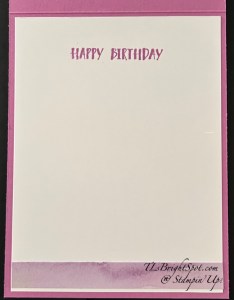
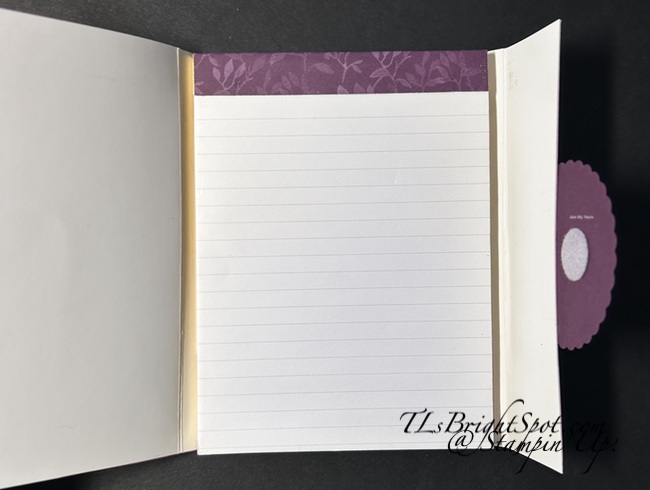
The inside panel is 2 x 5 1/4 stamped in Bubble Bath ink. The sentiment if from Words of Beauty, a coordinating stamp set in the Suite Collection. The leaves at the bottom are the same as on the front flap: stamped in Bubble Bath ink.
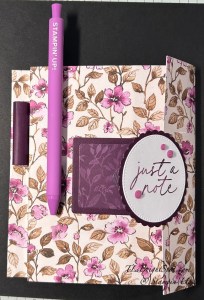
Completed card once more…
Want to purchase the products to make this card? See info below. And remember… now is REDEMPTION time for those coupons you earned!!! Don’t lose them. You have until the end of February to redeem thos coupons – or… you can give them to a teammate. How cool is that gift?!

Redemption Period: February 3–28, 2026There is no limit to the number of coupon codes you can redeem on an order during the redemption period. If you’re redeeming multiple codes, you must put a space between each code.
You may only redeem coupon codes one time. You cannot redeem them after February 28.
You can redeem Bonus Days coupon codes for month-to-month Paper Pumpkin subscriptions and new prepaid subscriptions.
Some restrictions apply. Coupons can’t be redeemed towards Starter Kits and you cannot use them on exchanges.
Redemption period ends: February 28, 2026, at 11:59 p.m. (MT)
This is my birth month – February – and with that in mind and all the awesome SU! promotions, I’m also offering Daisy Birthday Bash Bonuses …For all orders of $50 or greater (before shipping and taxes and after coupons) placed through me between now and Saturday, February 14, you’ll get your choice of a free adhesive! This can be anything that Stampin’ Up! sells that could be used as an adhesive! And for the adhesives that are $5 or under, two packs will equal one choice (see the items with the (2) on the list below) so if you select those, you’ll get double!!
Here is a list of the adhesives to choose:Adhesive Sheets – 152334
Multipurpose Liquid Glue – 110755
Mini Glue Dots – 103683
Tear & Tape Adhesive – 154031
Stampin’ Seal – 152813
Stampin’ Seal Refill – 152814
Stampin’ Seal + – 149699
Stampin’ Seal + Refill – 152812
Fine-Tip Glue Pen – 138309
Foam Adhesive Strips – 141825
Stampin’ Dimensionals (2) – 104430
Mini Stampin’ Dimensionals (2) – 144108
Black Stampin’ Dimensionals Combo Pack – 150893
Foam Adhesive Sheets – 152815
Silicone Craft Sheet– 127853 (although it’s not an adhesive, it’s one of my favorite tools for keeping my surface clean & free of ‘sticky’)
I’ll be placing the order the following Monday, that’s Feb 16, so be sure to let me know your item of choice – or… I’ll pick one for you 🥴 With Stampin’ Up!’s backorder policy where numbers are turned off for ordering if they go on backorder, if the adhesive that you pick is turned off for ordering when I place the order on the 16th, I’ll order Stampin’ Dimensionals for you instead. Deal?
You can place that order right here!
Here are the details about the JOINING PROMOTION…

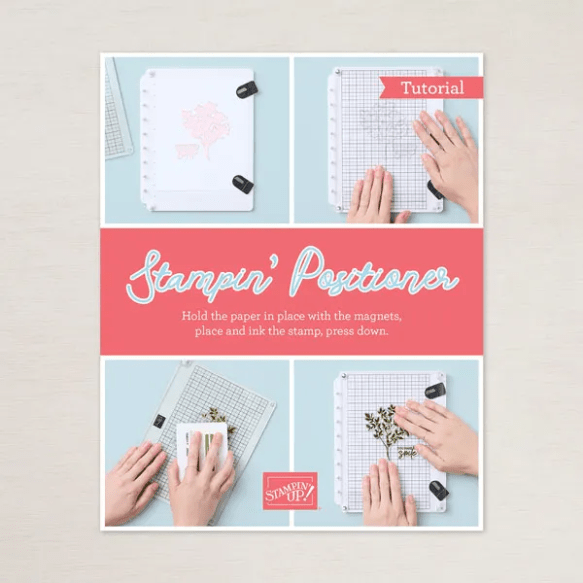
- New team members who purchase their Starter Kit February 3–March 2 will also receive our new Stampin’ Positioner*.
- New demonstrators who submit their Independent Demonstrator Agreement (IDA) before February 3 or after March 2 will not be eligible for this offer.
- Joining deadline: March 2, 2026, at 11:59 p.m. (MT)
Thanks for stopping by. May you have a beautiful day. Make someone happy by sending them a handmade card filled with ❤️
Product List![Petals Of Beauty Bundle (English) [ 167096 ]](https://assets1.tamsnetwork.com/images/EC042017NF/167096s.jpg "Petals Of Beauty Bundle (English) [ 167096 ]")
![Words Of Beauty Bundle (English) [ 167090 ]](https://assets1.tamsnetwork.com/images/EC042017NF/167090s.jpg "Words Of Beauty Bundle (English) [ 167090 ]")
![Mixed Up Patterns 12" X 12" (30.5 X 30.5 Cm) Mix In Designer Series Paper [ 166992 ]](https://assets1.tamsnetwork.com/images/EC042017NF/166992s.jpg "Mixed Up Patterns 12\" X 12\" (30.5 X 30.5 Cm) Mix In Designer Series Paper [ 166992 ]")
![Joined Together 3 D Embossing Folder [ 165170 ]](https://assets1.tamsnetwork.com/images/EC042017NF/165170s.jpg "Joined Together 3 D Embossing Folder [ 165170 ]")
![White 1/2" (1.3 Cm) Woven Ribbon [ 164634 ]](https://assets1.tamsnetwork.com/images/EC042017NF/164634s.jpg "White 1/2\" (1.3 Cm) Woven Ribbon [ 164634 ]")
![Strawberry Slush & Pretty In Pink Gems [ 165615 ]](https://assets1.tamsnetwork.com/images/EC042017NF/165615s.jpg "Strawberry Slush & Pretty In Pink Gems [ 165615 ]")
![Strawberry Slush 8 1/2" X 11" Cardstock [ 165625 ]](https://assets1.tamsnetwork.com/images/EC042017NF/165625s.jpg "Strawberry Slush 8 1/2\" X 11\" Cardstock [ 165625 ]")
![Bubble Bath 8 1/2" X 11" Cardstock [ 161718 ]](https://assets1.tamsnetwork.com/images/EC042017NF/161718s.jpg "Bubble Bath 8 1/2\" X 11\" Cardstock [ 161718 ]")
![Bubble Bath Classic Stampin' Pad [ 161664 ]](https://assets1.tamsnetwork.com/images/EC042017NF/161664s.jpg "Bubble Bath Classic Stampin' Pad [ 161664 ]")
![Basic White Medium Envelopes [ 159236 ]](https://assets1.tamsnetwork.com/images/EC042017NF/159236s.jpg "Basic White Medium Envelopes [ 159236 ]")
![Stampin' Cut & Emboss Machine [ 149653 ]](https://assets1.tamsnetwork.com/images/EC042017NF/149653s.jpg "Stampin' Cut & Emboss Machine [ 149653 ]")
![Paper Trimmer [ 152392 ]](https://assets1.tamsnetwork.com/images/EC042017NF/152392s.jpg "Paper Trimmer [ 152392 ]")
![Stampin' Dimensionals [ 104430 ]](https://assets1.tamsnetwork.com/images/EC042017NF/104430s.jpg "Stampin' Dimensionals [ 104430 ]")
![Multipurpose Liquid Glue [ 110755 ]](https://assets1.tamsnetwork.com/images/EC042017NF/110755s.jpg "Multipurpose Liquid Glue [ 110755 ]")
![Mini Glue Dots [ 103683 ]](https://assets1.tamsnetwork.com/images/EC042017NF/103683s.jpg "Mini Glue Dots [ 103683 ]")
![Paper Snips [ 103579 ]](https://assets1.tamsnetwork.com/images/EC042017NF/103579s.jpg "Paper Snips [ 103579 ]")
![Take Your Pick [ 144107 ]](https://assets1.tamsnetwork.com/images/EC042017NF/144107s.jpg "Take Your Pick [ 144107 ]")
![Clear Wink Of Stella Glitter Brush [ 141897 ]](https://assets1.tamsnetwork.com/images/EC042017NF/141897s.jpg "Clear Wink Of Stella Glitter Brush [ 141897 ]")


![Fragrant Layers Bundle (English) [ 167155 ]](https://assets1.tamsnetwork.com/images/EC042017NF/167155s.jpg "Fragrant Layers Bundle (English) [ 167155 ]")
![Lovely & Beautiful 12" X 12" (30.5 X 30.5 Cm) Specialty Designer Series Paper [ 166957 ]](https://assets1.tamsnetwork.com/images/EC042017NF/166957s.jpg "Lovely & Beautiful 12\" X 12\" (30.5 X 30.5 Cm) Specialty Designer Series Paper [ 166957 ]")
![Perennial Postage Dies [ 162607 ]](https://assets1.tamsnetwork.com/images/EC042017NF/162607s.jpg "Perennial Postage Dies [ 162607 ]")
![Calypso Coral 8-1/2" X 11" Cardstock [ 122925 ]](https://assets1.tamsnetwork.com/images/EC042017NF/122925s.jpg "Calypso Coral 8-1/2\" X 11\" Cardstock [ 122925 ]")
![Basic White 8 1/2" X 11" Thick Cardstock [ 159229 ]](https://assets1.tamsnetwork.com/images/EC042017NF/159229s.jpg "Basic White 8 1/2\" X 11\" Thick Cardstock [ 159229 ]")
![Basic Black 8-1/2" X 11" Cardstock [ 121045 ]](https://assets1.tamsnetwork.com/images/EC042017NF/121045s.jpg "Basic Black 8-1/2\" X 11\" Cardstock [ 121045 ]")
![Old Olive Classic Stampin' Pad [ 147090 ]](https://assets1.tamsnetwork.com/images/EC042017NF/147090s.jpg "Old Olive Classic Stampin' Pad [ 147090 ]")
![Calypso Coral Classic Stampin' Pad [ 147101 ]](https://assets1.tamsnetwork.com/images/EC042017NF/147101s.jpg "Calypso Coral Classic Stampin' Pad [ 147101 ]")
![Tuxedo Black Memento Ink Pad [ 132708 ]](https://assets1.tamsnetwork.com/images/EC042017NF/132708s.jpg "Tuxedo Black Memento Ink Pad [ 132708 ]")
![Iridescent Foil Gems [ 162842 ]](https://assets1.tamsnetwork.com/images/EC042017NF/162842s.jpg "Iridescent Foil Gems [ 162842 ]")
![Baker's Twine Essentials Pack [ 155475 ]](https://assets1.tamsnetwork.com/images/EC042017NF/155475s.jpg "Baker's Twine Essentials Pack [ 155475 ]")
![Basics Wow! Embossing Powder [ 165679 ]](https://assets1.tamsnetwork.com/images/EC042017NF/165679s.jpg "Basics Wow! Embossing Powder [ 165679 ]")
![Embossing Additions Tool Kit [ 159971 ]](https://assets1.tamsnetwork.com/images/EC042017NF/159971s.jpg "Embossing Additions Tool Kit [ 159971 ]")
![Versamark Pad [ 102283 ]](https://assets1.tamsnetwork.com/images/EC042017NF/102283s.jpg "Versamark Pad [ 102283 ]")
![Basic White 8 1/2" X 11" Cardstock [ 166780 ]](https://assets1.tamsnetwork.com/images/EC042017NF/166780s.jpg "Basic White 8 1/2\" X 11\" Cardstock [ 166780 ]")


![Brushed With Beauty 12" X 12" (30.5 X 30.5 Cm) Designer Series Paper [ 167082 ]](https://assets1.tamsnetwork.com/images/EC042017NF/167082s.jpg "Brushed With Beauty 12\" X 12\" (30.5 X 30.5 Cm) Designer Series Paper [ 167082 ]")
![Beautifully Celebrated Bundle (English) [ 166975 ]](https://assets1.tamsnetwork.com/images/EC042017NF/166975s.jpg "Beautifully Celebrated Bundle (English) [ 166975 ]")
![Crumb Cake Classic Stampin' Pad [ 147116 ]](https://assets1.tamsnetwork.com/images/EC042017NF/147116s.jpg "Crumb Cake Classic Stampin' Pad [ 147116 ]")
![Crumb Cake 8-1/2" X 11" Cardstock [ 120953 ]](https://assets1.tamsnetwork.com/images/EC042017NF/120953s.jpg "Crumb Cake 8-1/2\" X 11\" Cardstock [ 120953 ]")
![Mossy Meadow 8-1/2" X 11" Cardstock [ 133676 ]](https://assets1.tamsnetwork.com/images/EC042017NF/133676s.jpg "Mossy Meadow 8-1/2\" X 11\" Cardstock [ 133676 ]")
![Pressed Flower Motifs [ 165215 ]](https://assets1.tamsnetwork.com/images/EC042017NF/165215s.jpg "Pressed Flower Motifs [ 165215 ]")
![Very Vanilla 8 1/2" X 11" Cardstock [ 166784 ]](https://assets1.tamsnetwork.com/images/EC042017NF/166784s.jpg "Very Vanilla 8 1/2\" X 11\" Cardstock [ 166784 ]")
![Very Vanilla Medium Envelopes [ 107300 ]](https://assets1.tamsnetwork.com/images/EC042017NF/107300s.jpg "Very Vanilla Medium Envelopes [ 107300 ]")


![Covered In Flowers Accents [ 167197 ]](https://assets1.tamsnetwork.com/images/EC042017NF/167197s.jpg "Covered In Flowers Accents [ 167197 ]")
![Prayers & Promises Photopolymer Stamp Set (English) [ 167014 ]](https://assets1.tamsnetwork.com/images/EC042017NF/167014s.jpg "Prayers & Promises Photopolymer Stamp Set (English) [ 167014 ]")
![Banner Sayings Bundle (English) [ 167051 ]](https://assets1.tamsnetwork.com/images/EC042017NF/167051s.jpg "Banner Sayings Bundle (English) [ 167051 ]")
![Lovely Stripes 3 D Embossing Folder [ 167179 ]](https://assets1.tamsnetwork.com/images/EC042017NF/167179s.jpg "Lovely Stripes 3 D Embossing Folder [ 167179 ]")
![Stone & Vine 3 D Embossing Folder [ 166990 ]](https://assets1.tamsnetwork.com/images/EC042017NF/166990s.jpg "Stone & Vine 3 D Embossing Folder [ 166990 ]")
![2025–2027 In Color™ 6" X 6" (15.2 X 15.2 Cm) Designer Series Paper [ 165300 ]](https://assets1.tamsnetwork.com/images/EC042017NF/165300s.jpg "2025–2027 In Color™ 6\" X 6\" (15.2 X 15.2 Cm) Designer Series Paper [ 165300 ]")
![2025–2027 In Color™ Flat Pearls [ 165192 ]](https://assets1.tamsnetwork.com/images/EC042017NF/165192s.jpg "2025–2027 In Color™ Flat Pearls [ 165192 ]")
![Nature Walk 12" X 12" (30.5 X 30.5 Cm) Designer Series Paper [ 166912 ]](https://assets1.tamsnetwork.com/images/EC042017NF/166912s.jpg "Nature Walk 12\" X 12\" (30.5 X 30.5 Cm) Designer Series Paper [ 166912 ]")
![Cloud Cover 8 1/2" X 11" Cardstock [ 165621 ]](https://assets1.tamsnetwork.com/images/EC042017NF/165621s.jpg "Cloud Cover 8 1/2\" X 11\" Cardstock [ 165621 ]")
![Timid Tiger 8 1/2" X 11" Cardstock [ 165626 ]](https://assets1.tamsnetwork.com/images/EC042017NF/165626s.jpg "Timid Tiger 8 1/2\" X 11\" Cardstock [ 165626 ]")
![Timid Tiger Classic Stampin' Pad [ 165278 ]](https://assets1.tamsnetwork.com/images/EC042017NF/165278s.jpg "Timid Tiger Classic Stampin' Pad [ 165278 ]")
![Small Blending Brushes [ 160518 ]](https://assets1.tamsnetwork.com/images/EC042017NF/160518s.jpg "Small Blending Brushes [ 160518 ]")
![Uninked Stampin' Spots [ 141822 ]](https://assets1.tamsnetwork.com/images/EC042017NF/141822s.jpg "Uninked Stampin' Spots [ 141822 ]")
![Secret Sea Classic Stampin' Pad [ 165285 ]](https://assets1.tamsnetwork.com/images/EC042017NF/165285s.jpg "Secret Sea Classic Stampin' Pad [ 165285 ]")
![Cloud Cover Classic Stampin' Ink Refill [ 165279 ]](https://assets1.tamsnetwork.com/images/EC042017NF/165279s.jpg "Cloud Cover Classic Stampin' Ink Refill [ 165279 ]")


![Traditions Of Christmas 12" X 12" (30.5 X 30.5 Cm) Specialty Designer Series Paper [ 165853 ]](https://assets1.tamsnetwork.com/images/EC042017NF/165853s.jpg "Traditions Of Christmas 12\" X 12\" (30.5 X 30.5 Cm) Specialty Designer Series Paper [ 165853 ]")
![Christmas Greenery Bundle [ 165873 ]](https://assets1.tamsnetwork.com/images/EC042017NF/165873s.jpg "Christmas Greenery Bundle [ 165873 ]")
![Label Me Grateful Bundle (English) [ 166112 ]](https://assets1.tamsnetwork.com/images/EC042017NF/166112s.jpg "Label Me Grateful Bundle (English) [ 166112 ]")
![Traditional Sparkling Sequins [ 165875 ]](https://assets1.tamsnetwork.com/images/EC042017NF/165875s.jpg "Traditional Sparkling Sequins [ 165875 ]")
![Peaceful Greenery 3 D Embossing Folder [ 165928 ]](https://assets1.tamsnetwork.com/images/EC042017NF/165928s.jpg "Peaceful Greenery 3 D Embossing Folder [ 165928 ]")
![Gold Foil Sheets [ 132622 ]](https://assets1.tamsnetwork.com/images/EC042017NF/132622s.jpg "Gold Foil Sheets [ 132622 ]")
![Cherry Cobbler 8-1/2" X 11" Cardstock [ 119685 ]](https://assets1.tamsnetwork.com/images/EC042017NF/119685s.jpg "Cherry Cobbler 8-1/2\" X 11\" Cardstock [ 119685 ]")
![Cherry Cobbler Classic Stampin' Pad [ 147083 ]](https://assets1.tamsnetwork.com/images/EC042017NF/147083s.jpg "Cherry Cobbler Classic Stampin' Pad [ 147083 ]")
![Friendly Foliage Bundle (English) [ 167308 ]](https://assets1.tamsnetwork.com/images/EC042017NF/167308s.jpg "Friendly Foliage Bundle (English) [ 167308 ]")
![Nests Of Winter 12" X 12" (30.5 X 30.5 Cm) Designer Series Paper [ 164183 ]](https://assets1.tamsnetwork.com/images/EC042017NF/164183s.jpg "Nests Of Winter 12\" X 12\" (30.5 X 30.5 Cm) Designer Series Paper [ 164183 ]")
![Woven Textures 12" X 12" (30.5 X 30.5 Cm) Designer Series Paper [ 165560 ]](https://assets1.tamsnetwork.com/images/EC042017NF/165560s.jpg "Woven Textures 12\" X 12\" (30.5 X 30.5 Cm) Designer Series Paper [ 165560 ]")
![Shaded Spruce Classic Stampin' Pad [ 147088 ]](https://assets1.tamsnetwork.com/images/EC042017NF/147088s.jpg "Shaded Spruce Classic Stampin' Pad [ 147088 ]")
![Pool Party 8-1/2" X 11" Cardstock [ 122924 ]](https://assets1.tamsnetwork.com/images/EC042017NF/122924s.jpg "Pool Party 8-1/2\" X 11\" Cardstock [ 122924 ]")
![Pool Party Classic Stampin' Pad [ 147107 ]](https://assets1.tamsnetwork.com/images/EC042017NF/147107s.jpg "Pool Party Classic Stampin' Pad [ 147107 ]")
![Thoughtful Journey 6" X 6" (15.2 X 15.2 Cm) Designer Series Paper [ 163303 ]](https://assets1.tamsnetwork.com/images/EC042017NF/163303s.jpg "Thoughtful Journey 6\" X 6\" (15.2 X 15.2 Cm) Designer Series Paper [ 163303 ]")
![The Right Words Cling Stamp Set (English) [ 165316 ]](https://assets1.tamsnetwork.com/images/EC042017NF/165316s.jpg "The Right Words Cling Stamp Set (English) [ 165316 ]")
![Traditional Labels Bundle (English) [ 165865 ]](https://assets1.tamsnetwork.com/images/EC042017NF/165865s.jpg "Traditional Labels Bundle (English) [ 165865 ]")
![Misty Moonlight 8-1/2" X 11" Cardstock [ 153081 ]](https://assets1.tamsnetwork.com/images/EC042017NF/153081s.jpg "Misty Moonlight 8-1/2\" X 11\" Cardstock [ 153081 ]")
![Petunia Pop 8 1/2" X 11" Cardstock [ 163801 ]](https://assets1.tamsnetwork.com/images/EC042017NF/163801s.jpg "Petunia Pop 8 1/2\" X 11\" Cardstock [ 163801 ]")
![Charming Shimmer Faceted Dots [ 166139 ]](https://assets1.tamsnetwork.com/images/EC042017NF/166139s.jpg "Charming Shimmer Faceted Dots [ 166139 ]")
![Petunia Pop 3/8" (1 Cm) Bordered Ribbon [ 163785 ]](https://assets1.tamsnetwork.com/images/EC042017NF/163785s.jpg "Petunia Pop 3/8\" (1 Cm) Bordered Ribbon [ 163785 ]")
![Misty Moonlight & White 1/4" (6.4 Mm) Starter Ribbon Pack [ 165276 ]](https://assets1.tamsnetwork.com/images/EC042017NF/165276s.jpg "Misty Moonlight & White 1/4\" (6.4 Mm) Starter Ribbon Pack [ 165276 ]")
![Petunia Pop Classic Stampin Pad [ 163811 ]](https://assets1.tamsnetwork.com/images/EC042017NF/163811s.jpg "Petunia Pop Classic Stampin Pad [ 163811 ]")
![Misty Moonlight Classic Stampin' Pad [ 153118 ]](https://assets1.tamsnetwork.com/images/EC042017NF/153118s.jpg "Misty Moonlight Classic Stampin' Pad [ 153118 ]")
![Floral Charm 12" X 12" (30.5 X 30.5 Cm) Designer Series Paper [ 166125 ]](https://assets1.tamsnetwork.com/images/EC042017NF/166125s.jpg "Floral Charm 12\" X 12\" (30.5 X 30.5 Cm) Designer Series Paper [ 166125 ]")
![Round We Go Dies [ 163729 ]](https://assets1.tamsnetwork.com/images/EC042017NF/163729s.jpg "Round We Go Dies [ 163729 ]")
![Stylish Shapes Dies [ 159183 ]](https://assets1.tamsnetwork.com/images/EC042017NF/159183s.jpg "Stylish Shapes Dies [ 159183 ]")
![Notes & Totes Dies [ 165240 ]](https://assets1.tamsnetwork.com/images/EC042017NF/165240s.jpg "Notes & Totes Dies [ 165240 ]")
![Creative Haven Dies [ 167208 ]](https://assets1.tamsnetwork.com/images/EC042017NF/167208s.jpg "Creative Haven Dies [ 167208 ]")
![Blackberry Bliss Classic Stampin' Pad [ 147092 ]](https://assets1.tamsnetwork.com/images/EC042017NF/147092s.jpg "Blackberry Bliss Classic Stampin' Pad [ 147092 ]")
![Blackberry Bliss 8-1/2" X 11" Cardstock [ 133675 ]](https://assets1.tamsnetwork.com/images/EC042017NF/133675s.jpg "Blackberry Bliss 8-1/2\" X 11\" Cardstock [ 133675 ]")
