This is my first post today – because of the sale 😀 My card goes live as part of our Happy Inkin’ Thursday Blog Hop @ 9 AM (ET)
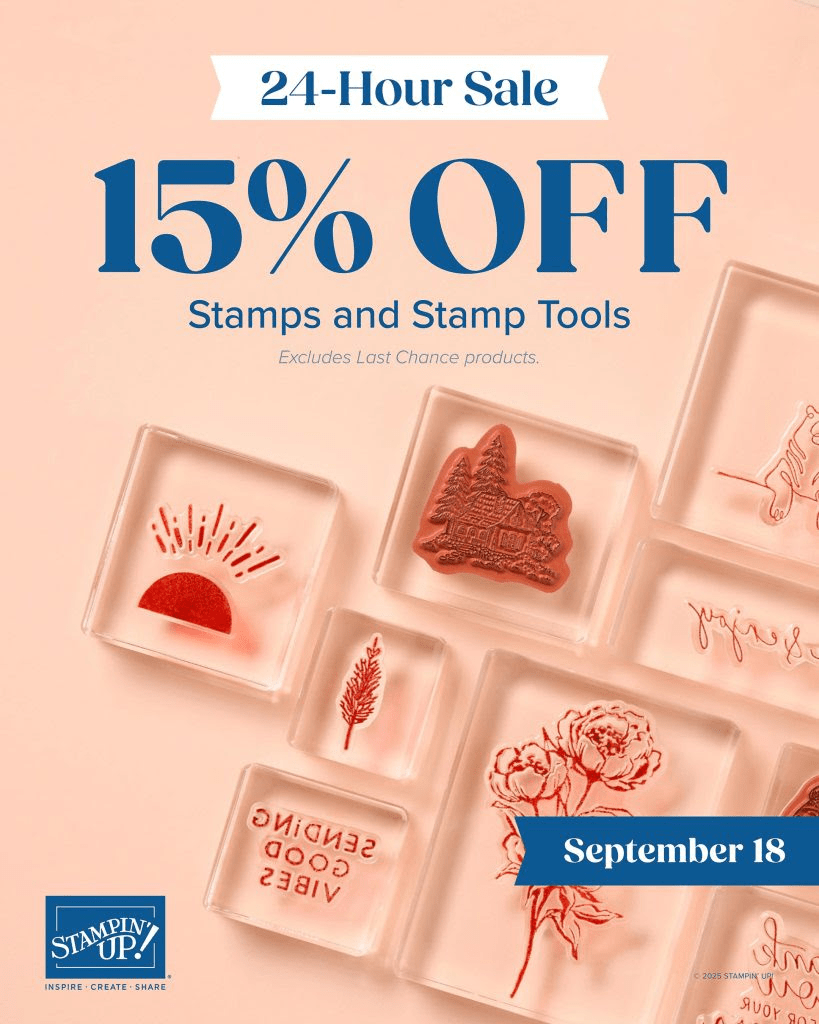
Stampin’ Up is having a great sale TODAY ONLY – September 18th, 2025!
You’ll find Stamp Sets and Stamping Tools included, so it’s the perfect time to grab something you’ve been wanting.Shop here with me. And.. when shopping with me today – receive double the daisy rewards for every $50 purchase (before shipping & taxes). Double your pleasure, double your fun.
And here’s more fun news… WORLD CARD MAKING DAY is fast approaching – Oct 4. here are the details…World Card Making Day- Mark your calendar for this special event!
Who: Everyone!!!
When: October 4, 2025, from 2:00 to 3:00 p.m. (MT)
Where: Online
Price of Event: Free
Registration Dates: September 3–October 3, 2025, until 2:00 p.m. (MT)
Registration for this event is free. You must register to receive a link to view the event. Also, those who register will receive a gift after the event ends. Free event & a prize to boot! Yippee!
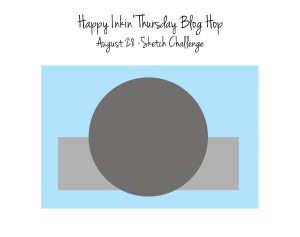
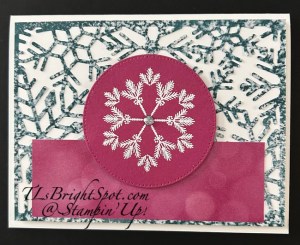
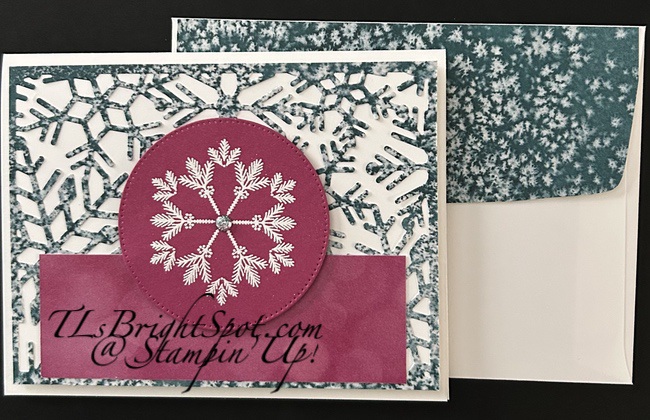
Welcome to our weekly blog hop! We have a sketch challenge today and I’m using the Delicate Pines stamp set to create the snowflake for my centerpiece and the Snowflake Kisses Dies for the background. These are ONLINE EXCLUSIVES being released Wed. Sep 3 and are part of the Elegant Pines Snowflakes Suite of products – both are bundles. The Designer Series Paper in the suite is called Elegant Pines Snowflakes DSP & it comes in the 12×12 size. It’s gorgeous – I used the ‘back side of one of the papers.
These. are so non-traditional colors that it sorta makes me second guess myself – and yet, it’s growing on me! I used the Color Wheel for help… 😀 So how to make this card.
Add an adhesive sheet to the Elegant Pines Snowflakes DSP cut 4 x 5 1/4. Run through the cut & emboss machine to create die cut, remove backing on Adhesive Sheet and add to a Basic White panel 4 x 5 1/4. Put dimensionals on the back and add to a Thick Basic White card base 8 1/2 x 5 1/2 scored at 4 1/4.
Cut a strip of Beautiful Bokeh 6×6 DSP 1 1/2 x 4 and add over the die cut piece.
Stamp the snowflake image using the Delicate Pines stamp set (remember this is also a bundle, so it has dies!) with VersaMark ink on a 3″ square of Berry Burst card stock. Sprinkle with WOW! White Embossing Powder and heat set. Once cooled, die cut with 2nd largest circle of Stitched Shapes Dies and add to card front with dimensionals.
Add a single embellishment in the center of the snowflake – Two-tone Sparkle Gems.
Card front is complete!!!
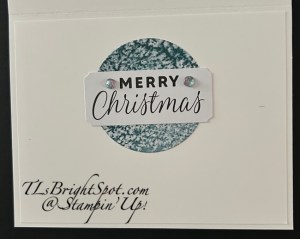
For the inside… when die cutting the snowflake background, there is a center circle that also is die cut. I set it aside at the time and added it to a Basic White inside panel (4 x 5 1/4), removing the adhesive sheet to attach it. The Greetings For All Seasons Mix & Match Ephemera pack has the perfect sentiment – and I added it with liquid glue. As a final touch, I added two more of the Two-Tone Sparkle Gems next to the sentiment. I added the panel to the inside of the card – and one & done!
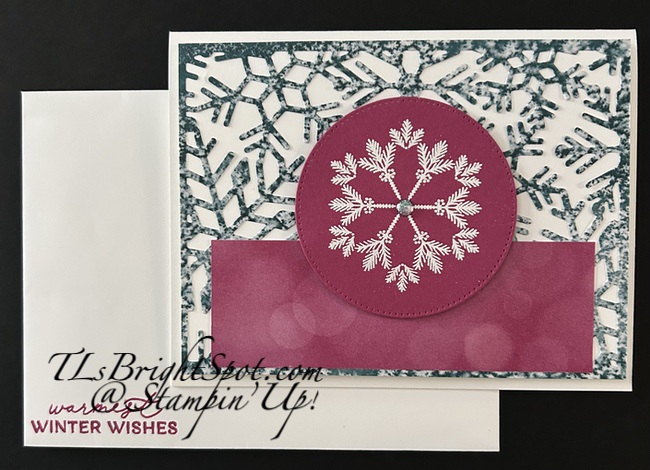
For the envelope… pictures below… I stamped the sentiment in Berry Burst ink using the Delicate Pines stamp set on the front of the envelope. For the flap, I added more of the Elegant Pines Snowflakes DSP and trimmed to fit. As I said… it’s growing on me 😀
To continue on the hop, click on the ‘next’ button or click on a name. Enjoy – you will be amazed at the creations!
Good Wednesday – mid week day – and how’s it going? Here in NJ we are experiencing cool nights, down to 57 or so then the temp rises to 81-84. It’s thew cool nights that are unusual and I’ve been trying to take advantage of that coolness to do yard work – like pulling out grass when it’s grown where it shouldn’t into flower beds. It’s back breaking but necessary. Anyway – sorry no post yesterday – I got outside and didn’t finish my post. 🥴
The card… is really just Old Olive and white – the focal point is the sweetest leaves from a July release ONLINE EXCLUSIVE bundle called Label Me Grateful. I used two dies from this, the leaves and the acorns. The Branching Out Dies are from the September-December 2025 Mini Catalog, also part of a bundle. Let’s take a look at the card.
I began with watercolor paper and a couple of inks: I wet the water color paper then added Old Olive and Granny Apple Green and maybe a dab of Mossy Meadow with a water painter. I’m not sure that darkest color shows up in these leaves though. I set this aside to dry while creating the rest of the card. I die cut four layers for the card front from Basic White using the Branching Out Dies. The two largest I adhered together. The smallest die cut I ran through a brand new embossing folder from the September ONLINE EXCLUSIVE called Gathering Leaves (it’s part of a suite of products but can be purchased separately. It will be available Wednesday Sep 3)) Once embossed I adhered the two smallest Branching Out die cuts together. These two got dimensionals and attached to the two larger Branching Out die cuts. I also die cut from the Label Me Dies the sweet branch of acorns – also from Basic White. With the watercolor paper now dry, I die cut the leaves for the front, but dimensionals on the back, placed the acorn die, then the leaves over that. I created a double Linen Thread bow and added it with a glue dot. I took a panel of Floral Delight DSP and added it to my Thick Basic White card base, then added the rest. I love the simplicity of the colors and lots of white.
For the inside… a similar leaf to the die cut leaves on the front is in the Gathering Moments bundle – remember it’s a September Online Exclusive release on Sep. 3. I stamped the image in Old Olive, using the one time stamp off method, then used full strength Old Olive ink for the sentiment – also from the Gathering Moments stamp set. I added a 1/2″ strip of the DSP to the bottom of the Basic White panel then attached it to the inside of the card.
For the envelope… More of the Floral Delight DSP added to the flap and trimmed to fit. On the front I stamped the same leaf image from Gathering Moments stamp set using the one time stamp off method.
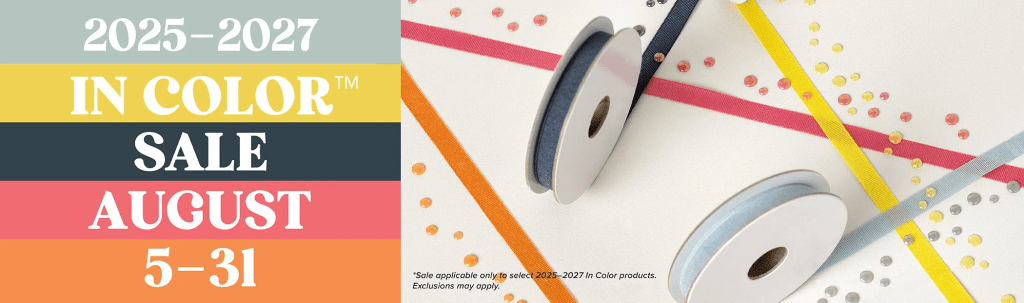
Stampin’ Up! has a fabulous sale going on right now – the 2025-2027 In Color Sale. It ends Aug 31. Over the next five days, when you place an order of $50 or more with me, regardless of what Stampin’ Up! products you purchase, I will send you a spool of the Linen Thread. That little prize will end at close of day Aug 31. Get your orders in quickly! Click the image below to go straight to the In Color Sale. Or see what’s available in the Last Chance products – or search through the 2025-2026 Annual catalog or ONLINE EXCLUSIVES. So many fabulous products.
Last Chance Products – click the image below to take you to shopping with me from that list!
And remember those ONLINE EXCLUSIVES! CLICK HERE FOR THOSE PRODUCTS.
Thanks for stopping by. May you have a beautiful day. Make someone happy by sending them a handmade card filled with ❤️
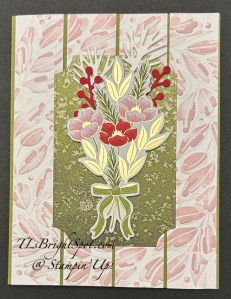
In the new September-December 2025 Mini Catalog on pages 21-27 the Traditions of Christmas Suite of products is showcased. The Christmas Wreath embossing folder creates a beautiful large wreath. Some time ago I had embossed this wreath on a Basic White panel then used a Bubble Bath ink pad to run across it. I set this aside and created other cards with the suite of products, but this wreath I left alone – until now. This is what I created with it.
The original size of the embossed wreath was 6 x 6. I cut this in 1 x 5 1/2 strips, discarding the first & last strips. The remaining four strips were added to an Old Olive card base, creating a rather stunning background. A September – December 2025 Mini Catalog release is called Branching out (page 50), and it’s a bundle (stamp set & dies). I used one of the dies to die cut the old olive panel of Elegant Pines Snowflake 12×12 DSP and attached it to the center of the card. I die cut from Basic White the additional sprigs poking out the top of the bouquet. The bouquet is cut directly from Traditions of Christmas 12×12 DSP with a Christmas Greenery Dies. With Real Red I die cut the two berry sprigs using the Christmas Greenery Dies. I added these to the card front with dimensionals and liquid adhesive. Final touch for the card front are three Traditional Sparkling Sequins in gold.
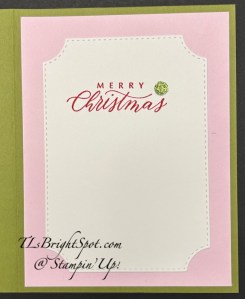
For the inside… I carried out the Bubble Bath with a panel adhered to the Old Olive card base. Using a larger Branching Out Dies, I cut the Basic White panel, stamped the sentiment in Real Red using a September ONLINE EXCLUSIVE stamp set called Hope & Peace. I added a single Traditional Sparkling Sequin in green.
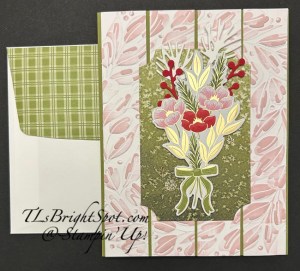
For the envelope… I adhered a piece of the Traditions of Christmas SDSP to the flap & trimmed to fit – and that was it. I am going to go back and add a stamped in Real Red ink bow to the front of the envelope, using the Christmas Greenery stamp set.
If you. do not have a demonstrator, reach out to me to get the new Sep-Dec 2025 Mini Catalog!
The 2025-2027 In Color sale ends Aug 31. Click the image below to shop those products with me.
Last chance Products are just that – last chance. There are some awesome bargains on this list. Click the image below to take you to my store and the last chance products.
Thanks for stopping by. Make someone happy sending a handmade card filled with ❤️
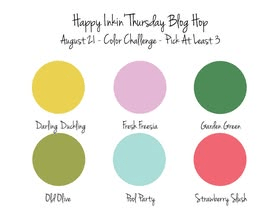
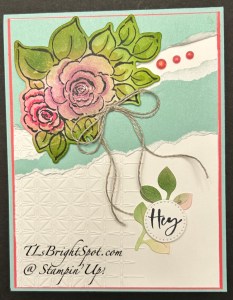
It’s Thursday and time for the Happy Inkin’ Thursday Blog hop! We have a color challenge today and I’ve chosen the Charming Day bundle, an ONLINE EXCLUSIVE. I’ve used a lot of colors on this card and I think I’ve pulled it off. Hope you like it too.
I began by coloring a piece of Basic White card stock with Blending Brushes: Strawberry Slush, Garden Green & Old Olive, Darling Duckling and Fresh Freesia. I then stamped this beautiful bouquet from the Charming Day bundle in Memento ink directly on the colored paper. Using Stampin’ Blends I enhanced some of the colors in the flowers & leaves: Strawberry Slush, Fresh Freesia and Old Olive. I added Wink of Stella to the flowers for a bit of sparkle, then die cut the image using the Charming Day Dies. I set this aside and die cut the small leaf image using another of the Charming Day Dies and set this aside to work on the background of this floral creation. I wanted texture, so pulled out the Glass Garden EF and embossed a Basic White panel. On page 45 in the upcoming Sep-Dec 2025 Mini Catalog is a package of TWO Tone cardstock called Keeping Traditions. I pulled out the Pool Party, cut it to about 3 1/4 x 4 then tore it to reveal the white inner. I adhered these torn pieces to the embossed panel, then added the stamped & colored floral piece with dimensionals. I adhered this to Strawberry Slush just slightly larger and attached both to a Pool Party card base. I stamped the sweet sentiment from the Charming Day stamp set in memento ink and die cut it with the Stitched Shapes Dies. I placed the die cut leaves and adhered with liquid glue adding the sentiment die cut with a dimensional over top. Final touch for the card front – 2 things… first the 2025-2027 In Color Flat Pearls in Strawberry Slush, then a double Linen Thread bow adhered with a glue dot.
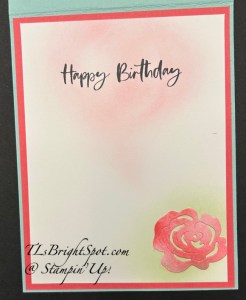
For the inside… I colored a Basic White panel with Strawberry Slush in kind of a heart shape, then Stamped the sentiment from Charming Day stamp set in Memento ink over top of it. I die cut the flower image from that very first panel of Blending Brush colored paper – Strawberry Slush. I love how this flower ahs variations in the shading, just as a natural flower would. Before attaching it I used the Blending Brush with Old Olive ink still on it and added a bit of background for the flower, then attached the flower in place. This panel was added to Strawberry Slush then attached to the inside of the card.
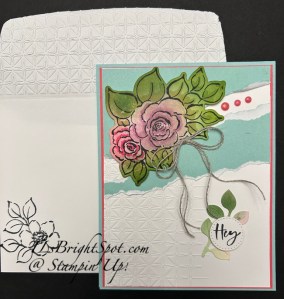
For the envelope… I used the same Glass Garden embossing folder to add texture to the envelope flap. I then stamped the small floral image from Charming Day stamp set in Memento ink on the front – and done!
To continue the hop and visit Nicole, click on the ‘next’ button – or click on a name to take you to another participant. Either way – don’t miss anyone and enjoy the hop!
There is always something new in the Stampin’ Up! world and that keeps us doing and creating. I love that challenge & inspiration. For the latest news about new packaging and a view of an upcoming November ONLINE EXCLUSIVE, visit my post about that here
The 2025-2027 iIn Color Sale continues through the end of August – see all the products by clicking the image below.
Remember there are LAST CHANCE PRODUCTS available – an amazing list of items. Check that by clicking the LAST CHANCE image below.
Customers will be able to order from the Sep-Dec 2025 Mini Catalog Wednesday Sep 4. If you do not have a demonstrator and need a catalog or have questions, please reach out to me. I’m happy to help!
Card cuts for today’s project:
Pool Party card base – 4 1/4 x 11 scored at 5 1/2
Strawberry Slush – (2) 4 1/8 x 5 3/8
Basic White – (2) 4 x 5 1/4; another for color blending w/ Blending Brushes + scrap for sentiment
Thanks for stopping by. May you have a beautiful day.
Make someone happy sending them a handmade card filled with love ❤️
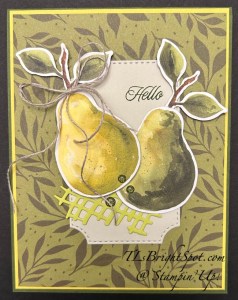
Good Sunday morning! I’ve a sweet Perfectly Pears card for you today and I paired it with a new die set from the Sep-Dec 2025 Mini Catalog called Branching Out Dies. It has a stamp set as well, but I’m not using that today.
This new die is shown here in the Basic Beige – as a background for the pears. The leaves of thew pears cover the top of the die cut, but it’s the same as the bottom. There are at least 6 of these layering dies in the set, plus some other fun dies as well. It’s wonderful. How to make this card…
The card base is Mossy Meadow with a layer of Darling Duckling then a layer of Painterly Pears DSP. Next I die cut the Basic Beige with the Branching Out dies and added it. With another piece of the Painterly Pears DSP and the Perfectly Pears Dies, I die cut the two pears and the stem/ leaves. Using another die in the Perfectly Pears Dies and Lemon Lime Twist, I die cut the open weave image. I adhered the stem/ leaves to each pear, then attached them to the card front: the darker pear is adhered directly and the lighter pear is on dimensionals. I slipped the open weave die cut under the pears and attached with dabs of liquid glue. The leaves of the darker pear do have dimensionals. Once everything was innplace, I stamped the sentiment in Mossy Meadow ink. It comes from the Perfectly Pears stamp set. Final touch – three Low Profile Sparkle Dots in Old Olive and a double Linen Thread bow added with a glue dot.
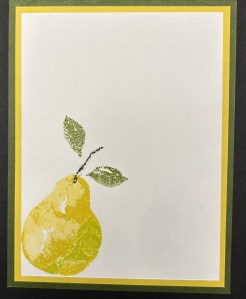
For the inside…on a panel of Basic White… the pear comes from the Perfectly Pears stamp set… inked first in Darling Duckling then Lemon Lime Twist added with a sponge dauber and stamped on the panel. The stem’ leaves are also from this stamp set and are inked with Old Olive and Early Espresso Markers. This was attached to aDarling Duckling panel then added to the inside of the card.
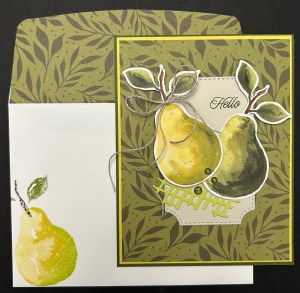
For the envelope… The same Painterly Pears DSP was added to the flap & trimmed to fit. The pear was stamped using the same method as above – using the Perfectly Pears stamps, Darling Duckling and Lemon Lime Twist inks for the pear and Old Olive and Early Espresso markers for the stem’ leaves. This is such a fabulous suite of products!
OK – more Stampin’ Up! info… The 2025-2027 In Color Sale is still on until the end of August. Click the image below to view this product sale.
Last Chance Products are just that – last chance 😀 and available while supplies last. Click that image below to take you to this list.
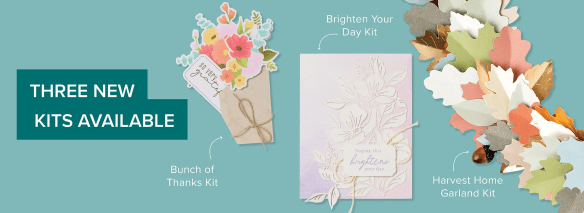
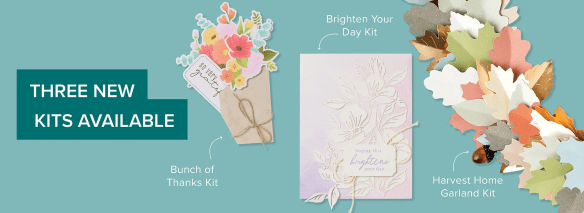
Kits and more kits… Stampin’ Up! continues to provide some of the best kits ever… There are kits for decorative items for your home as well as card kits. See those kits by clicking the image below. See that Brighten You Day Kit in the image? It is stunning! I’ll have photos of completed cards from that kit tomorrow.
The Painterly Pears Suite was a July release in the Online Exclusives. It’s in my product list below. The new Sep-Dec 2025 Mini Catalogs are in the mail. If you do not have a demonstrator and need a catalog, please let me know… happy to send one to you!
Thanks for stopping by. May you have a beautiful day.
Make someone happy sending them a handmade card filled with love. ❤️
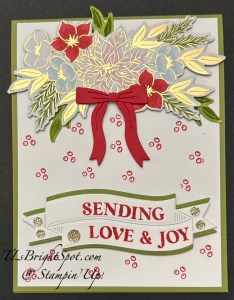
Yesterday was a blog hop & I used the Traditions of Christmas SDSP for my focal point. Today – still the same package of Designer Series Paper, but used very differently. First of all, there is a coordinating stamp & die bundle that coordinates and die cuts images in the paper – the Christmas Greenery bundle, available Sep 3 in the Sep-Dec 2025 Mini Catalog.
I began with one of those die cuts – of this beautiful ‘swag’. I then stamped some extra leaves from the Christmas Greenery stamp set in Old Olive ink on Old Olive card stock scraps – and die cut them as well. I adhered the ‘swag’ with dimensionals and the leaves directly to a Basic White panel. Next I die cut this gorgeous bow from Real Red and adhered it together, placed a cut dimensional and put it in place. Pulling out another bundle that coordinates is the Traditional Labels bundle that has all sentiments and label dies. I stamped on Basic White in Real Red ink, then die cut the label – love this curve die! I also die cut the same lable from Old Olive cardstock, cut it min half lengthwise to give a ‘shadow effect’ or frame to the white label. I added this to the card front with dimensionals. Once that was inn place, I felt the white space was ‘too white’ – too much white space (for me). So I pulled out the Christmas Greenery stamp that had the three berries and stamped those in Real Red all over the open spaces. As a final touch I added Traditional Sparkling Sequins in gold to the sentiment banner. This entire panel was adhered to an Old Olive card base.
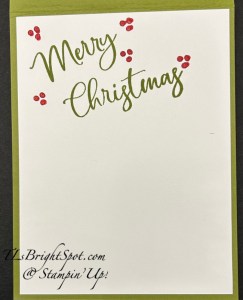
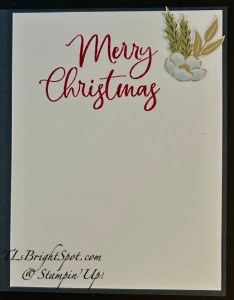
For the inside of the card, I stamped the sentiment from the Traditional Labels stamp set in Old Olive on a Basic White panel, then added berries in Real Red using the Christmas Greenery stamp set. This was adhered to the inside of the card – and done!
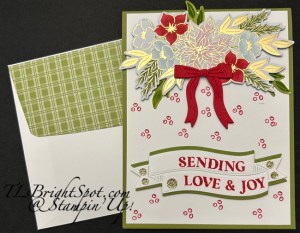
For the envelope… more of the Traditions of Christmas SDSP but using this fun olive plaid pattern, was adhered to the flap & trimmed to fit.
Don’t have a demonstrator & need/ want a Sep-Dec 2025 Mini Catalog?
Reach out to me so I can fix that!
The 2025-2027 IN COLOR SALE continues through the end of August.
Last chance products are those that are closing out & MANY at a fabulous sale price. Click the image below to take you right there.
Kits collection… Three new kits available. Click the image below to visit and see ALL THE KITS
Remember that shopping with me has benefits… Stampin’ Up! already gives it’s own product credits when shopping with me – and when your order is $50 & up, you will receive the monthly tutorial (this month is the Painterly Pears) via email, which has lots of ideas. And Daisy points add up – sometimes I offer double Daisy Points :O)
Thanks for stopping by. May you have a beautiful day.
Make someone happy sending them a handmade card filled with love ❤️
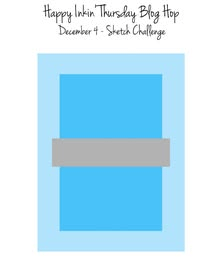
It’s Thursday and you know what that mean – a super dooper hop. Let’s get to it! We have a sketc h challenge today and I’ve used NEW PRODUCTS from the Sep-Dec 2025 Mini Catalog. Wheee!
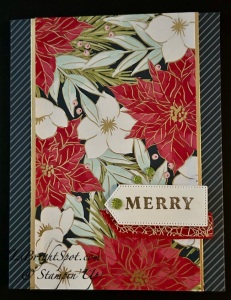
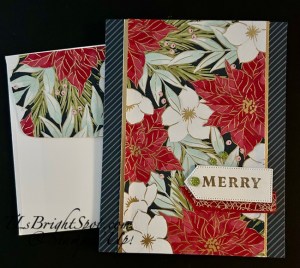
I used Secret Sea for my card base and adhered strips of Traditions of Christmas DSP & Gold Foil to create the front of the card. (card cuts are listed below) I stamped then sentiment in VersasMark ink then sprinkled WOW! Metallic Embossing Powder (gold) and heat set it. This small banner seemed to need some accent – so I cut a length of ribbon 1/2″ Shiny Ribbon in Real Red, angling one end to mimic the banner. To this ribbon i added 3/8″ Irregular Weave Trim with Stampin’ Seal. I adhered these to the card front, put dimensionals on the sentiment banner (die cut with the Traditional Labels Dies) and attached over the ribbons – creating a great accent. NOTE: you could easily create the same thing with card stock. My final step was adding three Traditional Sparkling Sequins – and the card front was complete! Remember these items will be available in the Sep-Dec 2025 Mini Catalog. You could also join my team now and be able to order these items as part of your starter kit!
For the inside of the card, I stamped the sentiment using the Traditional Labels stamp set and Real Red ink. I then fussy cut the image from one of the Traditions of Christmas SDSP and adhered it with liquid glue next to the sentiment.
For the envelope, more of the same main pattern of the Traditions of Christmas SDSP adhered to the envelope
Visit all those participating in today’s hop for inspiration – it’s going to be fabulous! Click the next button or click on a name. Enjoy!
The 2025-2027 IN COLOR SALE continues through the end of August. See all that’s available by clicking here.
Last chance products are those that are closing out & MANY at a fabulous sale price. Click the image below to take you right there.
Kits collection… Three new kits available. Click the image below to visit and see ALL THE KITS
Remember that shopping with me has benefits… Stampin’ Up! already gives it’s own product credits when shopping with me – and when your order is $50 & up, you will receive the monthly tutorial (this month is the Painterly Pears) via email, which has lots of ideas. And Daisy points add up – sometimes I offer double Daisy Points :O)
Card cuts for today’s card:
Secret Sea card base 8 1/2 x 5 1/2 scored at 4 1/4
Layer: Traditions of Christmas SDSP – 3/8 x 5 1/2 (2 side strips); Gold Foil – 1/8 x 5 1/2 (2); 3 1/4 x 5 1/2 (center panel)
Basic White 1 x 2 1/4 (sentiment label); 4 x 5 1/4 (inside)
Envelope: Traditions of Christmas 2 1/4 x 6 (flap)
Thanks for stopping by. May you have a beautiful day.
Make someone happy sending them a handmade card filled with love ❤️
Sneaky Peeks are so fun – you get to see new products that will be available in the Sep-Dec 2025 Mini Catalog and I get to p-l-a-y! Or should I say, experiment?! We hasve a challenge for this blog hop – “fall frenzy” and we can interpret that any way we like. So, here we go…
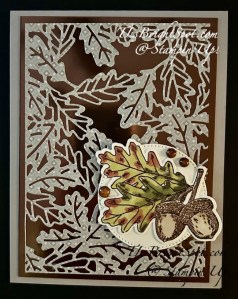
This is a BRAND NEW bundle – part of a suite of products in the Sep-De c 2025 Mini Catalog… Love, love, love this suite of products! We have LOTS of oak trees in our back area and because of that, acorns. That inspired this card – of course along with the theme. 😀 I used Gray Granite for my card base, then a layer of the shiny Earthen Toned Metallic Specialty Paper. It has a brownish coppery kind of look and as I said – is shiny. I then die cut the leaves using the Amber Autumn Dies (it’s one die) using the Autumn Toile DSP with Adhesive Sheet attached. Removing the adhesive sheet, I attached it to the Earthen Toned Metallic Specialty Paper. The main image is stasmped in Early Espresso ink and colored with several Stampin’ Blends: Old Olive, Mossy Meadow, Crumb Cake & Cajun Craze.I used a Blender Pen to move the Early Espresso ink on the acorn top and on the shading of the acorn, then filled in the rest of the acorns with Crumb Cake. After coloring, I die cut this image with the Amber Autumn Dies. I adhered this to a Stitched Shapes circle (third from largest) in Very Vanilla. This was attached to the card front with dimensionals. As a final touch three of the Streaked Dots, part of this suite of products.
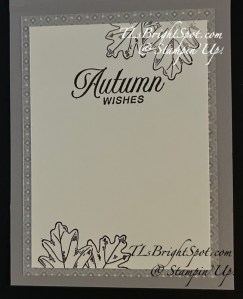
For the inside of the card… I stamped the sentiment in Early Espresso ink, then stamped a portion of the acorn stamp (also from Amber Autumn stamp set. stamping in the upper right corner, re-inking and stamping in the lower left corner.. This Very Vanilla stamped panel was adhered to an Autumn Toile DSP, then attached to the inside of the card.
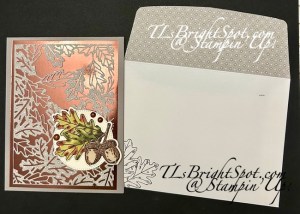
For the envelope… more of the same Autumn Toile DSP adhered to the flap & trimmed to fit. Again… I stamped a partial image of the acorn stamp from the Amber Autumn stamp set in the lower left corner.
Now check out what the others in this group have created just for this hop. Click the next button or click on a name to take you around.
Wow – last day of June! Summer is moving right along…and fourth of July is fast approaching. Today’s card uses a brand new release (available Jul 1 – tomorrow!) called Bauble Blooms bundle. Here is a photo of the stamp set & dies.
And here’s my first card made with this bundle.
I began with a piece of the Cherry Cobbler in the Regal Distressed Patterns SDSP and cut it 4 x 5 1/4. I made a diagonal cut approximately 1/2″ in from the top and up the right side, but you can make this smaller or larger – as you desire. I added the larger panel to a Basic Beige 4 x 5 1/4. I die cut a border using the Fancy Border Dies and Gold Foil and attached it along the edge. I stamped the sentiment with VersaMark ink then sprinkled Metallic WOW! Embossing Powder over and heat set. Love the mix of fonts on this sentiment! I stamped two images from the stamp set to create the decoration for the ornament: the leaves in Pretty Peacock ink and the flowers in Lost Lagoon ink. I die cut the ornament and the flowers at the same time, then added the flowers with dimensionals to the ornament. I die cut the ornament top from Gold Foil – again using the Bauble Blooms Dies. I put this in place on the card front with dimesnionals then added a double bow using the Gold Twisted Thread and attached it with a glue dot. These were added to the card base of Pretty Peacock.
I used the reserved cut of the Regal Distressed Patterns DSP to attach to the upper corner of a Basic White panel (3 3/4 x 5). I added another strip of gold foil die cut from Fancy Borders Dies. I stamped the sentiments from Bauble Blooms stamp set in Pretty Peacock ink. This was added to Basic Beige 4 x 5 14 and added to the inside of the card.
For the envelope… more of the Regal Distressed Patterns SDSP in Cherry Cobbler was adhered to the flap & trimmed to fit.
TODAY IS THE LAST DAY FOR THIS SUITE SALE! Starting June 3, all available suites and suite products from the 2025–2026 Annual Catalog and Online Exclusives are buy one, get one 50% off! If you’ve had your eye on a new suite from the annual catalog or you really like the look of a stamp set from an Online Exclusives suite, you don’t have to choose—you can get both!
Sales Period: June 3–30, 2025
Ordering Deadlines
Phone: June 30, 2025, at 6:59 p.m. (MT)
Online: June 30, 2025, at 11:59 p.m. (MT)
All available suites and suite products from the 2025–2026 Annual Catalog and Online Exclusives are buy one, get one 50% off.
When you shop the sale, the 50% off discount will apply to the lower-priced item (for example, if you buy a suite collection and a stamp set from a suite, the suite would be full price, and the stamp set would be 50% off).
Suite collections are available if all items are in stock; if all items are not in stock, you can still shop the available suite products.
You don’t have to buy a suite and suite products all from the same suite collection for the discount to apply. You can buy any suite products from any suite.
The discount will appear in your cart once you’ve added two items within the sale parameters to your cart.
Products are available only while supplies last.
See and shop all qualifying suites in the online store
SHOP LAST CHANCE PRODUCTS HERE… NEW ITEMS ADDED TO THE LIST… MAKE CERTAIN MY NAME IS LISTED AS YOUR DEMONSTRATOR WHEN YOU CHEVCK OUT! :O) REMEMBER…Browse the selection of Last Chance paper crafting products. Additional items are added every other month. These products are available only while supplies last so be sure to buy them before they are discontinued! Discounts vary and are subject to change.
Thanks for stopping by. May you have a beautiful day.
Make someone happy sending them a handmade card made with love. ❤️ Product List