
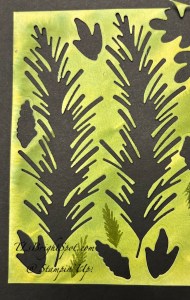
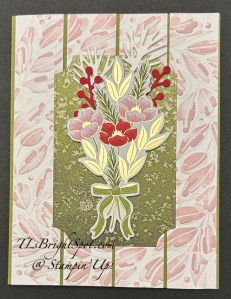
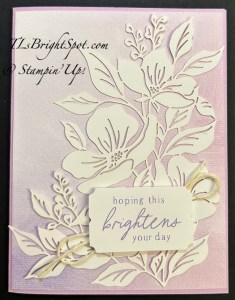
Good Tuesday, Sep 2 and 55 degrees here at the shore in NJ – not typical weather for this early in the month. When the kids return to school it is usually hot as blazes. But not this year… My card today is more than just thinking of you; it’s recognizing that life is not always easy. I used the Prairie Grass stamp set from the ONLINE EXCLUSIVES – it’s available to customers now. It’s become a favorite for things peaceful, restful, reassuring.
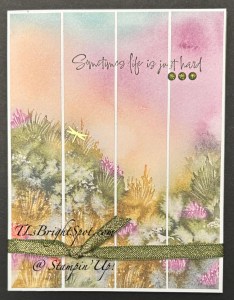
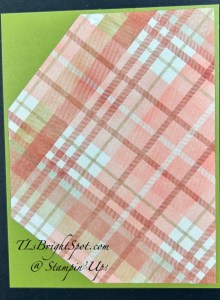
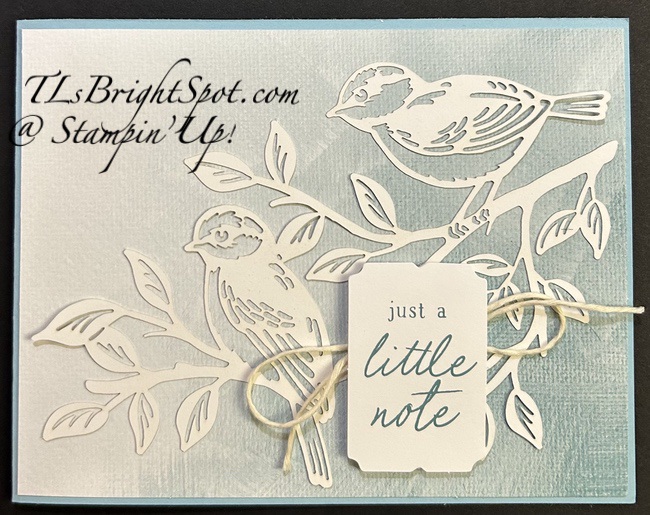
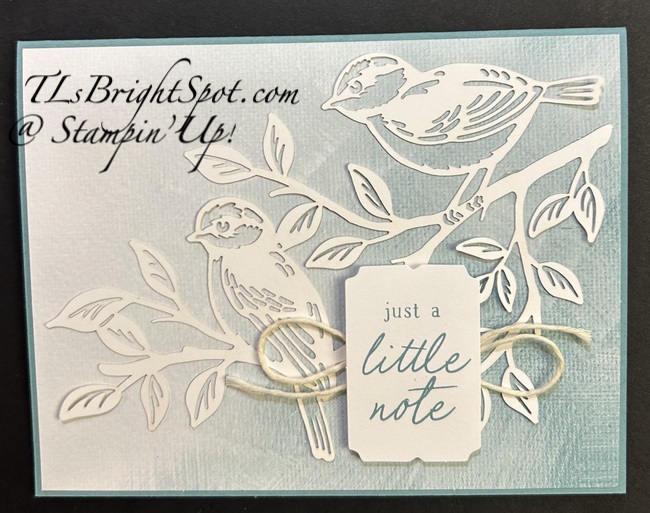
I cut 1″ strips of Thoughtful Journey 6×6 DSP (1 x 5 3/8) and added them to a Basic White background. Next I stamped the sentiment in Mossy Meadow ink using the Prairie Grass stamp set. I took a length of Mossy Meadow & Gold trim, wrapped it around and tied a knot, securing it with a glue dot. I then added three Low Profile Sparkle Dtos under the sentiment. Finally, I added a single Adhesive-Backed Dragonfly. This completed front panel was added to a Mossy Meadow card base.
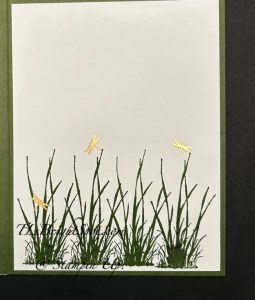
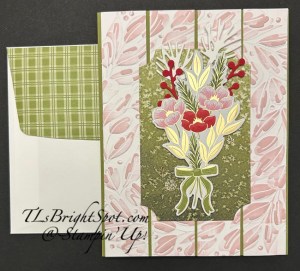
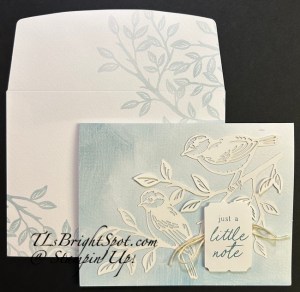
For the inside of the card, I stamped this grassy image four times across the bottom with Mossy Meadow ink. And yes, the stamp comes from Prairie Grass stamp set. I added three more of the Adhesive-Backed Dragonflies as they are very flat and so appropriate for this grassy scene. I adhered the Basic White panel to the inside of the card and voila – this card is ready to send.
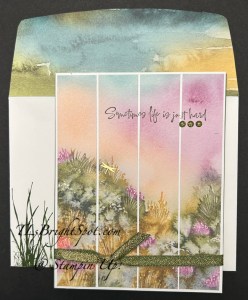
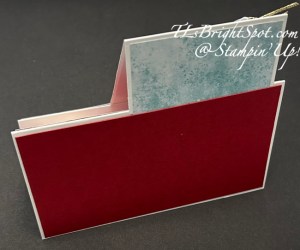
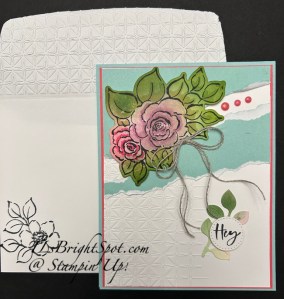
For the envelope… yet another panel of the Thoughtful Journey 6×6 was adhered to the flap & trimmed to fit. Again on the front, I stamped the same grassy image in Mossy Meadow ink from Prairie Grass stamp set to carry out the theme. This card will be sent today to a friend of mine who lives near the beach and diagnosed with ALS. Such an awful disease….
Tomorrow, Wednesday Sep 3, the Sep-Dec 2025 Mini Catalog will be open to ordering by customers – AND – there are some fabulous new ONLINE EXCLUSIVE products that can be ordered as well. If you do not have a demonstrator, I’d love to help you find your creative side. Click the image below to take you to my shop for purchases.

Thanks for stopping by – may you have a beautiful day. Make someone happy by sending them a handmade card filled with ❤️
Product List
![Prairie Grass Cling Stamp Set (English) [ 166168 ]](https://assets1.tamsnetwork.com/images/EC042017NF/166168s.jpg "Prairie Grass Cling Stamp Set (English) [ 166168 ]")
![Thoughtful Journey 6" X 6" (15.2 X 15.2 Cm) Designer Series Paper [ 163303 ]](https://assets1.tamsnetwork.com/images/EC042017NF/163303s.jpg "Thoughtful Journey 6\" X 6\" (15.2 X 15.2 Cm) Designer Series Paper [ 163303 ]")
![Mossy Meadow Classic Stampin' Pad [ 147111 ]](https://assets1.tamsnetwork.com/images/EC042017NF/147111s.jpg "Mossy Meadow Classic Stampin' Pad [ 147111 ]")
![Basic White 8 1/2" X 11" Cardstock [ 166780 ]](https://assets1.tamsnetwork.com/images/EC042017NF/166780s.jpg "Basic White 8 1/2\" X 11\" Cardstock [ 166780 ]")
![Mossy Meadow & Gold 1/4" (6.4 Mm) [ 166158 ]](https://assets1.tamsnetwork.com/images/EC042017NF/166158s.jpg "Mossy Meadow & Gold 1/4\" (6.4 Mm) [ 166158 ]")
![Low Profile Sparkle Dots [ 166157 ]](https://assets1.tamsnetwork.com/images/EC042017NF/166157s.jpg "Low Profile Sparkle Dots [ 166157 ]")
![Adhesive Backed Dragonflies & Birds [ 162743 ]](https://assets1.tamsnetwork.com/images/EC042017NF/162743s.jpg "Adhesive Backed Dragonflies & Birds [ 162743 ]")
![Paper Trimmer [ 152392 ]](https://assets1.tamsnetwork.com/images/EC042017NF/152392s.jpg "Paper Trimmer [ 152392 ]")
![Stampin' Dimensionals [ 104430 ]](https://assets1.tamsnetwork.com/images/EC042017NF/104430s.jpg "Stampin' Dimensionals [ 104430 ]")
![Multipurpose Liquid Glue [ 110755 ]](https://assets1.tamsnetwork.com/images/EC042017NF/110755s.jpg "Multipurpose Liquid Glue [ 110755 ]")
![Mini Glue Dots [ 103683 ]](https://assets1.tamsnetwork.com/images/EC042017NF/103683s.jpg "Mini Glue Dots [ 103683 ]")
![Paper Snips [ 103579 ]](https://assets1.tamsnetwork.com/images/EC042017NF/103579s.jpg "Paper Snips [ 103579 ]")
![Basic White Medium Envelopes [ 159236 ]](https://assets1.tamsnetwork.com/images/EC042017NF/159236s.jpg "Basic White Medium Envelopes [ 159236 ]")


![Basic White 8 1/2" X 11" Thick Cardstock [ 159229 ]](https://assets1.tamsnetwork.com/images/EC042017NF/159229s.jpg "Basic White 8 1/2\" X 11\" Thick Cardstock [ 159229 ]")
![Basic White 8 1/2" X 11" Cardstock [ 159276 ]](https://assets1.tamsnetwork.com/images/EC042017NF/159276s.jpg "Basic White 8 1/2\" X 11\" Cardstock [ 159276 ]")
![Fluid 100 Watercolor Paper [ 149612 ]](https://assets1.tamsnetwork.com/images/EC042017NF/149612s.jpg "Fluid 100 Watercolor Paper [ 149612 ]")
![Granny Apple Green Stampin' Pad [ 147095 ]](https://assets1.tamsnetwork.com/images/EC042017NF/147095s.jpg "Granny Apple Green Stampin' Pad [ 147095 ]")
![Old Olive Classic Stampin' Pad [ 147090 ]](https://assets1.tamsnetwork.com/images/EC042017NF/147090s.jpg "Old Olive Classic Stampin' Pad [ 147090 ]")
![Linen Thread [ 104199 ]](https://assets1.tamsnetwork.com/images/EC042017NF/104199s.jpg "Linen Thread [ 104199 ]")
![Stampin' Cut & Emboss Machine [ 149653 ]](https://assets1.tamsnetwork.com/images/EC042017NF/149653s.jpg "Stampin' Cut & Emboss Machine [ 149653 ]")


![Cajun Craze 8-1/2" X 11" Cardstock [ 119684 ]](https://assets1.tamsnetwork.com/images/EC042017NF/119684s.jpg "Cajun Craze 8-1/2\" X 11\" Cardstock [ 119684 ]")
![Timeless Plaid 6" X 6" (15.2 X 15.2 Cm) Designer Series Paper [ 164678 ]](https://assets1.tamsnetwork.com/images/EC042017NF/164678s.jpg "Timeless Plaid 6\" X 6\" (15.2 X 15.2 Cm) Designer Series Paper [ 164678 ]")
![Textured Notes Bundle (English) [ 165556 ]](https://assets1.tamsnetwork.com/images/EC042017NF/165556s.jpg "Textured Notes Bundle (English) [ 165556 ]")
![Old Olive 8-1/2" X 11" Cardstock [ 100702 ]](https://assets1.tamsnetwork.com/images/EC042017NF/100702s.jpg "Old Olive 8-1/2\" X 11\" Cardstock [ 100702 ]")
![Basic Beige 8 1/2" X 11" Cardstock [ 164511 ]](https://assets1.tamsnetwork.com/images/EC042017NF/164511s.jpg "Basic Beige 8 1/2\" X 11\" Cardstock [ 164511 ]")
![Natural Tones Linen Thread [ 164071 ]](https://assets1.tamsnetwork.com/images/EC042017NF/164071s.jpg "Natural Tones Linen Thread [ 164071 ]")


![Label Me Grateful Bundle (English) [ 166112 ]](https://assets1.tamsnetwork.com/images/EC042017NF/166112s.jpg "Label Me Grateful Bundle (English) [ 166112 ]")
![Floral Delight 12" X 12" (30.5 X 30.5 Cm) Designer Series Paper [ 164700 ]](https://assets1.tamsnetwork.com/images/EC042017NF/164700s.jpg "Floral Delight 12\" X 12\" (30.5 X 30.5 Cm) Designer Series Paper [ 164700 ]")
![Basic White 12" X 12" (30.5 X 30.5 Cm) Thick Cardstock [ 166782 ]](https://assets1.tamsnetwork.com/images/EC042017NF/166782s.jpg "Basic White 12\" X 12\" (30.5 X 30.5 Cm) Thick Cardstock [ 166782 ]")

![Bubble Bath Classic Stampin' Pad [ 161664 ]](https://assets1.tamsnetwork.com/images/EC042017NF/161664s.jpg "Bubble Bath Classic Stampin' Pad [ 161664 ]")
![Bubble Bath 8 1/2" X 11" Cardstock [ 161718 ]](https://assets1.tamsnetwork.com/images/EC042017NF/161718s.jpg "Bubble Bath 8 1/2\" X 11\" Cardstock [ 161718 ]")

![Bauble Blooms Bundle (English) [ 166096 ]](https://assets1.tamsnetwork.com/images/EC042017NF/166096s.jpg "Bauble Blooms Bundle (English) [ 166096 ]")
![Metallics Wow! Embossing Powder [ 165678 ]](https://assets1.tamsnetwork.com/images/EC042017NF/165678s.jpg "Metallics Wow! Embossing Powder [ 165678 ]")
![Embossing Additions Tool Kit [ 159971 ]](https://assets1.tamsnetwork.com/images/EC042017NF/159971s.jpg "Embossing Additions Tool Kit [ 159971 ]")
![Heat Tool (Us And Canada) [ 129053 ]](https://assets1.tamsnetwork.com/images/EC042017NF/129053s.jpg "Heat Tool (Us And Canada) [ 129053 ]")

![Brighten Your Day Kit [ 166460 ]](https://assets1.tamsnetwork.com/images/EC042017NF/166460s.jpg "Brighten Your Day Kit [ 166460 ]")
![Pecan Pie 8 1/2" X 11" Cardstock [ 161717 ]](https://assets1.tamsnetwork.com/images/EC042017NF/161717s.jpg "Pecan Pie 8 1/2\" X 11\" Cardstock [ 161717 ]")
![Balmy Blue 8-1/2" X 11" Cardstock [ 146982 ]](https://assets1.tamsnetwork.com/images/EC042017NF/146982s.jpg "Balmy Blue 8-1/2\" X 11\" Cardstock [ 146982 ]")
![Lost Lagoon 8-1/2" X 11" Cardstock [ 133679 ]](https://assets1.tamsnetwork.com/images/EC042017NF/133679s.jpg "Lost Lagoon 8-1/2\" X 11\" Cardstock [ 133679 ]")
![Fresh Freesia 8 1/2" X 11" Cardstock [ 155613 ]](https://assets1.tamsnetwork.com/images/EC042017NF/155613s.jpg "Fresh Freesia 8 1/2\" X 11\" Cardstock [ 155613 ]")
![Highland Heather 8-1/2" X 11" Cardstock [ 146986 ]](https://assets1.tamsnetwork.com/images/EC042017NF/146986s.jpg "Highland Heather 8-1/2\" X 11\" Cardstock [ 146986 ]")


![Charming Day Bundle (English) [ 166136 ]](https://assets1.tamsnetwork.com/images/EC042017NF/166136s.jpg "Charming Day Bundle (English) [ 166136 ]")
![Strawberry Slush 8-1/2" X 11" Card Stock [ 131295 ] (Retired)](https://assets1.tamsnetwork.com/images/EC042017NF/131295s.jpg "Strawberry Slush 8-1/2\" X 11\" Card Stock [ 131295 ] (Retired)")
![Stitched Shapes Dies [ 152323 ]](https://assets1.tamsnetwork.com/images/EC042017NF/152323s.jpg "Stitched Shapes Dies [ 152323 ]")
![Small Blending Brushes [ 160518 ]](https://assets1.tamsnetwork.com/images/EC042017NF/160518s.jpg "Small Blending Brushes [ 160518 ]")
![Strawberry Slush Classic Stampin' Pad [ 165286 ]](https://assets1.tamsnetwork.com/images/EC042017NF/165286s.jpg "Strawberry Slush Classic Stampin' Pad [ 165286 ]")
![Fresh Freesia Classic Stampin' Pad [ 155611 ]](https://assets1.tamsnetwork.com/images/EC042017NF/155611s.jpg "Fresh Freesia Classic Stampin' Pad [ 155611 ]")
![Darling Duckling Classic Stampin' Pad [ 165277 ]](https://assets1.tamsnetwork.com/images/EC042017NF/165277s.jpg "Darling Duckling Classic Stampin' Pad [ 165277 ]")
![Garden Green Classic Stampin' Pad [ 147089 ]](https://assets1.tamsnetwork.com/images/EC042017NF/147089s.jpg "Garden Green Classic Stampin' Pad [ 147089 ]")
![2025–2027 In Color™ Flat Pearls [ 165192 ]](https://assets1.tamsnetwork.com/images/EC042017NF/165192s.jpg "2025–2027 In Color™ Flat Pearls [ 165192 ]")
