Stampin’ Up! Side Step Fun Fold with Bauble Blooms

Good morning! We seem to have a more stable Internet today – thank goodness! Today’s card is extra easy & fun made with the Bauble Blooms bundle as well as Traditions of Christmas 12×12 DSP.
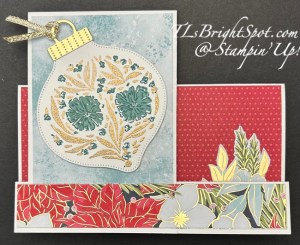
Stampin' Up! Bauble Blooms step card front

Putting this card together… card cuts are important and coordinating papers as well. Here I used the Traditions of Christmas SDSP plus Subtles 6×6 DSP in Pool Party. I also created the ‘Bauble’ first so I knew the contrasting to work with the focal image, the bauble.

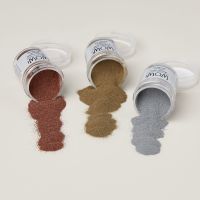
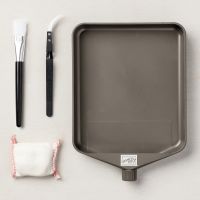
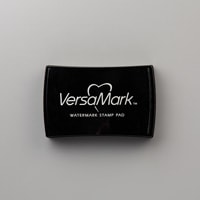
  • I used the embossing buddy to eliminate any any static from the Basic White panel on which I was stamping. With Versamark, stamp the leaves, sprinkle with WOW! Metallic embossing powder in gold and heat set.
  • Stamp the ‘filler’ image of flowers in Lost Lagoon then stamp the detail image in Pretty Peacock. Die cut the bauble with the Bauble Blooms Dies
  • With Gold Foil sheets, die cut the bauble top and add with liquid glue; add the gold ribbon from the Silver & Gold ribbon combo pack – set aside

Card stock cuts:

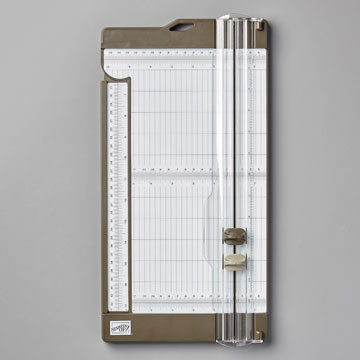
  • card base: Basic White 5 1/2 x 8 scored at 3, 6, & 7. Burnish – 3″ mountain, 6″ valley and 7″ mountain
  • step panel: 3 x 6 scored at 4 1/4

DSP pieces:

  • card panels: 2 7/8 x 5 3/8 – center front – adhere now; 7/8 x 5 3/8 -save
  • step panel pieces: 2 7/8 x 3 1/2 – front of step, adhere; 2 7/8 x 1 3/4 – back of step, adhere

Directions:

Add step panel (long section is the front) to the very front 1″ section, making it even at the bottom. Fold the card flat and adhere the short end of the step panel to the back. Add a card stock layer (here it is Cherry Cobbler) 2 7/8 x 5 3/8 to back panel. You can add a Basic White panel to this for additional sentiment or writing, I chose not to do that.
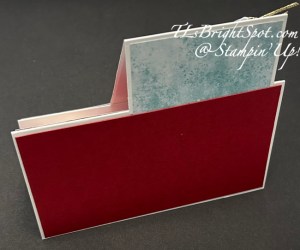
Stampin' Up! Bauble Blooms Step Panel card back

On the inside, add a piece of Cherry Cobbler 2 7/8 x 5 3/8. Add a Basic White 2 3/4 x 5 1/4 and stamp or decorate. I chose no sentiment but did add a fussy cut poinsettia & leaf image from the Traditions of Christmas 12×12 SDSP.

Time to add the set aside bauble and any additional decorations… The Bauble is added with dimensionals to the step front. An additional fussy cut image from the Traditions of Christmas SDSP was added to the front center panel – and the card is done!

Stampin' Up! Bauble Blooms Step card front, showing angle

To the envelope… I added more of the Traditions of Christmas SDSP (2 1/4 x 6) to the envelope flap & trimmed to fit. Yay! – love how simple and pretty this looks.
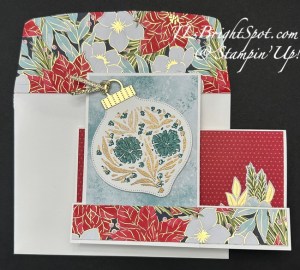
Stampin' Up! Bauble Blooms Side Step card & envelope

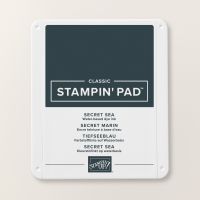
Here’s another I created with the same Bauble Blooms bundle and Traditions of Christmas SDSP. The card base & step panel are Secret Sea. Ink colors for the flowers are Strawberry Slush and Cherry Cobbler.
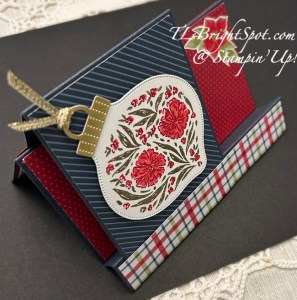
Stampin' Up! Bauble Blooms Side Step card in Secret Sea

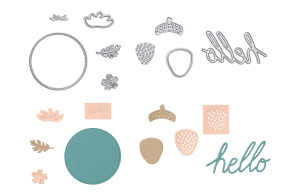
You can see the products made to make this card below but some products are not available until Wednesday Sep 3. You can Still create this fun fold with several other designer series papers and colors. Be creative, share with me what you have done.

Need catalogs? Connect with me as I would love to share Stampin’ Up! information and products to purchase.

Stampin' Up! Sep-Dec 2025 Mini Catalog

Click the image below to shop with me for the2025-2027 In Color SALE!
Stampin' Up! In Color 2025-2027 Sale

Last Chance products are just that – once gone, gone for good. There are some super buys in this list. Click the image below to shop with me from this list.
Stampin' Up! LAST CHANCE PRODUCTS

Thanks for stopping by. May you have a beautiful day making someone happy with a card made with ❤️


Product List

Stampin’ Up! Charming Day for the Happy Inkin’ Thursday Blog Hop

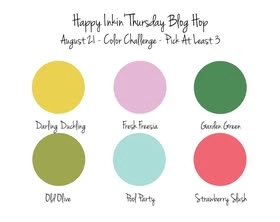
It’s Thursday and time for the Happy Inkin’ Thursday Blog hop! We have a color challenge today and I’ve chosen the Charming Day bundle, an ONLINE EXCLUSIVE. I’ve used a lot of colors on this card and I think I’ve pulled it off. Hope you like it too.

Stampin' Up! blog hop logo
Stampin' Up! blog color challenge
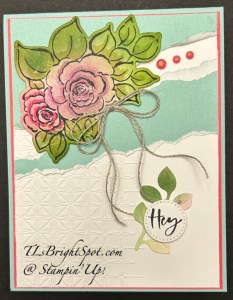
Stampin' Up! Charming Day card front, color challenge

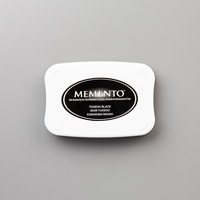
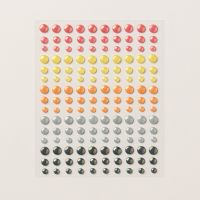
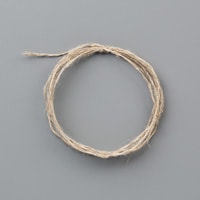
I began by coloring a piece of Basic White card stock with Blending Brushes: Strawberry Slush, Garden Green & Old Olive, Darling Duckling and Fresh Freesia. I then stamped this beautiful bouquet from the Charming Day bundle in Memento ink directly on the colored paper. Using Stampin’ Blends I enhanced some of the colors in the flowers & leaves: Strawberry Slush, Fresh Freesia and Old Olive. I added Wink of Stella to the flowers for a bit of sparkle, then die cut the image using the Charming Day Dies. I set this aside and die cut the small leaf image using another of the Charming Day Dies and set this aside to work on the background of this floral creation. I wanted texture, so pulled out the Glass Garden EF and embossed a Basic White panel. On page 45 in the upcoming Sep-Dec 2025 Mini Catalog is a package of TWO Tone cardstock called Keeping Traditions. I pulled out the Pool Party, cut it to about 3 1/4 x 4 then tore it to reveal the white inner. I adhered these torn pieces to the embossed panel, then added the stamped & colored floral piece with dimensionals. I adhered this to Strawberry Slush just slightly larger and attached both to a Pool Party card base. I stamped the sweet sentiment from the Charming Day stamp set in memento ink and die cut it with the Stitched Shapes Dies. I placed the die cut leaves and adhered with liquid glue adding the sentiment die cut with a dimensional over top. Final touch for the card front – 2 things… first the 2025-2027 In Color Flat Pearls in Strawberry Slush, then a double Linen Thread bow adhered with a glue dot.

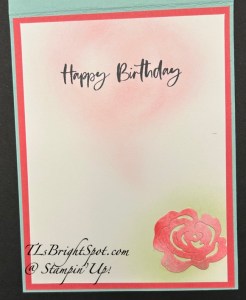
Stampin' Up! Charming Day inside card

For the inside… I colored a Basic White panel with Strawberry Slush in kind of a heart shape, then Stamped the sentiment from Charming Day stamp set in Memento ink over top of it. I die cut the flower image from that very first panel of Blending Brush colored paper – Strawberry Slush. I love how this flower ahs variations in the shading, just as a natural flower would. Before attaching it I used the Blending Brush with Old Olive ink still on it and added a bit of background for the flower, then attached the flower in place. This panel was added to Strawberry Slush then attached to the inside of the card.

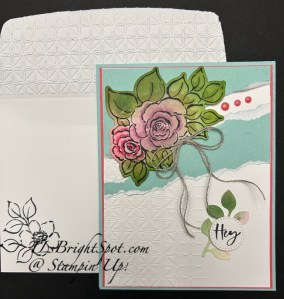
Stampin' Up! Charming Day card & envelope color challenge

For the envelope… I used the same Glass Garden embossing folder to add texture to the envelope flap. I then stamped the small floral image from Charming Day stamp set in Memento ink on the front – and done!

To continue the hop and visit Nicole, click on the ‘next’ button – or click on a name to take you to another participant. Either way – don’t miss anyone and enjoy the hop!

Stampin' Up! blog 'next' button

Amy Koenders

Mary Deatherage

Karen Ksenzakovic

Akiko Sudano

Tara Carpenter

Terry Lynn Bright

Nicole Bloxom

There is always something new in the Stampin’ Up! world and that keeps us doing and creating. I love that challenge & inspiration. For the latest news about new packaging and a view of an upcoming November ONLINE EXCLUSIVE, visit my post about that here

The 2025-2027 iIn Color Sale continues through the end of August – see all the products by clicking the image below.

Remember there are LAST CHANCE PRODUCTS available – an amazing list of items. Check that by clicking the LAST CHANCE image below.

Customers will be able to order from the Sep-Dec 2025 Mini Catalog Wednesday Sep 4. If you do not have a demonstrator and need a catalog or have questions, please reach out to me. I’m happy to help!

Stampin' Up! Sep-Dec 2025 Mini Catalog

Card cuts for today’s project:

  • Pool Party card base – 4 1/4 x 11 scored at 5 1/2
  • Strawberry Slush – (2) 4 1/8 x 5 3/8
  • Basic White – (2) 4 x 5 1/4; another for color blending w/ Blending Brushes + scrap for sentiment

Thanks for stopping by. May you have a beautiful day.

Make someone happy sending them a handmade card filled with love ❤️
 

Product List
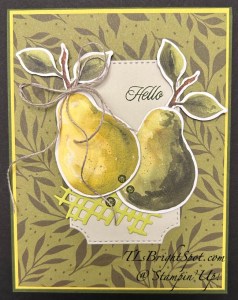
Stampin’ Up! Perfectly Pears plus Branching Out Dies

Good Sunday morning! I’ve a sweet Perfectly Pears card for you today and I paired it with a new die set from the Sep-Dec 2025 Mini Catalog called Branching Out Dies. It has a stamp set as well, but I’m not using that today.

Stampin' Up! Perfectly Pears card front

This new die is shown here in the Basic Beige – as a background for the pears. The leaves of thew pears cover the top of the die cut, but it’s the same as the bottom. There are at least 6 of these layering dies in the set, plus some other fun dies as well. It’s wonderful. How to make this card…

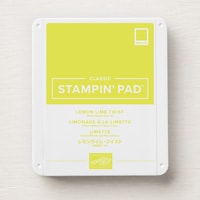
The card base is Mossy Meadow with a layer of Darling Duckling then a layer of Painterly Pears DSP. Next I die cut the Basic Beige with the Branching Out dies and added it. With another piece of the Painterly Pears DSP and the Perfectly Pears Dies, I die cut the two pears and the stem/ leaves. Using another die in the Perfectly Pears Dies and Lemon Lime Twist, I die cut the open weave image. I adhered the stem/ leaves to each pear, then attached them to the card front: the darker pear is adhered directly and the lighter pear is on dimensionals. I slipped the open weave die cut under the pears and attached with dabs of liquid glue. The leaves of the darker pear do have dimensionals. Once everything was innplace, I stamped the sentiment in Mossy Meadow ink. It comes from the Perfectly Pears stamp set. Final touch – three Low Profile Sparkle Dots in Old Olive and a double Linen Thread bow added with a glue dot.

Stampin' Up! Perfectly Pears inside card

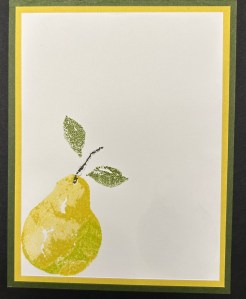
For the inside…on a panel of Basic White… the pear comes from the Perfectly Pears stamp set… inked first in Darling Duckling then Lemon Lime Twist added with a sponge dauber and stamped on the panel. The stem’ leaves are also from this stamp set and are inked with Old Olive and Early Espresso Markers. This was attached to aDarling Duckling panel then added to the inside of the card.

Stampin' Up! Perfectly Pearas card & envelope

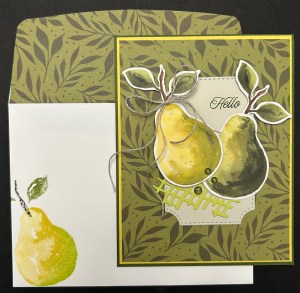
For the envelope… The same Painterly Pears DSP was added to the flap & trimmed to fit. The pear was stamped using the same method as above – using the Perfectly Pears stamps, Darling Duckling and Lemon Lime Twist inks for the pear and Old Olive and Early Espresso markers for the stem’ leaves. This is such a fabulous suite of products!

OK – more Stampin’ Up! info… The 2025-2027 In Color Sale is still on until the end of August. Click the image below to view this product sale.


Stampin' Up! In Color Sale

Last Chance Products are just that – last chance 😀 and available while supplies last. Click that image below to take you to this list.

Stampin' Up! Last Chance Products

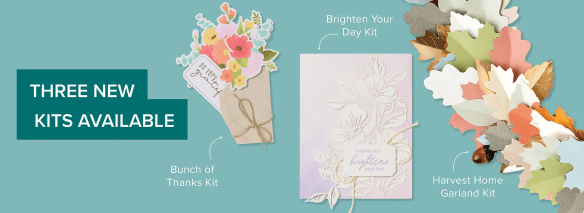
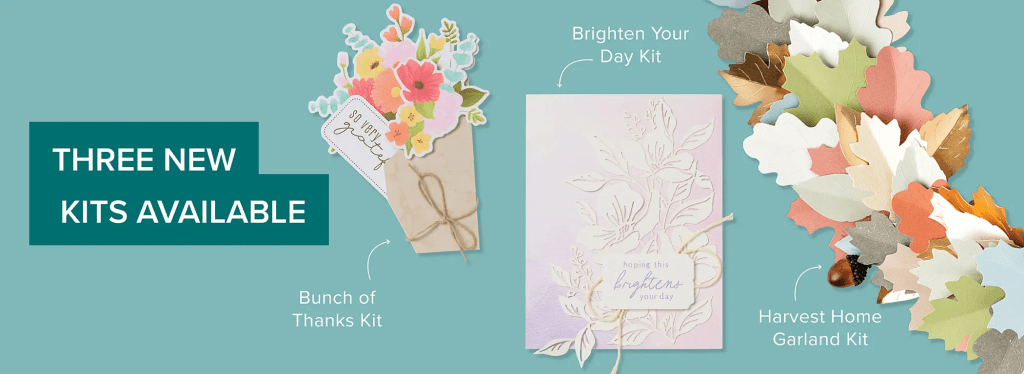
Kits and more kits… Stampin’ Up! continues to provide some of the best kits ever… There are kits for decorative items for your home as well as card kits. See those kits by clicking the image below. See that Brighten You Day Kit in the image? It is stunning! I’ll have photos of completed cards from that kit tomorrow.

Stampin' Up! Kits Collection

The Painterly Pears Suite was a July release in the Online Exclusives. It’s in my product list below. The new Sep-Dec 2025 Mini Catalogs are in the mail. If you do not have a demonstrator and need a catalog, please let me know… happy to send one to you!

Thanks for stopping by. May you have a beautiful day.

Make someone happy sending them a handmade card filled with love. ❤️


Product List
!– /wp:paragraph –>

Stampin’ Up! Sunflower 3D Anniversary Card

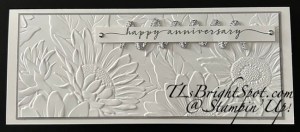
Good morning! It’s Saturday and a crisp 55 degrees here in coastal NJ. Not the right time of year for these temps, but I’ll take it! I needed an anniversary card and since that fabulous Sunflower 3D embossing folder was still on my desk – I used it 😀 This could so easily be a wedding card, but this is a couple celebrating 30 years of marriage and well, they needed something special.

Stampin' Up! Sunflower 3D Anniversary card front

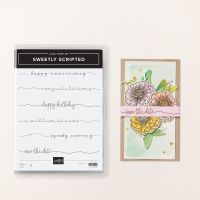
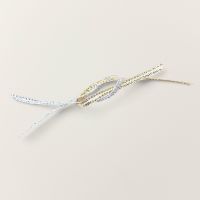
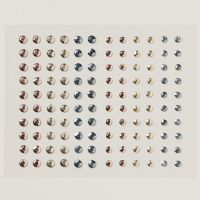
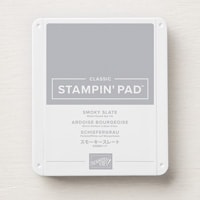
The card base is Thick Basic White to create this slimline card. After running a piece of Basic White through the Sunflower 3D embossing folder, I layered a piece of Smoky Slate to the back and adhered it to the card front. I took the Sweetly Scripted stamp set and stamped a 1/2″ strip with the sentiment in Smoky Slate. I ran my Stampin Seal along the back of the strip and attached Silver 1/8″ Trim, weaving it back and forth. I added lots of dimensionals and attached it to the card front. The last step was adding two Adhesive-Backed Metallic Gems. I absolutely love this!

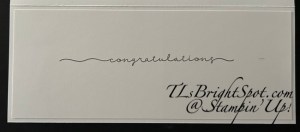
Stampin' Up! Sunflower 3D Anniversary card inside

For the inside… I used the same Sweetly Scripted stamp set and Smoky Slate ink to stamp the congratulations sentiment to a Basic White insert. And that was it… it’s simple and quite elegant.

Card cuts will be listed below to make this simple, elegant card. Stampin’ Up! has some great deals going right now. CLICK HERE TO VIEW ALL! or click the various images below.

Stampin' Up! LAST CHANCE PRODUCTS
STAMPIN' UP! KITS COLLECTION

Card cuts for this card:

  • Thick Basic White 7 x 8 1/2 scored at 3 1/2
  • Smoky Slate 3 1/4 x 8
  • Basic White 7 7/8 x 3 1/8 (embossed); 1/2 x 5 1/2 (sentiment strip); 3 1/4 x 8 1/4 (inside)

Thanks for stopping by. May you have a beautiful day.

Make someone happy sending them a handmade card filled with love ❤️

New products from the Sep-Dec 2025 Mini Catalog and from the soon to be released Sep ONLINE EXCLUSIVES have arrived on my doorstep. Looking for inspiration? Visit this blog post tomorrow!


Product List

Stampin’ Up! Sunflower Embossing Folder – Off-set Gatefold Sympathy Card

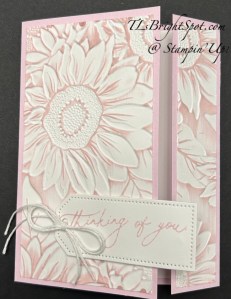
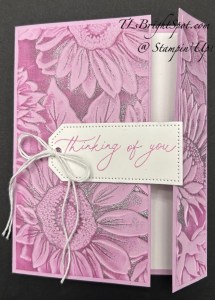
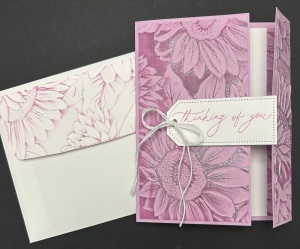
Good morning – it’s Friday and I have two cards for you this morning using the debossed side of paper run through this fabulous Sunflower 3D embossing folder. And, it’s an off-set gatefold card. In a traditional gatefold card, both closing sides are the same width; this off-set means one side (the right side in this case) is more narrow. Let’s take a peek…

Stampin' Up! Sunflower 3D offset gatefold card front
Stampin' Up! Offset gatefold Sunflower 3D card front

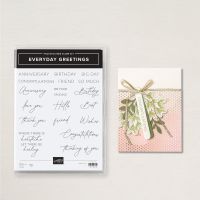
The card on the left is made with a Bubble Bath card base, embossed Basic White card stock, and Bubble Bath ink. The card on the right is made with Fresh Freesia card stock and a layer of embossed Fresh Freesia sprinkled with WOW! Metallic Embossing Powder in silver and heat set with the heat tool. It gives this card a real element of elegance. The sentiment on each card is from the Everday Greetings stamp set die cut with the Tailor Made Tags Dies. White Basic Twine was run through the hole in the tag and tied into a bow. The tag was adhered with dimensionals to the larger side of the card front.

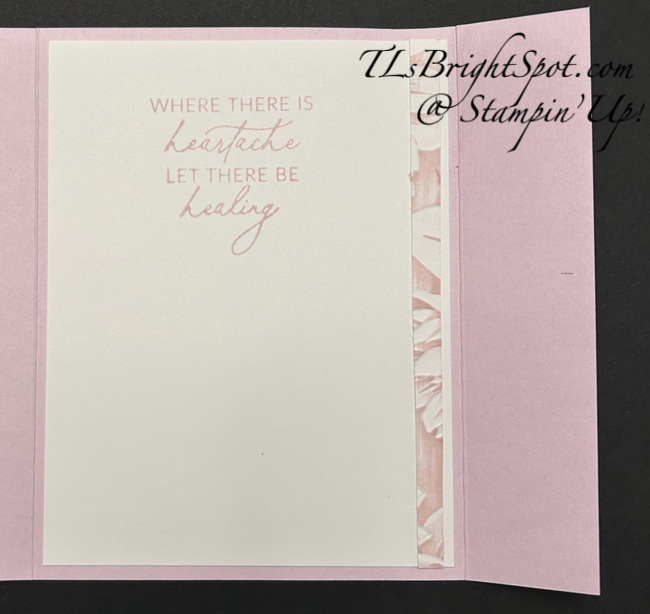
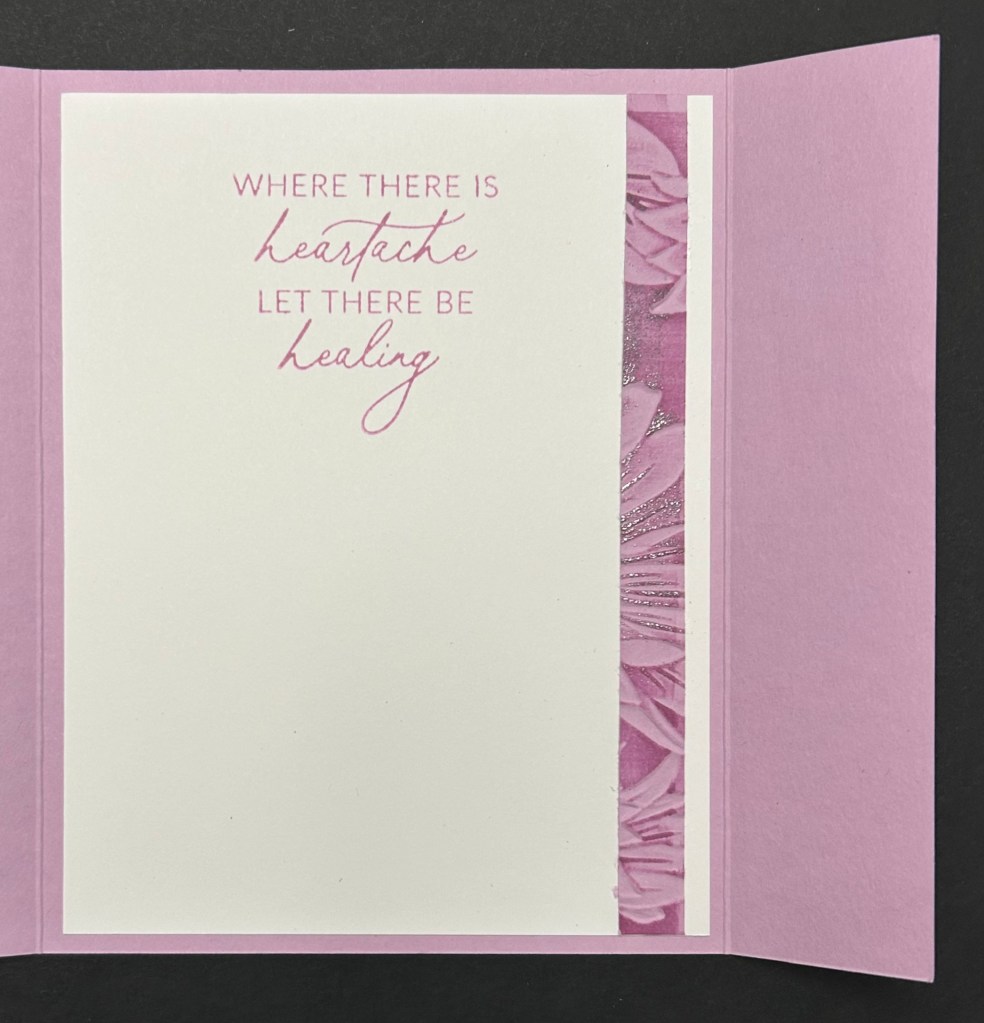
For the inside of the card… I had started with a 4 x 5 1/4 Basic White panel to emboss with the Sunflower Embossing folder. After inking the debossed side, I trimmed it down and there was a narrow remaining piece – which I adhered to the Basic White insert. I also stamped the sentiment: Bubble Bath for the first card and Fresh Freesia for the second. These were adherred and the cards were complete.

For the envelope… I took another strip of Basic White, ran it through the Sunflower 3D embossing folder, inked the debossed side: again, Bubble Bath ink for the first card and Fresh Freesia for the second card. For the second card I again sprinkled it with WOW! Metallic embossing powder in silver and heat set it. Each was adhered to a Basic White envelope and trimmed to fit. Card cuts are listed below.

Just a word about inking an embossed panel… if you saw yesterday’s post, it indicated a 45 degree angle when running the ink pad along the embossed piece. For these cards, the angle was more like a 20 degree angle and I liked it much better. Practice, right?!

Card cuts:

  • Card bass 8 1/2 x 5 1/2 scored on long side @ 1 1/4 & 5 1/2
  • Embossed layer 4 x 5 1/4 trimmed to 2 7/8 x 5 14, 1 x 5 1/4, remainder used for inside
  • Basic White for inside 4 x 5 1/4
  • Envelope flap 2 1/4 x 6, adhered & trimmed to fit

Stampin’ Up! has some fabulous updates: 2025-2027 IN COLOR SALE; LAST CHANCE PRODUCTS LIST UPDATED; and 3 new kits available. CLICK HERE TO VIEW ALL!

Stampin' Up! 2025-2027 IN COLOR SALE
Stampin' Up! LAST CHANCE PRODUCTS
Stampin' Up! Kits Collection

Thanks for stopping by. May you have a beautiful day.

Make someone happy sending them a handmade card filled with love ❤️


Product List
Stampin’ Up! Prairie Grass & Blending Brushes

Hello Monday! It’s hot here again in NJ – up to 93 today with very high humidity – not a day for being outside much. Guess I’ll just have to play in my stamp room – after doing chores of course 😀

Stampin' Up! Prairie Grass card front

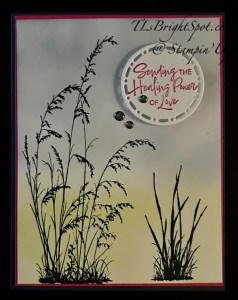
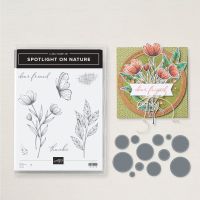
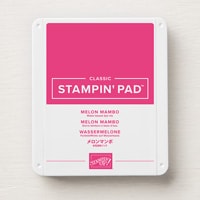
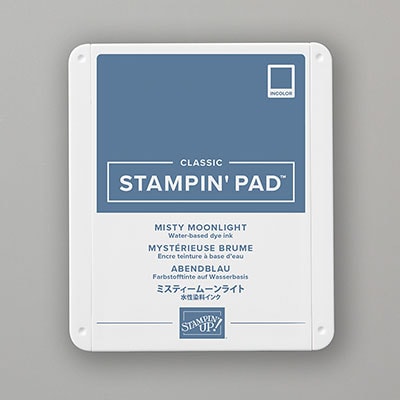
Prairie Grass is a fairly new stamp set for me and I am loving the grasses and the fonts for the sentiments. It’s an ONLINE EXCLUSIVE stamp set. I got out my Blending Brushes and a couple of inks and went to work… Misty Moonlight and a hint of Secret Sea for the sky then Lemon Lime Twist for the lower portion. I stamped the grasses in Secret Sea. I used my color wheel to bring in a contrasting color – Melon Mambo ink for the sentiment – and yes, it comes from the Prairie Grass stamp set. I die cut it with Spotlight On Nature Dies, put it on dimensionals and added it to the card front. I used the Low Profile Sparkle Dots in Secret Sea for a bit of glam. These come from the Perfectly Pear suite of products. This front panel was added to Melon Mambo then adhered to the Secret Sea card base.

Stampin' Up! Prairie Grass card inside

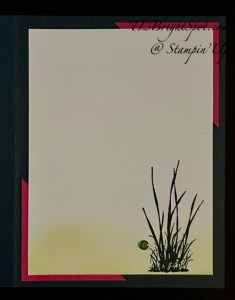
For the inside… I again used the Lemon Lime Twist and a Blending Brush to add color to the bottom of the Basic White. I then stamped one of the grasses in Secret Sea ink. I adhered two triangles in corners for a background border, bringing in the color from the front of the card. I gives a very modern look.

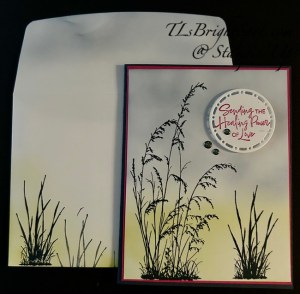
Stampin' Up! Prairie Grass card & envelope

For the envelope… I again added Lemon Lime Twist with my Blending Brush to the front, then stamped full strength the tallest grass, then stamped twice more without reinking – with Secret Sea ink. On the flap I added Misty Moonlight and a bit of Secret Sea with a Blending Brush.

See how to order these products below.

Cards cuts are as follows:

  • Card base – Secret Sea 8 1/2 x 5 1/2 scored at 4 1/4
  • Layer Melon Mambo 4 1/8 x 5 3/8 (front), 2 x 2 cut on diagonal (inside)
  • Basic White 4 x 5 12/4 (front, 3 3/4 x 5 (inside), 2″ scrap for circle die cut

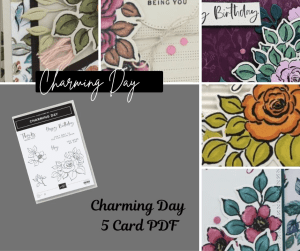
Get your FREE card tutorial using Stampin’ UP Charming Days Bundle this month with a $50 purchase at my online store.

Paper Pumpkin for August

Stampin' Up! August 2025 Paper Pumpkin

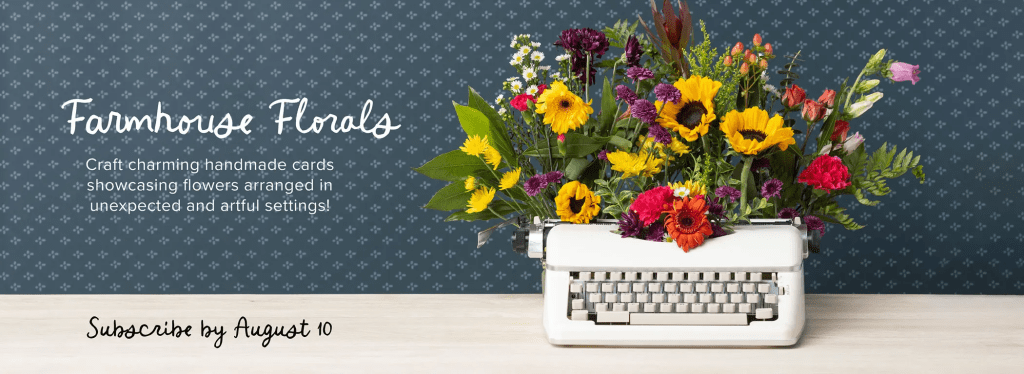
Kit Name:  Farmhouse Florals

This kit includes:

  • Makes 9 cards: 3 each of 3 designs with 9 coordinating envelopes
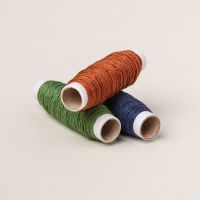
  • Precut paper pieces and linen thread
  • Sentiment stamps for the outside and inside of the cards
  • Coordinating colors: Calypso Coral, Darling Duckling, Gray Granite, Lost Lagoon,
  • Pecan Pie, Secret Sea (Classic Stampin’ Spot)
  • Subscribe by August 10 to get this awesome kit!

For more information and to sign up for the monthly or to check out the prepaid subscription options, click here… Paper Pumpkin is now all in one place! And here’s the add-on for June/ July and August that coordinates with the Paper Pumpkin kits for these months.

Circle of Season Dies

Stampin Up! Paper Pumpkin Circle of Season Dies

Thanks for stopping by. May you have a beautiful day. Make someone happy sending them a handmade card filled with love. ❤️

 Product List


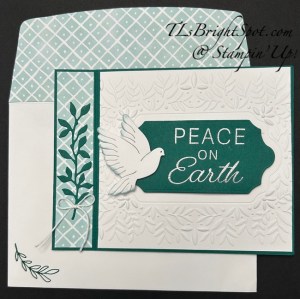
Stampin’ Up! Sneaky Peek: Book fold with Peace on Earth Bundle

Today’s card highlights the Peace on Earth bundle, which includes an embossing folder. This is part of a suite that will be available in the 2025 Sep-Dec Mini Catalog. This embossing folder makes a stunning leaf imprint with a center area open for a sentiment panel. I made a similar card a while back and my card class students wanted to give it a try. We made one of each – the original card in blues and this in Shaded Spruce. Here is the link to the original card.

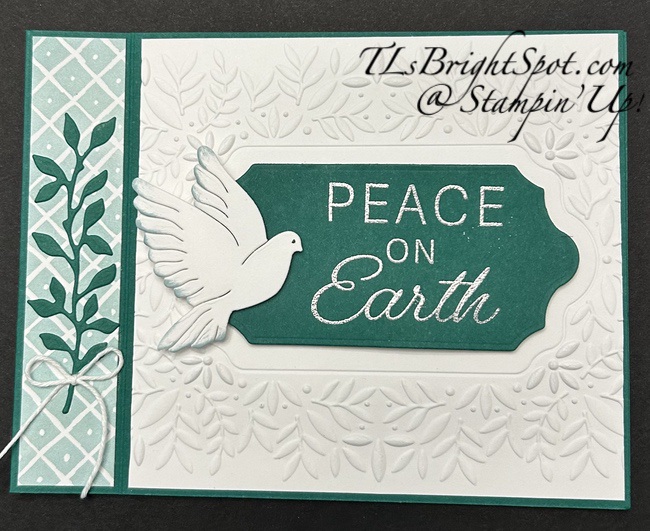
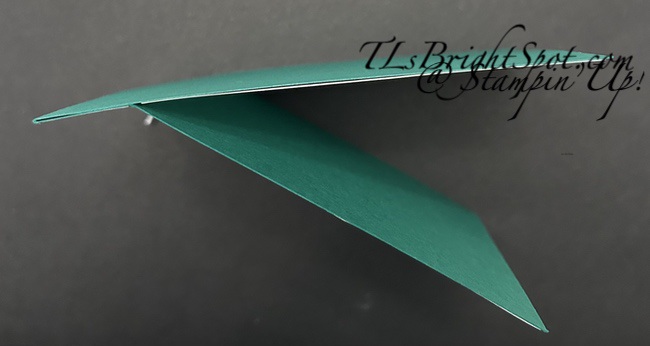
The card base is 4 1/4 x 11 scored at 4 1/2 & 5 1/2. Burnish the score lines well – fold the card in half (that’s the 5 1/2 score), then fold the 4 1/2 score forward. Add glue to that 1″ area and close the card base. This makes it a book fold! Now decorate… I ran a Basic White panel (4 1/8 x 4 3/8) through the Peaceful Garden embossing folder and adhered it to the card front. I cut a piece of Nests of Winter DSP 7/8 x 4 1/8 and adhered that to the 1″ area. With my Cut & emboss machine, I die cut the banner and leaf image from Shaded Spruce, and the dove from Basic White. I used a sponge dauber and Cloud Cover ink to add color around the feathers of the dove, then added an eye with just a dot of the Journaling pen. I set the dove aside. For the sentiment banner, Inused an embossing buddy to remove any finger marks, stamped the sentiment in VersaMark ink and sprinkled it with Wow! Polished Silver embossing powder & heat set with my heat tool. I added this to the card front with dimensionals, then added the dove with dimensionals. With dabs of liquid glue, I added the leaf die cut to the Nests of Winter DSP. I made a tiny bow from Bakers Twine – and the card front was complete!

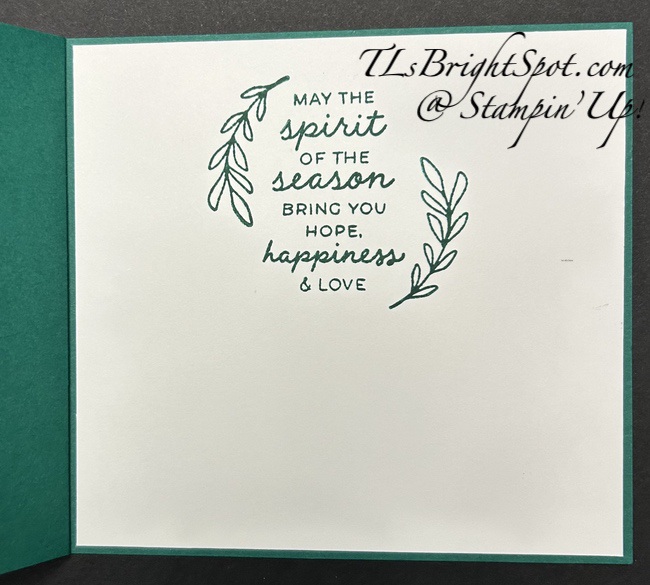
For the inside – a Basic White panel 4 1/8 x 4 3/8 stamped in Shaded Spruce ink using the Jolly Holly stamp set – a July ONLINE EXCLUSIVE. Note the photo of the top view of the book fold.

Stampin' Up! Book fold Peace on Earth card & envelope

For the envelope – more of the Nests of Winter DSP adhered to the flap & trimmed to fit. An ‘olive branch’ is stamped on the envelope front from the Jolly Holly stamp set (the same July ONLINE EXCLUSIVE)- in Shaded Spruce ink.

Now… let’s talk about the September-December 2025 Mini Catalog 😀 As a demonstrator, we have the opportunity to view the new catalog early, before it’s released to customers. If you would like that opportunity I encourage you to consider becoming a demonstrator on my team. We have lots of fun, team workshops, team demonstrations and shared team info. At least 20% off every order & other benefits as well. Join my team here!

Thanks for stopping by. May you have a beautiful day!

Make someone happy sending them a handmade card filled with love. ❤️

Product List
Stampin’ Up! Sunflower 3D and Woven Textures DSP for the Happy Inkin’ Thursday Blog Hop

Welcome to our Blog Hop! I want to give a shout out to a new person in our Thursday lineup for the blog hop – Nicole Bloxom. Can’t wait to see what she has created for today’s sketch challenge. Welcome Nicole!

So… this has been a stressful week – I learned I must have a heart catheterization tomorrow (7/18) with the possibility of a stent. I’m not used to this – having a cardiologist & all that, testing & so forth. It took my mojo & I’m having a bit of trouble creating… so bear with me. You may remember, I had a knee replacement back in early May – that has meant PT 3 x/ week since then. Today’s card is for my Physical Therapist as today is my last day for PT. WOOHOO!!! And just so you know, I can bend my knee on my own to 120 degrees and walk without a limp – no one would ever know I had a knee replacement. 😀

Stampin' Up! Blog hop Logo
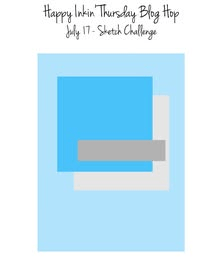
Stampin' Up! Hop Sketch Challenge

Stampin' Up! Sunflower 3D & Woven Textures card front

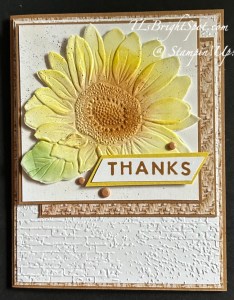
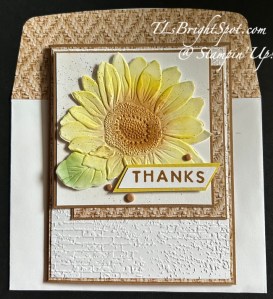
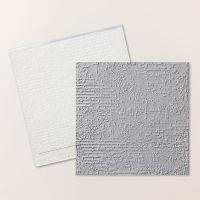
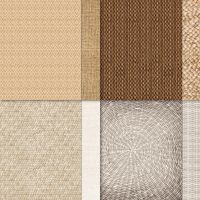
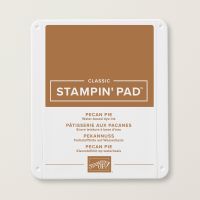
I used a new embossing folder from the July ONLINE EXCLUSIVES called Sunflower 3D embossing folder. It’s a stand alone item, which is unusual. I embossed the sunflower then colored it with Stampin’ Blends Darling duckling, Pecan Pie & Garden Green then fussy cut this single flower with my paper snips. I put dimensionals on the back and attached it to a Basic White panel 3 1/2″ square then to Pecan Pie card stock 1/8″ larger. I took Woven Textures DSP & cut it 3 1/2″ square and added that to Pecan Pie cardstock 1/8″ larger, then adhered these squares together as shown. For the background I ran a 4 x 5 14 panel of Basic White through the Exposed Brick 3D embossing folder then to another of the same design Woven Textures DSP 1/8″ larger – and attached to the Pecan Pie A2 card base. I used my Early Espresso Marker to ‘flip’ some splatters to the upper portion.The sentiment is from Sunshine Vibes stamp set stamped in Pecan Pie ink on a 1/2″ strip of Basic White adhered to Darling Duckling just 1/8″ wider. This was added to the flower with liquid glue then I added a single mini dimensional under the ‘s’. Myn final touch was three Neutral Matte Dots in Pecan Pie.

Stampin' Up! Sunshine Vibes inside card

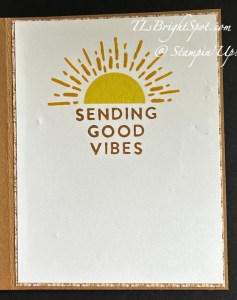
For the inside… I wanted something light & positive. Pulling out that same Sending Sunshine stamp set, I stamped the half sun in Darling duckling then the rays (stamped twice) in Crushed Curry, then the sentiment in Pecan Pie – all on a Basic White 4 x 5 1/4. I added this to the same pattern of Woven Textures DSP 4 1/8 x 5 3/8, added them both to the inside of the card – and done! As I mentioned, this card is to my Physical Therapist, but there are two therapists in this office. We joke with one another, share stories, kid around and WORK OUR ROUTINE to get where we need to be. It has been a good experience and I will miss these folks.

Stampin' Up! Sunflower 3D & Woven textures card & envelope

The envelope – keeping it simple, a piece of the same pattern of Woven Textures DSP adhered to the flap & trimmed to fit. That’s it. Want to purchase the products to make this card? See below for all the pertinent information. Also – continue on the hop by clicking the ‘next’ button or clicking on a name. Enjoy the hop!

Stampin' Up! Hop button

Amy Koenders

Mary Deatherage

Karen Ksenzakovic

Tara Carpenter

Terry Lynn Bright – you are here!!!

Nicole Bloxom

For online Exclusive’s click here. Use that same link to see the KITS COLLECTION, LAST CHANCE PRODUCTS and all items in the 2025-2026 Annual Catalog, & Paper Pumpkin info.

Thanks for Stopping by. May you have a beautiful day!

Create for someone else – be a positive influence for others. ❤️

Product List
Stampin’ Up! Peaceful Garden Suite for the Happy Inkin’ Thursday Blog Hop

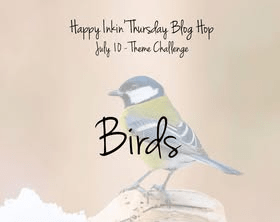
Welcome to our Thursday hop! If yo have joined me from the fabulous tara, glad you stopped by. If you jumped in right here – love that too! We have a theme challenge today – BIRDS… and I have chosen the new & wonderful Peaceful Garden Suite, available in the Sep-Dec Mini Catalog. Visit this post to learn more about this suite of products. The only item I did not use was the ribbon – I substituted the 1/2″ Sheer Ribbon, Silver & White. Let’s take a look-see.

Stampin' Up! Peaceful Garden Suite for the Happy Inkin' Thursday blog Hop
Stampin' Up! Hopo Theme Challenge
Stampin' Up! Peaceful Gardens Sympathy card front

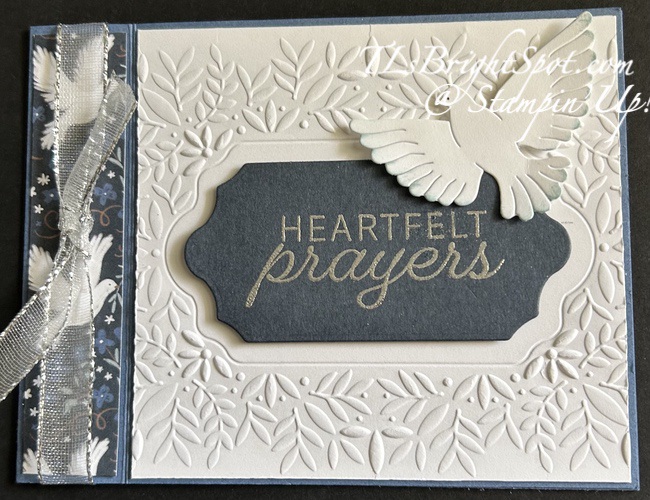
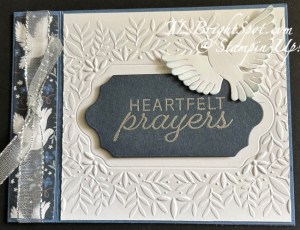
I began with a Misty Moonlight card base 4 1`/4 x 11 scored at 4 1/2 then 5 1/2 – to create a bookfold card.Next I cut a 7/8 x 4 1/8 piece of the Peaceful Garden 12×12 DSP and attached it tot he area between the two score lines. I then used the Silver & White 1/2″ Sheer ribbon to wrap over the DSP, securing with Tear n’ Tape. I then adhered that section to the card base, creating the bookfold. :O) I then tied a length of the same ribbon with a single knot around the ribbon and secured the knot with a glue dot. Next, I took a piece of Basic White 4 1/8 x 4 3/8 & ran it through the Peaceful Greenery 3D embossing folder. Gorgeousness! I adhered this to the remaining card front. With Secret Sea I cut the sentiment panel using the smaller label die in the Peace On Earth Dies. I used an embossing buddy to remove any specks, stamped the sentiment in VersaMark ink with a stamp from the Peace On Earth Stamp set,, sprinkled it with Metallic WOW! Embossing Powder in Polished Silver & heat set with the heat tool. I mounted this to the card front with dimensionals. This stunning dove is cut from Basic White with the Peace on Earth Dies. I used a dauber & Cloud Cover ink to add just a hint of color to the edges of the wings & tail. Attach with dimesnionals under the right wing & the bird body.

Stampin' Up! Peace On Earth card inside

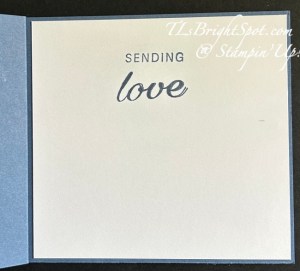
For the inside… I stamped the sentiments in Misty Moonlight ink on top of a bit of color of Cloud Cover added with the sponge dauber – these on a 4 1/8 x 4 3/8 Basic White panel.

Stampin' Up! Peaceful Garden Sympathy card & envelope.

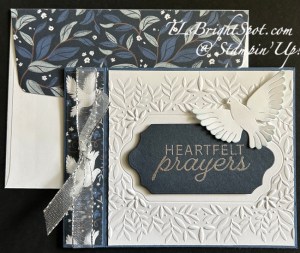
For the envelope, a different pattern from the Peaceful Garden 12×12 DSP adhered to the flap & trimmed to fit. For information on how to order products to make this card, see below.

Thanks for stopping by my blog. Follow along the links below to visit others in this blog hop – click the next button to take you to Amy K or click on a name. Whatever you do – see them all – enjoy the hop!

Amy Koenders

Mary Deatherage

Karen Ksenzakovic

Tara Carpenter

Terry Lynn Bright

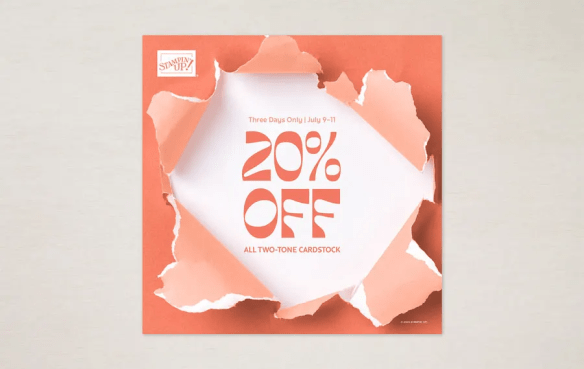
Remember that the SALE IS ON for Two-Tone cardstock, 20% off Jul 9-11 – while supplies last.

Stampin' Up! Two-Tone cardstock SALE!

All two-tone cardstock is now 20% off! Now is the time to stock up on this versatile crafting essential that’s perfect for both card making and scrapbooking. This sale only lasts three days, so make sure you visit the online store to shop a wide variety of colors before they’re gone! 

106 Color Variations. Our two-tone cardstock offers 53 lighter and darker Stampin’ Up! colors on double-sided sheets. It’s available in single or mixed-color packs for harmonious colorful or monochromatic projects. Encourage your customers to stock up on favorites or try new colors with no regrets!

A Crafting Necessity. Two-tone cardstock has so much to offer! It’s an ideal layering option without adding bulk and its white core means you can tear, crumple, sand, and emboss your way to fun effects whatever your crafting skill level. Its smooth texture is great for stamping, clean cuts, crisp folds, and seamless color applications. And because it’s 12″ x 12″ (30.5 x 30.5 cm), you can use it as a scrapbook base, or you can cut it to use as part of your card-making projects.

Sales Period:  July 9–11

– Sale ends:  July 11, 2025, at 11:59 p.m. (MT)

– Single-pack and multipack two-tone cardstock is 20% off.

– Some colors might sell out sooner than others.

– Available while supplies last.

Thanks for stopping by. May you have a beautiful day.

Make someone happy sending them a handmade card made with love. ❤️

 Product List
/p>

Stampin’ Up! NEWS FLASH! ALL TWO-TONE CARDSTOCK 20% OFF

20% Off Starts Today! JULY 9

Stampin' Up! Two-Tone CS SALE

All two-tone cardstock is now 20% off! Now is the time to stock up on this versatile crafting essential that’s perfect for both card making and scrapbooking. This sale only lasts three days, so make sure you visit the online store to shop a wide variety of colors before they’re gone! 
106 Color Variations. Our two-tone cardstock offers 53 lighter and darker Stampin’ Up! colors on double-sided sheets. It’s available in single or mixed-color packs for harmonious colorful or monochromatic projects. Encourage your customers to stock up on favorites or try new colors with no regrets!

A Crafting Necessity. Two-tone cardstock has so much to offer! It’s an ideal layering option without adding bulk and its white core means you can tear, crumple, sand, and emboss your way to fun effects whatever your crafting skill level. Its smooth texture is great for stamping, clean cuts, crisp folds, and seamless color applications. And because it’s 12″ x 12″ (30.5 x 30.5 cm), you can use it as a scrapbook base, or you can cut it to use as part of your card-making projects.

Sales Period:  July 9–11

– Sale ends:  July 11, 2025, at 11:59 p.m. (MT)

– Single-pack and multipack two-tone cardstock is 20% off.

– Some colors might sell out sooner than others.

– Available while supplies last.