
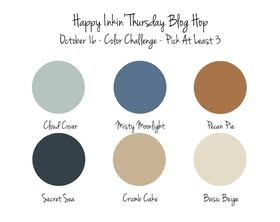
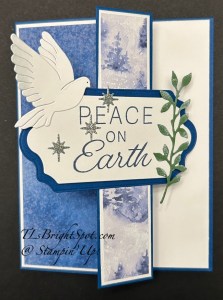
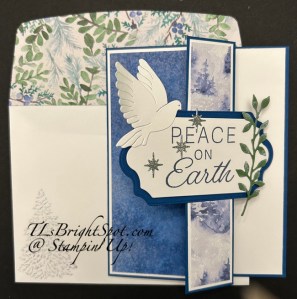
Welcome to Thursday and this wonderful group of ‘hoppers’! We have a color challenge today and I have chosen to work with the Peaceful Garden DSP, the Peaceful Garden Glimmer Paper & a bundle called Ornamental Christmas to create a fun fold.

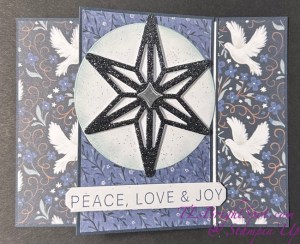
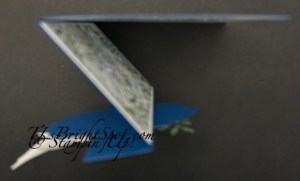
I started with a Secret Sea card base 4 1/4 x 5 1/2 & cut two strips of the Peaceful Garden DSP 1 1/2 x 4 1/8 and attached to each end leaving equal borders at top, bottom & side. I then took another piece of Secret Sea cut 4 1/4 x 5 12 & scored it on the long side @ 1 3/8 x 2 3/4. Burnish it well so it makes a nice ‘Z’ fold.

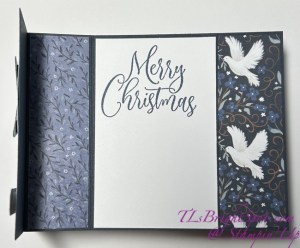
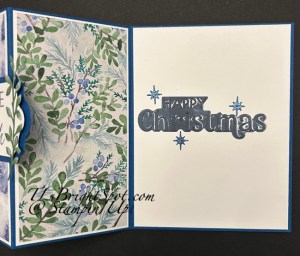
Before attaching it to the card base, I added another strip of Peaceful Garden DSP to the inside middle panel of the ‘Z’. I attached it to the card base, centering it. I stamped a Basic White panel 2 5/8 x 4 1/8 using the Ornamental Christmas stamp set & Misty Moonlight ink then added it to the inside panel of the ‘Z’.
I took yet another panel of Secret Sea 2 3/4 x 4 1/4, layered it with Peaceful Garden DSP 2 5/8 x 4 1/8 then attached it to the left panel of the z- fold. I cut a circle from Basic White using the Ornamental Christmas Dies, used Cloud Cover & a sponge dauber to add color to the edges, then flicked it with my Light Secret Sea Stampin’ Blends. I die cut the wonderful star from Peaceful Garden Glimmer paper, popped it on dimensionals & added it to the circle, centering it. For extra glam I die cut the diamond shape for the center of the star from Silver Foil Sheets & attached it with glue. I attached the circle in place on the card front with glue. For the sentiment… a stamp from Peace on Earth stamp set stamped in Misty Moonlight ink, die cut with a die from Ornamental Christmas Dies & added it to the card front with dimensionals.
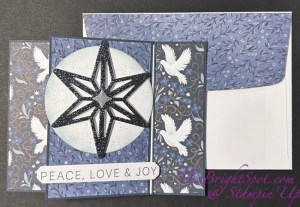
For the envelope, more of the Peaceful Garden DSP was added to the flap & trimmed to fit. Below is a list of the products to create this card & info to consider about becoming a demonstrator as part of my team 😀
Now – time to see what others have created for this color challenge. Click the next button or click on a name to take you around. Happy hopping!

Terry Lynn Bright – you are here!

From October 1 to 31, anyone who purchases the Starter Kit can choose between two amazing offers. In addition to FREE shipping, FREE business supplies, and a FREE Paper Pumpkin kit, you can either get $125 worth of products for just $35, an amazing first time ever offer, OR $189 worth of products for just $99!

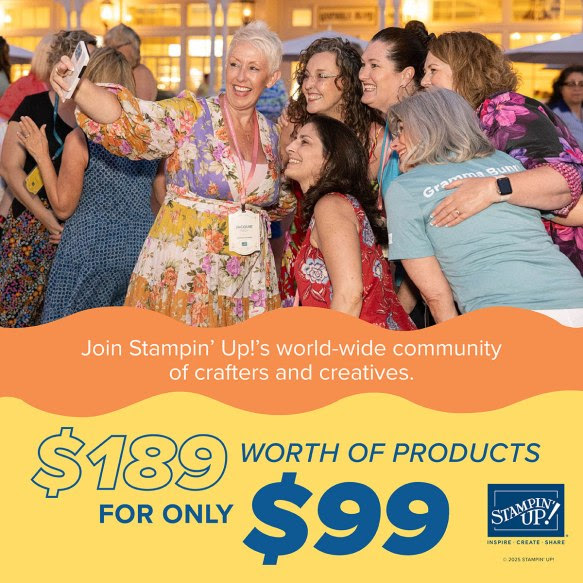
What are some of the benefits of joining…
- Crafting is even more fun with community
- Become a demonstrator and enjoy all the perks that come with that:
1) a 20–25% product discount
2) exclusive early access to the latest releases online and in catalogs
3) the opportunity to earn a modest supplemental income
4) the chance to attend incredible training and crafting events
5) Scrapbooking has never been better in Stampin’ Up! history. Have you seen all the new scrapbook products Stampin’ Up! has? It’s amazing…
6) There’s never an obligation to sell, you can join to enjoy the discount for yourself.
It’s also fun to learn new skills, develop new crafting techniques & share your passion for crafting. If you’re like me, it’s really fun to meet new people & connect with fellow crafters. How can I help & support you – lots of ways… through connection, team meetings, our team facebook page, updates. Feel free to connect with me – ask questions – get excited.
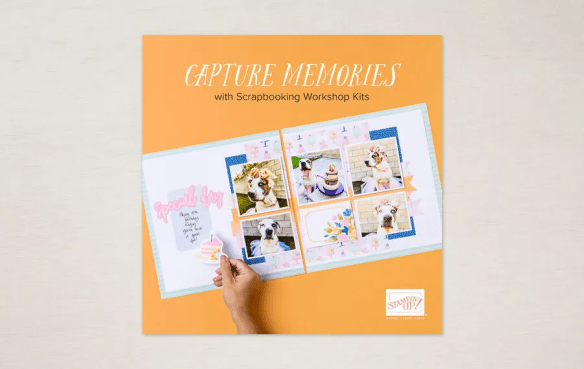
Are you a scrapbooker? Take a look at our new Scrapbooking Workshop Kits now available from the January 2025 Scrapbooking Brochure.
Thanks for stopping by. May you have a beautiful day. Make someone happy by sending them a handmade card filled with ❤️
Product List
![Peaceful Garden 12" X 12" (30.5 X 30.5 Cm) Designer Series Paper [ 165917 ]](https://assets1.tamsnetwork.com/images/EC042017NF/165917s.jpg "Peaceful Garden 12\" X 12\" (30.5 X 30.5 Cm) Designer Series Paper [ 165917 ]")
![Peaceful Garden 12" X 12" (30.5 X 30.5 Cm) Glimmer Paper [ 165929 ]](https://assets1.tamsnetwork.com/images/EC042017NF/165929s.jpg "Peaceful Garden 12\" X 12\" (30.5 X 30.5 Cm) Glimmer Paper [ 165929 ]")
![Peace On Earth Bundle (English) [ 165925 ]](https://assets1.tamsnetwork.com/images/EC042017NF/165925s.jpg "Peace On Earth Bundle (English) [ 165925 ]")
![Ornamental Christmas Bundle (English) [ 166001 ]](https://assets1.tamsnetwork.com/images/EC042017NF/166001s.jpg "Ornamental Christmas Bundle (English) [ 166001 ]")
![Silver 12" X 12" (30.5 X 30.5 Cm) Foil Sheets [ 163387 ]](https://assets1.tamsnetwork.com/images/EC042017NF/163387s.jpg "Silver 12\" X 12\" (30.5 X 30.5 Cm) Foil Sheets [ 163387 ]")
![Secret Sea 8 1/2" X 11" Cardstock [ 165624 ]](https://assets1.tamsnetwork.com/images/EC042017NF/165624s.jpg "Secret Sea 8 1/2\" X 11\" Cardstock [ 165624 ]")
![Basic White 8 1/2" X 11" Cardstock [ 166780 ]](https://assets1.tamsnetwork.com/images/EC042017NF/166780s.jpg "Basic White 8 1/2\" X 11\" Cardstock [ 166780 ]")
![Misty Moonlight Stampin' Blends Combo Pack [ 153108 ]](https://assets1.tamsnetwork.com/images/EC042017NF/153108s.jpg "Misty Moonlight Stampin' Blends Combo Pack [ 153108 ]")
![Cloud Cover Classic Stampin' Ink Refill [ 165279 ]](https://assets1.tamsnetwork.com/images/EC042017NF/165279s.jpg "Cloud Cover Classic Stampin' Ink Refill [ 165279 ]")
![Sponge Daubers [ 133773 ]](https://assets1.tamsnetwork.com/images/EC042017NF/133773s.jpg "Sponge Daubers [ 133773 ]")
![Tuxedo Black Memento Ink Pad [ 132708 ]](https://assets1.tamsnetwork.com/images/EC042017NF/132708s.jpg "Tuxedo Black Memento Ink Pad [ 132708 ]")
![Basic White Medium Envelopes [ 159236 ]](https://assets1.tamsnetwork.com/images/EC042017NF/159236s.jpg "Basic White Medium Envelopes [ 159236 ]")
![Stampin' Cut & Emboss Machine [ 149653 ]](https://assets1.tamsnetwork.com/images/EC042017NF/149653s.jpg "Stampin' Cut & Emboss Machine [ 149653 ]")
![Clear Wink Of Stella Glitter Brush [ 141897 ]](https://assets1.tamsnetwork.com/images/EC042017NF/141897s.jpg "Clear Wink Of Stella Glitter Brush [ 141897 ]")
![Paper Trimmer [ 152392 ]](https://assets1.tamsnetwork.com/images/EC042017NF/152392s.jpg "Paper Trimmer [ 152392 ]")
![Stampin' Dimensionals [ 104430 ]](https://assets1.tamsnetwork.com/images/EC042017NF/104430s.jpg "Stampin' Dimensionals [ 104430 ]")
![Multipurpose Liquid Glue [ 110755 ]](https://assets1.tamsnetwork.com/images/EC042017NF/110755s.jpg "Multipurpose Liquid Glue [ 110755 ]")
![Mini Glue Dots [ 103683 ]](https://assets1.tamsnetwork.com/images/EC042017NF/103683s.jpg "Mini Glue Dots [ 103683 ]")
![Paper Snips [ 103579 ]](https://assets1.tamsnetwork.com/images/EC042017NF/103579s.jpg "Paper Snips [ 103579 ]")
![Take Your Pick [ 144107 ]](https://assets1.tamsnetwork.com/images/EC042017NF/144107s.jpg "Take Your Pick [ 144107 ]")
Card Cuts:
Secret Sea: 4 1/4 x 5 1/2 (2), score one of these @ 1 3/8, 2 3/4 on the long side; 2 3/4 x 4 1/4 (front panel)
Basic White: 2 5/8 x 4 1/8 (inside); 3 1/4 x 3 1/4 (circle die cut); 5/8 x 3 1/2 (sentiment)
DSP: Peaceful Garden – 1 1/2 x 4 1/8 (cut 2); 1 1/4 x 4 1/8 (middle inside ‘Z’ fold); 2 5/8 x 4 1/8 (front panel)
Peaceful Garden Glimmer Paper 3 x 3 1/2 (star die cut)
Silver Foil sheet: scrap (1″ x 1″ at most!)
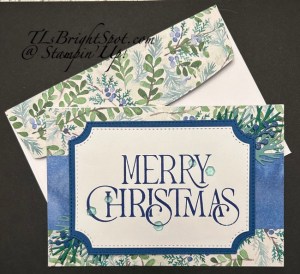
![Merry Christmas Photopolymer Stamp Set (English) [ 165831 ]](https://assets1.tamsnetwork.com/images/EC042017NF/165831s.jpg "Merry Christmas Photopolymer Stamp Set (English) [ 165831 ]")
![Gift Of Joy Photopolymer Stamp Set (English) [ 165964 ]](https://assets1.tamsnetwork.com/images/EC042017NF/165964s.jpg "Gift Of Joy Photopolymer Stamp Set (English) [ 165964 ]")
![Branching Out Bundle (English) [ 165776 ]](https://assets1.tamsnetwork.com/images/EC042017NF/165776s.jpg "Branching Out Bundle (English) [ 165776 ]")
![Winter Meadow 12" X 12" (30.5 X 30.5 Cm) Designer Series Paper [ 162133 ]](https://assets1.tamsnetwork.com/images/EC042017NF/162133s.jpg "Winter Meadow 12\" X 12\" (30.5 X 30.5 Cm) Designer Series Paper [ 162133 ]")
![Shaded Spruce 8-1/2" X 11" Cardstock [ 146981 ]](https://assets1.tamsnetwork.com/images/EC042017NF/146981s.jpg "Shaded Spruce 8-1/2\" X 11\" Cardstock [ 146981 ]")
![Blueberry Bushel 8-1/2" X 11" Cardstock [ 146968 ]](https://assets1.tamsnetwork.com/images/EC042017NF/146968s.jpg "Blueberry Bushel 8-1/2\" X 11\" Cardstock [ 146968 ]")
![Misty Moonlight 8-1/2" X 11" Cardstock [ 153081 ]](https://assets1.tamsnetwork.com/images/EC042017NF/153081s.jpg "Misty Moonlight 8-1/2\" X 11\" Cardstock [ 153081 ]")
![Real Red 8-1/2" X 11" Cardstock [ 102482 ]](https://assets1.tamsnetwork.com/images/EC042017NF/102482s.jpg "Real Red 8-1/2\" X 11\" Cardstock [ 102482 ]")
![Misty Moonlight Classic Stampin' Pad [ 153118 ]](https://assets1.tamsnetwork.com/images/EC042017NF/153118s.jpg "Misty Moonlight Classic Stampin' Pad [ 153118 ]")
![Blueberry Bushel Classic Stampin' Pad [ 147138 ]](https://assets1.tamsnetwork.com/images/EC042017NF/147138s.jpg "Blueberry Bushel Classic Stampin' Pad [ 147138 ]")
![Traditional Sparkling Sequins [ 165875 ]](https://assets1.tamsnetwork.com/images/EC042017NF/165875s.jpg "Traditional Sparkling Sequins [ 165875 ]")
![Shades Of Green Hexagons [ 165233 ]](https://assets1.tamsnetwork.com/images/EC042017NF/165233s.jpg "Shades Of Green Hexagons [ 165233 ]")
![Faceted Snowflakes [ 166077 ]](https://assets1.tamsnetwork.com/images/EC042017NF/166077s.jpg "Faceted Snowflakes [ 166077 ]")


![Snowflake Kisses Bundle (English) [ 166023 ]](https://assets1.tamsnetwork.com/images/EC042017NF/166023s.jpg "Snowflake Kisses Bundle (English) [ 166023 ]")
![Peaceful Garden Designer Series Paper & Sticker Sheet (English) [ 167363 ]](https://assets1.tamsnetwork.com/images/EC042017NF/167363s.jpg "Peaceful Garden Designer Series Paper & Sticker Sheet (English) [ 167363 ]")
![Cloud Cover 8 1/2" X 11" Cardstock [ 165621 ]](https://assets1.tamsnetwork.com/images/EC042017NF/165621s.jpg "Cloud Cover 8 1/2\" X 11\" Cardstock [ 165621 ]")
![Azure Afternoon 8 1/2" X 11" Cardstock [ 161719 ]](https://assets1.tamsnetwork.com/images/EC042017NF/161719s.jpg "Azure Afternoon 8 1/2\" X 11\" Cardstock [ 161719 ]")
![Misty Moonlight & Silver Edged 1/2" (1.3 Cm) Ribbon [ 165931 ]](https://assets1.tamsnetwork.com/images/EC042017NF/165931s.jpg "Misty Moonlight & Silver Edged 1/2\" (1.3 Cm) Ribbon [ 165931 ]")
![Azure Afternoon Stampin’ Blends Combo Pack [ 161672 ]](https://assets1.tamsnetwork.com/images/EC042017NF/161672s.jpg "Azure Afternoon Stampin’ Blends Combo Pack [ 161672 ]")


![Delicate Pines Bundle (English) [ 166074 ]](https://assets1.tamsnetwork.com/images/EC042017NF/166074s.jpg "Delicate Pines Bundle (English) [ 166074 ]")
![Elegant Pine Snowflakes 12" X 12" (30.5 X 30.5 Cm) Designer Series Paper [ 166066 ]](https://assets1.tamsnetwork.com/images/EC042017NF/166066s.jpg "Elegant Pine Snowflakes 12\" X 12\" (30.5 X 30.5 Cm) Designer Series Paper [ 166066 ]")
![Old Olive 8-1/2" X 11" Cardstock [ 100702 ]](https://assets1.tamsnetwork.com/images/EC042017NF/100702s.jpg "Old Olive 8-1/2\" X 11\" Cardstock [ 100702 ]")
![Shaded Spruce Classic Stampin' Pad [ 147088 ]](https://assets1.tamsnetwork.com/images/EC042017NF/147088s.jpg "Shaded Spruce Classic Stampin' Pad [ 147088 ]")
![Old Olive Classic Stampin' Pad [ 147090 ]](https://assets1.tamsnetwork.com/images/EC042017NF/147090s.jpg "Old Olive Classic Stampin' Pad [ 147090 ]")
![2 3/8" (6 Cm) Circle Punch [ 161354 ]](https://assets1.tamsnetwork.com/images/EC042017NF/161354s.jpg "2 3/8\" (6 Cm) Circle Punch [ 161354 ]")
![Frosted Forest Bundle (English) [ 164137 ]](https://assets1.tamsnetwork.com/images/EC042017NF/164137s.jpg "Frosted Forest Bundle (English) [ 164137 ]")
![Christmas Words Collage Hybrid Embossing Folder (English) [ 165912 ]](https://assets1.tamsnetwork.com/images/EC042017NF/165912s.jpg "Christmas Words Collage Hybrid Embossing Folder (English) [ 165912 ]")
![Garden Green 8-1/2" X 11" Cardstock [ 102584 ]](https://assets1.tamsnetwork.com/images/EC042017NF/102584s.jpg "Garden Green 8-1/2\" X 11\" Cardstock [ 102584 ]")
![Uninked Stampin’ Craft Pad & Whisper White Refill [ 147277 ]](https://assets1.tamsnetwork.com/images/EC042017NF/147277s.jpg "Uninked Stampin’ Craft Pad & Whisper White Refill [ 147277 ]")
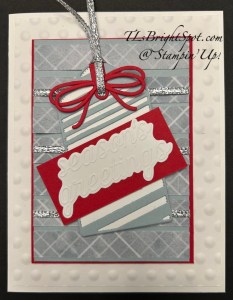
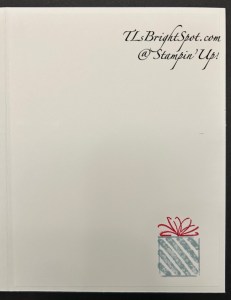
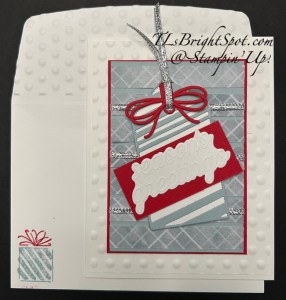
![Patterned Tags Dies [ 165910 ]](https://assets1.tamsnetwork.com/images/EC042017NF/165910s.jpg "Patterned Tags Dies [ 165910 ]")
![Gold & Silver 1/8" (3.2 Mm) Trim Combo Pack [ 161633 ]](https://assets1.tamsnetwork.com/images/EC042017NF/161633s.jpg "Gold & Silver 1/8\" (3.2 Mm) Trim Combo Pack [ 161633 ]")

