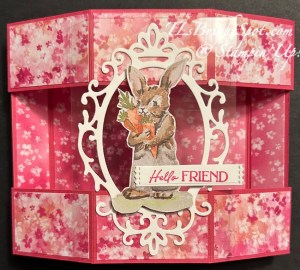
Good Friday morning! It’s 18 degrees this morning but nice & brightly sunny 😀 My inspiration came from one of my card class students who passed along info about making this cute fun fold. That led me to watch a video by Rachel Tessman. Let’s look at my creation.
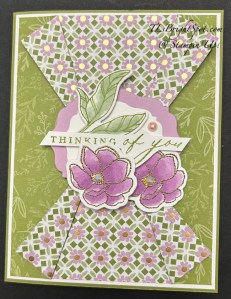
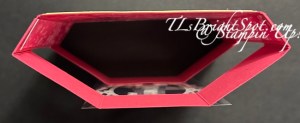
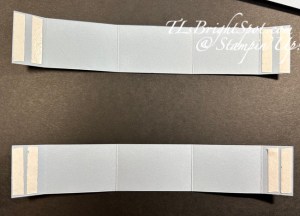
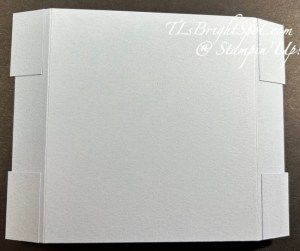
This begins with a Basic White panel 4 x 5 14 and adhering a strip of the Lovely & Beautiful SDSP 2 1/2 x 5 1/4 to the center of the panel. Now cut two more strips from the same pattern 1 3/4 x 5 1/4. Adhere those strips in this fashion: the left strip – add adhesive only to the left edge & attach; the right strip – add adhesive to the right edge and attach.
Folding: fold back the top right side of the left strip to approximately the center of the card, but the fold should not allow any of the Basic White to show. Turn the card upside down and do the same for that same panel to create the bottom fold. Now, do the same for the right strip; fold back the top left side of the right strip just to the edge of the center strip pattern to a center point. Turn the card upside down again and do the same on the bottom right side. Burnish those folded back sections.
TIP: this folding back does not necessarily have to be to the center; it could be more toward the top or toward the bottom, but both sides do need to be uniform – to the same point.
Create the center pieces to cover where the papers come together. I pulled out my Beautifully Celebrated Dies, Fresh Freesia card stock and Basic White, die cut the two pieces and adhered them together. ( I used the smallest & next size up). I then stamped this sweet leaf image in Old Olive ink from the Beautifully Celebrated stamp set and colored it with Soft Sea Foam Stampin’ Blends. I die cut it with coordinating dies (Beautifully Celebrated) and set it aside. I used the Simply Beautiful stamp set and Old Olive ink for the sentiment and fussy cut it, adhered the leaf to the back of the sentiment then attached the sentiment with mini dimentionals to the two die cut banners. W
ith the Simply Beautiful stamp set, I stamped the small flower in VersaMark ink (twice) on a Basic White piece, sprinkled those with WOW? Metallic Gold embossing Powder & heat set them. I colored both with Fresh Freesia Stampin’ Blends for the flowers and Daffodil Delight for the center of the flowers. I die cut these with the coordinating die from Simply Beautiful Dies and adhered them to the same banner: one adhered directly to the and one on dimensionals (yes, it slightly covers some of the sentiment) I attached the banners to the front of the card with dimensionals and added three Pearlized Faceted Circles.
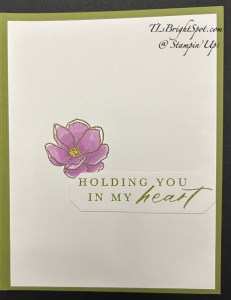
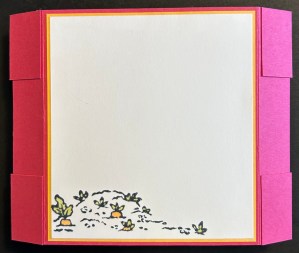
For the inside of the card, I stamped the same small flower from Simply Beautiful stamp set in VersaMark ink on a 4 x 5 1/4 Basic White panel, sprinkled it with WOW! Metallic Gold embossing powder & heat set it. Again I colored it with Stampin’ Blends Fresh Freesia and Daffodil Delight. I stamped the sentiment in Old Olive ink on a nother piece of Basic White and die cut it with Words of Beauty Dies. I adhered this just beneath the flower – and finis! This could easily be a sympathy card or get well card or simply ‘hello friend’ kind of card. But I love the simplicity of the fun fold and the extra charm it creates. Hope you like!
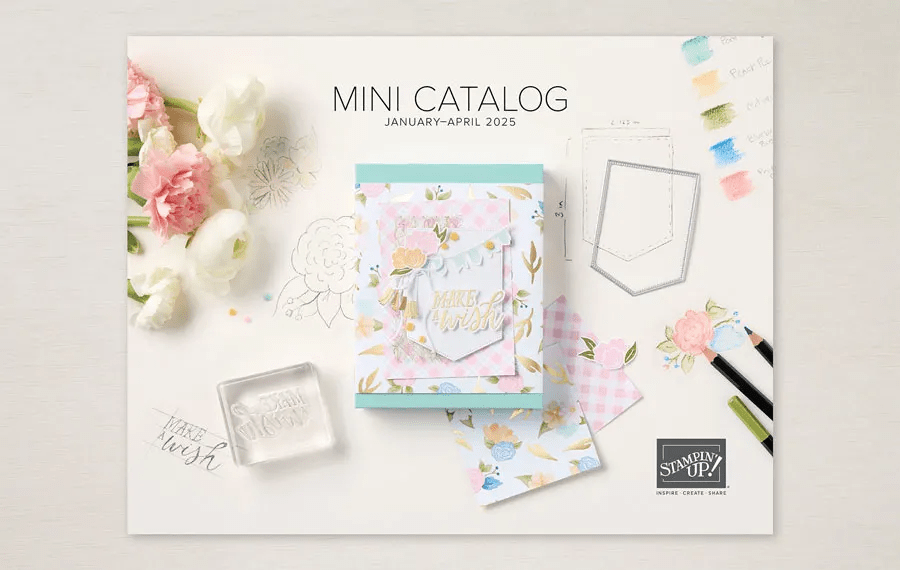
Wasnt to purchase the products to make this card? They may be found in the Jan-Apr 2026 Mini Catalog and you may SHOP WITH ME HERE!
Thanks for stopping by. May you have a beautiful day. Make someone happy by sending them a handmade card filled with ❤️
Stampin’ Up! is currently sponsoring BONUS DAYS: Because do you know what’s a great deal? Getting rewarded for all the crafting supplies you’re already going to buy! When you shop between January 6 and February 2 and spend $50 USD | $60 CAD, you will earn a $5 USD | $6 CAD coupon! Make sure you save all your coupons because you can redeem them (and we mean ALL of them) between February 3 and 28. During the earning period, a shopping-cart notification will appear when an order qualifies for a Bonus Days coupon—an online store feature on both the demonstrator and customer websites.

PRODUCT OF THE MONTH – only $5 with a $75 order (before shipping & taxes)
167972
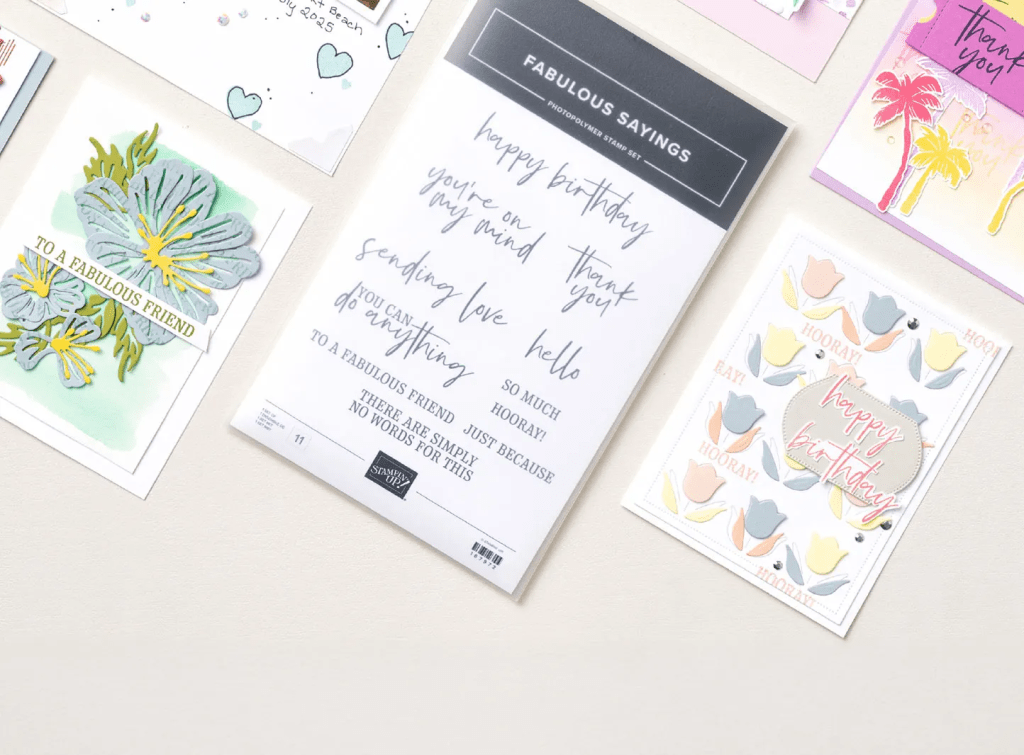
FABULOUS SAYINGS PHOTOPOLYMER STAMP SET (ENGLISH)
$5.00
The Fabulous Sayings Stamp Set is the exclusive Product of the Month for January 2026! Only available until stocks run out—don’t wait to get yours! This is a Two-Step Stampin’ set; it allows you to layer two or more images to create one final image with extra texture and dimension in the colors you want.
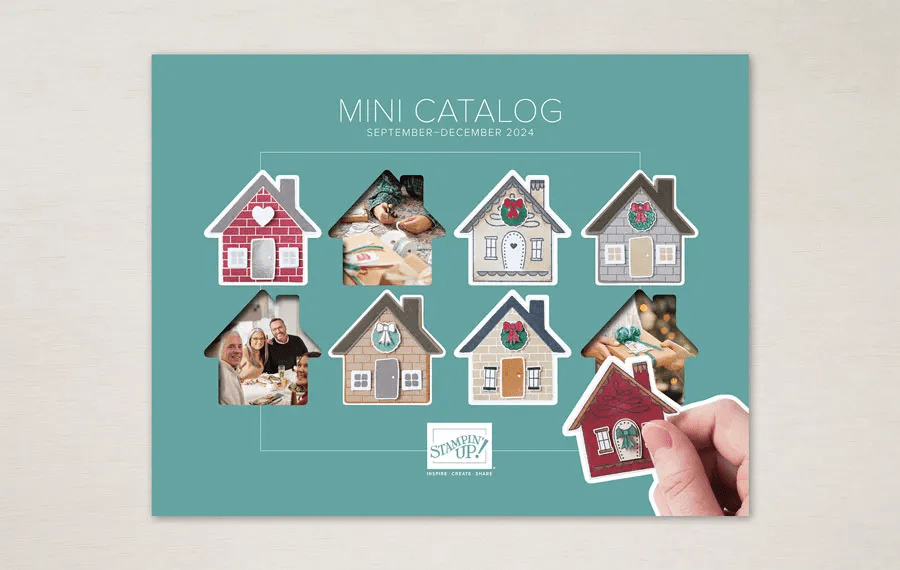
Jan-Apr 2026 Mini Catalog – click the image below to view the catalog
ONLINE EXCLUSIVES Several new stamp sets, dies, Designer Series Papers, embellishments and ribbons are available online that are not in any SU! Catalog. SHOP WITH ME HERE
KITS COLLECTION

![Lovely & Beautiful 12" X 12" (30.5 X 30.5 Cm) Specialty Designer Series Paper [ 166957 ]](https://assets1.tamsnetwork.com/images/EC042017NF/166957s.jpg "Lovely & Beautiful 12\" X 12\" (30.5 X 30.5 Cm) Specialty Designer Series Paper [ 166957 ]")
![Beautifully Celebrated Bundle (English) [ 166975 ]](https://assets1.tamsnetwork.com/images/EC042017NF/166975s.jpg "Beautifully Celebrated Bundle (English) [ 166975 ]")
![Lovely & Beautiful Suite Collection (English) [ 166981 ]](https://assets1.tamsnetwork.com/images/EC042017NF/166981s.jpg "Lovely & Beautiful Suite Collection (English) [ 166981 ]")
![Simply Beautiful Bundle (English) [ 166965 ]](https://assets1.tamsnetwork.com/images/EC042017NF/166965s.jpg "Simply Beautiful Bundle (English) [ 166965 ]")
![Pearlized Faceted Circles [ 166978 ]](https://assets1.tamsnetwork.com/images/EC042017NF/166978s.jpg "Pearlized Faceted Circles [ 166978 ]")
![Words Of Beauty Dies (English) [ 167089 ]](https://assets1.tamsnetwork.com/images/EC042017NF/167089s.jpg "Words Of Beauty Dies (English) [ 167089 ]")
![Fresh Freesia 8 1/2" X 11" Cardstock [ 155613 ]](https://assets1.tamsnetwork.com/images/EC042017NF/155613s.jpg "Fresh Freesia 8 1/2\" X 11\" Cardstock [ 155613 ]")
![Fresh Freesia Stampin' Blends Combo Pack [ 155518 ]](https://assets1.tamsnetwork.com/images/EC042017NF/155518s.jpg "Fresh Freesia Stampin' Blends Combo Pack [ 155518 ]")
![Soft Sea Foam Stampin' Blends Combo Pack [ 154902 ]](https://assets1.tamsnetwork.com/images/EC042017NF/154902s.jpg "Soft Sea Foam Stampin' Blends Combo Pack [ 154902 ]")
![Old Olive Classic Stampin' Pad [ 147090 ]](https://assets1.tamsnetwork.com/images/EC042017NF/147090s.jpg "Old Olive Classic Stampin' Pad [ 147090 ]")
![Embossing Additions Tool Kit [ 159971 ]](https://assets1.tamsnetwork.com/images/EC042017NF/159971s.jpg "Embossing Additions Tool Kit [ 159971 ]")
![Versamark Pad [ 102283 ]](https://assets1.tamsnetwork.com/images/EC042017NF/102283s.jpg "Versamark Pad [ 102283 ]")
![Metallics Wow! Embossing Powder [ 165678 ]](https://assets1.tamsnetwork.com/images/EC042017NF/165678s.jpg "Metallics Wow! Embossing Powder [ 165678 ]")
![Basic White 8 1/2" X 11" Cardstock [ 166780 ]](https://assets1.tamsnetwork.com/images/EC042017NF/166780s.jpg "Basic White 8 1/2\" X 11\" Cardstock [ 166780 ]")
![Basic White Medium Envelopes [ 159236 ]](https://assets1.tamsnetwork.com/images/EC042017NF/159236s.jpg "Basic White Medium Envelopes [ 159236 ]")
![Stampin' Cut & Emboss Machine [ 149653 ]](https://assets1.tamsnetwork.com/images/EC042017NF/149653s.jpg "Stampin' Cut & Emboss Machine [ 149653 ]")
![Paper Trimmer [ 152392 ]](https://assets1.tamsnetwork.com/images/EC042017NF/152392s.jpg "Paper Trimmer [ 152392 ]")
![Stampin' Dimensionals [ 104430 ]](https://assets1.tamsnetwork.com/images/EC042017NF/104430s.jpg "Stampin' Dimensionals [ 104430 ]")
![Multipurpose Liquid Glue [ 110755 ]](https://assets1.tamsnetwork.com/images/EC042017NF/110755s.jpg "Multipurpose Liquid Glue [ 110755 ]")
![Mini Glue Dots [ 103683 ]](https://assets1.tamsnetwork.com/images/EC042017NF/103683s.jpg "Mini Glue Dots [ 103683 ]")
![Paper Snips [ 103579 ]](https://assets1.tamsnetwork.com/images/EC042017NF/103579s.jpg "Paper Snips [ 103579 ]")
![Take Your Pick [ 144107 ]](https://assets1.tamsnetwork.com/images/EC042017NF/144107s.jpg "Take Your Pick [ 144107 ]")
![Clear Wink Of Stella Glitter Brush [ 141897 ]](https://assets1.tamsnetwork.com/images/EC042017NF/141897s.jpg "Clear Wink Of Stella Glitter Brush [ 141897 ]")


![Peace On Earth Bundle (English) [ 165925 ]](https://assets1.tamsnetwork.com/images/EC042017NF/165925s.jpg "Peace On Earth Bundle (English) [ 165925 ]")
![Winter Meadow 12" X 12" (30.5 X 30.5 Cm) Designer Series Paper [ 162133 ]](https://assets1.tamsnetwork.com/images/EC042017NF/162133s.jpg "Winter Meadow 12\" X 12\" (30.5 X 30.5 Cm) Designer Series Paper [ 162133 ]")
![Peaceful Garden 12" X 12" (30.5 X 30.5 Cm) Glimmer Paper [ 165929 ]](https://assets1.tamsnetwork.com/images/EC042017NF/165929s.jpg "Peaceful Garden 12\" X 12\" (30.5 X 30.5 Cm) Glimmer Paper [ 165929 ]")
![Frosted Forest Bundle (English) [ 164137 ]](https://assets1.tamsnetwork.com/images/EC042017NF/164137s.jpg "Frosted Forest Bundle (English) [ 164137 ]")
![Christmas Words Collage Hybrid Embossing Folder (English) [ 165912 ]](https://assets1.tamsnetwork.com/images/EC042017NF/165912s.jpg "Christmas Words Collage Hybrid Embossing Folder (English) [ 165912 ]")
![Blueberry Bushel 8-1/2" X 11" Cardstock [ 146968 ]](https://assets1.tamsnetwork.com/images/EC042017NF/146968s.jpg "Blueberry Bushel 8-1/2\" X 11\" Cardstock [ 146968 ]")
![Garden Green 8-1/2" X 11" Cardstock [ 102584 ]](https://assets1.tamsnetwork.com/images/EC042017NF/102584s.jpg "Garden Green 8-1/2\" X 11\" Cardstock [ 102584 ]")
![Sponge Daubers [ 133773 ]](https://assets1.tamsnetwork.com/images/EC042017NF/133773s.jpg "Sponge Daubers [ 133773 ]")
![Uninked Stampin’ Craft Pad & Whisper White Refill [ 147277 ]](https://assets1.tamsnetwork.com/images/EC042017NF/147277s.jpg "Uninked Stampin’ Craft Pad & Whisper White Refill [ 147277 ]")
![Misty Moonlight Classic Stampin' Pad [ 153118 ]](https://assets1.tamsnetwork.com/images/EC042017NF/153118s.jpg "Misty Moonlight Classic Stampin' Pad [ 153118 ]")