
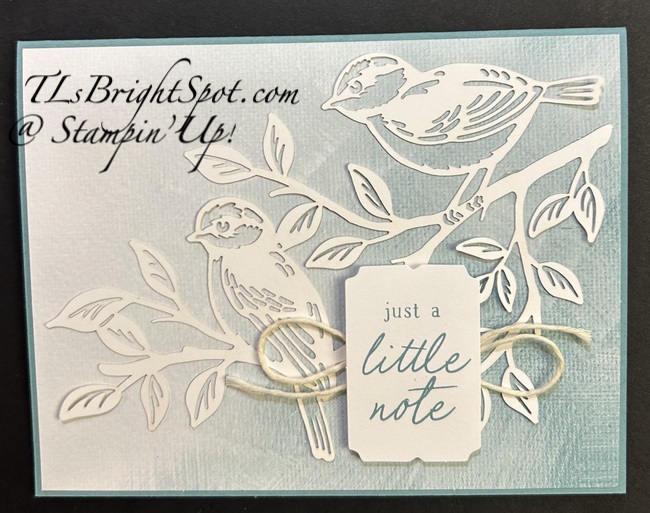
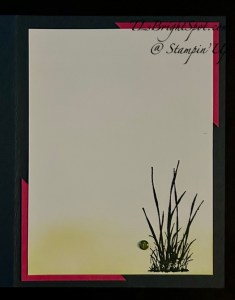
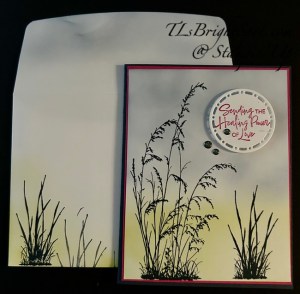
It’s Labor Day! Do you have plans to labor – or will you use this as a day to gather w/ friends & family? I have a card today made with lots of Basic White and just a bit of color. I used watercolor paper to create the focal green branch and the stunning Christmas Greenery Dies. The leaves are die cut from simple Basic White, using the Label Me Grateful Dies. But I get ahead of myself – let’s look at the card.
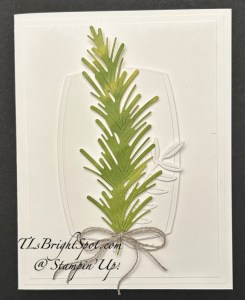
The card base is Thick Basic White with two layers of regular weight Basic White added to create depth. Using the Label Me Grateful Dies, I die cut two same size labels, cut one in half and adhered it behind the other. This was attached, centered on the card front, with dimensionals. I die cut the branch of leaves in white and attached it with liquid glue. The watercolor pine bough is attached with dimensionals. I added a simple double Linen Thread bow with a glue dot – and that was it!
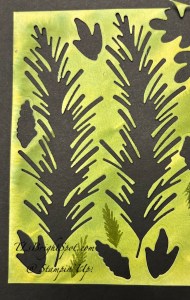
To create color on the watercolor paper…. I wet the entire piece with water, squeezed each ink pad container to get some ink in the lid, added a bit of water to that and simply added it to the watercolor paper. I used three colors – Granny Apple Green, Old Olive and Mossy Meadow. Once dry I die cut two of the pine boughs and some other things too. Bur for our purposes today – it’s just the pine bough that’s important. Here’s the watercolor paper after die cutting.
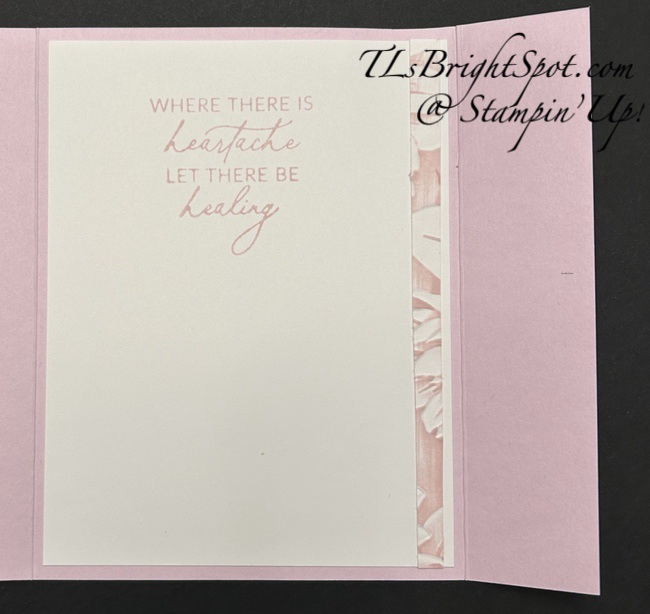
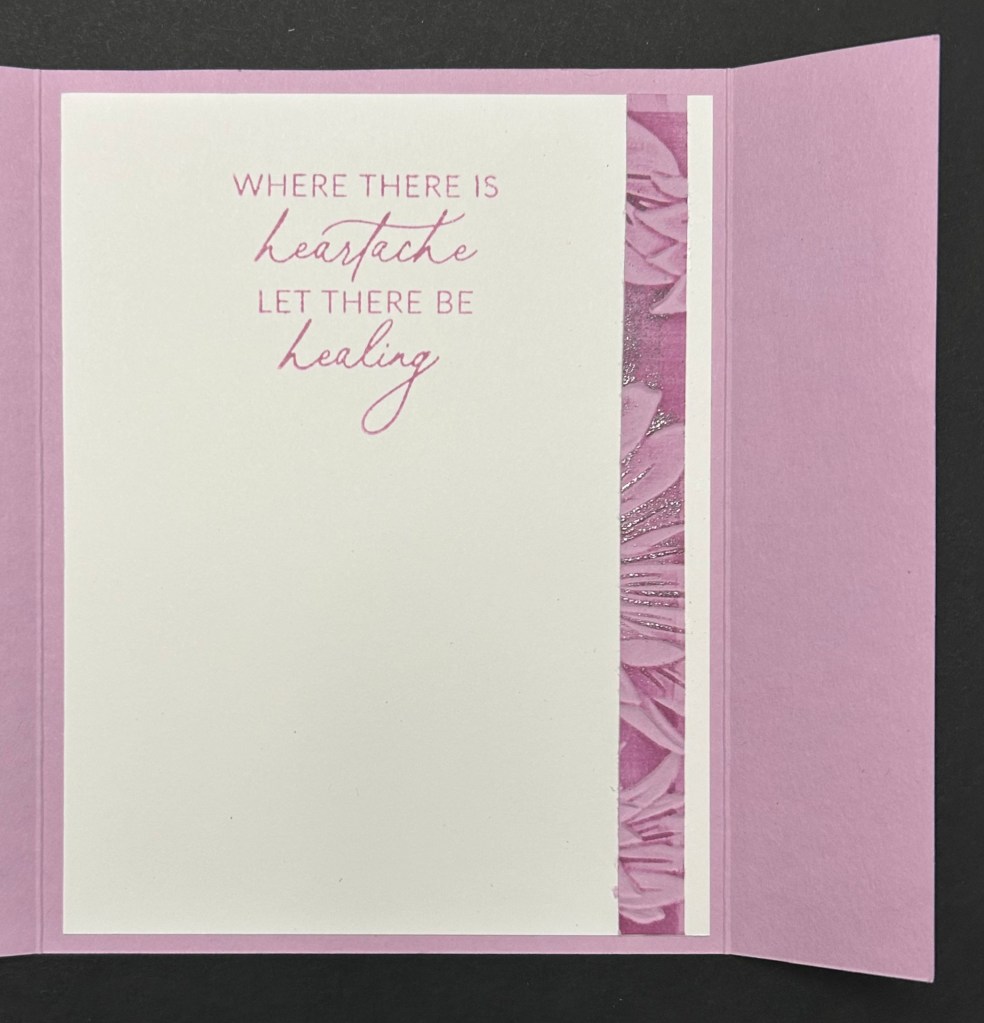
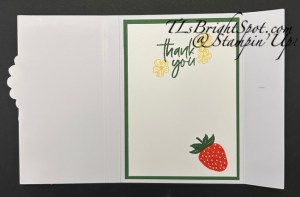
for the inside of the card…I stamped the sentiment in Mossy Meadow ink using the Traditional Labels stamp set and added a 1/2 x 4 strip of Old Olive from Floral Delight DSP. I added the Basic White panel to the inside of the card and bam – all done.

For the envelope, some of the same Floral Delight DSP in Old Olive for the flap, trimmed to fit.

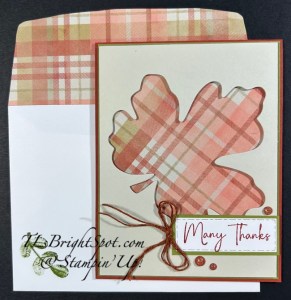
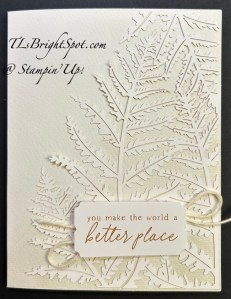
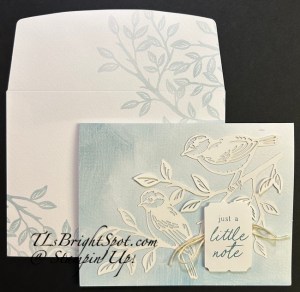
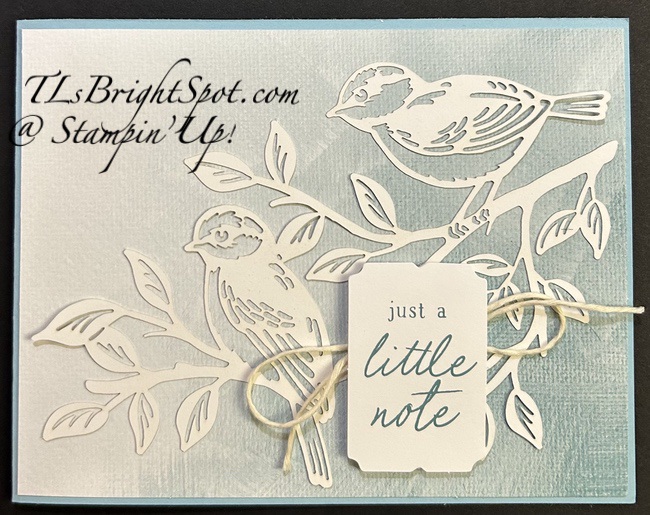
These items will be available Wednesday Sep 3 and are in the Sep-Dec 2025 Mini Catalog showcased on pages 21-27 as parts of the Traditions of Christmas Suite. They may be purchased as a suite or individually. Click the catalog image below to shop with me.

Thanks for stopping by. May you have a beautiful day! Make someone happy by sending them a handmade card filled with ❤️
Card cuts:
Thick Basic White – card base: 8 1/2 x 5 1/2 scored @ 4 1/4
Basic White – layers: 4 x 5 1/4 (2), one for card front, one for inside; 3 3/4 x 5
Basic White – labels: 2 1/2 x 7 1/2; leaves 1 1/4 x 3
Product List![Basic White 8 1/2" X 11" Thick Cardstock [ 159229 ]](https://assets1.tamsnetwork.com/images/EC042017NF/159229s.jpg "Basic White 8 1/2\" X 11\" Thick Cardstock [ 159229 ]")
![Basic White 8 1/2" X 11" Cardstock [ 159276 ]](https://assets1.tamsnetwork.com/images/EC042017NF/159276s.jpg "Basic White 8 1/2\" X 11\" Cardstock [ 159276 ]")
![Fluid 100 Watercolor Paper [ 149612 ]](https://assets1.tamsnetwork.com/images/EC042017NF/149612s.jpg "Fluid 100 Watercolor Paper [ 149612 ]")
![Granny Apple Green Stampin' Pad [ 147095 ]](https://assets1.tamsnetwork.com/images/EC042017NF/147095s.jpg "Granny Apple Green Stampin' Pad [ 147095 ]")
![Old Olive Classic Stampin' Pad [ 147090 ]](https://assets1.tamsnetwork.com/images/EC042017NF/147090s.jpg "Old Olive Classic Stampin' Pad [ 147090 ]")
![Mossy Meadow Classic Stampin' Pad [ 147111 ]](https://assets1.tamsnetwork.com/images/EC042017NF/147111s.jpg "Mossy Meadow Classic Stampin' Pad [ 147111 ]")
![Linen Thread [ 104199 ]](https://assets1.tamsnetwork.com/images/EC042017NF/104199s.jpg "Linen Thread [ 104199 ]")
![Stampin' Cut & Emboss Machine [ 149653 ]](https://assets1.tamsnetwork.com/images/EC042017NF/149653s.jpg "Stampin' Cut & Emboss Machine [ 149653 ]")
![Paper Trimmer [ 152392 ]](https://assets1.tamsnetwork.com/images/EC042017NF/152392s.jpg "Paper Trimmer [ 152392 ]")
![Stampin' Dimensionals [ 104430 ]](https://assets1.tamsnetwork.com/images/EC042017NF/104430s.jpg "Stampin' Dimensionals [ 104430 ]")
![Multipurpose Liquid Glue [ 110755 ]](https://assets1.tamsnetwork.com/images/EC042017NF/110755s.jpg "Multipurpose Liquid Glue [ 110755 ]")
![Mini Glue Dots [ 103683 ]](https://assets1.tamsnetwork.com/images/EC042017NF/103683s.jpg "Mini Glue Dots [ 103683 ]")
![Paper Snips [ 103579 ]](https://assets1.tamsnetwork.com/images/EC042017NF/103579s.jpg "Paper Snips [ 103579 ]")
![Basic White Medium Envelopes [ 159236 ]](https://assets1.tamsnetwork.com/images/EC042017NF/159236s.jpg "Basic White Medium Envelopes [ 159236 ]")


![Cajun Craze 8-1/2" X 11" Cardstock [ 119684 ]](https://assets1.tamsnetwork.com/images/EC042017NF/119684s.jpg "Cajun Craze 8-1/2\" X 11\" Cardstock [ 119684 ]")
![Timeless Plaid 6" X 6" (15.2 X 15.2 Cm) Designer Series Paper [ 164678 ]](https://assets1.tamsnetwork.com/images/EC042017NF/164678s.jpg "Timeless Plaid 6\" X 6\" (15.2 X 15.2 Cm) Designer Series Paper [ 164678 ]")
![Textured Notes Bundle (English) [ 165556 ]](https://assets1.tamsnetwork.com/images/EC042017NF/165556s.jpg "Textured Notes Bundle (English) [ 165556 ]")
![Old Olive 8-1/2" X 11" Cardstock [ 100702 ]](https://assets1.tamsnetwork.com/images/EC042017NF/100702s.jpg "Old Olive 8-1/2\" X 11\" Cardstock [ 100702 ]")
![Basic Beige 8 1/2" X 11" Cardstock [ 164511 ]](https://assets1.tamsnetwork.com/images/EC042017NF/164511s.jpg "Basic Beige 8 1/2\" X 11\" Cardstock [ 164511 ]")
![Natural Tones Linen Thread [ 164071 ]](https://assets1.tamsnetwork.com/images/EC042017NF/164071s.jpg "Natural Tones Linen Thread [ 164071 ]")

![Brighten Your Day Kit [ 166460 ]](https://assets1.tamsnetwork.com/images/EC042017NF/166460s.jpg "Brighten Your Day Kit [ 166460 ]")
![Pecan Pie 8 1/2" X 11" Cardstock [ 161717 ]](https://assets1.tamsnetwork.com/images/EC042017NF/161717s.jpg "Pecan Pie 8 1/2\" X 11\" Cardstock [ 161717 ]")
![Balmy Blue 8-1/2" X 11" Cardstock [ 146982 ]](https://assets1.tamsnetwork.com/images/EC042017NF/146982s.jpg "Balmy Blue 8-1/2\" X 11\" Cardstock [ 146982 ]")
![Lost Lagoon 8-1/2" X 11" Cardstock [ 133679 ]](https://assets1.tamsnetwork.com/images/EC042017NF/133679s.jpg "Lost Lagoon 8-1/2\" X 11\" Cardstock [ 133679 ]")
![Fresh Freesia 8 1/2" X 11" Cardstock [ 155613 ]](https://assets1.tamsnetwork.com/images/EC042017NF/155613s.jpg "Fresh Freesia 8 1/2\" X 11\" Cardstock [ 155613 ]")
![Highland Heather 8-1/2" X 11" Cardstock [ 146986 ]](https://assets1.tamsnetwork.com/images/EC042017NF/146986s.jpg "Highland Heather 8-1/2\" X 11\" Cardstock [ 146986 ]")

![2024–2026 In Color™ Stampin' Write Markers [ 163829 ]](https://assets1.tamsnetwork.com/images/EC042017NF/163829s.jpg "2024–2026 In Color™ Stampin' Write Markers [ 163829 ]")
![2025–2027 In Color™ Stampin' Write Markers [ 165292 ]](https://assets1.tamsnetwork.com/images/EC042017NF/165292s.jpg "2025–2027 In Color™ Stampin' Write Markers [ 165292 ]")
![Basic Black Stampin' Write Marker [ 162481 ]](https://assets1.tamsnetwork.com/images/EC042017NF/162481s.jpg "Basic Black Stampin' Write Marker [ 162481 ]")
![Brights Stampin' Write Markers [ 161696 ]](https://assets1.tamsnetwork.com/images/EC042017NF/161696s.jpg "Brights Stampin' Write Markers [ 161696 ]")
![Neutrals Stampin' Write Markers [ 161697 ]](https://assets1.tamsnetwork.com/images/EC042017NF/161697s.jpg "Neutrals Stampin' Write Markers [ 161697 ]")
![Regals Stampin' Write Markers [ 161699 ]](https://assets1.tamsnetwork.com/images/EC042017NF/161699s.jpg "Regals Stampin' Write Markers [ 161699 ]")
![Subtles Stampin' Write Markers [ 161698 ]](https://assets1.tamsnetwork.com/images/EC042017NF/161698s.jpg "Subtles Stampin' Write Markers [ 161698 ]")
![Stampin' Write Markers Collection [ 163136 ]](https://assets1.tamsnetwork.com/images/EC042017NF/163136s.jpg "Stampin' Write Markers Collection [ 163136 ]")

![Painterly Pears Suite Collection (English) [ 166159 ]](https://assets1.tamsnetwork.com/images/EC042017NF/166159s.jpg "Painterly Pears Suite Collection (English) [ 166159 ]")
![Mossy Meadow 8-1/2" X 11" Cardstock [ 133676 ]](https://assets1.tamsnetwork.com/images/EC042017NF/133676s.jpg "Mossy Meadow 8-1/2\" X 11\" Cardstock [ 133676 ]")
![Darling Duckling 8 1/2" X 11" Cardstock [ 165622 ]](https://assets1.tamsnetwork.com/images/EC042017NF/165622s.jpg "Darling Duckling 8 1/2\" X 11\" Cardstock [ 165622 ]")
![Darling Duckling Classic Stampin' Pad [ 165277 ]](https://assets1.tamsnetwork.com/images/EC042017NF/165277s.jpg "Darling Duckling Classic Stampin' Pad [ 165277 ]")
![Lemon Lime Twist 8-1/2" X 11" Cardstock [ 144245 ]](https://assets1.tamsnetwork.com/images/EC042017NF/144245s.jpg "Lemon Lime Twist 8-1/2\" X 11\" Cardstock [ 144245 ]")
![Lemon Lime Twist Classic Stampin' Pad [ 147145 ]](https://assets1.tamsnetwork.com/images/EC042017NF/147145s.jpg "Lemon Lime Twist Classic Stampin' Pad [ 147145 ]")
![Basic White 8 1/2" X 11" Cardstock [ 166780 ]](https://assets1.tamsnetwork.com/images/EC042017NF/166780s.jpg "Basic White 8 1/2\" X 11\" Cardstock [ 166780 ]")
![Bone Folder [ 102300 ]](https://assets1.tamsnetwork.com/images/EC042017NF/102300s.jpg "Bone Folder [ 102300 ]")
![Stampin' Seal [ 152813 ]](https://assets1.tamsnetwork.com/images/EC042017NF/152813s.jpg "Stampin' Seal [ 152813 ]")
![Take Your Pick [ 144107 ]](https://assets1.tamsnetwork.com/images/EC042017NF/144107s.jpg "Take Your Pick [ 144107 ]")

![Sunflower 3 D Embossing Folder [ 166145 ]](https://assets1.tamsnetwork.com/images/EC042017NF/166145s.jpg "Sunflower 3 D Embossing Folder [ 166145 ]")
![Sweetly Scripted Cling Stamp Set (English) [ 163600 ]](https://assets1.tamsnetwork.com/images/EC042017NF/163600s.jpg "Sweetly Scripted Cling Stamp Set (English) [ 163600 ]")
![Gold & Silver 1/8" (3.2 Mm) Trim Combo Pack [ 161633 ]](https://assets1.tamsnetwork.com/images/EC042017NF/161633s.jpg "Gold & Silver 1/8\" (3.2 Mm) Trim Combo Pack [ 161633 ]")
![Adhesive Backed Metallic Gems [ 163780 ]](https://assets1.tamsnetwork.com/images/EC042017NF/163780s.jpg "Adhesive Backed Metallic Gems [ 163780 ]")
![Smoky Slate 8-1/2" X 11" Cardstock [ 131202 ]](https://assets1.tamsnetwork.com/images/EC042017NF/131202s.jpg "Smoky Slate 8-1/2\" X 11\" Cardstock [ 131202 ]")
![Smoky Slate Classic Stampin' Pad [ 147113 ]](https://assets1.tamsnetwork.com/images/EC042017NF/147113s.jpg "Smoky Slate Classic Stampin' Pad [ 147113 ]")
![Versamark Pad [ 102283 ]](https://assets1.tamsnetwork.com/images/EC042017NF/102283s.jpg "Versamark Pad [ 102283 ]")
![Heat Tool (Us And Canada) [ 129053 ]](https://assets1.tamsnetwork.com/images/EC042017NF/129053s.jpg "Heat Tool (Us And Canada) [ 129053 ]")
![Embossing Additions Tool Kit [ 159971 ]](https://assets1.tamsnetwork.com/images/EC042017NF/159971s.jpg "Embossing Additions Tool Kit [ 159971 ]")

![Everyday Greetings Photopolymer Stamp Set (English) [ 165084 ]](https://assets1.tamsnetwork.com/images/EC042017NF/165084s.jpg "Everyday Greetings Photopolymer Stamp Set (English) [ 165084 ]")
![Tailor Made Tags Dies [ 155563 ]](https://assets1.tamsnetwork.com/images/EC042017NF/155563s.jpg "Tailor Made Tags Dies [ 155563 ]")
![Baker's Twine Essentials Pack [ 155475 ]](https://assets1.tamsnetwork.com/images/EC042017NF/155475s.jpg "Baker's Twine Essentials Pack [ 155475 ]")
![Metallics Wow! Embossing Powder [ 165678 ]](https://assets1.tamsnetwork.com/images/EC042017NF/165678s.jpg "Metallics Wow! Embossing Powder [ 165678 ]")
![Bubble Bath 8 1/2" X 11" Cardstock [ 161718 ]](https://assets1.tamsnetwork.com/images/EC042017NF/161718s.jpg "Bubble Bath 8 1/2\" X 11\" Cardstock [ 161718 ]")
![Bubble Bath Classic Stampin' Pad [ 161664 ]](https://assets1.tamsnetwork.com/images/EC042017NF/161664s.jpg "Bubble Bath Classic Stampin' Pad [ 161664 ]")
![Fresh Freesia Classic Stampin' Pad [ 155611 ]](https://assets1.tamsnetwork.com/images/EC042017NF/155611s.jpg "Fresh Freesia Classic Stampin' Pad [ 155611 ]")

![Celebration Expressions Memories & More Card Pack [ 165307 ]](https://assets1.tamsnetwork.com/images/EC042017NF/165307s.jpg "Celebration Expressions Memories & More Card Pack [ 165307 ]")
![Greetings For All Mix & Match Ephemera Pack (English) [ 164862 ]](https://assets1.tamsnetwork.com/images/EC042017NF/164862s.jpg "Greetings For All Mix & Match Ephemera Pack (English) [ 164862 ]")
![Balmy Blue Classic Stampin' Pad [ 147105 ]](https://assets1.tamsnetwork.com/images/EC042017NF/147105s.jpg "Balmy Blue Classic Stampin' Pad [ 147105 ]")
![Soft Sea Foam Classic Stampin' Pad [ 147102 ]](https://assets1.tamsnetwork.com/images/EC042017NF/147102s.jpg "Soft Sea Foam Classic Stampin' Pad [ 147102 ]")
![Lemon Lolly Classic Stampin' Pad [ 161666 ]](https://assets1.tamsnetwork.com/images/EC042017NF/161666s.jpg "Lemon Lolly Classic Stampin' Pad [ 161666 ]")
![Prairie Grass Cling Stamp Set (English) [ 166168 ]](https://assets1.tamsnetwork.com/images/EC042017NF/166168s.jpg "Prairie Grass Cling Stamp Set (English) [ 166168 ]")
![Spotlight On Nature Bundle [ 163581 ]](https://assets1.tamsnetwork.com/images/EC042017NF/163581s.jpg "Spotlight On Nature Bundle [ 163581 ]")
![Low Profile Sparkle Dots [ 166157 ]](https://assets1.tamsnetwork.com/images/EC042017NF/166157s.jpg "Low Profile Sparkle Dots [ 166157 ]")
![Secret Sea 8 1/2" X 11" Cardstock [ 165624 ]](https://assets1.tamsnetwork.com/images/EC042017NF/165624s.jpg "Secret Sea 8 1/2\" X 11\" Cardstock [ 165624 ]")
![Melon Mambo Classic Stampin' Pad [ 147051 ]](https://assets1.tamsnetwork.com/images/EC042017NF/147051s.jpg "Melon Mambo Classic Stampin' Pad [ 147051 ]")
![Melon Mambo 8-1/2" X 11" Cardstock [ 115320 ]](https://assets1.tamsnetwork.com/images/EC042017NF/115320s.jpg "Melon Mambo 8-1/2\" X 11\" Cardstock [ 115320 ]")
![Secret Sea Classic Stampin' Pad [ 165285 ]](https://assets1.tamsnetwork.com/images/EC042017NF/165285s.jpg "Secret Sea Classic Stampin' Pad [ 165285 ]")
![Misty Moonlight Classic Stampin' Pad [ 153118 ]](https://assets1.tamsnetwork.com/images/EC042017NF/153118s.jpg "Misty Moonlight Classic Stampin' Pad [ 153118 ]")
![Small Blending Brushes [ 160518 ]](https://assets1.tamsnetwork.com/images/EC042017NF/160518s.jpg "Small Blending Brushes [ 160518 ]")
![Sponge Daubers [ 133773 ]](https://assets1.tamsnetwork.com/images/EC042017NF/133773s.jpg "Sponge Daubers [ 133773 ]")
![Journaling Pens [ 145480 ]](https://assets1.tamsnetwork.com/images/EC042017NF/145480s.jpg "Journaling Pens [ 145480 ]")
![Uninked Stampin' Spots [ 141822 ]](https://assets1.tamsnetwork.com/images/EC042017NF/141822s.jpg "Uninked Stampin' Spots [ 141822 ]")
![Clear Wink Of Stella Glitter Brush [ 141897 ]](https://assets1.tamsnetwork.com/images/EC042017NF/141897s.jpg "Clear Wink Of Stella Glitter Brush [ 141897 ]")
![Tuxedo Black Memento Ink Pad [ 132708 ]](https://assets1.tamsnetwork.com/images/EC042017NF/132708s.jpg "Tuxedo Black Memento Ink Pad [ 132708 ]")


![Daffodil Delight Classic Stampin' Pad [ 147094 ]](https://assets1.tamsnetwork.com/images/EC042017NF/147094s.jpg "Daffodil Delight Classic Stampin' Pad [ 147094 ]")
![Poppy Parade Classic Stampin' Pad [ 119782 ] (Retired)](https://assets1.tamsnetwork.com/images/EC042017NF/119782s.jpg "Poppy Parade Classic Stampin' Pad [ 119782 ] (Retired)")
![Strawberry Slush Classic Stampin' Pad [ 165286 ]](https://assets1.tamsnetwork.com/images/EC042017NF/165286s.jpg "Strawberry Slush Classic Stampin' Pad [ 165286 ]")
![Strawberry Slush 8 1/2" X 11" Cardstock [ 165625 ]](https://assets1.tamsnetwork.com/images/EC042017NF/165625s.jpg "Strawberry Slush 8 1/2\" X 11\" Cardstock [ 165625 ]")
![Strawberry Slush & Pretty In Pink Gems [ 165615 ]](https://assets1.tamsnetwork.com/images/EC042017NF/165615s.jpg "Strawberry Slush & Pretty In Pink Gems [ 165615 ]")
![Real Red & White Baker's Twine [ 164051 ]](https://assets1.tamsnetwork.com/images/EC042017NF/164051s.jpg "Real Red & White Baker's Twine [ 164051 ]")
