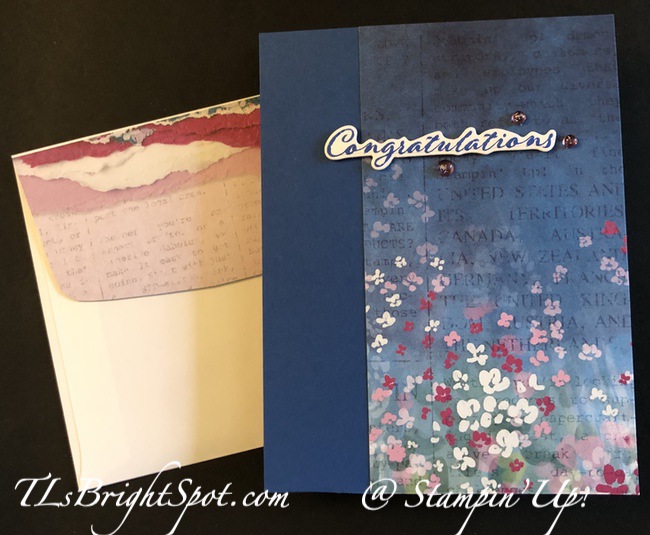
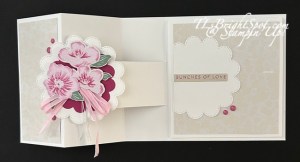
Had a card class just yesterday and we made a very pretty fun fold that I want to share with you. It has a wonderful focal point by die cutting from the gorgeous Velvet Meadow SDSP with the coordinating Flowering Meadow Dies – and using the Scalloped Blooms Dies for background. I hope you like 😊
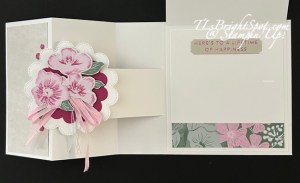
And here’s the inside… and the photo beside it shows the flap raised
The sentiments on the inside and on the flap are made with thew hot foil system & the Sweetly Sentimental hot foil dies. LOVE, LOVE.
And here are the deets for making this card…
The card base is 9 1/2 x 4 1/4 scored at 4 & 7 1/2 (Thick Basic White)
With the short side at the top with the last score line near top, place the paper at the 1 1/4 mark on the right side of the trimmer and CUT BETWEEN THE SCORE LINES
Without removing the paper, simply move it to the 1 1/2 mark on the left of the trimmer & CUT BETWEEN SCORE LINES
Turn the paper 90 degrees to the LEFT and score at 4″ both ABOVE AND BELOW THE CUT LINES
Leaving the paper in place but moving to the 3 1/2″ mark, SCORE THE CENTER SECTION
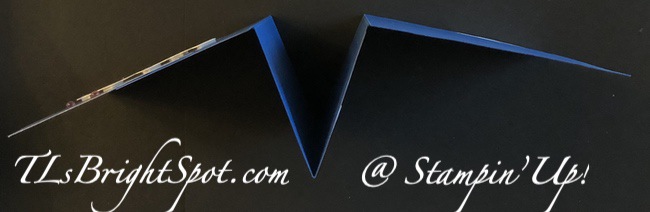
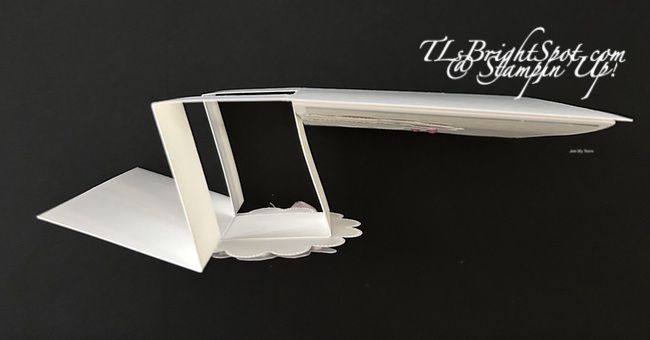
Burnish & fold score lines like this: with the 7 1/2″ score line on the left, mountain fold (folding back on itself); the 3 1/2 score (center section) is also a mountain fold; the two 4″ score lines above & below the cut sections are valley folds; the last is the center section only as a valley. From the top it should look like the photo below
Add a 1 3/4 x 4″ strip of DSP to the end section (I used the back side of a piece of the Velvet Meadow that has a Basic Beige design)
Cut a panel of Basic White 3 3/4 x 8 & score at 4; with the fold at the top, add this panel to the wide side section of the card base; decorate it’s front with the same DSP from Velvet Meadow SDSP – 3 1/2 x 3 3/4
Next step is to decorate:
Die cut two scallop pieces using the Scalloped Blooms dies & Basic White: maybe 3rd from smallest (approx. 2 3/4″)
Die cut one scallop piece from Berry Burst: maybe 2nd from smallest (approx 2″)
Adhere the berry burst piece to one of the larger Basic White scallops.
Die cut the double flowers from the Velvet Meadow SDSP using the appropriate die in Flowering Meadows Dies. Fussy cut at least one more flower – adhere these to the Scallop pieces with dimensionals. Fussy cut several leaves to add to the back of the flowers with liquid glue.
Tie a double bow with the Bubble Bath 1/8″ ribbpn (ONLINE EXCLUSIVE) and use Baker’s Twine in White to make a knot. Secure in place with a glue dot slipping it under the flowers.
Add this to the center section of the fold with liquid glue – see photo above for placement
Add five embellishments in Berry Burst
Add additional scallop to the front of the ‘flap’, trimming one side so the card closes properly
Do the hot foil for the sentiments using the pink foil, Basic Beige card stock and the Sweetly sentimental hot foil dies. Add sentiments appropriate to your occasion – there are several in this from which to choose! I trimmed and added one to the scallop on the flap, then added another to the inside of the flap portion of the card. I also added a trim at the bottom of the inside flap – from the Velvet Meadow SDSP
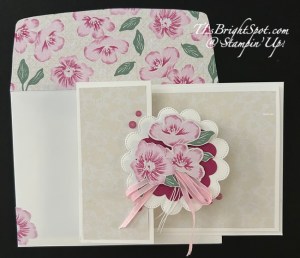
For the envelope… more Velvet Meadow SDSP (2 1/4 x 6) cut, adhered & trimmed to fit the flap. For the front of the envelope, I adhered a fussy cut flower from the SDSP to the edge.
To order from me – click here This will take you to ONLINE EXCLUSIVES, kits, current catalogues, the amazing new Hot Foil System – all Stampin’ Up! Have questions? Connect with me! Below is a list of the products used to make this card – and some standard items as well.
Happy belated fourth! It has been beastly hot here on the East Coast – 104 yesterday with a heat index of 111. I’ve been playing again… more shaped cards; one of which we made in card class Jul 2.
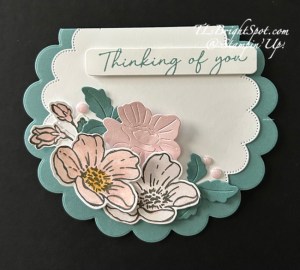
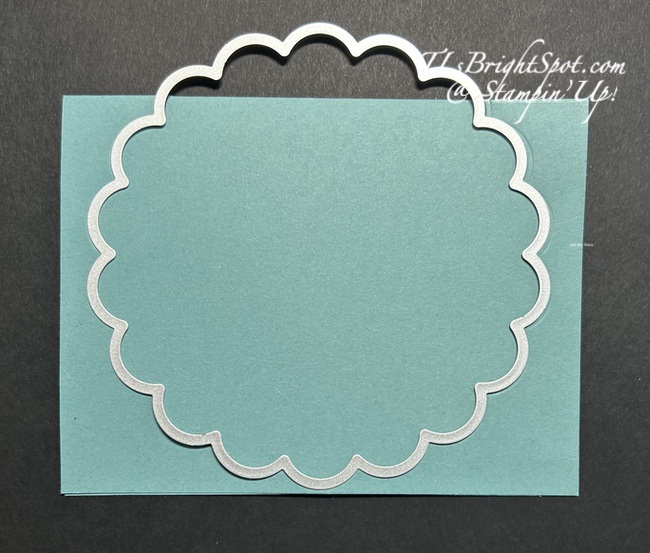
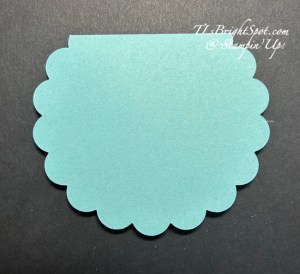
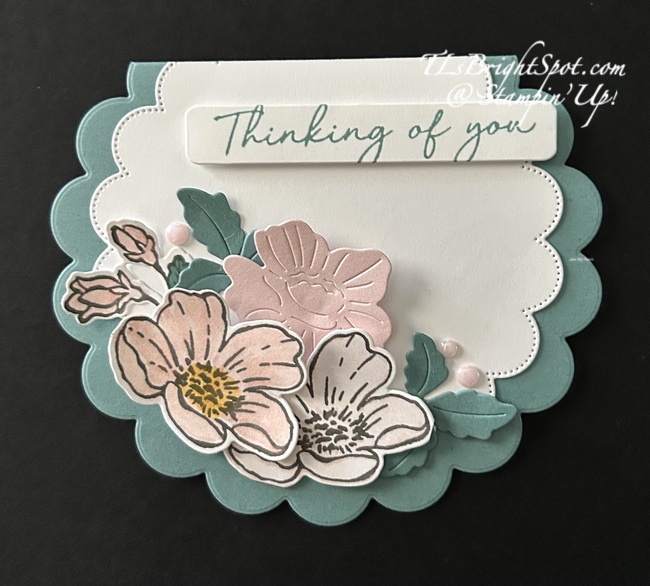
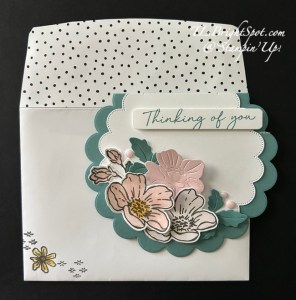
This first card begins with the Scalloped Blooms Dies, the largest & next to largest.The card stock is Lost Lagoon 5 1/2 x 8 1/2 scored at 4 14. This could make a portrait or a landscape card depending on where you place the flowers & leaves, sentiment. As you can see I chose landscape. With the fold at the top, lay the die so it uses most of the card – with maybe 5 of the scallops not on the card stock. (see photo) Run it through the die cutting machine twice so it cuts through both layers of card stock. Now cut the next layer with the next smaller Scalloped Blooms Die – here I used Basic White and about three of the scallops are off the panel. Layer these together with liquid glue – and decorate.
With Bouquet Blossoms stamp set, I stamped two of the same flower & the smaller buds with Basic Gray ink then colored with Barely Blush for one & The Shimmer Brush in Barely Blush for the other. I also used Golden Glow on that same flower for the center, then die cut these. I then die cut two three-section leaves from Lost Lagoon, then one more flower from Shimmer Paper in Barely Blush (that die cut is different!) I stamped a sentiment from the Bouquet Blossoms stamp set in Lost Lagoon ink & set it aside. The darker flower got dimensionals, the lighter stamped flower was attached with liquid glue then a dimensional on the right side. The bud die cut was slipped under & attached with a dab of liquid glue, then the leaves were added, also with liquid glue. The Shimmer paper flower was added last – liquid glue and a dimensional at the top to make it raised – this gives the card lots of dimension. I added the sentiment with dimensionals. Final touch – three 2026-2028 In Color Dots in Barely Blush.
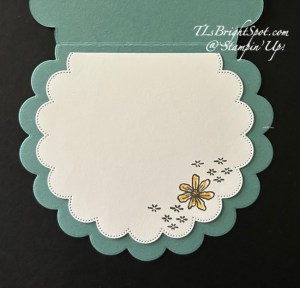
For the inside… this die cut was centered, and not all the way to the fold. You can do it either way. Two more stamps from Bouquet Blossoms stamped in Basic Gray ink. The single flower is colored with the Shimmer Brush in Golden Glow. Simple – attached the inside panel – done!
For the envelope… same images from the Bouquet Blossoms stamp set in Basic Gray ink stamped on the front. A 2 1/4 x 6 strip of … DSP was added to the flap & trimmed to fit. This is a very feminine kind of card – but could easily be a wedding or anniversary card, just by changing the sentiment.
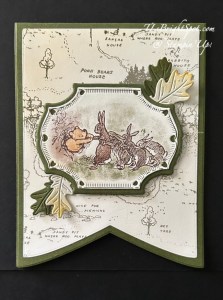
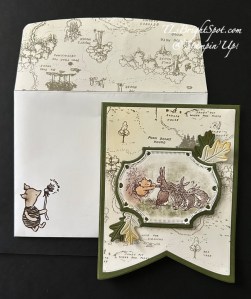
And here’s my 2nd shaped card… using the Banner Dies: 5th, 6th & 7th from the largest. It features the Silly Old Bear 12×12 DSP, Silly Old Friends bundle & the Sweet Words & Labels bundle.
The card stock base is 4 1/4 x 11 scored at 5 1/2 – Mossy Meadow. Lay the short flat edge close to the closed card base & run through the die cutting machine twice. With the 6th from largest banner die, cut the DSP two times (one for front & one for inside.) Adhere one to the card front & the other to the inside. Die cut two leaves from Mossy Meadow & two from Basic Beige using the Sweet Words & Labels Dies. Die cut the two banners: Mossy Meadow & the other from the Silly Old Bear DSP. Layer these together with liquid glue then attached over the card front with dimensionals. Add a touch of color to the leaves with Golden Glow & a sponge dauber, then slip them under the banner adhering with liquid glue. You can easily add dimensionals to the leaf ends to give them aa bit of flair.
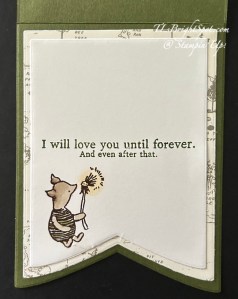
For the inside… with the 7th largest Banner Die, die cut the Basic White sentiment panel. With the Sweet Old Friends stamp set, stamp the Piglet image in Memento ink & color with Blends: Old Olive Crumb Cake & Golden Glow. Stamp the sentiment in Mossy Meadow ink using the same Silly Old Bear stamp set. Adhere the panel to the inside.
For the envelope… more of the Silly Old Bear 12×12 DSP attached to the flap & trimmed to fit. On the front – stamp the same image as inside the card & color similarly. My grandson loves Winnie the Pooh stuff & I think I need to send this to him to give to his fiancee’ – what do you think?!
And the two cards…
Thanks for stopping by. May you have a beautiful day. Make someone happy by sending them a handmade card filled with ❤️
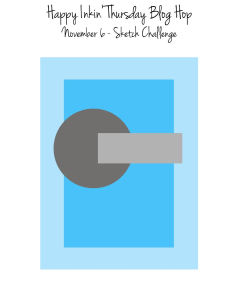
Welcome to our blog hop! We have a fun sketch challenge today ands I’ve chosen to work with the new November ONLINE EXCLUSIVE suite of products called Brushed with Beauty. As a demonstrator I was able to purchase this early in a pre-order and I l-o-v-e it! The colors are really ‘up my alley’ so to speak. Yesterday I shared several links to cards I made with this suite of products. You can see that post here
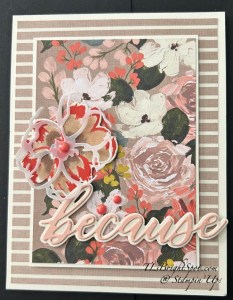
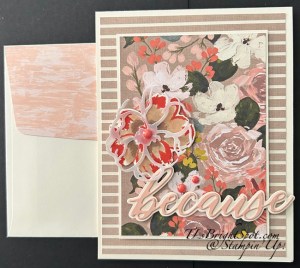
And … today is hubby & my anniversary… of several/ many years. I am so blessed and thankful. So, today’s card is in celebration of that. ❤️
I started with a Very Vanilla card base and adhered this striped pattern (it’s the ‘b’side to the floral paper showing) directly to the base. I then cut a smaller piece of the same DSP (the ‘a’side) and adhered it to Very Vanilla just slightly larger. This was added to the front with dimensionals. Next I stamped the larger floral outline stamp in Calypso Coral on a scrap of Very Vanilla and colored it with Stampin’ Blends Bronze & Ivory. I die cut this and the detail die (this one is from the Vellum in the suite of products) and attached the two together with a glue dot in the center of the flower. I attached a Pearls of Beauty embellishment to the flower center in Calypso Coral and added it to the card front with liquid adhesive. I die cut two elements from the Words of Beauty Dies: the background layer in very Vanilla and the detail of the word in Petal Pink that had an adhesive sheet attached to it. After die cutting I put them together & added them to the card front with mini dimensionals. I added two more of the Pearls of Beauty in Calypso Coral.
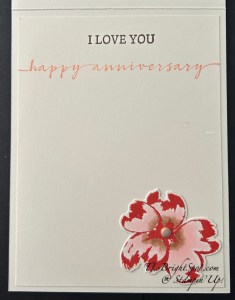
For the inside… I was playing around with color for the flower… stamped the outline stamp on a Very Vanilla scrap in Calypso Coral but colored this one with Stampin’ Blends 1000 & 500. The 1000 is the pinkish color and the 500 is the soft shade of brown. After die cutting the flower & adhering it to a Very Vanilla insert, I added a single Pearls of Beauty embellishment in the Crumb Cake kind of color. The top sentiment is stamped in Early Espresso using the Words of Beauty stamp set. The lower sentiment is stamped in Petal Pink ink using the Sweetly Scripted stamp set.
Keeping this envelope really simple… another panel of the Brushed with Beauty DSP showcasing a Petal Pink coloring, was added to the flap and trimmed to fit. You can purchase these products from my online store – see the link below!
Now… time to continue the journey to see what others have created for today’s hop. Click the ‘next’ link or click a name. Don’t miss anyone!
This same link will allow you to view anything in my store – from items in the Sep-Dec Mini Catalog to Online Exclusives, to Kit Collections to items in the 2025-2026 Annual Catalog.The above link will do it all!
Thanks for stopping by. May you have a beautiful day. Make someone happy by sending them a handmade card filled with ❤️
Stampin’ Up! is offering a Brushed with Beauty CRAFT CLASS November 20 @ 2 pm MT. That class code is 170074 and the cost is $30.00 US – open to demonstrators AND CUSTOMERS. You may place your order for the class (170074) AND the Brushed with Beauty Suite of Products (167100 – $136.25) here
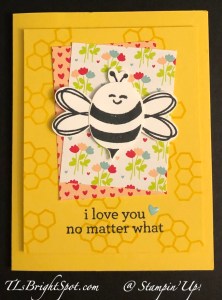
Good morning! It’s the ‘day after’ the OnStage@Home event… (now two days after – – – computer issues put a stymie on everything!) and there were several demonstrators from around the world providing tips, tricks and sharing some ideas on new products that will be offered in the Jan-Apr 2024 Mini Catalog. As demonstrators and those of us who attended the @Home event, we were able to order the Bee Mine Suite of products and make a card with card cuts provided by Stampin’ Up! I did that and today’s card is one we made. This is a fairly simple card, one that could work with new stampers.
This card uses Daffodil Delight as the card base, and a stamped layer added with dimensionals. The stamped layer uses the honeycomb stamp in the Bee My Valentine stamp set and Daffodil Delight ink. Also, stamp the sentiment in Memento ink from Bee My Valentine stamp set. Adhere the two panels of Bee Mine 12×12 DSP at an angle using Stampin’ Seal. Stamp the portions of the bee in Memento ink on Basic White scraps and punch out with the coordinating Bee Builder Punch. Adhere parts together with small dots of liquid glue and add to card front with dimensionals. I added the fun Pool Party heart from the Adhesive-Backed Hearts & Flowers pack that is also part of the suite.
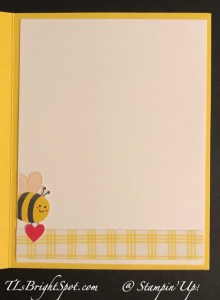
I added a strip of the plaid Bee Mine 12×12 DSP with Stampin’ Seal, then fussy cut this adorable bee holding a heart from the other side of this Bee Mine 12×12 DSP and adhered it in place with liquid glue – all on a Basic White panel.
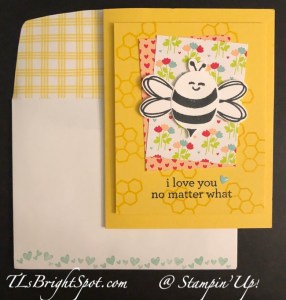
And here’s the card & envelope. Remember, no naked envelopes! More of the Bee Mine 12×12 DSP on the flap and trimmed to fit. On the front… these cute hearts from Bee My Valentine stamp set, stamped in Pool Party ink all along the bottom. Very cute! Love this bee & it’s coordinating punch. There are at least three options for bee faces in this set.
Ok – so I ‘hear’ the question… how do I get my hands on this set of products?
wait until January 2024 to order as a customer
Join my team here to be able to order Dec 5 as a demonstrator. (Yep – I got mine early as I was attending the OnStage@Home event!)
To order Stampin’ Up! products, please use this link to my online store. You will find ONLINE EXCLUSIVES, Clearance Rack, Sep-Dec Mini Catalog, the Annual Catalog, kits, Paper Pumpkin – you name it. Shop at your convenience :O)
When ordering from me please use my NEW HOST CODEHSJD7BR6 so that I receive proper notification and YOU GET THE Benefits of a FREE SU! item valued up to $10 :O) AND the Monthly Card Tutorial. (I like to treat my customers!) If your order is over $150, please don’t use the host code as SU! has benefits. I’ll still be notified and you can receive that FREE ITEM!
Note: Make sure that you can see my name on the final checkout page listed as your Demonstrator when you order so that you know that you’re ordering with me and you’ll get my rewards! PLUS… the monthly Online Tutorial when your order is over $50. The November Tutorial features the beautiful Winter Meadow suite of products which can found in the Jul-Dec 2023 Mini Catalog on pages 36-38!
Seasonal Sale Nov 14-16
I sent an email late yesterday when it was announced about this Seasonal sale – but here’s all the pertinent info.
Sales Period: 14–16 November 2023
Ordering Deadlines
Phone: 16 November 2023 at 6:59 p.m. (MT)
Online: 16 November 2023 at 11:59 p.m. (MT)
10% off ribbons and trims.
15% off inks, including pads, refills, markers, and Blends. Bundles are not included.
20% off papers, including cardstock, specialty paper, and Designer Series Paper.
Shop online to see the full selection of discounted products available. This is a limited time offer.
Discounts are automatically applied when sale items are added to any order, including Starter Kits.
Please keep in mind that due to the high volume of orders, the distribution center may fall behind our typical shipping timeframes. We will do everything we can to return to our regular service levels as quickly as possible.
Please note: Some items may sell out due to high demand. The discount will automatically be applied to qualifying items that are in stock. Per our updated policy, backorders are not available.
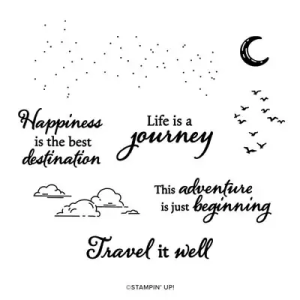
NEW KIT (THE BEST DESTINATION KIT) ADDED AS OF NOVEMBER 1!
163186
THE BEST DESTINATION KIT
$20.00 USD | $28.00 CAD
Available starting 1 November 1.
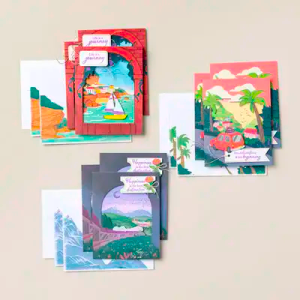
This kit lets you make nine tri-fold cards with a colorful, nostalgic, travel vibe.
Enough supplies to create 9 cards—3 each of 3 designs
9 coordinating envelopes
Best Destination Photopolymer Stamp Set
One Gorgeous Grape Ink Spot
Printed card bases, printed die cuts, adhesive, embellishments, and a clear block
Finished card size: 5-1/2″ x 4-1/4″ (14 x 10.8 cm)
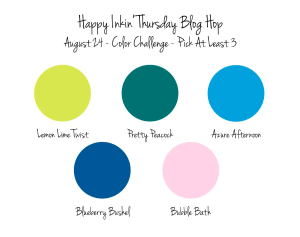
Welcome to another Thursday… and the amazing Happy Inkin’ Thursday Blog Hop. We have a color challenge for this hop.
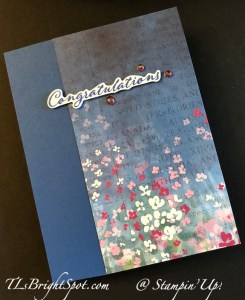
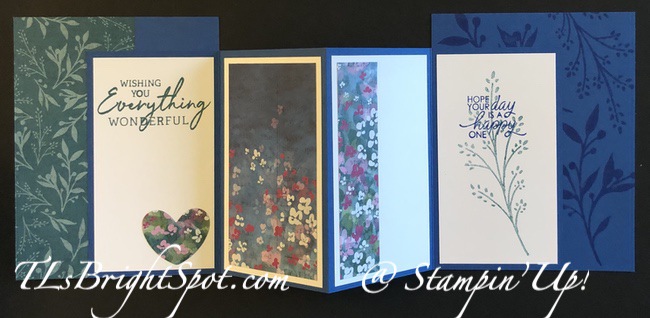
I found the directions for this card and it seemed a clever way of making the card more flexible – and just had to give it a try. Susan Campfield was the demonstrator and had another name for it. Here’s what it looks like open.
Notice how there is a gap between the front of the card and the back of the card – that’s the split. And here’s how the card looks from the top.
Directions to make this card are not all that complicated – and all the colors for the color challenge are in the DSP :O) I used Blueberry Bushel for the card base, Pretty Peacock for stamping one of the sentiments and Bubble Bath and Lemon Lime Twist are in the DSP – so we’re good.
Cut the card base back from Blueberry Bushel 4 1/4 x 5 1/2
Cut the card front in two parts: Blueberry Bushel 1 3/4 x 5 12 & Masterfully Made DSP 3 x 5 1/2
Adhere the two front panels together so they measure 4 1/4 x 5 1/2
Cut the ‘M’ section from Blueberry Bushel 11 x 4 3/4 and score on the long side @ 2 3/4, 5 1/2, 8 1/4. Burnish as valley, mountain, valley as shown above.
Decorate panels as desired: Basic White layers are 2 1/2 x 4 1/2
Panel 1 is stamped with Pretty Peacock ink using the Charming stamp set; Radiating Stitches Dies was used to die cut the heart from Masterfully Made DSP
Panel 2 is a layer of Masterfully Made DSP 2 14 x 4 1/4 on the Basic White panel
Panel 3 is the same Masterfully Made DSP pattern as the heart, cut 1 x 4 1/4 adhered to the Basic White panel. Here I will write my message.
Panel 4 is this pretty stamp from Gorgeously Made stamp set, stamped with Pretty Peacock ink, stamped off once. Over that is another sentiment, this time from So Sincere stamp set (available Sep.6 in the Mini Sep-Dec 2023 Catalog) in full strength Blueberry Bushel ink on the Basic White panel.
On the inside of the back of the card, I used the Gorgeously Made stamp set and Blueberry Bushel ink to stamp these pretty images
Adhere the now decorated ‘M’ fold to the inside of the card front, keeping bottom edges even with card front; secure to back in same fashion.
Decorate the card front:
The sentiment was stamped in Blueberry Bushel ink to a Basic White scrap using the Wonderful Thoughts stamp set, then die cut with the coordinating Wonderful Thoughts Dies. This was adhered to the card front with dimensionals cut in half. Three Berry Burst embellishments were added from the Tinsel Gems 4 Pack.
I used another pattern of the Masterfully Made DSP to adhere to the envelope, trimmed to fit – 2 1/4 x 6.
Fun card to make! I hope you give it a try and share your photos with me.
Now, on with the hop! See what creative folks we have on our team. you won’t want to miss a single one!
OK, Hopefully I mentioned stamps, dies, embossing folders and Designer Series Papers will be available Sep 6 via the Mini 2023 Sep-Dec catalog. If you have not received a catalog or do not have a demonstrator, I would be happy to be that person for you. If you are interested in ordering those products now and get 20% off in the bargain, it’s easy to join my teamhere. And when you do join my team, there are other benefits as well.
20%+ Discount on your demonstrator orders
Be a part of a fun and supportive team and the Stampin’ Up! community – this is one of the best parts, meeting new folks and new ideas, creating together
Early access to new catalogs and promotion information
Early ordering for new products
Be a hobby demonstrator or start a business
No pressure to sell products
My full support when you join my team
access to monthly class tutorials :O) Each month it’s different, this month it’s the Timeless Arrangements bundle, and that’s gorgeous!
If you are interested in Designer Series Paper Share from the Mini Sep-Dec 2023 Catalog, please visit about below my Designer Series Paper Share.
Other Stampin’ Up! opportunities…
Kits are fun, quick and easy, and all-inclusive so there’s nothing extra to buy and nothing to store afterward.
Completing a kit gives everyone a sense of artistic accomplishment.
Completed kits make great gifts. Make the projects and then give them away for someone else to use.
Because kits come in so many styles and project types, there’s something for everyone. Want to HOST a kits collection party? Let me know and I’ll help pull that off. Kt together in September with kits on sale now. :O)
KITS COLLECTION BY STAMPIN’ UP! You can shop with me here.
Sales Period: 1–31 August
Just make certain when you’re checking out that my name is at the top as your demonstrator. THANKS! If your order is over $50, please use my HOST CODE 3QH63UB7 so I can send to you a SU! item valued to $10. If your order is over $150, Stampin’ Up! has it’s own rewards, so don’t use the HOST CODE then. I will still send a SU! item valued to $10 :O)
Online Exclusives are just that – not in any Stampin’ Up! catalog.
How my shares work: I order full packs of all the Designer Series Papers listed below. I cut them into 6×6 pieces (or 6×12 for double shares) and give you one panel of each design from each pack on the list. I pack up the paper and get it back out to you just as quickly as possible! Shares give you a good working sample of all of the papers and makes it easier to decide which papers you like most and want to order.
Below is a list of the papers for this Designer Series Paper Share.
A single paper share is $30 plus $8.50 Priority Mail Shipping.
A double paper share is cut 6 x 12 and is $60 plus Priority Mail Shipping.
Remember, one 6×6 sheet of each design from these DSP packs. Most original DSP packs come in 12 x 12 size unless otherwise noted.
The list includes: name of DSP, number of sheets of that DSP in the pack.
A Walk in the Forest – 6
All About Autumn – (6×6 size) -12
Beary Christmas – 6
Melon Mambo & Granny Apple Green Foil Sheets – 2
Garden Walk – (6×6 size) – 8
Glow-In-The-Dark 6×6 Specialty Paper – 1
Joy of Christmas – 6
Joyful Specialty Paper – 4
Merry Bold & Bright – 6
O Holy Night – 6
Oxidized Copper Specialty Paper – 2
Shining Brightly Specialty Paper – 6
Snowflake Magic Specialty Paper – 3
Them Bones – 6
Winter Meadow – 6
Anyone is welcome to join this paper share opportunity, but shipping is limited to addresses within the US. If you would like to join in these shares, please email the following information to tlsbrightspot@gmail.com:
Your first & last name (yep, I need both :O)
The email address connected to your PayPal account. You DO NOT need to have a PayPal account to pay the invoice; you can choose to pay by credit card without having a PayPal account.
Deadline to sign up for my shares: Monday, September 4 @ 3 PM ET
Thanks for stopping by. May you have a beautiful day!
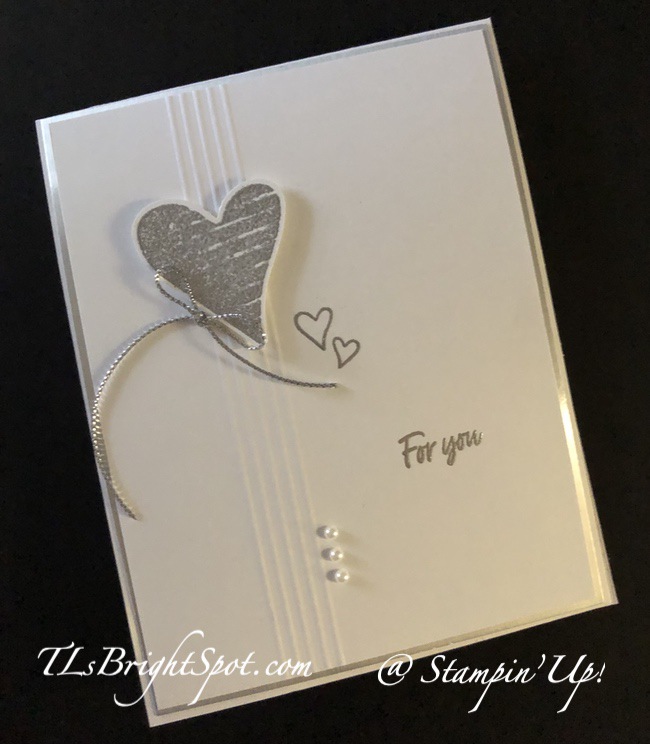
We have a theme challenge for today’s hop – love. I don’t tend to be a big Valentine sender/ giver, but I really like this Country Bouquet Bundle. I’ve taken a bit of a modern approach without DSP.
Silver heat embossing, a bit of scoring and some gorgeous Simply Elegant Trim in silver highlight this card. And of course, the heart uses the Country Bouquet Punch from the Country Bouquet Bundle. The words and hearts are from the Country Bouquet stamp set.
The ‘how to’:
Begin with a card base of Thick Basic White scored in half. This can work as 8 1/2 x 5 1/2scored at 4 1/4 or 4 1/4 x 11 scored at 5 1/2
Using the Scoring Tool and the back side of a Basic White panel, create five score lines. Why the back side? Scoring creates an indentation and I wanted the scoring to be raised. After scoring, turn card stock over & bingo!
On a piece of Basic White, rub the piece with the embossing buddy to remove finger prints or anything that would cause the embossing powder to attach itself; stamp the hearts from Country Bouquet stamp set with VersaMark ink; sprinkle with silver embossing powder and heat set with the Heat Tool. Once cool, punch with the Country Bouquet Punch and set both hearts aside.
Determine where on the card front panel the large heart will be placed, rub entire right side of card with the embossing buddy. Stamp the two open hearts from the Country Bouquet stamp set with VersaMark ink, then the words ‘for you’. Sprinkle both with silver embossing powder and heat set with the Heat Tool.
Add large heart with dimensionals.
Add silver bow using the Simply Elegant Trim and adhering with a scrunched glue dot.
Add three Pearl Basic Jewels for additional elegance.
Add this panel to a Silver Foil Specialty Paper panel slightly larger, then add to card front. Done!
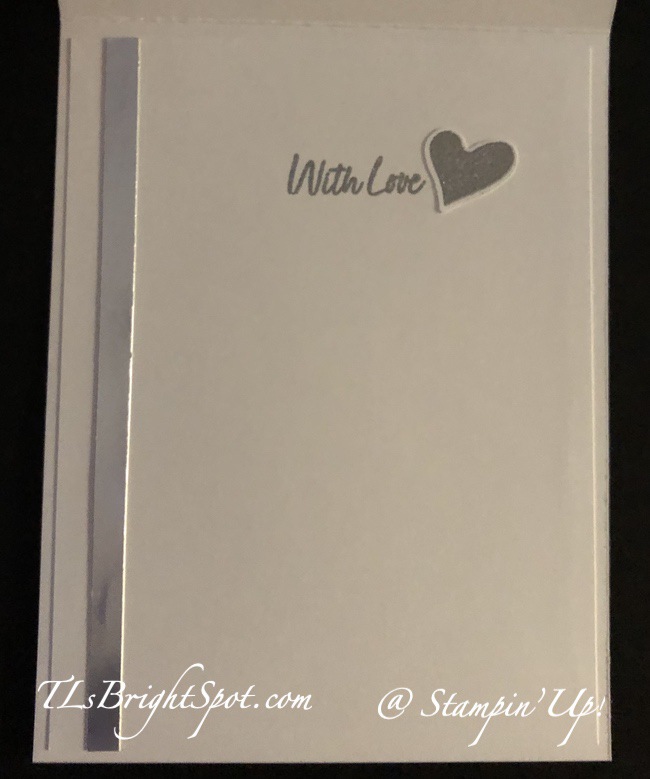
For the inside, I added a length of Silver Foil Specialty paper to the left side with liquid glue, cleaned the area to be stamped with the embossing buddy, inked the sentiment with VersaMark ink, sprinkled it with silver embossing powder and heat set. The smaller heart that was stamped & punched at the same time as the larger heart was added with liquid glue. This panel was added to the inside of the card and all done.
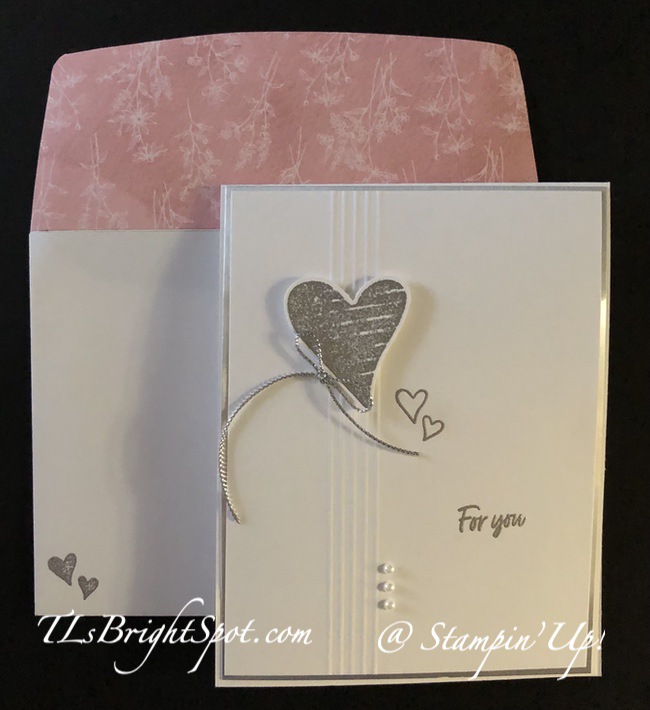
For the envelope, I again used the embossing buddy to clean an area for the enclosed hearts from the Country Bouquet stamp set; stamped them with VersaMark ink and sprinkled with the silver embossing powder and heat set with the Heat Tool. For the envelope flap, I wanted a soft pink so added a piece of the Dainty Flowers DSP (FREE with a $50 order during Sale-a-bration!)
I hope you liked my card. Now you have seen my gem, I hope you will travel along the hop to visit everyone else participating today. Click the ‘next’ button or a name to visit. ENJOY!
These new products are wonderful to create & play. Want to be able to create this… order from my online store (Click here to go my store) or JOIN MY TEAM with the awesome promotion by Stampin’ Up! you may do that here. Keep reading for more info.
If you would like to order from my online store, that’s really easy to do. And remember to use my current HOST CODE UBG3N32X to earn credit from me. Here’s how it works… when you place an order of $50 or more (before shipping & taxes), you receive from me a SU! item valued up to $10 + Star-Studded Rewards. If your order exceeds $150, do not use my HOST CODE as SU! has it’s own rewards from which you may choose. You will still receive that FREE ITEM valued up to $10 from me + the Star-Studded Rewards. 😁👍
For every $50 that you order from my online store (before shipping & taxes) and when you add my current Host Code, you will earn 1 STAR Reward. Orders of $49.99 or below DO NOT earn any rewards.Example $50 = 1 STAR Reward, $100 = 2 STAR Rewards , $150 = 3 STAR Rewards etc. When you have earned 8 STAR Rewards you will get a FREE product order valued up to $40.00, your choice, and mailed directly to you! Is that a deal or what??? You also earn my monthly Online Class Tutorial of exclusive projects when you place an order. For any order $50 or more you will also receive 1 free gift from me valued up to $10. Remember to use MY current HOST CODE: UBG3N32X Click here to go my store. Note: Make sure that you can see my name on the final checkout so you know you’re ordering from me.
Joining special promotion!
Option 1: The exclusive Boho Blue Mini Machine ($63 value) + your choice of $175* of Stampin’ Up! products for only $129.
Option 2: The original white Mini Machine ($63 value) + your choice of $175* of Stampin’ Up! products for only $129.
Option 3: Your choice of $175* of Stampin’ Up! products for only $99.
*That’s $50 more product than the standard Starter Kit offer! JOIN MY TEAM – you may do that here.
The Boho Blue Mini Machine (161104) is the same as the White Mini Cut & Emboss machine – only in Boho Blue – a new In Color that will be introduced for 2023-2025.
The January-February Sale-a-bration event has a buy, host and join promotion! Above is the JOIN! Next is the SHOP!
Spend $50 or more and pick from 7 new products (4 stamp sets and 3 paper packs!) that are available as free items!
Spend $100 or more and pick from 2 new items (1 paper pack and 1 stamp set that are) that are available as free items!
There is a new host exclusive stamp set called Scenic Garden that will be available for FREE with either a personal order of $300+ or a party with sales totaling $300+!
Let me know if you are interested & I’ll set up a personal HOST CODE for you & your friends to see if you can collect orders to reach the $300 point to get that free stamp set!
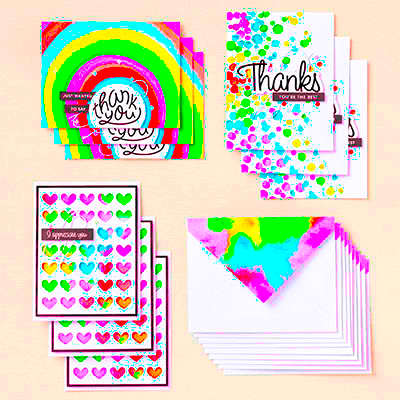
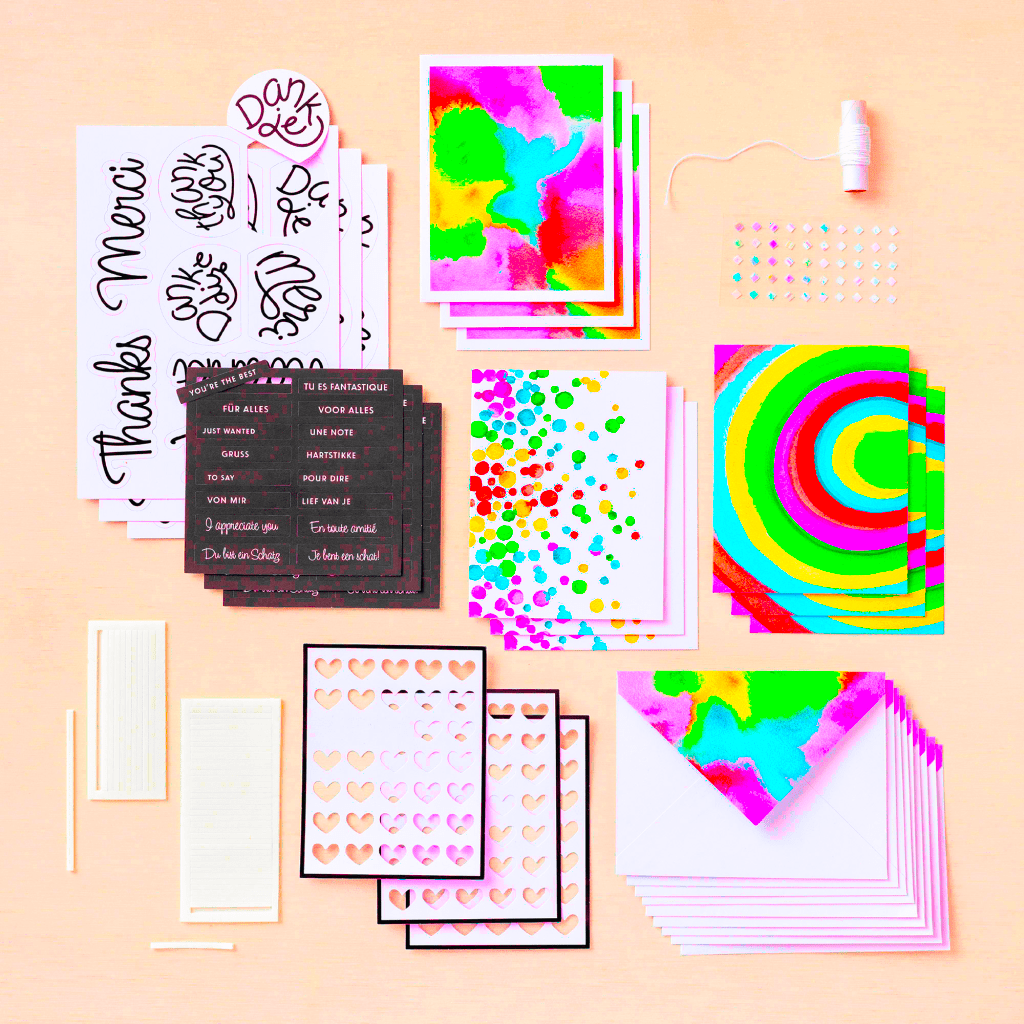
The new Saying Thanks Kit is another great option to add when you join… but you don’t have to join to purchase the kit!
162361
SAYING THANKS KIT
$13.00 USD | $18.00 CAD
Each kit comes with precut die cuts in Dutch, English, French and German
Available starting 5 January 2023
This kit includes:
Enough supplies to create 9 cards—3 each of 3 designs—and 9 coordinating envelopes.
Printed die-cut words, precut pieces, and enough adhesive to complete projects.
White baker’s twine and iridescent diamond sequins.
Finished card size: 5-1/2″ x 4-1/4″ (14 x 10.8 cm).
Hi Folks! Happy POST Thanksgiving… We are still celebrating in our home – family arrived yesterday and we had our feast today. Needless to say, I have been preoccupied with our being able to be together, and cooking. :O) I enjoy cooking, but mostly I appreciate that we can be together. There’s nothing better!
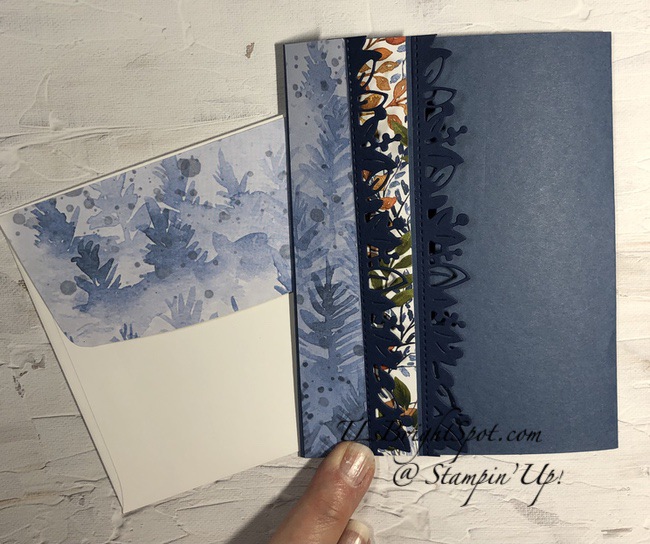
Here’s a card for you that was super fun to do. A friend of mine wanted a card in blues for an anniversary and I came up with this.
Anniversary with Beauty of the Earth
This card also had a belly band and for some reason a missed taking a picture of it. 😦 And you can see I used the Eden Dies for special trim on the edges. This IS a fun fold and opens like this…
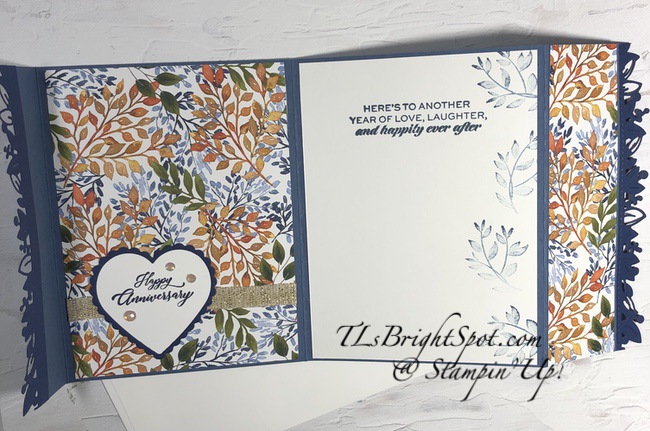
Anniversary with Beauty of the Earth, inside
You can see I also used the Heart Punch Pack (Night of Navy & Basic White) over the Gold Fine Art Ribbon & Beauty of the Earth DSP. Gilded Gems were added to the heart to bring it all together. On the large Basic White panel I stamped leaves in second generation Misty Moonlight ink. The sentiment on this panel & the heart come from an ALL NEW stamp set that will be in the Jan-Jun 2022 Mini Catalog called Love and Happiness. I love the sentiments AND the fonts! This stamp set will be available Jan 3 for customers. Of course… if you JOIN MY TEAM NOW you can order this set right away :O) How’s THAT for incentive? AND… joining as a demonstrator through the end of November is just $75 and the bonus is $125 worth of product. It just doesn’t get any better than that.
Not have a demonstrator so you can order? If you do not have a demonstrator and need an Annual 2021 Catalog OR Jul-Dec 2021 Catalog, please reach out to me – happy to send one to you. Please also use my current host code when ordering: 62EHPGHC I offer my customers a free item from Stampin’ Up! valued to $10 with your order of $50 and above. Click here to go my store. When the order is over $150, you still receive that free gift from me, but SU! has Stampin’ Rewards that may be used for additional products, so don’t use the host code at that time. If you have questions just let me know. If you would like to be able to order products early from catalogs AND enjoy that 20% discount, join my team now… you may do that here. We have lots of fun and are a creative bunch that encourages & supports one another. Would love to have you! And… as a reminder – during the month of November only, joining is $75 and the products with joining are $125 worth of product ~ your choice too! Just sayin’, I haven’t seen this kind of deal since joining as as demo several years ago. This is the time!
Here’s what I’m encouraging and sharing with you: join to become a Stampin’ Up Demonstrator. You may do that with me – here. Joining during the month of November is $75 to create your own ‘starter kit’ ~ but you receive $125 worth of products that you get to choose. When you join, that’s free shipping for that one time, and I must say, I haven’t seen a $75 joining deal like this in my time with Stampin’ Up! This is a sweet package. Start with Savings is what they’re calling the joining promotion.
Thanks for stopping by. May you have a beautiful day. Send someone a handmade card and make their day! Inspire. Create. Share.
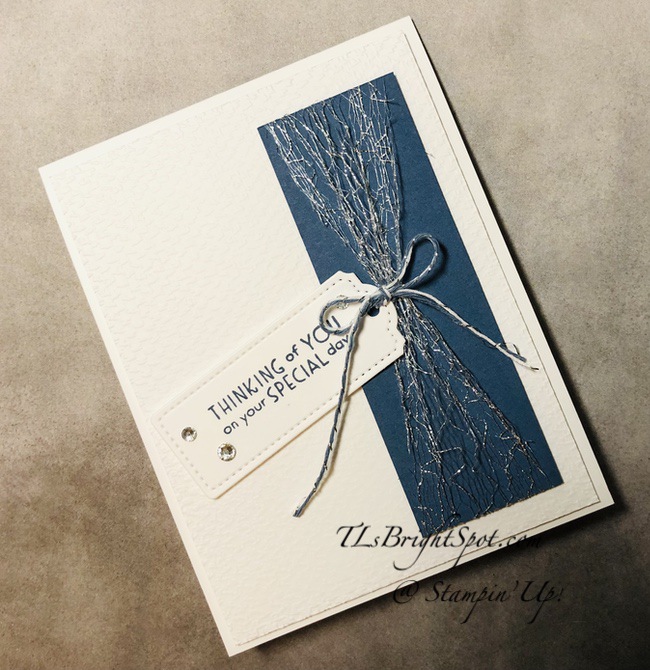
Monday, Monday… remember that song? It’s hard to believe it’s Monday already… where does the time go? I hope you had a wonderful weekend. Do you ever search through Pinterest, find an idea you like and file it in your brain – then try to find it again, and can’t? Well, today’s card is just that – a CASE of someone, I just can’t give credit cuz I don’t know who it is. At any rate, I’ve kept the colors really simple – Misty Moonlight and Basic White.
Tailor Made Tag Dies Anniversary.1
I began with a Thick Basic White card base and added a panel of Basic White regular card stock that had been run through the Tasteful Textile 3D Embossing Folder – adhered with dimensionals. I took a strip of Misty Moonlight card stock and wrapped 1 1/2″ Metallic Mesh Ribbon over it adhering in back with Seal+. I then stamped the sentiment from Inspired Thoughts stamp set on a Basic White piece with Misty Moonlight ink and die cut it using the Tailor Made Tag Dies. I tied Misty Moonlight & Silver twine (from Flowers For Every Season Ribbon Combo Pack) around the mesh ribbon and through the hole in the tag and made a bow I secured the bow with a glue dot. I adhered all this to the card front with dimensionals, added a few Rhinestone Basic Jewels and the card front was done.
Tailor Made Tag Dies Anniversary.2
For the inside I stamped the sentiment from Elegantly Said stamp set in Misty Moonlight ink on another panel of Basic White card stock. I then stamped the flower in stamped off Misty moonlight ink, adhered the panel with liquid glue to the inside and the card was complete.
Tailor Made Tag Dies Annjiversary.3
For the envelope I ran another piece of Basic White card stock through the Tasteful Textile 3D Embossing Folder and adhered it to the flap, trimmed to fit. Finis!. I love the simplicity of this card – it’s elegant.
Card cuts are listed at the bottom of this post.
Products for todays project are from the 2021-22 Annual Catalog. They may be found in the list below. I’ve made it easy for you to simply ‘add all to cart’. If I can help you in any way to order these items, or others, please give me a holler. As a thank you to my customers, when the order is between $50-$150 I offer a SU! item of your choice valued at $10. Remember to use MY NEW HOST CODE – 4A6RJ2TA . When the order is over $150, you still receive that free gift from me, but SU! has Stampin’ Rewards that may be used for additional products, so don’t use the host code at that time. If you have questions just let me know. If you would like to be able to order products early from catalogs AND enjoy that 20% discount, join my team now… you may do that here. We have lots of fun and are a creative bunch that encourages & supports one another.
Thanks for stopping by. May you have a beautiful day. Inspire. Create. Share.
I’ll be back later today with more information about what’s going on in the Stampin’ Up! world – promotions et all!
Card Cuts:
Basic White Thick – 4 1/4 x 11 scored at 5 1/2
Basic White – 4 x 5 1/4 (2), 2 1/4 x 6 (flap), approx. 3 x 1 1/2 (tag)

![Flowering Meadow Bundle (English) [ 167912 ]](https://assets1.tamsnetwork.com/images/EC042017NF/167912s.jpg "Flowering Meadow Bundle (English) [ 167912 ]")
![Velvet Meadow 12" X 12" (30.5 X 30.5 Cm) Specialty Designer Series Paper [ 167904 ]](https://assets1.tamsnetwork.com/images/EC042017NF/167904s.jpg "Velvet Meadow 12\" X 12\" (30.5 X 30.5 Cm) Specialty Designer Series Paper [ 167904 ]")
![Berry Burst 8-1/2" X 11" Cardstock [ 144243 ]](https://assets1.tamsnetwork.com/images/EC042017NF/144243s.jpg "Berry Burst 8-1/2\" X 11\" Cardstock [ 144243 ]")
![Charming Shimmer Faceted Dots [ 166139 ]](https://assets1.tamsnetwork.com/images/EC042017NF/166139s.jpg "Charming Shimmer Faceted Dots [ 166139 ]")
![Bubble Bath 1/8" (3.2 Mm) Faux Linen Ribbon [ 167075 ]](https://assets1.tamsnetwork.com/images/EC042017NF/167075s.jpg "Bubble Bath 1/8\" (3.2 Mm) Faux Linen Ribbon [ 167075 ]")
![Baker's Twine Essentials Pack [ 155475 ]](https://assets1.tamsnetwork.com/images/EC042017NF/155475s.jpg "Baker's Twine Essentials Pack [ 155475 ]")
![Basic White 12" X 12" (30.5 X 30.5 Cm) Thick Cardstock [ 166782 ]](https://assets1.tamsnetwork.com/images/EC042017NF/166782s.jpg "Basic White 12\" X 12\" (30.5 X 30.5 Cm) Thick Cardstock [ 166782 ]")
![Basic White 8 1/2" X 11" Cardstock [ 166780 ]](https://assets1.tamsnetwork.com/images/EC042017NF/166780s.jpg "Basic White 8 1/2\" X 11\" Cardstock [ 166780 ]")
![Basic White Medium Envelopes [ 159236 ]](https://assets1.tamsnetwork.com/images/EC042017NF/159236s.jpg "Basic White Medium Envelopes [ 159236 ]")
![Stampin' Positioner [ 167768 ]](https://assets1.tamsnetwork.com/images/EC042017NF/167768s.jpg "Stampin' Positioner [ 167768 ]")
![Stampin' Cut & Emboss Machine [ 149653 ]](https://assets1.tamsnetwork.com/images/EC042017NF/149653s.jpg "Stampin' Cut & Emboss Machine [ 149653 ]")
![Paper Trimmer [ 152392 ]](https://assets1.tamsnetwork.com/images/EC042017NF/152392s.jpg "Paper Trimmer [ 152392 ]")
![Stampin' Dimensionals [ 104430 ]](https://assets1.tamsnetwork.com/images/EC042017NF/104430s.jpg "Stampin' Dimensionals [ 104430 ]")
![Multipurpose Liquid Glue [ 110755 ]](https://assets1.tamsnetwork.com/images/EC042017NF/110755s.jpg "Multipurpose Liquid Glue [ 110755 ]")
![Mini Glue Dots [ 103683 ]](https://assets1.tamsnetwork.com/images/EC042017NF/103683s.jpg "Mini Glue Dots [ 103683 ]")
![Paper Snips [ 103579 ]](https://assets1.tamsnetwork.com/images/EC042017NF/103579s.jpg "Paper Snips [ 103579 ]")
![Take Your Pick [ 144107 ]](https://assets1.tamsnetwork.com/images/EC042017NF/144107s.jpg "Take Your Pick [ 144107 ]")
![White Gel Pens [ 166642 ]](https://assets1.tamsnetwork.com/images/EC042017NF/166642s.jpg "White Gel Pens [ 166642 ]")
![Clear Wink Of Stella Glitter Brush [ 141897 ]](https://assets1.tamsnetwork.com/images/EC042017NF/141897s.jpg "Clear Wink Of Stella Glitter Brush [ 141897 ]")
![Metallics Wow! Embossing Powder [ 165678 ]](https://assets1.tamsnetwork.com/images/EC042017NF/165678s.jpg "Metallics Wow! Embossing Powder [ 165678 ]")
![Basics Wow! Embossing Powder [ 165679 ]](https://assets1.tamsnetwork.com/images/EC042017NF/165679s.jpg "Basics Wow! Embossing Powder [ 165679 ]")
![Heat Tool (Us And Canada) [ 129053 ]](https://assets1.tamsnetwork.com/images/EC042017NF/129053s.jpg "Heat Tool (Us And Canada) [ 129053 ]")
![Embossing Additions Tool Kit [ 159971 ]](https://assets1.tamsnetwork.com/images/EC042017NF/159971s.jpg "Embossing Additions Tool Kit [ 159971 ]")
![Small Blending Brushes [ 160518 ]](https://assets1.tamsnetwork.com/images/EC042017NF/160518s.jpg "Small Blending Brushes [ 160518 ]")
![Scalloped Blooms Bundle (English) [ 167647 ]](https://assets1.tamsnetwork.com/images/EC042017NF/167647s.jpg "Scalloped Blooms Bundle (English) [ 167647 ]")
![Boutique Blossoms Bundle [ 167654 ]](https://assets1.tamsnetwork.com/images/EC042017NF/167654s.jpg "Boutique Blossoms Bundle [ 167654 ]")
![Lost Lagoon 8-1/2" X 11" Cardstock [ 133679 ]](https://assets1.tamsnetwork.com/images/EC042017NF/133679s.jpg "Lost Lagoon 8-1/2\" X 11\" Cardstock [ 133679 ]")
![Basic Gray Classic Stampin' Pad [ 149165 ]](https://assets1.tamsnetwork.com/images/EC042017NF/149165s.jpg "Basic Gray Classic Stampin' Pad [ 149165 ]")
![2026–2028 In Color™ 12" X 12" (30.5 X 30.5 Cm) Pearlized Specialty Paper [ 167766 ]](https://assets1.tamsnetwork.com/images/EC042017NF/167766s.jpg "2026–2028 In Color™ 12\" X 12\" (30.5 X 30.5 Cm) Pearlized Specialty Paper [ 167766 ]")
![2026–2028 In Color™ Dots [ 167546 ]](https://assets1.tamsnetwork.com/images/EC042017NF/167546s.jpg "2026–2028 In Color™ Dots [ 167546 ]")
![Barely Blush Classic Stampin Pad [ 167678 ]](https://assets1.tamsnetwork.com/images/EC042017NF/167678s.jpg "Barely Blush Classic Stampin Pad [ 167678 ]")
![Silly Old Bear Suite Collection [ 167634 ]](https://assets1.tamsnetwork.com/images/EC042017NF/167634s.jpg "Silly Old Bear Suite Collection [ 167634 ]")
![Mossy Meadow 8-1/2" X 11" Cardstock [ 133676 ]](https://assets1.tamsnetwork.com/images/EC042017NF/133676s.jpg "Mossy Meadow 8-1/2\" X 11\" Cardstock [ 133676 ]")
![Mossy Meadow Classic Stampin' Pad [ 147111 ]](https://assets1.tamsnetwork.com/images/EC042017NF/147111s.jpg "Mossy Meadow Classic Stampin' Pad [ 147111 ]")
![Crumb Cake Stampin' Blends Combo Pack [ 154882 ]](https://assets1.tamsnetwork.com/images/EC042017NF/154882s.jpg "Crumb Cake Stampin' Blends Combo Pack [ 154882 ]")
![Golden Glow Classic Stampin' Pad [ 167676 ]](https://assets1.tamsnetwork.com/images/EC042017NF/167676s.jpg "Golden Glow Classic Stampin' Pad [ 167676 ]")
![Sponge Daubers [ 133773 ]](https://assets1.tamsnetwork.com/images/EC042017NF/133773s.jpg "Sponge Daubers [ 133773 ]")

![Brushed With Beauty Suite Collection (English) [ 167100 ]](https://assets1.tamsnetwork.com/images/EC042017NF/167100s.jpg "Brushed With Beauty Suite Collection (English) [ 167100 ]")
![Sweetly Scripted Cling Stamp Set (English) [ 163600 ]](https://assets1.tamsnetwork.com/images/EC042017NF/163600s.jpg "Sweetly Scripted Cling Stamp Set (English) [ 163600 ]")
![Very Vanilla 8-1/2" X 11" Cardstock [ 101650 ]](https://assets1.tamsnetwork.com/images/EC042017NF/101650s.jpg "Very Vanilla 8-1/2\" X 11\" Cardstock [ 101650 ]")
![Petal Pink 8-1/2" X 11" Cardstock [ 146985 ]](https://assets1.tamsnetwork.com/images/EC042017NF/146985s.jpg "Petal Pink 8-1/2\" X 11\" Cardstock [ 146985 ]")
![Bronze & Ivory Stampin' Blends Combo Pack [ 154922 ]](https://assets1.tamsnetwork.com/images/EC042017NF/154922s.jpg "Bronze & Ivory Stampin' Blends Combo Pack [ 154922 ]")
![Petal Pink Classic Stampin' Pad [ 147108 ]](https://assets1.tamsnetwork.com/images/EC042017NF/147108s.jpg "Petal Pink Classic Stampin' Pad [ 147108 ]")
![Early Espresso Classic Stampin' Pad [ 147114 ]](https://assets1.tamsnetwork.com/images/EC042017NF/147114s.jpg "Early Espresso Classic Stampin' Pad [ 147114 ]")
![Very Vanilla Medium Envelopes [ 107300 ]](https://assets1.tamsnetwork.com/images/EC042017NF/107300s.jpg "Very Vanilla Medium Envelopes [ 107300 ]")
![Tuxedo Black Memento Ink Pad [ 132708 ]](https://assets1.tamsnetwork.com/images/EC042017NF/132708s.jpg "Tuxedo Black Memento Ink Pad [ 132708 ]")