
Welcome to my first post of 2026! The year did NOT start out well – my computer screen failed & had to be replaced… it took a bit as it had to be ordered, installed, secured – all that. Now I’m back in business!! With Tues being Jan 6, all kinds of things happened with Stampin’ Up! products: new kits announced, a new product of the month with a $75 order (before tax & shipping), AND the Jan-Apr, 2026 Catalog went live – WOOHOO! and new online exclusives announced too. PLUS Bonus DAYS are here as well. Let’s check out some of these new items.
Kits:
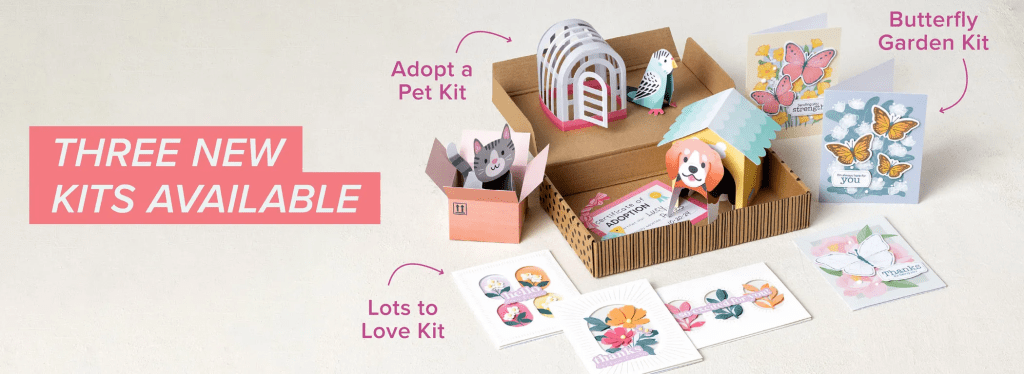

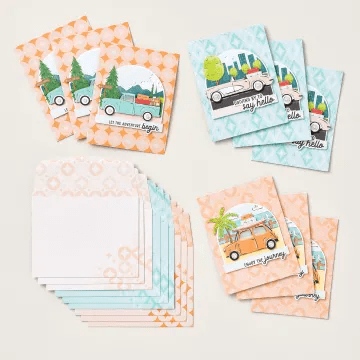
Adopt a Pet Kit – $15.00 167256
For the pet lover in your life, the Adopt a Pet Kit is a total tail-wagger. Build adorable homes, craft playful pets, and fill out your own certificate of adoption for a creative experience that’s full of heart. This kit is paws-itively perfect for celebrating every furry friend.
DETAILS
– Makes 4 projects: 1 each of 4 designs
– Largest box size: 4-3/8″ x 3-1/2″ x 4-1/2″
– Colors: Basic Gray, Cajun Craze, Coastal Cabana, Crushed Curry, Secret Sea, Strawberry Slush
– Sentiments printed in English, French, and German
Kit includes one of each item listed below.
– Step-by-step instructions
– 4 boxes to construct
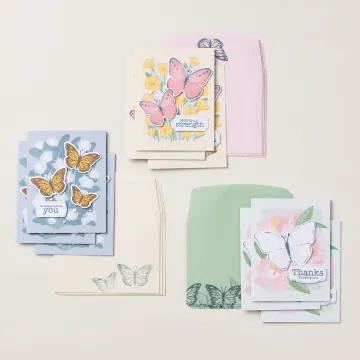
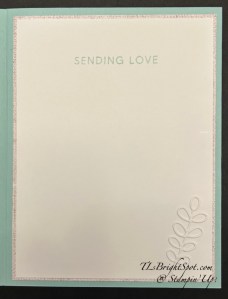
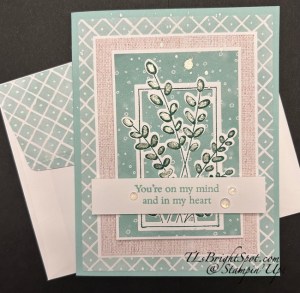
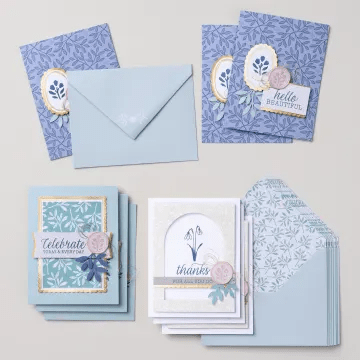
Butterfly Garden Kit $24.00 167266
Create uplifting cards filled with messages of hope and support using the Butterfly Garden Kit. Featuring hand-illustrated butterflies and heartfelt sentiments, it’s perfect for sending encouragement to friends and loved ones. The kit includes everything you need to craft meaningful cards that truly brighten someone’s day.
DETAILS
– Makes 9 cards: 3 each of 3 designs
– Folded card size: 5-1/2″ x 4-1/4″ (14 x 10.8 cm)
– Colors: Crushed Curry, Flirty Flamingo, Garden Green, Misty Moonlight, Pretty Peacock, Timid Tiger
– Also available in French
Kit includes one of each item listed below.
– Butterfly Garden Photopolymer Stamp Set
– Clear stamp block
– Misty Moonlight Classic Stampin’ Spot
– Step-by-step instructions
– 9 printed envelopes
– 9 card bases
– Precut paper pieces
– White dot embellishments
– Adhesive
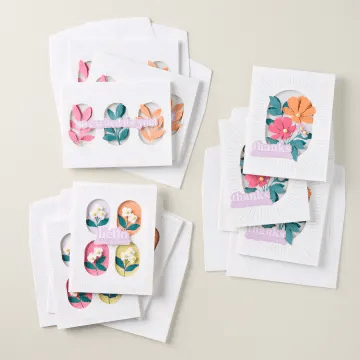
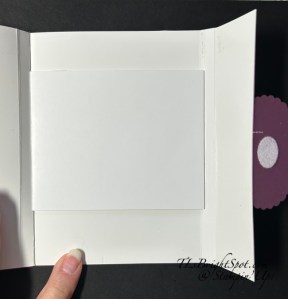
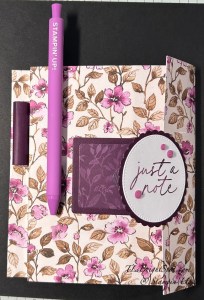
Lots to love Kit $15.00 167263
Design thoughtful cards without the fuss! The Lots to Love Kit has everything you need to craft sweet handmade cards enhanced with colorful accents and fun botanical touches. Each kit comes with printed card bases and envelopes, laser-cut card fronts, precut paper pieces and sentiments, and dot embellishments. Whether you’re saying thanks or just saying hello, this kit lets you create meaningful cards with ease.
DETAILS
– Makes 9 cards: 3 each of 3 designs
– Folded card size: 5-1/2″ x 4-1/4″ (14 x 10.8 cm)
– Colors: Basic Beige, Darling Duckling, Fresh Freesia, Pretty Peacock, Strawberry Slush, Timid Tiger
– Sentiments printed in English, French, and German
Kit includes one of each item listed below.
– Step-by-step instructions
– 9 printed envelopes
– 9 printed card bases
– 9 laser-cut card fronts
– Precut paper pieces and sentiments
– Darling Duckling dot embellishments
– Adhesive
BONUS DAYS BONUS DAYS! Because do you know what’s a great deal? Getting rewarded for all the crafting supplies you’re already going to buy! When you shop between January 6 and February 2 and spend $50 USD | $60 CAD, you will earn a $5 USD | $6 CAD coupon! Make sure you save all your coupons because you can redeem them (and we mean ALL of them) between February 3 and 28. During the earning period, a shopping-cart notification will appear when an order qualifies for a Bonus Days coupon—an online store feature on both the demonstrator and customer websites.
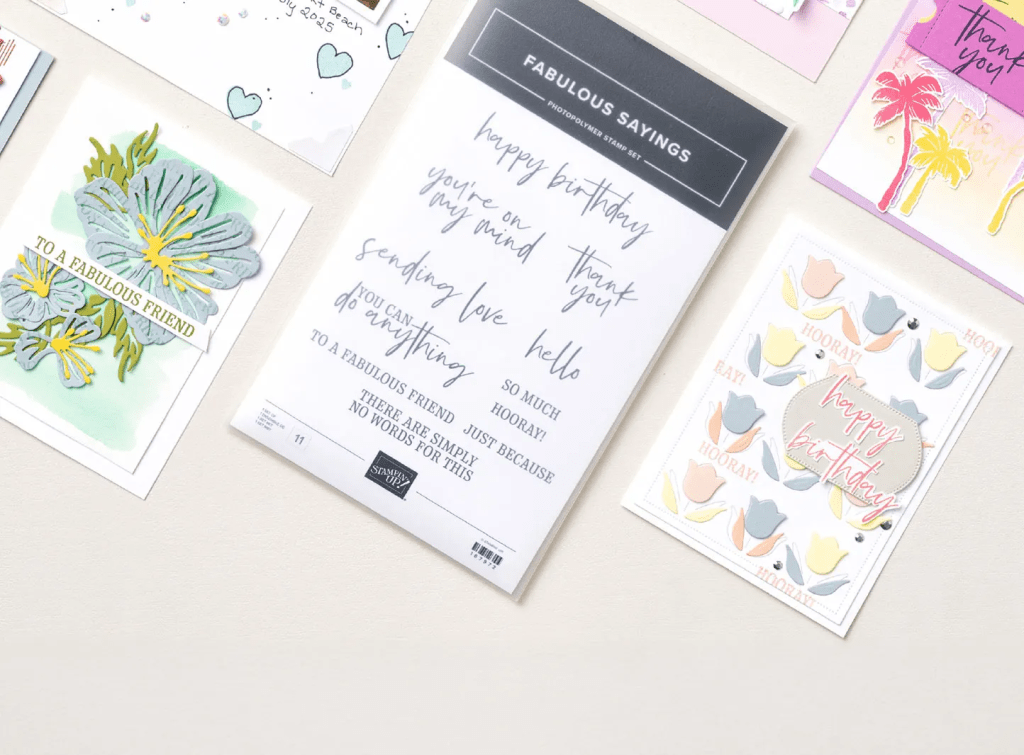
PRODUCT OF THE MONTH – only $5 with a $75 order (before shipping & taxes)

167972
FABULOUS SAYINGS PHOTOPOLYMER STAMP SET (ENGLISH)
$5.00
The Fabulous Sayings Stamp Set is the exclusive Product of the Month for January 2026! Only available until stocks run out—don’t wait to get yours!
This is a Two-Step Stampin’ set; it allows you to layer two or more images to create one final image with extra texture and dimension in the colors you want.
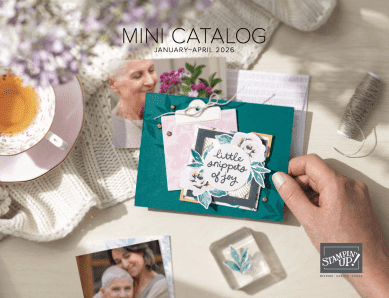
Jan-Apr 2026 Mini Catalog – click the image below to view the catalog
ONLINE EXCLUSIVES Several new stamp sets, dies, Designer Series Papers, embellishments and ribbons are available online that are not in any SU! Catalog. SHOP WITH ME HERE
During this time frame of Jan 6-12, 2026, I am offering DOUBLE DAISY PATCH REWARDS as a customer Thank You! In other words, for every $25 order (before shipping & taxes), you will receive double the rewards. :O) In addition, when your order is $50 & above, you will also receive thew monthly tutorial with lots of fabulous ideas. For January, that tutorial is all about the Lovely Arrangements bundle and Lovely Blossoms DSP – all part of the January ONLINE EXCLUSIVE Lovely Blossoms Suite Collection.
OK – did I mention all the new stuff? Let me know if you have questions… Happy New Year & welcome to 2026! Thanks for stopping by. Share with your ❤️


![Botanical Textures 12" X 12" (30.5 X 30.5 Cm) Designer Series Paper [ 165545 ]](https://assets1.tamsnetwork.com/images/EC042017NF/165545s.jpg "Botanical Textures 12\" X 12\" (30.5 X 30.5 Cm) Designer Series Paper [ 165545 ]")
![Beautiful Pattern 3 D Embossing Folder [ 167097 ]](https://assets1.tamsnetwork.com/images/EC042017NF/167097s.jpg "Beautiful Pattern 3 D Embossing Folder [ 167097 ]")
![The Right Words Cling Stamp Set (English) [ 165316 ]](https://assets1.tamsnetwork.com/images/EC042017NF/165316s.jpg "The Right Words Cling Stamp Set (English) [ 165316 ]")
![Traditional Labels Dies [ 165864 ]](https://assets1.tamsnetwork.com/images/EC042017NF/165864s.jpg "Traditional Labels Dies [ 165864 ]")
![Cloud Cover 3/8" (1 Cm) Faux Linen Ribbon [ 165271 ]](https://assets1.tamsnetwork.com/images/EC042017NF/165271s.jpg "Cloud Cover 3/8\" (1 Cm) Faux Linen Ribbon [ 165271 ]")
![Neutral Matte Dots [ 165561 ]](https://assets1.tamsnetwork.com/images/EC042017NF/165561s.jpg "Neutral Matte Dots [ 165561 ]")
![Basic Black 8-1/2" X 11" Cardstock [ 121045 ]](https://assets1.tamsnetwork.com/images/EC042017NF/121045s.jpg "Basic Black 8-1/2\" X 11\" Cardstock [ 121045 ]")
![Tuxedo Black Memento Ink Pad [ 132708 ]](https://assets1.tamsnetwork.com/images/EC042017NF/132708s.jpg "Tuxedo Black Memento Ink Pad [ 132708 ]")
![Uninked Stampin' Spots [ 141822 ]](https://assets1.tamsnetwork.com/images/EC042017NF/141822s.jpg "Uninked Stampin' Spots [ 141822 ]")
![Cloud Cover Classic Stampin' Ink Refill [ 165279 ]](https://assets1.tamsnetwork.com/images/EC042017NF/165279s.jpg "Cloud Cover Classic Stampin' Ink Refill [ 165279 ]")
![Basic White 8 1/2" X 11" Cardstock [ 166780 ]](https://assets1.tamsnetwork.com/images/EC042017NF/166780s.jpg "Basic White 8 1/2\" X 11\" Cardstock [ 166780 ]")
![Basic White Medium Envelopes [ 159236 ]](https://assets1.tamsnetwork.com/images/EC042017NF/159236s.jpg "Basic White Medium Envelopes [ 159236 ]")
![Stampin' Cut & Emboss Machine [ 149653 ]](https://assets1.tamsnetwork.com/images/EC042017NF/149653s.jpg "Stampin' Cut & Emboss Machine [ 149653 ]")
![Paper Trimmer [ 152392 ]](https://assets1.tamsnetwork.com/images/EC042017NF/152392s.jpg "Paper Trimmer [ 152392 ]")
![Stampin' Dimensionals [ 104430 ]](https://assets1.tamsnetwork.com/images/EC042017NF/104430s.jpg "Stampin' Dimensionals [ 104430 ]")
![Multipurpose Liquid Glue [ 110755 ]](https://assets1.tamsnetwork.com/images/EC042017NF/110755s.jpg "Multipurpose Liquid Glue [ 110755 ]")
![Mini Glue Dots [ 103683 ]](https://assets1.tamsnetwork.com/images/EC042017NF/103683s.jpg "Mini Glue Dots [ 103683 ]")
![Paper Snips [ 103579 ]](https://assets1.tamsnetwork.com/images/EC042017NF/103579s.jpg "Paper Snips [ 103579 ]")
![Take Your Pick [ 144107 ]](https://assets1.tamsnetwork.com/images/EC042017NF/144107s.jpg "Take Your Pick [ 144107 ]")
![Clear Wink Of Stella Glitter Brush [ 141897 ]](https://assets1.tamsnetwork.com/images/EC042017NF/141897s.jpg "Clear Wink Of Stella Glitter Brush [ 141897 ]")


![Traditions Of Christmas 12" X 12" (30.5 X 30.5 Cm) Specialty Designer Series Paper [ 165853 ]](https://assets1.tamsnetwork.com/images/EC042017NF/165853s.jpg "Traditions Of Christmas 12\" X 12\" (30.5 X 30.5 Cm) Specialty Designer Series Paper [ 165853 ]")
![Christmas Greenery Bundle [ 165873 ]](https://assets1.tamsnetwork.com/images/EC042017NF/165873s.jpg "Christmas Greenery Bundle [ 165873 ]")
![Label Me Grateful Bundle (English) [ 166112 ]](https://assets1.tamsnetwork.com/images/EC042017NF/166112s.jpg "Label Me Grateful Bundle (English) [ 166112 ]")
![Traditional Sparkling Sequins [ 165875 ]](https://assets1.tamsnetwork.com/images/EC042017NF/165875s.jpg "Traditional Sparkling Sequins [ 165875 ]")
![Peaceful Greenery 3 D Embossing Folder [ 165928 ]](https://assets1.tamsnetwork.com/images/EC042017NF/165928s.jpg "Peaceful Greenery 3 D Embossing Folder [ 165928 ]")
![Gold Foil Sheets [ 132622 ]](https://assets1.tamsnetwork.com/images/EC042017NF/132622s.jpg "Gold Foil Sheets [ 132622 ]")
![Cherry Cobbler 8-1/2" X 11" Cardstock [ 119685 ]](https://assets1.tamsnetwork.com/images/EC042017NF/119685s.jpg "Cherry Cobbler 8-1/2\" X 11\" Cardstock [ 119685 ]")
![Cherry Cobbler Classic Stampin' Pad [ 147083 ]](https://assets1.tamsnetwork.com/images/EC042017NF/147083s.jpg "Cherry Cobbler Classic Stampin' Pad [ 147083 ]")
![Old Olive Classic Stampin' Pad [ 147090 ]](https://assets1.tamsnetwork.com/images/EC042017NF/147090s.jpg "Old Olive Classic Stampin' Pad [ 147090 ]")
![Friendly Foliage Bundle (English) [ 167308 ]](https://assets1.tamsnetwork.com/images/EC042017NF/167308s.jpg "Friendly Foliage Bundle (English) [ 167308 ]")
![Nests Of Winter 12" X 12" (30.5 X 30.5 Cm) Designer Series Paper [ 164183 ]](https://assets1.tamsnetwork.com/images/EC042017NF/164183s.jpg "Nests Of Winter 12\" X 12\" (30.5 X 30.5 Cm) Designer Series Paper [ 164183 ]")
![Woven Textures 12" X 12" (30.5 X 30.5 Cm) Designer Series Paper [ 165560 ]](https://assets1.tamsnetwork.com/images/EC042017NF/165560s.jpg "Woven Textures 12\" X 12\" (30.5 X 30.5 Cm) Designer Series Paper [ 165560 ]")
![Shaded Spruce Classic Stampin' Pad [ 147088 ]](https://assets1.tamsnetwork.com/images/EC042017NF/147088s.jpg "Shaded Spruce Classic Stampin' Pad [ 147088 ]")
![Pool Party 8-1/2" X 11" Cardstock [ 122924 ]](https://assets1.tamsnetwork.com/images/EC042017NF/122924s.jpg "Pool Party 8-1/2\" X 11\" Cardstock [ 122924 ]")
![Pool Party Classic Stampin' Pad [ 147107 ]](https://assets1.tamsnetwork.com/images/EC042017NF/147107s.jpg "Pool Party Classic Stampin' Pad [ 147107 ]")
![Thoughtful Journey 6" X 6" (15.2 X 15.2 Cm) Designer Series Paper [ 163303 ]](https://assets1.tamsnetwork.com/images/EC042017NF/163303s.jpg "Thoughtful Journey 6\" X 6\" (15.2 X 15.2 Cm) Designer Series Paper [ 163303 ]")
![Traditional Labels Bundle (English) [ 165865 ]](https://assets1.tamsnetwork.com/images/EC042017NF/165865s.jpg "Traditional Labels Bundle (English) [ 165865 ]")
![Misty Moonlight 8-1/2" X 11" Cardstock [ 153081 ]](https://assets1.tamsnetwork.com/images/EC042017NF/153081s.jpg "Misty Moonlight 8-1/2\" X 11\" Cardstock [ 153081 ]")
![Petunia Pop 8 1/2" X 11" Cardstock [ 163801 ]](https://assets1.tamsnetwork.com/images/EC042017NF/163801s.jpg "Petunia Pop 8 1/2\" X 11\" Cardstock [ 163801 ]")
![Charming Shimmer Faceted Dots [ 166139 ]](https://assets1.tamsnetwork.com/images/EC042017NF/166139s.jpg "Charming Shimmer Faceted Dots [ 166139 ]")
![Petunia Pop 3/8" (1 Cm) Bordered Ribbon [ 163785 ]](https://assets1.tamsnetwork.com/images/EC042017NF/163785s.jpg "Petunia Pop 3/8\" (1 Cm) Bordered Ribbon [ 163785 ]")
![Misty Moonlight & White 1/4" (6.4 Mm) Starter Ribbon Pack [ 165276 ]](https://assets1.tamsnetwork.com/images/EC042017NF/165276s.jpg "Misty Moonlight & White 1/4\" (6.4 Mm) Starter Ribbon Pack [ 165276 ]")
![Petunia Pop Classic Stampin Pad [ 163811 ]](https://assets1.tamsnetwork.com/images/EC042017NF/163811s.jpg "Petunia Pop Classic Stampin Pad [ 163811 ]")
![Misty Moonlight Classic Stampin' Pad [ 153118 ]](https://assets1.tamsnetwork.com/images/EC042017NF/153118s.jpg "Misty Moonlight Classic Stampin' Pad [ 153118 ]")
![Floral Charm 12" X 12" (30.5 X 30.5 Cm) Designer Series Paper [ 166125 ]](https://assets1.tamsnetwork.com/images/EC042017NF/166125s.jpg "Floral Charm 12\" X 12\" (30.5 X 30.5 Cm) Designer Series Paper [ 166125 ]")
![Round We Go Dies [ 163729 ]](https://assets1.tamsnetwork.com/images/EC042017NF/163729s.jpg "Round We Go Dies [ 163729 ]")
![Stylish Shapes Dies [ 159183 ]](https://assets1.tamsnetwork.com/images/EC042017NF/159183s.jpg "Stylish Shapes Dies [ 159183 ]")
![Notes & Totes Dies [ 165240 ]](https://assets1.tamsnetwork.com/images/EC042017NF/165240s.jpg "Notes & Totes Dies [ 165240 ]")
![Creative Haven Dies [ 167208 ]](https://assets1.tamsnetwork.com/images/EC042017NF/167208s.jpg "Creative Haven Dies [ 167208 ]")
![Blackberry Bliss Classic Stampin' Pad [ 147092 ]](https://assets1.tamsnetwork.com/images/EC042017NF/147092s.jpg "Blackberry Bliss Classic Stampin' Pad [ 147092 ]")
![Blackberry Bliss 8-1/2" X 11" Cardstock [ 133675 ]](https://assets1.tamsnetwork.com/images/EC042017NF/133675s.jpg "Blackberry Bliss 8-1/2\" X 11\" Cardstock [ 133675 ]")


![Brushed With Beauty Suite Collection (English) [ 167100 ]](https://assets1.tamsnetwork.com/images/EC042017NF/167100s.jpg "Brushed With Beauty Suite Collection (English) [ 167100 ]")
![Sweetly Scripted Cling Stamp Set (English) [ 163600 ]](https://assets1.tamsnetwork.com/images/EC042017NF/163600s.jpg "Sweetly Scripted Cling Stamp Set (English) [ 163600 ]")
![Very Vanilla 8-1/2" X 11" Cardstock [ 101650 ]](https://assets1.tamsnetwork.com/images/EC042017NF/101650s.jpg "Very Vanilla 8-1/2\" X 11\" Cardstock [ 101650 ]")
![Petal Pink 8-1/2" X 11" Cardstock [ 146985 ]](https://assets1.tamsnetwork.com/images/EC042017NF/146985s.jpg "Petal Pink 8-1/2\" X 11\" Cardstock [ 146985 ]")
![Bronze & Ivory Stampin' Blends Combo Pack [ 154922 ]](https://assets1.tamsnetwork.com/images/EC042017NF/154922s.jpg "Bronze & Ivory Stampin' Blends Combo Pack [ 154922 ]")
![Petal Pink Classic Stampin' Pad [ 147108 ]](https://assets1.tamsnetwork.com/images/EC042017NF/147108s.jpg "Petal Pink Classic Stampin' Pad [ 147108 ]")
![Early Espresso Classic Stampin' Pad [ 147114 ]](https://assets1.tamsnetwork.com/images/EC042017NF/147114s.jpg "Early Espresso Classic Stampin' Pad [ 147114 ]")
![Very Vanilla Medium Envelopes [ 107300 ]](https://assets1.tamsnetwork.com/images/EC042017NF/107300s.jpg "Very Vanilla Medium Envelopes [ 107300 ]")
![Spotlight On Nature Dies [ 163580 ]](https://assets1.tamsnetwork.com/images/EC042017NF/163580s.jpg "Spotlight On Nature Dies [ 163580 ]")
![Stitched Shapes Dies [ 152323 ]](https://assets1.tamsnetwork.com/images/EC042017NF/152323s.jpg "Stitched Shapes Dies [ 152323 ]")
![Gray Granite 8-1/2" X 11" Cardstock [ 146983 ]](https://assets1.tamsnetwork.com/images/EC042017NF/146983s.jpg "Gray Granite 8-1/2\" X 11\" Cardstock [ 146983 ]")
![Streaked Dots [ 165902 ]](https://assets1.tamsnetwork.com/images/EC042017NF/165902s.jpg "Streaked Dots [ 165902 ]")
![Low Profile Sparkle Dots [ 166157 ]](https://assets1.tamsnetwork.com/images/EC042017NF/166157s.jpg "Low Profile Sparkle Dots [ 166157 ]")
![Linen Thread [ 104199 ]](https://assets1.tamsnetwork.com/images/EC042017NF/104199s.jpg "Linen Thread [ 104199 ]")
![Mossy Meadow & Gold 1/4" (6.4 Mm) [ 166158 ]](https://assets1.tamsnetwork.com/images/EC042017NF/166158s.jpg "Mossy Meadow & Gold 1/4\" (6.4 Mm) [ 166158 ]")
![Heat Tool (Us And Canada) [ 129053 ]](https://assets1.tamsnetwork.com/images/EC042017NF/129053s.jpg "Heat Tool (Us And Canada) [ 129053 ]")
