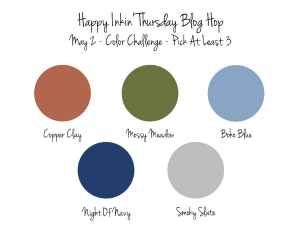
Welcome to Thursday and another fun and Happy Inkin’ Krew Blog Hop! We have a color challenge today – can you figure out what colors I used? HA! I’ve used new 2024-2025 Annual Catalog products – Take to the Sky DSPand the Adventurous Sky Bundle plus Industrial Trinkets – all from the Suite :0)
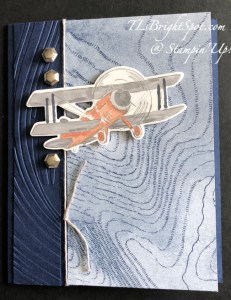
I began with a Night of Navy cardstock cut 5 1/2 x 6 and scored on the long side @ 4 1/4. I cut apiece of Take To The Sky DSP 31/2 it to the x 5 1/2 and adhered to the 1 1/2x 5 1/2″ side. Cut anther piece of Night of Navy 1 x 5 1/2 and run it through an embossing folder – I used a new So Swirly EF. I added it to the front of the Night of Navy card, equidistant between the fold and the DSP. I wrapped a length of Baker’s Twine in gray around the cardstock and tied a knot. I used the wonderful biplane stamp and Smoky Slate ink to stamp on Basic White. I die cut it with the coordinating die from Adventurous Sky Dies. I colored the plane with Stampin’ Blends Copper Clay & Smoky Slate, and a bit of Basic Black. I added it ti the card front with dimensionals. I added three Industrial Trinkets – and the card front was complete.
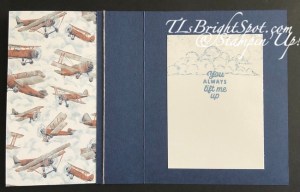
For the inside… I cut a piece of Basic White, stamped the clouds from the Take To The Sky stamp set in Boho Blue and the sentiment from the same stamp set and same ink. I adhered this to the inside of the card. Notice how the back side of the DSP shows so very clearly – I like this business of the DSP sharing both sides.
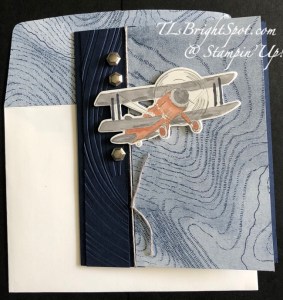
For the envelope, I wanted to keep it very simple – similar to the card – so only used the same Take To The Sky DSP to the flap & trimmed it to fit. And that was it.
Now, it’s time to see what the others on the team have created. Click on the ‘next’ button or click on a name to take you somewhere else. Enjoy the hop!
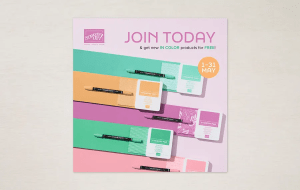
JOIN MY TEAM! – click here. Stampin’ Up! has a joining promotion going on right now – May 1-31. For $99, you will be able to select your own products worth $125 PLUS Stampin’ Up! is including products in the 24-26 NEW IN COLORS, which are gorgeous: FIVE (5) In Color Classic Stampin’ Pad bundle; In Color 8 1/2 x 11 Cardstock; In Color 6×6 DSP pack; AND FIVE (5) In Color Stampin’ Write Markers – all these are $82 in value and they are FREE when you sign up to be a demonstrator. You will also receive FREE SHIPPING and FREE business supplies – all for the $99 and the decision to move forward. 15-20% off every order after joining – why wait? click here to join my team.
I offer fringe benefits to my customers: free tutorial of the month and a FREE Stampin’ Up! item valued to $10 – all for a $50 order, before shipping and taxes. Use my current host code to receive those benefits – especially when your order does not exceed $150.
HOST CODE 4JF6ZWC9
Thanks for Stopping by. May you have a beautiful day!
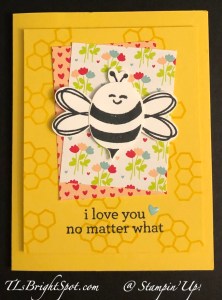
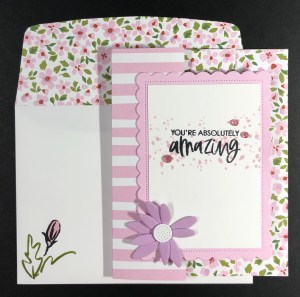
Good morning! It’s the ‘day after’ the OnStage@Home event… (now two days after – – – computer issues put a stymie on everything!) and there were several demonstrators from around the world providing tips, tricks and sharing some ideas on new products that will be offered in the Jan-Apr 2024 Mini Catalog. As demonstrators and those of us who attended the @Home event, we were able to order the Bee Mine Suite of products and make a card with card cuts provided by Stampin’ Up! I did that and today’s card is one we made. This is a fairly simple card, one that could work with new stampers.
This card uses Daffodil Delight as the card base, and a stamped layer added with dimensionals. The stamped layer uses the honeycomb stamp in the Bee My Valentine stamp set and Daffodil Delight ink. Also, stamp the sentiment in Memento ink from Bee My Valentine stamp set. Adhere the two panels of Bee Mine 12×12 DSP at an angle using Stampin’ Seal. Stamp the portions of the bee in Memento ink on Basic White scraps and punch out with the coordinating Bee Builder Punch. Adhere parts together with small dots of liquid glue and add to card front with dimensionals. I added the fun Pool Party heart from the Adhesive-Backed Hearts & Flowers pack that is also part of the suite.
I added a strip of the plaid Bee Mine 12×12 DSP with Stampin’ Seal, then fussy cut this adorable bee holding a heart from the other side of this Bee Mine 12×12 DSP and adhered it in place with liquid glue – all on a Basic White panel.
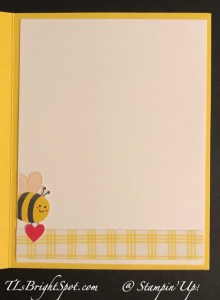
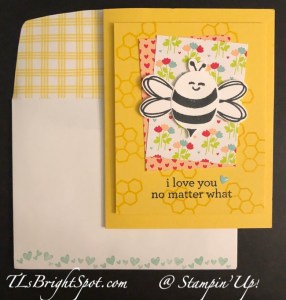
And here’s the card & envelope. Remember, no naked envelopes! More of the Bee Mine 12×12 DSP on the flap and trimmed to fit. On the front… these cute hearts from Bee My Valentine stamp set, stamped in Pool Party ink all along the bottom. Very cute! Love this bee & it’s coordinating punch. There are at least three options for bee faces in this set.
Ok – so I ‘hear’ the question… how do I get my hands on this set of products?
wait until January 2024 to order as a customer
Join my team here to be able to order Dec 5 as a demonstrator. (Yep – I got mine early as I was attending the OnStage@Home event!)
To order Stampin’ Up! products, please use this link to my online store. You will find ONLINE EXCLUSIVES, Clearance Rack, Sep-Dec Mini Catalog, the Annual Catalog, kits, Paper Pumpkin – you name it. Shop at your convenience :O)
When ordering from me please use my NEW HOST CODEHSJD7BR6 so that I receive proper notification and YOU GET THE Benefits of a FREE SU! item valued up to $10 :O) AND the Monthly Card Tutorial. (I like to treat my customers!) If your order is over $150, please don’t use the host code as SU! has benefits. I’ll still be notified and you can receive that FREE ITEM!
Note: Make sure that you can see my name on the final checkout page listed as your Demonstrator when you order so that you know that you’re ordering with me and you’ll get my rewards! PLUS… the monthly Online Tutorial when your order is over $50. The November Tutorial features the beautiful Winter Meadow suite of products which can found in the Jul-Dec 2023 Mini Catalog on pages 36-38!
Seasonal Sale Nov 14-16
I sent an email late yesterday when it was announced about this Seasonal sale – but here’s all the pertinent info.
Sales Period: 14–16 November 2023
Ordering Deadlines
Phone: 16 November 2023 at 6:59 p.m. (MT)
Online: 16 November 2023 at 11:59 p.m. (MT)
10% off ribbons and trims.
15% off inks, including pads, refills, markers, and Blends. Bundles are not included.
20% off papers, including cardstock, specialty paper, and Designer Series Paper.
Shop online to see the full selection of discounted products available. This is a limited time offer.
Discounts are automatically applied when sale items are added to any order, including Starter Kits.
Please keep in mind that due to the high volume of orders, the distribution center may fall behind our typical shipping timeframes. We will do everything we can to return to our regular service levels as quickly as possible.
Please note: Some items may sell out due to high demand. The discount will automatically be applied to qualifying items that are in stock. Per our updated policy, backorders are not available.
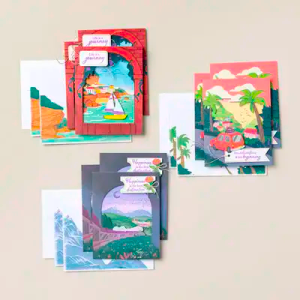
NEW KIT (THE BEST DESTINATION KIT) ADDED AS OF NOVEMBER 1!
163186
THE BEST DESTINATION KIT
$20.00 USD | $28.00 CAD
Available starting 1 November 1.
This kit lets you make nine tri-fold cards with a colorful, nostalgic, travel vibe.
Enough supplies to create 9 cards—3 each of 3 designs
9 coordinating envelopes
Best Destination Photopolymer Stamp Set
One Gorgeous Grape Ink Spot
Printed card bases, printed die cuts, adhesive, embellishments, and a clear block
Finished card size: 5-1/2″ x 4-1/4″ (14 x 10.8 cm)
We have a challenge of a ‘fun fold’ for Amy’s Inkin’ Krew Blog Hop Group today. I’ve combined Delightfully Eclectic DSP and the Color & Contour bundle for my card.
This fun fold uses a 5 1/2 x 12 piece of Designer Series Paper. Here I’m using Delightfully Eclectic. It’s scored @ 1 3/4, 4 3/4, & 7 3/4 and folded accordian style or valley, mountain, valley. Here’s the finished card, open.
Using the Scalloped Contour Dies, cut 3 from Bubble Bath card stock cut 3 1/4 x 4 1/2. Begin by adhering to the back panel first, centering the die cut. Fold DSP at 2nd score line and attach 2nd Bubble Bath die cut so that it is even with the die cut on the bottom panel. Remember, the adhesive will not cover the entire die cut as there is some ‘overhang’. See photo.
Close entirely and attach the front Scalloped Contour die cut. I do this by turning the die to the wrong side and add adhesive to back side as per this photo. That way I do not put adhesive where it is not needed!
Cut 3 panels of Basic White card stock and decorate as desired. For the front panel I used a Color & Contour sentiment and stamped it in Memento ink. I then used the blotchy dot stamp and Bubble Bath ink to stamp over the sentiment. I attached this to the front Scalloped Contour die then added a flower already put together from the Paper Florist Dies (cut from Fresh Freesia and Basic White) and added it as you see it. As a final touch to the front, I added three Tinsel Gems in Berry Burst. For the second section of this fun fold, I stamped the flower in Memento ink from Color & Contour stamp set, then colored it with the additional stamps provided: Fresh Freesia for the flowers and Old Olive for the leaves. I then stamped the sentiment on this panel in Memento ink. For the last panel I stamped the sentiment from Color & Contour stamp set in Memento ink, then the splotchy dots in Bubble Bath and added the panel. Once everything was together, I attached a panel of Old Olive card stock ( 4 1/4 x 5 1/2) to the very back to add strength and stability to the card. All done!
The envelope got more of the Delightfully Eclectic DSP to the flap, & trimmed to fit. For the front I stamped the leaves in Old Olive, the bud in Memento, then filled the bud with Bubble Bath – all from the Color & Contour stamp set. This is such a sweet, delicate card. I absolutely love it. I hope you do as well.
Now it’s time to continue the hop. Do that by clicking on one of the “previous’ or ‘next’ or a name to continue.
BONUS DAYS for Stampin’ Up! have begun… and run for this entire month
BONUS DAYS! Because do you know what’s a great deal? Getting rewarded for all the crafting supplies you’re already going to buy! When you shop between 6–31 July and spend $50 USD | $60 CAD you will earn a $5 USD | $6 CAD coupon! Make sure you saveall your coupons because you can redeem them (and we mean ALL of them) between 1–31 August.
Coupon codes may be redeemed for any product (excluding Starter Kits, demonstrator supply items, and Paper Pumpkin month-to-month subscriptions).
New prepaid Paper Pumpkin codes may be discounted using Bonus Days coupon codes.
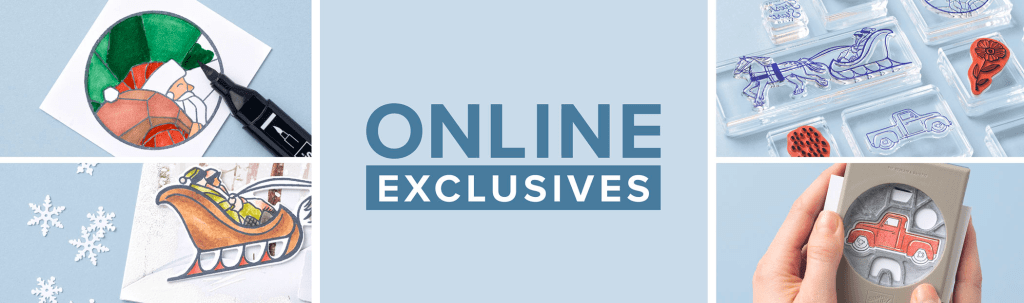
New Product release in the Online Store as of Jul 6.
ONLINE EXCLUSIVES are just that – ONLINE ONLY products not shown in any Stampin’ Up! Catalog. New products mean new inspiration and new ways to express your creativity and develop your business! 6 July, there will be even more Online Exclusive products for you to shop. The best way to see what is available is to view the online store.
And if you wish to order these products, be sure to use my current HOST CODE to receive rewards. What does that mean? With every order of $50 you receive a FREE GIFT from me of a SU! items of your choice valued to $10. If your order is over $150, don’t use my host code, but you’ll still get my free gift item.
HOST CODE CV4N6Y6M
Thanks for stopping by. May you have a beautiful day.
Happy Happy 2023!I’ve been a bit out of the loop for a bit – hubby had surgery & my attention was all about that, then Christmas & family – and now, here we are. I hope you had a really good holiday, however you celebrate things. Ours was quieter, of course, but still wonderful. We are so blessed with wonderful family. – and hubby is improving every day. 👍🙏
My card today is a sneaky peek at one of the HOST stamp options for the Jan-Apr 2023 Mini Catalog, which will be available come Jan 5. And that’s just really soon! I’ve also used some DSP that is free with a qualifying order during the Jan-Feb Sale-a-bration period – Dainty Flowers DSP.
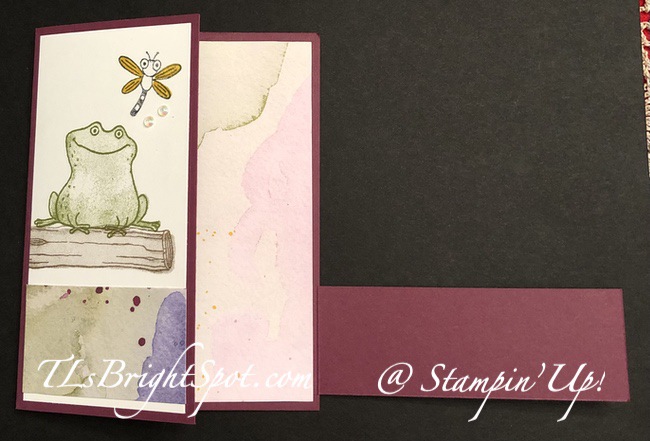
Isn’t this a cute, sassy frog? I’m going to name him Alfred – and no, I have no idea where that came from. 😀 You can see there are no flowers on this side of the Dainty Flowers DSP – it looks similar to watercolors – love, love. And the hinge flap has a sentiment from another new stamp set called Sending Support – also FREE with a qualifying order during Jan-Feb Sale-a-bration. I’ve die cut the sentiment with Stylish Shapes Dies. I extended the length of the die cut a bit to make the sentiment fit. But I’ll explain that.
Hinge Flap Fun Fold:
Cut card base 81/2 x 5 1/2 and score at 4 1/4 on the long side.
Trim off 1 1/2 from the long side; score this at 4 1/4
Adhere this strip to the card base about 3/4″ from bottom with the fold on the edge (I adhered it lower and don’t like where it is!) This is now your hinge flap!
Decorate:
Cut panels of DSP: front – 1 3/4 x 2 1/2; hinge flap – 1 1/4 x 4; inside – 1 3/4 x 4; envelope flap – 2 1/4 x 6
Cut Basic White panels: front – 2 1/2 x 4; inside 4 x 5 1/4; sentiment banner for hinge flap 1 1/4 x 3
On the front panel:
Stamp the frog in Old Olive – this is a two-step stamp, so stamp the inner then the outline
Stamp the log in Soft Suede – again aa two-step stamp, stamp the inner then then outline stamp
Stamp the bee in Crushed Curry & Memento inks – CC for the wings, then the body in Memento
Add this panel to the card front
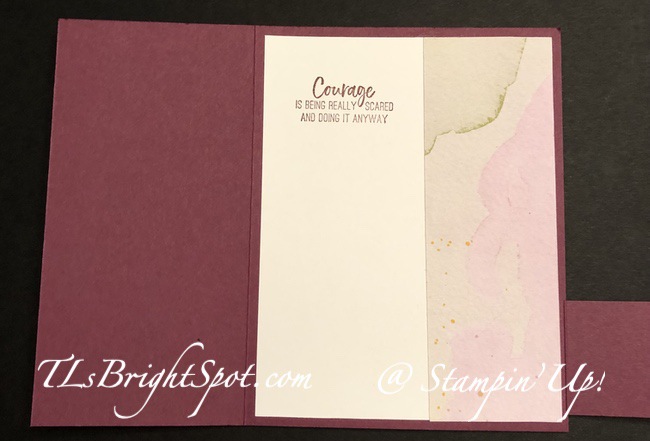
On the inside panel:
Add the 1 3/4 x 4 DSP to the far right edge
Stamp the sentiment in Rich Razzleberry ink using the Sending Support stamp set
Adhere this to the inside of the card, covering where the hinge flap is attached
On the hinge flap:
Add DSP to the flap (1 1/4 x 4)
Stamp the sentiment in Rich Razzleberry ink from Sending Support stamp set on the remaining Basic White strip
Die cut using the Stylish Shapes Dies: Die cut about 2/3 of length by placing the top cutting plate so it covers just 2/3 of die; run it through the die cutting machine; replace die to cover other end of stamped sentiment, matching or lining up die, then placing top cutting plate just over that area to be die cut, run it through the die cutting machine – and done!
Attache die cut sentiment to hinge flap with dimensionals
Add Iridescent Rhinestone Basic Jewels to both hinge flap and card front
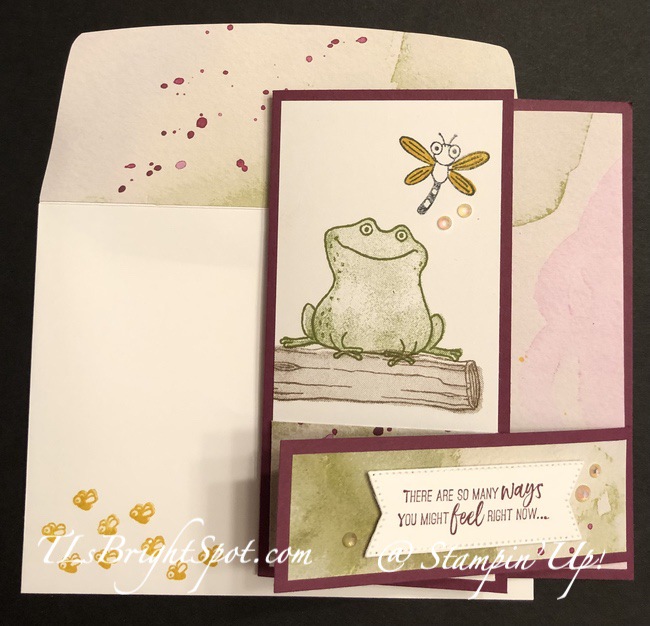
All that’s left to do now is the envelope & it is so easy…
Add 2 1/4 x 6 piece of Dainty Flowers DSP to the envelope flap & trim to fit
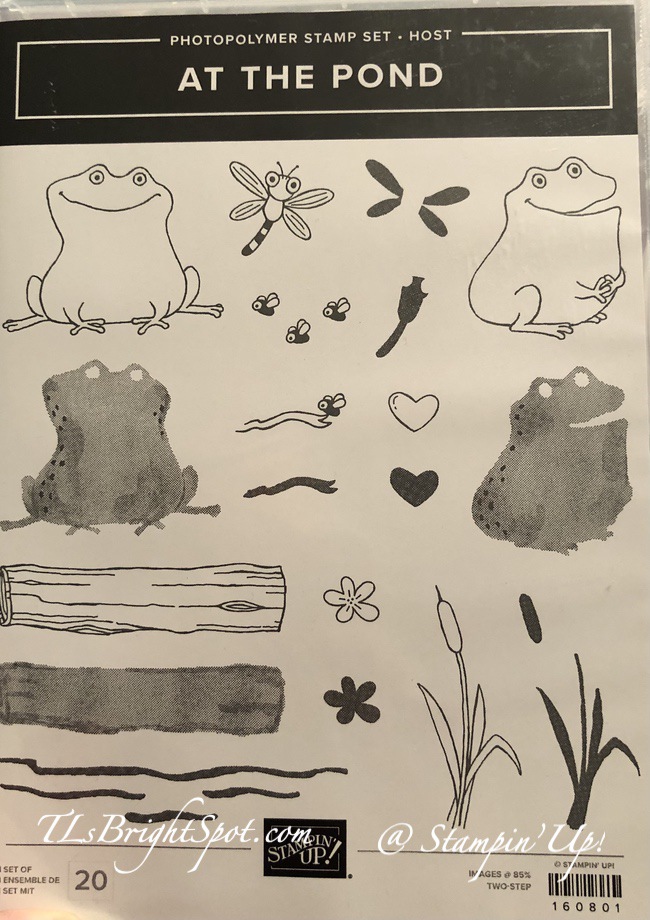
Stamp the small bees 3 times on envelope front in Crushed Curry ink using the At The Pond stamp set
What a fun stamp set! Can’t wait to get your hands on this? I couldn’t either… Would love you to JOIN MY TEAM and be a part of this fabulous community. you may do that here.
If you would like to order any of the products to make this card from my online store or any other items, that’s really easy to do. And remember to use my current HOST CODE UBG3N32X to earn credit from me. Here’s how it works… when you place an order of $50 or more (before shipping & taxes), you receive from me a SU! item valued up to $10 + Star-Studded Rewards. If your order exceeds $150, do not use my HOST CODE as SU! has it’s own rewards from which you may choose. You will still receive that FREE ITEM valued up to $10 from me + the Star-Studded Rewards 😀👍
My Star-Studded Rewards as a THANK YOU
For every $50 that you order from my online store (before shipping & taxes) and when you add my current Host Code, you will earn 1 STAR Reward. Orders of $49.99 or below DO NOT earn any rewards.Example $50 = 1 STAR Reward, $100 = 2 STAR Rewards , $150 = 3 STAR Rewards etc. When you have earned 8 STAR Rewards you will get a FREE product order valued up to $40.00, your choice, and mailed directly to you! Is that a deal or what??? You also earn my monthly Online Class Tutorial of exclusive projects when you place an order. For any order $50 or more you will also receive 1 free gift from me valued up to $10. Remember to use MY current HOST CODE: UBG3N32X Click here to go my store.
Good Tuesday morning! I was driving around town yesterday doing errands and oh my goodness – the tree colors are spectacular! The yellows, golds, oranges and rust, reds – they are in their prime showing off. It was simply jaw-dropping stunning. Of course – that has nothing to do with my card today, I just simply HAD to share the glory that is out there… Today’s card… Wintry 3D Embossing Folder (using the snowflake), Taylor Made Tags and the wonderful Texture Chic DSP share the spotlight on this card.
I used the Chic Dies that coordinate with the Season of Chic stamp set to create the die cut snowflakes: Basic White, Soft Succulent and some Kraft card stock. I used the Tailor Made Tags Dies for, what else, the various tags :O) Two of them are die cut from Texture Chic Specialty DSP and the top one is is Basic White stamped with Pool Party ink. Everything is layered: some with liquid adhesive, others with dimensionals. The bow is from the fabulous Threaded Twine. I simply cut a length and pulled several of the threads apart and made a bow. It has a very natural look that I like a lot. Once I did all the die cuts, I put the card together: Crumb Cake card stock for the card base. This was layered with a panel of Basic White run through the Wintry 3D embossing folder twice (to fill the page so to speak). OH… I DID use a Blending Brush to add a bit of Crumb Cake ink to various snowflakes – to give it a bit of a vintage look.Then the rest was added as you see. I die cut the larger snowflake twice: once in Basic White, again in Soft Succulent and adhered them together, holding all the inner pieces together as best I could. For glam I added the Iridescent Rhinestone Basic Jewels in the center of many of the snowflakes.
On a Basic White panel I stamped the snowflake (love this stamp!!!) in Pool Party ink then the ‘splatter’ stamp also from the Season of Chic stamp set in Evening Evergreen ink. So here’s my confession… I wish I had done it the other way: snowflake in Evening Evergreen and splatter in Pool Party. As it is the splatter is too strong, it shows more than the snowflake 😦 Once the panel was added to the inside of the card – it was done.
For the envelope, more of the Texture Chic DSP on the envelope flap, adhered & trimmed to fit. I stamped the snowflake in Evening Evergreen ink and love it! Of course, it is from Season of Chic stamp set.
Below is the product list used to make this card. If you would like to order from my online store, that’s really easy to do. And remember to use my current HOST CODE 4TMA4FZU to earn credit from me. Here’s how it works… when you place an order of $50 or more (before shipping & taxes), you receive from me a SU! item valued up to $10 + Star-Studded Rewards. If your order exceeds $150, do not use my HOST CODE as SU! has it’s own rewards from which you may choose. You will still receive that FREE ITEM valued up to $10 from me + the Star-Studded Rewards. 😁👍
My Star-Studded Rewards as a THANK YOU
For every $50 that you order from my online store (before shipping & taxes) and when you add my current Host Code, you will earn 1 STAR Reward. Orders of $49.99 or below DO NOT earn any rewards.Example $50 = 1 STAR Reward, $100 = 2 STAR Rewards , $150 = 3 STAR Rewards etc. When you have earned 8 STAR Rewards you will get a FREE product order valued up to $40.00, your choice, and mailed directly to you! Is that a deal or what??? You also earn my monthly Online Class Tutorial of exclusive projects when you place an order. For any order $50 or more you will also receive 1 free gift from me valued up to $10. Remember to use MY current HOST CODE: 4TMA4FZU Click here to go my store.
Stampin’ Up! has an awesome joining special right now – which makes me ask – why wouldn’t you join now?It’s a fabulous time to join Stampin’ Up! For a limited time, new team members will get even MORE FREE products in their customizable Starter Kit. Sign up between 4–31 October and you’ll get $125 USD | $165 CAD$155 USD| $206 | $135 CAD worth of products + free business supplies + all the fun being a part of our fantastic community! You may do that here. Let’s be clear: $155 worth of product for $99!!! The items to make this card could be part of your joining items :O) There’s no pressure to sell, just join & get that 20% discount on every order moving forward :O)
This suite of products are new 😁. Currently, only demonstrators can purchase them. However, they will be available to customers beginning Nov. Continue reading for more details.
Add just the right touch of elegance to any occasion, including Christmas and seasonal celebrations, with the sweet Fitting Florets Collection. From color schemes to sentiments and embellishments to dies, these unique products blend together so that your cards and crafts fit whatever occasion you might need. Send birthday wishes, express your gratitude, or spread Christmas cheer—with so many options to mix and match you’ll be set no matter the celebration all year!
Starting 1 November 2022, customers can order items from the Fitting Florets Collection. All items in the collection can be ordered separately. No limits apply during the customer sales period.
The following exclusive products are only available while supplies last:
Framed & Festive Cling Stamp Set (item 160888)*
Fitting Florets Designer Series Paper (item 161814)
Gold Adhesive-Backed Swirls (item 161822)
The following will be available for purchase in the Mini Catalog starting January 2023:
Framed Florets Bundle (item 162407)
Framed Florets Photopolymer Stamp Set (item 161815)*
Kit includes one 8″ x 10″ (20.3 x 25.4 cm) monthly planner with space to record birthdays each month as well as a pocket sleeve to hold birthday cards.
Includes 12 full-size birthday cards, 6 of 2 designs, and 12 coordinating envelopes.
Includes Glue Dots, Stampin’ Dimensionals, Adhesive-Backed Embellishments, and Tear & Tape Adhesive
Includes die-cut florals and pieces ready for you to use—no prep work required!
Includes sticker sentiments and die-cut labels in Dutch, English, French, and German
Kit includes 9 tags and 9 gift card holders—3 each of 3 designs
Includes the exclusive Christmas Gifting Stamp Set and a Shaded Spruce Classic Stampin’ Spot
Sized to fit standard gift cards
Coordinating colors: Basic Black, black foil, Mint Macaron, Real Red, Shaded Spruce
Any of the items above can be part of a ‘joining’ kit – and you have the opportunity to choose what exactly is in your starter kit. It’s such a good deal. And… you decide how to make this work for you: time, commitment, 20% off each and every order after joining, no push to sell. Now’s the time – before the promotion ends 31 Oct. Questions? Connect with me for answers!
Thanks for stopping by.
May you have a beautiful day.
Make someone happy sending them a handmade card filled with love.
Good morning, good morning. I’ve an encouragement card for you today. A friend of mine has had some health issues for a bit & just needs a ‘pick-me-up’, so I send cards every now & then to let her know she’s in my prayers and not forgotten in her pain. I’ve used Perched In A Tree stamp set with it’s coordinating Aspen Tree Dies – one of my favs.
I’ve tried coloring this sweet bird similar to a chickadee – not sure that worked so that’s why I’m telling you :O). I used Watercolor Pencils after stamping with Memento ink on a Basic White scrap: Basic Black, Basic Gray, Daffodil Delight, Calypso Coral , Whisper White and then blended with a Blender Pen to smooth the lines. It was then die cut with the appropriate die from the Aspen Trees Dies. My next step was to die cut several of these gorgeous leaves from the Aspen Trees Dies: Brushed Metallic paper & Copper Foil Sheets. I used a circle on my desk die cut for another project to create the sun/ moon. I used a Blending Brush with So Saffron ink then Mango Melody ink around the edges. It isn’t real bright cuz it’s on Gray Granite card stock. I used another Blending Brush to add some Balmy Blue ink all over, making it look like sky. It’s very subtle, but definitely there in person. I stamped the tree branch in Soft Suede ink and the sentiment in Memento ink – both from the Perched in a Tree stamp set. The bird was adhered over the branch with dimensionals, then the leaves added with liquid glue. The center leaf is adhered with liquid glue at the stem and a dimensional on its leaf tip for more depth. This panel was added to a Basic Gray card base.
For the inside I stamped the sentiment in Balmy Blue ink using Perched In A Tree stamp set, then used a Blending Brush to add a frame of color to the Basic White panel. I included the large die cut leaf from the Aspen Trees Dies with liquid glue. This leaf was die cut from Copper Foil Sheets. The panel was added to the inside of the Basic Gray card base.
For the envelope, stamp the branch again with Soft Suede ink on the front. Add a strip of Basic Gray that has been run through the Timber 3D embossing folder to the flap, trim to fit. This could so easily be a masculine card, and I don’t have many of those. However, as I mentioned earlier, this for a woman friend this time.
If you would like to order the products to make this card, please see the list below. Please use my current host code:4TMA4FZU and remember I offer Star-Studded Rewards As a thank you to my customers I also offer a free item from Stampin’ Up! valued to $10 with your order of $50 and above. Click here to go my store. When the order is over $150, you still receive that free gift from me, but SU! has Stampin’ Rewards that may be used for additional products, so don’t use the host code at that time. If you have questions just let me know. You also earn my monthly Online Class Tutorial of exclusive projects when you place an order of $50 or more. If you would like to be able to order products early from catalogs AND enjoy that 20% discount, join my team now… you may do that here. WooHoo! We have lots of fun and are a creative bunch that encourages & supports one another. Would love to have you. :O) Speaking of joining, below the product list is the current Stampin’ Up! joining special!
Stampin’ Up! has an awesome joining special right now – which makes me ask – why wouldn’t you join now?It’s a fabulous time to join Stampin’ Up! For a limited time, new team members will get even MORE FREE products in their customizable Starter Kit. Sign up between 4–31 October and you’ll get $125 USD | $165 CAD$155 USD| $206 | $135 CAD worth of products + free business supplies + all the fun being a part of our fantastic community! You may do that here.
My Star-Studded Rewards as a THANK YOU – DOUBLE OCT 3-7, 2022
For each $50 that you order from my online store (before shipping & taxes) and when you add my current Host Code, you will earn 1 (2) STAR Reward. Orders of $49.99 or below DO NOT earn any rewards.Example $50 = 1 (2) STAR Reward, $100 = 2 (4) STAR Rewards , $150 = 3 (6) STAR Rewards etc. When you have earned 8 STAR Rewards you will get a FREE product order valued up to $40.00, your choice, and mailed directly to you! Is that a deal or what??? You also earn my monthly Online Class Tutorial of exclusive projects when you place an order. For any order $50 or more you will also receive 1 free gift from me valued up to $10. Remember to use MY current HOST CODE: 4TMA4FZU Click here to go my store. HAPPY SHOPPING!
Here are more really cool specials Stampin’ Up! is offering.
This could be added to your joining items as a demonstrator – only available right now to demonstrators. As a demonstrator, this can be ordered Oct 4-31, same time frame as the joining promotion 😁 just sayin’ – you may join my team here. And you can see a card I posted with the above items here.
Kit includes one 8″ x 10″ (20.3 x 25.4 cm) monthly planner with space to record birthdays each month as well as a pocket sleeve to hold birthday cards.
Includes 12 full-size birthday cards, 6 of 2 designs, and 12 coordinating envelopes.
Includes Glue Dots, Stampin’ Dimensionals, Adhesive-Backed Embellishments, and Tear & Tape Adhesive
Includes die-cut florals and pieces ready for you to use—no prep work required!
Includes sticker sentiments and die-cut labels in Dutch, English, French, and German
Hello fellow stampers – it’s Saturday and we are into AUGUST! I cannot believe it – where did summer go? As I mentioned min a previous post, I held a watercolor techniques class and am sharing the creations as I complete them. Today’s is a Basic White notecard & envelope using watercolor technique #4. Do you remember what that was on the Stampin’ Up! video? Truth be told, I wouldn’t either if I hadn’t taken some serious notes 😁. Technique #4 is this: stamp the Fluid 100 watercolor paper with stamp & ink of choice; use the Water Painter to draw color into the image, limiting the amount of ink. My first image was the leaf branch from the Cottage Rose stamp set.
Today I stamped the single rose from that same stamp set in Polished Pink ink on Fluid 100 watercolor paper & using the small tip Water Painter, I drew the color into the image. Once dry I die cut it with the Cottage Flower Dies and I also die cut the leaf I had prepped for class. I adhered the two together with liquid glue and then lightly curled both the flower & leaves with my fingers.
Before getting too far ahead of myself, I adhered a panel of Abigail Rose DSP to a piece of Basic White, put dimensionals on the back and added it to a Basic White notecard. I die cut a circle with the Stylish Shapes Dies and Lovely Layers Vellum and adhered the two watercolored pieces with glue dots to the vellum. I stamped the sentiment in Smoky Slate on a Basic White scrap using the Charming Sentiments stamp set, then die cut it with the coordinating Sentiment Silhouettes Dies. I put a couple of mini dimensionals on the back and adhered it in place. The last couple of things: a Metallic Woven Ribbon bow in Sweet Sorbet was attached with a glue dot; three Iridescent Rhinestone Basic Jewels were added for glam ~ and the card front was done.
For the inside, a simple sentiment from the Charming sentiments stamp set was added in Smoky slate ink. And for the envelope, a single rose from Cottage Rose stamp set stamped in Polished Pink on the flap and the front.
Products to make this card are from the 2022-2023 AnnualCatalog. If you do not have a demonstrator and need catalogs please reach out to me – happy to send one to you. The other two catalogs available right now are the Jul-Dec 2022 Catalog and the Sale-a-bration Catalog. When ordering, please also use my current host code:YM6ZTUJE. I offer my customers a free item from Stampin’ Up! item valued to $10 with your order of $50 and above. Click here to go my store. When the order is over $150, you still receive that free gift from me, but SU! has Stampin’ Rewards that may be used for additional products, so don’t use the host code at that time. If you have questions just let me know. If you would like to be able to order products early from catalogs AND enjoy that 20% discount, join my team now… you may do that here. WooHoo! We have lots of fun and are a creative bunch that encourages & supports one another. Would love to have you. :O)
Star Special kicking off the new Jul-Dec 2022 Mini Catalog
OK – DOUBLE STAR REWARDS ended a bit ago ~ I’m sorry you missed the deal. BUT – With the start of this new catalog I am beginning a STAR REWARDS program ~ YAY! This will continue from this day forth and below is the informations about those customer rewards.
Here’s how my STAR REWARDS work:
For each $50 that you order from my online store (before shipping & taxes) and when you add my current Host Code, you will earn 1 STAR Reward. Orders of $49.99 or below DO NOT earn any rewards.
Example $50 = 1 STAR Reward, $100 = 2 STAR Rewards, $150 = 3 STAR Rewards etc.
When you have earned 8 STAR Rewards you will get a FREE product order valued up to $40.00, your choice, and mailed directly to you! Is that a deal or what???
You also earn my monthly Online Class Tutorial of exclusive projects when you place an order.
For any order $50 or more you will also receive 1 free gift from me valued up to $10.
And remember too, during this time of Sale-a-bration, for every $50 order from any catalog, you’ll earn free Sale-a-bration goodies from Stampin’ Up!
Remember to use MY current HOST CODE: YM6ZTUJE Click here to go my store.
HAPPY SHOPPING!!
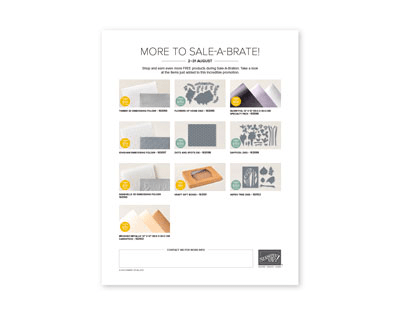
NEW FREE ITEMS ADDED when making purchases during Sale-a-bration
Since this flyer is hard to read… photos from top left to right
Timber 3D Embossing Folder 163094 – free w/ $50 purchase
Flowers of home Dies 163095 – free w/ $100 purchase
Be sure to use the items numbers listed for these products to be redeemed as Sale-a-bration items. These products have different numbers in the catalog and therefore don’t register as part of
Sale-a-bration.
If you have questions about this – connect with me!
NEW COZY & BRIGHT CARD KIT AVAILABLE Aug. 3 – 160338!
Celebrate the season with a card kit that has everything you need wish those you love a merry Christmas and a joyous New Year. Don’t let the holidays overwhelm you–get your all-inclusive kit and make quick multiples everyone will love! Available NOW!
160338
COZY & BRIGHT KIT
$23 USD | $32 CAD
Available starting August 3!
This Paper Pumpkin Kit has so much in store—elegant watercolor designs hand-crafted by our in-house artists, TWO Classic Stampin’ Spots for a Two-Step stamping experience, and the all-new twist technique to make your floral designs come alive with depth and detail! And the August Paper Pumpkin Kit includes the Gold Foil Honeycomb Sheets as a FREE gift that will add the perfect golden accent to any card or project. We can’t wait to see the bee-utiful projects you’ll create!
This kit includes:
All the supplies you need to create 9 cards: 3 each of 3 designs; and coordinating envelopes.
An all-occasion stamp set to express words of gratitude, friendship, greetings and beautiful wildflower designed images.
Specialty Vellum honeycomb shape pre-cut pieces.
2 Classic Stampin’ Spots (Crushed Curry and Soft Suede) for a Two-Step stamping experience with a twist!
Paper pieces and embellishments with watercolor designs and images.
Mini Stampin’ Dimensionals.
FREE GIFT: 8 Gold Foil Honeycomb Sheets
Completed card size: 5-1/2″ x 4-1/4″ (14 x 10.8 cm)
The Back To School Sales Tax Holiday is going on until August. For those of you living in Alabama, Arkansas, Florida, Illinois, Massachusetts, Missouri, New Mexico, Ohio, Puerto Rico, South Carolina, Tennessee, Texas, Virginia and West Virginia…you’ve got sales tax holidays coming up!! The good news is that some items in the Stampin’ Up! Catalogs qualify for the sales tax holidays! The list of sales tax holidays by state and items in that state that qualify Here on a printable PDF. Check it out to see when your state has the Sales Tax Holiday.
Thanks for stopping by May you have a beautiful day.
Make someone happy sending them a handmade card filled with love.
Except for yesterdays Blog Hop in which I participated, I have focused on the Seasons of Chic Bundle for my cards this week. I am enamored with the versatility of this stamp set & dies. Today’s card is no exception. And I’ve certainly let you know how I gravitate toward monochromatic cards.
Seasons of Chic.1
The card base is thick Basic White. The next two layers are Shimmery White Paper. It’s a cross between Basic White and Very Vanilla, just not so creamy as the VV. Here’s what I did…
Die cut the front panel of Shimmery White card stock with Stitched Rectangles Dies. I used the smallest of the large set of dies.
Use Foam adhesive strips to line the rectangle and portions of the card to layer on another panel of Shimmery White card stock. SEE PHOTO.
Foam adhesive strips
Remove backing on strips and adhere to the slightly larger Shimmery White Paper.
Stamp the two-step leaf from Seasons of Chic stamp set in Petal Pink ink and Sahara Sand ink (both second generations), then die cut with the Chic Dies. It’s nearly impossible to see in this photo, but the vein stamp is in Sahara Sand ink, the other leaf stamp was stamped first in second generation Petal Pink ink.
Die cut two more leaves in Shimmery White.Layer the three leaves together adhering with liquid glue along the stems.
Tie a bow with strands of Linen Thread & Simply Elegant Trim in Gold, together and around the stems. Add a touch of liquid glue to the knot so it stays in place.
Put dimensionals on the stamped leaf and adhere to the die cut frame cutout.
Add three Iridescent Pearls Basic Jewels too the card.
Adhere the two Shimmery White Paper panels to the Thick Basic White card base.
Seasons of Chic. Leaves.1
For the inside… Stamp the sentiment in Sahara Sand ink from the Seasons of Chic stamp set. Add two more of the die cut leaves (these are smaller & different from those on front, but die cut from Shimmery White Paper) to the Basic White panel. Adhere panel to the inside of the card. DONE!
Seasons of Chic. Leaves. inside
For the envelope, I stamped this stunning leaf (w/ veins) to the front and on the flap ~ second generation Sahara Sand ink. Oh boy… I really, really like this card! What can I say… this Season of Chic Bundle is a MUST HAVE!
Seasons of Chic. Leaves. 4
Products to make this card are from the 2022 – 2023 Annual Catalog. If you do not have a demonstrator and need catalogs please reach out to me – happy to send one to you. The other two catalogs available right now are the Jul-Dec 2022 Catalog and the Sale-a-bration Catalog which shows all the FREE items items offered by Stampin’ Up! in Jul-Aug 31. When ordering, please also use my current host code:YM6ZTUJE. I offer my customers a free item from Stampin’ Up! item valued to $10 with your order of $50 and above. Click here to go my store. When the order is over $150, you still receive that free gift from me, but SU! has Stampin’ Rewards that may be used for additional products, so don’t use the host code at that time. If you have questions just let me know. If you would like to be able to order products early from catalogs AND enjoy that 20% discount, join my team now… you may do that here. WooHoo! We have lots of fun and are a creative bunch that encourages & supports one another. Would love to have you. :O)
Star Special kicking off the new Jul-Dec 2022 Mini Catalog
OK – DOUBLE STAR REWARDS ended last night at midnight. I’m sorry you missed the deal. BUT – With the start of this new catalog I am beginning a STAR REWARDS program ~ YAY! This will continue from this day forth and below is the informations about those customer rewards.
Here’s how my STAR REWARDS work:
For each $50 that you order from my online store (before shipping & taxes) and when you add my current Host Code, you will earn 1 STAR Reward. Orders of $49.99 or below DO NOT earn any rewards.
Example $50 = 1 STAR Reward, $100 = 2 STAR Rewards, $150 = 3 STAR Rewards etc.
When you have earned 8 STAR Rewards you will get a FREE product order valued up to $40.00, your choice, and mailed directly to you! Is that a deal or what???
You also earn my monthly Online Class Tutorial of exclusive projects when you place an order.
For any order $50 or more you will also receive 1 free gift from me valued up to $10.
And remember too, during this time of Sale-a-bration, for every $50 order from any catalog, you’ll earn free Sale-a-bration goodies from Stampin’ Up!
Remember to use MY current HOST CODE: YM6ZTUJE Click here to go my store.
HAPPY SHOPPING!!
Thanks for stopping by. May you have a beautiful day.
Make someone happy sending them a handmade card filled with love.
WooHoo! It is for many a l-o-n-g weekend! Happy Memorial Day celebrations. Thanks you Veterans for your service to our country. We DO appreciate you! I’ve another easy card for you today, creating with the Deckled Rectangles Dies and Designer Series Paper, Awash in Beauty 12 x 12, and the Biggest Wish stamp set.
Biggest Wish w/ Layers.1
This card has many layers and it’s colorful. Polished Pink is one of the In Colors from last year and it is b-r-i-g-h-t! And… it has made, in my opinion, this particular pattern or patterns of DSP really pop.
Begin with a card base of Polished pink. Layer the Basic White panel, then the DSP (Awash in Beauty) that has been die cut with the largest Deckled Rectangles Dies. Adhere these together as shown.
Using the 4th largest of the Deckled Rectangles, cut another of the Polished Pink. Layer a panel of Basic White then the final layer of Awash in Beauty, also die cut with the Deckled Rectangles. Adhere all together.
Wrap these layers with 3/8″ Glittered Organdy Ribbon in White and secure in back with Stampin’ Seal
Wrap Open Weave Ribbon in Polished Pink directly over the Organdy Ribbon and secure in back with more Stampin’ Seal. Slip a length of the Polished Pink Open Weave Ribbon under the Organdy and tie a bow on the far left.
Stamp the ‘Hello’ in Mossy Meadow ink from the Biggest Wish stamp set and die cut with one of the Stylish Shapes Dies.
Stamp the ‘friend’ from the same stamp set (love the varied fonts here!) in Polished Pink ink and fussy cut. Put dimensionals on the back of this word and add it to the die cut circle.
Put dimensionals on the back of the die cut circle and add it over the ribbon. For centering, I used the bottom of the word ‘hello’ to line up with the bottom of the ribbon
Add three Iridescent Rhinestone Basic Jewels to the circle and the front is complete.
True confessions… I have not completed the inside of this card. I simply could not decide what I wanted. I do not have, but am ordering today, the True Beauty Bundle that coordinates with this DSP. When it arrives, I will complete the inside and share it with you. For now, I have used the largest Deckled Rectangles Die to cut an inner layer to decorate. It is, of course in Basic White.
Biggest Wish w/ Layers, inside
For the envelope… more of the Mossy Meadow Awash in Beauty DSP for the flap. For the front of the envelope, I took an edge of the rectangle die cut, trimmed the ends and added it to the bottom. Once that coordinating True Beauty Bundle is here, I will add one of the floral stamps :O)
Biggest Wish w/ Layers.3
Products to make this card are listed below. If you do not have a demonstrator and need an Annual Catalog please reach out to me (the 2022-2023 AC) – happy to send one to you. When ordering, please also use current host code:AZQDZ4U4. I offer my customers a free item from Stampin’ Up! item valued to $10 with your order of $50 and above. Click here to go my store. When the order is over $150, you still receive that free gift from me, but SU! has Stampin’ Rewards that may be used for additional products, so don’t use the host code at that time. If you have questions just let me know. If you would like to be able to order products early from catalogs AND enjoy that 20% discount, join my team now… you may do that here. WooHoo! We have lots of fun and are a creative bunch that encourages & supports one another. Would love to have you. :O)
Let’s talk starter kit… New In Colors, New 2022-2023 Annual Catalog release
Time is getting short my friends… today is the 27th and you have until the 31st to join with this fabulous promotion. What ARE you waiting for???
Order products early from catalogs AND enjoy that 20% discount, join my team now… you may do that here.
Just a few of the perks of being a Stampin’ Up! Demonstrator AND part of our Critters ‘n Creatin’ Krew Team:
At least a 20% discount on everything that you order as a Demonstrator!
Early peeks at new release items and preorders for new items about a month before they are available to customers!
The ability to attend Demonstrator exclusive Stampin’ Up! events!
No pressure to sell to anyone, hold classes or workshops or run a business. You can simply order for yourself and get the discount! And as long as you have at least $300 in sales per quarter, you’ll continue as an active Demonstrator and continue to get the discount. If you aren’t able to maintain the $300 per quarter minimums, you simply go back to being a customer, no commitment required and no penalty if decide that being a Demonstrator isn’t right for you.
Stampin’ Up! does have an extensive library of class and project ideas for those wishing to jump into hosting classes as well as training to help start your business, should you choose to do that.
If you join with me, you’ll also get:
Monthly team meetings via video conference where we talk about the latest happenings at Stampin’ Up! and share project ideas. Team members are located all over the United States, but we still get together in person online and have lots of fun.
Quarterly in-person meetings if you live in the NJ or surrounding area, where we get together to do a little stamping, creating, getting to know one another and most of all SHARE inspiration. If you live outside the NJ area you can join us through that wonderful ZOOM video conference.
Free access to our online class tutorials. These are exceptional!
A private Facebook page where we can chat, ask questions and share ideas.
Team giveaways and prizes for reaching sales and team goals or attending specific meetings. 😉
The best part is the laughing and kidding and sharing of information/ creativity/ talent ~ following the SU! adage: Inspire. Create. Share. ❤️ 😁
Join our incredible group of crafters and creators.
If you would like to be able to order products early from catalogs AND enjoy that 20% discount,
Hello stampers! Today is the always fun Happy Inkin’ Thursday Blog Hop. You will see some fabulous creations along the hop, so I encourage you to ‘do the tour’. If you have come from Tara’s blog, welcome. If you have simply hopped in, thank you for joining us today.
And our sketch challenge is this…
And here’s the card I created for the challenge. It uses the Abigail Rose 12 x 12 DSP as the focal point. Don’t you just love this DSP? Gorgeous… I colored the one flower with Stampin’ Blends Calypso Coral and Daffodil Delight. For background interest I used the Timeworn 3D Embossing Folder on a Basic White panel and added it directly to the Thick Basic White card base. The next two layers are a piece of Early Espresso and the colored Abigail Rose DSP, adhered together then popped on dimensionals and added to the card front. The sentiment panel is stamped in Early Espresso ink on a Basic White scrap, then added to another strip of Calypso Coral adhered to the front on dimensionals. The sentiment is from the Go To Greetings stamp set. Finally, two Iridescent Pearl Basic Jewels were colored with the Dark Calypso Coral Blends and added beneath the sentiment.
Abigail Rose.1
For the inside of the card, I stamped one of the smaller flowers from the coordinating Cottage Rose stamp set in Early Espresso ink on a Basic White panel, then colored it with Calypso Coral Stampin’ Blends. This was adhered to a slightly larger panel of Early Espresso card stock, then added to the inside of the card. Voila!
Abigail Rose, inside
For the envelope, I used the medium rose from Cottage Rose stamp set and stamped the envelope front – Early Espresso ink of course and three more on the envelope flap. I chose not to color these – don’t ask me why, I don’t know. And that was it. Love the versatility of this layout and this DSP. Just change the sentiment and it could be sympathy, birthday, get well – you name it. It isn’t a masculine card, but change the DSP for that :O)
Abigail Rose.3
Products to make this card are listed below. If you do not have a demonstrator and need an Annual Catalog please reach out to me (the 2022-2023 AC) – happy to send one to you. When ordering, please also use current host code:AZQDZ4U4. I offer my customers a free item from Stampin’ Up! item valued to $10 with your order of $50 and above. Click here to go my store. When the order is over $150, you still receive that free gift from me, but SU! has Stampin’ Rewards that may be used for additional products, so don’t use the host code at that time. If you have questions just let me know. If you would like to be able to order products early from catalogs AND enjoy that 20% discount, join my team now… you may do that here. WooHoo! We have lots of fun and are a creative bunch that encourages & supports one another. Would love to have you. :O)
Remember to hop along the blog hop. Those participating are listed below. Click on the next button to visit Amy Koenders or, click on a name to visit another’s blog. Happy Hopping! Card cuts for my card are listed at the bottom of this post.
Time is getting short my friends… today is the 26th and you have until the 31st to join with this fabulous promotion. What ARE you waiting for???
Order products early from catalogs AND enjoy that 20% discount, join my team now… you may do that here.
Just a few of the perks of being a Stampin’ Up! Demonstrator AND part of our Critters ‘n Creatin’ Krew Team:
At least a 20% discount on everything that you order as a Demonstrator!
Early peeks at new release items and preorders for new items about a month before they are available to customers!
The ability to attend Demonstrator exclusive Stampin’ Up! events!
No pressure to sell to anyone, hold classes or workshops or run a business. You can simply order for yourself and get the discount! And as long as you have at least $300 in sales per quarter, you’ll continue as an active Demonstrator and continue to get the discount. If you aren’t able to maintain the $300 per quarter minimums, you simply go back to being a customer, no commitment required and no penalty if decide that being a Demonstrator isn’t right for you.
Stampin’ Up! does have an extensive library of class and project ideas for those wishing to jump into hosting classes as well as training to help start your business, should you choose to do that.
If you join with me, you’ll also get:
Monthly team meetings via video conference where we talk about the latest happenings at Stampin’ Up! and share project ideas. Team members are located all over the United States, but we still get together in person online and have lots of fun.
Quarterly in-person meetings if you live in the NJ or surrounding area, where we get together to do a little stamping, creating, getting to know one another and most of all SHARE inspiration. If you live outside the NJ area you can join us through that wonderful ZOOM video conference.
Free access to our online class tutorials. These are exceptional!
A private Facebook page where we can chat, ask questions and share ideas.
Team giveaways and prizes for reaching sales and team goals or attending specific meetings. 😉
The best part is the laughing and kidding and sharing of information/ creativity/ talent ~ following the SU! adage: Inspire. Create. Share. ❤️ 😁
Join our incredible group of crafters and creators.
If you would like to be able to order products early from catalogs AND enjoy that 20% discount,


/08.22-cozy-and-bright/demo_ldpg_nka_1_na_0822_cozy_bright.jpg?sfvrsn=777db356_12)
/08.22-cozy-and-bright/demo_ldpg_nka_2_na_0822_cozy_bright.jpg?sfvrsn=767db356_12)
/08.22-cozy-and-bright/demo_ldpg_nka_3_na_0822_cozu_bright.jpg?sfvrsn=757db356_12)


