
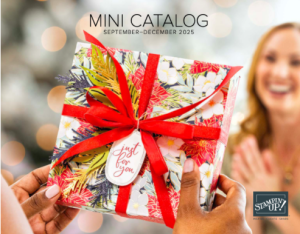
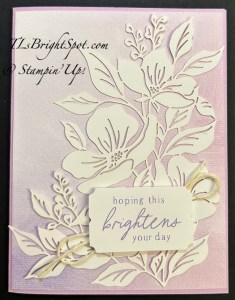
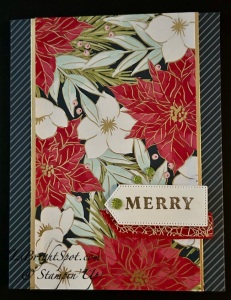
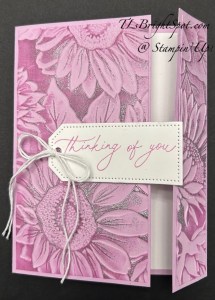
Good Wednesday – BIG DAY TODAY! Sep-Dec 2025 Mini Catalog LAUNCH and SEPTEMBER ONLINE EXCLUSIVE RELEASES. I’m sharing a card today that uses products from the Mini Catalog , mixing products. The stamped images come from the Gift of Joy stamp set onnpage 55. The embossed panel is done on Designer Series Paper from the Peaceful Garden Suite of products on pages 32-25. The embellishments are from that suite as well.
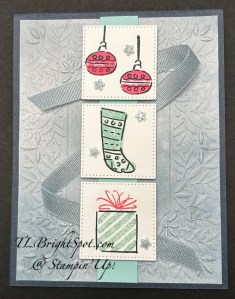
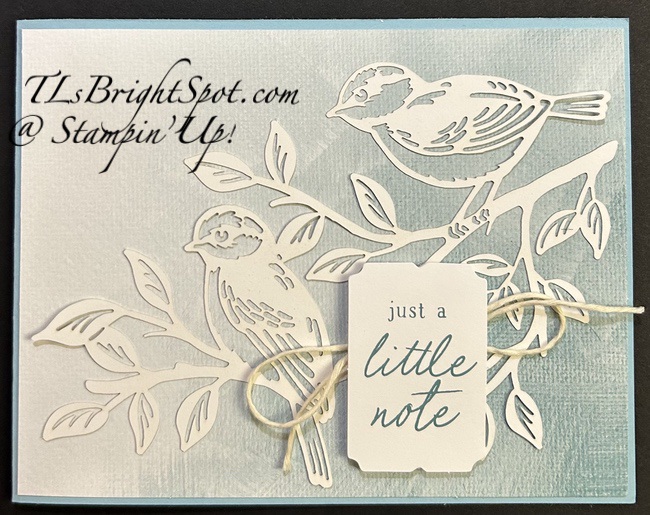
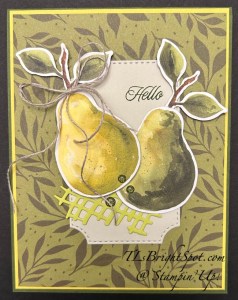
I began by stamping the various images from the Gift of Joy stamp set in Secret Sea ink. I filled in the images using Pool Party and Strawberry Slush. I then die cut them with the Stitched Shapes Dies, second from smallest square. I added them to a Pool Party strip 3/4 x 5 1/4. Next I embossed a panel of Peaceful Garden DSP with the Peaceful Greenery 3D embossing folder. This gives a beautiful embossing and background. I adhered this embossed panel to Secret Sea card stock, then wove ribbon back & forth for movement and texture. The ribbon is Faux Linen Ribbon in Cloud Cover. I added the strip of Poll Party over top to hold the ribbon in place and added the stamped pieces with dimensionals. The final touch, several Hues of Blue Flowers from the Peaceful Garden Suite.

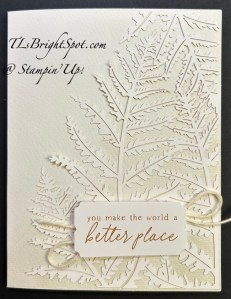
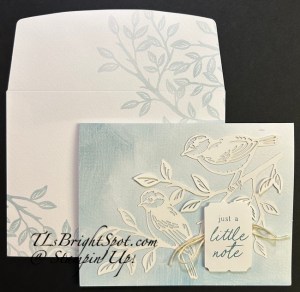
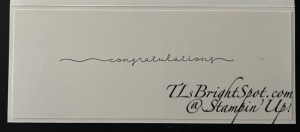
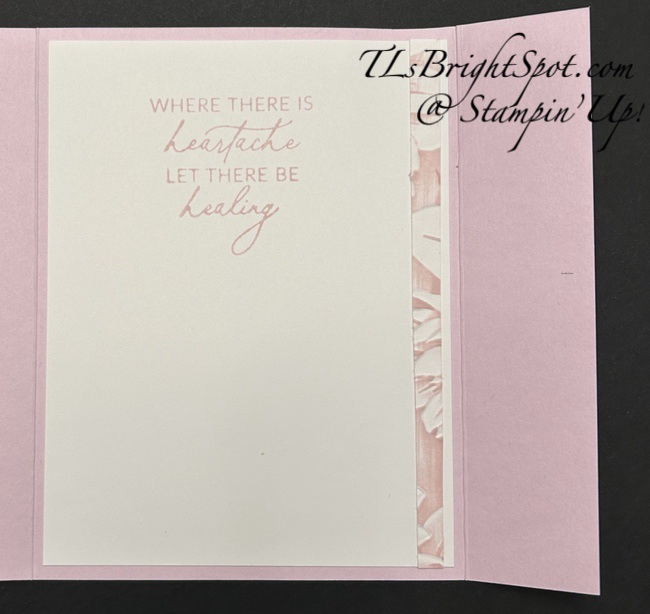
For the inside… When first die cutting the stamped images, I die cut the squares too large, so in cutting down to the appropriate size, I had a leftover ‘trim’ so used it to enhance the stamped sentiment 😀 The sentiment is from Gift of Joy stamp set and is stamped in Secret Sea ink. The gorgeous bow is stamped in Strawberry Slush and is from the Gift of Joy stamp set. This Basic White panel was added to the inside of the card & voila!
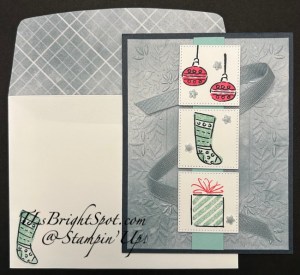
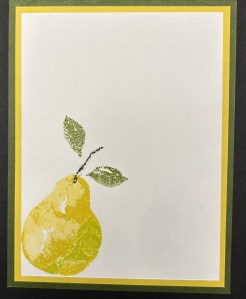
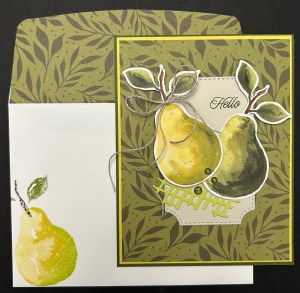
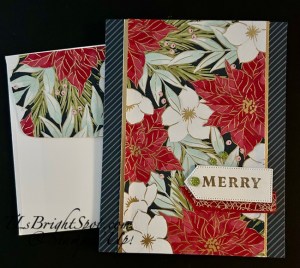
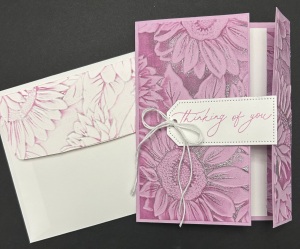
For the envelope, another piece of the Peaceful Garden DSP adhered to the flap & trimmed to fit. On the front, again the cute stocking first stamped in Secret Sea then stamped with Pool Party ink. Since this and the others are two-step images, this works well!.
This is not your traditional bright red & green for a Christmas card, but softer colors that still work. Stampin’ Up! does a great job of coordinating colors for doing just this kind of thing! Hope you like.Shop the products to make this card by clicking the images below.
For every order of $50 & above from today Sep. 3 to Sep 10, I will send not only the monthly tutorial, but a package of the Hues of Blue Flowers. Get double daisy patch rewards too. Daisy Patch rewards is my way of thinking my customers for shopping with me. For every single order of $50 or more before shipping & tax, and every full increment of $50n order (before shipping & tax), earn double the daisy patch rewards during this week Sep 3 – Sep 10, 2025. Those rewards add up, and when you have 8 daisy patch rewards you’ll receive $40 worth of Stampin’ Up! product from me. Got it? good!
Thanks for stopping by. May you have a beautiful day. Make someone happy sending them a handmade card filled with ❤️
Product List![Stitched Shapes Dies [ 152323 ]](https://assets1.tamsnetwork.com/images/EC042017NF/152323s.jpg "Stitched Shapes Dies [ 152323 ]")
![Secret Sea 8 1/2" X 11" Cardstock [ 165624 ]](https://assets1.tamsnetwork.com/images/EC042017NF/165624s.jpg "Secret Sea 8 1/2\" X 11\" Cardstock [ 165624 ]")
![Secret Sea Classic Stampin' Pad [ 165285 ]](https://assets1.tamsnetwork.com/images/EC042017NF/165285s.jpg "Secret Sea Classic Stampin' Pad [ 165285 ]")
![Pool Party Classic Stampin' Pad [ 147107 ]](https://assets1.tamsnetwork.com/images/EC042017NF/147107s.jpg "Pool Party Classic Stampin' Pad [ 147107 ]")
![Strawberry Slush Classic Stampin' Pad [ 165286 ]](https://assets1.tamsnetwork.com/images/EC042017NF/165286s.jpg "Strawberry Slush Classic Stampin' Pad [ 165286 ]")
![Cloud Cover 3/8" (1 Cm) Faux Linen Ribbon [ 165271 ]](https://assets1.tamsnetwork.com/images/EC042017NF/165271s.jpg "Cloud Cover 3/8\" (1 Cm) Faux Linen Ribbon [ 165271 ]")
![Pool Party 8-1/2" X 11" Cardstock [ 122924 ]](https://assets1.tamsnetwork.com/images/EC042017NF/122924s.jpg "Pool Party 8-1/2\" X 11\" Cardstock [ 122924 ]")
![Basic White 8 1/2" X 11" Cardstock [ 166780 ]](https://assets1.tamsnetwork.com/images/EC042017NF/166780s.jpg "Basic White 8 1/2\" X 11\" Cardstock [ 166780 ]")
![Basic White Medium Envelopes [ 159236 ]](https://assets1.tamsnetwork.com/images/EC042017NF/159236s.jpg "Basic White Medium Envelopes [ 159236 ]")
![Paper Trimmer [ 152392 ]](https://assets1.tamsnetwork.com/images/EC042017NF/152392s.jpg "Paper Trimmer [ 152392 ]")
![Stampin' Dimensionals [ 104430 ]](https://assets1.tamsnetwork.com/images/EC042017NF/104430s.jpg "Stampin' Dimensionals [ 104430 ]")
![Multipurpose Liquid Glue [ 110755 ]](https://assets1.tamsnetwork.com/images/EC042017NF/110755s.jpg "Multipurpose Liquid Glue [ 110755 ]")
![Mini Glue Dots [ 103683 ]](https://assets1.tamsnetwork.com/images/EC042017NF/103683s.jpg "Mini Glue Dots [ 103683 ]")
![Paper Snips [ 103579 ]](https://assets1.tamsnetwork.com/images/EC042017NF/103579s.jpg "Paper Snips [ 103579 ]")


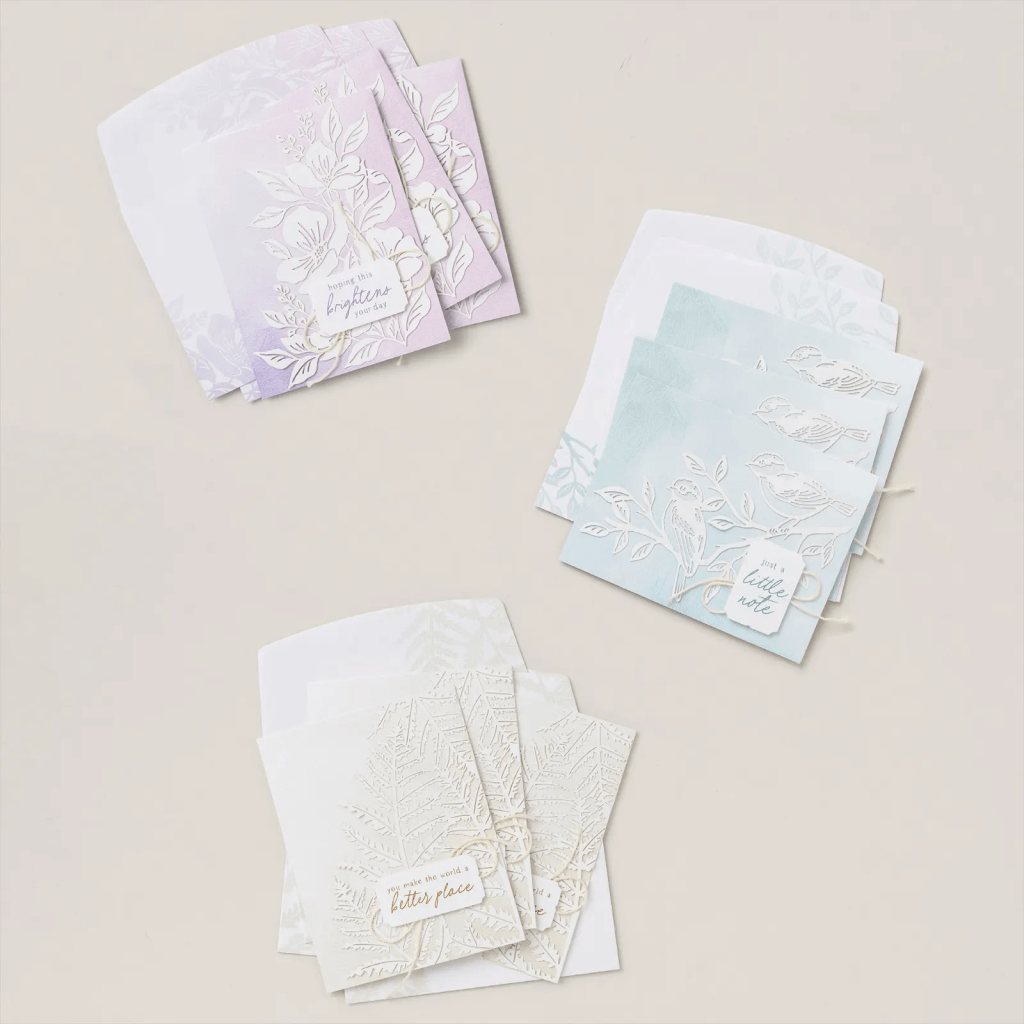
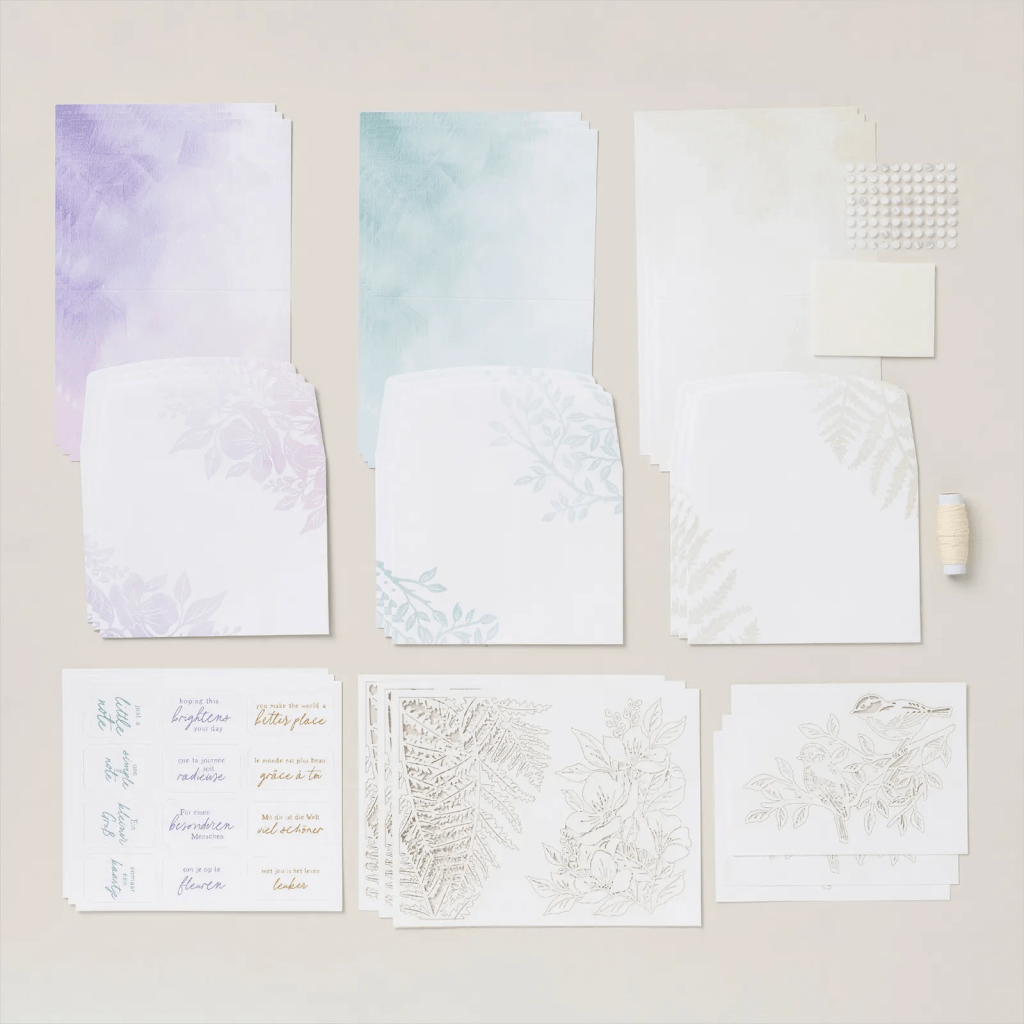
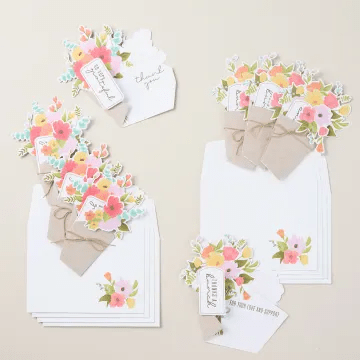
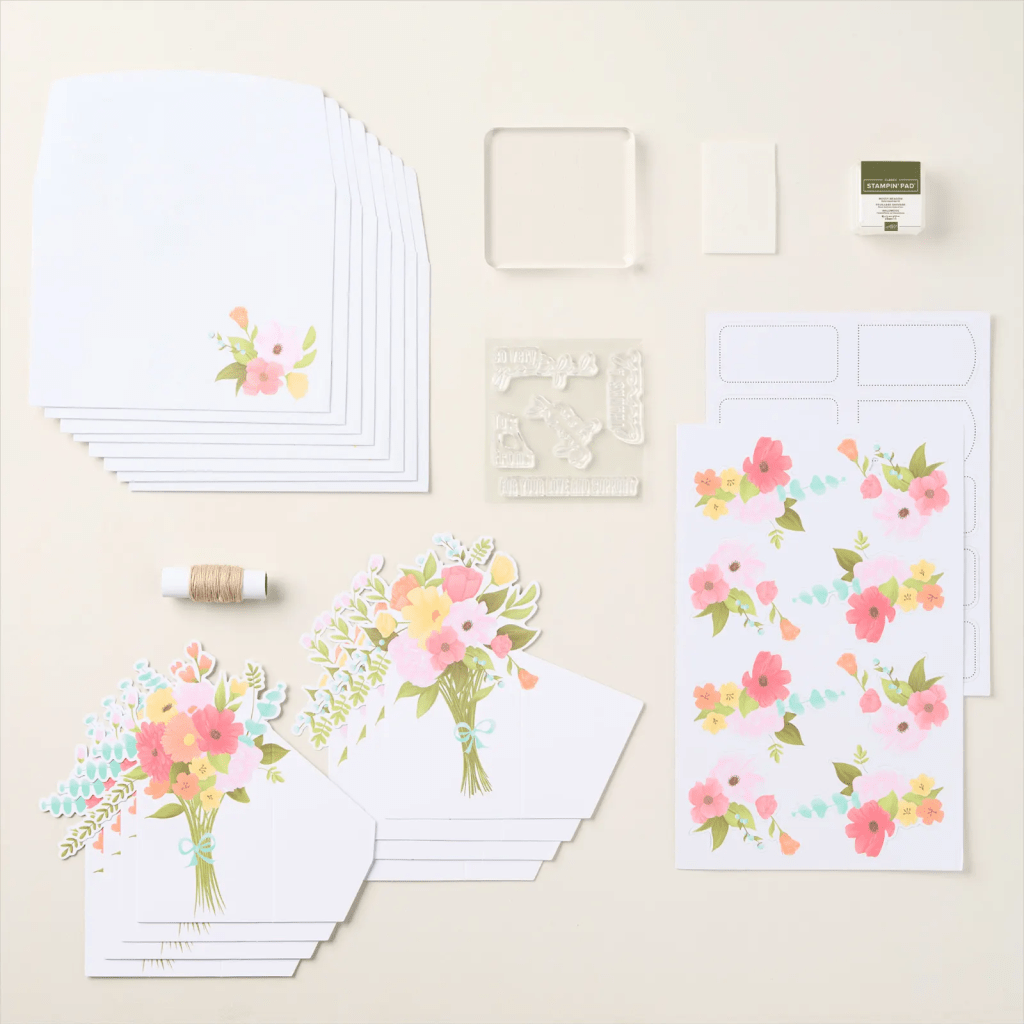
![Brighten Your Day Kit [ 166460 ]](https://assets1.tamsnetwork.com/images/EC042017NF/166460s.jpg "Brighten Your Day Kit [ 166460 ]")
![Basic Beige 8 1/2" X 11" Cardstock [ 164511 ]](https://assets1.tamsnetwork.com/images/EC042017NF/164511s.jpg "Basic Beige 8 1/2\" X 11\" Cardstock [ 164511 ]")
![Pecan Pie 8 1/2" X 11" Cardstock [ 161717 ]](https://assets1.tamsnetwork.com/images/EC042017NF/161717s.jpg "Pecan Pie 8 1/2\" X 11\" Cardstock [ 161717 ]")
![Balmy Blue 8-1/2" X 11" Cardstock [ 146982 ]](https://assets1.tamsnetwork.com/images/EC042017NF/146982s.jpg "Balmy Blue 8-1/2\" X 11\" Cardstock [ 146982 ]")
![Lost Lagoon 8-1/2" X 11" Cardstock [ 133679 ]](https://assets1.tamsnetwork.com/images/EC042017NF/133679s.jpg "Lost Lagoon 8-1/2\" X 11\" Cardstock [ 133679 ]")
![Fresh Freesia 8 1/2" X 11" Cardstock [ 155613 ]](https://assets1.tamsnetwork.com/images/EC042017NF/155613s.jpg "Fresh Freesia 8 1/2\" X 11\" Cardstock [ 155613 ]")
![Highland Heather 8-1/2" X 11" Cardstock [ 146986 ]](https://assets1.tamsnetwork.com/images/EC042017NF/146986s.jpg "Highland Heather 8-1/2\" X 11\" Cardstock [ 146986 ]")


![Painterly Pears Suite Collection (English) [ 166159 ]](https://assets1.tamsnetwork.com/images/EC042017NF/166159s.jpg "Painterly Pears Suite Collection (English) [ 166159 ]")
![Mossy Meadow 8-1/2" X 11" Cardstock [ 133676 ]](https://assets1.tamsnetwork.com/images/EC042017NF/133676s.jpg "Mossy Meadow 8-1/2\" X 11\" Cardstock [ 133676 ]")
![Darling Duckling 8 1/2" X 11" Cardstock [ 165622 ]](https://assets1.tamsnetwork.com/images/EC042017NF/165622s.jpg "Darling Duckling 8 1/2\" X 11\" Cardstock [ 165622 ]")
![Darling Duckling Classic Stampin' Pad [ 165277 ]](https://assets1.tamsnetwork.com/images/EC042017NF/165277s.jpg "Darling Duckling Classic Stampin' Pad [ 165277 ]")
![Lemon Lime Twist 8-1/2" X 11" Cardstock [ 144245 ]](https://assets1.tamsnetwork.com/images/EC042017NF/144245s.jpg "Lemon Lime Twist 8-1/2\" X 11\" Cardstock [ 144245 ]")
![Lemon Lime Twist Classic Stampin' Pad [ 147145 ]](https://assets1.tamsnetwork.com/images/EC042017NF/147145s.jpg "Lemon Lime Twist Classic Stampin' Pad [ 147145 ]")
![Linen Thread [ 104199 ]](https://assets1.tamsnetwork.com/images/EC042017NF/104199s.jpg "Linen Thread [ 104199 ]")
![Stampin' Write Markers Collection [ 163136 ]](https://assets1.tamsnetwork.com/images/EC042017NF/163136s.jpg "Stampin' Write Markers Collection [ 163136 ]")
![Bone Folder [ 102300 ]](https://assets1.tamsnetwork.com/images/EC042017NF/102300s.jpg "Bone Folder [ 102300 ]")
![Stampin' Cut & Emboss Machine [ 149653 ]](https://assets1.tamsnetwork.com/images/EC042017NF/149653s.jpg "Stampin' Cut & Emboss Machine [ 149653 ]")
![Stampin' Seal [ 152813 ]](https://assets1.tamsnetwork.com/images/EC042017NF/152813s.jpg "Stampin' Seal [ 152813 ]")
![Take Your Pick [ 144107 ]](https://assets1.tamsnetwork.com/images/EC042017NF/144107s.jpg "Take Your Pick [ 144107 ]")


![Old Olive 8-1/2" X 11" Cardstock [ 100702 ]](https://assets1.tamsnetwork.com/images/EC042017NF/100702s.jpg "Old Olive 8-1/2\" X 11\" Cardstock [ 100702 ]")
![Old Olive Classic Stampin' Pad [ 147090 ]](https://assets1.tamsnetwork.com/images/EC042017NF/147090s.jpg "Old Olive Classic Stampin' Pad [ 147090 ]")
![Real Red 8-1/2" X 11" Cardstock [ 102482 ]](https://assets1.tamsnetwork.com/images/EC042017NF/102482s.jpg "Real Red 8-1/2\" X 11\" Cardstock [ 102482 ]")
![Real Red Classic Stampin' Pad [ 147084 ]](https://assets1.tamsnetwork.com/images/EC042017NF/147084s.jpg "Real Red Classic Stampin' Pad [ 147084 ]")


![Metallics Wow! Embossing Powder [ 165678 ]](https://assets1.tamsnetwork.com/images/EC042017NF/165678s.jpg "Metallics Wow! Embossing Powder [ 165678 ]")
![Versamark Pad [ 102283 ]](https://assets1.tamsnetwork.com/images/EC042017NF/102283s.jpg "Versamark Pad [ 102283 ]")
![Heat Tool (Us And Canada) [ 129053 ]](https://assets1.tamsnetwork.com/images/EC042017NF/129053s.jpg "Heat Tool (Us And Canada) [ 129053 ]")
![Embossing Additions Tool Kit [ 159971 ]](https://assets1.tamsnetwork.com/images/EC042017NF/159971s.jpg "Embossing Additions Tool Kit [ 159971 ]")


![Sunflower 3 D Embossing Folder [ 166145 ]](https://assets1.tamsnetwork.com/images/EC042017NF/166145s.jpg "Sunflower 3 D Embossing Folder [ 166145 ]")
![Sweetly Scripted Cling Stamp Set (English) [ 163600 ]](https://assets1.tamsnetwork.com/images/EC042017NF/163600s.jpg "Sweetly Scripted Cling Stamp Set (English) [ 163600 ]")
![Basic White 8 1/2" X 11" Thick Cardstock [ 159229 ]](https://assets1.tamsnetwork.com/images/EC042017NF/159229s.jpg "Basic White 8 1/2\" X 11\" Thick Cardstock [ 159229 ]")
![Gold & Silver 1/8" (3.2 Mm) Trim Combo Pack [ 161633 ]](https://assets1.tamsnetwork.com/images/EC042017NF/161633s.jpg "Gold & Silver 1/8\" (3.2 Mm) Trim Combo Pack [ 161633 ]")
![Adhesive Backed Metallic Gems [ 163780 ]](https://assets1.tamsnetwork.com/images/EC042017NF/163780s.jpg "Adhesive Backed Metallic Gems [ 163780 ]")
![Smoky Slate 8-1/2" X 11" Cardstock [ 131202 ]](https://assets1.tamsnetwork.com/images/EC042017NF/131202s.jpg "Smoky Slate 8-1/2\" X 11\" Cardstock [ 131202 ]")
![Smoky Slate Classic Stampin' Pad [ 147113 ]](https://assets1.tamsnetwork.com/images/EC042017NF/147113s.jpg "Smoky Slate Classic Stampin' Pad [ 147113 ]")


![Everyday Greetings Photopolymer Stamp Set (English) [ 165084 ]](https://assets1.tamsnetwork.com/images/EC042017NF/165084s.jpg "Everyday Greetings Photopolymer Stamp Set (English) [ 165084 ]")
![Tailor Made Tags Dies [ 155563 ]](https://assets1.tamsnetwork.com/images/EC042017NF/155563s.jpg "Tailor Made Tags Dies [ 155563 ]")
![Baker's Twine Essentials Pack [ 155475 ]](https://assets1.tamsnetwork.com/images/EC042017NF/155475s.jpg "Baker's Twine Essentials Pack [ 155475 ]")
![Bubble Bath 8 1/2" X 11" Cardstock [ 161718 ]](https://assets1.tamsnetwork.com/images/EC042017NF/161718s.jpg "Bubble Bath 8 1/2\" X 11\" Cardstock [ 161718 ]")
![Bubble Bath Classic Stampin' Pad [ 161664 ]](https://assets1.tamsnetwork.com/images/EC042017NF/161664s.jpg "Bubble Bath Classic Stampin' Pad [ 161664 ]")
![Fresh Freesia Classic Stampin' Pad [ 155611 ]](https://assets1.tamsnetwork.com/images/EC042017NF/155611s.jpg "Fresh Freesia Classic Stampin' Pad [ 155611 ]")


![Exposed Brick 3 D Embossing Folder [ 161600 ]](https://assets1.tamsnetwork.com/images/EC042017NF/161600s.jpg "Exposed Brick 3 D Embossing Folder [ 161600 ]")
![Sunshine Vibes Bundle (English) [ 165152 ]](https://assets1.tamsnetwork.com/images/EC042017NF/165152s.jpg "Sunshine Vibes Bundle (English) [ 165152 ]")
![Small Blending Brushes [ 160518 ]](https://assets1.tamsnetwork.com/images/EC042017NF/160518s.jpg "Small Blending Brushes [ 160518 ]")
![Woven Textures 12" X 12" (30.5 X 30.5 Cm) Designer Series Paper [ 165560 ]](https://assets1.tamsnetwork.com/images/EC042017NF/165560s.jpg "Woven Textures 12\" X 12\" (30.5 X 30.5 Cm) Designer Series Paper [ 165560 ]")
![Neutral Matte Dots [ 165561 ]](https://assets1.tamsnetwork.com/images/EC042017NF/165561s.jpg "Neutral Matte Dots [ 165561 ]")
![Pecan Pie Classic Stampin' Pad [ 161665 ]](https://assets1.tamsnetwork.com/images/EC042017NF/161665s.jpg "Pecan Pie Classic Stampin' Pad [ 161665 ]")
![Garden Green Classic Stampin' Pad [ 147089 ]](https://assets1.tamsnetwork.com/images/EC042017NF/147089s.jpg "Garden Green Classic Stampin' Pad [ 147089 ]")
![Uninked Stampin' Spots [ 141822 ]](https://assets1.tamsnetwork.com/images/EC042017NF/141822s.jpg "Uninked Stampin' Spots [ 141822 ]")
![Sponge Daubers [ 133773 ]](https://assets1.tamsnetwork.com/images/EC042017NF/133773s.jpg "Sponge Daubers [ 133773 ]")
![Clear Wink Of Stella Glitter Brush [ 141897 ]](https://assets1.tamsnetwork.com/images/EC042017NF/141897s.jpg "Clear Wink Of Stella Glitter Brush [ 141897 ]")
![Tuxedo Black Memento Ink Pad [ 132708 ]](https://assets1.tamsnetwork.com/images/EC042017NF/132708s.jpg "Tuxedo Black Memento Ink Pad [ 132708 ]")


![Perfectly Pears Bundle (English) [ 166154 ]](https://assets1.tamsnetwork.com/images/EC042017NF/166154s.jpg "Perfectly Pears Bundle (English) [ 166154 ]")
![Jolly Holly Bundle (English) [ 166120 ]](https://assets1.tamsnetwork.com/images/EC042017NF/166120s.jpg "Jolly Holly Bundle (English) [ 166120 ]")
