Stampin ‘ Up! Front flap Thinking of You Fun Fold

Hi folks! Today is – GAME DAY… are you for the red (Kansas City Chiefs) or green for the Eagles? Because of where I live, the Eagles are the players of choice. :O)

On Thursday evening I learned a friend of mine is on hospice care and it really threw me for a loop. I was shocked and dismayed – and heartbroken. This card is for her…

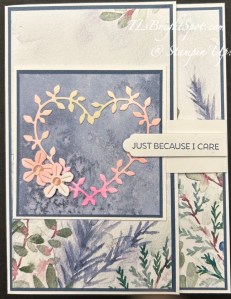
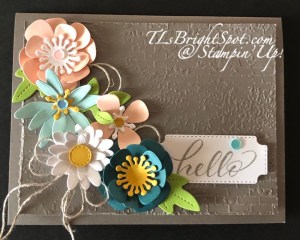
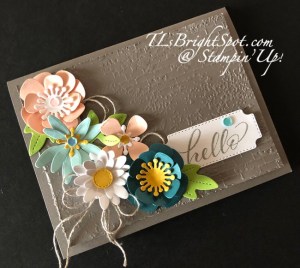
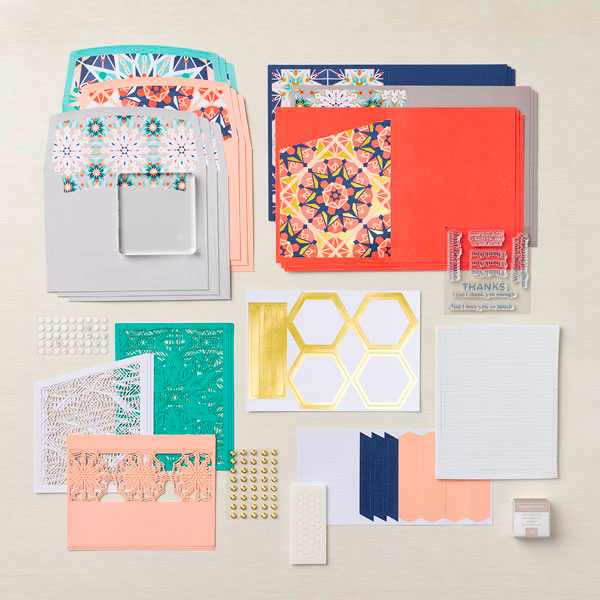
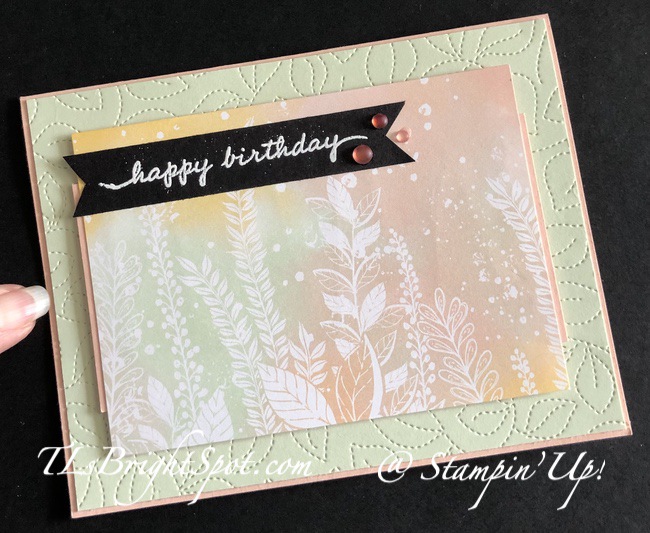
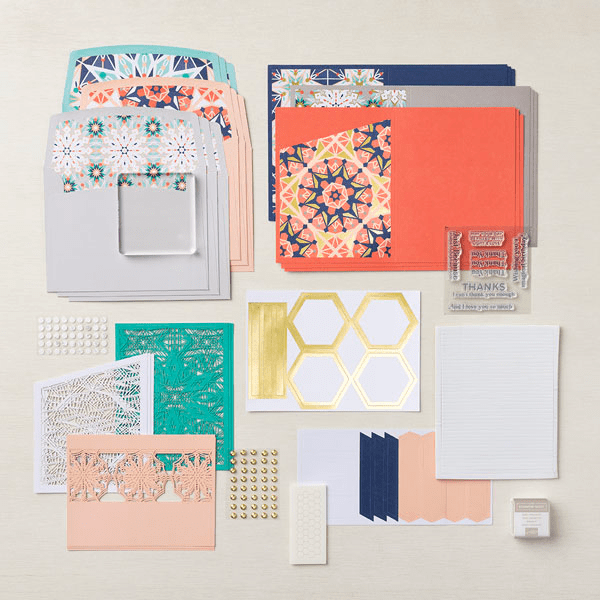
I combined a couple of Stampin’ Up! items… Winter Meadow DSP and the free during Sale-a-Bration bundle called Heart Shaped. It’s delicate, it’s beautiful and perfect for so many occasions.. Here I used I a heart stamped from paper I created with Blending brushes and several colors. I’ll link to the post here that will give all the info about how to do that. The two small flowers were die cut from that same paper with dies from Heart Shaped Dies.

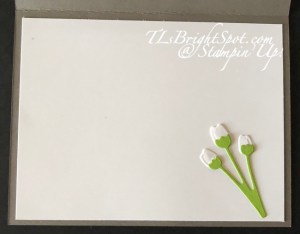
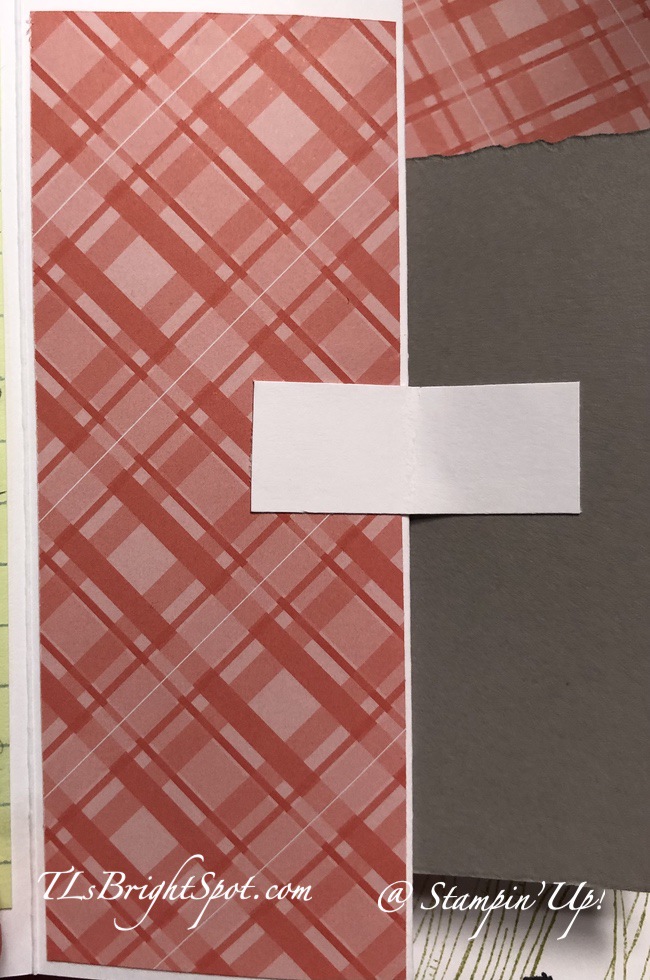
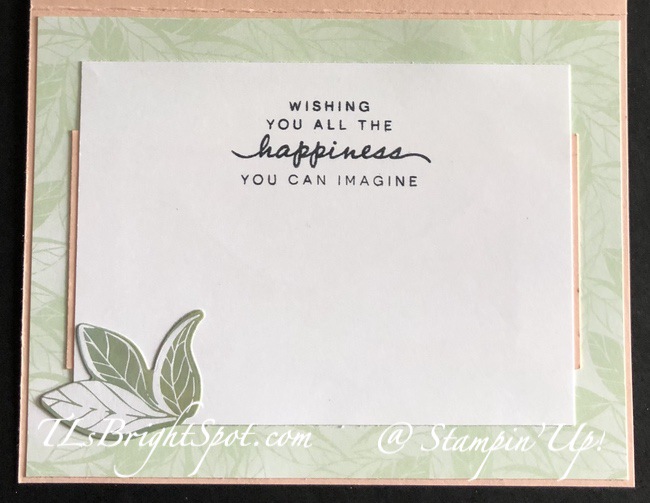
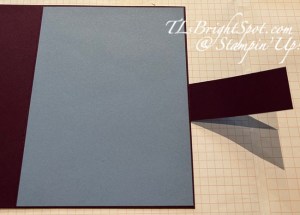
I began with a Thick Basic White card stock 5 1/2 x 7 1/2 scored on the long side at 4 1/4. Cut layer pieces (here it was Misty Moonlight cs) 3 1/8 x 5 3/8 for the front and 4 1/8 x 5 3/8 for the inside. DSP panels should be 3 x 5 1/4 and 1 x 5 1/4. Adhere the larger DSP panel to the larger card stock piece then secure to the card front. The 1″ strip should be added to a Basic White piece 4 x 5 1/4 for the inside of the card. Cut another piece of Basic White 1 x 3 and score at 1/2″ on one end. This will become the tab for the front ‘flap’. Add this tab to the back of the card stock layer for the inside of the card, centering it top to bottom. Now add this card stock to the inside of the card. It will look like the photo below.

Stampin' Up! Fun fold tab

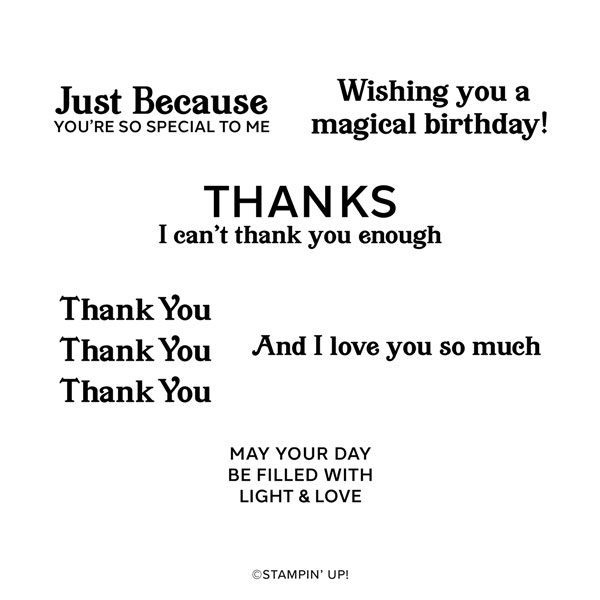
Add the 1″ DSP strip to the right edge of the Basic White layer, then stamp the sentiment.. Here the sentiment is from Everyday Greetings stamp set and stamped in Misty Moonlight ink I also added the stamped heart, twice – once in Pretty in Pink and the second in Moody Mauve stamped off once. Adhere this to the inside of the card.

Stampin' Up! Front Flap card inside

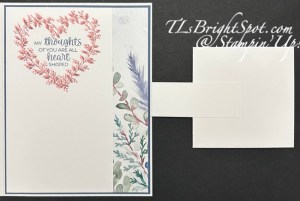
Now close the card and center the square that attaches to the flap. The layers are Basic White 2 3/4 x 2 3/4, Winter Meadow DSP cut 2 5/8 x 2 5/8. The die c ut heart is attached with tiny dabs of liquid glue. The flowers are attached with a mini dimensional for one and liquid glue for the other. The sentiment is again from Everyday Greetings and stamped in Misty Moonlight ink. It was die cut with a banner die from the Heart Shaped dies, then one end trimmed. This was attached with mini dimensionals.

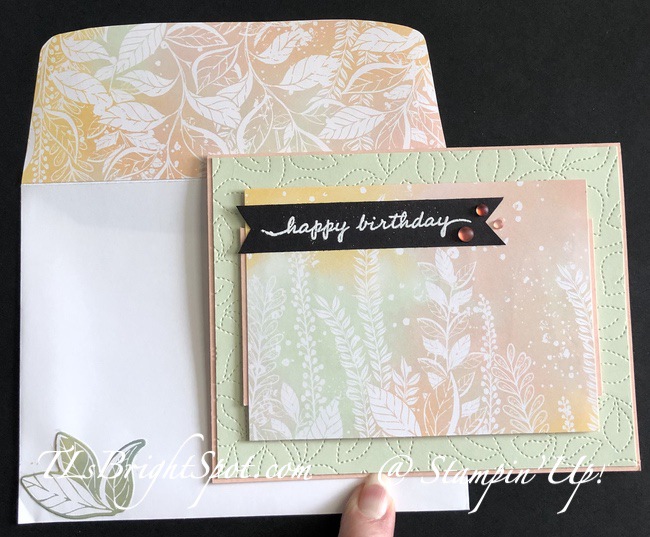
Unfortunately I do not have a photo of the envelope – ugh! – but I did attach more of the Winter Meadow DSP to the flap, trimmed to fit, then stamped the grouping of flowers in Pretty In Pink ink on the envelope front.

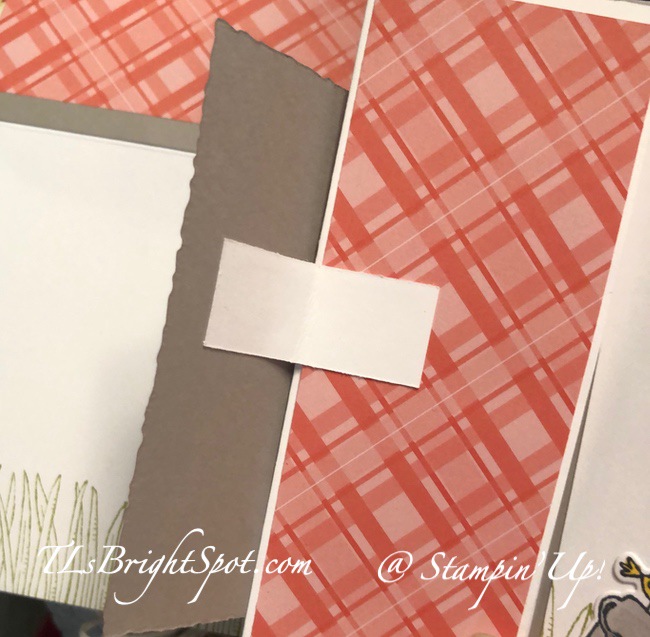
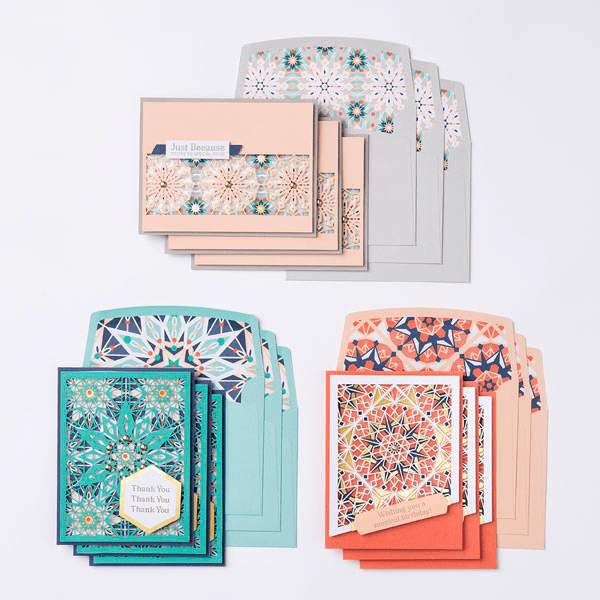
I made three more cards using this same ‘pattern’ but chose different DSP for those and different card stock bases as well.I’ll share those photos below.

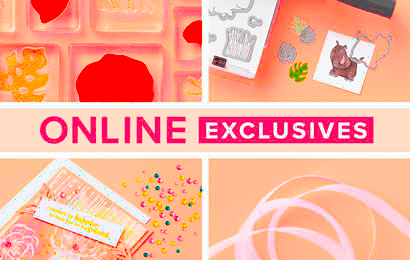
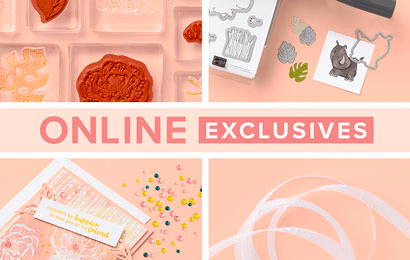
To purchase the supplies to make this card, please use this link to take you to my Stampin’ Up! store – look around a bit: Online Exclusives, Kits Collections, 2024-2025 Annual Catalog – like that. And when you shop with me right now, Stampin’ Up! is in the ending stages of Sale-a-bration (Jan-Feb), but when you order prior to Feb 28, you will receive an opportunity to receive FREE items from Stampin’ Up! – the Heart Shaped bundle is one of those that qualifies with a $120 order. How fun is that!!!

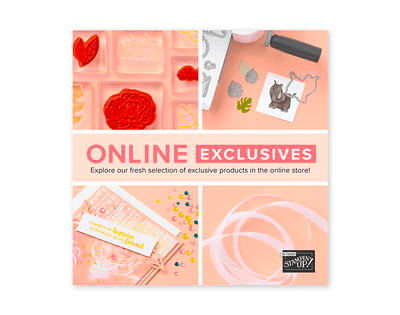
So now… how to purchase from me..These items can all be purchased through me – and I would appreciate your business! To view the ONLINE EXCLUSIVES, CLICK HERE. To see the items in the Jan-Apr 2025 Mini Catalog – click here And if you do not have a demonstrator and need either of these catalogs, let me know! For all those coloring tools, the basics of card stock and embossing/ die cut machines, more stamps & dies, watercolor pencils, click this link for the 2024-2025 Annual Catalog. Remember that when purchasing from me, to use my current host code…and make certain my name is listed as your demonstrator :O)

LAST CHANCE PRODUCTS – CLICK HERE!

Sale-a-bration ends soon – Feb 28, 2025 and there are some FAB products you receive FREE with qualified purchases.

For purchases of $60 (level 1) – these items are FREE – click here

For purchases of $120 (level 2) – these items are FREE – click here

Use my CURRENT HOST CODE WTGKS9DH

When you shop with me and your purchase is $50 or more – you will receive a free giftie valued up to $10 that is a Stampin’ Up! item. You will also receive the monthly tutorial – January is the Terrific Toadstool and it has some really cute ideas!

If you’ve been thinking about becoming a Stampin’ Up! demonstrator, then there’s no better time than right now during Sale-A-Bration! When you join by February 28, 2025, you can choose between two fabulous offers:

Option 1: Get $125 worth of product PLUS a choice of two Stampin’ Write Marker Assortment packs AND the Handmade Designs Cling Stamp Set (an exclusive stamp set designed to work with the markers). That’s a $216 value for just $99! I strongly recommend Option 1

join by February 28, 2025, you can choose between two fabulous offers:

Option 2: Get $125 worth of product PLUS an additional $30 worth of product when you join Stampin’ Up! That’s a $155 value for just $99!

If you’d like to join the team, we’d love to have you!  Once you join, you’ll get at least a 20% discount on all of your Stampin’ Up! purchases and you can preorder from the upcoming catalogs!

Another key thought for joining now during Sale-a-bration… you will receive either an extra $30 in free product in your Starter Kit or your choice of two packs of Stampin’ Write Markers and an exclusive stamp set!

Stampin’ Up! and our particular team welcome all types of Demonstrators – those only purchasing to get the discount for themselves

those who want to run a business and…

– those anywhere in between!  Let’s stamp and have fun doing it!

Demonstrators get lots of perks including at least a 20% discount on all orders that you place as a Demonstrator, invitations to Stampin’ Up! Demonstrator events and preordering from upcoming catalogs and promotions. And if joining this Jan-Feb makes sense to you, you will have the opportunity to view the new catalog early and preorder as well. Opportunity knocks! Click the link in the image below to join with me now.

Stampin' Up! Joining Promotion

Thanks for stopping by. May you have a beautiful day!

Make someone happy by sending them a handmade card filled with love.

Stampin’ Up! Paper Florist Dies Hello card

Hello this shiny bright Tuesday! I have a really pretty card for you today, made with the Paper Florist Dies. This is a stand alone die set that allows you to create all KINDS of flowers your imagination can envision. And there are three leaf dies as well. Let’s take a peek at this fun card.

Stampin' Up! Pretty Florist Dies card

This card uses a couple of new products in the 2023-2024 Annual Catalog: Pebbled Path card stock for the card base; an embossed layer using the Exposed Brick 3D embossing folder, and a returning color to the palette – Pretty Peacock. The other colors used to make these creations are Pool Party, Crushed Curry, Basic White and Granny Apple Green for the leaves. Embellishments used were Pastel Adhesive-Backed Sequins in Petal Pink & Balmy Blue and Linen Thread doubled and made into a bow.

Since this is a stand alone set of floral and leaf dies, the sentiment comes from the Cheerful Daisy stamp set and was die cut with a banner die from the Cheerful Daisy Dies. This was stamped using Smoky Slate ink on a Basic White panel. I’m trying to keep my sentiment stamping to a bare minimum as I’m away and FORGOT MY ACRYLIC BLOCKS. Go figure… don’t even ask how I could forget them. I just did.

Stampin' Up! Paper Florist Dies Hello card.2
Stampin' Up! Paper Florist Dies, inside card

For the inside, I die cut the tulips in two parts: Basic White for the flower and Garden Green for the stems. These were adhered to a Basic White panel and attached to the inside of the card. The simplicity comparison with the card front is quite a contrast. I hope you like…

All flowers were attached to the card base with liquid glue. As you can see, some of the petals are curled up and some are curled downwards – as in the Pretty Peacock flower. The white daisy like flower has many layers. I just kept adding petals until I was happy with the look.

I’m afraid there is no envelope.. forgot to bring those with me as well. I’ll have to remedy that situation when I return home. For now I’m where I’m supposed to be and I have no regrets.

SAVE 15% ON SELECT DESIGNER SERIES PAPERS!

We all love beautiful Designer Series Paper, and in June, you can enjoy a 15% discount on select Designer Series Papers from our new 2023–2024 Annual Catalog and Online Exclusives. Whether you’re a scrapbooker, a card maker or simply a paper lover, this is a great time to stock up and save on gorgeous paper, so you have artistic and versatile paper designs on hand for your next projects! Check the list below.

161449 Bright & Beautiful 6×6 DSP $10.62

161467 Countryside Inn 12 x 12 DSP $10.62

161640 Delightfully Eclectic 12 x 12 DSP $25.50

161503 Earthen Elegance 12 x 12 DSP $10.62

161289 Fresh As A Daisy 12 x 12 DSP $10.62

163170 Glorious Gingham 6×6 DSP $8.92

161139 Hello, Irresistible6x6 DSP (ONLINE EXCLUSIVE) $10.62

161157 Inked Botanicals 6×6 DSP $10.62

161322 Les Shoppes 12 x 12 DSP $10.62

161534 Let’s Go Fishing 12 x 12 DSP $10.62

161192 Masterfully Made 12 x 12 DSP $10.62

161175 Stargazing 12 x 12 DSP $10.62

161304 Zoo Crew 12 x 12 DSP $10.62

Stampin' Up! ONLINE EXCLUSIVES

Stampin’ Up! ONLINE EXCLUSIVES are just that – products not offered in any catalog. My post today used two products from this list.

You may shop those products here.

Stampin’ Up! has kits that are super quick and easy to make – great for a gathering as all elements are provided in the kit. Talk about CELEBRATE!

Stampin' Up! Confetti Birthday kit

162390

CONFETTI BIRTHDAY KIT

$23.00 USD | $32.00 CAD

Available starting 2 May

Also available in French (item 16239

This month’s kit includes:

  • Enough supplies to create 9 cards—3 each of 3 designs
  • 9 coordinating envelopes
  • Confetti Birthday photopolymer stamp set
  • One Blueberry Bushel Ink Spot
  • Printed card bases, card fronts, self-adhesive cellophane shaker bags, die-cut pieces, holographic foil labels, adhesive, embellishments, and a clear block
  • Finished card size: 5-1/2″ x 4-1/4″ (14 x 10.8 cm)
  • Coordinating colors: Blueberry Bushel, Coastal Cabana, Crushed Curry, Flirty Flamingo, Lemon Lime Twist, Poppy Parade

You may order kits from me here.

Stampin' Up! Joining Promotion

Now here’s some GREAT NEWS!!! Stampin’ Up! is having a joining special. It’s a fabulous time to join Stampin’ Up!  New team members will get even more FREE products in their customizable Starter Kit. Between 1–30 June, those who sign up can get $155 worth of products for only $99 + free business supplies + free shipping + all the fun being a part of Stampin’ Up!

PROMOTION DATES: 1–30 JUNE 2023

– When new team members purchase their Starter Kit, they will be able to redeem $155 of Starter Kit eligible products for just $99

– Shipping of your new kit is FREE!!

When you join as a Stampin’ Up! Demonstrator, you’ll get the following perks:

– 20% discount on all purchases immediately after joining (and for as long as you are an active demonstrator). Plus, you ALSO get to take advantage of any customer specials going on from Stampin’ Up!, too! (Such as the DSP SALE, also starting today.)

– Early peeks at new release items and preorders for new items. A new ONLINE list of products is available to demonstrators June 1!

Why join Stampin’ Up!?

– The opportunity to attend Demonstrator exclusive Stampin’ Up! events!

– You’ll have the chance to earn a modest additional income on your sales!

– No pressure to sell to anyone, hold classes or workshops or run a business.  You can simply order for yourself and get the discount!  And as long as you have at least $300 in sales per quarter, you’ll continue as an active Demonstrator and continue to get the discount.  If you aren’t able to maintain the $300 per quarter minimums, you simply go back to being a customer, no commitment required and no penalty if you decide that being a Demonstrator isn’t right for you.

– And should you choose to use this joining special and promote the business side of things, Stampin’ Up! does have lots of class and project ideas as well as training to help start your business, should you choose to do that.

You can join with me here.

Thanks for stopping by. May you have a beautiful day!

Stampin’ Up! Monochromatic w/ Wonderful Thoughts Bundle

Good Sunday morning! We have a beautiful cool day here in New Jersey – after a full day of LOTS of rain. We needed the rain, don’t get me wrong, but the sunshine is really nice :O) I created a card that is monochromatic today, and I would love your opinion on it.

Stampin' Up! Wonderful Thoughts, front

I began with a Fresh Freesia card base and layered another panel on dimensionals that I had run through the Raindrops Embossing Folder. Next, I die cut five panels of Fresh Freesia using one of the dies in Wonderful Thoughts Dies. I used a sponge dauber to add a bit of Fresh Freesia to all sides of each die cut, then added them with dimensionals to the embossed panel. Next I die cut three of the flowers from Wonderful Thoughts Dies and colored them using Stampin’ Blends: both light & dark Fresh Freesia, Dark Granny Apple Green and both light & dark Daffodil Delight. I also used the Color Lifter in a couple of places on the flowers to add a bit more definition. These were added with liquid glue over the five panels. I then stamped the sentiment from Wonderful Thoughts stamp set in Memento ink on a Basic White scrap, die cut it with a die from Wonderful Thoughts Dies and adhered it with liquid glue. The last step for the card front was some Adhesive-Backed Sequins in white. I added these between the panels.

Stampin' Up! Wonderful Thoughts, inside

For the inside, the last of the three flowers was adhered to the bottom of this Basic White panel. I stamped the sentiment from Wonderful Thoughts in Memento ink, then added the panel with liquid glue and the card was done! I like the flowers on the Basic White panel and think I would like to make this card again with a Basic White card base, color the flowers similarly, etc. What do you think?

I’ve mentioned before that I’m having trouble with the html in this blog – so know my site is being worked on and in a week or so, that will be fixed! I’m very much looking forward to that…. Once it’s fixed, the html’s should be made available to past cards as well, at least, that’s what I THINK will happen :O)

You can still shop with me by visiting my store here. Items used: Wonderful Thoughts bundle, Fresh Freesia cardstock, Basic White card stock, Fresh Freesia ink, sponge dauber, Memento ink, Stampin’ Blends ~ Fresh Freesia, Daffodil Delight, Granny Apple Green and Color Lifter; Raindrops Embossing Folder and Adhesive-Backed Sequins. The basics needed for creating this card: paper trimmer, cut & emboss machine, dimensionals, liquid adhesive.

Stampin’ Up! has kits that are super quick and easy to make – great for a gathering as all elements are provided in the kit. Talk about CELEBRATE!

Stampin' Up! Confetti Birthday kit

162390

CONFETTI BIRTHDAY KIT

$23.00 USD | $32.00 CAD

Available starting 2 May

Also available in French (item 162391

This month’s kit includes: 

  • Enough supplies to create 9 cards—3 each of 3 designs
  • 9 coordinating envelopes
  • Confetti Birthday photopolymer stamp set
  • One Blueberry Bushel Ink Spot
  • Printed card bases, card fronts, self-adhesive cellophane shaker bags, die-cut pieces, holographic foil labels, adhesive, embellishments, and a clear block
  • Finished card size: 5-1/2″ x 4-1/4″ (14 x 10.8 cm)
  • Coordinating colors: Blueberry Bushel, Coastal Cabana, Crushed Curry, Flirty Flamingo, Lemon Lime Twist, Poppy Parade
Stampin' Up! Paper pumpkin

Stampin’ Up! has a monthly subscription for Paper Pumpkin that is also a kit all in one. The first order includes an acrylic block which can be used for all Paper Pumpkin kits after that. This particular kit must be ordered by June 10. Click on the photo above to go straight to my Paper Pumpkin area to subscribe :O)

Stampin' Up! Online Exclusives

Online Exclusives are products not available in a catalog. This allows Stampin’ Up! to update, add to seasonally or when needed, products on demand. Click on the image above to go straight to my store to order.

If you do not have a demonstrator and would like to order from me or need a catalog, I would like to help you create. When ordering $50 or more in product (before shipping/ taxes), use my HOST CODE 64NDVS4D to receive Star Rewards and a SU! gift valued to $10. Star Rewards build up so that when you have 8 rewards from me, you can receive a stamp set valued to $40. :O) And when your order is $50 or more prior to Shipping/ taxes, you also receive the monthly tutorial. :O)

You may order from me here.

Thanks for stopping by. May you have a beautiful day!

Stampin’ Up! Naturally Gilded and Blending Brushes

Good Tuesday morning. I’m using a new Designer Series Paper called Naturally Gilded Specialty Paper that can be found in the ONLINE EXCLUSIVES. It’s wonderful for using Blending Brushes. It comes with copper, silver & gold designs and is beautiful. I chose today to use Blending Brushes to add color to the copper tone.

Stampin' Up! Naturally Gilded Specialty DSP

I began at the top of the paper blending in Daffodil Delight ink with the Blending Brush. Using the same brush, I then added Mango Melody ink. With a new brush I added Balmy Blue. I have my brushes using color tones for the similar colors and this works well for me. I adhered this to a panel of Copper Foil and set both aside to decide what to do next. This looks like a wildflower garden to me so I pulled out my Dragonfly Punch and it’s coordinating Dragonfly Garden stamp set. There are two dragonflies in this stamp set: one has a more solid, filled in body and the other is the one I chose to use. Using VersaMark ink, I stamped this on a scrap of Basic White, then Copper embossing powder to sprinkle over it, then heat set with the heat tool. I again pulled out my Blending Brushes, Daffodil Delight ink and Balmy Blue, but also brought out Pacific Point for a more vibrant butterfly. I added Daffodil Delight to the center portion of the dragonfly, then Balmy Blue on the outer wings and finally Pacific Point. The Pacific Point really brought the dragonfly to life as it is vibrant. Here’s what it looked like prior to using the punch.

Stampin' Up! Copper dragonfly with embossing powder & blending brushes

You can also notice how mixing the blue with the yellow creates some green on the dragonfly – and that’s ok! I did two of these, punched them with the Dragonfly Punch, then adhered them with mini dimensionals down the center. For the long tail, I trimmed a edge of a dimensional and attached it. I punched a tiny dragonfly from the copper foil. I used a sentiment from the stamp set to create the banner… VersaMark ink + copper embossing powder + heat tool. I punched this with my Double Oval Punch. I played around for a background color for both the card and the sentiment – and came up with Daffodil Delight for both. Yep, brought out the Double Oval Punch for the back of the oval. I attached the tiny copper foil dragonfly with a dab of liquid glue to the sentiment banner, then added dimensionals and placed it on the card front. I added the dragonflies. I had a length of Baker’s Twine on my desk in White, so pullled out my Balmy Blue Stampin’ Blends and colored it, folded it in half to make a double bow and attached it with a dab of glue, also to the banner. I added several dimensionals to the back of this slimline panel of Naturally Gilded Paper & Copper foil and added it to a Daffodil Delight card base.

Stampin' Up! Dragonfly Garden for the inside

For the card’s inside, I stamped this array of wildflowers and hovering dragonflies using Memento ink and stamps from the Dragonfly Garden stamp set. I haven’t used this set in a bit and I love it. But then, we just had winter so it seemed inappropriate. Now that it’s officially Spring – bring it on! OK, getting carried away… these were stamped on a Basic White panel then adhered to the inside of the card.

For the envelope, I used this same field flower stamp to stamp the left front but forgot to take a photo. There are slimline envelopes in the catalog and I used a white one :O) Card cuts will be listed at the end of this post.

OK, want to buy products to make this card? Here ya go… And remember to use my HOST CODE XFYQSSE9 when shopping with me. . Here’s how it works… when you place an order of $50 or more (before shipping & taxes), you receive from me a SU! item valued up to $10 + Star-Studded Rewards. If your order exceeds $150, do not use my HOST CODE as SU! has it’s own rewards from which you may choose. You will still receive that FREE ITEM valued up to $10 from me + the Star-Studded Rewards. 😁👍 Please note… I have had to remove card stock as a free item due to increased cost of mailing – ugh.

For every $50 that you order from my online store (before shipping & taxes) and when you add my current Host Code XFYQSSE9 you will earn 1 STAR Reward.  Orders of $49.99 or below DO NOT earn any rewards.Example $50 = 1 STAR Reward, $100 = 2 STAR Rewards , $150 = 3 STAR Rewards etc. When you have earned 8 STAR Rewards you will get a FREE product order valued up to $40.00, your choice, and mailed directly to you! Is that a deal or what??? You also earn my monthly Online Class Tutorial of exclusive projects when you place an order. For any order $50 or more you will also receive 1 free gift from me valued up to $10. PRODUCTS FOR THIS CARD BELOW!

Get ready for the latest addition to the Kits Collection by Stampin’ Up! The Colorful Kaleidoscope Kit is filled with geometric shapes and unique kaleidoscopic patterns.

Stampin' Up! Colorful Kaleidoscope kit
Stampin' Up! Colorful Kaleidoscope kit parts

Stampin' Up! Colorful Kaleidosope kit stamps

161804

COLORFUL KALEIDOSCOPE KIT

$23.00 USD | $32.00 CAD

Available starting 1 March

GET YOURS NOW! Click here to go my store to see more of the many kits available.

This kit includes:

  • 9 full-size cards, 3 each of 3 designs, measuring 4-1/4″ x 5-1/2″ (10.8 x 14 cm) and 9 coordinating envelopes.
  • One photopolymer stamp set with all-occasion sentiments that go beyond the basics.
  • One Gray Granite Stampin’ Spot.
  • 9 peek-through laser cuts that can easily be layered to create a kaleidoscopic effect.
  • Precut die cuts that are lined with gold foil, perfect for all your stamped sentiments.
  • Mini Stampin’ Dimensionals, Tear & Tape Adhesive, and Foam Adhesive Strips.
  • Gold, pearlized embellishments.
  • The coordinating colors are Bermuda Bay, Calypso Coral, Gray Granite, Night of Navy, and Petal Pink.
  • Each project takes less than 60 minutes to complete. 
Stampin' Up! ONLINE EXCLUSIVES

Now available Stampin’ Up! Online Exclusive Products. These products will not be offered in a catalog – only in the ONLINE STORE.

Thanks for stopping by. May you have a beautiful day.

Make someone happy sending them a handmade card filled with love.

Stampin’ Up! Rhino Ready Floating Panel Fun Fold

Good Sunday morning. The ONLINE EXCLUSIVES have been a big hit and with the March 1 offerings was this fun bundle – the Rhino Ready stamp set and Rhino Ready Dies. The rhinos are so cute and a bit sassy and I couldn’t resist. Pinterest is a wonderful resource for ideas & instructions and I found this Floating Fun Fold by LeeAnn Greff that this new set was perfect for making this card.

Stampin' Up! Rhino Ready stamp set
Stampin' Up! Rhino Ready Dies

This is so incredibly easy ~ so here ya go…

  • The card base is Basic White and is 8 1/2 x 5 12, scored at 2 1/8 & 4 1/4
  • The two front panels are from the Subtles 6×6 DSP and are cut 2 x 5 1/4. Quick tip: I make sure when there is a pattern that the panels match side by side. These are Calypso Coral… adhere to the two front panels on the card base.
  • Using the Deckled Rectangle Dies, cut a Basic White panel to stamp, color & decorate for the floating panel
    • Stamp the Rhino with Memento ink and color with Gray Granite Stampin’ Blends
    • Die cut the birthday hat from a scrap of Subtles 6×6 DSP – this time in Pear Pizzazz. Add hat to the rhino with a dimensional. Add a Balmy Blue sequin from the Pastel Adhesive-backed Sequin pack.
    • Stamp the sentiment from the Rhino Ready stamp set in Memento ink on a Basic White strip, then die cut with the banner die from Something Fancy Dies. Adhere to the stamped panel with dimensionals. Add three Classic Matte Dots in Gray.
    • Stamp the bird from Rhino Ready stamp set in Memento ink, color with Dark Daffodil Delight Blends and die cut with the appropriate die from Rhino Ready Dies. Add with a mini dimensional cut in half added to the top of the bird and a dab of glue to the feet
  • Die cut another piece slightly larger than the rhino panel using the Deckled Rectangle dies and Gray Granite card stock. Adhere this to the back of the stamped rhino.
  • Now to create the ‘floating’ pieces 😀
    • Cut two pieces of card stock 3/4 x 1 3/4; fold in half. Estimating the half point on the front panels of the card base, add adhesive to one side of the folded strip and attach at the fold. Do the same with the other strip making sure the folds butt against one another.
    • Add adhesive to the loose end of the strip and set the rhino stamped panel on it. Do the other side. The attached strips should look like the photo below.
Stampin' Up! Rhino Ready Floating Fun Fun. floating mechanism
Stampin' Up! Rhino Ready Floating Panel Fun Fold. floating mechanism.2

Decorate the inside…

  • On a 4 x 5 1/4 Basic White panel, stamp the grass in Pear Pizzazz ink. The grass comes from the Rhino Ready stamp set.
  • Stamp the birthday sentiment from Rhino Ready stamp set in Memento ink
  • On a separate piece of Basic White, stamp the rhino with the bird on it’s back and stamp another individual bird.
    • Color the rhino with Gray Granite Blends and the birds with Dark Daffodil Delight. Die cut each with the coordinating dies in the Rhino Ready Dies.
    • Die cut three of the grasses from Pear Pizzazz and layer on top of one another, using liquid glue to secure. Add to the card as shown. This will be the ‘stopper’ to allow the card to remain folded when it stands for display.
    • Adhere the rhino in place with loiquid glue and the bird as well.
  • Adhere stamped piece to 4 1/8 x 5 38 piece of Gray Granite card stock and add to inside of card.
Stampin' Up! Rhino Ready Floating Panel Fun Fold.inside

Now for the envelope…

  • Stamp the grass along the bottom of the envelope with Pear Pizzazz ink, leaving an opening for the bird peeking through.
  • Stamp the bird in Memento ink and color with Dark Daffodil Delight Blend
  • Add Subtles 6×6 DSP in Calypso Coral to the flap, 2 1/4 x 6 & trim to fit. My piece of DSP was only about 2″ so I added a Gray Granite strip first, then the DSP
Stampin' Up! Rhino Ready Floating Panel Fun Fold card & envelope

This is such a cute card – could be used for any gender and any age as well. And I love that flexibility!!! This bundle is available right now as an ONLINE EXCLUSIVE, meaning it will not be in any catalog. No telling if this will be reordered should SU! run out, so get it before it goes away. 😀

Stampin' Up! ONLINE EXLUSIVES - Rhino Ready Bundle

Best way to see what’s available is to go to the ONLINE STORE …Click here to go my store.

For every $50 that you order from my online store (before shipping & taxes) and when you add my current Host Code, you will earn 1 STAR Reward.  Orders of $49.99 or below DO NOT earn any rewards.Example $50 = 1 STAR Reward, $100 = 2 STAR Rewards , $150 = 3 STAR Rewards etc. When you have earned 8 STAR Rewards you will get a FREE product order valued up to $40.00, your choice, and mailed directly to you! Is that a deal or what??? You also earn my monthly Online Class Tutorial of exclusive projects when you place an order. For any order $50 or more you will also receive 1 free gift from me valued up to $10. Remember to use MY current HOST CODE XFYQSSE9

THANKS FOR STOPPING BY. MAY YOU HAVE A BEAUTIFUL DAY.

MAKE SOMEONE HAPPY SENDING THEM A HANDMADE CARD FILLED WITH LOVE.

Stampin’ Up! Irresistible Blooms Suite for the Happy Inkin’ Krew Thursday Blog Hop

Happy Thursday – and you know what that means… a really fun blog hop with the Happy Inkin’ Krew! We have a great sketch challenge today.

Stampin' Up! Happy Inkin' Thursday Blog Hop
Stampin' Up! Blog Hop Sketch Challenge

I have chosen to use several items from an ONLINE EXCLUSIVE suite of products called the Irresistible Blooms Suite. The Designer Series Papers in this suite are absolutely stunning ~ and they are my focus for this card. The stamps are amazing as well, but I chose to primarily use the DSP for this card.

Stampin' Up! Irresistible Blooms Suite.1

I absolutely love the rather watercolored background with the pattern/ design in white on this particular DSP. I began with a Petal Pink card base, then adhered a Soft Sea Foam panel that was run through the Stitched Greenery Die. I attached a Petal Pink strip to the Hello, Irresistible 6×6 DSP and added that with dimensionals. The sentiment is from the Happiness Abounds stamp set, stamped in VersaMark ink and sprinkled with White embossing powder and heat set – on a Basic Black strip. I created the ends with paper snips. This was added with Stampin’ Seal, then the wonderful Loose Frosted Dots (in Pink) were added to the sentiment banner. And the card front was done!

Stampin' Up! Irresistible Blooms Suite. hop 3/2.2

For the inside I took another of the papers from the Hello, Irresistible 6×6 DSP and added it to the Petal Pink card base. I stamped the sentiment in Memento ink, again using the Happiness Abounds stamp set. This Basic White panel was adhered to another Petal Pink strip (as on the card front), and affixed to the inside. A triple leaf die, (Irresistible Blooms Dies) cut from another of the Hello, Irresistible 6×6 DSP was adhered to the panel.

Stampin' Up! Irresistible Blooms Suite.hop.3

For the envelope, a left-over piece from the card front DSP panel was added to the envelope flap and trimmed to fit (Hello, Irresistible 6×6 DSP). For the envelope front, another triple leaf die cut from the Hello, Irresistible 6×6 DSP was adhered in the corner – and the card is ready for posting in the mail! Remember, these are mostly ONLINE EXCLUSIVE products and cannot be found in a paper catalog.

Now, time to continue your hop among the participants. Next in line is Carol Buckelew who always has a fun creation to share. Click the ‘next’ button or click on a name to continue the hop. Enjoy!

Stampin' Up! Happy Inkin' Blog Hop 'next' button

Amy Koenders

Mary Deatherage

Jaimie Babarczy

Sue Prather

Karen Finkle

Akiko Sudano

Karen Ksenzakovic

Tara Carpenter

Terry Lynn Bright – you are here! 😀

Carol Buckalew

Stampin' Up! ONLINE EXCLUSIVES

Best way to see what’s available is to go to the ONLINE STORE …Click here to go my store.

Get ready for the latest addition to the Kits Collection by Stampin’ Up! The Colorful Kaleidoscope Kit is filled with geometric shapes and unique kaleidoscopic patterns. It’s time to give a card that no one will forget! 

Stampin' Up! COLORFUL KALEIDOSCOPE KIT
Stampin' Up! Colorful Kaleidoscope Kit parts

Stampin' Up! Colorful Kaleidoscope kit stamps

161804

COLORFUL KALEIDOSCOPE KIT

$23.00 USD | $32.00 CAD

Available starting 1 March

GET YOURS NOW! Click here to go my store.

THANKS FOR STOPPING BY. MAY YOU HAVE A BEAUTIFUL DAY.

MAKE SOMEONE HAPPY SENDING THEM A HANDMADE CARD FILLED WITH LOVE. ❤️

Stampin’ Up! NEW ONLINE EXCLUSIVES AVAILABLE TODAY

I’m seeing daffodils with their fat buds and some crocuses & jonquils in bloom already. What does that tell me – spring is coming! And, as of March 1 (that’s today) Stampin’ Up! has opened a new line of products called ONLINE EXCLUSIVES. That means these will not be in any paper catalog and are new items for your creative playing. Intertestingly, there is no end date for these products. However, some will be reordered when inventory is low, while others will only be available while supplies last. Which simply means more new products will be introduced throughout the year! Such a deal, isn’t it?

Stampin' Up! ONLINE EXCLUSIVES MAR 1

Best way to see what’s available is to go to the ONLINE STORE …Click here to go my store. Right now, today March 1, 2023 – you can see what’s available below.