Unknown's avatar

About TL's Bright Spot

I love to be creative - in the garden, crafting, and in leadership roles. There is something wonderful that happens when we design something new and share it with others. It's fun and makes everyone happy.

Stampin’ Up! Patterned Tags Dies Christmas Card

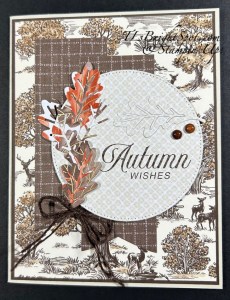
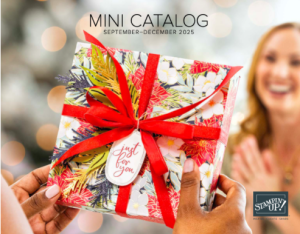
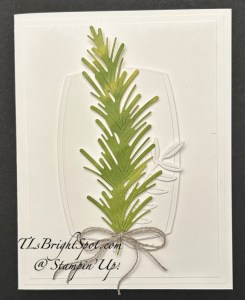
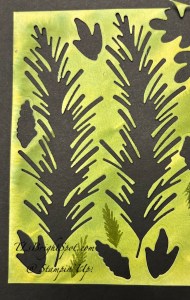
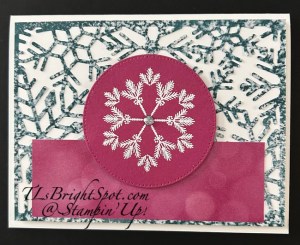
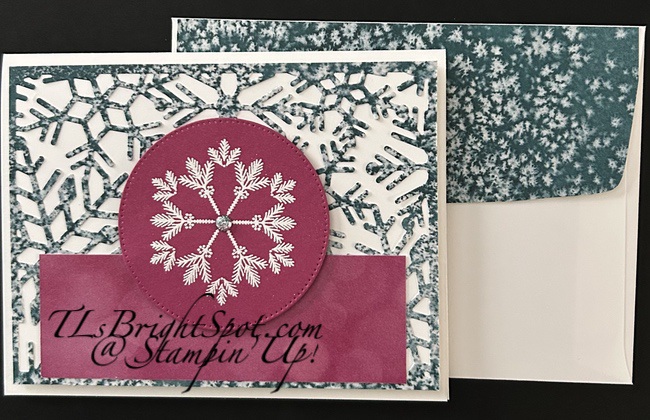
Good Saturday! It’s humid again here in NJ, and warm. And I thought cool weather might be here to stay – silly me. I have a pretty card for you today made with Peaceful Gardens 3D embossing folder and a new item from the Sep-Dec 2025 Mini Catalog – the Patterned Tags Dies. I’m displaying the tag with pine boughs, a rather intricate die.

Stampin' Up! Patterned Tags Dies C'mas Card front

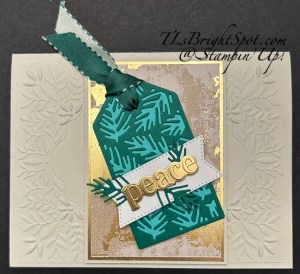
I started with a card base of Basic Beige and added a layer of Basic Beige run through the Peaceful Gardens 3D embossing folder. Next is an elegant front panel in layers: Basic Beige, Gold Foil and Season of Elegance Specialized DSP added to the front with dimensionals. Now, I could have stopped here and simply added a sentiment and embellishments. Instead, I added this fun tag die cut from Shaded Spruce and Summer Splash. After adhering those two die cuts together, I added the gorgeous ribbon from the Turte-Y- Awesome suite of products – Bordered Ribbon. To this tag I added the Basic White banner die cut with the stitched Shapes Dies on which I added the sentiment die cut from Gold Foil using the Christmas Words Collage Dies. And those pine bough die cuts were attached with dabs a liquid glue – came from the Patterned Tags die. This was attached to the card front with dimensionals.

Stampin' Up! Patterned Tags Dies card inside

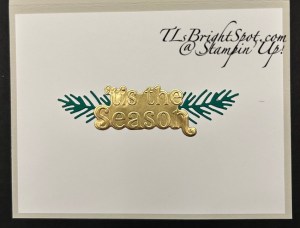
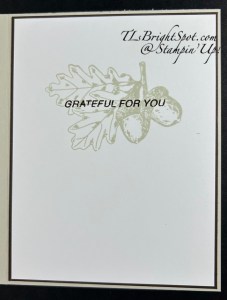
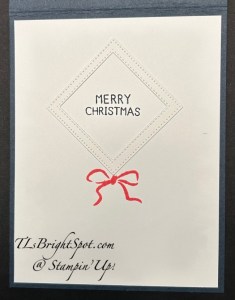
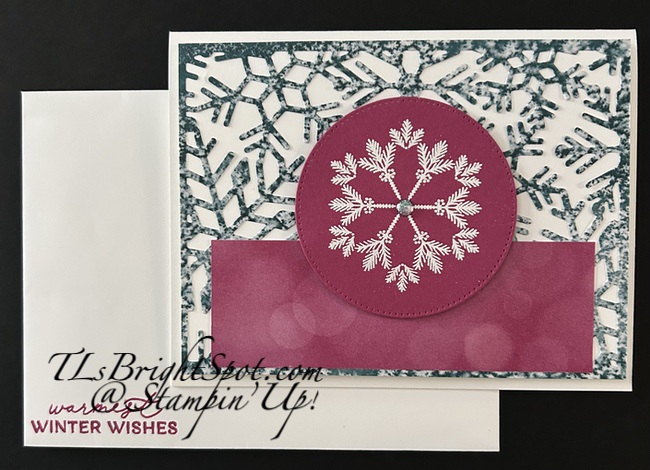
On the inside of the card, i added more of the pine boughs with liquid glue and another of the sentiments die cut from Gold Foil using the Christmas Words Collage Dies – all to the Basic White panel.

Stampin' Up! Patterned Tags Dies C'mas Card & envelope

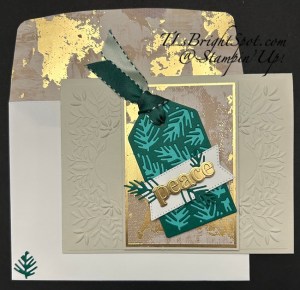
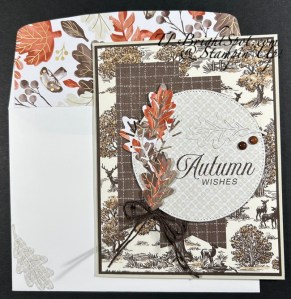
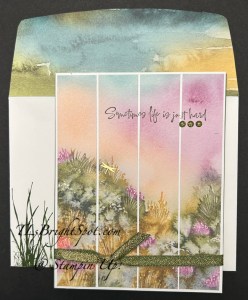
For the envelope… another piece of the Season of Elegance Specialized DSP to the flap & trimmed to fit. On the front, another of the pine bough die cuts from the tag adhered in place.

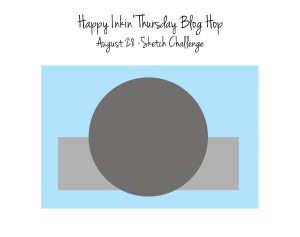
The layout for this card was inspired by Susan Campfield, a Stampin’ Up demonstrator. Below are the dimensions for making this card. The products to make this card are available from both the Sep-Dec 2025 Mini Catalog and from the Annual Catalog. You may find those items below, go directly to my store to purchase.

For every order of $50 & above from Sep. 3 to Sep 10, I will send not only the monthly tutorial (for September (it’s the Amber Autumn bundle!), but a package of the Hues of Blue Flowers. Get double daisy patch rewards too. Daisy Patch rewards is my way of thanking my customers for shopping with me. For every single order of $50 or more before shipping & tax, and every full increment of $50 order (before shipping & tax), earn double the daisy patch rewards during this week Sep 3 – Sep 10, 2025. Those rewards add up, and when you have 8 daisy patch rewards you’ll receive $40 worth of Stampin’ Up! product from me. Got it? good!

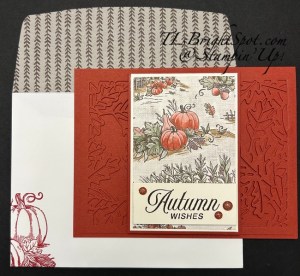
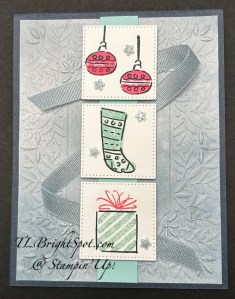
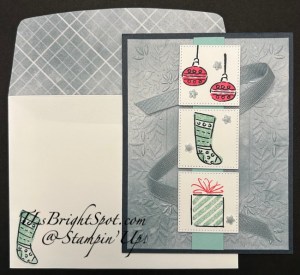
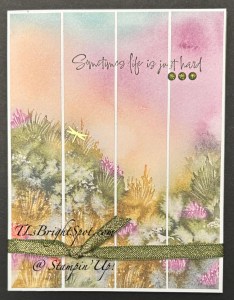
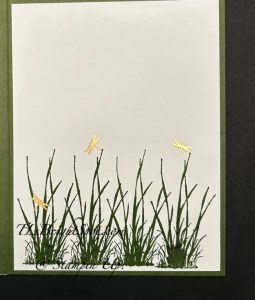
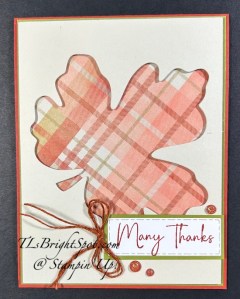
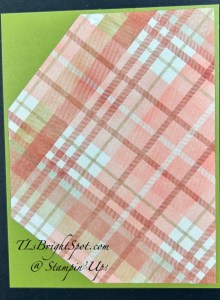
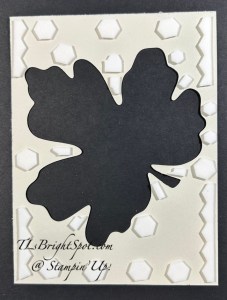
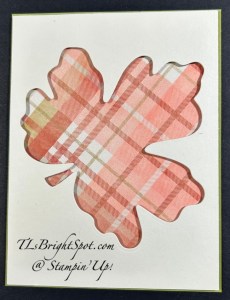
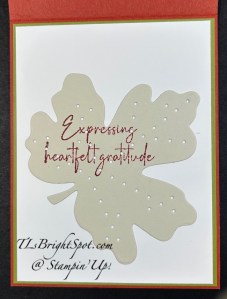
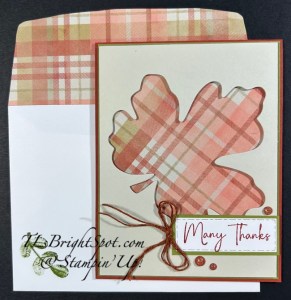
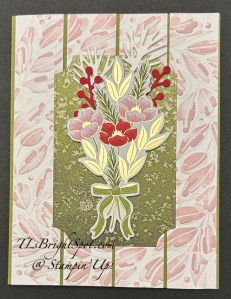
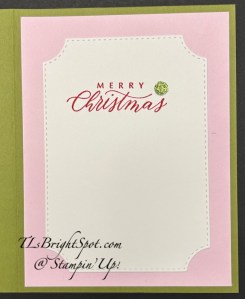
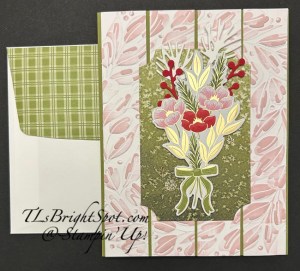
Here’s another card made with this same layout…

Stampin' Up! Faux embossed with Amber Autumn Dies

Thanks for stopping by. May you have a beautiful day. Make someone happy by sending them a handmade card filled with ❤️

Product List

Card cuts:

Basic Beige 8 1/2 x 5 1/2 scored at 4 1/4; 4 x 5 1/4 (embossed); 2 3/4 x 4

Gold Foil: 2 5/8 x 3 7/8: 6 x 6 (for Christmas Words Collage Dies)

Season of Elegance DSP: 2 1/2 x 3 3/4; 2 1/4 x 6 (flap)

Basic White: 4 x 5 1/4 (inside); 1 x 2 1/2 (banner)

Shaded Spruce & Summer Splash: each 2 x 3 1/2

Stampin’ Up! Amber Autumn Fall Card for the Happy Inkin’ Thursday Blog Hop

Welcome to Thursday and the Happy Inkin’ Thursday Blog Hop! Our theme today is an autumn card and I’ve chosen to make an avid card using the Amber Autumn Bundle and other products in the Autumn Toile Suite of products on pages 39-43 in the September – December 2025 Mini Catalog. If you look at page 42, you will see a similar card , I’ve just added a few items to make it a bit more wow!

Stampin' Up! Amber Autumn card front

Then card base is Basic Beige with an added layer of Early espresso & a slightly smaller layer of Amber Toile DSP. I created two strips (banners really) using the back side of the larger DSP panel. I trimmed the ends using the new & fabulous Party Banner Dies. With the largest of the circles in the Stitched Shapes Dies, I cut a circle from Gathering Together Specialty DSP. I turned this saame paper to the other side and die cut several leaves with the Amber Autumn Dies. With this die, then ‘vein’ of the leaves pops out. I mixed up those ‘veins’ and put them in other die cut leaves. The only one I left with it’s original center is the leaf die cut from the same side of the DSP as the circle. I stamped the sentiment in Early Espresso ink with an Amber Autumn sentiment, then popped the circle on the card front with dimensionals. I added the die cut leaves with liquid glue except for one – that’s on mini dimensionals. I tied a double bow with the coordinating Early Espresso Thread and attached it with a glue dot. Final touch… two Streaked Dots from the suite of products

Stampin' Up! Amber Autumn card inside

For the inside… I stamped the acorn & leaf image with Basic Beige ink. It comes from the Amber Autumn stamp set and it’s a favorite image! I then stamped the sentiment, also from the Amber Autumn stamp set in early Espresso ink. This Basic White panel was added to an Early espresso piece then attached to the inside of the card.

Stampin' Up! Amber Autumn card & envelope

For the envelope, another piece of the Gathering Together Specialty DSP was added to the flap & trimmed to fit. On the front, I die cut another leaf using the Amber Autumn Dies and Gathering Together Specialtyb DSP and attached it with glue to the front. This card is being sent to a special person who has a September birthday 😀. I really like this card.

Want to make this card? See the photos below & shop with me. Card cuts are listed below as well. For every order of $50 & above from today Sep. 3 to Sep 10, I will send not only the monthly tutorial (for September it’s the Amber Autumn bundle!), but a package of the Hues of Blue Flowers. Get double daisy patch rewards too. Daisy Patch rewards is my way of thinking my customers for shopping with me. For every single order of $50 or more before shipping & tax, and every full increment of $50n order (before shipping & tax), earn double the daisy patch rewards during this week Sep 3 – Sep 10, 2025. Those rewards add up, and when you have 8 daisy patch rewards you’ll receive $40 worth of Stampin’ Up! product from me. Got it? good!

Now, click the links below to visit the others participating in today’s blog hop.

Amy Koenders

Mary Deatherage

Karen Ksenzakovic

Akiko Sudano

Tara Carpenter

Terry Lynn Bright

Nicole Bloxom

Thanks for stopping by. May you have a beautiful day. Make someone happy sending them a handmade card filled with ❤️

Product List

Card cuts for today’s project:

Basic Beige: 8 1/2 x 5 1/2 scored at 4 1/4

Early Espresso: 4 1/8 x 5 3/8 (2)

Basic White 4 x 5 1/4

Autumn Toile DSP: 4 x 51`4; 4 x 1 1/2 (2)

Gathering Together Specialty DSP: 4 x 4 (die cuts); 2 1/4 x 6 (envelope flap

Stampin’ Up! Gift of Joy & Peaceful Garden Christmas Card

Good Wednesday – BIG DAY TODAY! Sep-Dec 2025 Mini Catalog LAUNCH and SEPTEMBER ONLINE EXCLUSIVE RELEASES. I’m sharing a card today that uses products from the Mini Catalog , mixing products. The stamped images come from the Gift of Joy stamp set onnpage 55. The embossed panel is done on Designer Series Paper from the Peaceful Garden Suite of products on pages 32-25. The embellishments are from that suite as well.

Stampin' Up! Gift of Joy & Peaceful Garden card front

I began by stamping the various images from the Gift of Joy stamp set in Secret Sea ink. I filled in the images using Pool Party and Strawberry Slush. I then die cut them with the Stitched Shapes Dies, second from smallest square. I added them to a Pool Party strip 3/4 x 5 1/4. Next I embossed a panel of Peaceful Garden DSP with the Peaceful Greenery 3D embossing folder. This gives a beautiful embossing and background. I adhered this embossed panel to Secret Sea card stock, then wove ribbon back & forth for movement and texture. The ribbon is Faux Linen Ribbon in Cloud Cover. I added the strip of Poll Party over top to hold the ribbon in place and added the stamped pieces with dimensionals. The final touch, several Hues of Blue Flowers from the Peaceful Garden Suite.

For the inside… When first die cutting the stamped images, I die cut the squares too large, so in cutting down to the appropriate size, I had a leftover ‘trim’ so used it to enhance the stamped sentiment 😀 The sentiment is from Gift of Joy stamp set and is stamped in Secret Sea ink. The gorgeous bow is stamped in Strawberry Slush and is from the Gift of Joy stamp set. This Basic White panel was added to the inside of the card & voila!

Stampin' Up! Gift of Joy & Peaceful Garden card & envelope

For the envelope, another piece of the Peaceful Garden DSP adhered to the flap & trimmed to fit. On the front, again the cute stocking first stamped in Secret Sea then stamped with Pool Party ink. Since this and the others are two-step images, this works well!.

This is not your traditional bright red & green for a Christmas card, but softer colors that still work. Stampin’ Up! does a great job of coordinating colors for doing just this kind of thing! Hope you like.Shop the products to make this card by clicking the images below.

For every order of $50 & above from today Sep. 3 to Sep 10, I will send not only the monthly tutorial, but a package of the Hues of Blue Flowers. Get double daisy patch rewards too. Daisy Patch rewards is my way of thinking my customers for shopping with me. For every single order of $50 or more before shipping & tax, and every full increment of $50n order (before shipping & tax), earn double the daisy patch rewards during this week Sep 3 – Sep 10, 2025. Those rewards add up, and when you have 8 daisy patch rewards you’ll receive $40 worth of Stampin’ Up! product from me. Got it? good!

Thanks for stopping by. May you have a beautiful day. Make someone happy sending them a handmade card filled with ❤️

Product List

Stampin’ Up! Prairie Grass and Thoughtful Journey

Good Tuesday, Sep 2 and 55 degrees here at the shore in NJ – not typical weather for this early in the month. When the kids return to school it is usually hot as blazes. But not this year… My card today is more than just thinking of you; it’s recognizing that life is not always easy. I used the Prairie Grass stamp set from the ONLINE EXCLUSIVES – it’s available to customers now. It’s become a favorite for things peaceful, restful, reassuring.

Stampin' Up! Thoughtful Journey, & Prairie Grass

I cut 1″ strips of Thoughtful Journey 6×6 DSP (1 x 5 3/8) and added them to a Basic White background. Next I stamped the sentiment in Mossy Meadow ink using the Prairie Grass stamp set. I took a length of Mossy Meadow & Gold trim, wrapped it around and tied a knot, securing it with a glue dot. I then added three Low Profile Sparkle Dtos under the sentiment. Finally, I added a single Adhesive-Backed Dragonfly. This completed front panel was added to a Mossy Meadow card base.

For the inside of the card, I stamped this grassy image four times across the bottom with Mossy Meadow ink. And yes, the stamp comes from Prairie Grass stamp set. I added three more of the Adhesive-Backed Dragonflies as they are very flat and so appropriate for this grassy scene. I adhered the Basic White panel to the inside of the card and voila – this card is ready to send.

Stampin' Up! Prairie Grass and Thoughtful Journey card & envelope

For the envelope… yet another panel of the Thoughtful Journey 6×6 was adhered to the flap & trimmed to fit. Again on the front, I stamped the same grassy image in Mossy Meadow ink from Prairie Grass stamp set to carry out the theme. This card will be sent today to a friend of mine who lives near the beach and diagnosed with ALS. Such an awful disease….

Tomorrow, Wednesday Sep 3, the Sep-Dec 2025 Mini Catalog will be open to ordering by customers – AND – there are some fabulous new ONLINE EXCLUSIVE products that can be ordered as well. If you do not have a demonstrator, I’d love to help you find your creative side. Click the image below to take you to my shop for purchases.

Stampin' Up! Sep-Dec 2025 Mini Catalog

Thanks for stopping by – may you have a beautiful day. Make someone happy by sending them a handmade card filled with ❤️


Product List

Stampin’ Up! Christmas Greenery + Label Me Grateful Dies

It’s Labor Day! Do you have plans to labor – or will you use this as a day to gather w/ friends & family? I have a card today made with lots of Basic White and just a bit of color. I used watercolor paper to create the focal green branch and the stunning Christmas Greenery Dies. The leaves are die cut from simple Basic White, using the Label Me Grateful Dies. But I get ahead of myself – let’s look at the card.

Stampin' Up! Christmas Greenery + Label Me Grateful Dies card front

The card base is Thick Basic White with two layers of regular weight Basic White added to create depth. Using the Label Me Grateful Dies, I die cut two same size labels, cut one in half and adhered it behind the other. This was attached, centered on the card front, with dimensionals. I die cut the branch of leaves in white and attached it with liquid glue. The watercolor pine bough is attached with dimensionals. I added a simple double Linen Thread bow with a glue dot – and that was it!

To create color on the watercolor paper…. I wet the entire piece with water, squeezed each ink pad container to get some ink in the lid, added a bit of water to that and simply added it to the watercolor paper. I used three colors – Granny Apple Green, Old Olive and Mossy Meadow. Once dry I die cut two of the pine boughs and some other things too. Bur for our purposes today – it’s just the pine bough that’s important. Here’s the watercolor paper after die cutting.

Stampin' Up! Christmas Greenery Dies and watercolor paper

for the inside of the card…I stamped the sentiment in Mossy Meadow ink using the Traditional Labels stamp set and added a 1/2 x 4 strip of Old Olive from Floral Delight DSP. I added the Basic White panel to the inside of the card and bam – all done.

Stampin' Up! Traditional Labels sentiment inside card

For the envelope, some of the same Floral Delight DSP in Old Olive for the flap, trimmed to fit.

Stampin' Up! Christmas Greenery and Label Me Grateful Dies card & envelope

These items will be available Wednesday Sep 3 and are in the Sep-Dec 2025 Mini Catalog showcased on pages 21-27 as parts of the Traditions of Christmas Suite. They may be purchased as a suite or individually. Click the catalog image below to shop with me.

Stampin' Up! Sep-Dec 2025 Mini Catalog

Thanks for stopping by. May you have a beautiful day! Make someone happy by sending them a handmade card filled with ❤️

Card cuts:


Thick Basic White – card base: 8 1/2 x 5 1/2 scored @ 4 1/4

Basic White – layers: 4 x 5 1/4 (2), one for card front, one for inside; 3 3/4 x 5

Basic White – labels: 2 1/2 x 7 1/2; leaves 1 1/4 x 3

Product List

Stampin’ Up! 2025-2027 In Color Sale is ending

Happy Sunday and the last day of August! Remember that today is the last day (11:59 PM MT ) to get in on the 2025-2027 IN COLOR SALE. Here are the details… Click the image below to shop with me!

Stampin' Up! 2025-2027 IN COLOR SALE
  • Sale includes select inks, cardstock, Designer Series Paper, embellishments, and other products that include these new In Colors. Only products featured on the 2025–2027 In Colors page are included in this promotion.
  • Some products are excluded from the sale, including the Month by Month Album Retreat 2025 kit (167338).
  • Products are available only while supplies last.

Here’s a video you might appreciate about color theory and the new In Colors

Stampin' Up! Cloud Cover color options

Cloud Cover: look at this options above for the many combinations of colors to pair with Cloud Cover: Petal Pink, Calypso Coral, Old Olive, & Pumpkin Pie

Stampin' Up! Darling Duckling color options

Darling Duckling color options: Coastal Cabana, Real Red, Melon Mambo, Bubble Bath

Stampin' Up! Secret SeaColor options

Secret Sea is one of my favorite new colors – a deep, deep blue: Balmy Blue, Berry Burst, Calypso Coral & Granny Apple Gteen

Stampin' Up! Strawberry Slush color options

And look at these color options for Strawberry Slush – another favorite: Lost Lagoon, Coastal Cabana, Secret Sea, & Lemon Lolly

Stampin' Up! Timid Tiger color options

Timid Tiger and it’s color options… Lost Lagoon, Misty Moonlight, Petal Pink & Mossy Meadow

Stampin’ Up! NEW Gathering Moments

Good Friday – my goodness August is flittering away – Monday is LABOR DAY! Today’s card is all about fall and it uses a September Release ONLINE EXCLUSIVE. The bundle is Gathering Moments.

Stampin' Up! Gathering Moments bundle
Stampin' Up! Gathering Moments card front

The card has a Basic Beige front from which I die cut the large leaf with Gathering Moments Dies. I wanted to use the Timeless Plaid 6×6 DSP behind the die cut but on an angle. This meant an odd shape for cutting the DSP and it needed to be slightly smaller than the Basic Beige card front. Once I cut the DSP I added it to an Old Olive panel and that to the card base of Cajun Craze.

Stampin' Up! Old Olive w/ Timeless Plaid 6x6 DSP
Stasmpin' Up! Gathering Moments die cut w/ dimensionals on back

I put dimensionals all over the back of the die cut panel and adhered it to the the card. I stamped the sentiment in Cajun Craze ink using the Gathering Moments stamp set and die cut the basic White with Textured Notes Dies. I cut a piece of Old Olive for a backing, adhered the two together and added them directly to the card front. I tied a double bow with Natural Tones Linen Thread then added three Cajun Craze and Gold Dots.

Stampin' Up! Gathering moments card front unfinished
Stampin' Up! Gathering Moments inside card

For the inside… I used the die cut that came out of the front die cut to stamp the sentiment from Gathering Moments in Cajun Craze ink. I added this to a Basic White panel then both to Old Olive then to the inside of the card base..

Stampin' Up! Gathering moments card & envelope

For the envelope, more of the Timeless Plaid 6×6 DSP on the flap trimmed to fit, then a single leaf stamped on the front: Gathering Moments stamp set in Old Olive ink. Totally fall – good for a masculine card too!

These new products are ONLINE EXCLUSIVES to be released Wed Sep 3. For those products available today, see the list below. Today (the 29th), tomorrow the 30th and Sunday the 31st, I have a special deal going on as Stampin’ Up! has a promotion through end of August of 2025-2027 In Color SALE. When shopping with me, I am offering with a $50 order & up, a spool of Linen Thread in addition to my regular benefits. Other benefits… the monthly tutorial sent right to your inbox, daisy points to add together for a free item down the road, and having fun with the Stampin’ Up! products. Shop the In Color Sale by clicking the image below.

Stampin' Up! 2025-2027 In Color Sale

Last chance products are available through my store as well – click the image below to view those items, updated regularly by Stampin’ Up!

Stampin' Up! LAST CHANCE PRODUCTS

Thanks for stopping by. May you have a beautiful day. Make someone happy sending them a handmade card filled with ❤️


Product List

Stampin’ Up! NEW Delicate Pines for the Happy Inkin’ Thursday Blog hop

Welcome to our weekly blog hop! We have a sketch challenge today and I’m using the Delicate Pines stamp set to create the snowflake for my centerpiece and the Snowflake Kisses Dies for the background. These are ONLINE EXCLUSIVES being released Wed. Sep 3 and are part of the Elegant Pines Snowflakes Suite of products – both are bundles. The Designer Series Paper in the suite is called Elegant Pines Snowflakes DSP & it comes in the 12×12 size. It’s gorgeous – I used the ‘back side of one of the papers.

Stampin' Up! Delicate Pines card front

These. are so non-traditional colors that it sorta makes me second guess myself – and yet, it’s growing on me! I used the Color Wheel for help… 😀 So how to make this card.

  • Add an adhesive sheet to the Elegant Pines Snowflakes DSP cut 4 x 5 1/4. Run through the cut & emboss machine to create die cut, remove backing on Adhesive Sheet and add to a Basic White panel 4 x 5 1/4. Put dimensionals on the back and add to a Thick Basic White card base 8 1/2 x 5 1/2 scored at 4 1/4.
  • Cut a strip of Beautiful Bokeh 6×6 DSP 1 1/2 x 4 and add over the die cut piece.
  • Stamp the snowflake image using the Delicate Pines stamp set (remember this is also a bundle, so it has dies!) with VersaMark ink on a 3″ square of Berry Burst card stock. Sprinkle with WOW! White Embossing Powder and heat set. Once cooled, die cut with 2nd largest circle of Stitched Shapes Dies and add to card front with dimensionals.
  • Add a single embellishment in the center of the snowflake – Two-tone Sparkle Gems.
  • Card front is complete!!!
Stampin' Up! Greetings for All Mix & Match Ephemera Pack card inside

For the inside… when die cutting the snowflake background, there is a center circle that also is die cut. I set it aside at the time and added it to a Basic White inside panel (4 x 5 1/4), removing the adhesive sheet to attach it. The Greetings For All Seasons Mix & Match Ephemera pack has the perfect sentiment – and I added it with liquid glue. As a final touch, I added two more of the Two-Tone Sparkle Gems next to the sentiment. I added the panel to the inside of the card – and one & done!

For the envelope… pictures below… I stamped the sentiment in Berry Burst ink using the Delicate Pines stamp set on the front of the envelope. For the flap, I added more of the Elegant Pines Snowflakes DSP and trimmed to fit. As I said… it’s growing on me 😀

To continue on the hop, click on the ‘next’ button or click on a name. Enjoy – you will be amazed at the creations!

Amy Koenders

Mary Deatherage

Karen Ksenzakovic

Akiko Sudano

Tara Carpenter

Terry Lynn Bright

Nicole Bloxom

Thanks for stopping by. May you have a beautiful day. Make someone happy by sending them a handmade card filled with heart

Stampin’ Up! NEW Branching Out Dies w/ Fall

Good Wednesday – mid week day – and how’s it going? Here in NJ we are experiencing cool nights, down to 57 or so then the temp rises to 81-84. It’s thew cool nights that are unusual and I’ve been trying to take advantage of that coolness to do yard work – like pulling out grass when it’s grown where it shouldn’t into flower beds. It’s back breaking but necessary. Anyway – sorry no post yesterday – I got outside and didn’t finish my post. 🥴

The card… is really just Old Olive and white – the focal point is the sweetest leaves from a July release ONLINE EXCLUSIVE bundle called Label Me Grateful. I used two dies from this, the leaves and the acorns. The Branching Out Dies are from the September-December 2025 Mini Catalog, also part of a bundle. Let’s take a look at the card.

Stampin' Up! Branching Out Dies w/ fall

I began with watercolor paper and a couple of inks: I wet the water color paper then added Old Olive and Granny Apple Green and maybe a dab of Mossy Meadow with a water painter. I’m not sure that darkest color shows up in these leaves though. I set this aside to dry while creating the rest of the card. I die cut four layers for the card front from Basic White using the Branching Out Dies. The two largest I adhered together. The smallest die cut I ran through a brand new embossing folder from the September ONLINE EXCLUSIVE called Gathering Leaves (it’s part of a suite of products but can be purchased separately. It will be available Wednesday Sep 3)) Once embossed I adhered the two smallest Branching Out die cuts together. These two got dimensionals and attached to the two larger Branching Out die cuts. I also die cut from the Label Me Dies the sweet branch of acorns – also from Basic White. With the watercolor paper now dry, I die cut the leaves for the front, but dimensionals on the back, placed the acorn die, then the leaves over that. I created a double Linen Thread bow and added it with a glue dot. I took a panel of Floral Delight DSP and added it to my Thick Basic White card base, then added the rest. I love the simplicity of the colors and lots of white.

Stampin' Up! Watercolor & Label Me Grateful Dies
Stampin' Up! Branching Out Dies for card front

For the inside… a similar leaf to the die cut leaves on the front is in the Gathering Moments bundle – remember it’s a September Online Exclusive release on Sep. 3. I stamped the image in Old Olive, using the one time stamp off method, then used full strength Old Olive ink for the sentiment – also from the Gathering Moments stamp set. I added a 1/2″ strip of the DSP to the bottom of the Basic White panel then attached it to the inside of the card.

Stampin' Up! Gathering moments inside card

For the envelope… More of the Floral Delight DSP added to the flap and trimmed to fit. On the front I stamped the same leaf image from Gathering Moments stamp set using the one time stamp off method.

Stampin' Up! Branching Out Dies w/ fall card & envelope

Stampin’ Up! has a fabulous sale going on right now – the 2025-2027 In Color Sale. It ends Aug 31. Over the next five days, when you place an order of $50 or more with me, regardless of what Stampin’ Up! products you purchase, I will send you a spool of the Linen Thread. That little prize will end at close of day Aug 31. Get your orders in quickly! Click the image below to go straight to the In Color Sale. Or see what’s available in the Last Chance products – or search through the 2025-2026 Annual catalog or ONLINE EXCLUSIVES. So many fabulous products.

Stampin' Up! 2025-2027 In Color Sale

Last Chance Products – click the image below to take you to shopping with me from that list!

Stampin' Up! Last Chance products

And remember those ONLINE EXCLUSIVES! CLICK HERE FOR THOSE PRODUCTS.

Thanks for stopping by. May you have a beautiful day. Make someone happy by sending them a handmade card filled with ❤️

Product List

Stampin’ Up! Christmas Wreath Embossing Folder

In the new September-December 2025 Mini Catalog on pages 21-27 the Traditions of Christmas Suite of products is showcased. The Christmas Wreath embossing folder creates a beautiful large wreath. Some time ago I had embossed this wreath on a Basic White panel then used a Bubble Bath ink pad to run across it. I set this aside and created other cards with the suite of products, but this wreath I left alone – until now. This is what I created with it.

Stampin' Up! Christmas Wreath 3D EF

The original size of the embossed wreath was 6 x 6. I cut this in 1 x 5 1/2 strips, discarding the first & last strips. The remaining four strips were added to an Old Olive card base, creating a rather stunning background. A September – December 2025 Mini Catalog release is called Branching out (page 50), and it’s a bundle (stamp set & dies). I used one of the dies to die cut the old olive panel of Elegant Pines Snowflake 12×12 DSP and attached it to the center of the card. I die cut from Basic White the additional sprigs poking out the top of the bouquet. The bouquet is cut directly from Traditions of Christmas 12×12 DSP with a Christmas Greenery Dies. With Real Red I die cut the two berry sprigs using the Christmas Greenery Dies. I added these to the card front with dimensionals and liquid adhesive. Final touch for the card front are three Traditional Sparkling Sequins in gold.

Stampin' Up! Christmas Wreath 3D EF, inside card

For the inside… I carried out the Bubble Bath with a panel adhered to the Old Olive card base. Using a larger Branching Out Dies, I cut the Basic White panel, stamped the sentiment in Real Red using a September ONLINE EXCLUSIVE stamp set called Hope & Peace. I added a single Traditional Sparkling Sequin in green.

Stampin' Up! Christmas Wreath 3D EF card & envelope

For the envelope… I adhered a piece of the Traditions of Christmas SDSP to the flap & trimmed to fit – and that was it. I am going to go back and add a stamped in Real Red ink bow to the front of the envelope, using the Christmas Greenery stamp set.

If you. do not have a demonstrator, reach out to me to get the new Sep-Dec 2025 Mini Catalog!

Stampin' Up! September - December 2025 Mini Catalog

The 2025-2027 In Color sale ends Aug 31. Click the image below to shop those products with me.

Stampin' Up! 2025-2027 In Color Sale

Last chance Products are just that – last chance. There are some awesome bargains on this list. Click the image below to take you to my store and the last chance products.

Stampin' Up! Last Chance Products

Thanks for stopping by. Make someone happy sending a handmade card filled with ❤️

Product List