SU! Dove of Hope Bundle

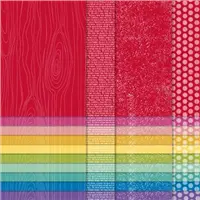
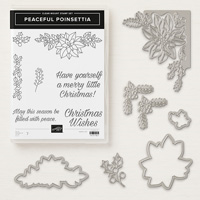
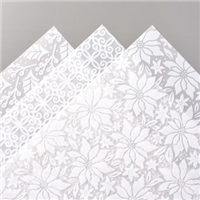
Hello again… I think you are going to love this card… it’s a slimline card made with the Dove of Hope Bundle and Plush Poinsettia Specialty Paper. Gosh this is pretty … velvetty-like on vellum.
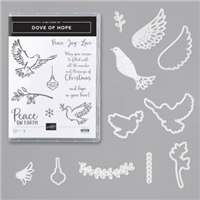
Dove of Hope Bundle
#1

This definitely non-traditional Christmas colors, but I’m really pleased with the way it turned out. Let’s talk about how we did this…

  • Thick Whisper White card base – slimline fashion
  • Layer of Blushing Bride cs adhered with liquid glue to the card front
  • Plush Poinsettia Specialty Paper layer adhered with liquid glue HINT: glue in strategic spots on the backside of the ‘plush’ where the plush comes together.
  • Stamp the dove with Smokey Slate ink onto Whisper Whiter cs.
  • Using the Detailed Dove Dies from this exquisite bundle, die cut the stamped dove.
  • Die cut the ‘olive branch’ out of Mint Macaron cs.
  • Adhere the ribbon – Snowflake Splendor Ribbon – using snail
  • Adhere the dove over the top of the ribbon with dimensionals.
  • Stamp the sentiment from the Dove of Hope stamp set, again in Smokey Slate ink, on a Whisper White strip. Punch the ends using the Lovely Labels Pick a Punch. 
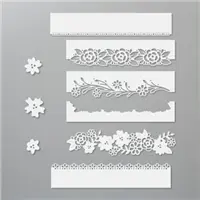
  • Using the Ornate Borders Dies and a 1/2″ x 3 1/4″ scrap of Blushing Bride, cut a decorative border. Add to the back of the sentiment banner with liquid glue and trim for proper length. Adhere banner with dimensionals to the card front.

For the inside…

Dove of Hope Bundle #2

  • Adhere Blushing Bride cs to the card inside
  • To a Whisper White panel, stamp the sentiment from Dove of Hope stamp set in Smokey Slate ink.
  • Over the top of this stamp the larger ‘olive branch’ with stamped off twice Mint Macaron ink.
  • Adhere this panel to the card inside and the card is complete.

Dove of Hope Bundle
#3

Now for the envelope… first we create the envelope 😊 – easy peasy

  • Using a full 8 1/2 x 11 Blushing Bride cs, score on the long side @ 2 1/2″ & 6 1/2″. Score on the short side 1 1/2″ & 10 1/2″. Burnish all score lines.
  • Remove the corners by cutting along the score lines.

On the 1 1/2″ end, use the Detailed Trio Punch, round the corners. Your piece should look like this…

Slimline envelope #4

    • Fold in the 1/2 end, add Tape n Tape or liquid glue and fold over the 2″ length, adhering it.
    • Add liquid glue to the long side and  fold the 2 1/2″ length over it. Your envelope is created!
    • Now decorate… I stamped the sentiment from the Dove of Hope stamp set in Smokey Slate ink, then added the snowflake from the same stamp set near the sentiment and several on the envelope flap, also in Smokey Slate ink.

      Slimline envelope
      #5

      Such a fun and beautiful card using this wonderful Dove of Hope Bundle. I do hope you will try this and would love to see your version.  Card cuts are listed at the end of this post. Would love to have you shop with me – and the items used for this project are shown below. Just click on them and it will take you directly to my online shop to complete your purchase – or… click “add all to cart” :O)

      Thanks for stopping by.

    • May you have a beautiful day.
    • Make someone happy by sending them a handmade card filled with love.
Card cuts for todays card…
  • Thick Whisper White 8 1/2 x 7
  • Blushing Bride 2 1/2 x 7 for card front,1/2 ” x about 3 1/4″ scrap for under sentiment panel, 3 x 8 for inside, 8 1/2 x 11 for envelope
  • Whisper Whiten – 3 x 3 for the dove die cut, 1/2 x 4 for the sentiment banner, 2 1/2 x 7 1/2 for the inside panel

li>

SU! Tag Buffet w/ Itty Bitty C’mas

Hi everyone! It’s been a couple of days since I posted… things have been a bit crazy here. Another gorgeous day here on the East Coast. Truly, I wish this would last a while. We’ll wait for Mother Nature to decide though :O) Today’s card…

Tag Buffet w/ Itty Bitty C’mas
#1

And here’s how…

  • With an acrylic block, stamp the block on an ink pad, stamp off then stamp on the Whisper White card stock This leaves a fun background on which to stamp.I first used Mango Melody, then Pacific Point then Just Jade inks. It doesn’t make a sold imprint but one that easily will show another stamp over it.
  • With Tuxedo Memento Black ink, stamp the image directly on the center of the ‘inked spot’. This adorable ornament comes from Tag Buffet stamp set.
  • I did some minor coloring on each ornament using Mango Melody Blends, Pretty Peacock Blends and Just Jade Blends.
  • Stamp the word ‘believe’ in the open area of the center ornament. This comes from Itty Bitty Greetings stamp set and I used Tuxedo Black Memento ink.
  • Using a Take Your Pick Tool, poke a hole in the ornament top and slip a bit of string or  ribbon through to the back and tape. Here I used the Misty Moonlight/ silver Bakers Twine from the Flowers for Every Season Ribbon Combo Pack. Add a bow with a glue dot on the center ornament.
  • Adhere this completed Whisper White panel to a piece of Pacific Point card stock.
  • Adhere a panel of Bright 6×6 DSP to the Thick Whisper White card base with liquid glue.
  • Now attach the decorated  panel to the card front with dimensionals.
  • The sentiment banner was stamped with Tuxedo Black Memento ink on a Thick Whisper White 1/2″ strip. 
  • I trimmed the ends with the Banners Pick a Punch. Adhere with dimensionals to the card front.
  • For a final touch I added these fun and elegant Blue Adhesive-Backed Gems.

The inside was super easy…

Tag Buffet w/ Itty Bitty Greetings
#2

  • Add a strip of the Brights 6×6 DSP in Pacific Point to the bottom of the card.
  • Stamp the sentiment from Itty Bitty Greetings stamp set in Tuxedo Black Memento ink.
  • Adhere to card inside with liquid glue.

The envelope…

Tag Buffet & Itty Bitty Greetings
#3

  • With another piece of the Brights 6×6 DSP in Pacific Point, adhere with liquid glue to the envelope flap and trim to fit.
  • Stamp the ornament o0n the front of the envelope with Tuxedo Black Memento ink using the Tag Buffet stamp set.
  • Again I colored with Just Jade Blends and Bronze Blend for the top. Remember to slip a piece of scrap card stock in. the envelope before coloring or the blends will bleed through.
  • Products to purchase to make this card may be found below. Card cuts may be found at the bottom of this post.
  • Fun card to create folks and so easy using an acrylic block to create the background.

Only a couple more days before the end of the ‘joining’ special offered by SU! Here is the info once more. Join my team and let’s have some F-U-N.

  • SU! has a promotion going on for new recruits that is a win-win for everyone… for $99 you will get a starter kit worth of products valued at $125 – plus two card sets with instructions & an additional stamp set & Rhinestones. What’s not to like about that? Join my team- and yes, do it NOW so you get all the benefits of this awesome deal. More details below.

.

  • In addition to the regular starter kit (for $99 USD/$135 CAD, new recruits choose $125 USD/$165 CAD-worth of products) new recruit will also receive enough card stock pieces to make 16 cards, a pack of Rhinestone Basic Jewels, the So Much Love stamp set, and the Queen Anne’s Lace stamp set—all for their first event.
  • 8 packs of precut card stock of the coastal cabana pack will be provided, and 8 packs of precut card stock of the Granny Apple Green pack, for a total of 16 cards (packs include envelopes). The new recruit can choose what samples to replicate and how to distribute the packs to their customers.
  • Important note: Ink, adhesive, cutting tool, and clear block for stamping must be purchased separately. However, these products may be included as part of the Starter Kit product selection.

Thanks for stopping by.

May you have a beautiful day.

Make someone happy by sending therm a handmade card filled with love.

Card cuts for today’s card

  • Thick Whisper White 4 1/4 x 11 scored at 5 1/2
  • Brights 6×6 DSP, Pacific Point 4 x 5 1/2, 2 1/4 x 6 (envelope flap) + 1 /4 x 5 1/4 for inside strip
  • Pacific Point 2 7/8 x 5 3/8
  • Whisper White 1/2 x 3 (sentiment banner), 2 3/4 x 5 1/4 (decorated front panel), 4 x 5 1/4 (inside)


SU! Poinsettia Petals Bundle

Hi again – DO HOPE you have taken the opportunity to purchase stamp sets during today’s 24 hr STAMP SALE! If not, get on it 😏


Today’s card is another using the Poinsettia Petals Bundle – I just love this set… so FUN to create using different colors, either on the bloom (bract) itself or the background. I’ve done both today…

Poinsettia Petals Bundle
#1

Is this gorgeous or what?! Now that I look at it, I guess I could have added some linen thread behind the poinsettia for more texture – that might have been very nice. What I DID add was Shimmery Crystal Effects to the berries. It adds a wonderful sheen in real life – not certain it shows in this photo though. I also add the same Shimmery Crystal Effects to the center of the flower on the envelope. Again, it doesn’t show but I did do it. So, steps, how to..

  • Thick Whisper White for the card base
  • Crumb Cake layer both inside and out
  • ‘Tis the Season 6×6 DSP – die cut with second largest Stitched Rectangles Dies
  • Whisper White for stamping/ die cutting the poinsettia, leaves & sentiment: Stamp everything using Tuxedo Black Memento ink. Color the Poinsettia layers with Crumb Cake Blends; color the leaves with Just Jade Blends, color the berries with Cherry CobblerBlends. Die cut all: 2 small leaves, 1 large leaf, 4 layers of poinsettia bracts and 3 berry clumps. Curl the poinsettia bracts and leaves with a bone folder.
  • Adhere the DSP layer to the Crumb Cake with liquid glue.
  • Adhere the poinsettia together with liquid glue. Adhere flower to the DSP/ Crumb Cake panel with liquid glue. Place leaves and adhere with liquid glue. Lastly add the berry clumps, again with liquid glue.
  • Cover the berries with Shimmery Crystal Effects and set aside to dry.
  • Stamp the sentiment from the Poinsettia Petals stamp set with Tuxedo Black Memento Ink and fussy cut. Place on Mini dimensionals and adhear to the card.
  • If the Crumb Cake/ DSP panel with the poinsettia/ berries is now dry, put dimensionals on the back and adhere to the card base.
  • Add a single Beaded Pearl to the poinsettia center then add Pearl Basic Jewels for the final touch completing the card front.

The inside…

Poinsettia Petals, inside
#2

  • Stamp the sentiment from the Poinsettia Petals stamp set in Tuxedo 
    Black Memento Ink on a panel of Whisper White
  • With a leaf stamp from Poinsettia Petals stamp set, stamp off twice with Just Jade ink and stamp in center of the sentiment.
  • Adhere the Whisper White panel to the Crumb Cake panel with liquid glue then add this to the inside of the card.

Envelope…

Poinsettia Petals Bundle
#3

  • Cover the envelope flap with a strip of the ‘Tis the Season 6×6 DSP (I used the same pattern). Add a strip of Crumb Cake cs to complete the flap. Trim.
  • On the front, stamp the poinsettia from the Poinsettia Petals stamp set in Tuxedo Black Memento Ink.
  • Color with Blends: Crumb Cake for the bracts, Cherry Cobbler for the center. TIP: be sure to slip a piece of scrap card stock inside the envelope when coloring the poinsettia – otherwise it will bleed through to the back of the envelope – and that’s a no-no.
  • Cot the center of the flower with the Shimmery Crystal Effects and let dry.

Poinsettia Petals Bundle
#4

Whee! This gorgeous card is ready to sending to someone special in December! Card cuts are listed at the bottom of this post.


p style=”text-align: center;”>Thanks for stopping by.

May you have a beautiful day.

Make someone happy by sending them a handmade card filled with love.

Card stock cuts for today’s project…

  • Thick Whisper White 8 1/2 x 5 1/2 scored at 4 1/4
  • Crumb Cake 3 3/4 x 5 (2)
  • Whisper White 3 5/8 x 4 3/4 (inside) probably 5 1/2 x 8 1/2 for die cuts
  • ‘Tis the Season 6×6 DSP cut with Stitched Rectangles Dies OR… 4 5/8 x 3 3/8


SU! Birthday Triple Cube Pop Up Fun Fold

Hellooooo 😁 It’s F-A-L-L, officially… and today’s card is sort of fall and definitely a birthday card. It was, I confess, my first attempt at making this fun fold, and I’m generally pretty pleased with it. We learn from mistakes, hopefully, and I should make another real soon as to remember what I would do differently… Here ’tis…

Triple Box Fun Fold
#1

The gorgeous Gilded Autumn Specialty DSP is the highlight of this card – and the background to it is the Brushed Metallic card stock in copper and the card base is Cinnamon Cider. I used the Ornate Frames Dies to frame the sentiment and Fancy Phrases stamp set for the sentiment. I added the Gilded Gems on the sentiment label.

Ornate Frames Dies, Gilded Gems
#2

The Butterfly Gala Bundle (stamp set/ butterfly punch) were used for the butterflies (3 of them) and several Blends for coloring: Lt Purple Posy, Lt Bermuda Bay and Lt Mango Melody. To add as bit of glam on the butterflies, I added Champagne Rhinestone Basic Jewels. I also used gold metallic trim for the butterfly antennae – this is from the Forever Greenery Trim Combo Pack.

For the “inside” decorations I used the Forever Gold Laser-Cut Specialty DSP and the Boho Indigo Dies for the vases.

Triple Fun Fold, inside
#3

On another of the ‘inside panels” I created a banner/ tag using the Fancy Phrases Bundle (stamp set and Fancy Tag Topper Punch).

Fun Fold, inside
#4

Fancy Tag Topper Punch
#5

The tag was stamped in Tuxedo Black Memento ink, then the flowers colored with Calypso Coral and Just Jade Blends. Champagne Rhinestone Basic Jewels were centered on the two flowers. Basketweave & Metallic Ribbon Combo Pack – copper metallic for the trim + Forever Greenery Ribbon Combo Pack using the Vanilla. I did trim the width to allow it to slip inside the prepared sleeve.

Here are photos in general preparation of this FUN FOLD… card cuts will be. listed at the end of this post.

Triple Box Fun Fold
#6

Triple Box Fun Fold
#7


tabs for holding the sentiment
#8

This is great picture of the tabs to hold the sentiment… each is about 1/2″ width x 2″ in length then folded in half. Adhere tear n tape to each side. Adhere the folded side to the fold of the lower ‘boxes’, centering. Remove tear n tape and carefully apply sentiment tag.

sentiment added to tabs
#9


Triple Box Fun Fold
#10

What a fun project… I suggest/ highly recommend doing a You Tube search before beginning this project. That will be very helpful – and there are several out there. Find what works best for you.

Thanks for stopping by.

May you have a beautiful day.

Make someone happy by sending them a handmade card filled with love.

The above card was made for our daughters birthday and given to her yesterday. She’s a sweetheart – and of course we are not prejudiced at all. 😏

Shop with me? Below are the products used for today’s card.

Current Host Code from now through Sep 30 GNH9MVXK

Earn a SU! item worth $10 when your order is over $50

(one free item per month please/ thank you!

<div><div><div id=”0a60eb34-89c3-4b03-8256-27c9ee4261f7″>https://mystampinblog.com/Showcase/Details/294f4087-cb28-464e-9dd3-d2000942d8f7?layout=Tiled&showSku=True&showPrice=True&showSalePrice=True&showAddToCart=False&showAddAllToCart=True&showDownload=True&transparent=True&bordered=True&hFontHeight=14&rFontHeight=13&imageHeight=120&middleContent=False</div>https://mystampinblog.com/Script/ShowcaseDetailsScript</div></div>


Card Cuts for today’s project:

  • Cinnamon Cider : 5 1/2 x 11 1/2 (main cube) scored at 2 3/4, 5 1/2, 8 1/4 and 11; (side cubes) 2 3/4 x 11 1/2 scored at 2 3/4, 5 1/2, 8 1/4 and 11 – cut  & prepare 2
  • Card stock mats (I used Brushed Metallic) 2 1/2 square (6)
  • DSP: 2 1/4 square (6) I used Gilded Autumn SDSP
  • DSP for inside coverings: 2 1/2 square (6) I used Gilded Autumn SDSP
  • Card stock for tabs, 1/2 x 2 (2)
  • Card stock for sentiment banner – depends on what banner/ sentiment chosen
  • addition… sleeve for tag – 2 5/8 x 5 1/4; tag – 2 x 5


SU! Winter Woods

Howdy! It’s Sunday… do you have routines for a Sunday? We certainly do… and they have changed some ever the last several months due to the pandemic. I look back and remember the routines of my family on a Sunday – it was something that could be counted on. I wonder in our routines of a Sunday if it’s something that will be handed down. I just finished reading a book by Lisa Wingate – The Book of Lost Friends. It’s about generational history, beautifully written. I highly recommend it.

Today’s card looks like tradition to me – a stately tree, decorated for the holidays.

Winter Woods
#1

Here’s what’s needed for this project….

  • Thick Whisper White card stock and regular Whisper White cs
  • Winter Woods stamp set
  • Cherish the Season stamp set (inside sentiment)
  • Ornate Frames Dies (banner on front)
  • Just Jade card stock/ ink
  • Cherry Cobbler ink
  • Old World Paper 3D Embossing Folder
  • Star Designer Elements
  • Wonderful Gems

On a Whisper White panel, stamp this beautiful tree from Winter Woods stamp set in Just Jade ink. My inking pad is very inky so it was necessary for me to stamp off once. With another Whisper White scrap – say 1 1/4 x 3, stamp the sentiment in Cherry Cobbler ink. I love this combined font – so crisp! Using a die from Ornate Frames Dies, die cut, add dimensionals and adhere under the tree. Adhere this tree panel to Just Jade cs. It too should have dimensionals before adhering to the Thick Whisper White card base. I added the Star Element at the tree top, then the Wonderful Gems all over the tree and on the sentiment panel as well.

For the inside…

Winter Woods, inside
#2

I love how this turned out, and there’s a story here. I had cut my Whisper White panel and must have gotten distracted, cuz I stamped the trees as though it was a landscape profile, not portrait!  (Yes, I needed to stamp off once more.) I went ahead and stamped the sentiment from Cherish the Season stamp set in Cherry Cobbler ink. It was then I realized the error. 😳 Instead of going into a panic, I simply cut the inked paper down to size, adhered it with liquid glue to the Just Jade panel and then into the card base. I adhered another panel below it for writing a message. Project saved!!!

For the envelope…

Winter Woods
#3

I used a strip of Just Jade cs and ran it through the Old World Paper 3D Embossing Folder, adhered it with liquid glue and cut it to fit. For the from I stamped this sweet pine needle from the Winter Woods stamp set along the side and bottom in stamped off once Just Jade ink, And the card is complete – yay…

Thanks for stopping by.

May you have a beautiful day.

Make someone happy by sending them a handmade card filled with love.


<div><div><div id=”a9bc2bf4-c30d-4dbc-8578-16f4a7709b63″>https://mystampinblog.com/Showcase/Details/91952bed-c575-4eea-b807-746c5052c2bf?layout=Tiled&showSku=True&showPrice=True&showSalePrice=True&showAddToCart=False&showAddAllToCart=True&showDownload=True&transparent=True&bordered=True&hFontHeight=14&rFontHeight=13&imageHeight=120&middleContent=False</div>https://mystampinblog.com/Script/ShowcaseDetailsScript</div></div>

Card cuts for this project:

  • Thick Whisper White 4 1/4 x 11 scored at 5 1/2
  • Whisper White 3 3/4 x 5, scrap – say 1 1/4 x 3 (for front); 3 3/4 x 5 OR as shown 3 3/4 x 3 3/4, 1 1/8 x 3 3/4 (for inside)
  • Just Jade 4 x 5 1/4 (x 2), 2 1/4 x 6


Whisper White

SU! Sep. Team Projects

Hi Everyone – it’s Saturday! It’s amazing what cool weather can do…this is that in-between season, before the leaves turn and fall – cool temps, absolutely perfect for sleeping, not quite cool enough for a fire in the fireplace though. We live in a ‘shore community’ and have lots of folks visit due to the many beaches. By now though, the beaches are OURS again….😁

Today I want to share a couple of team projects we created virtually ‘together’ last Sunday. We had been sent pictures and dimensions and instructions via email, but then created them via ZOOM. What a great tool ZOOM has become! Anyhoo – these are fun projects and primarily use the Celebration Tidings Bundle. The stamp set has stamps for Halloween, Thanksgiving, Christmas AND Valentines!  Here are three of the projects…

Celebration Tidings Bundle and Poinsettia Petals


Isn’t this beautiful? Yep – the bag is empty – I had no candy to fill it, but the Celebrations Labels Dies create the ‘fold-over’ and background for the Poinsettia Dies. Plaid Tidings 6×6 DSP was used for the ‘label’, Shaded Spruce for the leaves, a bit of Brushed Metallic for the berries, Cherry Cobbler for the poinsettia and the gorgeous Beaded Pearls to accent the center of the poinsettia. . The cello bag pictured here is a retired commodity (unfortunately)n but SU! has Mosaic Gusseted Cello Bags that are very versatile.


celebrations Tidings Bundle
Project #2


Project #2 is a Christmas card… Celebration Tidings Bundle, Stitched Rectangles Dies and Winter Snow 
Embossing Folder were the primary SU! items used. Another pattern from Plaid Tidings 6×6 DSP was a major focus and I love how the Celebration Dies were used for a fold-over flap for a surprise addition. It was my personal addition of the Linen Thread bow and Red Rhinestone Basic Jewels for the card front. Let me share inside the flap and the card inside as well.


Celebration Tidings Bundle, inside flap

It was my decision to add the Plaid Tidings 6×6 DSP to the top inside of the die cut. And here’s my reasoning… When using the Blends to color, the stamping element, their is some bleeding through and I didn’t like the way that looked. I simply used the smallest die to cut a piece of DSP to cover the bleeding through. It makes it look more complete and professional to me. Now for the inside…

Celebration Tidings C’mas card inside
Project #2


I chose to do no coloring for the inside – I liked the simplicity, and no additional sentiment needed – lots of room for sharing a friendly update!


Project #3 is a fall card, again using the Plaid Tidings 6×6 DSP and the Celebration Tidings Bundle.

Celebration Tidings Bundle, Fall
Project #3

Celebration Tidings Bundle, Fall
Project #3


Another gorgeous project! Plaid Tidings 6×6 DSP takes center stage again, but the stamped Celebration Die holds its own for sure. Colors here are Cinnamon Cider, Blackberry Bliss, Crumb Cake and Very Vanilla card stocks. Blends used for coloring are Pumpkin Pie, Shaded Spruce. Markers used are Early Espresso and Bumblebee.

Thanks for letting me share our team projects! They are beautiful and it’s fun to gather, even if virtually, to encourage and learn from one another. Want to be able to do this? Join my team!

SU! has a promotion going on for new recruits that is a win-win for everyone… for $99 you will get a starter kit worth of products valued at $125 – plus two card sets with instructions & an additional stamp set & Rhinestones. What’s not to like about that? Join my team- and yes, do it NOW so you get all the benefits of this awesome deal. More details below.

.

  • In addition to the regular starter kit (for $99 USD/$135 CAD, new recruits choose $125 USD/$165 CAD-worth of products) new recruit will also receive enough card stock pieces to make 16 cards, a pack of Rhinestone Basic Jewels, the So Much Love stamp set, and the Queen Anne’s Lace stamp set—all for their first event.
  • 8 packs of precut card stock of the coastal cabana pack will be provided, and 8 packs of precut card stock of the Granny Apple Green pack, for a total of 16 cards (packs include envelopes). The new recruit can choose what samples to replicate and how to distribute the packs to their customers.
  • Important note: Ink, adhesive, cutting tool, and clear block for stamping must be purchased separately. However, these products may be included as part of the Starter Kit product selection.
  • Thanks for stopping by.
  • May you have a beautiful day.
  • Make someone happy by sending them a handmade card filled with love.


SU! Beautiful Autumn Bundle

It’s Friday already – where did this week go? How was it – did you have a good week? We had lots of meetings this week, mostly virtual – and that’s OK. Being able to accomplish the goals is what matters. Ok – idle chatter… let’s get on with it shall we?

Today’s card is another fall one – a masculine birthday card. And it’s the DSP that really takes center stage, although… the Autumn Punch pack from the Beautiful Autumn bundle shows itself pretty well too. This is a CASE of a card I saw by another demo: Dawn Olchefske. Thanks for the inspiration!

Beautiful Autumn Bundle
#1

Let’s take a peek at how we made this card.

  • cut a rectangle with Stitched Rectangle Dies from  a 2 x 4 piece of Pumpkin Pie cs. SAVE the outside trim!
  • Using the wonderful Autumn Punch Pack, punch the leaves and acorn. And quick tip… align the right side of the punch with the paper and punch, then move to the left side and align the left sign and punch, then punch the center. And if it helps even more, lightly draw a center line that can be erased after punching.
  • Slip a DSP scrap behind it and adhere with liquid glue. There are so many possibilities in this Gilded Autumn Specialty DSP pack, but I definitely wanted masculine and this check fit that perfectly.
  • Mat on a layer of Early Espresso cs with dimensionals. But wait – some texture… I played around with several things, paper, various ribbons, even other DSP, but settled on this from the Forever Greenery Trim Combo Pack. Layer and adhere with Stampin Seal then place on the Early Espresso cs.
  • Adhere another panel of Gilded Autumn DSP to the Early Espresso card base with liquid glue. (What I would do differently here… adhere DSP to Very Vanilla OR Pumpkin Pie layer, then to the card stock base.)
  • Stamp the birthday sentiment from the Best Year stamp set with Pumpkin Pie ink on Very Vanilla cs. Die cut using the Ornate Frames Dies.
  • Adhere both the sentiment panel and the Autumn Punch panel to the card using liquid glue.
  • For a bit of ‘glam’ and added texture – add the Artistry Blooms Adhesive-Backed Sequins to the sentiment panel.

For the inside… and I really like how this turned out!

Beautiful Autumn Bundle – inside
#2

  • Adhere the saved ‘trim’ from the Stitched Rectangle onto a panel of Very Vanilla cs, using liquid glue.
  • Stamp the sentiment from the Banner Year stamp set in Early Espresso ink.
  • Adhere the punched out leaves/ acorn (from the card front) with liquid glue.
  • Adhere the Very Vanilla panel to the card base – and voila – the card is complete.

For the envelope..

Beautiful Autumn
Bundle
#3

Beautiful Autumn Bundle
#4

Thanks for stopping by.
May you have a beautiful day.
Make someone happy by sending them a handmade card filled with love.
Card cuts:
  • Early Espresso 4 1/4 x 11 scored at 5 1/2, 1 7/8 x 4
  • Gilded Autumn Specialty DSP 4 1/8 x 5 3/8, 2 1/4 x is 6, scrap
  • Pumpkin Pie 2 x 4
  • Very Vanilla 4 x 5 1/4, scrap 2 1/2 x 1 1/2

SU! Lots of Leaves Bundle

Hello again! The weather here in NJ is beginning to turn cool – and that means leavers are gonna fall…. and we have LOTS of trees on our property… which means raking, raking, raking. Before this sounds as though I’m in the complaint department – let’s look at today’s card – it’s an elegant fall card and it features the fabulous Love of Leaves bundle. Why a bundle? When purchasing a coordinating die set with a stamp set it’s 10% LESS when bought together – a great deal.

Love of Leaves Bundle #1

I started by choosing my paper – Gilded Autumn Specialty DSP. This guided me to Very Vanilla for a coordinating card stock (versus Whisper White). Thick Very Vanilla for the card base, Brushed Metallic 12 x 12 card stock to coordinate with the gold in the Gilded Autumn Specialty DSP and Very Vanilla – that’s it for papers. I wanted the Brushed Metallic paper to create a bit of shadow for my leaf, so I die cut this gorgeous leaf from the center of the panel I had cut. This ‘hole’ is covered by both the Very Vanilla card base and the Specialty DSP on top – so no one knows (but you and me!). Here’s a picture of how it looks from the back side.

Love of Leaves – die cut from Brushed metallic
#2

I die cut a rectangle using the Stitched Rectangle Dies and the 3rd smallest die from Very Vanilla cs and also die cut this gorgeous leaf from Very Vanilla at the same time. One of the special things about this bundle is how the leaves have an embossing portion that creates these wonderful impressions. OK… adhere the Very Vanilla leaf to the Brushed Metallic leaf using Stampin Seal. Adhere the leaf to the stitched rectangle with dimensionals. Then adhere this to the center of the Gilded Autumn Specialty DSP with liquid glue, and this to the Brushed Metallic and then onto the card base. Now all it needs is a double length of Linen Thread tied into a bow and attached with a glue dot.

Love of Leaves
Bundle
#3

For the inside, because this particular sheet of Specialty DSP coordinates with Mint Macaron, I added a panel as a layer to the card base. The Very Vanilla got special treatment along the left edge with one of the embossing dies in this die set. Then I stamped the sentiment in Mint Macaron ink. Adhere this panel to the mint Macaron and the card is complete.

Love of Leaves inside
#4

For the envelope I used a strip of the Gilded Autumn Specialty DSP to adhere to the envelope flap. For the card front I ’embossed’ a portion of one of the leaves from the die set. Elegant!

Love of Leaves Bundle #5

Love of Leaves
Bundle
#3


Such a beautiful card and so EASY to do with this gorgeous bundle. One of the items that makes this card so simple to do is the new Metallic Plate that can be used with the new Cut & Emboss machine. Because the plate is metallic all over, once the die is placed on it, it doesn’t move!!! No need to hold it down with a sticky note or anything. It’s the best ever. So I’m going to show it on the product list, along with the die cutting machine, cuz these are ‘must haves’. Remember, when you shop with me and your order is over $50, you will receive a SU! item of your choice worth $10.

<div><div><div id=”e4d5dfeb-95e0-4bbc-b8ae-92cf0315bdc6″>https://mystampinblog.com/Showcase/Details/c327d7aa-f094-45d9-b991-5005e4dc67f6?layout=Tiled&showSku=True&showPrice=True&showSalePrice=True&showAddToCart=False&showAddAllToCart=True&showDownload=True&transparent=True&bordered=True&hFontHeight=14&rFontHeight=13&imageHeight=120&middleContent=False</div>https://mystampinblog.com/Script/ShowcaseDetailsScript</div></div>

SU! Tag Buffet #3

Today’s card is another using the wonderful Tag Buffet stamp set and using the stocking stamp. It’s so cute, that little stocking! Here’s the card…

Tag Buffet stamp set
#1

These are the stamp sets I used for this card:

  • Tag Buffet stamp set for the stocking
  • Dove of Hope stamp set for the for the sentiment on front.
  • Cherish the Season Stamp set for the pine branches and the inside sentiment

I also used:

  • Winter Snow Embossing Folder with Whisper White Craft ink
  • Adhesive-So Sweetly Dies – the 3rd smallest, the largest and next to largest
  • Ornate Layers Dies for the inside
  • Wonder of the Season Combo Pack Ribbon – the Gold cord
  • Just Jade Stampin Blends for coloring the stocking, fussy cut and placed on dimensionals
  • Pick a Punch for the sentiment tag

Papers:

  • Just Jade cs 3 3/4 x 5 for the front panel run through the Snowflake embossing folder and 4 x 5 1/4 for the inside (this panel should have been a bit larger 4 x 5 3/8
  • Tis the Season 6×6 DSP approx.4 x 2 1/2 + 2 1/4 x 6 for the envelope flap
  • Whisper White approx. 3 x 4 1/4 and die cut the background for the stocking out of the center 🙂  and approx .4 1/4 x 5 1/4 for the inside die cut

All the layers are adhered with liquid glue except the stocking, which is on dimensionals. Here are more pictures…

Tag Buffet
#2

Tag Buffet, inside
#3


And here’s a final picture…

Tag Buffet
#5

This was a bit of a new format for this card, lots of layering and fairly simple, so wasn’t sure tons of directions were necessary.

Thanks for stopping by.

May you have a beautiful day.

Make someone happy by sending them a handmade card filled with love.

Below is a list of the supplies that will take you directly to my online store 😁 Enjoy shopping and creating… When you shop with me, you will receive a SU! item of choice worth $10 when your purchase is over $50. All you have to do is let me know what that is after placing your order (and yes, I WILL reach out to you when your order is placed!)

.<div><div><div id=”635c1263-e56c-4412-8ab8-2603588a2b2c”>https://mystampinblog.com/Showcase/Details/fff0eab3-4155-414f-bdb2-4ee4cf5992db?layout=Tiled&showSku=True&showPrice=True&showSalePrice=True&showAddToCart=False&showAddAllToCart=True&showDownload=True&transparent=True&bordered=True&hFontHeight=14&rFontHeight=13&imageHeight=120&middleContent=False</div>https://mystampinblog.com/Script/ShowcaseDetailsScript</div></div>


And now is the perfect time to join my team as well… SU! has this awesome deal going on until Sep 30… take a peek…

  • SU! has a promotion going on for new recruits that is a win-win for everyone… for $99 you will get a starter kit worth of products valued at $125 – plus two card sets with instructions & an additional stamp set & Rhinestones. What’s not to like about that? Join my team- and yes, do it NOW so you get all the benefits of this awesome deal. More details below.

.

  • In addition to the regular starter kit (for $99 USD/$135 CAD, new recruits choose $125 USD/$165 CAD-worth of products) new recruit will also receive enough card stock pieces to make 16 cards, a pack of Rhinestone Basic Jewels, the So Much Love stamp set, and the Queen Anne’s Lace stamp set—all for their first event.
  • 8 packs of precut card stock of the coastal cabana pack will be provided, and 8 packs of precut card stock of the Granny Apple Green pack, for a total of 16 cards (packs include envelopes). The new recruit can choose what samples to replicate and how to distribute the packs to their customers.
  • Important note: Ink, adhesive, cutting tool, and clear block for stamping must be purchased separately. However, these products may be included as part of the Starter Kit product selection.


SU! Ornamental Envelopes and Celebrations Labels Z-Fold

Helllooooo. It’s Monday, the start of a new week. What’s your plan – who are you reaching out to? My card today is guess what – a CHRISTMAS CARD! Yep – I’m back to making them and a fun fold is always a bit exciting – and creating a Z-Fold is – just – easy. Let’s take a look…

Z-Fold, Celebration Labels w/ Ornamental Envelopes
#2

Z-Fold, Celebration Labels
#1


Fun look, right? I’ve used a few stamp sets on this card to get the sentiments or images I wanted. I love these ornaments and they were so fun to color. But I’m getting ahead of myself… Choose a DSP that will add color to the background but not compete with your main image. Here I chose Snowflake Splendor DSP and adhered it to the card front (that card stock is Pacific Point 4 1/4 x 11 and scored at 5 1/2). With the Celebration Labels Dies, cut one in Whisper White for your stamping and the next size larger for a nice background. You are actually cutting through the card front and the DSP and card stock layers. AND – big tip here, listen carefully – you are cutting from the back side of the card front . The reason for this is to have the plain side behind your main image and to have a decorated side when you open the card. It makes the larger die cut stand out more as well. 

Stamp the ornaments from the Ornamental Envelopes stamp set, only using the four ornaments shown. In other words using sticky notes, tape off that section on the stamp you do not want in your image prior to inking, ink the appropriate area in Tuxedo Black Memento ink – then remove the sticky notes and stamp on the die cut Whisper White. Stamp the sentiment using the Itty Bitty Greetings stamp set in Granny Apple Green. Now color the ornaments – I used: Poppy Parade, Granny Apple Green, Daffodil Delight  and Shaded Spruce Stampin Blends. Put dimensionals on the back and adhere to the solid color side of the larger die cut.

For the Z-Fold: cut a strip from Whisper White 2 1/2 x 10 and score at 4 & 8. Burnish these score lines well so they make a wonderful Z. This creates ‘panels that are 4″, 4″ and 1 1/2″. The smallest panel is the end that will attach to the Celebration Dies and the opposite end will adhere to the inside of the card. With the 4″ end and the score line against the score line of the card, adhere the two together with liquid glue, centering it from top to bottom.  Look at this photo again for reference… Now it is time to adhere the die cuts for the front. With the card closed and the 1 1/2 strip facing you, place the die cut panel right into it’s place and adhere with liquid glue. Voila – the Z-Fold is created! Now you are ready to create the inside.

Z-Fold, Celebration Labels
#1For the inside, cut  2 panels of Seaside Spray cs 2 3/8 x 3 7/8; then cut two panels of Whisper White cs 2 1/4 x 3 3/4. Stamp your Whisper White panels. I used Yuletide Pasture stamp set ‘cuz these animals remind me of those in the stable with baby Jesus. 🙂 I stamped them in Soft Suede ink and then used the smallest of the Water Painters to ‘bleed’ the color. The collar of the sheep was colored with Poppy Parade, the bells with Daffodil Delight and the leaves with Granny Apple Green – all Stampin’ Blends. The sentiment on the sheep panel was from the Itty Bitty Greetings stamp set and stamped in Granny Apple Green ink. The bull  got fun ornaments hung from his horns using the Little Treats stamp set and colored with Poppy Parade, Granny Apple Green and the Daffodil Delight Stampin Blends. 

Now these Whisper White panels are colored, adhere them to the Seaside Spray panels with liquid glue, then adhere to the inside of the card on the strips. This picture will help you. I apologize it’s in the wrong direction! Should have fixed that… 😦

Z-Fold inside card
#3

Now flip the card over and do something for the back – – I cut a panel of Whisper White 4 x 5 1/4, stamped the sentiment from the Little Treats stamp set in Granny Apple Green ink and adhered to the card with liquid glue. And your card is complete!!! Such fun. Love doing this.

Z-Fold, back
#5

Z-Fold
#4


Thanks for stopping by today.

May you have a beautiful day.

Make someone happy by sending them a handmade card filled with love.