Stampin’ Up! Sweet Bugs Sneak Peek for the Happy Inkin’ Thursday Blog Hop

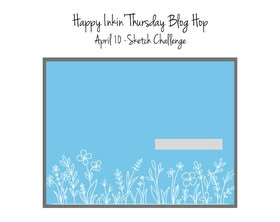
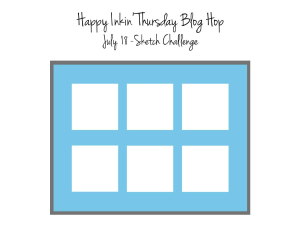
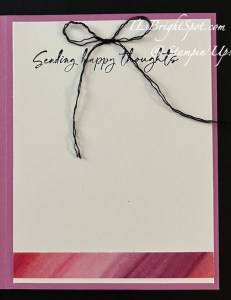
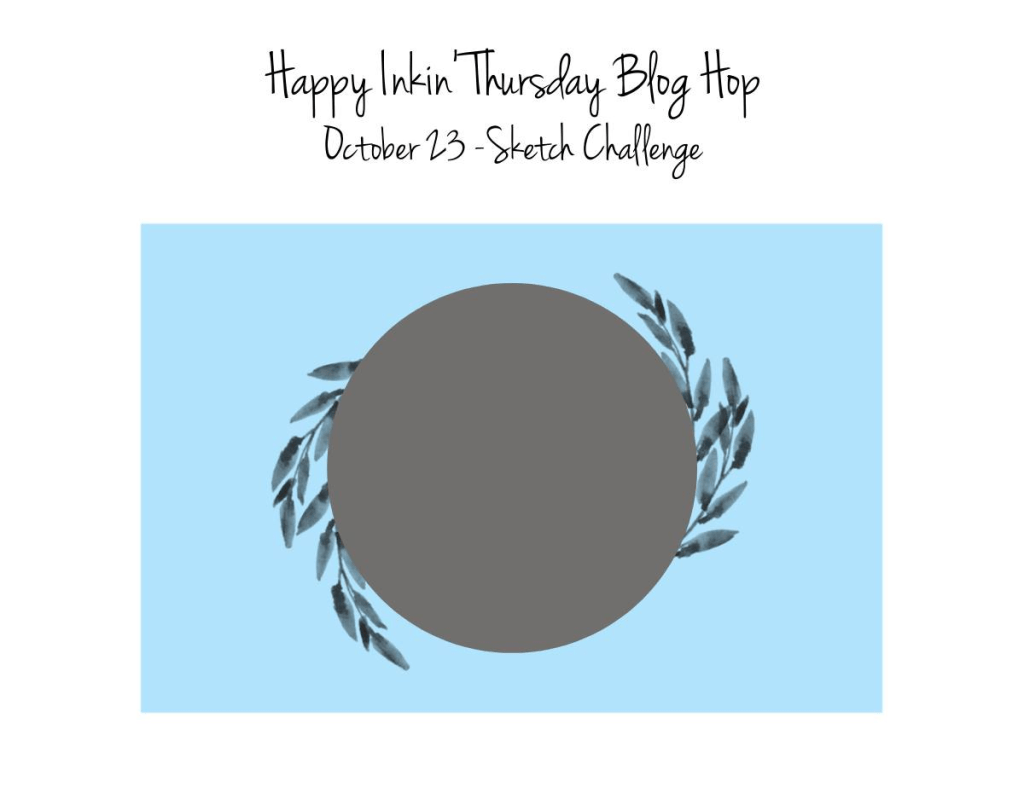
Welcome to Thursday – Dec 4 – and the super fun blog hop. We have a sketch challenge today that is just perfect to show off a new January-April 2026 Mini Catalog product – some of the Cute As A Bug Suite. Just super, super cute! Thanks for joining me today.

Stampin' Up! Happy Inkin' Thursday Blog hop

Stampin' Up! Sweet Bugs card front

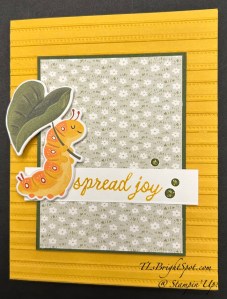
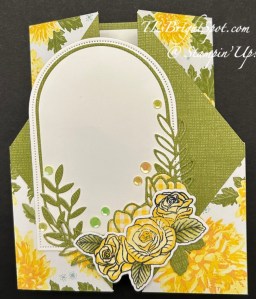
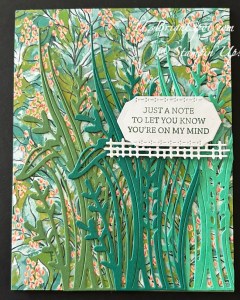
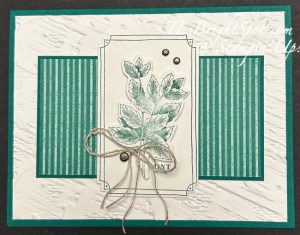
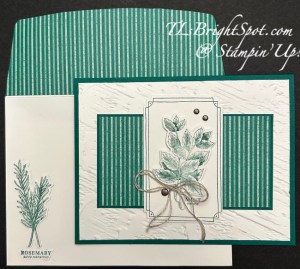
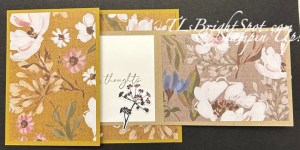
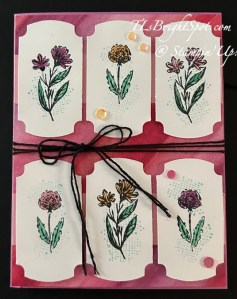
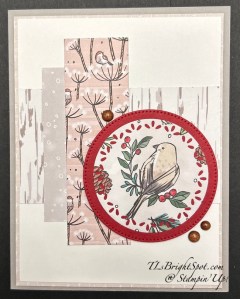
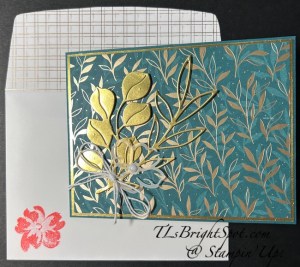
This super cute ‘bug’ is a die cut (from Sweet Bugs Dies) using the Designer Series Paper called Cute As A Bug 12×12. It may be found in the January-April 2026 Mini Catalog on pages 42-44. I added a Basic White backing for strength. The sentiment comes from the Sweet Bug stamp set. and the DSP these sit on is more of the Cute As A Bug 12×12 DSP. It was added to a Mossy Meadow panel just slightly larger. The embossing folder is also brand new – it’s called Lovely Stripes and is an ONLINE EXCLUSIVE coming in January. It was dry embossed on Crushed Curry card stock and added to as Crushed Curry card base.The embellishments I used are Low Profile Sparkle Dots in Mossy Meadow.

Stampin' Up! Sweet Bugs card inside

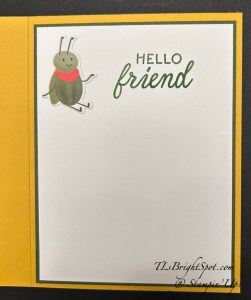
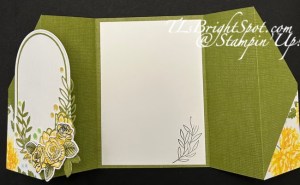
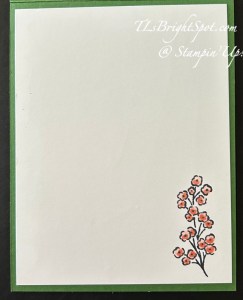
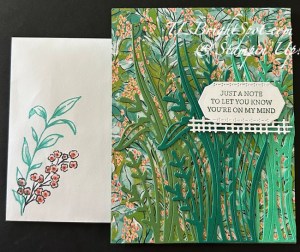
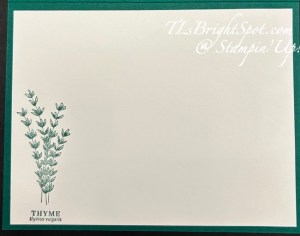
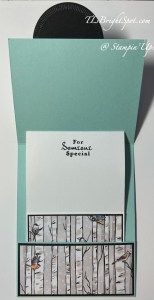
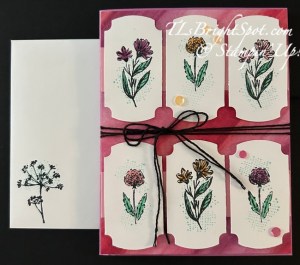
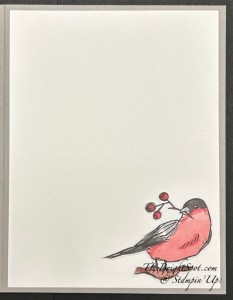
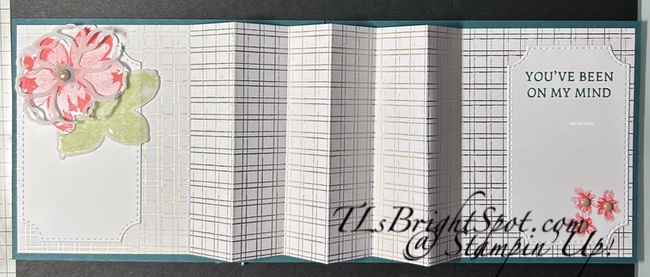
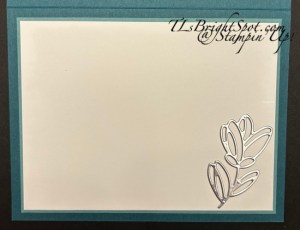
For the inside of the card I die cut another cute ‘fellow’ from the Cute As A Bug DSP and adhered it to a Basic White panel. I also stamped a sentiment from the Sweet Bug stamp set in Mossdy Meadow ink. This panel is attached to Mossy Meadow & both added to the inside of the card.

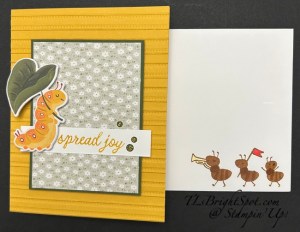
A super cute stamp of these ants mar ching along… from the Sweet Bug stamp set. I stamped in Pecan Pie ink – should have usede Memento Black ink. I colored with Stampin’ Blends Pecan Pie, Daffodil Delight & Real Red.

Stampin' Up! Sweet Bugs Card & envelope back

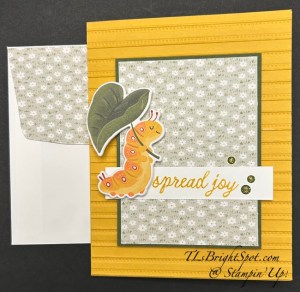
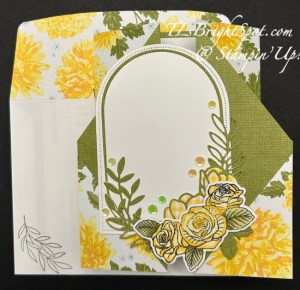
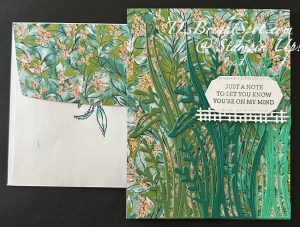
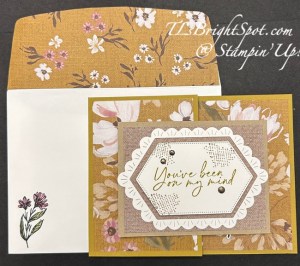
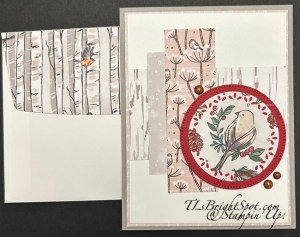
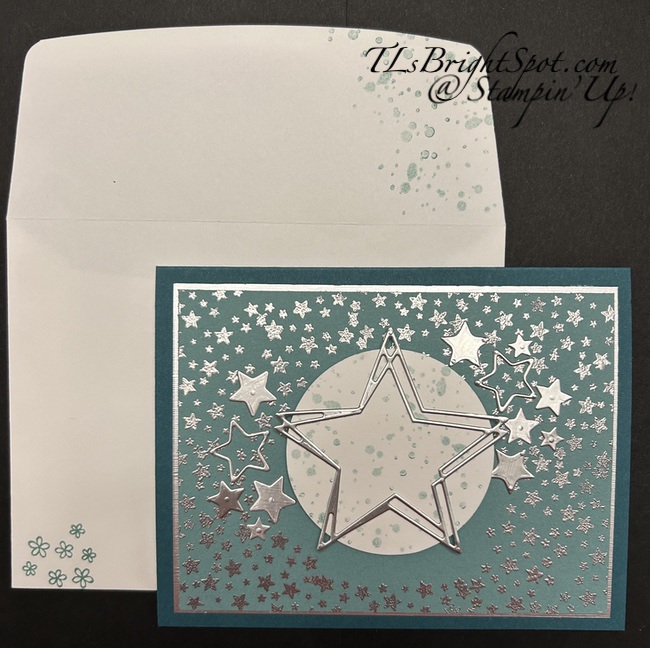
For the envelope back I attached more of the same design from the Cute As A Bug 12×12 DSP. Tuesday, the day I made this card ,was a dismal, dreary day outside – rained all day – 2 1/2″ plus – and making this card made me smile. Hope it makes you smile too. If you do not have a copy of the new January to April 2026 Mini Catalog, please reach out to me – I can fix that!

Shop with me here

When shopping through me & Stampin’ Up! you will earn 10% of your retail amount on all orders of $20 or greater – that’s deal #1! You will also be earning Daisy Patch Rewards from me – one Daisy Patch reward for each $25 of your order through my online store – that’s deal #2! When you have a total of 16 Daisy Patch Rewards – you will be able to select a $40 gift from me – that’s deal #3! 😀 When your order is $50 or greater, you will receive the monthly tutorial – and for December it’s the Pop-Up Petals tutorial – deal #4! See below for more fantastic deals.

Please see the lineup of those participating today – and make the rounds! Next is the creative Nicole.

Stampin' Up! Blog Hop button

Amy Koenders

Mary Deatherage

Karen Ksenzakovic

Tara Carpenter

Terry Lynn Brightyou are here!

Nicole Bloxom

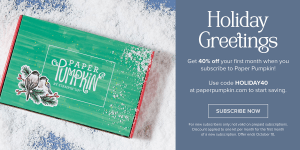
Whether you’re looking for a last-minute Christmas present that sparks creativity or resolving to make time to craft in the new year, a Paper Pumpkin subscription is the gift that keeps on giving!

Stampin' Up! Paper Pumpkin SALE

From 1 – 9 December, prepaid Paper Pumpkin subscriptions will be discounted as follows:

-3-month prepaid: $61.00 (regular price $81.00)

– 6-month prepaid: $122.00 (regular price $162.00)

– 12-month prepaid: $244.00 (regular price $324.00)

Here are the details:

– Subscriptions purchased during this promotion start immediately with the December Watercolor in Bloom Kit. This kit cannot be skipped.

– Do not purchase multiple subscriptions for the same recipient. The subscriptions will ALL start with the Watercolor in Bloom Kit, so the recipient will end up receiving duplicates of the same kit each month.  SO – if you already have a subscription – Pause it (pre-paid) – or cancel it (month-to-month) before the 10th.  Sign up during the special (1 – 9 Dec) and then you’ll get December (for sure) and can get/skip future kits like always!

– Subscriptions purchased during the promotion will earn reduced rewards compared to full-priced subscriptions due to the discounted price, but they will still qualify for rewards once the threshold is met.

PRODUCT OF THE MONTH FROM STAMPIN’ UP!

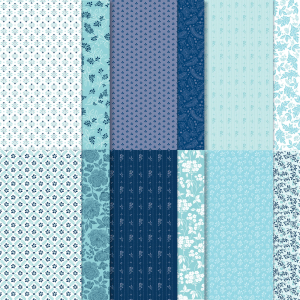
If you love exclusive products, you’re going to love Product of the Month, a promotion centered around a special product release every month. The Product of the Month items are specially designed to be some of the best items Stampin’ Up! has to offer that aren’t available in any of our catalogs or our Online Exclusives. Every month we’ll release a new item that is only available for purchase once per account. These items will be limited quantity and are likely to sell out quickly—once they’re sold out, they’re gone for good! The True Blue Florals 12″ x 12″ (30.5 x 30.5 cm) Designer Series Paper is the exclusive Product of the Month for December 2025! Only available until supplies run out—don’t wait to get yours! This product can be unlocked for just $5 with a single order over $75 (after discounts and rewards).

167970

TRUE BLUE FLORALS 12″ X 12″ (30.5 X 30.5 CM) DESIGNER SERIES PAPER

$5.00

The Last Chance Products list has been updated!!! Click the image below to see the list and shop with me.

Stampin' Up! Last Chance Products

Stampin’ Up! Nests of Winter DSP & Sketch

WOW – November! Halloween is behind us & Thanksgiving is coming soon. What a time to be be thankful & grateful… yes, yes. I’m thankful for all of you & grateful for this fun craft which I so enjoy. So MANY blessings… lest I get sappy… let me share today’s card.

Stampin' Up! Nests of Winter DSP card front

This cute little bird has been sitting on my desk for a bit. He was supposed to be used on another project & well, I got busy with other cards, designs & stuff. He was die cut using a Spotlight on Nature Die, cut directly from the Nests of Winter DSP. I mounted him on a Cherry Cobbler circle die cut with the Stitched Shapes Dies. Then I pulled various papers from the Nests of Winter DSP pack.

  • the cross panel is 2 1/4 x 3 7/8
  • the two vertical panels are 1 x 3 & 1 1/4 x 4

These were adhered on the Basic White 3 7/8 x 5 1/8 pice which was attached to yet another panel of DSP 4 x 5 1/4. These were added to the Gray Granite card base (8 1/2 x 5 1/2 scored at 4 1/4) with dimensionals. The circles were also added to the card with dimesnionals. Then these wonderful Streaked Dots were scattered for additional charm.

Stampin' Up! Nests of Winter DSP, inside card

For the inside of the card I fussy cut with my paper snips this adorable bird & adhered it with liquid glue to the Basic White insert (4 x 5 1/4).

Stampin' Up! Nests of Winter DSP card & envelope

For the envelope… more of the Nests of Winter DSP attached to the flap & trimmed to fit. DONE! Cut the DSP panels ahead of time & this card layout is a quick 1, 2, 3. Add a sentiment depending on the front focal point, or not, as I didn’t here. It’s easy to add a message inside when this card is needed for something special.

Want to purchase these products – see the info below for the easy shopping experience. OR …

SHOP WITH ME HERE

to view ALL the stampin’ Up! products available: kits’, ONLINE EXCLUSIVES, SU! classes & more.

Thanks for stopping by. Masy you have a beautiful day. Make someone happy by sending them a handmade card filled with ❤️

Product List

Stampin’ Up! Regal Distressed Patterns with Pearls of Beauty & Words of Beauty

Mixing old & new is almost magical – it brings life to papers you have had for a while, making it possible to create with new eyes. I’m sharing another accordion fold card made with the Regal Distressed Pattern SDSP that is Pretty Peacock in color and pairing it with the dies from Pearls of Beauty – a new November 4 release in the ONLINE EXCLUSIVES.

Stampin' Up! Regal Distressed Patterns SDSP w/ Pearls of Beauty bundle accordion fold

These gorgeous dies from the new Pearls of Beauty bundle were die cut from Gold Foil and from Vellum. Yes – Vellum is back! Vellum is one of the products in the Brushed with Beauty Suite. I cut a panel of Gold Foil 4 1/8 x 5 3/8 & from the center die cut the two leaf dies – using the Pearls of Beauty Dies. I cut a panel of the Regal Distressed Pattern SDSP 4 x 5 1/4 & added it to the Gold Foil – no one will suspect die cut were taken from the center! Both were added to the Pretty Peacock card base. The gold foil die cuts were added with liquid glue – except under four of the larger leaves I added a dimensional for added depth. I die cut the delicate floral edging detail from Vellum & attached it with a glue dot in the center of the flower. One single Pearls of Beauty embellishment in the center covers the glue dot. I added a double bow from white Baker’s Twine & attached it with a glue dot as well. Gorgeous!

Stampin' Up! Regal Distressed Patterns accordion folkd with Pearls of Beauty

For the inside… stunning. The accordion fold is a panel of DSP (here it is Regal Distressed Patterns SDSP in white) cut 4 x 12 and scored at 3, 4, 5, 6, 7, 8, & 9, then added to the card base with equal edges on both ends – only adhering those 3″ ends. Here I used the Branching Out Dies to die cut two Basic White panels adhering them 1/4″ from the edge of the paper on each end. The Pearls of Beauty single flower is stamped in Flirty Flamingo full strength for the flower outline, then using the ‘filler’ stamp and Flirty Flamingo ink, stamping off once. I die cut the stamped image with the Pearls of Beauty Dies and added it to the upper left corner. I die cut the delicate Vellum edging of the flower and added it with a single glue dot & a Pearls of Beauty embellishment in the center. I stamped the leaf image on the Vellum in Soft Sea Foam ink, heat set it with my heat tool, then die cut it with the Pearls of Beauty Dies and slipped it gently under the flower, using liquid glue to attach it. On the lower right corner… I stamped the flowers in the same manner as the first…outline stamp in Flirty Flamingo full strength and the filler stamp in stamped off Flirty Flamingo ink. I added three small Pearls of Beauty embellishments.

Stampin' Up! Regal Distressed Patterns with Pearls of Beauty bundle in an accordion fold

For the envelope… more of the Regal Distressed Pattern SDSP added to the flap & trimmed to fit. On the front, this gorgeous flower stamped in Flirty Flamingo ink in the 2 step method described above.

If you want to see another couple of cards using the Brushed with Beauty suite as an accordion fold – look here. And this is a card using other dies in the suite – look here

Want these products – shop below – and remember the Brushed With Beauty Suite will be available Nov 4!

Brushed with Beauty Suite available November 4 – ONLINE EXCLUSIVE

ORDER FROM ME HERE

From October 1 to 31, anyone who purchases the Starter Kit can choose between two amazing offers.  In addition to FREE shippingFREE business supplies, and a FREE Paper Pumpkin kit, you can either get $125 worth of products for just $35, an amazing first time ever offer, OR $189 worth of products for just $99

Stampin' Up! Starter Kit
Stampin' Up! Starter Kit 1
Stampin' Up! Starter Kit 2

What are some of the benefits of becoming a demonstrator?

  • Crafting is even more fun with community
  • Become a demonstrator and enjoy all the perks that come with that:

1) a 20–25% product discount

2) exclusive early access to the latest releases online and in catalogs

3) the opportunity to earn a modest supplemental income

4) the chance to attend incredible training and crafting events

5) Scrapbooking has never been better in Stampin’ Up! history. Have you seen all the new scrapbook products Stampin’ Up! has? It’s amazing…

6) There’s never an obligation to sell, you can join to enjoy the discount for yourself.

It’s also fun to learn new skills, develop new crafting techniques & share your passion for crafting. If you’re like me, it’s really fun to meet new people & connect with fellow crafters. How can I help & support you – lots of ways… through connection, team meetings, our team facebook page, updates. Feel free to connect with me – ask questions – get excited.

JOIN WITH ME HERE

Thanks for stopping by, may you have a beautiful day! Make someone happy by sending them a handmade card filled with ❤️

Product List

Stampin’ Up! Sneak Peek of Swirled Designs for the Happy Inkin’ Thursday Blog Hop

Welcome to the Happy Inkin’ Thursday Blog Hop! You may have come from the fabulous Tara or just hopped in right here… However you got here, welcome! We have a sketch challenge this week and I have chosen to work with a NEW November ONLINE EXC;LUSIVE soon to be released November 4 bundle… called Swirled Designs. The dies are delicate so I encourage you to adhere an Adhesive Sheet to whatever paper you want to use to adhere these detailed dies. They are gorgeous but as I said – delicate.

I began by stamping the small star images from the Swirled Designs stamp set with VersMark ink over most of the Lost Lagoon panel, then sprinkling it with WOW! Metallic Embossing Powder in Polished Silver. I heat set it with my SU! heat tool. I then used the 2 3/8″ circle punch to punch a circle from Basic White, stamped it with Lost Lagoon stamped off once. What that means… ink the stamp, stamp off once then stamp on the circle – do that each time to create the dotted image on the circle. Adhere the stamped circle to the embossed star background with dimensionals. Cut a piece of Silver Foil 3 7/8 x 5 1/8, back it with an Adhesive Sheet. Die cut the single large star & several of the small stars plus the larger floral image from this in the center of the Silver Foil paper using the coordinating Swirled Designs Dies. Attach stars as shown – large star in the center of the circle and remaining small stars to the the embossed Lost Lagoon panel to reflect the challenge. Adhere the embossed panel to the Silver Foil & add to the Pretty Peacock card base with adhesive.

Stampin' Up! Swirled Designs inside card

For the inside… adhere the Silver Foil die cut floral image to a Basic White panel (3 3/4 x 5) then attach to a panel of Lost lagoon (3 7/8 x 5 1/8) then to the inside of the card. Done!

Stampin' Up! Swirled Designs card & envelope

For the envelope… stamp the dots from the Swirled Designs stamp set in stamped off Lost Lagoon in k. (ink, stamp off on scrap, then stamp on envelope flap). Stamp the flower design from the Swirled Designs stamp set on the front of the envelope with full strength Lost Lagoon ink. This card is ready to send. No sentiment makes this card great for all occasions… just add your message – it could be Christmas, birthday, silver anniversary,New Years – you name it . And, it could be masculine or feminine 😀 This is really non-generic – and I love that! As I mentioned earlier, this bundle will be released November 4 as an ONLINE EXCLUSIVE. And to remind hyou – as a Demonstrator I have the privilege of preordering items before they become available to the general public. 👍 That’s just a hint to become a Demonstrator!!! See below for moreinformation.

Now it’s time to visit those participating in today’s blog hop… click the next button to visit Nicole or click on a name to take you elsewhere. Whichever you do, do not miss a single creation on this hop.

Amy Koenders

Mary Deatherage

Karen Ksenzakovic

Akiko Sudano

Tara Carpenter

Terry Lynn Bright

Nicole Bloxom

FREE SHIPPING for orders $75 & up is happening NOW … what’s on your list to order? I don’t have a l-o-n-g list but I do have a list. It’s the perfect time to order those heavy items that add bulk, also adhesives & bundles – so yeah, just about everything! Here are all the details about the Free Shipping.

Stampin' Up! Free Shipping

Sales Period: October 22–24

Ordering Deadlines

  • Phone: October 24 at 6:59 p.m. (MT)
  • Online: October 24 at 11:59 p.m. (MT)
  • All order types qualify for this promotion.
  • Free shipping is for three days only. Orders must be opened and closed from October 22–24.
  • Free shipping automatically applies to your cart after the qualifying amount has been met, which is $75 USD | $100 CAD (before tax).
  • Coupon codes and Stampin’ Rewards will lower your order’s retail amount. Orders must meet the qualifying amount to be eligible for free shipping.
  • The additional cost for expedited shipping is not covered by this promotion.
  • Prepaid 3-, 6-, and 12-month Paper Pumpkin subscriptions and month-to-month subscriptions do not qualify for free shipping. Refills, past kits and add-ons do qualify toward free shipping, but you must be a subscriber to purchase. Subscriptions billed and shipped this month will be charged for the normal amount ($27.00 USD | $36.75 CAD shipping included) + tax.

ORDER FROM ME HERE

And did you know… when you are a demonstrator, you ALSO participate in these great deals – on top of your discount.. it’s likie double your pleasure, double your fun! 😀 👍 And right now, Stampin’ Up! has a JOINING PROMOTION that is the best ever…

Stampin' Up! Starter Kit

From October 1 to 31, anyone who purchases the Starter Kit can choose between two amazing offers.  In addition to FREE shippingFREE business supplies, and a FREE Paper Pumpkin kit, you can either get $125 worth of products for just $35, an amazing first time ever offer, OR $189 worth of products for just $99

What are some of the benefits of becoming a demonstrator?

  • Crafting is even more fun with community
  • Become a demonstrator and enjoy all the perks that come with that:

1) a 20–25% product discount

2) exclusive early access to the latest releases online and in catalogs

3) the opportunity to earn a modest supplemental income

4) the chance to attend incredible training and crafting events

5) Scrapbooking has never been better in Stampin’ Up! history. Have you seen all the new scrapbook products Stampin’ Up! has? It’s amazing…

6) There’s never an obligation to sell, you can join to enjoy the discount for yourself.

It’s also fun to learn new skills, develop new crafting techniques & share your passion for crafting. If you’re like me, it’s really fun to meet new people & connect with fellow crafters. How can I help & support you – lots of ways… through connection, team meetings, our team facebook page, updates. Feel free to connect with me – ask questions – get excited.

JOIN WITH ME HERE

Card Cuts:

Card base: Pretty Peacock 8 1/2 x 5 1/2 scored at 4 1/4

Layer: Silver Foil – 3 7/8 x 5 1/8 (die cut foil pieces from center)

Layer: Lost Lagoon (cut 2) 3 3/4 x 5

Basic White: 3 3/4 x 5

Thanks for stopping by. May you have a beautiful day. Make someone happy by sending them a handmade card filled with ❤️

Stampin' Up! Swirled Designs November ONLINE EXCLUSIVE

Swirled Designs November ONLINE EXCLUSIVE –

Available Nov 4 to customers


Product List

Stampin’ Up! Another DSP Fun Fold

Today is THE day of a two day 2x Stampin’ Rewards for purchases $20 & up. 2 fun! Celebrate National Scrapbooking Day with 2x Rewards for 2 Days!

Stampin' Up! 2x Stampin' Rewards

Have you heard? The global crafting community will be celebrating National Scrapbooking Day on May 3 —and we’re joining in the fun by offering you 2x Stampin’ Rewards for 2 days! Opt in if you haven’t done so yet!
What better way to celebrate one of our favorite crafting holidays? And the best part? This offer applies to ALL products, not just scrapbooking items! (Non-commissionable items and existing Paper Pumpkin subscriptions are excluded.)

  • Earn double rewards (2x rewards) for two days only, from May 2–3!
  • This offer applies to ALL products (excluding non-commissionable products and existing Paper Pumpkin subscriptions).
  • All orders qualify once the rewards threshold of $20 USD | $25 CAD is met.
  • To participate, customers must have a Stampin’ Up! account and be opted in to Stampin’ Rewards.

This includes LAST CHANCE PRODUCTS, items in the Jan-Apr 2025 Mini Catalog, the 2024-2025 Annual Catalog – scrapbooking supplies too!

Now – to the card for this post…

I made this card and was not going to post it, but… here it is. :O) It’s made with the retiring Floral Delight 12×12 DSP, Everyday Arches Dies (an ONLINE EC) AND the wonderful carrying over bundle, Lifetime of Love.

Stampin' Up! DSP Fun Fold w/ Floral Delight DSP

Notice – there is no sentiment on here, and it needs one. It’s screaming for one. I just couldn’t decide. It could be a Mother’s Day card or a birthday card or thinking of you… I need to figure that out. Here are basic directions for this layout.

  • Cut DSP 5 1/2 x 12 and score @ 2, 4, 8, 10. Be award of the direction when cutting AND since both sides show, be aware of that too.
  • On the short side of both ends, make a mark at 2 5/8″ from the top & cut from the closest score line to the mark. (Make certain when cutting each end that the cut is on the top side.) Save those trimmed pieces.
  • Fold mountain, valley, valley & mountain; burnish
  • Adhere those trimmed pieces to each front side
  • Decorate as desired making certain when adding the die cut front pieces, that they adhere to only one side
    • I used the 4th from largest of the Everyday Arches & Basic White card stock
    • The green die cut if from a leftover piece of this same Floral Delight DSP and using the lifetime of Love Dies
    • I stamped the the floral design in Memento ink – again from Lifetime of Love stamp set & colored it with Stampin. Blends Daffodil Delight and Old Olive, then highlighted the flowers with Wink of Stella
    • Final touch on the front was several of the Adhesive Backed Shiny Sequins, another ONLINE EXCLUSIVE
Stampin' Up! DSP Fun Fold w/ Floral Delight DSP

For the inside… on a Basic White 3 3/4 x 5 1/4 stamp the image in Old Olive ink using the Lifetime of Love stamp set. Adhere the Basic White panel to the inside.

Stampin' Up! DSP Fun Fold w/ Floralo Delight DSP

For the envelope… more Floral Delight DSP on the flap, adhered & trimmed to fit – and on the front, the same leaf stamped in Old Olive ink using the Lifetime of Love stamp set.

Shop with me by clicking here. For purchases of $50+ from me, you will receive the May Tutorial bundle in your in-box. Make sure my name is listed as your demonstrator when you check out :O)

Stampin’ Up! Happy Inkin’ Thursday Blog Hop

Hello – and WELCOME to the Happy In kin’ Thursday Blog Hop. We have a sketch challenge today & I’ve maybe stretched the parameters just a bit, but I like the card and think it works.

Stampin' Up! Happy Inkin' Thursday Blog Hop
Stampin' Up! Blog Hop Sketch Challenge
Stampin' Up! Mixed Media Florals, Mixed Labels & Mixed Florals

I’ve used some ONLINE EXCLUSIVE products for this card – primarily the Mixed Media Florals DSP, the Mixed Labels Bundle and the Mixed Florals Bundle. I LOVE this DSP for the background. It reminds me a bit of a jungle and it was adhered directly to the Garden Green card base. The multiple die cut leaves are in Garden Green, Shaded Spruce and Shy Shamrock & I used the Mixed Florals Dies to create them. I simply adhered them with dabs of liquid glue but could very easily have used Adhesive Sheets as a backing, I just didn’t. The next step was to stamp the sentime on a Basic White scrap in Garden Green ink using the Mixed Labels stamp set. I die this and the rectangular piece using the Mixed Labels Dies. I adhered the fence-like piece to the back of the sentiment label then added dimensionals to the sentiment & attached it to the card. Viola!

Stampin' Up! Mixed Florals

For the inside… I stamped this beautiful floral image in Memento ink on the Basic White panel then colored it with Calypso Coral Stampin’ Blends. Done!

Stampin' Up! Mixed Media Florals card & envelope back
Stampin' Up! Mixed Media Florals card & envelope front

For the envelope… I added more of the Mixed Media Florals DSP to the flap (after messing up the stamp image of the leaf!), trimmed the paper to fit. Since the mess-up of the stamped image on the flap, I decided to add some ink ‘edging’ to the remaining leaves, making them look like the leaves on the DSP :O) I added some extra ‘doodles’ for fun – all this with a SU! Journaling Pen. For the envelope front, I stamped the image of the leaves (just fine) with Shy Shamrock ink & used a Blends in Shy Shamrock to add some extra color depth. I also stamped the same sweet image as on the inside of the card in Memento ink & colored the flowers with Calypso Coral Stampin’ Blends. Finis…

This is such pretty DSP and the coordinating bundles are so perfect to layer or use individually. I encourage you to visit my ONLINE EXCLUSIVE store – see info below.

Now, make the rounds of the hop – don’t miss a single one :O) & have fun! Click on the next button or click on a name to make the rounds.

Stampin' Up! Blog Hop icon

Amy Koenders

Mary Deatherage

Karen Finkle

Akiko Sudano

Karen Ksenzakovic

Tara Carpenter

Terry Lynn Bright

When shopping with me and your purchase is $50 or more, you will receive a SU! item valued up to $10 and the current months fabulous tutorial – for April, it’s Memorable Blooms. And use my HOST CODE until April 12. If you do not have a demonstrator, I would love to support, encourage and help you create your best. Contact me!

HOST CODE Y3TPZVYN

HOST CODES are going away April 12, but something even better for you is happening – you will be earning Stampin’ Rewards when your purchases are $20 or more.

Remember the LAST CHANCE LIST ? Click here to shop that list.

Click this link to see all that’s available in the Stampin’ Up! world – this includes the link to ONLINE EXCLUSIVES – and make sure my name is at the top when checking out. This link allows you to see the online exclusives, Kits Collection, The Paper Pumpkin information, etc., etc. If you have questions, please connect with me!

Thanks for stopping by. May you have a beautiful day!

Stampin’ Up! Grow with Love Card

Online Exclusives are just that – items not in any of the Stampin’ Up! Catalogs. This Grow with Love bundle is perfect for cards for no specific reason. I like sending cards just for fun and it makes the receiver feel special.

Stampin' Up! Grow with Love  Card front

The card base is a standard A2 size in Shaded Spruce. I layered an embossed Basic White panel 4 x 5 1/4. The embossing folder is another ONLINE EXCLUSIVE called Plaster Painting 3D embossing folder. It has lots of texture. The next layer is Shaded Spruce 2 3/8 x 4 3/8 with Regals 6×6 cut 2 1/4 x 4 1/4 adhered directly to the card front. The center Basic White panel is 2 1/4 x 3 3/4 stamped in Shaded Spruce ink with another of the stamps in Grow With Love, then die cut with the appropriate Grow With Love Dies. I really like the corner edges! Again, this was adhered directly to the card front, centering. The mint leaves were stamped again and die cut and attached with dimensionals over the stamped image. I tied a double Linen Thread and attached it with a glue dot. Lastly, Adhesive-Backed Dots were added for contrast.

Stampin' Up! Grow with Love card inside

For the inside… another stamp in the Grow with Love is Thyme – and it’s stamped here in Shaded Spruce on the Basic White 4 x 5 1/4 panel.

Stampin' Up! Grow With Love card & envelope

The envelope… more of the Regals 6×6 DSP in Shaded Spruce added to the flap & trimmed to fit (2 1/4 x 6) and on the front another image – this time it’s Rosemary :O). I messed up when stamping the image so did it again on a scrap, die cut it and adhered with liquid glue. When die cutting the image, it cuts off the name of the plant, so I fussy cut that with my paper snips and added it.

Fun, easy card, could be masculine if one is needed. It shows appreciation and care for another human being – which the world always needs.

You may this Grow With Love bundle in my store – look around at all the possibilities, kits, last chance products and more . When shopping with me and your purchase is $50 or more, you will receive a SU! item valued up to $10 and the current months fabulous tutorial – for April, it’s Memorable Blooms. And use my HOST CODE until April 12.

HOST CODE Y3TPZVYN

Remember the LAST CHANCE LIST I mentioned in an earlier post? Click here to shop that list.

Click this link to see all that’s available in the Stampin’ Up! world and make sure my name is at the top when checking out.

Thanks for stopping by. May you have a beautiful day!

Stampin’ Up! Pop-Up Gift Card Fun Fold

Oh I’ve a fun gift card for you today using both the Spotlight on Nature Dies (one of my favorite die sets!) and the gorgeous Nests of Winter DSP.

Stampin' Up! Pop-Up Gift card

We start with a card base of Pool Party, score, burnish and adhere layers of Basic Black and Nests of Winter DSP to the top section and the lower section. Next I used one of thew gorgeous Spotlight on Nature Dies to die cut the black circle and also this sweet chickadee from the Nest of Winter DSP. I adhered the bird image to the Basic Black circle with dimensionals. I used the Stampin’ Seal+ to the back of this larger circle and added this wonderful Silver 1/8″ Trim then adhered the circle to the upper section of the card. I added three Drusy Adhesive-Backed Dots and the front was complete :O)

Stampin' Up! Pop-up Gift Card inside

For the inside… here you can see that lower front section is folded up for the inner ‘liner’ to slide into – like a pocket. And, that inner liner also has a ‘pocket’ – this time for the gift card. This basic White panel has two score lines, one at the top where it adheres to the upper section of the card and another to create the pocket for the gift card. It is also stamped using the Spotlight on Nature stamp set and Memento Black ink. What’s nice is this card can be used for Christmas or birthday or anything really. The measurements are listed below.

Measurements:

  • Card base: Pool Party – 4 1/4 x 11 scored @ 3 1/2 & 9, burnishing both inward
  • Upper layers: Basic Black 4 1/8 x 3 3/8; DSP 4 x 3 3/4
  • Lower layers: Basic Black 4 1/8 x 1 7/8; DSP 4 x 1 3/4 – – once layers are in place, fold up lower section and secure in place with glue dots in each bottom inside corner. This allows the insert to slide easily.
  • Pop-up insert: Basic White 3 1/2 x 7 1/4, score @ 1/2 & 5 3/8. Burnish score lines so the 1/2″ score goes back and the bottom score is forward. Stamp upper sentiment. Decorate bottom panel of insert.
    • Basic Black: 33/8 x 1 7/8
    • DSP: 3 1/4 x 1 3/4
  • Add glue dots to bottom inside corners and close to create pocket.
  • Insert into card base pocket; add tear ‘n tape to the 1/2″ area at top and with this section open and flat, close the top of the card. Bingo – the card opens with the insert in place and ready for the gift card.

Stampin’ Up! AC Wildflower Suite Fun Fold for Happy Inkin’ Thursday Blog Hop

It’s Thursday and you know what that means – a VERY FUN HOP! We have a color challenge today and I’ve chosen to use the Wildly Flowering DSP as my focus and the coordinating suite to highlight this fun fold card.

Stampin' Up! Happy Inkin' Thursday Blog Hop
Stampin' Up! Inkin' Thursday Color Challenge
Stampin' Up! Wildflower Designs Fun Fold card front

This is called a JOY FOLD card – and is two cards in one so to speak. The colors are mostly Wild Wheat, Mossy Meadow and Moody Mauve. This is just gorgeous Designer Series Paper – Wildly Flowering 12 x 12 DSP. And here’s how we put this together…

  • Build your card base first: Wild Wheat 4 1/4 x 8 1/2 scored @ 3
    • Add DSP layers: 4 x 5 1/4 (inside right panel) and 2 3/4 x 4 (inside flap – I embossed this panel in the Dashing Designs 3D EF) and another flower panel on the left front 2 3/4 x 4
    • On the inside front panel, die cut from Wild Wheat the hexagon using the Wildflower Designs Dies; add to panel.
    • Stamp this larger flower on a Basic White scrap in Memento ink using the Wildflower Designs stamp set. Color with Stampin’ Blends Wild Wheat, Moody Mauve and Mossy Meadow. Add to hexagon and embellish with Adhesive-Backed Textured Dots.
  • Create the ‘mini’ card: Crumb Cake 3 x 8 and scored @ 4.
    • Add to card base, centering it on the right card base panel
    • Add DSP to inside right mini card 2 3/4 x 4 and to mini card front 2 3/4 x 4 (embossed with Dashing Designs 3D EF)
    • Decorate mini card front: die cut from Basic White both the scalloped hexagon and the stamped hexagon using the Wildflower Designs Dies. Adhere the scalloped design directly to the mini card front. Stamp the remaining hexagon with Wildflower Designs stamps – the sentiment in Wild Wheat ink and the dots in Crumb Cake ink. Add to mini card front with dimensionals and embellish with Adhesive-Backed Textured Dots, part of this suite of products.
    • To the inside of the mini card… stamp the sentiment on a Basic White panel (2 3/4 x 4) in Crumb Cake ink using the Wildflower Designs stamp set. Add a stamped & die cut flower: stamped with Memento ink and colored with Moody Mauve Stampin’ Blends & die cut with Wildflower Designs Dies.
Stampin' Up! Wildflower Designs Fun Fold.1
Stampin' Up! Wildflower Designs fun fold.2

With the card complete… time to decorate the envelope… add another panel of Wildly Flowering DSP 2 1/4 x 6 to the flap and trim to fit. On the front, stamp another of the flowers from the Wildflower Designs stamp set in Memento ink and color with Stampin’ Blends Moody Mauve and Mossy Meadow.

Stampin' Up! Wildflower Designs Joy Fold card & envelope

Now… time to visit the others participating in this fun hop. Don’t miss a one! Click on the ‘next’ button or click on a name to take you around to visit everyone. Enjoy!!!

Stampin' Up! Link for blog hop

Amy Koenders

Mary Deatherage

Jaimie Babarczy

Akiko Sudano

Karen Ksenzakovic

Tara Carpenter

Terry Lynn Bright – you are here!

Carol Buckalew

Stampin' Up! Sep - Dec 2024 Mini Catalog

Use this link to take you to the mini catalog and view all the awesome items available.

I appreciate your business and welcome any questions regarding sales or creating or joining my team. Make sure when shopping with me, that you see my name at the top as your demonstrator. That way I can send you a Stampin’ Up! giftie and you can earn rewards – with a $50 order or more. You also receive the monthly tutorial for that particular month – September is Autumn Expressions.

There are new kits available beginning Sep 4 – check by clicking here.

Christmas Ornaments kit – NEW!
Stampin' Up! Card Keeper Kit
Card Keeper kit – NEW!

Stampin' Up! Scrapbooking Brochure

There are new scrapbooking supplies available, click here! Also – click on the brochure for other information. This is a digital-only scrapbooking brochure, full of scrapbooking essentials and exciting new products. As a companion brochure to the September–December 2024 Mini Catalog, the products inside coordinate with products from the mini catalog (and some online only products, too!). With Workshop Kits and some new product releases *hint* Two-Tone Cardstock *hint*, we hope this adds variety and inspiration to your and your customers’ holiday crafts this year!

Products will be available like our Online Exclusive releases, meaning that some products will be reordered when inventory is low, and others will only be available while supplies last.

Stampin' Up! Paper Pumpkin SALE

Santa Claus is comin’ to town a bit early this year—and he’s brought a holiday Paper Pumpkin sale! Starting September 11, 2024, at 12:01 a.m. (MT) until October 10, 2024, at 11:50 p.m. (MT), anyone who signs up for our monthly Paper Pumpkin subscription as a new subscriber will receive 40% off their first kit. That’s right, 40% OFF!

Where This Discount Is Applied
This discount will be applied to one kit in the first kit shipment of the Paper Pumpkin subscription, which means new subscribers will get 40% off the October Nests of Christmas Paper Pumpkin Kit. After that, each month’s kit will return to the regular price of $25.00.

Qualifying for This Discount
This offer is only for new month-to-month subscribers and is not valid on purchased or redeemed prepaid subscriptions.

Now that you’ve read through all the details, it’s time to head to paperpumpkin.com to subscribe and use code HOLIDAY40 to get 40% off your first month!

Stampin' Up! ONLINE EXCLUSIVES

Click the image above to see that’s available in the ONLINE EXCLUSIVES!

Use my HOST CODE so I recognize you!

host code ZBAU6PKX

Thanks for stopping by. May you have a beautiful day. Make someone happy sending them a handmade card filled with love

Stampin’ Up! Wildflower Designs for the Happy Inkin’ Thursday Blog Hop

Hello Thursday! And that means another Happy Inkin’ Thursday Blog Hop. We have a sketch challenge today and I’ve chosen to work with the Wildflower Designs stamp set, the Labeled with Love Punch and Full of Life 6×6 DSP to create my card.

Stampin' Up! Wildflower Designs card front

I began by punching these fun shapes using the Labeled with Love Punch and Basic White card stock. I used scraps but you could cut two pieces 2 1/2 x 4 1/2. I stamped these with two different flower designs – in Memento ink using Wildflower Designs stamp set. I colored these with Stampin’ Blends In Colors: Peach Pie, Pretty In Pink, Petunia Pop and Shy Shamrock. I then used the Summer Splash ink and the splotch stamp in the same Wildflower Designs stamp set, stamped it off once and then on the flower. I varied the placement of the stamping so it didn’t look too uniform. With the stamping and coloring completed, I cut a Full of Life 6×6 DSP 4 1/8 x 5 3/8, added two strips of Pretty in Pink card stock 1 x 4 1/8 with stampin’ Seal, then added the stamped flowers with dimensionals. I like to place my center panels first, then use equal spacing for the rest. I wrapped Black Bakers Twine from the Baker’s Twine Essentials Pack around the card three times and tied a bow, securing it with a glue dot. I put dimesnionals on the DSP and adhered it to a Petunia Pop card base – 8 1/2 x 5 1/2 scored at 4 1/4. My final touch for the card front was adding Adhesive-Backed Shiny Sequins in two colors.

Stampin' Up! Wildflower Designs card front
Stampin' Up! Wildflower Designs card inside

For the inside, I stamped the sentiment in Memento ink using the Wildflower Designs stamp set. I added a 1/2 x 4 strip of the same DSP as the card front. I also had a length of the Black Baker’s Twine that I tied in a bow and added as an enhancement. This panel was adhered in place and the card was complete.

Stampin' Up! Wildflower Designs inside card
Stampin' Up! Wildflower Dedsigns card & envelope front
Stampin' Up! Wildflower Designs card & envelope back

For the envelope – a bit of another panel of Full of Life 6×6 DSP on the flap adhered in place and trimmed to fit. I stamped another of the pretty flowers from Wildflower Designs stamp set on the DSP and yet another flower on the envelope front – both in Memento ink. Again, I used the splotch stamp and Summer Splash ink to stamp over the flower in second generation ink. This is such a happy card – and I know to whom I’ll send it!

Now – time to see what others on this creative team have created! Use the link below to take you to the next person in line – Carol Buckalew – or click on a name to take you elsewhere. You’ll not want to miss any!

Stampin' Up! blog link

Amy Koenders

Mary Deatherage

Karen Finkle

Karen Ksenzakovic

Terry Lynn Bright

Carol Buckalew

Nel Thames

Below is a compiled list of products used to make today’s card. Shop with me to earn fringe benefits to my customers: free tutorial of the month and a FREE Stampin’ Up! item valued to $10 – all for a $50 order, before shipping and taxes. Use my current host code to receive those benefits – especially when your order does not exceed $150. Make certain my name is listed as your demonstrator when checking out! :O) Shop here with me!

Here’s another thing… BONUS DAYS… Bonus Days are an exciting time of receiving $5 coupons for every $50 purchase. Below are ALL the details for this Stampin’ Up! promotion. Are you ALL IN? I certainly hope so, ‘cuz I certainly am.

PROMOTION DETAILS

Earning Period: 3–31 July 2024
Ordering Deadlines
Phone: 31 July 2024 at 6:59 p.m. (MT) 
Online: 31 July 2024 at 11:59 p.m. (MT) 

  • If a participant earns multiple codes from a single order, they will receive one email with multiple codes. If they earn multiple codes from multiple orders, they will receive separate emails for each code earned.
  • All order types qualify for this promotion. Phone and email orders still require an email address.
  • Orders started before the promotion begins will not count toward earning coupon codes. For example, if you add items to your cart before 3 July and wait to purchase until that date or later, then those items will not qualify towards earning coupons. You must add items to your cart and complete your purchase during the earning period. 
  • There is no limit to the number of coupon codes participants can earn per order or throughout the duration of the earning period
  • Coupon codes can only be earned on commissionable items. Non-commissionable items (such as catalogs) do not count towards coupon earnings. 
  • Customers must use a valid email address during checkout in order to receive their coupon code. If a customer places an order over the phone, they must still provide a valid email address to receive their coupon code.
  • Starter Kit orders are excluded from this offer. All other order types qualify.
  • For workshop orders, each customer who reaches a qualifying amount will receive a coupon code to their provided email address. 
  • All coupon codes will be emailed right after a qualifying purchase has been made. Encourage your customers to create an account on our online store. 
  • If a participant earns multiple codes from a single order, they will receive one email with multiple codes. If they earn multiple codes from multiple orders, they will receive separate emails for each code earned.
  • All order types qualify for this promotion. Phone and email orders still require an email address.
  • Orders started before the promotion begins will not count toward earning coupon codes. For example, if you add items to your cart before 3 July and wait to purchase until that date or later, then those items will not qualify towards earning coupons. You must add items to your cart and complete your purchase during the earning period. 
  • Coupon codes can only be earned on commissionable items. Non-commissionable items (such as catalogs) do not count towards coupon earnings. 
  • Customers must use a valid email address during checkout in order to receive their coupon code. If a customer places an order over the phone, they must still provide a valid email address to receive their coupon code.
  • Starter Kit orders are excluded from this offer. All other order types qualify.
  • For workshop orders, each customer who reaches a qualifying amount will receive a coupon code to their provided email address.
  • All coupon codes will be emailed right after a qualifying purchase has been made. Encourage your customers to create an account on our online store. 
  • If a participant earns multiple codes from a single order, they will receive one email with multiple codes. If they earn multiple codes from multiple orders, they will receive separate emails for each code earned.
  • All order types qualify for this promotion. Phone and email orders still require an email address.
  • Orders started before the promotion begins will not count toward earning coupon codes. For example, if you add items to your cart before 3 July and wait to purchase until that date or later, then those items will not qualify towards earning coupons. You must add items to your cart and complete your purchase during the earning period. 
  • There is no limit to the number of coupon codes participants can earn per order or throughout the duration of the earning period
  • Coupon codes can only be earned on commissionable items. Non-commissionable items (such as catalogs) do not count towards coupon earnings. 
  • Customers must use a valid email address during checkout in order to receive their coupon code. If a customer places an order over the phone, they must still provide a valid email address to receive their coupon code.
  • Starter Kit orders are excluded from this offer. All other order types qualify.
  • For workshop orders, each customer who reaches a qualifying amount will receive a coupon code to their provided email address.
Stampin' Up! Earn to Redeem

After earning those coupons, it’s important to know how to use/n redeem them :O)

Redemption Period: 1–31 August 2024
Ordering Deadlines
Phone: 30 August 2024 at 6:59 p.m. (MT) 
Online: 31 August 2024 at 11:59 p.m. (MT)

  • There is no limit to the number of coupon codes participants can redeem on an order during the redemption period. If using multiple codes, they must be separated by a space. 
  • Coupon codes may be redeemed one time only. They cannot be redeemed after the 31 August. 
  • Coupon codes may be redeemed for any product (excluding Starter Kits and demonstrator supply items). They cannot be used on exchanges.
  • Bonus Days coupon codes can be applied to new prepaid Paper Pumpkin subscriptions.
  • Coupon codes will reduce the commissionable amount of an order

Check out this video to see what Stampin’ Up! says about BONUS DAYS. Just click on the red arrow

Join with me by following this link...

To view all the available ONLINE EXCLUSIVES, click here.

Clearance items may be found here

HOST CODE  HFXSJCNB

Thanks for stopping by. May you have a beautiful day. Make someone happy when sending them a handmade card filled with love.