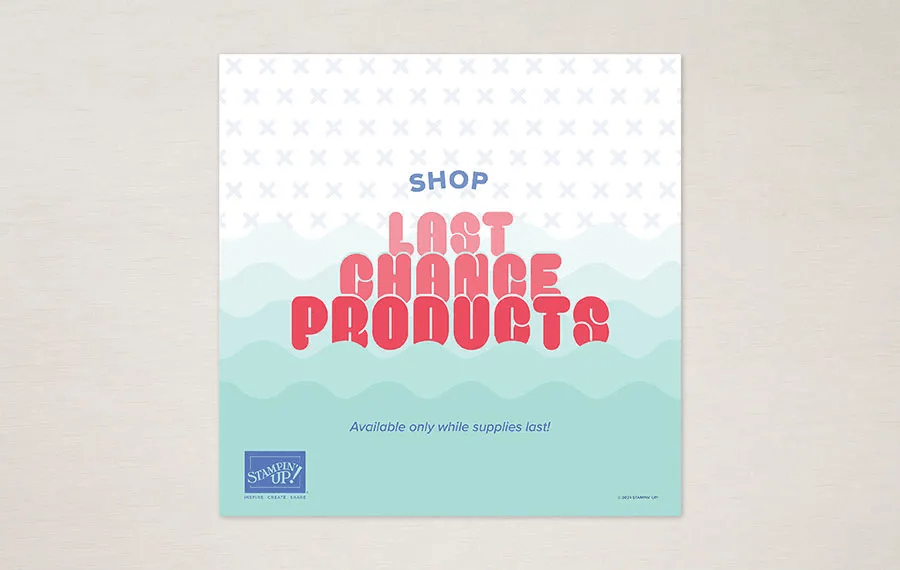
SHOP Last Chance Products here. And remember to make certain my name is at the top of the page when you check out so you receive my bonus gifts when your order is over $50: SU! item valued up to $10 & the April Tutorial for the Memorable Blooms Bundle. Use my HOST CODE until April 12.
HOST CODE Y3TPZVYN
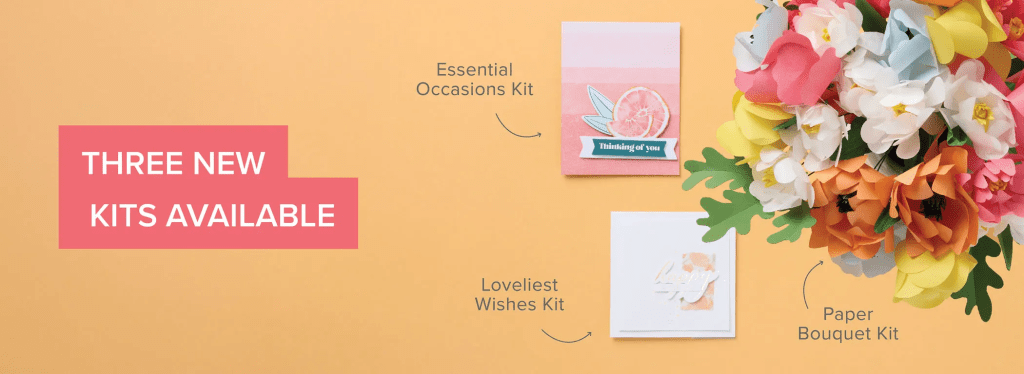
Three new kits available..
65635
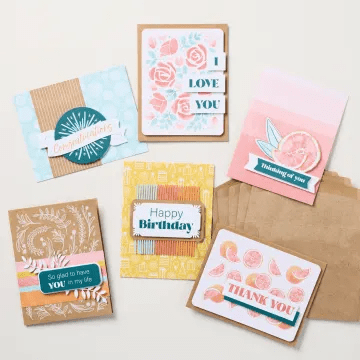
ESSENTIAL OCCASIONS KIT
$13.00
With hand-illustrated elements, die cut sentiments, and six card designs, the Essential Occasions Kit comes with everything you need to celebrate birthdays, share well wishes, or send a thank-you message. From graduations to anniversaries—and everything in between—celebrate the most important moments in your life with this kit!
165636
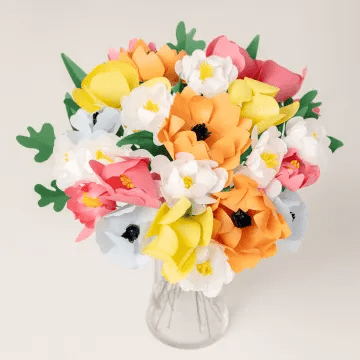
PAPER BOUQUET KIT
$22.00
166284
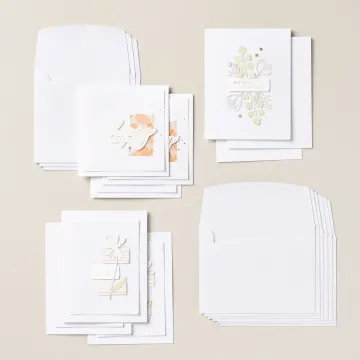
LOVELIEST WISHES KIT
$14.00
Elevate your birthday cards with the Loveliest Wishes Kit! Craft cards that speak volumes through sophisticated simplicity. With precut images and gold foil sentiments, you can create nine stunning cards that lend an air of elegance to every, “Happy birthday!”
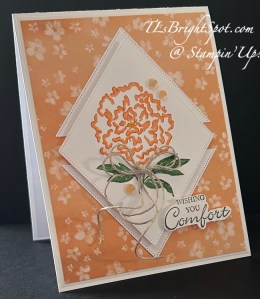
All of a sudden I am in need of sympathy cards and I want them to be somewhat special. I had not played with the Handmade Designs stamp set (FREE when joining as a Demonstrator through Feb 28, 2025) OR the Linked Together Dies. This is a soft feeling card because of the Peach Pie color in the the Blooming Impressions 12×12 DSP (FREE with a $60 purchase through Feb.28, 2025). And I was inspired by the card on page 48 in the Jan-Apr 2025 Mini Catalog to use the diamond die in this way. I really like how it turned out. The sentiment is from the Hope You Know stamp set, an ONLINE EXCLUSIVE.
So let me tell you how I did this. I stamped the floral image from the Handmade Designs stamp set using two Markers for the ink: Pumpkin Pie and Garden Green, then huffed on the stamp and stamped on Basic White card stock – about 4 x 4 in size. I then took a Peach Pie Marker and followed the edge of the flower stamped to create the second color. For the center of the flower I scribbled with the Daffodil Delight Marker. I die cut the flower using the diamond die, then cut another from plain Basic White card stock – and cut it in half corner to corner in the middle. I attached the stamped piece to the two (now) triangles and set this aside. I cut a piece of the Blooming Impressions 4 x 5 1/4 and adhered it to a Basic White 4 1/8 x 5 3/8, then to the Thick Basic White card base (4 14 x 11 scored at 5 1/2). I attached the diamonds that were set aside, directly to the card front. I tied a double bow with Linen Thread and attached it with a glue dot, then added three Adhesive-Backed Shiny Sequins, also an ONLINE EXCLUSIVE. I wanted a sentiment and pulled out the Hope You Know stamp set and with Pebbled Path ink, stamped a scrap of Basic White and fussy cut with paper snips the sentiment. I added dimensionals and added it to the card front.
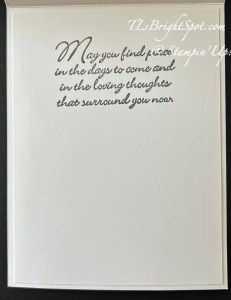
For the inside, all I did was stamp the sentiment – again from the Hope You Know stamp set and with Pebbled Path ink, on a 4 x 5 1/4 Basic White panel. I added this to the inside of the card – and done!
For the envelope, more of the Blooming Impressions 12×12 DSP was added to the flap & trimmed to fit. For the front of the envelope, I inked just a portion of the flower with the Pumpkin Pie Marker, huffed on it and stamped. I used the Peach Pie Marker as before to add color.
Sale-a-bration like is here – There are two levels of products offered during this time – for purchases of at least $60, Level 1. For purchases of at least $120, Level 2.
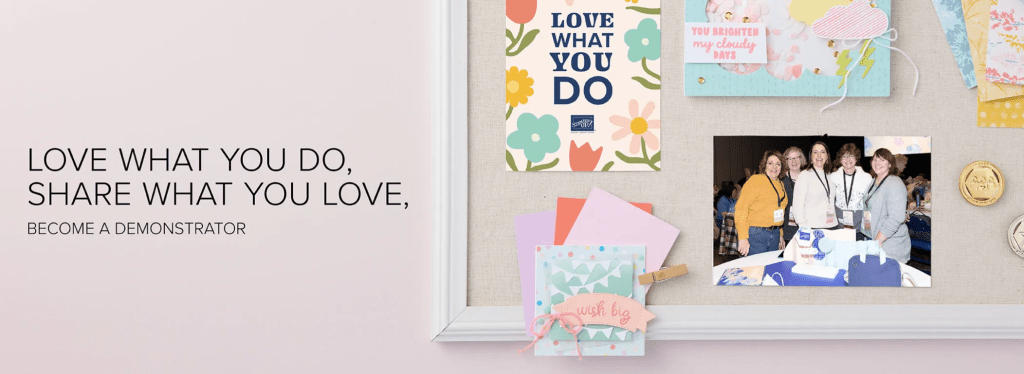
Click on the image below to see more about JOINING MY TEAM!
What is a Stampin’ Up! demonstrator?
Stampin’ Up! demonstrators are creative consultants who help others learn card making and paper crafting techniques using our high quality products and pre-designed kits. They get early access to the latest products and catalogs, receive discounts, earn commission, and are part of an exciting, global community.
If you’ve been thinking about becoming a Stampin’ Up! demonstrator, then there’s no better time than right now during Sale-A-Bration! When you join by February 28, 2025, you can choose between two fabulous offers:
Option 1: Get $125 worth of product PLUS a choice of two Stampin’ Write Marker Assortment packs AND the Handmade Designs Cling Stamp Set (an exclusive stamp set designed to work with the markers). That’s a $216 value for just $99! I strongly recommend Option 1
Option 2: Get $125 worth of product PLUS an additional $30 worth of product when you join Stampin’ Up! That’s a $155 value for just $99!
If you’d like to join the team, we’d love to have you! Once you join, you’ll get at least a 20% discount on all of your Stampin’ Up! purchases and you can preorder from the upcoming catalogs!
Another key thought for joining now during Sale-a-bration… you will receive either an extra $30 in free product in your Starter Kit or your choice of two packs of Stampin’ Write Markers and an exclusive stamp set!
Stampin’ Up! and our particular team welcome all types of Demonstrators – those only purchasing to get the discount for themselves
those who want to run a business and…
– those anywhere in between! Let’s stamp and have fun doing it!
Demonstrators get lots of perks including at least a 20% discount on all orders that you place as a Demonstrator, invitations to Stampin’ Up! Demonstrator events and preordering from upcoming catalogs and promotions. And if joining this Jan-Feb makes sense to you, you will have the opportunity to view the new catalog early and preorder as well. Opportunity knocks! Click the link in the image below to join with me now.
To purchase the supplies to make this card, please use this link to take you to my Stampin’ Up! store – look around a bit: Online Exclusives, Kits Collections, 2024-2025 Annual Catalog – like that. And when you shop with me right now, Stampin’ Up! is in the ending stages of Sale-a-bration (Jan-Feb), but when you order prior to Feb 28, you will receive an opportunity to receive FREE items from Stampin’ Up! via the Sale-a-Bration offerings.
So now… how to purchase from me..These items can all be purchased through me – and I would appreciate your business! To view the ONLINE EXCLUSIVES, CLICK HERE. To see the items in the Jan-Apr 2025 Mini Catalog – click hereAnd if you do not have a demonstrator and need either of these catalogs, let me know! For all those coloring tools, the basics of card stock and embossing/ die cut machines, more stamps & dies, watercolor pencils, click this link for the 2024-2025 Annual Catalog. Remember that when purchasing from me, to use my current host code…and make certain my name is listed as your demonstrator :O)
Hi folks! Today is – GAME DAY… are you for the red (Kansas City Chiefs) or green for the Eagles? Because of where I live, the Eagles are the players of choice. :O)
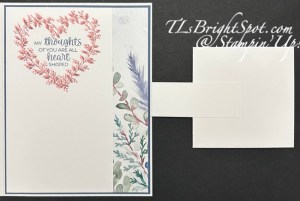
On Thursday evening I learned a friend of mine is on hospice care and it really threw me for a loop. I was shocked and dismayed – and heartbroken. This card is for her…
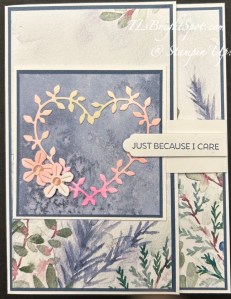
I combined a couple of Stampin’ Up! items… Winter Meadow DSP and the free during Sale-a-Bration bundle called Heart Shaped. It’s delicate, it’s beautiful and perfect for so many occasions.. Here I used I a heart stamped from paper I created with Blending brushes and several colors. I’ll link to the post here that will give all the info about how to do that. The two small flowers were die cut from that same paper with dies from Heart Shaped Dies.
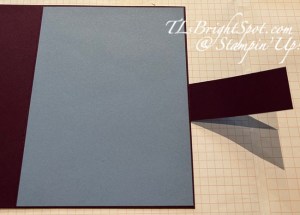
I began with a Thick Basic White card stock 5 1/2 x 7 1/2 scored on the long side at 4 1/4. Cut layer pieces (here it was Misty Moonlight cs) 3 1/8 x 5 3/8 for the front and 4 1/8 x 5 3/8 for the inside. DSP panels should be 3 x 5 1/4 and 1 x 5 1/4. Adhere the larger DSP panel to the larger card stock piece then secure to the card front. The 1″ strip should be added to a Basic White piece 4 x 5 1/4 for the inside of the card. Cut another piece of Basic White 1 x 3 and score at 1/2″ on one end. This will become the tab for the front ‘flap’. Add this tab to the back of the card stock layer for the inside of the card, centering it top to bottom. Now add this card stock to the inside of the card. It will look like the photo below.
Add the 1″ DSP strip to the right edge of the Basic White layer, then stamp the sentiment.. Here the sentiment is from Everyday Greetings stamp set and stamped in Misty Moonlight ink I also added the stamped heart, twice – once in Pretty in Pink and the second in Moody Mauve stamped off once. Adhere this to the inside of the card.
Now close the card and center the square that attaches to the flap. The layers are Basic White 2 3/4 x 2 3/4, Winter Meadow DSP cut 2 5/8 x 2 5/8. The die c ut heart is attached with tiny dabs of liquid glue. The flowers are attached with a mini dimensional for one and liquid glue for the other. The sentiment is again from Everyday Greetings and stamped in Misty Moonlight ink. It was die cut with a banner die from the Heart Shaped dies, then one end trimmed. This was attached with mini dimensionals.
Unfortunately I do not have a photo of the envelope – ugh! – but I did attach more of the Winter Meadow DSP to the flap, trimmed to fit, then stamped the grouping of flowers in Pretty In Pink ink on the envelope front.
I made three more cards using this same ‘pattern’ but chose different DSP for those and different card stock bases as well.I’ll share those photos below.
To purchase the supplies to make this card, please use this link to take you to my Stampin’ Up! store – look around a bit: Online Exclusives, Kits Collections, 2024-2025 Annual Catalog – like that. And when you shop with me right now, Stampin’ Up! is in the ending stages of Sale-a-bration (Jan-Feb), but when you order prior to Feb 28, you will receive an opportunity to receive FREE items from Stampin’ Up! – the Heart Shaped bundle is one of those that qualifies with a $120 order. How fun is that!!!
So now… how to purchase from me..These items can all be purchased through me – and I would appreciate your business! To view the ONLINE EXCLUSIVES, CLICK HERE. To see the items in the Jan-Apr 2025 Mini Catalog – click hereAnd if you do not have a demonstrator and need either of these catalogs, let me know! For all those coloring tools, the basics of card stock and embossing/ die cut machines, more stamps & dies, watercolor pencils, click this link for the 2024-2025 Annual Catalog. Remember that when purchasing from me, to use my current host code…and make certain my name is listed as your demonstrator :O)
Sale-a-bration ends soon – Feb 28, 2025 and there are some FAB products you receive FREE with qualified purchases.
For purchases of $60 (level 1) – these items are FREE – click here
For purchases of $120 (level 2) – these items are FREE – click here
Use my CURRENT HOST CODE WTGKS9DH
When you shop with me and your purchase is $50 or more – you will receive a free giftie valued up to $10 that is a Stampin’ Up! item. You will also receive the monthly tutorial – January is the Terrific Toadstool and it has some really cute ideas!
If you’ve been thinking about becoming a Stampin’ Up! demonstrator, then there’s no better time than right now during Sale-A-Bration! When you join by February 28, 2025, you can choose between two fabulous offers:
Option 1: Get $125 worth of product PLUS a choice of two Stampin’ Write Marker Assortment packs AND the Handmade Designs Cling Stamp Set (an exclusive stamp set designed to work with the markers). That’s a $216 value for just $99! I strongly recommend Option 1
join by February 28, 2025, you can choose between two fabulous offers:
Option 2: Get $125 worth of product PLUS an additional $30 worth of product when you join Stampin’ Up! That’s a $155 value for just $99!
If you’d like to join the team, we’d love to have you! Once you join, you’ll get at least a 20% discount on all of your Stampin’ Up! purchases and you can preorder from the upcoming catalogs!
Another key thought for joining now during Sale-a-bration… you will receive either an extra $30 in free product in your Starter Kit or your choice of two packs of Stampin’ Write Markers and an exclusive stamp set!
Stampin’ Up! and our particular team welcome all types of Demonstrators – those only purchasing to get the discount for themselves
those who want to run a business and…
– those anywhere in between! Let’s stamp and have fun doing it!
Demonstrators get lots of perks including at least a 20% discount on all orders that you place as a Demonstrator, invitations to Stampin’ Up! Demonstrator events and preordering from upcoming catalogs and promotions. And if joining this Jan-Feb makes sense to you, you will have the opportunity to view the new catalog early and preorder as well. Opportunity knocks! Click the link in the image below to join with me now.
Thanks for stopping by. May you have a beautiful day!
Make someone happy by sending them a handmade card filled with love.
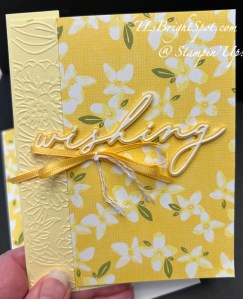
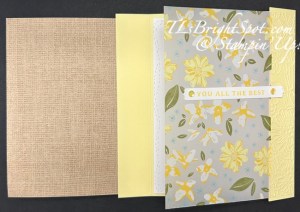
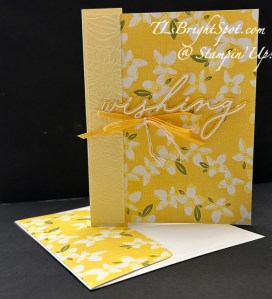
I’m not certain what this fun fold is called… maybe a double fold? It opens from the left, then again from the right. Yo can see the sentiment here in the middle – and it’s from the Delightful Wishes Dies. There are two layers, the background layer is Daffodil Delight and the top layer is Basic White. It’s attached to the card front with mini dimensionals cut in half. The bow is a double bow made with the Satin Ribbon in Daffodil Delight and tied with White Baker’s Twine and attached with a glue dot. The card base and DSP panels is what makes this card the fun fold it is.
Card Base, Lemon Lolly cs: 6 1/4 x 5 1/2 scored on the long side at 1″ and 5 1/4″. Fold both ends toward the center & burnish
DSP panels: cut 2 at 3 1/2 x 5 1/4 but from two different DSP panels. The front layer you see is Floral Delight 12×12; the other layer is from Floral & Gingham Vellum 12×12. Attach these DSP pieces to the card base at each end.
Cut two side panels of Lemon Lolly card stock 7/8 x 5 1/4 and run through the Zinnia 3D embossing folder and adhere to the card panels at each end, covering the ends of the DSP attached to the card base. See photos below.
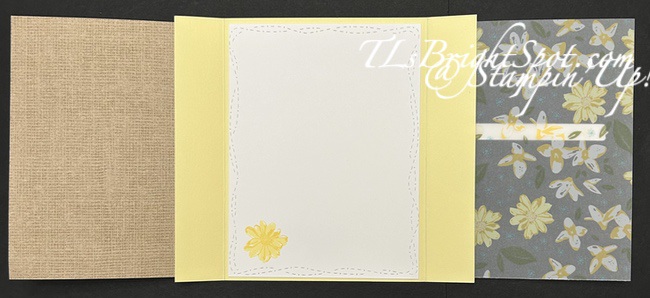
You can see in this photo that I added a sentiment piece… stamped in Daffodil Delight ink on a Basic White strip 5/8 x 3 1/2 then die cut with Delightful Wishes banner die. This was attached to the vellum panel with glue dots and Adhesive-Backed Shiny Sequins were added at each end.
The center panel is Basic White 4 x 5 1/4 and run through the largest die in the Stitched with Whimsy Dies. Before attaching to the inside of the card, I stamped the floral image from Delightful Wishes stamp set. Since this is a two-step stamp, the first is Lemon Lolly ink, the second is Daffodil Delight ink to give more detail of the flower. Now adhere to the inside.
For the envelope, I added more of the Floral Delight 12×12 DSp to the flap and used the same two step method to stamp the same flower on the envelope front. This is such a bright, springy card and could be used for several occasions: birthday, encouragement, even a wedding or baby card. Love the versatility.
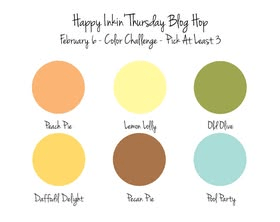
My main colors were Lemon Lolly, Daffodil Delight and Old Olive. This is a hop, remember, so check out what others on the team have created. Click the next button or a name to take you where you want to go.
Want to purchase the products used to make this card? See below the list of names for more information. Thank you for your business & for stopping by today.
Fun hop, right? So now… how to purchase from me..These items can all be purchased through me – and I would appreciate your business! To view the ONLINE EXCLUSIVES, CLICK HERE. To see the items in the Jan-Apr 2025 Mini Catalog – click hereAnd if you do not have a demonstrator and need either of these catalogs, let me know! For all those coloring tools, the basics of card stock and embossing/ die cut machines, more stamps & dies, watercolor pencils, click this link for the 2024-2025 Annual Catalog. Remember that when purchasing from me, to use my current host code…and make certain my name is listed as your demonstrator :O)
Sale-a-bration ends soon – Feb 28, 2025 and there are some FAB products you receive FREE with qualified purchases.
For purchases of $60 (level 1) – these items are FREE – click here
For purchases of $120 (level 2) – these items are FREE – click here
Use my CURRENT HOST CODE WTGKS9DH
When you shop with me and your purchase is $50 or more – you will receive a free giftie valued up to $10 that is a Stampin’ Up! item. You will also receive the monthly tutorial – January is the Terrific Toadstool and it has some really cute ideas!
If you’ve been thinking about becoming a Stampin’ Up! demonstrator, then there’s no better time than right now during Sale-A-Bration! When you join by February 28, 2025, you can choose between two fabulous offers:
Option 1: Get $125 worth of product PLUS a choice of two Stampin’ Write Marker Assortment packs AND the Handmade Designs Cling Stamp Set (an exclusive stamp set designed to work with the markers). That’s a $216 value for just $99! I strongly recommend Option 1
Option 2: Get $125 worth of product PLUS an additional $30 worth of product when you join Stampin’ Up! That’s a $155 value for just $99!
If you’d like to join the team, we’d love to have you! Once you join, you’ll get at least a 20% discount on all of your Stampin’ Up! purchases and you can preorder from the upcoming catalogs!
Another key thought for joining now during Sale-a-bration… you will receive either an extra $30 in free product in your Starter Kit or your choice of two packs of Stampin’ Write Markers and an exclusive stamp set!
Stampin’ Up! and our particular team welcome all types of Demonstrators – those only purchasing to get the discount for themselves
those who want to run a business and…
– those anywhere in between! Let’s stamp and have fun doing it!
Demonstrators get lots of perks including at least a 20% discount on all orders that you place as a Demonstrator, invitations to Stampin’ Up! Demonstrator events and preordering from upcoming catalogs and promotions. And if joining this Jan-Feb makes sense to you, you will have the opportunity to view the new catalog early and preorder as well. Opportunity knocks! Click the link in the image below to join with me now.
Thanks for stopping by. May you have a beautiful day!
Make someone happy by sending them a handmade card filled with love.
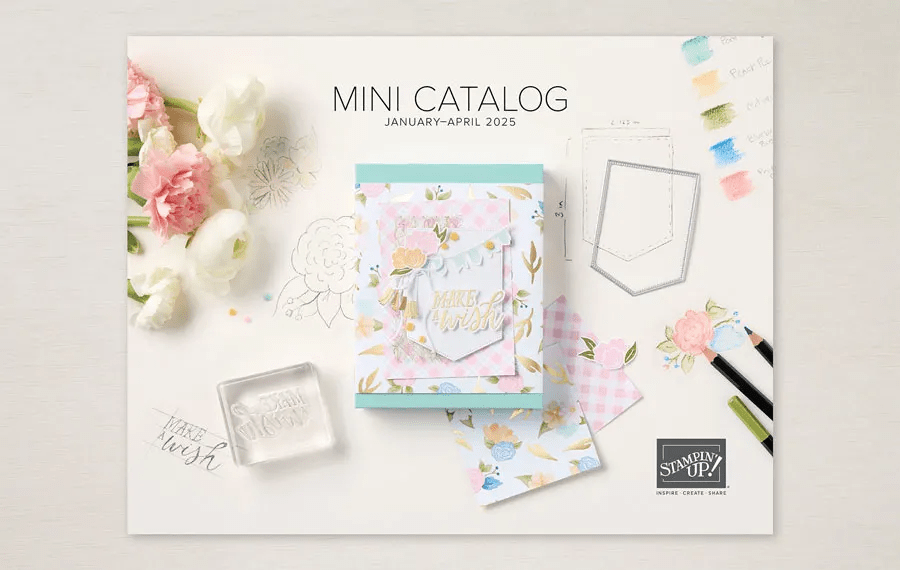
Good Tuesday January 7! Today is the day… the new Jan-Apr 2025 Mini Catalog goes LIVE and… benefits of the Jan-Feb 2025 Sale-a-bration Catalog also go into effect. What that means is when you make a purchase of any Stampin’ Up! items: Kits Collection, Last Chance items, the 2024-2025 Annual Catalog OR the new MINI Catalog, Sale-a-bration items are available. How cool is that! There are two levels: a $60 purchase and a $120 Purchase – each allowing different products that are FREE TO YOU. So, shop, shop, shop!
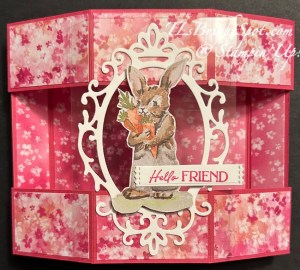
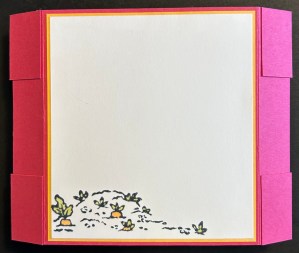
Today’s card is another fun fold, called the bandstand, and it used products from the two mini catalogs going live today. The Designer Series Paper DSP) is a free Sale-a-bration item, and the rabbit, sentiment and delicate frame die are from the Storybook Friends bundle and Storybook Moments 12×12 SDSP. Here ya go…
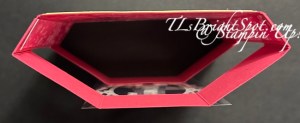
How sweet is that rabbit and how gorgeous that frame!!! I adhered the frame to a Window Sheet so all the DSP would show :O) The rabbit is fussy cut from the Storybook Moments SDSP and attached with dimensionals. The sentiment is stamped in Melon Mambo ink from the Storybook Friends stamp set and die cut with a die from Happy Little Things Dies, retiring. It is attached with a dimensional on the right end and liquid glue to the rabbit. And here’s the top-down view.
This card fold flat and works perfectly in a standard envelope. Here’s the envelope for the card
That cute rabbit is from the Storybook Friends stamp set and is stamped in Memento ink and colored with Stampin/ Blends: Crumb Cake, Melon Mambo, Peach Pie and Old Olive.
Here’s how to make this card…
Card base, back: 4 1/4 x 5 3/8 scored on long side at 3/4 & 4 5/8. Burnish.
Card base, front: cut 2 – 1 1/4 x 4 1/8, score on long side 3/4, 2 1/2, 4 1/2 & 6 1/4. Burnish. These are the pop-out sections.
Decorate:
Cut DSP for inside back, 5/8 x 4 1/8, 3 3/4 x 4 1/8 and again 5/8 x 4 1/8 and adhere to the inside back.
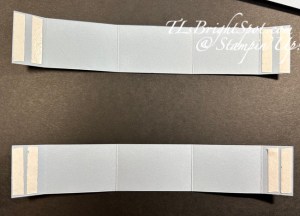
For pop-out sections: cut a single strip 1 1/8 x 5 1/8 then trim to 1 5/8 x 1 1/8, 1 7/8 x 1 1/8 and lastly 1 5/8 x 1 1/8. By cutting this as a single strip and trimming down, this allows for a continuous pattern. Do this twice, then adhere to the pop-out strips, leaving the ends without DSP
Turn strips over and adhere Tear n’ Tape to the ends as shown.
Putting together:
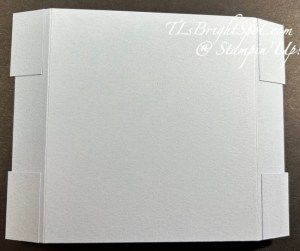
Leaving the strips face down, lay the decorated back panel, decoration side down and even at top of strip, centering the back panel between score lines. There will maybe be a 1/16″ between the score line and the back panel. Remoce cover on Tear n’ Tape & adhere to back panel. Do this again at the bottom. Notice there is ‘wiggle room’ on the ends in the photo – this is as it should be!
Now is the perfect time to decorate the back of the card where you can write your message.
Here I used Peach Pie as a nice contrasting color, 3 3/4 x 4 1/8, and adhered it to the back. I cut a Basic White 3 5/8 x 4 and stamped it with an image from Storybook Friends in Memento ink, coloring it with Stampin’ Blends: Peach Pie & Old Olive. I adhered this in place.
Decorate the front: the key here is to provide something to ‘stabilize’ the card and. to adhere it only to the center panel. It can extend beyond the center panel as the pop-out sections go back not forward.
Die cut from Basic White this gorgeous frame. With liquid glue adhere it to a Window Sheet.
Add Window Sheet to card front adhering only to the center panel with Stampin’ Seal
Fussy cut the bunny from the Storybook Moments SDSP OR use one of the fabulous pieces that can be punched out – 2 sheets of these are provided in the SDSP pack!
Fun, fun! And you can get these today – click the phot below to see what’s available in the Jan-April 2025 Mini Catalog.
Click the Sale-a-bration image to learn what free products are available when ordering Jan-Feb.
If you are a scrapbooker, there is a scrapbooking brochure – click here to see whats available beginning today!
New catalog, new Sale-a-bration, new Scrapbooking brocure, new Joining promotion – do it all here with me.
If you’ve been thinking about becoming a Stampin’ Up! demonstrator, then there’s no better time than right now during Sale-A-Bration! When you join by February 28, 2025, you can choose between two fabulous offers:
Option 1: Get $125 worth of product PLUS a choice of two Stampin’ Write Marker Assortment packs AND the Handmade Designs Cling Stamp Set (an exclusive stamp set designed to work with the markers). That’s a $216 value for just $99!
Option 2: Get $125 worth of product PLUS an additional $30 worth of product when you join Stampin’ Up! That’s a $155 value for just $99!
Want to order these products from me? When you shop with me and your purchase is $50 or more – you will receive a free giftie valued up to $`10 that is a Stampin’ Up! item. You will also receive the monthly tutorial – January is the Toadstool and it has some really cute ideas.
Use my CURRENT HOST CODE WTGKS9DH
when purchasing and
make certain my name is listed as your demonstrator :O
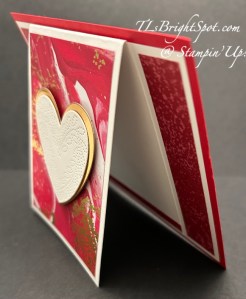
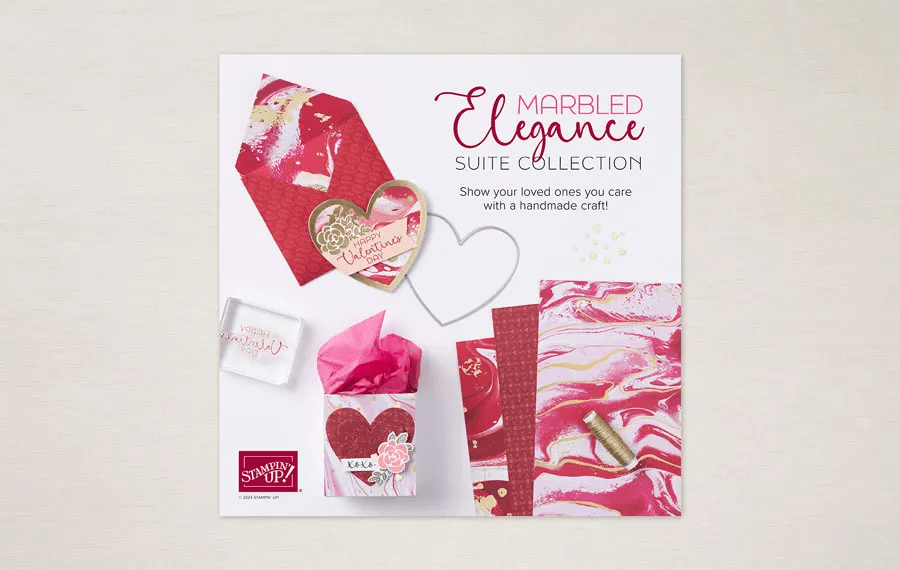
Good day sweet folks… we had card class yesterday using the the Marbled Elegance products from the suite – ONLINE EXCLUSIVES. This is a sweet, sweet set of stamps/ dies – the Heart of Elegance Bundle. Take a peek at the card and notice the deep embossing on the white heart – love! And what I like a lot is that this card could be a masculine card, birthday card, anniversary card, thinking of you card, or a LOVE card :O) It’s versatile. And… this is a fun fold.
I wanted you to see the side view to notice how the center is the fold fold portion. So maybe we call this a ‘center fun fold’??? If you have a better name for it, let me know!
I began with a card base of Real Red 4 1/4 x 5 1/2 and layered a Basic White panel 4 x 5 1/4. Cut a Basic White 3 1/4 x 8 and score on long side at 4. Attach to card base, centering and even with the Basic White at top & bottom. Cut two strips of DSP 7/8 x 3 3/4 and add to side edges. They will lay up against the center folded panel. (my DSP strips are 3/4″ wide and I didn’t like all the white. Trust me, it looks better with wider strips!) Add the Marbled Elegance DSP 3 x 3 3/4 to the front of this panel. Now cut a heart from Gold Foil and another from Basic White and adhere together. Attach with dimensionals to the fun fold panel. I stopped here but there is more that could be done: add adhesive-backed gold hearts from the suite, add a bow using the gold twine in the suite; or add a sentiment banner across the front. Because I have someone specific in mind for this card, I knew they would prefer something more on the simple side – and it’s gorgeous as is – in my opinion that is.
For the inside.. my students (remember this was a card class) chose to heat emboss with the Gold WOW embossing powder, the sentiment ‘Love you” from the Heart of Elegance stamp set. I took a scrap strip of the DSP and adhered it across the bottom. I will heat emboss a sentiment, just not now.
Click here to watch an unveiling video of how the papers were created and some samples created.
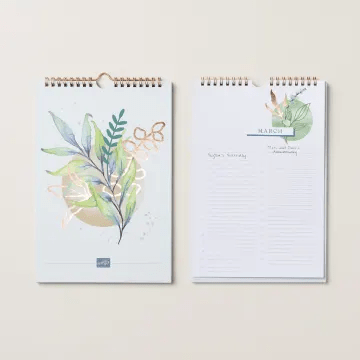
Perpetual Beauty Calendar Kit available 12/3
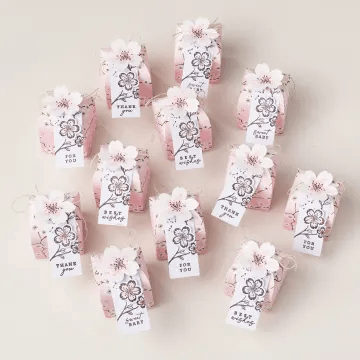
Cherry Blossom Treats Kit, available 12/3
There are two NEW KITS available in the Kits Collection. They are shown below. To view other kits available, click here.
I am always so sad to see products go away, but what it means is… make room for NEW! If you do not have a demonstrator, I would be happy to send you a copy of the NEW 2025 January-April Mini Catalog and the accompanying Jan/ Feb 2025 Sale-a-Bration catalog.
Last Chance Products include retiring products from both catalogs and online releases, excluding Paper Pumpkin.
Last Chance Products in this category are available while supplies last and will be discontinued when they sell out. Items will be automatically removed from the category and the online store when they are discontinued.
Discounts vary and are subject to change. Also, depending on inventory, these products may or may not have discounts.
We may add individual items from bundles or suite collections to our Last Chance Products category. If one or more products from the suite collection or bundle are in the Last Chance Products category, then the bundle and suite collection will also appear in this category. The bundle or suite will not be orderable if one or more of the items in the bundle or suite collection sell out. Our standard 10% bundle discounts will be available if one or more of the items move to the Last Chance Product category; however, the item in the Last Chance Products category may have a deeper discount.
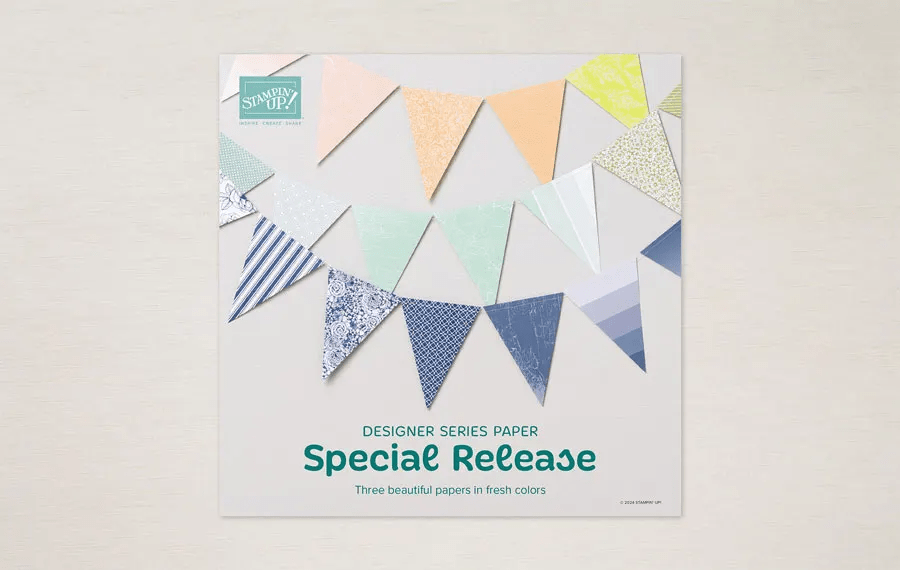
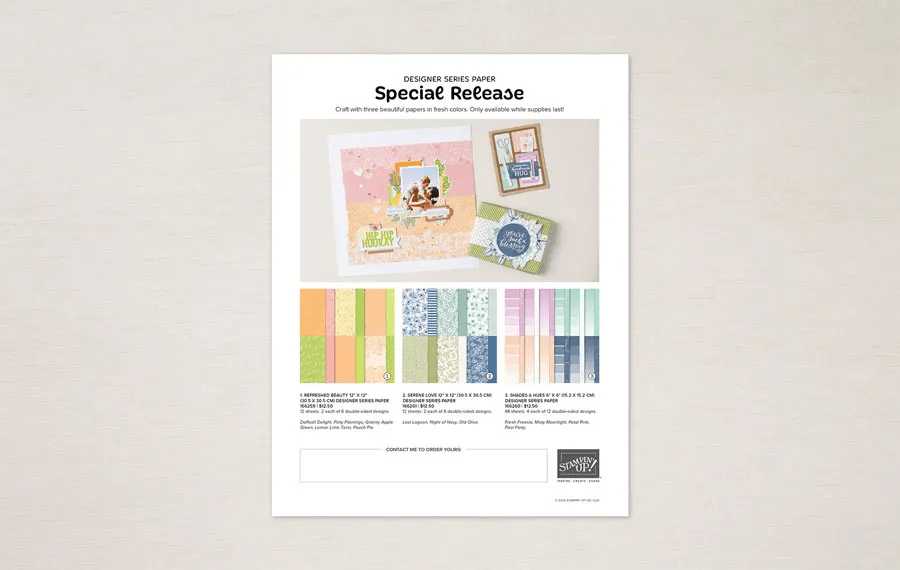
Stampin’ Up! refreshed these previous Designer Series Papers using some of our best-selling colors!
Serene Love is recolored from True Love.
Refreshed Beauty is recolored from Blackberry Beauty.
Shades & Hues is recolored from Color Theory.
Available while supplies last.
Sales begin Dec. 3, 2024 as part of the ONLINE EXCLUSIVES – click to see what’s available right now!
When shopping with me, please use the new host code listed below. This is good 11/20 – 12/11. Use it when your order is $50 to just less than $150 to receive a free gift from me + the monthly tutorial. If your order is over $150, SU! has it’s own rewards so don’t use my code… but I will still send that free SU! item to you valued up to $10. Got that? If not, connect with me to talk you through it. :O) I would love to have you join my team and we can create & have some fun together. Please make certain my name is on as your demonstrator when ordering :O)
HOST CODE Q4Y3MQEU
Thanks so much for joining me today. I hope you enjoyed my card and this hop. May you have a beautiful day!
Happy Sunday morning – crispy air here today at 48 degrees. I have an easy fun fold today, one I found on Pinterest – hope you like it.
Susan Campfield created this card in a video tutorial and I liked the ease of it, then did my own thing.
Card Cuts:
5 1/2 x 5 1/4, score on short side at 4 1/4 (here I used Real Red)
4 x 4 (again, Real Red)
DSP panels: 3/4 x 4 (cut 2); 3/4 x 5 1/4; contrasting DSP 3 x 3 3/4 (here I used Take A Bow 6×6)
Basic White: 3 x 3 (circle on front) 2 x 3 (stamped holly); 4 x 3 3/4 (inside)
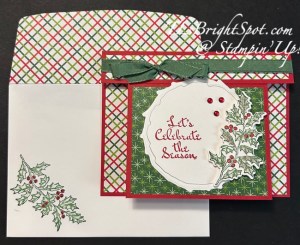
The first step is to burnish the score line on the card base, then add the 4 x 4 panel, centering it left & right & even with the bottom of the card base. This means it does not attach all the way to the score line! Now adhere the DSP panels: the 3/4 x 5 1/4 across the top and the two 3/4 x 4 panels on. the inside – keeping an even border on each – and the 3 x 3 3/4 on the front panel. Wrap a ribbon around the top & tie a bow. Here I used a retired Garden Green ribbon and kept it in place with a glue dot. As an option you could use that top area for a sentiment.
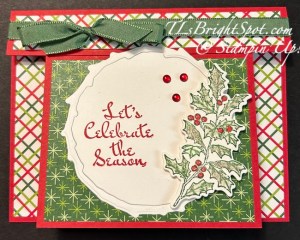
For the front… with Decked Circles Dies (6th from center), die cut a circle in Basic White and stamp with Sentimental Wishes stamp set and Real Red ink. Add it to the card front with dimensionals. Stamp the holly image from Sentimental Wishes in Garden Green ink and with a water painter very slightly damp, pull the color on the holly leaves. Don’t over work this step. With a Real Red Marker, color the berries, then die cut the image with the coordinating Sentimental Wishes Dies. Attach with dimensionals to the circle. Add Cherry Cobbler Adhesive-Backed Berries – and the card front is complete. :O)
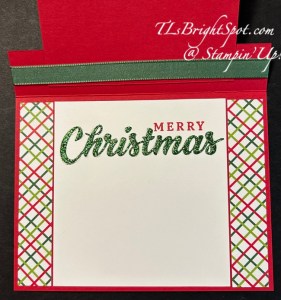
On the inside… with Peaceful Season Dies and Festive 12×12 Glimmer paper in Garden Green, die cut the word Christmas and adhere to the inside of the card. Remember to save the dot on the ‘i’ and attach it as well. Now stamp the word ‘merry’ from Peaceful Season stamp set in Real Red ink. Adhere the Basic White panel to the inside of the card & voila – the card is complete.
For the envelope … more of the Take A Bow DSP is adhered to the flap & trimmed to fit. AgainI stamped the holly using the Sentimental Wishes stamps in Garden Green ink, used the water painter barely damp to pull the color into the leaves. I used a Real Red marker to color the berries.
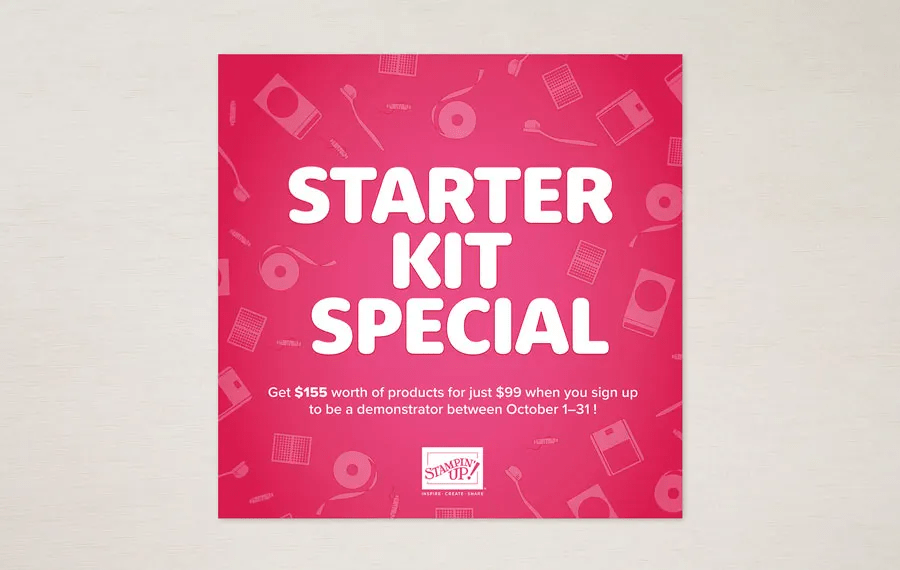
There’s only a few more days to take advantage of our Starter Kit Special! Those who sign up to be Stampin’ Up! demonstrators by October 31 will get $125 USD | $165 CAD$155 USD | $206 CAD worth of products in their Starter Kit for just $99 USD | $135 CAD! This offer also includes FREE business supplies and FREE shipping. Not to mention all the FUN that comes with being part of our fantastic crafting community. Join with me here…
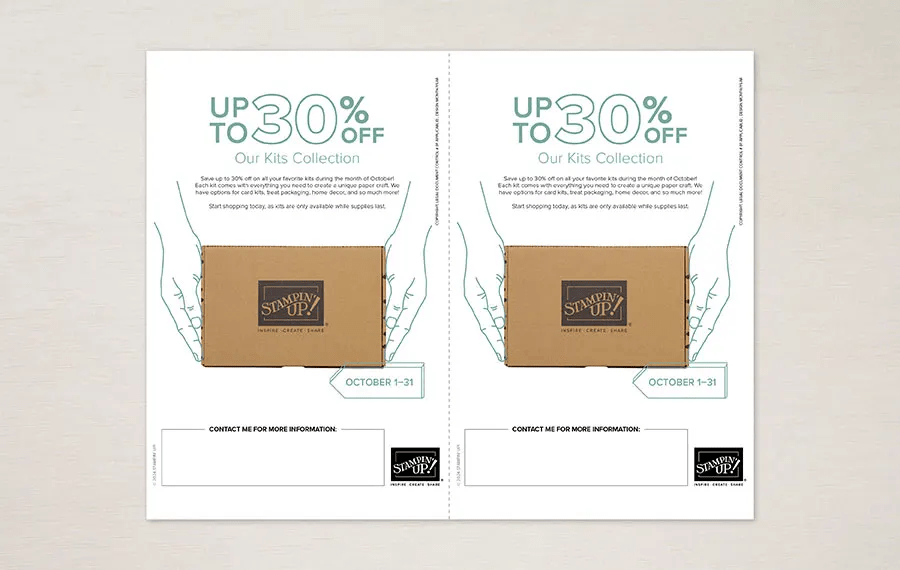
The Kits Collection Sale Ends Soon
Our Kits Collection sale is coming to an end. These are the last few days for you to shop all our kits at up to 30% off. Shop our wide selection of kits before it’s too late! See the Kits Collections here.
OK – so time to order… don’t forget to use a HOST CODE FYAH4HG3 when placing a $50 order or more. This gets you a free item from me valued up to $10 for a Stampin’ Up! item.
Thanks for stopping by… love to hear from you, thank you for comments shared. May you have a beautiful day!
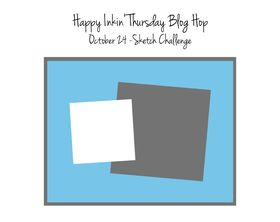
Welcome, welcome. It’s Thursday and time for another Happy Inkin’ Krew Blog Hop! You may have popped in from Tara – or from another Krew member. Enjoy as you make the rounds 😀
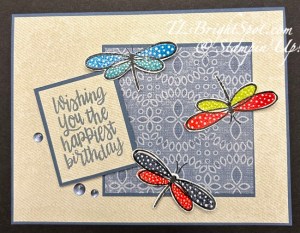
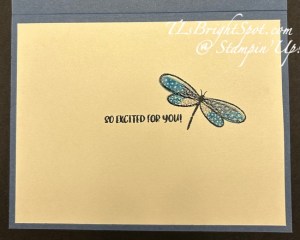
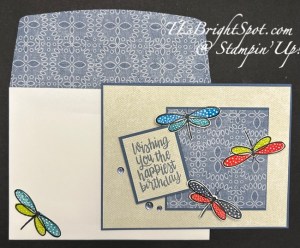
So this sketch was a fun challenge! There are so MAN papers I could have used, but I needed a birthday card and also to play with this stamp set. After adding co0lor to each of the dragonflies, I stamped again with VersaMark ink, sprinkled with clear embossing powder and heat set it for a nice ‘glow, then fussy cut each one with my fabulous Stampin’ Up! Paper Snips. The top left dragonfly is Azure Afternoon for the top wings and Balmy Blue for the bottom wings. The upside down dragonfly is Lemon Lime Twist for the smaller wings and Poppy Parade for the larger wings. The last dragonfly is Misty Moonlight for the larger wings and Poppy Parade for the smaller wings. The top left and bottom dragonflies are added with a single mini dimensional while the remaining dragonfly was adhered with liquid glue. I drew antennae with a Basic Black Marker with the fine tip end.
Card Cuts:
Card base 8 1/2 x 5 1/2 scored at 4 1/4 (Misty Moonlight)
DSP layer from Country Lace is 4 1/8 x 5 3/8
The square is Misty Moonlight 3 x 3 with a layer of Country Lace 2 7/8 x 2 7/8 and adhered directly to the card front
The sentiment panel is 1 11/16 x 2 with more Country Lace 1 1/2 x 1 7/8 and attached with dimensionals. The sentiment is from Happiest Day and stamped in Misty Moonlight ink.
As a final touch on the card front, I added 3 Adhesive-Backed Dots
For the inside I cut a panel of Basic Beige 4 x 5 1/4, stamped it in the center with memento ink (sentiment is from Happiest Days). I then stamped the dragonfly in Mementop in, added color with additional wing stamps: Misty Moonlight and Balmy Blue inks and drew the antennae with the same Basic Black marker with the fine tip. I did the same as before by stamped over the color with VersaMark ink, sprinkling with Clear embossing Powder and heat set. It gives a nice glowy to the wings.
On the envelope I stamped the same dragonfly as before – Memento ink – colored it with Balmy Blue ink for the top wings and Lemon Lime Twist for the smaller wings. On the flap I added another panel of the Country Lace DSP – and done!
Time to make the rounds and see what everyone else is creating with this sketch challenge. Click the next button to take you to Carol – or click on a name. Whatever you do – don’t miss a single new creation from this Krew!
There’s only a few more days to take advantage of our Starter Kit Special! Those who sign up to be Stampin’ Up! demonstrators by October 31 will get $125 USD | $165 CAD$155 USD | $206 CAD worth of products in their Starter Kit for just $99 USD | $135 CAD! This offer also includes FREE business supplies and FREE shipping. Not to mention all the FUN that comes with being part of our fantastic crafting community. Join with me here…
The Kits Collection Sale Ends Soon
Our Kits Collection sale is coming to an end. These are the last few days for you to shop all our kits at up to 30% off. Shop our wide selection of kits before it’s too late! See the Kits Collections here.
OK – so time to order… don’t forget to use a HOST CODE FYAH4HG3 when placing a $50 order or more. This gets you a free item from me valued up to $10 for a Stampin’ Up! item.
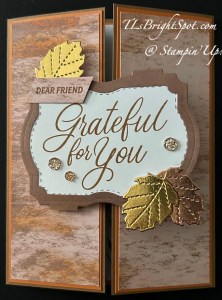
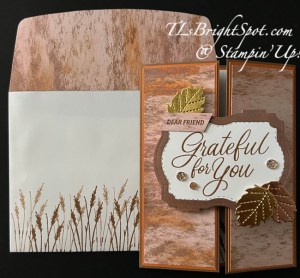
Welcome, welcome! Welcome to this blog hop group! Our theme this month is ‘Giving Thanks’ in whatever way that means for us… and I have lots for which to be thankful: people, support, this team and other teams, family, a roof over my head – just LOTS! I chose to use the Autumn Expressions bundle – beautiful script stamps, great dies (I’m a succor for leaf dies) and a host of other beautiful Stampin’ Up! products.
Stunning leaf die cut from Textured Metallic 12×12 Specialty DSP in both gold (2) and copper (1). And the very swirly script and framing – all from the Autumn Expressions bundle. Such a great set! The additional DSP is an online product – Meandering Meadows 6s6 DSP. I cut the front panels to look like sunset, the oranges and pinks streaking across the sky. The ‘frame’ is from another panel of the Meandering Meadows DSP.
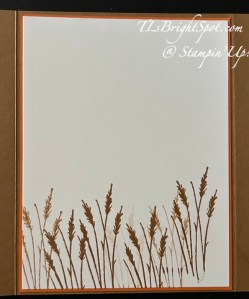
For the inside, I used this wonderful ‘grass’ stamp and Pecan Pie ink – first generation and 2nd generation – to stamp across the bottom. How to do that? Ink the stamp, stamp the paper, stamp again without re-inking. This second stamping is called second generation.
Card Cuts/ directions:
Pecan Pie for the card base – 8 1/2 x 5 1/2, scored at 2 1/8 on the long side. Burnish and fold other side to meet it, burnishing it as well. Why do I do this in lieu of scoring on each side at 2 1/8? ‘Cuz it doesn’t always come together in the middle – and I want them to. I have found this to be the easiest way to make sure that happens.
Cut Pumpkin Pie 2 x 5 3/8 (2) and adhere to each side front panel
Cut Meandering Meadows 6×6 DSP 1 7/8 x 5 1/4 (2) and adhere to the Pumpkin Pie
On Basic White 2 3/4 x 3 3/4, stamp the sentiment from Autumn Expressions stamp set in Pecan Pie ink. Die cut with the smaller ‘frame’ from Autumn Expressions Dies. Die cut the outside ‘frame’ for this using the larger ‘frame’ die. Attach together with dots of liquid glue.
Die cut the gorgeous leaves from 1 1/4 square Textured Metallic 12×12 SDSP – two in gold and one in copper. Attach one go0ld leaf to the top of the sentiment frame with liquid glue, then the copper leaf on the opposite corner also with liquid glue. Attache the other gold leaf with a dimensional. Add three Drusy Adhesive-Backed Embellishments on the sentiment panel. Add sentiment panel to the left side of the gate fold – and the card front is complete!
For the envelope… I added more of the same Meandering Meadows 6×6 DSP to the flap and trimmed to fit. Do the same stamping technique as before along the envelope front.
This can so easily be a masculine card if needed. I like that versatility! And many of these products may be found in the Sep-Dec 2024 Mini Catalog, Card Stocks & inks, acrylic blocks, paper trimmer – these ‘staples’ are in the Annual Catalog.
Time to continue the hop – click on a name or use the previous & next buttons to take you to specific folks. Thanks for dropping in!
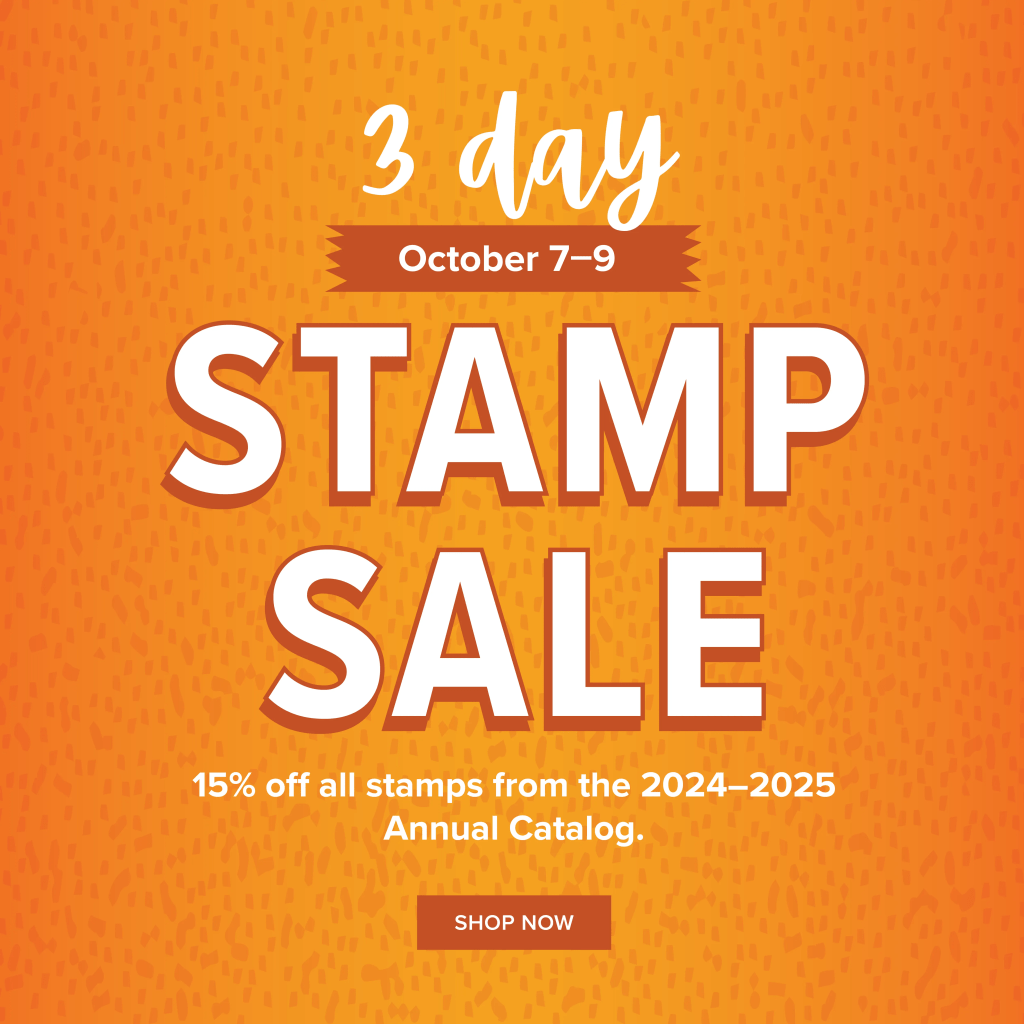
Click on the image above to shop the Stampin’ Up! stamp sale.
If you’ve had your eye on a certain stamp set or two (or ten) from the 2024–2025 Annual Catalog, then we have some exciting news! From October 7–9, all the stamp sets (excluding bundles) from the 2024–2025 Annual Catalog will be 15% off!
Here are the details:This stamp sale only happens once a year!
The sale will run for three days.
The 15% off discount will apply to all stamp sets (photopolymer and cling) from the 2024–2025 Annual Catalog.
Bundles are not included in this sale.
Stamp sets are available while supplies last.
Sales Period: October 7, 2024, at 12:00 a.m. to October 9, 2024, at 11:59 p.m. (MT)
Ordering Deadlines: By Phone – October 9, 2024, at 6:59 p.m. (MT), or Online – October 9, 2024, at 11:59 p.m. (MT)
Promotion Period: October 1–31
Ordering Deadlines
Phone: October 31 2024, at 6:59 p.m. (MT)
Online: October 31 2024, at 11:59 p.m. (MT)
Become a demonstrator between October 1–31 can get $125 USD | $165 CAD$155 USD | $206 CAD worth of products for just $99 USD | $135 CAD.
Being a part of Stampin’ Up!’s creative community also comes with several perks, including early access to products, special discounts, a chance to earn product credits, access to exclusive trainings, demonstrator-only events, and so much more.
As a demonstrator, I am here to help you through the join process and beyond.Join with me here.
Kits Collection Salestarted Oct 1!
Exciting news! We’re having a huge sale on our Kits Collection beginning October 1! All kits will be available at a discounted price. Save up to 30% off on all your favorite kits October 1–31! Our kits come with everything you need to create a unique paper craft. We have crafting options for card kits, treat packaging, home decor, and so much more! Click here
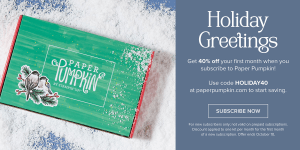
Santa Claus is comin’ to town a bit early this year—and he’s brought a holiday Paper Pumpkin sale! Starting September 11, 2024, at 12:01 a.m. (MT) until October 10, 2024, at 11:50 p.m. (MT), anyone who signs up for our monthly Paper Pumpkin subscription as a new subscriber will receive 40% off their first kit. That’s right, 40% OFF!
Where This Discount Is Applied This discount will be applied to one kit in the first kit shipment of the Paper Pumpkin subscription, which means new subscribers will get 40% off the October Nests of Christmas Paper Pumpkin Kit. After that, each month’s kit will return to the regular price of $25.00.
Qualifying for This Discount This offer is only for new month-to-month subscribers and is not valid on purchased or redeemed prepaid subscriptions.
Now that you’ve read through all the details, it’s time to head to paperpumpkin.com to subscribe and use code HOLIDAY40 to get 40% off.
Click the link above to take you to the ONLINE EXCLUSIVES!
I appreciate your business and welcome any questions regarding sales or creating or joining my team. Make sure when shopping with me, that you see my name at the top as your demonstrator. That way I can send you a Stampin’ Up! giftie and you can earn rewards – with a $50 order or more. You also receive the monthly tutorial for that particular month – for October, it is More Than Autumn bundle.
Click the image above to take you to the ONLINE EXCLUSIVES!
I appreciate your business and welcome any questions regarding sales or creating or joining my team. Make sure when shopping with me, that you see my name at the top as your demonstrator. That way I can send you a Stampin’ Up! giftie and you can earn rewards – with a $50 order or more. You also receive the monthly tutorial for that particular month – for October, it is More Than Autumn bundle.
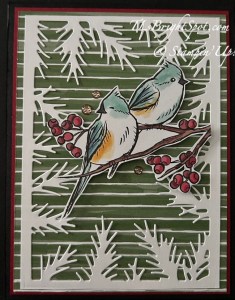
Welcome to the HOP! Our theme today is fun folds – and there will be some extraordinary ones, I am certain. I have chosen a tried & true front flap fun fold for today, using the WinterlyTree Tops bundle, the Christmas Labels bundle and Nests of Winter 12 x 12 DSP.
I’m going to be honest, I haven’t played with this set and I’ve had it for a bit. I… LOVE… IT… The pine frame is from Basic White card stock (3 5/8 x 5) and die cut with Winterly Tree Tops Dies. The birds are fussy cut (paper snips) from the Nests of Winter 12×12 DSP and added with dimensionals. The background (stripes) is also from this DSP pack (3 7/8 x 5 1/8) and was layered on Cherry Cobbler (4 x 5 3/8), and adhered to the Basic Black card front. I added three Pecan Pie Ribboned Adhesive-Backed Dots (an ONLINE EXCLUSIVE). Let’s look at how this card opens… the front flap opens from the top to show the gatefold, below.
The layers are Cherry Cobbler (2 x 5 3/8 – cut 2) and a smaller Nests of Winter 12×12 DSP (1 7/8 x 5 1/4- cut 2) and adhere together and then to the Basic Black card baseThe sentiment panel is stamped on Basic White with Cherry Cobbler ink using the Christmas Labels stamp set then die cut with the coordinating Christmas Lablels Dies. Only the left side of the label was attached to the left ‘gate’.
Here is the inside…
The inside… a panel of Basic White (3 7/8 x 5 1/8) with another fussy cut bird from the Nests of Winter 12×12 DSP attached with liquid glue. This panel was added to Cherry Cobbler (4 x 5 1/4) then to the inside of the Basic Black card base. All opened out the card looks like this…
And the envelope I kept very simple… more of the Nests of Winter 12×12 DSP on the flap & trimmed to fit, and a sentiment stamped in Cherry Cobbler ink from the Christmas Labels stamp set.
These two bundles and the DSP may be found in the Stampin’ Up! Sep-Dec 2024 Catalog. The card stock & adhesive, scissors, paper trimmer, bone folder are in the Stampin’ Up! 2024 Annual Catalog. And the adhesive dots part of the Stampin’ Up! ONLINE EXCLUSIVES. You can find more information about shopping with me below the list of names of those participating in the hop today – so scroll down to learn more.
Carol is the next participant on the hop and she always has something amazing to share. Click the next button or click on a name to take you on an extraordinary adventure.
LOTS GOING ON IN THE STAMPIN’ UP! WORLD – give me a few minutes to share the excitement…
Kits Collection Salestarted Oct 1!
Exciting news! We’re having a huge sale on our Kits Collection beginning October 1! All kits will be available at a discounted price. Save up to 30% off on all your favorite kits October 1–31! Our kits come with everything you need to create a unique paper craft. We have crafting options for card kits, treat packaging, home decor, and so much more! Click here
Santa Claus is comin’ to town a bit early this year—and he’s brought a holiday Paper Pumpkin sale! Starting September 11, 2024, at 12:01 a.m. (MT) until October 10, 2024, at 11:50 p.m. (MT), anyone who signs up for our monthly Paper Pumpkin subscription as a new subscriber will receive 40% off their first kit. That’s right, 40% OFF!
Where This Discount Is Applied This discount will be applied to one kit in the first kit shipment of the Paper Pumpkin subscription, which means new subscribers will get 40% off the October Nests of Christmas Paper Pumpkin Kit. After that, each month’s kit will return to the regular price of $25.00.
Qualifying for This Discount This offer is only for new month-to-month subscribers and is not valid on purchased or redeemed prepaid subscriptions.
Now that you’ve read through all the details, it’s time to head to paperpumpkin.com to subscribe and use code HOLIDAY40 to get 40% off.
Click here to take you to the Sep-Dec 2024 Mini Catalog
Promotion Period: October 1–31
Ordering Deadlines
Phone: October 31 2024, at 6:59 p.m. (MT)
Online: October 31 2024, at 11:59 p.m. (MT)
Become a demonstrator between October 1–31 can get $125 USD | $165 CAD$155 USD | $206 CAD worth of products for just $99 USD | $135 CAD.
Being a part of Stampin’ Up!’s creative community also comes with several perks, including early access to products, special discounts, a chance to earn product credits, access to exclusive trainings, demonstrator-only events, and so much more.
As a demonstrator, I am here to help you through the join process and beyond.Join with me here.
Click the image above to take you to the ONLINE EXCLUSIVES!
Want to just shop? You can do that too. I appreciate your business and welcome any questions regarding sales or creating or joining my team. Make sure when shopping with me, that you see my name at the top as your demonstrator. That way I can send you a Stampin’ Up! giftie and you can earn rewards – with a $50 order or more. You also receive the monthly tutorial for that particular month – for October, it is More Than Autumn bundle.
HOST CODE … SEP 26- OCT 15 NDADFHMR
Thanks for stopping by. May you have a beautiful day!