Sneaky Peeks are so fun – you get to see new products that will be available in the Sep-Dec 2025 Mini Catalog and I get to p-l-a-y! Or should I say, experiment?! We hasve a challenge for this blog hop – “fall frenzy” and we can interpret that any way we like. So, here we go…
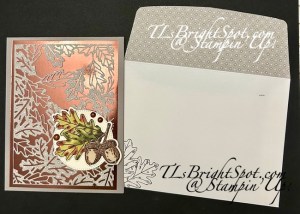
This is a BRAND NEW bundle – part of a suite of products in the Sep-De c 2025 Mini Catalog… Love, love, love this suite of products! We have LOTS of oak trees in our back area and because of that, acorns. That inspired this card – of course along with the theme. 😀 I used Gray Granite for my card base, then a layer of the shiny Earthen Toned Metallic Specialty Paper. It has a brownish coppery kind of look and as I said – is shiny. I then die cut the leaves using the Amber Autumn Dies (it’s one die) using the Autumn Toile DSP with Adhesive Sheet attached. Removing the adhesive sheet, I attached it to the Earthen Toned Metallic Specialty Paper. The main image is stasmped in Early Espresso ink and colored with several Stampin’ Blends: Old Olive, Mossy Meadow, Crumb Cake & Cajun Craze.I used a Blender Pen to move the Early Espresso ink on the acorn top and on the shading of the acorn, then filled in the rest of the acorns with Crumb Cake. After coloring, I die cut this image with the Amber Autumn Dies. I adhered this to a Stitched Shapes circle (third from largest) in Very Vanilla. This was attached to the card front with dimensionals. As a final touch three of the Streaked Dots, part of this suite of products.
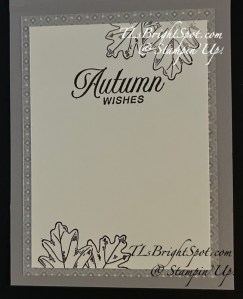
For the inside of the card… I stamped the sentiment in Early Espresso ink, then stamped a portion of the acorn stamp (also from Amber Autumn stamp set. stamping in the upper right corner, re-inking and stamping in the lower left corner.. This Very Vanilla stamped panel was adhered to an Autumn Toile DSP, then attached to the inside of the card.
For the envelope… more of the same Autumn Toile DSP adhered to the flap & trimmed to fit. Again… I stamped a partial image of the acorn stamp from the Amber Autumn stamp set in the lower left corner.
Now check out what the others in this group have created just for this hop. Click the next button or click on a name to take you around.
Good Monday! It’s turned cold again after a very beautiful day of 81 degrees – ah, that’s Spring. That 81 degrees made the hostas pop up, helebores are in full bloom (they love the cool!), daffodils & crocus are blooming as well. I really enjoy this time of year.
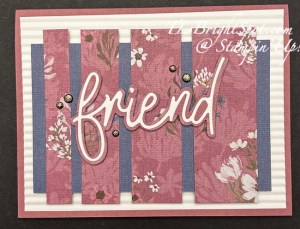
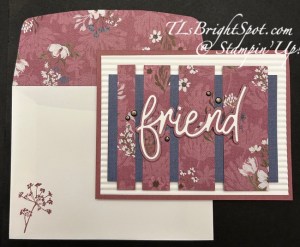
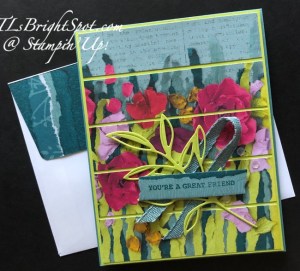
My card today is for a friend who isn’t feeling all that great, I’ve combined the Friends For Life Dies and the Wanted To Say Dies to create my messages – and the last of my Wildly Flowering 12×12 DSP.
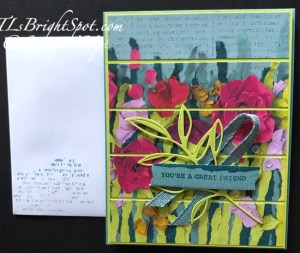
To make this card I began with my card base: Moody Mauve cut 8 1/2 x 5 1/2 and scored at 4 1/4. I layered a panel of Basic White 4 x 5 1/4 that I ran through a brand new Mini Corrugated 3D embossing folder, a new favorite. This piece was adhered directly to the card base. Next I cut a piece of the Wildly Flowering DSP 4 x 3, that coordinates with the strips of another piece of the Wildly Flowering DSP. This was cut 3 1/2 x 3 1/2, then into strips 1/2, 3/4, 1 & 1 1/4. I spaced then evenly along the 4 x 3 panel & adhered with Stampin’ Seal. I took a scrap of the Wildly Flowering DSP 4 x 2 1/2 & die cut the background for the word ‘friend’ from the Friends For Life Dies. Next I took a piece of Basic White 4 x 2 5/8 and covered the back with Adhesive Sheets. I then die cut the word ‘friend’ from that, removed the backing of the Adhesive Sheet and attached it to the DSP background die cut. I put this on dimensionals and adhered it over the DSP strips, added dimensionals to the 4 x 3 DSP panel and attached to the card front. As a final touch, I added five (5) Adhesive-Backed Textural Dots and the card front was complete.
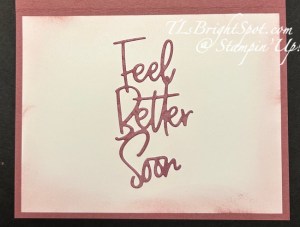
For the inside, I took another piece of the Wildly Flowering DSP in Moody Mauve, 2 1/2 x 3 1/2, attached aAdhesive Sheet to that & die cut the sentiment from the Wanted To Say Dies. I attached this to the center of a Basic White piece 4 x 5 1/4. I then used a Blending Brush & Moody Masuve ink to add some color to the edges of this Basic White panel, then attached it to the inside of the card.
For the envelope, more Wildly Flowering DSP, 2 1/4 x 6, attached to the flap & trimmed to fit. A simple flower from the Wildflower Designs stamp set was stamped in Moody Mauve ink on the envelope front. Done, ready to send in hopes my friend will ‘feel better soon’!
The 2024-2025 Annual Catalog is quickly coming to an end – and the 2025-2026 catalog will be released soon. I believe this Wildly Flowering DSP is on the Last Chance List. Tomorrow, the list will be updated with all the retiring items and I’ll include it in my post. If there is something you want, get it quickly as once it is gone, it will not be replaced. Use my host code below to receive benefits from me when you purchase is $50 & up… a SU! item valued up to $10 & the monthly tutorial.
HOST CODE Y3TPZVYN
The 2025-2026 Annual Catalog will be released May 6. Items from that catalog can be viewed then, but not until then :O) – unless you are a Demonstrator, then that’s different. Preorders for demonstrators have begun. Want to be a demonstrator and always get at least 20% off each order? Sign up with me now & you will be able to order items for your Starter Kit from the new catalog. For $99 you will be able to order $125 worth of products. click this link, then the join menu :O)
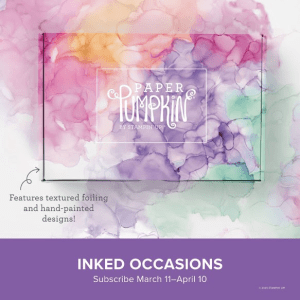
Inked Occasions Paper Pumpkin
Subscribe March 11 – April 10
Subscribe March 11 – April 10
I’m extra excited about this particular PP. We had something similar in the past & it was gorgeous – looking forward! Craft stunning cards with hand-painted, alcohol ink designs! • Makes 9 cards: 3 each of 3 designs with 9 coordinating envelopes • Textured gold foil on the card bases and sentiments • Precut paper pieces and butterfly embellishments • Coordinating colors: Berry Burst (Classic Stampin’ Spot), Flirty Flamingo, Fresh Freesia, Gorgeous Grape, Peach Pie, Pool Party
Cards come in a beautiful coordinating box!
Subscribe to the April Paper Pumpkin Kit between 11 March and 10 April by clicking here.
Thanks for stopping by. May you have a beautiful day!
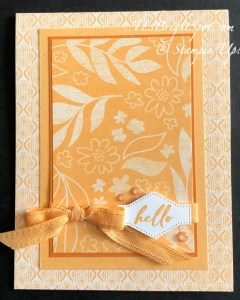
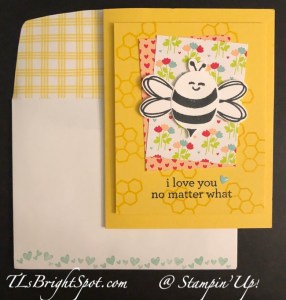
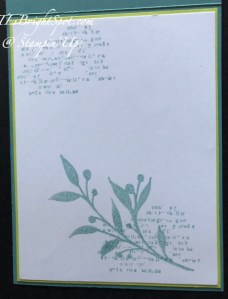
It is amazing what one finds when tidying their desk! That would be me :O) What I found is this pretty piece of watercolor paper and I decided not to set it aside any longer. I stamped this gorgeous image of the flower from the You Are Remarkable stamp set – in Secret Sea ink – one of the new In Colors available May 6. This is a two step stamp, so the flowers have a ‘filler’ stamp and I used Melon Mambo ink for that; again the leaves have a ‘filler’ stamp and I used Granny Apple Green; and finally, the center is a stamp that is Crushed Curry ink. I stamped the sentiment, also from the You Are Remarkable stamp set, in Secret Sea ink. I adhered this panel to Melon Mambo card stock, giving it a small border, put dimensionals on that and adhered to a 4 x 5 1/4 Secret Sea panel die cut with the largest Textures Notes Dies. This was adhered directly to the 8 1/2 x 5 1/2 card front, scored at 4 1/4 of course. Two steps more for the card front – Wink of Stella on the flower – petals & center and three Iridescent Pearls Basic Jewels scattered in a bit of triangle.
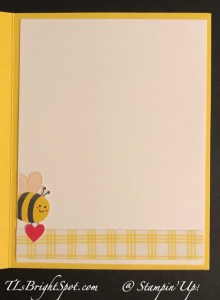
For the inside… I used the second largest die from Textured Notes Dies – again available May 6 – and Basic White card stock, to die cut the inside panel. I then stamped the very cute bee buzzing in Secret Sea ink.
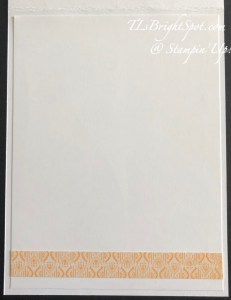
The envelope… Another sweet buzzing bee stamped in Secret Sea ink in the front and another of the same flower stamped on the flap, just a portion of it though – with same coloring as the card front. Silly me did not photograph that! :O(
The stamp set, Secret Sea ink and dies will all be available May 6. The other products are in the annual catalog.
Thanks for stopping by. May you have a beautiful day!
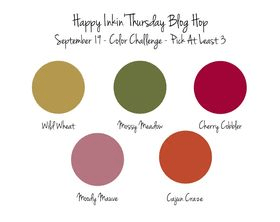
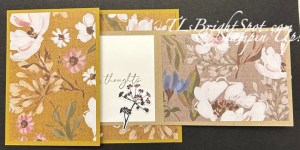
It’s Thursday and you know what that means – a VERY FUN HOP! We have a color challenge today and I’ve chosen to use the Wildly Flowering DSP as my focus and the coordinating suite to highlight this fun fold card.
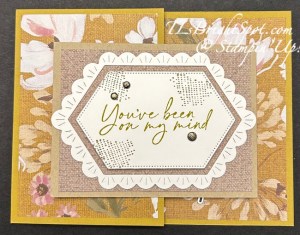
This is called a JOY FOLD card – and is two cards in one so to speak. The colors are mostly Wild Wheat, Mossy Meadow and Moody Mauve. This is just gorgeous Designer Series Paper – Wildly Flowering 12 x 12 DSP. And here’s how we put this together…
Build your card base first: Wild Wheat 4 1/4 x 8 1/2 scored @ 3
Add DSP layers: 4 x 5 1/4 (inside right panel) and 2 3/4 x 4 (inside flap – I embossed this panel in the Dashing Designs 3D EF) and another flower panel on the left front 2 3/4 x 4
On the inside front panel, die cut from Wild Wheat the hexagon using the Wildflower Designs Dies; add to panel.
Stamp this larger flower on a Basic White scrap in Memento ink using the Wildflower Designs stamp set. Color with Stampin’ Blends Wild Wheat, Moody Mauve and Mossy Meadow. Add to hexagon and embellish with Adhesive-Backed Textured Dots.
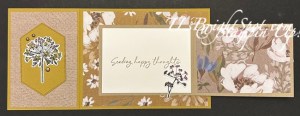
Create the ‘mini’ card: Crumb Cake 3 x 8 and scored @ 4.
Add to card base, centering it on the right card base panel
Add DSP to inside right mini card 2 3/4 x 4 and to mini card front 2 3/4 x 4 (embossed with Dashing Designs 3D EF)
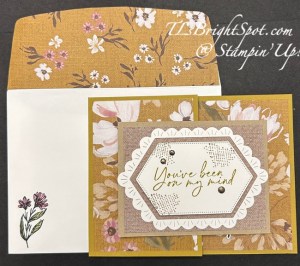
Decorate mini card front: die cut from Basic White both the scalloped hexagon and the stamped hexagon using the Wildflower Designs Dies. Adhere the scalloped design directly to the mini card front. Stamp the remaining hexagon with Wildflower Designs stamps – the sentiment in Wild Wheat ink and the dots in Crumb Cake ink. Add to mini card front with dimensionals and embellish with Adhesive-Backed Textured Dots, part of this suite of products.
To the inside of the mini card… stamp the sentiment on a Basic White panel (2 3/4 x 4) in Crumb Cake ink using the Wildflower Designs stamp set. Add a stamped & die cut flower: stamped with Memento ink and colored with Moody Mauve Stampin’ Blends & die cut with Wildflower Designs Dies.
With the card complete… time to decorate the envelope… add another panel of Wildly Flowering DSP 2 1/4 x 6 to the flap and trim to fit. On the front, stamp another of the flowers from the Wildflower Designs stamp set in Memento ink and color with Stampin’ Blends Moody Mauve and Mossy Meadow.
Now… time to visit the others participating in this fun hop. Don’t miss a one! Click on the ‘next’ button or click on a name to take you around to visit everyone. Enjoy!!!
Use this link to take you to the mini catalog and view all the awesome items available.
I appreciate your business and welcome any questions regarding sales or creating or joining my team. Make sure when shopping with me, that you see my name at the top as your demonstrator. That way I can send you a Stampin’ Up! giftie and you can earn rewards – with a $50 order or more. You also receive the monthly tutorial for that particular month – September is Autumn Expressions.
There are new kits available beginning Sep 4 – check by clicking here.
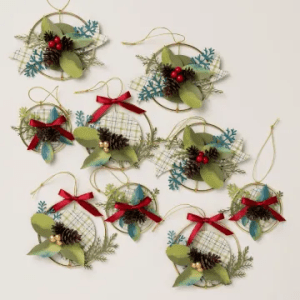
Christmas Ornaments kit – NEW!
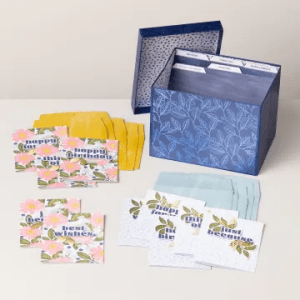
Card Keeper kit – NEW!
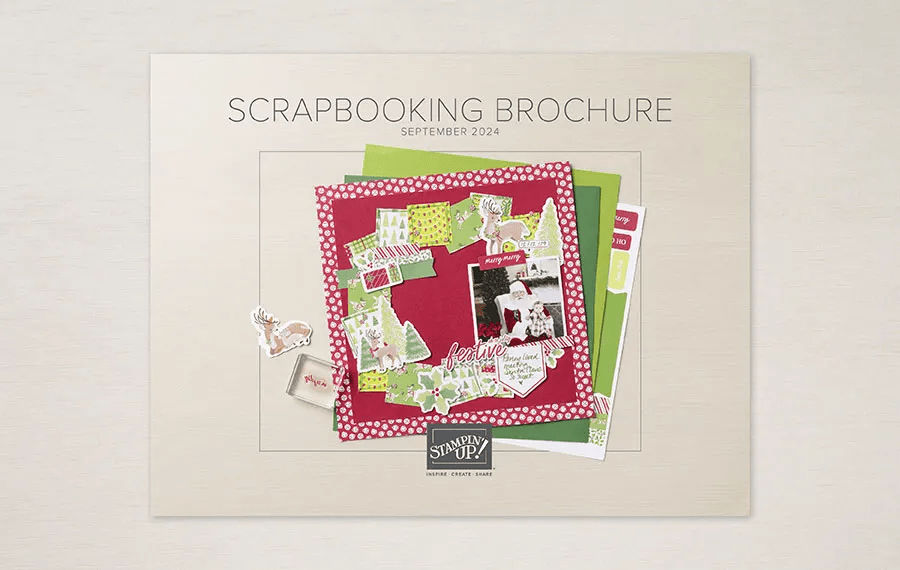
There are new scrapbooking supplies available, click here! Also – click on the brochure for other information. This is a digital-only scrapbooking brochure, full of scrapbooking essentials and exciting new products. As a companion brochure to the September–December 2024 Mini Catalog, the products inside coordinate with products from the mini catalog (and some online only products, too!). With Workshop Kits and some new product releases *hint* Two-Tone Cardstock *hint*, we hope this adds variety and inspiration to your and your customers’ holiday crafts this year!
Products will be available like our Online Exclusive releases, meaning that some products will be reordered when inventory is low, and others will only be available while supplies last.
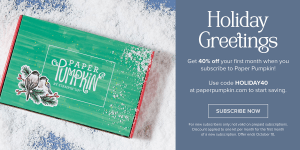
Santa Claus is comin’ to town a bit early this year—and he’s brought a holiday Paper Pumpkin sale! Starting September 11, 2024, at 12:01 a.m. (MT) until October 10, 2024, at 11:50 p.m. (MT), anyone who signs up for our monthly Paper Pumpkin subscription as a new subscriber will receive 40% off their first kit. That’s right, 40% OFF!
Where This Discount Is Applied This discount will be applied to one kit in the first kit shipment of the Paper Pumpkin subscription, which means new subscribers will get 40% off the October Nests of Christmas Paper Pumpkin Kit. After that, each month’s kit will return to the regular price of $25.00.
Qualifying for This Discount This offer is only for new month-to-month subscribers and is not valid on purchased or redeemed prepaid subscriptions.
Now that you’ve read through all the details, it’s time to head to paperpumpkin.com to subscribe and use code HOLIDAY40 to get 40% off your first month!
Click the image above to see that’s available in the ONLINE EXCLUSIVES!
Use my HOST CODE so I recognize you!
host code ZBAU6PKX
Thanks for stopping by. May you have a beautiful day. Make someone happy sending them a handmade card filled with love
Good Sunday morning. I’ve been attending a convention the past couple of days asnd while I thought this post went out, it didn’t. :O( Those of you who ordered DSP/ Ribbon shares from me – may have received your package already – or will perhaps on Monday. My overnight order arrived Thursday noon just as I was leaving for convention – so U packed everything up – paper trimmer, boxes for mailing, scissors – all that, & off I went. Timing is everything! Got the packages mailed Friday afternoon. :O) Now – the reason you are on my blog today is to see a creation of some sort – and here it is…
This is such pretty DSP – the 24-26 In Color 6×6 pack. Here’s what I did… I layered one of the Peach Pie designs on the Thick Basic White card front and adhered it in place. I cut the leaf piece 2 3/4 x 4 1/2, then layered it on Pumpkin Pie just slightly larger. I wrapped a length of the B ordered Ribbon in Peach Pie and tied a bow, securing it in place with a glue dot.I added another Peach Pie card stock layer cut larger yet, then added these to the card front. It created a nice layering effect. I pulled out this simple sentiment from the New Unbounded Love stamp set and stamped it in Peach Pie ink, then die cut it with the Unbounded Love Dies., added dimensionals to the back and put in place. Let me just add here, this Unbounded Love Bundle is a sentiment bundle and the stamps & dies are wonderful! There’s nothing like having more sentiments in your stash. As a final touch – a bit of bling with the 24-26 In Color Gems, in Peach Pie of course. Monochromatic card all the way :O)
Using a scrap of the 24-26 In Color DSP 6×6 Peach Pie, I added the 1/2″ strip to the Basic White card panel (4 x 5 1/4) – and that was it.
For the envelope… another panel of the 24-26 In Color 6×6 Peach Pie was added to the envelope flap & trimmed to fit. Love this card showing off this particular pack of DSP!
The 24-25 Annual Catalog is now live… here’s a link to take you directly to the items available in this catalog.
Stampin’ Up! has a fabulous joining opportunity from May 1-31.
To join is $99 and what comes with joining, besides your 15-20% discount on every order… FOUR free IN COLOR PRODUCTS valued to $82 plus your choice of $125 worth of products. Those FREE items – the IN COLOR products – Classic stampin’ pad bundle – 5 of them, package of 8 1/2 x 11 cardstock – 5 of those, 6×6 Designer Series Paper – 5 colors in the pack, and the coordinating Stampin’ Write markers. You will also receive free shipping on these products + free business supplies. What’s not to like about this joining special – remember it begins May 1! Join with me by following this link...
To view all the available ONLINE EXCLUSIVES, click here.
While you’re looking around in my store, remember there are some stunning kits available, for all ages and all seasons – even Christmas! And while you’re shopping, I offer fringe benefits to my customers: free tutorial of the month and a FREE Stampin’ Up! item valued to $10 – all for a $50 order, before shipping and taxes. Use my current host code to receive those benefits – especially when your order does not exceed $150.
HOST CODE 4JF6ZWC9
Thanks for stopping by. May you have a beautiful day. Make someone happy when sending them a handmade card filled with love.
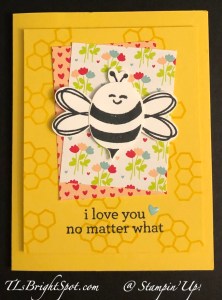
Good morning! It’s the ‘day after’ the OnStage@Home event… (now two days after – – – computer issues put a stymie on everything!) and there were several demonstrators from around the world providing tips, tricks and sharing some ideas on new products that will be offered in the Jan-Apr 2024 Mini Catalog. As demonstrators and those of us who attended the @Home event, we were able to order the Bee Mine Suite of products and make a card with card cuts provided by Stampin’ Up! I did that and today’s card is one we made. This is a fairly simple card, one that could work with new stampers.
This card uses Daffodil Delight as the card base, and a stamped layer added with dimensionals. The stamped layer uses the honeycomb stamp in the Bee My Valentine stamp set and Daffodil Delight ink. Also, stamp the sentiment in Memento ink from Bee My Valentine stamp set. Adhere the two panels of Bee Mine 12×12 DSP at an angle using Stampin’ Seal. Stamp the portions of the bee in Memento ink on Basic White scraps and punch out with the coordinating Bee Builder Punch. Adhere parts together with small dots of liquid glue and add to card front with dimensionals. I added the fun Pool Party heart from the Adhesive-Backed Hearts & Flowers pack that is also part of the suite.
I added a strip of the plaid Bee Mine 12×12 DSP with Stampin’ Seal, then fussy cut this adorable bee holding a heart from the other side of this Bee Mine 12×12 DSP and adhered it in place with liquid glue – all on a Basic White panel.
And here’s the card & envelope. Remember, no naked envelopes! More of the Bee Mine 12×12 DSP on the flap and trimmed to fit. On the front… these cute hearts from Bee My Valentine stamp set, stamped in Pool Party ink all along the bottom. Very cute! Love this bee & it’s coordinating punch. There are at least three options for bee faces in this set.
Ok – so I ‘hear’ the question… how do I get my hands on this set of products?
wait until January 2024 to order as a customer
Join my team here to be able to order Dec 5 as a demonstrator. (Yep – I got mine early as I was attending the OnStage@Home event!)
To order Stampin’ Up! products, please use this link to my online store. You will find ONLINE EXCLUSIVES, Clearance Rack, Sep-Dec Mini Catalog, the Annual Catalog, kits, Paper Pumpkin – you name it. Shop at your convenience :O)
When ordering from me please use my NEW HOST CODEHSJD7BR6 so that I receive proper notification and YOU GET THE Benefits of a FREE SU! item valued up to $10 :O) AND the Monthly Card Tutorial. (I like to treat my customers!) If your order is over $150, please don’t use the host code as SU! has benefits. I’ll still be notified and you can receive that FREE ITEM!
Note: Make sure that you can see my name on the final checkout page listed as your Demonstrator when you order so that you know that you’re ordering with me and you’ll get my rewards! PLUS… the monthly Online Tutorial when your order is over $50. The November Tutorial features the beautiful Winter Meadow suite of products which can found in the Jul-Dec 2023 Mini Catalog on pages 36-38!
Seasonal Sale Nov 14-16
I sent an email late yesterday when it was announced about this Seasonal sale – but here’s all the pertinent info.
Sales Period: 14–16 November 2023
Ordering Deadlines
Phone: 16 November 2023 at 6:59 p.m. (MT)
Online: 16 November 2023 at 11:59 p.m. (MT)
10% off ribbons and trims.
15% off inks, including pads, refills, markers, and Blends. Bundles are not included.
20% off papers, including cardstock, specialty paper, and Designer Series Paper.
Shop online to see the full selection of discounted products available. This is a limited time offer.
Discounts are automatically applied when sale items are added to any order, including Starter Kits.
Please keep in mind that due to the high volume of orders, the distribution center may fall behind our typical shipping timeframes. We will do everything we can to return to our regular service levels as quickly as possible.
Please note: Some items may sell out due to high demand. The discount will automatically be applied to qualifying items that are in stock. Per our updated policy, backorders are not available.
NEW KIT (THE BEST DESTINATION KIT) ADDED AS OF NOVEMBER 1!
163186
THE BEST DESTINATION KIT
$20.00 USD | $28.00 CAD
Available starting 1 November 1.
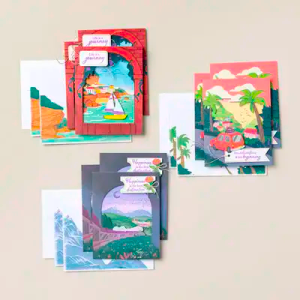
This kit lets you make nine tri-fold cards with a colorful, nostalgic, travel vibe.
Enough supplies to create 9 cards—3 each of 3 designs
9 coordinating envelopes
Best Destination Photopolymer Stamp Set
One Gorgeous Grape Ink Spot
Printed card bases, printed die cuts, adhesive, embellishments, and a clear block
Finished card size: 5-1/2″ x 4-1/4″ (14 x 10.8 cm)
Oh goodness, I just played with a new suite of products and didn’t want to quit… This Majestically Made DSP is just beautiful: love the colors and the variety of patterns. And the Majestically Made stamp set & dies are beautiful. I chose to make a top fold card using the Lost Lagoon card stock and Lemon Lime Twist for contrast.
I cut a panel of DSP 4 x 5 and made five 1 x 4 pieces. I added these to a 4 1/8 x 5 3/8 panel of Lemon Lime Twist While this ribbon is not part of the suite of products found on pages 102-103 in the 2023-2024 Annual Catalog, I decided a simple fold over and adhered with a couple of glue dots. I die cut this gorgeous leaf using the Masterfully Made Dies and lemon Lime Twist card stock. I adhered the leaf in place with glue dots as well. I stamped the sentiment in Pretty Peacock ink on a scrap of the Masterfully Made DSP and die cut it with the banner die from Masterfully Made Dies. I added it over the ribbon & die cut leaf with dimensionals. For final touch I added three Adhesive-Backed Sequins Trio in White – also a part of this suite. This entire panel was added to the Lost Lagoon card stock with dimensionals.
For the inside of the card, I used Lost Lagoon ink and the Masterfully Made stamp set and randomly stamped the ‘wording’ stamp in second generation ink. I then stamped the large leaf from the same stamp set in the same second generation manner with Lost Lagoon ink. I adhered this to a panel of Lemon Lime Twist, then into the inside of the Lost Lagoon card base.
For the envelope… a left over piece of the Masterfully Made DSP for the flap and for the front, more of the stamped off ‘words’ in Lost Lagoon ink from the Masterfully Made stamp set. And the set was done. Love it!
I’m not sure how Stampin’ Up! does it, but the Designer Series Papers seem to get better & better and… I have learned to USE THEM not HOARD THEM :O) One of my problems though, is I want to just play with one set at a time and there are so many new ones I haven’t played with yet!!! Ah, time.
If you do not have a demonstrator and would like to order from me or need a catalog, I would like to help you create. When ordering $50 or more in product (before shipping/ taxes), use my HOST CODE 64NDVS4D to receive Star Rewards and a SU! gift valued to $10. Star Rewards build up so that when you have 8 rewards from me, you can receive a stamp set valued to $40. :O) And when your order is $50 or more prior to shipping/ taxes, you also receive the monthly tutorial. :O)You may order from me here.
Thanks for stopping by! may you have a beautiful day.
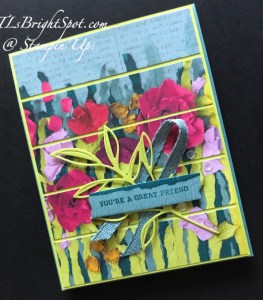
I have a pretty card for you today, using a retiring stamps and dies. It’s called Wisteria Wishes, but they are made into Lupine instead :O) And I confess (confession is good for the soul), the design is from a demonstrator in Australia, Gail Ellis. We made this in card class Thursday.
I’ve used Basic White Thick card stock for the card base, fence posts, flowers & stems. Soft Sea Foam card stock was used for the die cut leaves. Inks were Orchid Oasis and Soft Sea Foam.
Begin with a card base 8 1/2 x 5 1/2 scored at 4 1/4. Remove 4 -5/8 x 5 1/2″ strips from the card front and set aside. Die cut 6 ‘posts’ using the long banner die from the Harvest Dies. These dies and coordinating stamp set, Quiet Meadow, are carrying over to the new 2023-2024 Annual Catalog.
Close the card with the short front side facing up. Place a long length of washi tape or something similar, and with the sticky side up, attach in the center of the short front side. The tape should form a sort of ‘T’ when looking at the card front. Lay a 5/8 x 5 1/2″ strip so it aligns with the card back and sticks to the tape. Place two other lengths in between the spacing of the short front and bottom edge of the front. It is helpful to have this card on a grid paper to keep everything straight. Adhere the two outside posts to the ‘fencing’. Once this is done the card will be much more stable. :O) When adhering the posts, I did not use the full length of the post. It should be about 5/8″ up on the card front and about 3/8″ from the edge. Remove the sticky tape and adhere the center post. Turn the card over and adhere three posts on the inside. Cut off the overhanging edges of the ‘posts’. That was the hard part! The rest is pretty easy.
Stamp the set of three wisteria flowers in stamped off Orchid Oasis ink. Stamp the detail stamp in full strength Orchid Oasis ink.. Do this twice so there are two sets of blooms, then die cut with the Wisteria Dies.
Stamp the stems in Soft Sea Foam ink, also twice, and die cut with the appropriate die from Wisteria Dies. Adhere the first set of stems to the far right edge of the card and attach with with liquid glue. Attach one set of blooms with dimensionals overlapping the stems. Use the photo for reference. Adhere the other set of stems with liquid glue. Note placement by referring to the photo. Adhere second set of blooms, also with dimensionals, overlapping as necessary.
Die cut the sentiment banner from Basic White Thick card stock. Stamp the sentiment in Orchid Oasis ink. (The sentiment I chose required me to tape off a portion of the sentiment, ink, remove tape and stamp on the banner.) Adhere banner in place with dimensionals.
Leaves: I die cut three bunches of the leaves from Soft Sea Foam card stock, then used a sponge dauber and Soft Sea Foam ink to darken areas of the leaves. I trimmed down the second bunch of leaves: one branch to fit under the sponged leaves and another to fit on top. Again, refer to photo for placement. I added retiring 2022-2024 In Color Matte Dots in Orchid Oasis and the front was complete.
For the inside… on a 4 x 5 1/4 in panel of Basic White, I adhered the third branch of leaves to the far upper right. I wanted to make sure, it would be covered by the largest part of the card front. I stamped the rest of the sentiment in Orchid Oasis ink. Just as before, I taped off what I didn’t want, inked the stamp, removed the tape and stamped on the panel. This was adhered to the inside of the card & voila! Love, love, love!
Click on the Last Chance icon above to see the list of what is still available. Last Chance products are only until May 1, then go away.
GO TO MY ONLINE STORE AND ORDER…order from me here
SHOP CLEARANCE RACK HERE. This is really the way to save! The items in the Clearance Rack are highly discounted.
USE MY CURRENT HOST CODE K4PPCYJA
Stock Up Now Because Prices Are Increasing – As of May 2nd, prices will increase with the new Annual Catalog. Right now is the best time to stock up on basics and carryover products. New prices will be in effect (including for all catalog-related promotions, such as the catalog preorder) within the following product categories:
Cardstock
Designer Series Paper
Specialty Paper
Notecards and Envelopes
Classic Stampin’ Ink Pads and Refills
Stampin’ Blends
Stampin’ Write Markers
Select Specialty Inks
Stampin’ Cut & Emboss Machines and plates
Embossing Folders
Punches
Take Your Pick products
Storage
Clear Blocks
Select tools
Select adhesives
Select stamp sets
Paper Pumpkin
When you place an order of $50 or more (before shipping & taxes), you receive from me a SU! item valued up to $10 + Star-Studded Rewards. If your order exceeds $150, do not use my HOST CODE as SU! has it’s own rewards from which you may choose. You will still receive that FREE ITEM from me up to $10 + the Star-Studded Rewards. And if your order is $50 or more I will also send you my monthly class tutorials. BONUS! :O)
USE MY CURRENT HOST CODE K4PPCYJA
THANKS FOR STOPPING BY. MAY YOU HAVE A BEAUTIFUL DAY!
MAKE SOMEONE HAPPY SENDING THEM A HANDMADE CARD FILLED WITH LOVE.
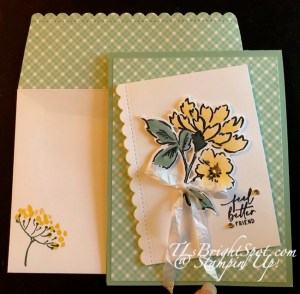
Welcome to Amy’s Inkin’ Krew Blog Hop Group! Our challenge this time is to create something “For The Ladies/Girls” and we could create this any way we wanted. I have created a very ‘girlie’ card, feminine in other words.
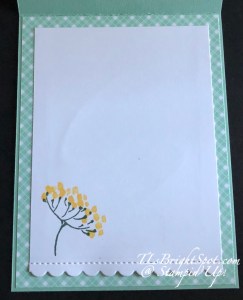
I’ve used Country Gingham 6×6 DSP adhered to a Mint Macaron card base to get me started. Then a Basic White panel with the long side run through the cut & emboss machine using this adorable scallop die from Penned Flowers Dies. I stamped the floral image in Memento ink using the Hand-Penned Petals stamp set, then colored it with So Saffron Blends and Soft Succulent Blends. This was die cut with the coordinating die in the Penned Flowers Dies and added to the scalloped panel with dimensionals. I stamped the sentiment from Hand-Penned Petals, also in Memento ink, then added the scalloped panel with dimensionals to the card front. The bow is tied with White Crinkled Seam Binding and attached with a glue dot. And finally… Champagne Rhinestone Basic Jewels for the sparkly touch.
For the inside, another panel of Basic White die cut with the scalloped die from Penned Flowers Dies :O), followed by stamping the flower stem in Evening Evergreen ink and the Flowers in So Saffron ink. This was adhered to another panel of the Country Gingham 6×6 DSP, then into the inside of the card ~ and done.
For the envelope… more of the Country Gingham 6×6 DSP adhered to the envelope flap, then run through the die cutting machine with what else – the scallop die from Penned Flowers Dies! L-O-V-E this extra feminine touch! For the front of the envelope, I did the same stamping as the inside of the card: Evening Evergreen ink for the stem and So Saffron ink for the flowers.
Each of the products used in the card (except Memento ink & Basic White card stock) is retiring as of May 1 and is on the LAST CHANCE PRODUCT list. The Country Gingham 6×6 DSP is on the Jan-April 2023 Mini Catalog list. More info about that below!
Now… time top around. Feel free to click on the NEXT or the PREVIOUS button to view those projects, OR click on a name. Whichever you choose, plan to see them all! HAPPY HOPPING.
This Last Chance Products promotion includes two lists of Last Chance Products that will no longer be available once the catalog retires. There will be one for each catalog retiring. For these retiring catalogs, there will not be a Carryover List. You can find carryover products in the upcoming Annual Catalog.
Click here for the PDF of the 2022-2023 Annual Catalog LAST CHANCE PRODUCTS
Click here for the PDF of the January to April LAST CHANCE PRODUCTS
REMEMBER… this sale is Apr 4 – May 1 and is while supplies last. My first recommendation is to order ASAP as products run out quickly.
All products are available while supplies last, and there are no purchase limits.
Discounted items can be added to a Starter Kit and redeemed as a 50% off item or with Stampin’ Rewards.
Only orders opened and closed during the promotion period apply.
Stamp Sets are not guaranteed during this promotion and are while supplies last.
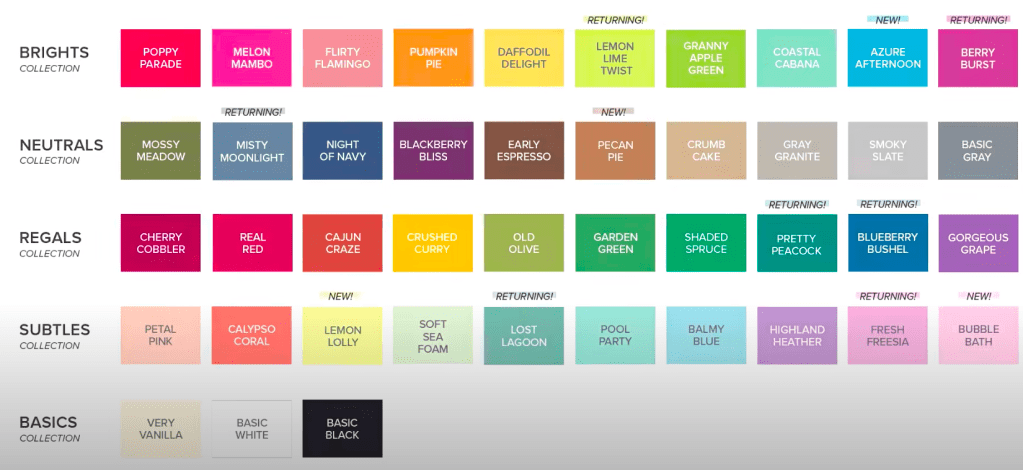
Our color collection is getting a fresh look with new and returning colors! We’re excited to welcome these colors, but it also means saying goodbye to others. There’s no better time to purchase the outgoing color products than during Last Chance!
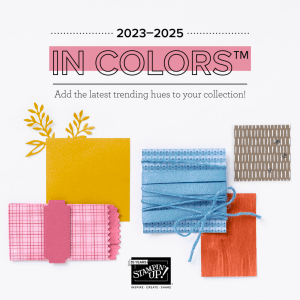
Check out this… some of you are waiting for the new colors – we’ve got a refresh of the whole line AND the arrival of the new 2023-2025 In Colors! Do you see some returning colors? I do!!! and I see some new ones too. So excited to share.
THESE new IN COLORS ARE:
Pebble Path
Moody Mauve,
Boho Blue
Copper Clay
Wild Wheat.
LOVE, LOVE these new In Colors! You can see a video here
And… here’s my HOST CODE CXR49K4W for ordering any products from the retiring lists or any other items… just know the retiring lists sale begins April 4.
When you place an order of $50 or more (before shipping & taxes), you receive from me a SU! item valued up to $10 + Star-Studded Rewards. If your order exceeds $150, do not use my HOST CODE as SU! has it’s own rewards from which you may choose. You will still receive that FREE ITEM from me valued up to $10 + the Star-Studded Rewards.
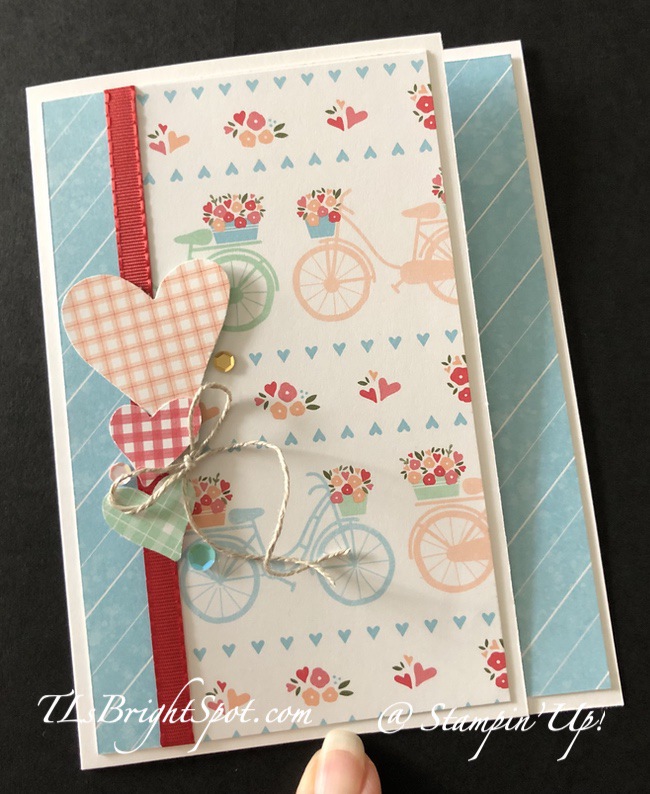
Welcome, welcome! Such an exciting time with new SU! products to create and share. I’ve chosen to use products from the Country Floral Lane Suite to meet the color challenge.
And… drum roll… here’s my card:
I’ve used all new products in the Country Floral Lane Suite – and they are so F-U-N! I didn’t want a Valentine’s card, but I DID want hearts & friendship & bicycles. The items in this suite of products include: County Bouquet Bundle (includes punch), Real Red and Burlap Ribbon pack, Pastel Adhesive-Backed Sequins (Gold, Petal Pink & Balmy Blue – I used all 3!), Country Gingham 6×6 DSP and Country Floral Lane 12×12 DSP. What an awesome combination of products. I love the plaid of the Country Gingham 6×6 DSP,; love the fact the punch is not a quite a traditional shape; love the ribbon pack as well ~ what’s not to love about this suite?! The hearts along the Real Red Ribbon are on dimensionals; then sequins added to the DSP. The linen thread was added with a glue dot and really add a fun flare to this card (at least to me it does!)
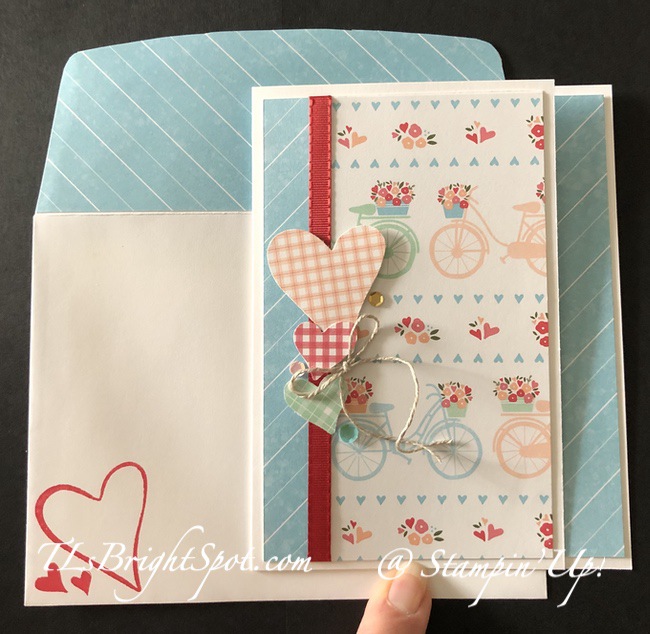
For the inside… I adhered a strip of the Country Floral Lane 12×12 DSP to the edge of a Basic White panel, then stamped the sentiment from Country Bouquet stamp set in Sweet Sorbetink, then added the punched hearts & leaves using the Country Bouquet Punch along with the Country Gingham 6×6 DSP. This panel was adhered to the inside of the card and – done!
The envelope was easy peasy… more of the Country Floral 12×12 DSP to the envelope flap and stamped hearts in Sweet Sorbet ink using the Country Bouquet stamp set.
Now it’s time to visit the others on the hop & see what fun cards they are sharing. Click on the next button to visit the talented Carol Buckalew or click on a name to visit another post. Whichever you chose, don’t miss anyone ❤️
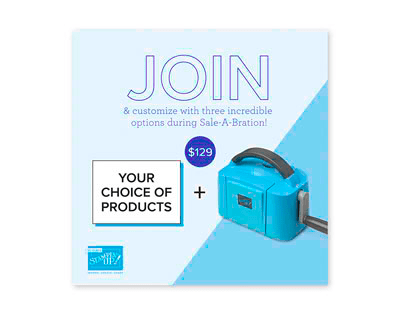
Option 1: The exclusive Boho Blue Mini Machine ($63 value) + your choice of $175* of Stampin’ Up! products for only $129.
Option 2: The original white Mini Machine ($63 value) + your choice of $175* of Stampin’ Up! products for only $129.
Option 3: Your choice of $175* of Stampin’ Up! products for only $99.
*That’s $50 more product than the standard Starter Kit offer!
The Boho Blue Mini Machine (161104) is the same as the White Mini Cut & Emboss machine – only in Boho Blue – a new In Color that will be introduced for 2023-2025.
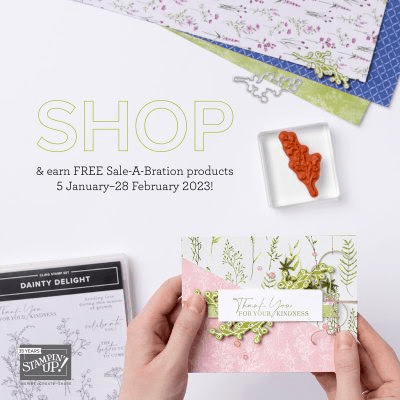
The January-February Sale-a-bration event has a buy, host and join promotion!
Spend $50 or more and pick from 7 new products (4 stamp sets and 3 paper packs!) that are available as free items!
Spend $100 or more and pick from 2 new items (1 paper pack and 1 stamp set that are) that are available as free items!
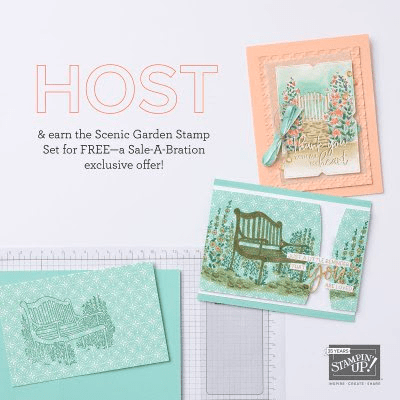
There is a new host exclusive stamp set called Scenic Garden that will be available for FREE with either a personal order of $300+ or a party with sales totaling $300+!
Let me know if you are interested & I’ll set up a personal HOST CODE for you & your friends to see if you can collect orders to reach the $300 point to get that free stamp set!
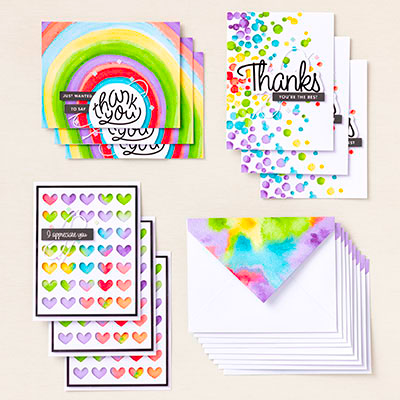
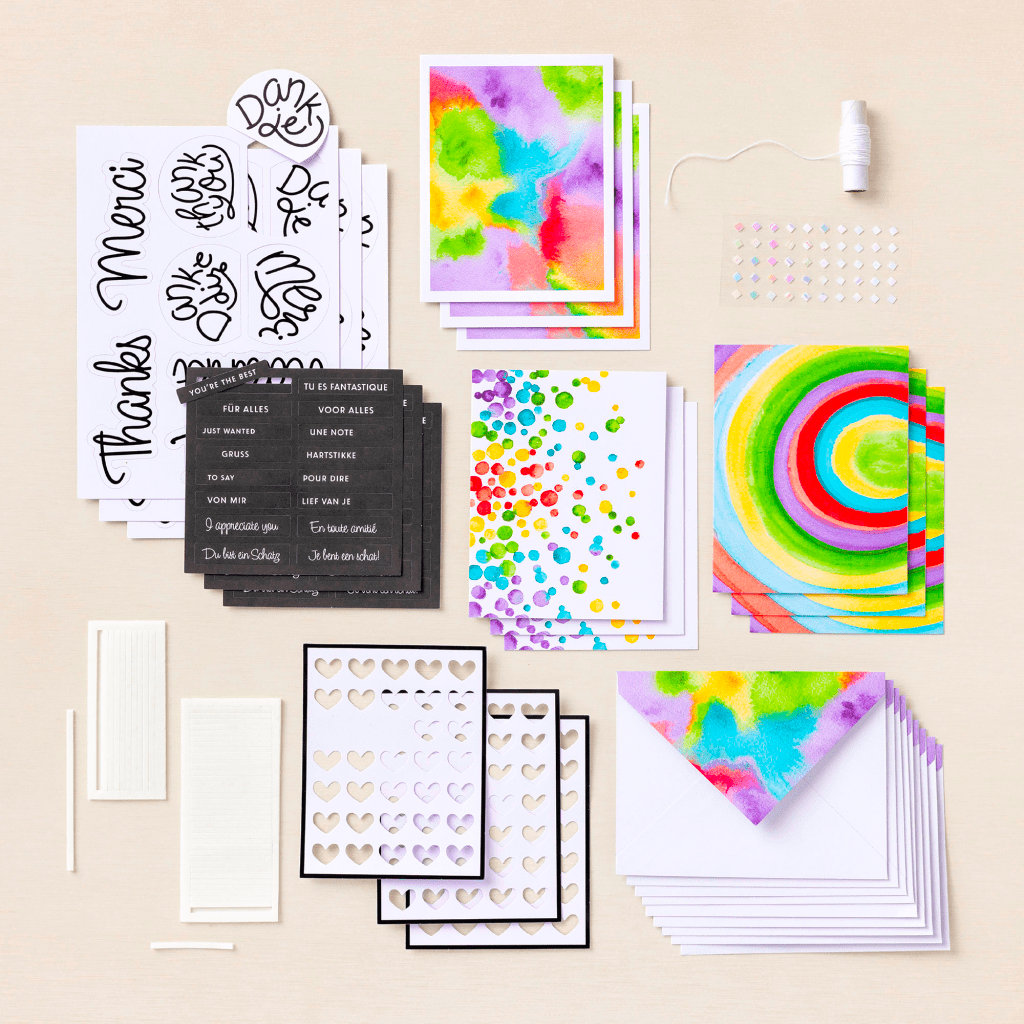
The new Saying Thanks Kit is another great option to add when you join… but you don’t have to join to purchase the kit!
162361
SAYING THANKS KIT
$13.00 USD | $18.00 CAD
Each kit comes with precut die cuts in Dutch, English, French and German
Available starting 5 January 2023
This kit includes:
Enough supplies to create 9 cards—3 each of 3 designs—and 9 coordinating envelopes.
Printed die-cut words, precut pieces, and enough adhesive to complete projects.
White baker’s twine and iridescent diamond sequins.
Finished card size: 5-1/2″ x 4-1/4″ (14 x 10.8 cm).
If kits are your thing – check out this link for more options
And here’s another thing to consider when joining during this time period – during Sale-a bration for every $50 increment of purchase you receive FREE Stampin’ Up! product from the Sale-a-bration Catalog. You can order product from the current 2022-2023 Annual Catalog or from the Jan-April 2023 Mini Catalog and still get that same FREE product during Sale-a-bration. And this Jan-Feb for Sale-a-bration is the ONLY Sale-a-bration this year!!! Don’t forget that when joining, you automatically receive a 20% discount on all Stampin’ Up! products.
My Star-Studded Rewards as a THANK YOU
Would love you to JOIN MY TEAM and be a part of this fabulous community. you may do that here.
If you would like to order from my online store, that’s really easy to do. And remember to use my current HOST CODE UBG3N32X to earn credit from me. Here’s how it works… when you place an order of $50 or more (before shipping & taxes), you receive from me a SU! item valued up to $10 + Star-Studded Rewards. If your order exceeds $150, do not use my HOST CODE as SU! has it’s own rewards from which you may choose. You will still receive that FREE ITEM valued up to $10 from me + the Star-Studded Rewards. 😁👍
For every $50 that you order from my online store (before shipping & taxes) and when you add my current Host Code, you will earn 1 STAR Reward. Orders of $49.99 or below DO NOT earn any rewards.Example $50 = 1 STAR Reward, $100 = 2 STAR Rewards , $150 = 3 STAR Rewards etc. When you have earned 8 STAR Rewards you will get a FREE product order valued up to $40.00, your choice, and mailed directly to you! Is that a deal or what??? You also earn my monthly Online Class Tutorial of exclusive projects when you place an order. For any order $50 or more you will also receive 1 free gift from me valued up to $10. Remember to use MY current HOST CODE: UBG3N32X Click here to go my store. Note: Make sure that you can see my name on the final checkout page listed as your Demonstrator when you order so that you know that you’re ordering with me and you’ll get my rewards!
Thanks for stopping by. May you have a beautiful day.
Make someone happy sending them a handmade card filled with love.