Stampin’ Up! More Butterflies

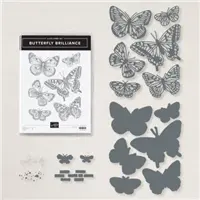
Butterfly Brilliance shines again! This is such a gorgeous stamp and die bundle and I do have a ‘thing’ about butterflies. Yesterday we had our quarterly Team Meeting and did a bit of stamping as well as business. I chose to use different colors but the layout and idea are the same. Here’s a close-up of the butterfly as I covered it in Wink of Stella after coloring it in Stampin’ Blends and the sparkle doesn’t really show well.

More Butterflies close-up – #1

Can you see the sparkle? Maybe just a bit, eh? Preparation:

  • Card base is Terracotta Tile 4 1/4 x 11 scored at 5 1/2
  • Basic White 4 x 5 1/4 (2), one for inside; enough for butterfly die cut + sentiment banner
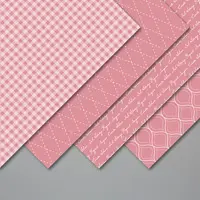
  • 2019-2021 In Color 6×6 DSP 3 7/8 x 5 1/8m – Terracotta Tile
  • Crumb Cake 3 3/8 x 5 1/8
  • In Good Taste DSP 3 1/4 x 5 1/8

How to:

  • Stamp the butterfly from Butterfly Brilliance stamp set on a Basic White panel. I used Sahara Sand but would recommend Memento Black ink.
  • Color the butterfly with Stampin’ Blends. I used Calypso Coral, Pumpkin Pie, Smoky Slate and Color Lifter. Cover with Wink of Stella. Die cut with the Brilliant Wings Dies. Hint: I have cut my butterflies apart and really like that I can use my mini die cut machine for these dies now. Plus they are so much more versatile for me. I have aslo cut the butterfly stamps apart as well 😁
  • Stamp the In Good Taste panel with various butterflies – or just one of therm – in Sahara Sand ink. My ink pad is inky so it shows up a bit darker than I expected, but it’s still subtle enough for me.
  • Adhere this panel to the Crumb Cake piece with liquid glue. Adhere these two pieces to the 2019-2021 In Color panel, again with liquid glue. Finally adhere all this to the Basic White piece. Put dimensionals on the back and adhere to the card front.
  • Stamp your sentiment on Basic White – I did mine in Terracotta Tile ink and it comes from the Happy Thoughts stamp set. Die cut with Tasteful Labels Dies. Add to the card front with dimensionals.
  • Put dimensionals on the die cut butterfly and add to the front.
  • Add three (3) Artistry Blooms Adhesive-Backed Sequins and the card front is complete.
More Butterflies – #2

For the inside of the card… so simple. Stamp butterflies from Butterfly Brilliance stamp set in Sahara Sand ink on the remaining Basic White panel. Adhere this to the inside of the card and done, done.

More Butterflies, inside – #3

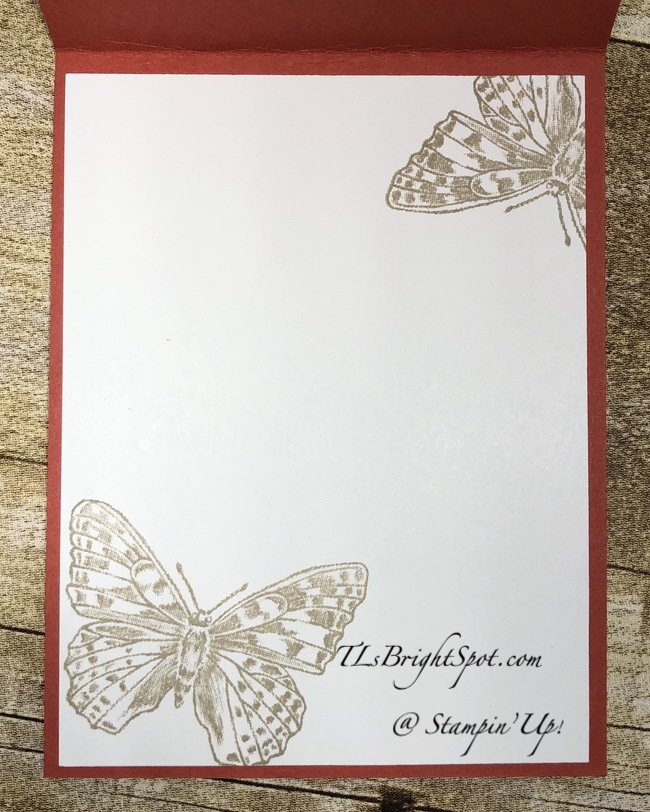
For the envelope, I used the same butterfly and stamped it on the envelope front, then covered the flap with the remaining piece of the 2019-2020 In Color 6×6 DSP. Here’s repeat of that photo.

More Butterflies – #2

This card is not particularly feminine – intentionally so. It’s going to a male friend of ours who just had unplanned quadruple bypass surgery. Ugh… Cannot imagine his wife not being able to visit during this time of unknown due to the pandemic. But he is to be released from the hospital quite soon – so grateful for that!

Below is a product list of items used in today’s project. They come from the 2020-2021 Annual Catalog as well as the 2021 Product Premier Butterfly Brilliance Collection, part of which will be in the 2021-2022 Annual Catalog (stamp set & dies)~ and those products are available now for purchase. You will find them in the product list below. As a reminder… I’ve made it easy for you to simply ‘add all to cart’. If I can help you in any way to order these items, or others, please give me a holler. As a thank you to my customers, when the order is between $50-$150 I offer a SU! item of your choice valued at $10. Remember to use MY CURRENT HOST CODE QDCUDHDC – good Mar 1 – 15. When the order is over $150, you still receive that free gift from me, but SU! has Stampin’ Rewards that may be used for additional products, so don’t use the host code at that time. If you have questions just let me know.

Thanks for stopping by.

May you have a beautiful day.

Make someone happy sending them a handmade card filled with love.

Stampin’ Up! Enjoy The Moment Small Note

Good morning… Today’s card is a sneak peek of a stamp set that will be available in the Jan-Jun 2021 Mini Catalog. You may remember that for the last couple of days we had a SU! virtual convention – On Stage @ Home. This was one of the sets we received in our goody bag after registering to attend. Love the outlining/ drawing concept of these stamps. Here’s the card…

Enjoy the Moment – #1

This stamp set is all about seed pods – and honestly I cannot tell you to what plants they belong. Whatever they are, they are well done! And what I did here after stamping on Whisper White card stock with Crumb Cake ink was take my Crumb Cake Blends and outline the area with the dark blends, then follow that with the light blend, but not covering the entire thing. Then I went in with the Light So Saffron blend and colored some to show it off a bit. I went back in a did a bit more highlighting with the dark Crumb Cake blend.

Enjoy The Moment – #2

I stamped the sentiment from the Enjoy The Moment stamp set in Crumb Cake ink, layered it on a panel of Subtles 6×6 DSP with liquid glue and wrapped the Gingham Ribbon in Bumblebee around it and tied a knot, securing it with a glue dot. To complete the card front I added three Artistry Blooms Adhesive-Backed Sequins for added charm. All of this got dimensionals and was adhered to a Whisper White Note Card.

The inside and the envelope…

Enjoy The Moment, inside – #3

Again I stamped the image in Crumb Cake ink and darkened areas with the dark Crumb Cake Blends, then going over it with the light Crumb Cake Blends. I also used light So Saffron Blends to add a bit of color. The envelope got more of the same Subtles 6×6 DSP for the envelope flap and a sweet sentiment ‘a little note’ on the front also in Crumb Cake ink. I intentionally stuck with only using the one stamp set – Enjoy The Moment to highlight many of the pods and sentiments in the set. Here’s a photo of the stamp set.

available in the Jan-Jun 2021 Mini Catalog

I’m really enjoying this set. The pods are beautifully drawn and i especially appreciate the sketch look.

I hope you have enjoyed this sneak peek of one of the stamp sets in the Jan-Jun 2021 catalog. There will be more to come in the not-so-distant future. Other products for todays project may be found below.

Thanks for stopping by.

May you have a beautiful day.

Make someone happy by sending them a handmade card filled with love.

Merry Moose Notecard

Today’s card is just so sweet – and yet it is also masculine. It would be perfect for a man for just about any occasion, but I have chosen it to be a Christmas card. The Merry Moose stamp set and coordinating Moose Punch are a carryover from last years catalog – and I love the sentiments and images in this set.

Merry Moose Notecard – #1

The finished size of the notecards is 3 1/2 x 5 – a perfect size for a quick note. For this particular card I hav e adhered Merry Merlot card stock – a nice masculine color – that is cut 3 1/4 x 4 3/4. Adhered to that on dimensionals is a panel of Plaid Tidings 6×6 DSP. For some added strength to the DSP I did adhere with liquid glue a piece of Whisper White slightly smaller in size.

Next I added a length of the Black/ White Bakers Twine from the Playful Pets Trim Combo Pack, and tied it in a bow, placed a glue dot just beneath the knot to keep it in place. Then come these cute moose marching across… one in Basic Black card stock and one in Whisper White card stock. They were punched with the Moose Punch – so quick and easy! They are mounted on dimensionals as well. For a final touch I added three white elements from the All The Trimmings Embellishments and the card front was complete. I love the simplicity of this notecard.

For the inside… and the envelope…

Merry Moose Notecard, inside – #2

I choose to stamp the larger tree from the Merry Moose stamp set in Shaded Spruce ink and the added grass in Garden Green ink (hard to tell that). The sentiment, also from the Merry Moose stamp set is stamped in Merry Merlot ink. For the envelope, I used the same design from the Plaid Tidings 6×6 DSP and adhered it to the envelope flap. Done, done, done.

Here’s a last look at the completed project – and as I said b efore, I love the simplicity of this card.

Merry Moose Notecard – #3

The product list may be found below. I hope you enjoyed today’s card. Tomorrow I hope to show you an card or two made with another of the stamp sets that will be in the Jan-Jun 20212 Mini Catalog. Until then…

Thanks for stopping by.

May you have a beautiful day.

Make someone happy by sending them a handmade card filled with love.

SU! Beautiful Autumn Bundle

It’s Friday already – where did this week go? How was it – did you have a good week? We had lots of meetings this week, mostly virtual – and that’s OK. Being able to accomplish the goals is what matters. Ok – idle chatter… let’s get on with it shall we?

Today’s card is another fall one – a masculine birthday card. And it’s the DSP that really takes center stage, although… the Autumn Punch pack from the Beautiful Autumn bundle shows itself pretty well too. This is a CASE of a card I saw by another demo: Dawn Olchefske. Thanks for the inspiration!

Beautiful Autumn Bundle
#1

Let’s take a peek at how we made this card.

  • cut a rectangle with Stitched Rectangle Dies from  a 2 x 4 piece of Pumpkin Pie cs. SAVE the outside trim!
  • Using the wonderful Autumn Punch Pack, punch the leaves and acorn. And quick tip… align the right side of the punch with the paper and punch, then move to the left side and align the left sign and punch, then punch the center. And if it helps even more, lightly draw a center line that can be erased after punching.
  • Slip a DSP scrap behind it and adhere with liquid glue. There are so many possibilities in this Gilded Autumn Specialty DSP pack, but I definitely wanted masculine and this check fit that perfectly.
  • Mat on a layer of Early Espresso cs with dimensionals. But wait – some texture… I played around with several things, paper, various ribbons, even other DSP, but settled on this from the Forever Greenery Trim Combo Pack. Layer and adhere with Stampin Seal then place on the Early Espresso cs.
  • Adhere another panel of Gilded Autumn DSP to the Early Espresso card base with liquid glue. (What I would do differently here… adhere DSP to Very Vanilla OR Pumpkin Pie layer, then to the card stock base.)
  • Stamp the birthday sentiment from the Best Year stamp set with Pumpkin Pie ink on Very Vanilla cs. Die cut using the Ornate Frames Dies.
  • Adhere both the sentiment panel and the Autumn Punch panel to the card using liquid glue.
  • For a bit of ‘glam’ and added texture – add the Artistry Blooms Adhesive-Backed Sequins to the sentiment panel.

For the inside… and I really like how this turned out!

Beautiful Autumn Bundle – inside
#2

  • Adhere the saved ‘trim’ from the Stitched Rectangle onto a panel of Very Vanilla cs, using liquid glue.
  • Stamp the sentiment from the Banner Year stamp set in Early Espresso ink.
  • Adhere the punched out leaves/ acorn (from the card front) with liquid glue.
  • Adhere the Very Vanilla panel to the card base – and voila – the card is complete.

For the envelope..

Beautiful Autumn
Bundle
#3

Beautiful Autumn Bundle
#4

Thanks for stopping by.
May you have a beautiful day.
Make someone happy by sending them a handmade card filled with love.
Card cuts:
  • Early Espresso 4 1/4 x 11 scored at 5 1/2, 1 7/8 x 4
  • Gilded Autumn Specialty DSP 4 1/8 x 5 3/8, 2 1/4 x is 6, scrap
  • Pumpkin Pie 2 x 4
  • Very Vanilla 4 x 5 1/4, scrap 2 1/2 x 1 1/2

SU! Tag Buffet #3

Today’s card is another using the wonderful Tag Buffet stamp set and using the stocking stamp. It’s so cute, that little stocking! Here’s the card…

Tag Buffet stamp set
#1

These are the stamp sets I used for this card:

  • Tag Buffet stamp set for the stocking
  • Dove of Hope stamp set for the for the sentiment on front.
  • Cherish the Season Stamp set for the pine branches and the inside sentiment

I also used:

  • Winter Snow Embossing Folder with Whisper White Craft ink
  • Adhesive-So Sweetly Dies – the 3rd smallest, the largest and next to largest
  • Ornate Layers Dies for the inside
  • Wonder of the Season Combo Pack Ribbon – the Gold cord
  • Just Jade Stampin Blends for coloring the stocking, fussy cut and placed on dimensionals
  • Pick a Punch for the sentiment tag

Papers:

  • Just Jade cs 3 3/4 x 5 for the front panel run through the Snowflake embossing folder and 4 x 5 1/4 for the inside (this panel should have been a bit larger 4 x 5 3/8
  • Tis the Season 6×6 DSP approx.4 x 2 1/2 + 2 1/4 x 6 for the envelope flap
  • Whisper White approx. 3 x 4 1/4 and die cut the background for the stocking out of the center 🙂  and approx .4 1/4 x 5 1/4 for the inside die cut

All the layers are adhered with liquid glue except the stocking, which is on dimensionals. Here are more pictures…

Tag Buffet
#2

Tag Buffet, inside
#3


And here’s a final picture…

Tag Buffet
#5

This was a bit of a new format for this card, lots of layering and fairly simple, so wasn’t sure tons of directions were necessary.

Thanks for stopping by.

May you have a beautiful day.

Make someone happy by sending them a handmade card filled with love.

Below is a list of the supplies that will take you directly to my online store 😁 Enjoy shopping and creating… When you shop with me, you will receive a SU! item of choice worth $10 when your purchase is over $50. All you have to do is let me know what that is after placing your order (and yes, I WILL reach out to you when your order is placed!)

.<div><div><div id=”635c1263-e56c-4412-8ab8-2603588a2b2c”>https://mystampinblog.com/Showcase/Details/fff0eab3-4155-414f-bdb2-4ee4cf5992db?layout=Tiled&showSku=True&showPrice=True&showSalePrice=True&showAddToCart=False&showAddAllToCart=True&showDownload=True&transparent=True&bordered=True&hFontHeight=14&rFontHeight=13&imageHeight=120&middleContent=False</div>https://mystampinblog.com/Script/ShowcaseDetailsScript</div></div>


And now is the perfect time to join my team as well… SU! has this awesome deal going on until Sep 30… take a peek…

  • SU! has a promotion going on for new recruits that is a win-win for everyone… for $99 you will get a starter kit worth of products valued at $125 – plus two card sets with instructions & an additional stamp set & Rhinestones. What’s not to like about that? Join my team- and yes, do it NOW so you get all the benefits of this awesome deal. More details below.

.

  • In addition to the regular starter kit (for $99 USD/$135 CAD, new recruits choose $125 USD/$165 CAD-worth of products) new recruit will also receive enough card stock pieces to make 16 cards, a pack of Rhinestone Basic Jewels, the So Much Love stamp set, and the Queen Anne’s Lace stamp set—all for their first event.
  • 8 packs of precut card stock of the coastal cabana pack will be provided, and 8 packs of precut card stock of the Granny Apple Green pack, for a total of 16 cards (packs include envelopes). The new recruit can choose what samples to replicate and how to distribute the packs to their customers.
  • Important note: Ink, adhesive, cutting tool, and clear block for stamping must be purchased separately. However, these products may be included as part of the Starter Kit product selection.


SU! Ornamental Envelopes and Celebrations Labels Z-Fold

Helllooooo. It’s Monday, the start of a new week. What’s your plan – who are you reaching out to? My card today is guess what – a CHRISTMAS CARD! Yep – I’m back to making them and a fun fold is always a bit exciting – and creating a Z-Fold is – just – easy. Let’s take a look…

Z-Fold, Celebration Labels w/ Ornamental Envelopes
#2

Z-Fold, Celebration Labels
#1


Fun look, right? I’ve used a few stamp sets on this card to get the sentiments or images I wanted. I love these ornaments and they were so fun to color. But I’m getting ahead of myself… Choose a DSP that will add color to the background but not compete with your main image. Here I chose Snowflake Splendor DSP and adhered it to the card front (that card stock is Pacific Point 4 1/4 x 11 and scored at 5 1/2). With the Celebration Labels Dies, cut one in Whisper White for your stamping and the next size larger for a nice background. You are actually cutting through the card front and the DSP and card stock layers. AND – big tip here, listen carefully – you are cutting from the back side of the card front . The reason for this is to have the plain side behind your main image and to have a decorated side when you open the card. It makes the larger die cut stand out more as well. 

Stamp the ornaments from the Ornamental Envelopes stamp set, only using the four ornaments shown. In other words using sticky notes, tape off that section on the stamp you do not want in your image prior to inking, ink the appropriate area in Tuxedo Black Memento ink – then remove the sticky notes and stamp on the die cut Whisper White. Stamp the sentiment using the Itty Bitty Greetings stamp set in Granny Apple Green. Now color the ornaments – I used: Poppy Parade, Granny Apple Green, Daffodil Delight  and Shaded Spruce Stampin Blends. Put dimensionals on the back and adhere to the solid color side of the larger die cut.

For the Z-Fold: cut a strip from Whisper White 2 1/2 x 10 and score at 4 & 8. Burnish these score lines well so they make a wonderful Z. This creates ‘panels that are 4″, 4″ and 1 1/2″. The smallest panel is the end that will attach to the Celebration Dies and the opposite end will adhere to the inside of the card. With the 4″ end and the score line against the score line of the card, adhere the two together with liquid glue, centering it from top to bottom.  Look at this photo again for reference… Now it is time to adhere the die cuts for the front. With the card closed and the 1 1/2 strip facing you, place the die cut panel right into it’s place and adhere with liquid glue. Voila – the Z-Fold is created! Now you are ready to create the inside.

Z-Fold, Celebration Labels
#1For the inside, cut  2 panels of Seaside Spray cs 2 3/8 x 3 7/8; then cut two panels of Whisper White cs 2 1/4 x 3 3/4. Stamp your Whisper White panels. I used Yuletide Pasture stamp set ‘cuz these animals remind me of those in the stable with baby Jesus. 🙂 I stamped them in Soft Suede ink and then used the smallest of the Water Painters to ‘bleed’ the color. The collar of the sheep was colored with Poppy Parade, the bells with Daffodil Delight and the leaves with Granny Apple Green – all Stampin’ Blends. The sentiment on the sheep panel was from the Itty Bitty Greetings stamp set and stamped in Granny Apple Green ink. The bull  got fun ornaments hung from his horns using the Little Treats stamp set and colored with Poppy Parade, Granny Apple Green and the Daffodil Delight Stampin Blends. 

Now these Whisper White panels are colored, adhere them to the Seaside Spray panels with liquid glue, then adhere to the inside of the card on the strips. This picture will help you. I apologize it’s in the wrong direction! Should have fixed that… 😦

Z-Fold inside card
#3

Now flip the card over and do something for the back – – I cut a panel of Whisper White 4 x 5 1/4, stamped the sentiment from the Little Treats stamp set in Granny Apple Green ink and adhered to the card with liquid glue. And your card is complete!!! Such fun. Love doing this.

Z-Fold, back
#5

Z-Fold
#4


Thanks for stopping by today.

May you have a beautiful day.

Make someone happy by sending them a handmade card filled with love.


SU! Tag Buffet Plus

Hi Everyone… did I ‘get’ you with that title? Funny… what it means is Tag Buffet stamp set plus Stitched Nested Labels Dies plus Dainty Diamonds 3D embossing folder.  And yes, it’s a Christmas card. I counted my cards the other day and I don’t have nearly enough. I wonder what Christmas will be like this year – with the pandemic et all? But I can’t go there yet, cuz my head is not able to wrap around all the ‘what ifs’ and it certainly won’t help me to fret about it.

We had a cord of wood delivered yesterday (that’s a stack 4’x 4′ x 8′, I think) and hubby and I carted every piece of it around to the back yard and stacked it!!! Ta da!!! Give us points folks – that’s a lot of wood to haul & stack. In fact it’s 28 cart loads – not wheelbarrow loads, cart loads. Garden carts have two wheels and are much more stable than wheelbarrows and they are larger that wheelbarrows. We would haul five loads, stacking each one as we took it ’round, then rest a bit. We did 15 before lunch and the rest after. Thank goodness it was a gorgeous day – only about 72 and very low humidity. I’ll include a photo at the end – just so you can see we did it :O)

The card…

Tag Buffet Plus
#!

This is such a cute stamp set, I especially love the Christmas images (stocking and this gorgeous ornament). And here’s what I did …

Stamp the ornament from the Tag Buffet stamp set with Tuxedo Black Memento ink and color it with the Cherry Cobbler Stampin Blends, then fussy cut. Oh, and I colored the hangy thingy with Bronze Stampin Blends and covered that with Wink of Stella.While I was at it, I stamped the sentiment (yep, it’s from the Tag Buffet stamp set!) onto Whisper White cs with the Tuxedo Black Memento ink and fussy cut that as well.

I die cut a Stitched Nested Label from Whisper White cs and a larger one from Tis the Season 6×6 DSP. By the way – my Magnetic Platform for the new SU! Cut and Emboss machine arrived the day before so I used that and oh my gosh – incredible! The dies didn’t move one bit!!!

I took another panel of Whisper White cs and ran it through the Dainty Diamonds 3D Embossing Folder.That was. adhered directly to a Thick Whisper White card base. I then adhered the DSP stitched die cut and the Whisper White stitched die cut, again with liquid glue. For the ornament, I first punched a tiny hole in the hanger thingy and slipped a length of Gold metallic trim from the Forever Greenery Trim Combo Pack and glued it in place with a dot of liquid glue. The ornament then got dimensionals and was placed atop the Whisper White stitched die cut. I put dimensionals on the Merry Christmas sentiment and attached it to the bottom of the card. For a little bling I added the stunning Wonderful Gems.

Tag Buffet Plus
#2

For the inside I adhered a panel of Cherry Cobbler to the card base. I then took a panel of Whisper White and stamped the sentiment from the Tag Buffet stamp set inCherry Cobbler ink. Then I stamped the ‘needles’ from Just Jade ink and placed another Wonderful Gem. This panel was adhered to the Cherry Cobbler with liquid glue and the card was complete.

Tag Buffet
#3

For the envelope I stamped a leaf ‘spray’ from the Tag Buffet stamp set in Just Jade ink. For the envelope flap I took several strips of Cherry Cobbler, Whisper White, Tis the Season 6×6 DSP and another Whisper White and adhered them then trimmed to fit. Fait accompli – card is ready!

Tag Buffet Plus
#4

Thanks for stopping by.

May you have a beautiful day.

Make someone happy by sending them a handmade card filled with love.

Card Cuts for today’s project:
  • Thick Whisper White 4 1/4 x 11
  • Whisper White 4 x 5 1/4 (embossed); scraps for die cut and fussy cut sentiment, 3 5/8 x 4 7/8 (inside panel) + strip scraps
  • Cherry Cobbler 3 7/8 x 5 1/8 + scrap strip for envelope flap
  • Tis the Season 6×6 DSP approximately 2 1/4 x 4 for die cut + scrap strip for envelope flap

Amy’s Inkin Krew Blog Hop

Hi y’all… so exciting … Amy’s Inkin’ Krew Blog Hop – theme is ‘Halloween Fun’. I can’t wait to see what everyone is sharing today…

I have to be up front with everyone, I’m not much into Halloween. My Mother was – she got all dressed up every year – she & Dad were in a Halloween group that got together only once a year – big party, costumes, never knew where the party was… they had a designated meeting place and would caravan for 30-45 minutes to the party site. I. was. horrified… My Mother always came up with these outlandish ideas for costumes and they most often won best costume. Me? Not so much. so, fair warning, my card is… tame, understated, not scary.

Autumn Essentials Dies
AIK Blog Hop, Sep
#!

Pumpkins are an essential part of Halloween. We carve them – a family event usually, and do – well, not the traditional carving. It’s a witch or a cat, or a scarecrow, or something like that – not a pumpkin ‘face’ . We started this when we moved to NJ – 34 years ago and have had LOTS of fun with this. It’s usually pretty cold – and messy. I set up a table (or two or three) in the garage for carving. Did I say it’s messy? it’s messy! In the past we have had some friends over too, but you know, this year that probably won’t happen – it will just be family.

I digress… back to the card… Crushed Curry cs run through the Tasteful Textiles embossing folder creates a wonderful background. On this go three Stitches Shapes (squares, the smallest) adhered with liquid glue about 1/2″ from top and left side. Then comes the pumpkin part – so F-U-N… drop Stampin’ Ink on a wet wipe in the colors Calypso Coral, Pumpkin Pie and Crushed Curry. TIP:… I put my wet wipe on a glass that used to be part of a picture frame. The glass edges have been covered in Duct Tape or something similar so there are no raw edges that might cut. This keeps your work surface dry. Here’s what the wet wipe looks like…

Wet wipe technique

Next I took a piece of Pumpkin Pie cs and put it on top of the ink splotch. This gives the paper an uneven color – as you see in the pumpkins. I then die cut the two pumpkins with the  Autumn Essential Dies. I die cut another set in plain Pumpkin Pie as I wanted the detail of the pumpkin plain, not colored. I also die cut the outline of the two pumpkins. I laid the detail pumpkin on. top of the outline pumpkin and adhered the two together with liquid glue. Then I took the colored pieces of the pumpkin and inserted them into the appropriate fitting place for each pumpkin. Voila – gorgeous pumpkins! These were adhered to the card front embossed panel with dimensionals. I added a Linen Thread bow by tying it around the larger pumpkin stem and frayed the ends. I added Curry embossed panel to a piece of Cinnamon Cider with liquid glue. This got dimensionals and was adhered to a Pumpkin Pie card base. For a bit of glitz and fun I added Artistry Blooms Adhesive-Backed Sequins – five of them.

Autumn Essentials Dies
AIK Blog Hop, Sep
#2

For the inside… Very Vanilla cs and Festive Corners stamp set… Memento Black ink for the web, wet wipe inks for the spider and for the word SPOOKY. It isn’t very spooky really, but nonetheless, I like it! I adhered this to Cinnamon Cider cs with liquid glue and then into the card base, also with liquid glue. And the card is complete…

Festive Corners for the inside
#3

For the envelope I embossed a panel of Pumpkin Pie cs with the Tasteful Textile embossing folder and adhered it to the envelope flap with liquid glue, trimmed it to fit. I then stamped ‘Happy Haunting’ with ink from the baby wipe onto the front of the envelope. This sentiment comes from the Celebration Tidings stamp set. (this set is so versatile!)

AIK Blog Hop, Sep
#4

I enjoyed making this card – just my style… hope you liked it too…

The blog hop list is shown below. Be sure to visit everyone – such fun and different cards to share. You may also use the Next button or the Previous button. Enjoy…


Shop with me by using my current HOST CODE>>> Z3WFFJTH
Thanks for stopping by.
May you have a beautiful; day.
Make someone happy by sending them a handmade card filled with love.
CARD CUTS FOR TODAY’S PROJECT…
  • Crushed Curry 4 x 5 1/4 + scraps for Stitched Shapes (squares, smallest)
  • Cinnamon Cider 4 1/8 x 5 3/8 (2)
  • Pumpkin Pie 4 1/4 x 11 scored at 5 1/2 + scraps for pumpkins
  • Very Vanilla 4 x 5 1/4

SU! In Good Taste DSP – Masculine Card

Hi Everyone – it’s… Thursday – almost Labor Day weekend… can you believe it? I cannot. As long and slow as this pandemic has been, time did not slow in any way… And guess what? The Kentucky Derby is also this weekend. I enjoy horse racing and this one in particular, for some reason and plan on watching it.

The card today was made for two specific reason… 1) last week I did a Christmas Card with this same layout and mentioned in my post how easy it would be to ‘transition’ to a masculine (or other sort) of card; reason #2 my friends hubby just had shoulder replacement and it seemed perfect for that.

In Good Taste

What I did… cut three strips of coordinating In Good Taste DSP. Layer on an Early Espresso panel with liquid glue, then onto the Gray Granite card base, also with liquid glue. Cut a length of  Vanilla 1/2″ ribbon from the Forever Greenery Trim Combo Pack. Adhere with just a bit of Stampin Seal. Over this goes a banner on dimensionals. Banner: Early Espresso cs cut with the Ornate Frames Dies (gosh these are versatile!!). Stamp the sentiment in Early Espresso ink on Very Vanilla scrap and die cut with another of the Ornate Frames Dies. Adhere to the Early Espresso banner with liquid glue; add dimensionals and place over the ribbon. Bingo – your card front is done!

For the inside.. on a panel of Very Vanilla, stamp the leaf/ fall floral bouquet in stamped off once Crumb Cake ink. Over the top of this stamp the sentiment from Healing Hugs stamp set in Early Espresso ink. Adhere the completed Very Vanilla panel to Early Espresso cs with liquid glue then add to the card base the same way. yes – card completed…

In Good Taste – Masculine
inside

In the last photo I’m hoping you can see that I dry embossed the envelope flap after adhering Early Espresso cs to the flap. I used the Tastful Textile 3D embossing folder. The front of the card got another of those floral/ leaf bouquets. And this card is ready to send! Actually – it went out in yesterday’s mail 😊

In Good Taste – Masculine

OK – what else – of course you want card cuts. They will be found at the bottom of this post.

Other news – NEW HOST CODE… Z3WFFJTH  – so shop with me 🙂


Here’s a picture of how this new machine looks open, in use and closed. There is also a picture of the Mini Stampin’ Cut and Emboss Machine, but it is not yet available for purchase – not even for demonstrators.


Starting 1 September the Magnetic Cutting Plate becomes available to customers AND demonstrators. It is not required for use with the new machine but is great to incorporate into the die-cutting experience. It is a thin, fully magnetic sheet with a self-healing cutting surface and holds dies securely in place, even nested dies. This slim, portable sheet replaces a Cutting Plate in your sandwich. That order number is…149656 – so SHOP WITH ME…

Join My Team…

Starter Kit Promotion 1-30 September

  • In addition to the regular starter kit (for $99 USD/$135 CAD, new recruits choose $125 USD/$165 CAD-worth of products) new recruit will also receive enough card stock pieces to make 16 cards, a pack of Rhinestone Basic Jewels, the So Much Love stamp set, and the Queen Anne’s Lace stamp set—all for their first event.
  • 8 packs of precut card stock of the coastal cabana pack will be provided, and 8 packs of precut card stock of the Granny Apple Green pack, for a total of 16 cards (packs include envelopes). The new recruit can choose what samples to replicate and how to distribute the packs to their customers.
  • Important note: Ink, adhesive, cutting tool, and clear block for stamping must be purchased separately. However, these products may be included as part of the Starter Kit product selection.

Card cuts for Today’s project:

  • In Good Taste DSP 1 1/4 x 5 1/2 (cut 3 coordinating panels
  • Early Espresso cs 4 1/8 x 5 3/8 (cut 2) + scrap for banner
  • Very Vanilla cs 4 x 5 1/4 (inside) + scrap for banner
  • Gray Granite card base 4 1/4 x 11 scored at 5 1/2

SU! In The Pines Bundle

Ever have one of those nights when you can’t sleep? Well, that was my night last night – restless, wide-eyed. No doubt I will be worthless most of the day because of that. But for right now, I’m writing my post – and that’s a good thing… In The Pines… I’ve had this bundle for a while and it’s been ‘calling’ me to play, but I kept pulling out other stamp sets or Dies. It is so versatile, some marvelous tree dies. I got busy and created two cards, each very different from the other. Let’s take a peek…

In The Pines w/ coordinating Pine Woods Dies
Card #1

In The Pines w/ Pine Woods Dies
Card #2

Aren’t these trees gorgeous? Card #1 is two die cuts: the intricate part and the outline die. I used the outline after die cutting the detail in white then used the outline again for the green of the tree. The Tree in card #2 is a single tree. The background is the fabulous Evergreen Forest 3D embossing folder.

Let’s go back to card #1 and re-create it… With the Pine Woods Dies, die cut the detail of the tree from Whisper White cs. Then use the outline die to create the tree. Die cut another tree outline from Shaded Spruce cs and adhere the white tree to it with liquid glue. TIP: You could use an adhesive sheet for the detail of the tree and adhere it to the green that way, but I didn’t think of that until later. 

I then took one of the papers from the Plaid Tiding 6×6 DSP and die cut a panel using one of the Stitched Rectangle Dies. I adhered the tree to that DSP with dimensionals. Using a larger Stitched Rectangle die, I cut a panel from Shaded Spruce cs. I adhered the DSP piece with the tree to the Shaded Spruce panel with dimensionals. This was then adhered to a Whisper White Note Card with liquid glue. I next attached a Star Element for the tree top, and a copper bow from the Basketweave & Metallic Ribbon Combo Pack. For the final touch of the front, I adhered Elegant Faceted Gems, both the white and the clear. To me this makes it look as though there are several presents under the tree :O)

For the inside I stamped the tree outline in Shaded Spruce and then the tree ‘filler’ in Garden Green stamped off once. It’s a very cute small tree. For the envelope I used the same Plaid Tidings 6×6 DSP to cover the envelope flap then stamped the same tree from the inside of the card to the envelope front. And Card #1 was complete!

In The Pines stamp set
inside card #1

In The Pines Bundle
Card #1


Card #2 I did very differently… I took a panel of Whisper White cs and ran it through the Evergreen Forest 3D embossing Folder. I then took a cosmetic brush and tapped it into a Shaded Spruce ink pad and smoothed it around adding color to the paper. I did the same with Garden Green and Granny Apple Green ink. This gave the tree wonderful dimension making them look similar to a real forest :). For the sky I again used the cosmetic brush with Balmy Blue first then an overlay of Seaside Spry. These were done very lightly but it shows clearly.  I adhered this to a larger Whisper White panel with liquid glue. This then was added to a Garden Green card base with dimensionals. I die cut another tree using the Pine Woods Dies from Whisper White and adhered it to the card front with dimensionals. The sentiment was stamped in Garden Green ink on a Whisper White strip and comes from the Itty Bitty Greetings stamp set. I cut a banner for the end and adhered it with dimensionals. Here it is again…

In The Pines w/ Pine Woods Dies
Card #2

For the inside I took one of the tree stamps from In The Pines stamp set and stamped it in Garden Green ink on a Whisper White panel. This was adhered to the inside of the card with liquid glue. For the envelope I stamped the same trees both to the card front and the envelope flap. And card #2 was complete! What a fun bundle… I encourage you to try it.

In The Pines stamp set
inside card #2

In The Pines Bundle
Card #2

Fun set of cards, right? And so different, yet from the same bundle: In The Pines stamp set w/ coordinates Pine Woods Dies. Love it… Also the Evergreen Forest 3D Embossing Folder….

Shop with me and receive a SU! item of choice worth $10 if your purchase is between $50-$150 and use my CURRENT HOST CODE 4TEZ7HWY. If your purchase is over $150, don’t use the Host Code as SU! will offer you special rewards. (You will still receive the free item from me though!)

OK, what else – only a couple more days to redeem those coupons from August. I have an order I’m placing today to use my last coupon..

Business…. during the month of September, SU! is going to have a ‘joining’ special – do hope you will join my team and become a creative junkie with me. Let me know if I can help you make that decision – if you have questions, etc.


Box of Sunshine shareable image


This is also the time to be cashing in those BONUS rewards earned during the month of August. Do not let those go to waste! If not used in August they will be lost forever.

Thanks for stopping by.

May you have a beautiful day.

Make someone happy by sending them a handmade card made with love.

Remember to cash in those Bonus Coupons from purchases made last month!

20200804_AD_en_US Annual Catalog PDF

August_89_2020 Mini Catalog PDF

Card Cuts:

Card #1

  • Note Cards & Envelopes – Whisper White
  • Whisper White scrap for tree – about 3 1/2″ x 2 1/2″
  • Plaid Tidings 6×6 DSP
  • Shaded Spruce cs about 4 3/4 x 3 1/2

Card #2

  • Whisper White embossed panel 4 x 5 1/4; panel behind it 4 1/8 x 5 3/8, inside 4 x 5 1/4 + scraps for die cut and sentiment banner
  • Garden Green cs 4 1/4 x 11 scored at 5 1/2