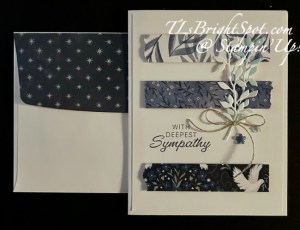
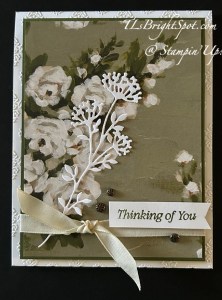
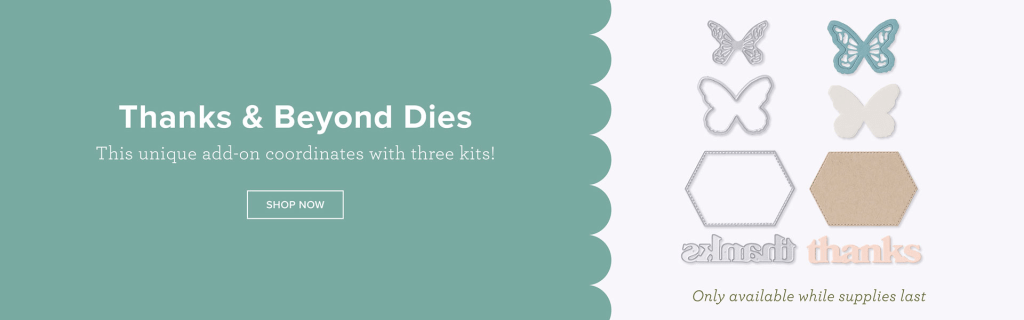
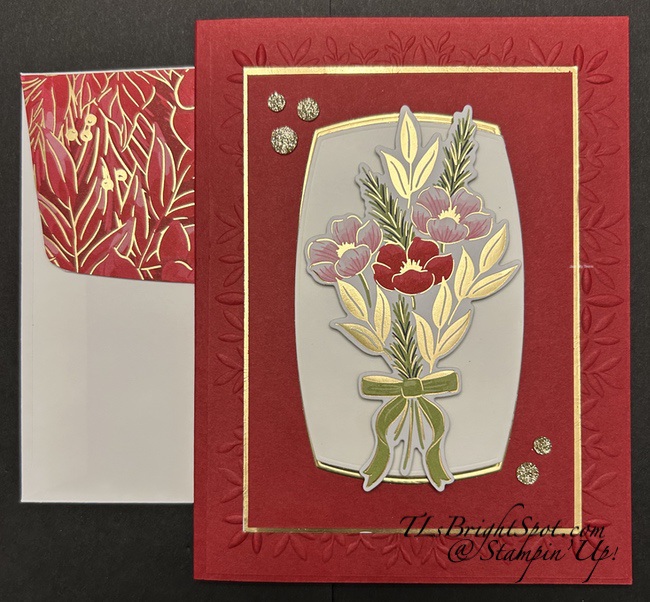
Hello wonderful stampers – it’s Monday Feb 16 & I’m placing my order today for those of you who shopped with me these past couple of weeks – all those adhesives that are available through Stampin’ Up! I’m also sharing this sweet card that will be included with the adhesives… as a thank you for shopping with me.
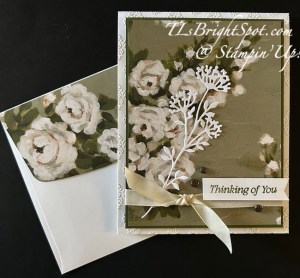
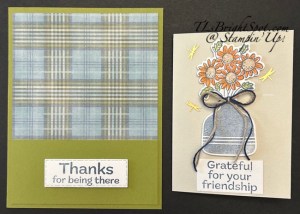
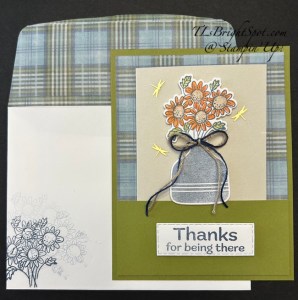
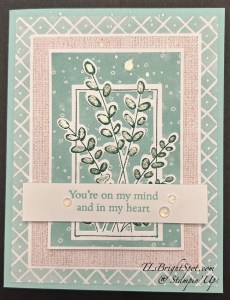
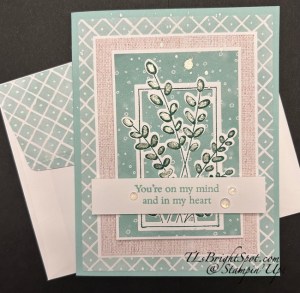
The card base is 4 1/4 x 5 1/2 Old Olive layered with Timeless Plaid 6×6 DSP 4 x 5 1/4. I took another panel of Old Olive 1 3/4 x 4 and attached it on three sides to the card base – leaving the upper area open, as in an pocket. 😀 I stamped a sentiment from Pop-Up Petals stamp set in Misty Moonlight and die cut it with a Textured Notes Die and attached it to that lower panel with dimensionals. For the cute card for the pocket, I cut Basic Beige 6 x 4 1/4 & scored it at 3 (on the long side). I stamped the vase & flowers from Pop-Up Petals stamp set in Misty Moonlight. I colored the leaves with Old Olive Stampin’ Blends, the flowers with Timid Tiger & Crumb Cake using the stamps in the Pop-Up Petals stamp set – so easy! I then die cut both the vase & the flowers with the coordinating Pop-Up Petals Dies. I stamped a sentiment on a Basic White scrap with another sentiment in Pop-Up Petals stamp set and attached it at the bottom of the Basic Beige card front. I attached the vase with dimensionals, then the flowers, slipping the stems into the top of the vase and dimensionals behind the flowers. I added three metallic Adhesive-Backed Butterflies, then a bow tied with Bakers Twine Essentials Pack and Natural Tones Linen Thread in dark blue – a very sweet card front.
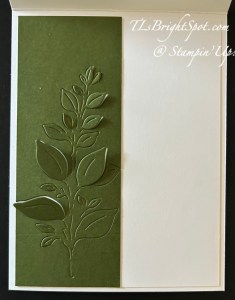
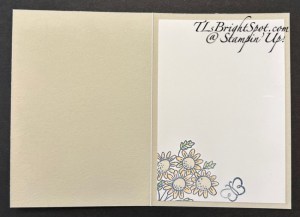
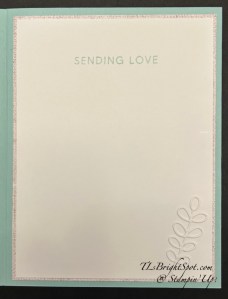
For the inside of this pocket insert… a Basic White panel 2 3/4 x 4 stamped with Misty Misty Moonlight ink – both the butterfly & the flowers are from Pop-Up Petals stamp set. Again, the same coloring as the card front: Timid Tiger & Crumb Cake inks & Stampin’ Blends Old Olive for the leaves. Now fold this in half and insirt into the pocket in the card base front – yay!
For the envelope…n the flower bundle stamped on the card front, first full strength, then a couple more times without re-inking. This makes it look as though it is a large bouquet!! On the flap, another piece of the Timeless Plaid adhered & trimmed to fit.
Want to make this card? See the list of products below. Remember to REDEEM THOSE COUPONS now through Feb 28, then they go away if unused.
Redemption Period: February 3–28, 2026There is no limit to the number of coupon codes you can redeem on an order during the redemption period. If you’re redeeming multiple codes, you must put a space between each code.
You may only redeem coupon codes one time. You cannot redeem them after February 28.
You can redeem Bonus Days coupon codes for month-to-month Paper Pumpkin subscriptions and new prepaid subscriptions.
Some restrictions apply. Coupons can’t be redeemed towards Starter Kits and you cannot use them on exchanges.
Redemption period ends: February 28, 2026, at 11:59 p.m. (MT)
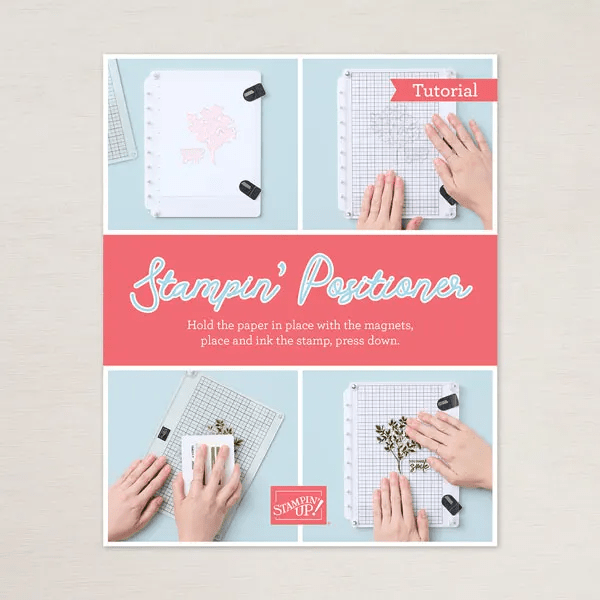
There’s a joining promotion too – with a fabulous new Positioner when you join between now & March 2
Here are the details about the JOINING PROMOTION…New team members who purchase their Starter Kit February 3–March 2 will also receive our new Stampin’ Positioner*. Joining deadline: March 2, 2026, at 11:59 p.m. (MT)
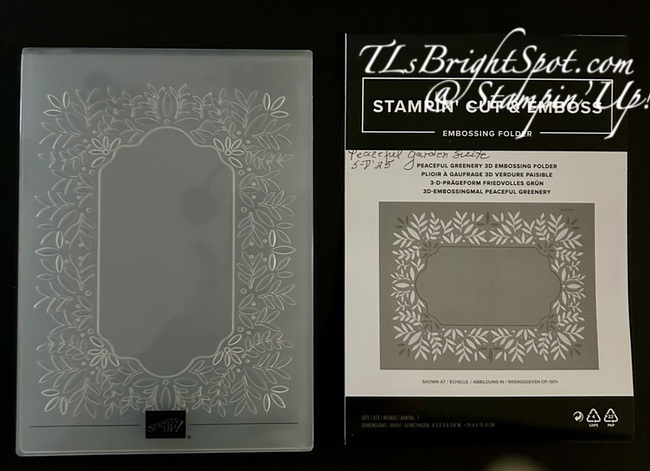
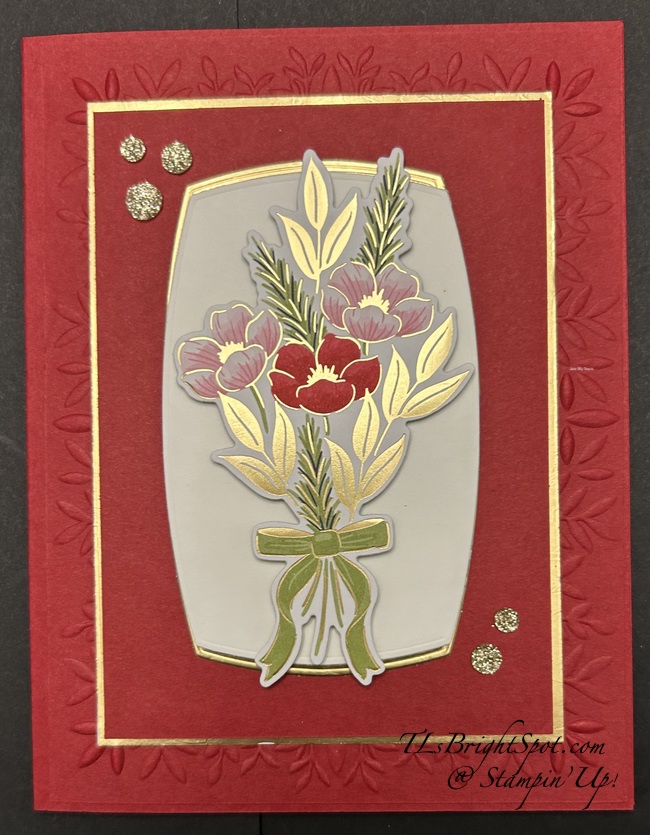
Embossing folders help create wonderful texture on a card and I’ve used the Peaceful Greenery embossing folder to do just that – it’s a great background embossing folder.
I’m leaving the photo in large format so you can really see the embossing folder & how that added texture really makes the. card – at least it does for me! Of course the wonderful die cut from the Traditions of Christmas SDSP is pretty special too. Add in the gold foil and the Traditional Sparkling Sequins and the card is a win/ win. To create the background the floral die cut sits on, I used the Label Me Grateful Dies to die cut from the center of the gold foil used to surround the Cherry Cobbler smaller panel. I cut it in half across the center and adhered a the Basic White die cut from the same Label Me Grateful Dies. The floral die cut is attached with dimensionals while everything else is added with adhesive directly to each layer. Those card cuts will be listed below.
For the inside of the card, I used the Christmas Gallery stamp set to stamp this gorgeous poinsettia in Cherry Cobbler ink and the leaves in Old Olive ink. In the center of the flower is another Traditional Sparkling Sequin in Gold. The Basic White panel was added to the inside of the card.
For the envelope, another panel of the Traditions of Christmas SDSP was added to the flap and another poinsettia & leaves was stamped on the envelope front, which I forgot to photograph!
Here’s the 2nd card… no embossing folder used and while it’s nice, I really prefer the card with the embossing folder. The inside and envelope had the same treatment – and I’ve left them in large format so you can see the difference. :O) Just curious – do you prefer one over the other?
Card cuts:
Cherry Cobbler 8 1/2 x 5 1/2 scored at 4 1/4; 4 1/8 x 5 3/8 (embossed); 3 18 x 4 3/8
Gold Foil 3 14 x 4 1/2 (center die cut banner)
Basic White 2 1/2 x 4 (banner); 4 x 5 1/4 (inside)
Traditions of Christmas SDSP – floral die cut from SDSP; 2 1/4 x 6 (envelope flap
Thanks for Stopping by. May you have a beautiful day. Make someone happy by sending them a handmade card filled with ❤️
Want these products) See the list below and simply click all to purchase. Want other Stampin’ Up! products in my shop – click here to shop with me and get anything from ONLINE EXCLUSIVES to Paper Pumpkin to last chance items. To JOIN MY TEAM – click the link. 😀 We have tons of fun, sharing projects, collaborating, learning new tricks. Would love to have you. 🎁
First of all, happy Veterans Day to all our veterans out there. Thank you for your sacrifices and service to our country. You are amazing human beings and I am so grateful. Big salutes to those who have served in the past, and to those currently serving – bless you… and your families, for they have served in a different way and suffered too. ❤️
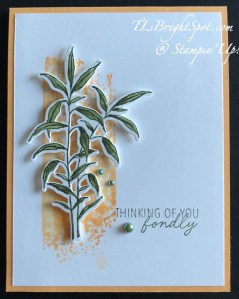
Now – my card for today is a NEW November ONLINE EXCLUSIVE release called Friendly Foliage.
This card has some layers… and begins with a card base in Pool Party with a layer of Nests of Winter DSP. The next two layers are Basic White and Woven Textures DSP. These all all attached directly to the card base. The next layers are attached with dimensionals: Basic White layered with another pattern in Nests of Winter then the Basic White stamped & die cut image from Friendly Foliage. This image is the focal point of the card… stamped in Shaded Spruce ink, die cut and attached with liquid glue. I then added Wink of Stella to all the leaves, bringing more attention to the pretty image. I splattered Wink of Stella to the entire card as well. While that was drying, I stamped the sentiment from Friendly Foliage in Pool Party ink on the Basic White strip and added it with dimensionals as well. Final touch… three Opal Rounds.
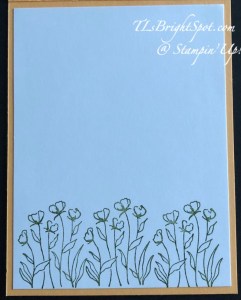
For the inside of my card I added a layer of Woven textures DSP as a background to my Basic White stamped panel. The sentiment is from Friendly Foliage stamp set and stamped in Pool Party ink. The sweet leaves are a die cut from the beautiful Friendly Foliage Dies.
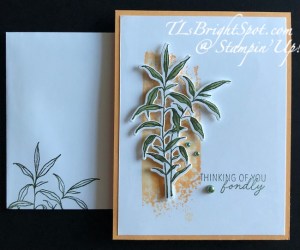
For the envelope… more of the Nests of Winter DSP was added to the envelope – no naked envelopes for me.
Due to the colors, this is a definite feminine card. When I create with this next, I’m going to really try to make a more masculine one. When my hubby saw this card, he called the image pussy willows and I hadn’t thought of that. Pussy Willows are definitely brown, so next time, masculine, in brown tones. Card cuts for this card are listed below.
Want to purchase this beautiful new bundle? You can have a look see at my online store here or see below all the products to make this card and purchase from me there. In my online store, there are items in the Kits Collection, ONLINE EXCLUSIVES, Stamp Class, Paper Pumpkin, Last Chance Products – you name it, it’s all in one place. 😀 Want to JOIN MY TEAM to be a part of this amazing community? You can do that by JOINING MY TEAM HERE.
Thanks for stopping by. May you have a beautiful day. Make someone happy by sending them a handmade card filled with ❤️
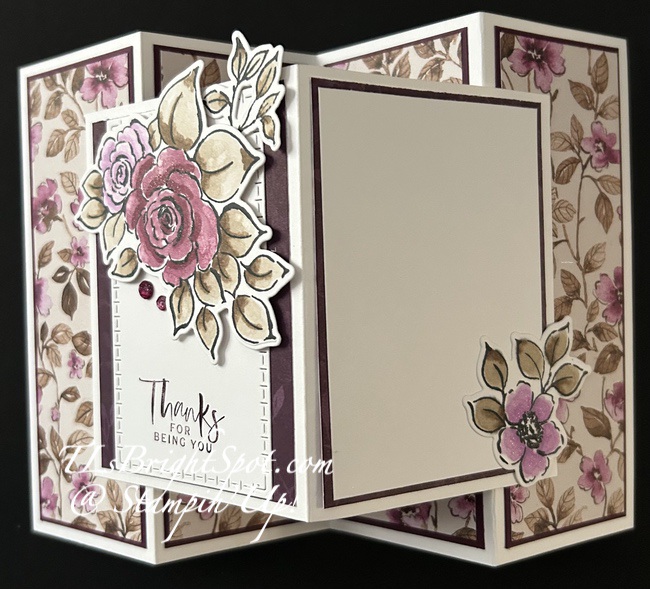
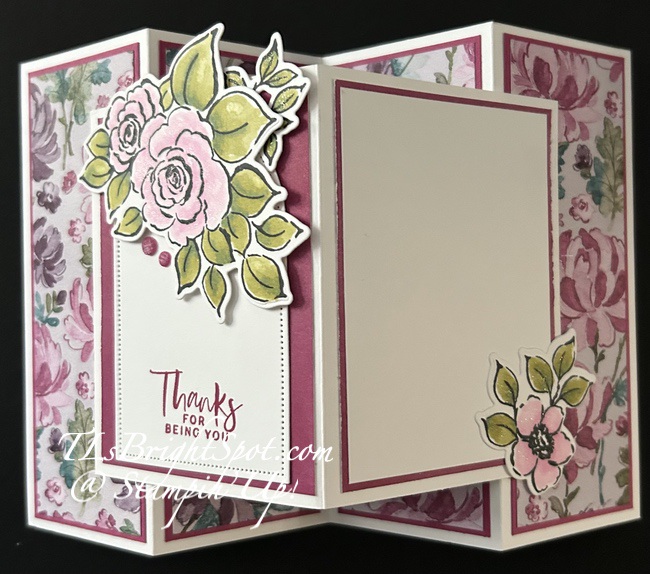
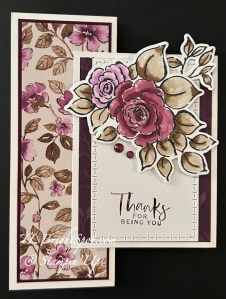
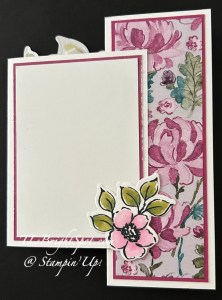
Hello, hello – It’s Saturday and an absolutely gorgeous day. I’m hoping to get some yard work done – yay! So… my cards for today are a fun fold and use the Charming Day bundle and it’s coordinating Designer Series Paper – Floral Charm 12×12. I really like how they turned out – hope you do as well. I’m going to share both cards and in the info at the bottom of the post I’ll list the different colors & embellishments, Stampin’ Blends – like that. The directions are exactly the same for both.
Card 1.Card 2
The card base is 8 1/2 x 5 1/2 scored at 2 1/8, 4 1/4 and 6 3/8. This creates four panels all the same width. Burnish these score lines mountain, valley, mountain. Decorate each panel with a card stock layer then a DSP layer: cs layer1 7/8 x 5 1/4 (cut 4); DSP layer1 3/4 x 5 1/8 (cut 4). When cutting the designer series paper, I make certain it’s a flow of the design that creates a picture. Set this aside and work on the front section.
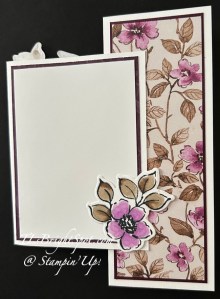
The front… this card stock is cut 6 x 4 & scored at 3, creating two even sections. Burnish score line. Decorate both with a coordinating DSP layer 2 3/4 x 3 3/4. The left section is the side with the added layers of decoration while the right is used for your written message. The section on the right, add a Basic White piece cut 2 5/8 x 3 5/8. Let’s work on further decorating these two sections.
Stamp the large floral image using the Charming Day stamp set with Memento ink, stamping two images. Also stamp the small leaf image two times.
Color w/ Stampin’ Blends:
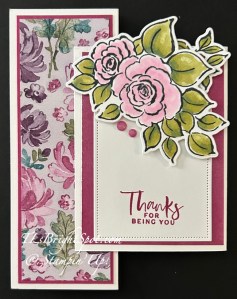
Card 1 – Blackberry Bliss & Fresh Freesia for the flowers; Light Crumb Cake & SU 300 on the leaves. I used these colors to coordinate with the background DSP. I added Wink of Stella to the flowers, die cut the image and set aside. Color one of the small leaf images using the same colors, die cut & set aside.
Stamp the small flower w/ leaves from the Charming Day stamp set – stamping twice in Memento ink.
For card 1 – color the flower in Fresh Freesia Stampin’ Blends, and the leaves in Light Crumb cake & SU! 300. Add Wink of Stella to the flower. Die cut & set aside.
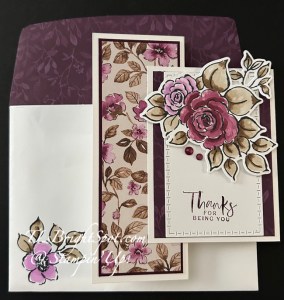
Card 2 – large floral image: Bubble Bath for the flowers, Light Old Olive and Light Pretty Peacock for the leaves. TIP: for the leaf color combination I colored one leaf with both colors before moving on to the next leaf. This way the inks were still wet and blended really well. Add Wink of Stella to the flowers, die cut & set aside. Color the 2nd small leaf image using the same comb & same combination of Light Old olive & Light Pretty Peacock, die cut & set aside. Remember the tip of coloring one leaf at a time!
Card 2 – small floral image: color flower with Bubble Bath & leaves in same combination of Light Old Olive & Light Pretty Peacock – and remember the tip… add Wink of Stella to the flower, die cut & set aside.
Attach front panels to each card:
With the larger card base folded on itself, add the front section. I used my grid paper to make certain the finished card was no wider than 4 1/4″, so it would fit in the standard A2 envelope. Adhere one side down, then the other side.
Add extras… Card 1 – I used Everyday Arches Dies to cut a Basic White piece to make the flowers stand out and adhered. The large floral bouqwuet was attached w/ dimensionals and the small leaf spray was added with liquid glue. I stamped the sentiment from Charming Day stamp set in Blackberry Bliss ink, then added two Purple Fine Shimmer Gems. For the other side of this card, I added the small single flower w/ leaves w/ liquid glue.
Card 2 was done in the very same fashion – except that I used Textured Notes Dies for the Basic White panel, Berry Burst ink for the sentiment and Charming Shimmer Faceted Dots for added embellishment.
Envelope… Coordinating DSP on flaps were added & trimmed to fit. On the front O stamped that sweet small flower and colored each as described above for the individual card. Creating two cards at once was really easy & fun as well. Same layout just different colors.
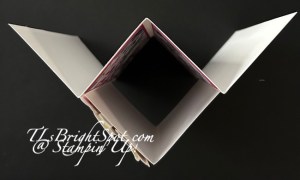
This is what the card looks like from the top. It stand beautifully for display.
Questions about how to make this card? Connect with me… but I think you will find this a pretty easy card to make. This design/ layout would make a great masculine card – in other DSP patterns & different bundle of course. It would also make a fabulous Christmas card.
Ok – so what’s next… how about purchasing SU! products – need to do that? Stampin’ Up! has kits available for purchase, ONLINE EXCLUSIVES, a Sep-Dec 2025 Mini Catalog full of SU! products – and of course the 2025-2026 Annual Catalog. If you’re looking for a demonstrator – I would be happy to support your crafty needs. Shop with me here.
When shopping with me, I like to thank my customers with a tutorial of the month and Daisy Patch points when the order is $50 or above (before tax & shipping). And being a demonstrator also has it’s benefits: team work, support, pre-ordering new items, at least 20% off every order, plus attending workshops & conventions! Join with me here!
Thanks for stopping by. May you have a beautiful day. Make someone happy by sending them a handmade card filled with ❤️
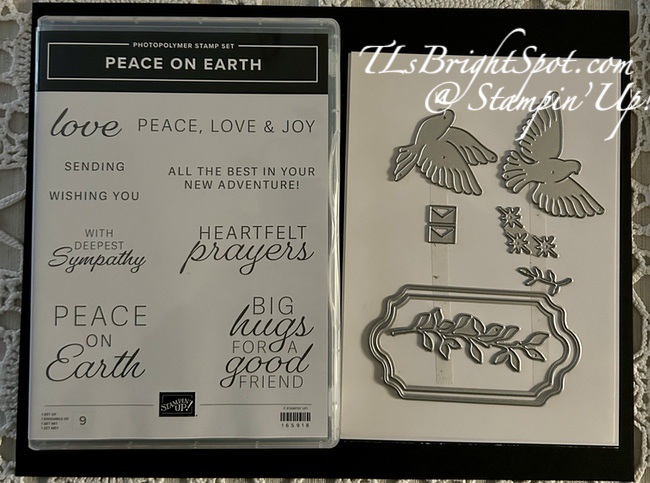
Good morning! I participated in a Demonstrator only event yesterday called Creativity Now and we used a NEW suite collection that will be available in the Sep-Dec 2025 Mini Catalog . We made 3 cards and a darling little box. But first, the suite products.
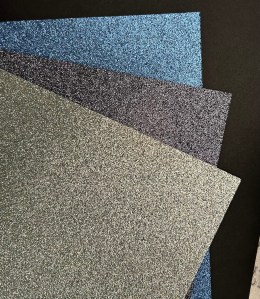
Peace On Earth Bundle includes stamp set, dies and the Peaceful Greenery 3D embossing folder; Hues of Blue Flowers, Peaceful Garden 12×12 DSP both front & reverse side, and Peaceful Garden 12×12 Glimmer Paper. The Misty Moonlight & Silver Edged ribbon is shown on both a card & a cute box.
Card 1 uses strips and beautiful die cut leaves + a stamped sentiment
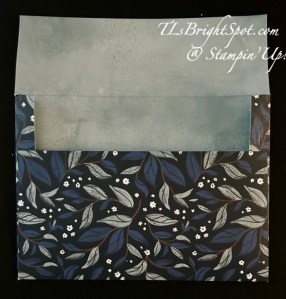
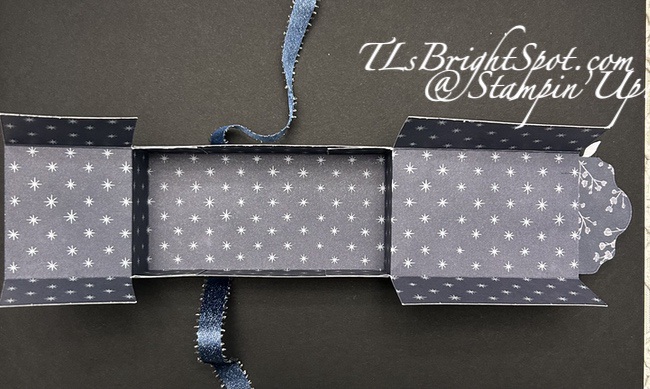
Card 2 is a fun fold, elongated card with a matching envelope, ribbon and die cuts
Card 3 uses the embossing folder to create a small strip, the showing off another of the DSP and glimmer paper. It also has a ‘pocket’ on the front for a message
The last is a darling box made with the Designer Series Paper, die cuts and ribbon
Fun projects, right? And all because being a demonstrator offers more opportunity for connecting with others, creating, and and and… :O) Join my team now to be a part of the fun and opportunities that await.
Welcome to our fun weekly hop. We have a sketch challenge today that stumped me for a bit. I hope you find it still fits the sketch as it’s a bit ‘outside the box’.
This is a brand newy suite of products that I used on this card… the Turtle-Y Awesome Suite: DSP, stamp set/ dies, embellishments & ribbon. I did not use the dies for this project – I fussy cut the turtles, and I did not use the ribbon. This is a cute set – very different than we’ve had in the past. I don’t see this as a totally kids kind of suite of products. It’s light and fun – at least, that’s the way I look at it!
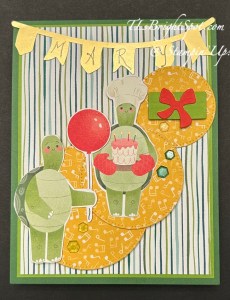
So the circles are die cut using the Stitched Shapes Dies, second from largest for the bottom circle; 3rd from largest for the next circle and then one more. Honestly I forget where it fits in. I die cut circles from the Turtle-Y Awesome 12 x 12 DSP specifically cuz this card is for a retired piano teacher and there are music notes all over this sheet- and she was fun! And this card, to me, is fun Because the circles were die cut from DSP which is not as strong as cardstock, I layered each on a die cut Basic White circle and adhered them together for strength. The bottom one and middle circles are on dimensionals. The smallest is adhered directly to the card. The turtles, as I mentioned, were fussy cut with my paper snips from the Turtle-Y Awesome DSP and attached with liquid glue. Additional dimensionals were added under the balloon & the chefs cap. The birthday package is die cut from Granny Apple Green and Poppy Parade using the Wanted To Say Dies. I found this gold banner in the Wildflower Birthday SDSP, wrote the recipients name with a fine tip marker and attached it with glue dots. The last touch was the Shades of Green Hexagons from this Turtle-Y Awesome Suite. All these will become available May 6 as part of the ONLINE EXCLUSIVES. Now that I look at this card – some Wink of Stella is called for: balloon, icing on the cake and the bow!
For the inside… I pulled out two sets of dies for the inside: the Wanted to Say Dies for the Happy birthday sentiment and background, and the Alphabet A La Mode Dies for the #90. I used adhesive sheets on the back of the DSP for the numbers as well as for the Happy Birthday. It made attaching those to the inside of the card so easy! The numbers were die cut from the Turtle-Y Awesome 12×12 DSP. The background of the happy birthday was die cut from the same DSP. The words themselves were from Petal Pink card stock.
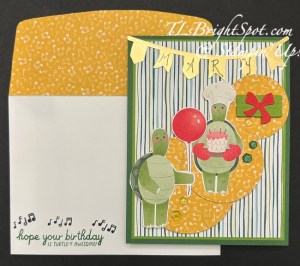
For the envelope… more of the Turtle-Y Awesome DSP (do you notice the music notes on the paper?) attached to the flap & trimmed to fit. For the card front I used Garden Green ink for the sentiment, pulled from the Turtle-Y Awesome stamp set and memento ink for the music notes, also from the Turtle-Y Awesome stamp set. Card cuts are listed at the bottom of this post.
For information to order from me – see below the list of names.
Time to see what everone else has created. Follow the links below & enjoy the hop!
Ordering from me… click this link to look & shop in my store. At the top of the page is a menu: what’s new, specials, join – and my name should be at the top of the page. You can shop the current 2024-2025 Annual Catalog, the Jan-Apr 2025 Catalog, ONLINE EXCLUSIVES – it’s all right here! If you need help, connect with me :O) Use the HOST CODE below to receive a free gift from me when your order is $50 or above – plus my monthly tutorial. Host codes will go away mid April – but for now – use them – and make certain my name is listed as your demonstrator!
HOST CODE Y3TPZVYN
The 2025-2026 Annual Catalog will be released May 6. Items from that catalog can be viewed then, but not until then :O) – unless you are a Demonstrator, then that’s different. Preorders for demonstrators have begun. Want to be a demonstrator and always get at least 20% off each order? Sign up with me now & you will be able to order items for your Starter Kit from the new catalog. For $99 you will be able to order $125 worth of products. click this link, then the join menu :O)
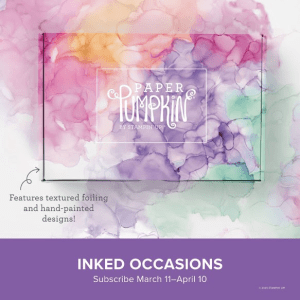
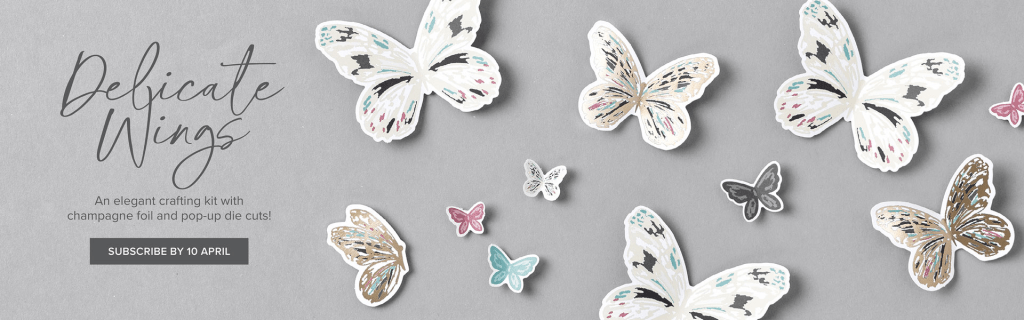
Inked Occasions Paper Pumpkin
Subscribe March 11 – April 10
I’m extra excited about this particular PP. We had something similar in the past & it was gorgeous – looking forward! Craft stunning cards with hand-painted, alcohol ink designs! • Makes 9 cards: 3 each of 3 designs with 9 coordinating envelopes • Textured gold foil on the card bases and sentiments • Precut paper pieces and butterfly embellishments • Coordinating colors: Berry Burst (Classic Stampin’ Spot), Flirty Flamingo, Fresh Freesia, Gorgeous Grape, Peach Pie, Pool Party
Cards come in a beautiful coordinating box!
Subscribe to the April Paper Pumpkin Kit between 11 March and 10 April by clicking here.
Thanks for stopping by. May you have a beautiful day!
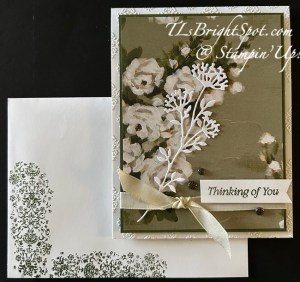
Good Saturday morning. I’v e been under the weather this week – got a full blown head cold, lost my voice, all those things. Ugh… I’m beginning to feel better and hoping to be able to play in my craft room. Today’s card is a sympathy card made with products that as demonstrators we can order early before they become available to the general population. It helps build excitement and give you, the customer a chance to see new products. These will become available May 6 as ONLINE EXCLUSIVES.
This is stunningly beautiful DSP that is called Beautiful Gallery 6×6 DSP. This photo doesn’t show the colors very well (hmmm) but they are Mossy Meadow & other similar shades of green, Basic White, Basic Beige.
I’ve cut the DSP 3 3/4 x 5 and layered it on Mossy Meadow 3 7/8 x 5 1/8. I wrapped a 3/8″ Classic Ribbon in Basic Beige around this, securing it in back with Tear n’ Tape. I took another length and tied a half knot around the ribbon and secured it in place with a glue dot. I die cut this fabulous flower in Basic White using the Beautiful Motifs Dies and slipped it under the ribbon and secured it in place with dots of liquid glue. It’s quite delicate and next time I’ll use Adhesive Sheets adhered to the card stock prior to die cutting. :O) The sentiment also comes from the Beautiful Motifs stamp set and is stamped in Mossy Meadow ink. I adhered this in place with dimensionals. I took another piece of Basic White 4 1/4 x 5 1/2 and ran it through a new embossing folder (part of this fantastic suite!) called the Damask Designs embossing folder and adhered it to the Thick Basic White card base 4 1/4 x 11 scored at 5 1/2. The entire card front was attached to the card base over the embossed front, with dimensionals. As a final touch I added three Pressed Flower Motif embellishments.
For the inside… I was playing with the gorgeous dies in this set and this leaf die fascinated me. It die cuts edges but not the entire piece, so sections can be raised. Really cool! It would be a fabulous card front – but that’s for another day… Anyway – this Mossy Meadow panel is 2 x 5 1/4 and adhered to a 4 x 51/4 Basic White and added to the inside of the card.
More Beautiful Gallery 6×6 DSP adhered to the flap & trimmed to fit. On the envelope front is this very fun stamp from the Beautiful Motifs stamp set, stamped in Mossy Meadow ink.
Stampin’ Up! is doing much more of an online presence these days, adding new products about every 2 months. Want early access to see what’s being added? For $99 get $125 worth of products when joining my team. Do that here… AND after joining, get 20% off all orders. Connecting with other demonstrators is part of the fun of being on a team- there’s always something new to learn. Want to look around in my store? Do that here.
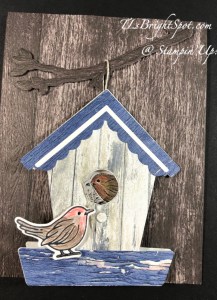
Welcome! It is the 2nd Tuesday of the month and time for Amy’s Inkin’ Krew Blog Hop. I hope you enjoy the creations you see today. The theme is ‘celebrate summer’ and we can interpret that any way that inspires. I think you may see a lot of different ideas here today. I have chosen to work with the Country Woods Designer Series Paper and the Country Birdhouse bundle to prepare today’s card.
This card uses two particular bundles: Country Birdhouse and it’s coordinating dies and Nested Friends and it’s coordinating dies. Nested Friends is now an ONLINE EXCLUSIVE set, while Country Birdhouse is in the new 2024-2025 Annual Catalog. I began by making the birdhouse portion first then the rest of the card followed.
Directions:
Fold a piece of the Country Woods DSP (8 1/2 x 11 to 4 1/4 x 11)
Lay the birdhouse die (from Country Birdhouse Dies) along the fold line with one side of the roofline extending beyond the cutting line until it is OVER the fold – meaning it will NOT cut along the fold. (You can place either side of the roof beyond the fold). Die cut. You now have a birdhouse that opens & closes along one side of the roof. :O) YAY!
Die cut the hole opening using the appropriate die
Die cut the additional roof decorations from Country Woods DSP – noting the direction of the grain (this happens to be the Misty Moonlight color in the pack)
Die cut the bottom panel on the birdhouse – adhere all pieces. There is one die cut from Basic White and I layered it over the other two, where they are adhered together.
See that little small circle piece below the opening – that is supposed to indicate a landing spot for the birds!
Stamp the bird on the front in Memento ink and color with Watercolor Pencils: Real Red, Early Espresso, Basic Gray
These are house finches – the male has the red head and a bit of red down the front breast. Intermixed is some gray & brown.
I used short strokes, not covering the entire bird at once, to make it look more like feathers.
I colored the eye with a Basic Black Marker using the fine tip end
I clipped the beak down the center of it, cut a short length of Linen Thread, took the fibers apart and ‘encouraged’ them into the cut of the beak. I turned this item over and added a dot of liquid glue to secure the thread in place. I put dimensional on the bird and added it to the birdhouse front. The male finch is helping it’s partner build a nest – it’s what they do!
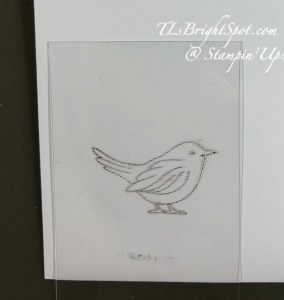
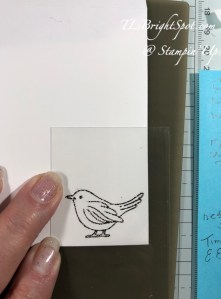
To create the opposite facing bird is called ‘reverse stamping’.
Using Memento ink, ink the stamp and stamp a Window Sheet, then turn the window sheet over and place it on a Basic White scrap. Rub over the window sheet without it moving, then lift window sheet. A bird stamped in reverse has been created!
Color it with Watercolor Pencils: mostly Early Espresso, Basic Gray, just a bit of real Red and some Crushed Curry. Keep going over this until satisfied with the result. This is a female finch!
Step 1: stamp window sheet
Step 2: turn window sheet over, ink side on card stock
First of all, more photos should have been taken! What you are seeing is the female finch bird already die cut & adhered in place. :O(
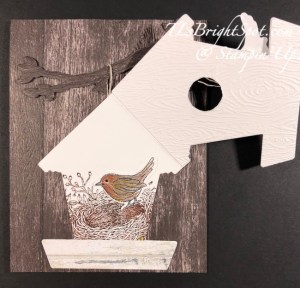
I used the Nested Friends stamp set for the nest, inked with Early espresso ink then used a sponge dauber to add a bit of Copper Clay in places, then stamped it directly to the inside of the birdhouse. I adhered the female finch inplace with liquid glue. I diec ut another piece of Country Woods DSP for the bottom strip on the birdhouse inside.
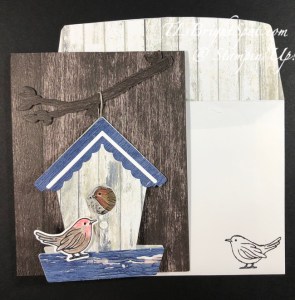
The card base is Early Espresso, 4 1/4 x 11 scored at 5 1/2. Adhered to that is a Country Woods panel 4 1/4 x 5 1/2 that I ran through the Timber 3D embossing folder. I stamped this wonderful branch in Early espresso ink using the Nested Friends stamp set, then die cut it with Nested Friends Dies. I adhered the tree branch in place with mini stampin’ dimensionals. I took a length of Linen Thread and put it over the branch and adhered it in place with Seal+. I adhered the birdhouse over that with liquid glue – to make it appear as though the birdhouse was hanging from the tree branch.
With the card front complete, I worked on the inside of the card.
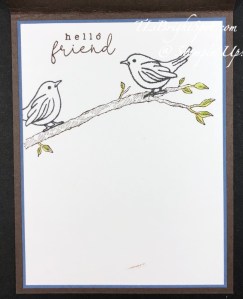
I began by stamping the branch from Nested Friends in Early Espresso ink on the Basic White panel. Using the Country Birdhouse stamps, I stamped the bird on the left in Memento ink, then stamped the bird on the right using the Reverse Stamping method. I colored the leaves with Stampin’ Blends: Granny Apple Green. I stamped the sentiment from Country Birdhouse in Early espresso ink. With the stamping complete, I adhered this to a slightly larger Misty Moonlight, then to the inside of the card.
For the envelope, I used more of the Country Woods DSP to add to the flap, trim to fit. I stamped the bird on the right side using the reverse stamping technique as mentioned above.
Now … time to see what the others on the team have created. click the previous button or the next button… or click on a name. Remember to also read more info below on how to purchase these products from me.
here’s a link to take you directly to the items available in this catalog –
and to shop with me.
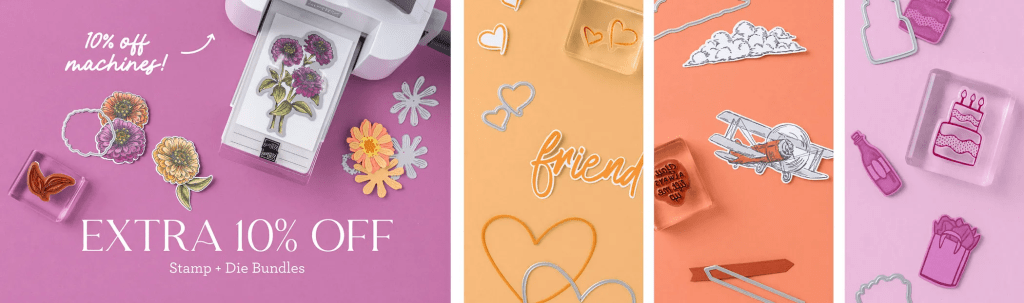
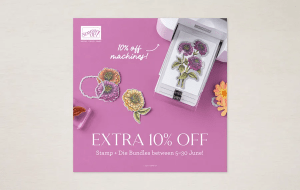
STAMPIN’ UP! STAMP & DIE BUNDLE 10% OFF SALE!!
Sales Period: 5–30 June 2024 Ordering Deadlines Phone: 28 June 2024 at 6:59 p.m. (MT) Online: 30 June 2024 at 11:59 p.m. (MT)
Get an additional 10% discount on stamp and die bundles only (that’s a total of 20% discount on stamp and die bundles!). This excludes suite collections, stamp and punch bundles, bundles not yet released to customers, and any other bundles*.
Save 10% on Stampin’ Cut & Emboss Machine and Mini Stampin’ Cut & Emboss Machine (white and Boho Blue).
The 10% discount applies automatically to stamp and die bundles in all orders… including Starter Kit orders.
See and shop all qualifying bundles in the online store.
Please note Close to My Heart products are not included in this promotion.
Stampin’ Up! Demonstrators get the SAME discounts and sales that CUSTOMERS do – on TOP OF their demonstrator discount
Keeping that information in the forefront of your mind,
While you’re looking around in my store, remember there are some stunning kits available, for all ages and all seasons – even Christmas! And while you’re shopping, I offer fringe benefits to my customers: free tutorial of the month and a FREE Stampin’ Up! item valued to $10 – all for a $50 order, before shipping and taxes. Use my current host code to receive those benefits – especially when your order does not exceed $150. Make certain my name is listed as your demonstrator when checking out! :O)
HOST CODE BAQG9RSE
Thanks for stopping by. May you have a beautiful day. Make someone happy when sending them a handmade card filled with love.
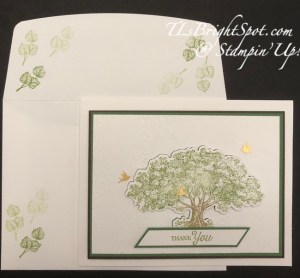
Good Sunday morning. It’s SUNNY here this morning – after days of rain AND a 4.8 earthquake – we live in central, east coast New Jersey and earthquakes are not common here, so it was strange to have the whole house shaking! No damage and everyone is ok…
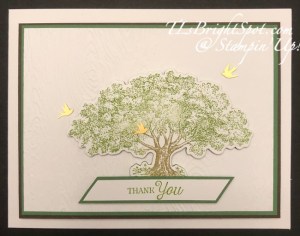
My card today uses a new bundle – Loveliest Trees and it is… well, lovely.
The card base is Thick Basic White. The colored card stock layers are Early Espresso (3 3/4 x 4 7/8) and Garden Green (3 5/8 x 4 3/4). The Basic White top panel was embossed after stamping & die cutting the tree image – with what else – Timber 3D Embossing Folder. The grain is going up & down – as a tree grows :O) Unfortunately it doesn’t show well in the photo.
I inked the tree from Loveliest Trees stamp set with Granny Apple Green ink, then with a sponge dauber tapped in Pecan Pie ink on the trunk and a bit of the branches, then stamped it on the Basic White panel and die cut it with the Loveliest Trees die. That’s when I ran the panel through the Timber 3D EF – after adhering the layers together, I attached the tree in the open die on dimensionals. Then all the layers were added to the Thick Basic White card base with dimensionals. I stamped the sentiment from Loveliest Trees stamp set in Garden Green ink, trimmed the Basic White strip down to 3/8″ x about 2 7/8″, added it to a slightly larger Garden Green strip & attached it as shown with dimensionals near the ends of the strips. With all in place I added three brass birds from the Adhesive-Backed Dragonflies & Birds that retire the end of April.
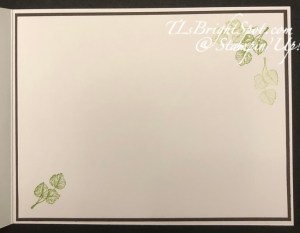
For the inside, I stamped this sweet leaf from Loveliest Trees stamp set in Garden Green ink, and stamped it twice more without re-inking. Love how it gives shades of the same color! I adhered this to a Garden Green slightly larger panel then to the inside of the card.
For the envelope, I used the same process as the inside of the card – inked the stamp with Garden Green ink, stamped it once then twice more without re-inking. I did the same on the envelope flap – and it’s ready to send!
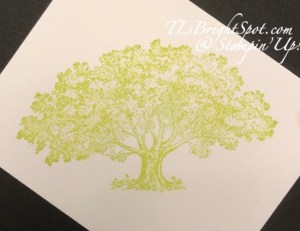
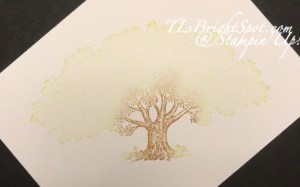
Just to share, here are two more sample of the stamped image… Granny Apple Green ink for the entire image and Granny Apple Green (stamped off once) with Pecan Pie added by sponge dauber. I rfeally like this second image a lot.
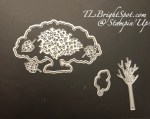
And here’s the stamp & die bundle.
Keep in mind… this stamp & die bundle is not available until May 1 – but to demonstrators :O) it is possible to purchase this bundle NOW. And how do you do that – join my team here of course. With 20% off every order, what’s to lose? There’s more benefits than that of course, that’s just the surface deal. Connect with me for more info :O)
Here’s a picture of me & receiving the new catalog in Houston TX. For information regarding my DSP & Ribbon Shares, click here
Thanks so much for stopping by. May you have a beautiful day!
Good morning! It’s Monday and another week begins. Hope you have plans to craft a day or two this week. My card today is super simple – not so many layers. It’s made with a new stamp set bundle called Thoughtful Wishes.
I began by stamping this leaf ‘stalk’ from Thoughtful Wishes stamp set in Mossy Meadow ink on a Basic White piece. I colored in the leaves with Mossy Meadow Stampin’ Blends then die cut it with the appropriate Thoughtful wishes Dies. I pulled out an acrylic block and covered it with Peach Pie ink (NEW IN COLOR & GORGEOUS) with the brush tip of my Stampin’ Blends. I spritzed it with alcohol to give it a watery look and stamped it on a larger piece of Basic White. It takes a minute to dry completely so I used half dimensionals to put on the back of my leaf stalk and adhered it on top of the stamped image. It gave it a great background! I then chose a sentiment from the Thoughtful Wishes stamp set and stamped it in Mossy Meadow ink. For embellishments, I pulled out the Blooming Pearls and added three. This panel was secured to a Peach Pie card base and the front was finished. As I said, very, very simple.
For the inside… I stamped this very sweet image from Thoughtful Wishes stamp set all across the bottom of the Basic White panel. This was adhered to the inside of the card.
For the envelope I wanted to keep this simple too, so I stamped just a portion of the same leaf stalk from Thoughtful Wishes stamp set in Mossy Meadow ink.
Now, let me tell you, this stamp set is part of a suite of products: Thoughtful Journey 6×6 DSP and another package of SDSP in 12 x 12 – just stunning watercolor images on the 6×6 and more elegant papers in the 12×12 SDSP. I’ll be playing with these products this week, so look for more from this suite of products.
These products (and more!) are available to demonstrators prior to the new 2024-2025 Annual catalog release to share images & projects with our customers & friends to get them excited about all the new items. If you would like to be a part of the demonstrator world and have the advantage of seeing new products early, plus get an automatic 20% discount on all products AND meet new team members who will encourage & share with you, JOIN my team – you can do that here. If you just want to be a hobby crafter and not make this a business, that’s OK too. That discount is a big draw to folks.
Below is a photo of the next Paper Pumpkin kit. You can subscribe to this kit by April 10. You can subscribe herePaper Pumpkin arrives in your mailbox with card stock, embellishments, die cuts, glue dots or dimensionals, an ink spot and instructions to put together that particular kit. It also gives alternate ideas if you prefer to make other items from your kit. There is no limit to what you can do with these kits! A little monthly inspiration and a fun way to get those creative juices flowing.
These dies are paired with the next three months of kits. And it’s so easy to use these dies on other cards as well.
If you like kits… Stampin’ Up! has a kits collection that is every changing. Click here to see more
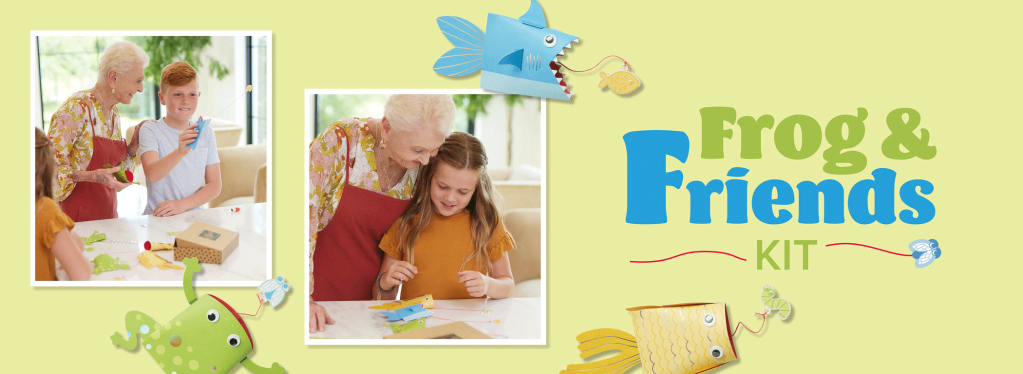
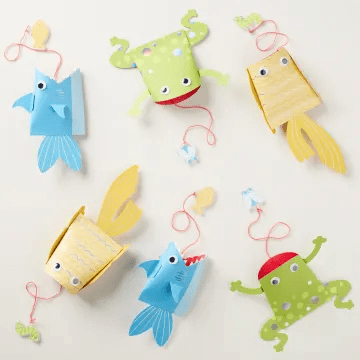
Below are two photos of one of the cute kits – Frog & Friends.
DIY a classic cup-and-ball game! With the Frog & Friends Kit, you can craft six cup-and-ball games in three designs: a fun frog, a flashy fish, and a silly shark. The kit includes everything you need to complete the toys, even googly eyes! It’s a great kit for crafting with kids, grandkids, nieces and nephews, play groups—kids and kids at heart! All for $12.00!
There is always lots to inspire your creativity – and mine as well. Thanks for stopping by today. Make someone happy by sending them a handmade card filled with love. Communicate kindness!


![Pop Up Petals Bundle (English) [ 168010 ]](https://assets1.tamsnetwork.com/images/EC042017NF/168010s.jpg "Pop Up Petals Bundle (English) [ 168010 ]")
![Textured Notes Dies [ 165555 ]](https://assets1.tamsnetwork.com/images/EC042017NF/165555s.jpg "Textured Notes Dies [ 165555 ]")
![Timeless Plaid 6" X 6" (15.2 X 15.2 Cm) Designer Series Paper [ 164678 ]](https://assets1.tamsnetwork.com/images/EC042017NF/164678s.jpg "Timeless Plaid 6\" X 6\" (15.2 X 15.2 Cm) Designer Series Paper [ 164678 ]")
![Adhesive Backed Dragonflies & Birds [ 162743 ]](https://assets1.tamsnetwork.com/images/EC042017NF/162743s.jpg "Adhesive Backed Dragonflies & Birds [ 162743 ]")
![Natural Tones Linen Thread [ 164071 ]](https://assets1.tamsnetwork.com/images/EC042017NF/164071s.jpg "Natural Tones Linen Thread [ 164071 ]")
![Baker's Twine Essentials Pack [ 155475 ]](https://assets1.tamsnetwork.com/images/EC042017NF/155475s.jpg "Baker's Twine Essentials Pack [ 155475 ]")
![Old Olive 8-1/2" X 11" Cardstock [ 100702 ]](https://assets1.tamsnetwork.com/images/EC042017NF/100702s.jpg "Old Olive 8-1/2\" X 11\" Cardstock [ 100702 ]")
![Basic Beige 8 1/2" X 11" Cardstock [ 164511 ]](https://assets1.tamsnetwork.com/images/EC042017NF/164511s.jpg "Basic Beige 8 1/2\" X 11\" Cardstock [ 164511 ]")
![Crumb Cake Classic Stampin' Pad [ 147116 ]](https://assets1.tamsnetwork.com/images/EC042017NF/147116s.jpg "Crumb Cake Classic Stampin' Pad [ 147116 ]")
![Misty Moonlight Classic Stampin' Pad [ 153118 ]](https://assets1.tamsnetwork.com/images/EC042017NF/153118s.jpg "Misty Moonlight Classic Stampin' Pad [ 153118 ]")
![Timid Tiger Classic Stampin' Pad [ 165278 ]](https://assets1.tamsnetwork.com/images/EC042017NF/165278s.jpg "Timid Tiger Classic Stampin' Pad [ 165278 ]")
![Old Olive Stampin' Blends Combo Pack [ 154892 ]](https://assets1.tamsnetwork.com/images/EC042017NF/154892s.jpg "Old Olive Stampin' Blends Combo Pack [ 154892 ]")
![Basic White 8 1/2" X 11" Cardstock [ 166780 ]](https://assets1.tamsnetwork.com/images/EC042017NF/166780s.jpg "Basic White 8 1/2\" X 11\" Cardstock [ 166780 ]")
![Basic White 12" X 12" (30.5 X 30.5 Cm) Thick Cardstock [ 166782 ]](https://assets1.tamsnetwork.com/images/EC042017NF/166782s.jpg "Basic White 12\" X 12\" (30.5 X 30.5 Cm) Thick Cardstock [ 166782 ]")
![Basic White Medium Envelopes [ 159236 ]](https://assets1.tamsnetwork.com/images/EC042017NF/159236s.jpg "Basic White Medium Envelopes [ 159236 ]")
![Stampin' Cut & Emboss Machine [ 149653 ]](https://assets1.tamsnetwork.com/images/EC042017NF/149653s.jpg "Stampin' Cut & Emboss Machine [ 149653 ]")
![Paper Trimmer [ 152392 ]](https://assets1.tamsnetwork.com/images/EC042017NF/152392s.jpg "Paper Trimmer [ 152392 ]")
![Stampin' Dimensionals [ 104430 ]](https://assets1.tamsnetwork.com/images/EC042017NF/104430s.jpg "Stampin' Dimensionals [ 104430 ]")
![Multipurpose Liquid Glue [ 110755 ]](https://assets1.tamsnetwork.com/images/EC042017NF/110755s.jpg "Multipurpose Liquid Glue [ 110755 ]")
![Mini Glue Dots [ 103683 ]](https://assets1.tamsnetwork.com/images/EC042017NF/103683s.jpg "Mini Glue Dots [ 103683 ]")
![Paper Snips [ 103579 ]](https://assets1.tamsnetwork.com/images/EC042017NF/103579s.jpg "Paper Snips [ 103579 ]")
![Take Your Pick [ 144107 ]](https://assets1.tamsnetwork.com/images/EC042017NF/144107s.jpg "Take Your Pick [ 144107 ]")
![Clear Wink Of Stella Glitter Brush [ 141897 ]](https://assets1.tamsnetwork.com/images/EC042017NF/141897s.jpg "Clear Wink Of Stella Glitter Brush [ 141897 ]")


![Traditions Of Christmas 12" X 12" (30.5 X 30.5 Cm) Specialty Designer Series Paper [ 165853 ]](https://assets1.tamsnetwork.com/images/EC042017NF/165853s.jpg "Traditions Of Christmas 12\" X 12\" (30.5 X 30.5 Cm) Specialty Designer Series Paper [ 165853 ]")
![Christmas Greenery Bundle [ 165873 ]](https://assets1.tamsnetwork.com/images/EC042017NF/165873s.jpg "Christmas Greenery Bundle [ 165873 ]")
![Label Me Grateful Bundle (English) [ 166112 ]](https://assets1.tamsnetwork.com/images/EC042017NF/166112s.jpg "Label Me Grateful Bundle (English) [ 166112 ]")
![Traditional Sparkling Sequins [ 165875 ]](https://assets1.tamsnetwork.com/images/EC042017NF/165875s.jpg "Traditional Sparkling Sequins [ 165875 ]")
![Peaceful Greenery 3 D Embossing Folder [ 165928 ]](https://assets1.tamsnetwork.com/images/EC042017NF/165928s.jpg "Peaceful Greenery 3 D Embossing Folder [ 165928 ]")
![Gold Foil Sheets [ 132622 ]](https://assets1.tamsnetwork.com/images/EC042017NF/132622s.jpg "Gold Foil Sheets [ 132622 ]")
![Cherry Cobbler 8-1/2" X 11" Cardstock [ 119685 ]](https://assets1.tamsnetwork.com/images/EC042017NF/119685s.jpg "Cherry Cobbler 8-1/2\" X 11\" Cardstock [ 119685 ]")
![Cherry Cobbler Classic Stampin' Pad [ 147083 ]](https://assets1.tamsnetwork.com/images/EC042017NF/147083s.jpg "Cherry Cobbler Classic Stampin' Pad [ 147083 ]")
![Old Olive Classic Stampin' Pad [ 147090 ]](https://assets1.tamsnetwork.com/images/EC042017NF/147090s.jpg "Old Olive Classic Stampin' Pad [ 147090 ]")
![Tuxedo Black Memento Ink Pad [ 132708 ]](https://assets1.tamsnetwork.com/images/EC042017NF/132708s.jpg "Tuxedo Black Memento Ink Pad [ 132708 ]")
![Friendly Foliage Bundle (English) [ 167308 ]](https://assets1.tamsnetwork.com/images/EC042017NF/167308s.jpg "Friendly Foliage Bundle (English) [ 167308 ]")
![Nests Of Winter 12" X 12" (30.5 X 30.5 Cm) Designer Series Paper [ 164183 ]](https://assets1.tamsnetwork.com/images/EC042017NF/164183s.jpg "Nests Of Winter 12\" X 12\" (30.5 X 30.5 Cm) Designer Series Paper [ 164183 ]")
![Woven Textures 12" X 12" (30.5 X 30.5 Cm) Designer Series Paper [ 165560 ]](https://assets1.tamsnetwork.com/images/EC042017NF/165560s.jpg "Woven Textures 12\" X 12\" (30.5 X 30.5 Cm) Designer Series Paper [ 165560 ]")
![Shaded Spruce Classic Stampin' Pad [ 147088 ]](https://assets1.tamsnetwork.com/images/EC042017NF/147088s.jpg "Shaded Spruce Classic Stampin' Pad [ 147088 ]")
![Pool Party 8-1/2" X 11" Cardstock [ 122924 ]](https://assets1.tamsnetwork.com/images/EC042017NF/122924s.jpg "Pool Party 8-1/2\" X 11\" Cardstock [ 122924 ]")
![Pool Party Classic Stampin' Pad [ 147107 ]](https://assets1.tamsnetwork.com/images/EC042017NF/147107s.jpg "Pool Party Classic Stampin' Pad [ 147107 ]")

![Charming Day Bundle (English) [ 166136 ]](https://assets1.tamsnetwork.com/images/EC042017NF/166136s.jpg "Charming Day Bundle (English) [ 166136 ]")
![Floral Charm 12" X 12" (30.5 X 30.5 Cm) Designer Series Paper [ 166125 ]](https://assets1.tamsnetwork.com/images/EC042017NF/166125s.jpg "Floral Charm 12\" X 12\" (30.5 X 30.5 Cm) Designer Series Paper [ 166125 ]")
![Charming Shimmer Faceted Dots [ 166139 ]](https://assets1.tamsnetwork.com/images/EC042017NF/166139s.jpg "Charming Shimmer Faceted Dots [ 166139 ]")
![Floral Charm Suite Collection (English) [ 166141 ]](https://assets1.tamsnetwork.com/images/EC042017NF/166141s.jpg "Floral Charm Suite Collection (English) [ 166141 ]")
![Purple Fine Shimmer Gems [ 162611 ]](https://assets1.tamsnetwork.com/images/EC042017NF/162611s.jpg "Purple Fine Shimmer Gems [ 162611 ]")
![Everyday Arches Dies [ 164629 ]](https://assets1.tamsnetwork.com/images/EC042017NF/164629s.jpg "Everyday Arches Dies [ 164629 ]")
![Basic White 8 1/2" X 11" Thick Cardstock [ 159229 ]](https://assets1.tamsnetwork.com/images/EC042017NF/159229s.jpg "Basic White 8 1/2\" X 11\" Thick Cardstock [ 159229 ]")
![Blackberry Bliss 8-1/2" X 11" Cardstock [ 133675 ]](https://assets1.tamsnetwork.com/images/EC042017NF/133675s.jpg "Blackberry Bliss 8-1/2\" X 11\" Cardstock [ 133675 ]")
![Berry Burst 8-1/2" X 11" Cardstock [ 144243 ]](https://assets1.tamsnetwork.com/images/EC042017NF/144243s.jpg "Berry Burst 8-1/2\" X 11\" Cardstock [ 144243 ]")
![Blackberry Bliss Classic Stampin' Pad [ 147092 ]](https://assets1.tamsnetwork.com/images/EC042017NF/147092s.jpg "Blackberry Bliss Classic Stampin' Pad [ 147092 ]")
![Berry Burst Classic Stampin' Pad [ 147143 ]](https://assets1.tamsnetwork.com/images/EC042017NF/147143s.jpg "Berry Burst Classic Stampin' Pad [ 147143 ]")
![Crumb Cake Stampin' Blends Combo Pack [ 154882 ]](https://assets1.tamsnetwork.com/images/EC042017NF/154882s.jpg "Crumb Cake Stampin' Blends Combo Pack [ 154882 ]")
![Fresh Freesia Stampin' Blends Combo Pack [ 155518 ]](https://assets1.tamsnetwork.com/images/EC042017NF/155518s.jpg "Fresh Freesia Stampin' Blends Combo Pack [ 155518 ]")
![Blackberry Bliss Stampin' Blends Combo Pack [ 154877 ]](https://assets1.tamsnetwork.com/images/EC042017NF/154877s.jpg "Blackberry Bliss Stampin' Blends Combo Pack [ 154877 ]")
![Bubble Bath Stampin’ Blends Combo Pack [ 161675 ]](https://assets1.tamsnetwork.com/images/EC042017NF/161675s.jpg "Bubble Bath Stampin’ Blends Combo Pack [ 161675 ]")
![Pretty Peacock Stampin’ Blends Combo Pack [ 161676 ]](https://assets1.tamsnetwork.com/images/EC042017NF/161676s.jpg "Pretty Peacock Stampin’ Blends Combo Pack [ 161676 ]")
![Stampin’ Blends Medium Combo [ 159462 ]](https://assets1.tamsnetwork.com/images/EC042017NF/159462s.jpg "Stampin’ Blends Medium Combo [ 159462 ]")
![Stampin' Blends Color Lifter [ 144608 ]](https://assets1.tamsnetwork.com/images/EC042017NF/144608s.jpg "Stampin' Blends Color Lifter [ 144608 ]")