Stampin’ Up! Easy Fun Fold

Hello Saturday! I have a super easy fun fold today made with the gorgeous Awash In Beautfy DSP and the Teacup Dies.

Easy Fun Fold.1

To make this card…

  • Cut Card base (Balmy Blue) 5 1/2 x 7 and score on the long side at 4 1/4
  • Cut another piece of Balmy Blue 4 x 4 & score on one side at 1″. This becomes the fold-over flap
  • Decorate the card base front: Awash in Beauty DSP cut 2 1/2 x 5 1/4
  • Fold this area back and decorate it with another panel of Awash in Beauty 2 1/2 x 5 14 (see photo 2)
Easy Fun Fold.2
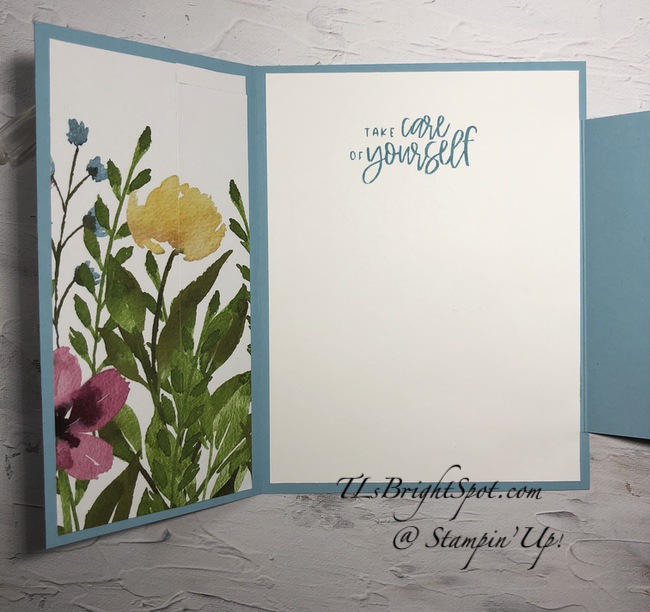
  • Cut panel of Basic White 4 x 5 1/4 for inside, stamp in Balmy Blue ink the sentiment from Cup of Tea stamp set. Add ‘fold-over flap with liquid glue, adhering close to the burnished fold line of the 4 x 4 piece, centering it. Add to inside of card.
  • Decorate fold-over flap:
    • Awash in Beauty DSP cut 2 3/4 x 3 3/4 adhered to front of flap.
    • Stamp the flower stems from Cup of Tea stamp set on a Basic White piece approx. 2 x 2 1/4 in Pear pizzazz ink. Die cut with Teacup Dies. Stamp flowers from Cup of Tea stamp set in Merry Merlot ink and die cut with Teacup Dies. Set these aside
    • Die cut tea cup from another piece of Awash in Beauty (pink)
    • Die cut decorative pattern for tea cup in Basic White & add to pink tea cup.
    • Add die cut leaves to fold-over front, then flowers, some on dimensionals some with liquid glue.
    • Add tea cup on dimensionals
    • Decorate flowers with Iridescent Rhinestone Basic Jewels
  • Add more Iridescent Rhinestone Basic Jewels to left front of card and voila! Card is done. :O)
Easy Fun Fold.3

For the envelope, add a 2 1/4 x 6 piece of Awash in Beauty DSP to the flap; stamp the sentiment from Cup of Tea stamp set in Balmy Blue.

Easy Fun Fold.4

Here’s another photo of the card/ envelope with the card held closed.

Easy Fun Fold.5

I do hope you will try this super easy fun fold. You can change the size of the fold-over flap to make it cover more of the card front, but still maintain the 1″ score line to adhere to the Basic White panel. Instead of 4 x 4, make it 4 1/2 x 4 1/2. Let me know how either one works for you. 😀

Products to make this card are listed below. If you do not have a demonstrator and need an Annual Catalog please reach out to me (the 2022-2023 AC) – happy to send one to you. When ordering, please also use current host code: AZQDZ4U4. I offer my customers a free item from Stampin’ Up! item valued to $10 with your order of $50 and above. Click here to go my store. When the order is over $150, you still receive that free gift from me, but SU! has Stampin’ Rewards that may be used for additional products, so don’t use the host code at that time. If you have questions just let me know. If you would like to be able to order products early from catalogs AND enjoy that 20% discount, join my team now… you may do that here. WooHoo! We have lots of fun and are a creative bunch that encourages & supports one another. Would love to have you. :O)

Let’s talk starter kit… New In Colors, New 2022-2023 Annual Catalog release

Starter Kit Price: $99 USD | $135 CAD
Redemption Value: $125 USD | $165 CAD
Additional In Color Products: $66.50 USD | $91.25 CAD

 In Color Grid PaperIn Color Ink Pad Collection, In Color Cardstock Collection, and In Color 6″ x 6″ (15.2 x 15.2 cm) Designer Series Paper Assortments. 

You’ll also get a free Paper Pumpkin kit! 

PROMOTION DATES: 3–31 MAY 2022

Time is getting short my friends… today is the 28th and you have until the 31st to join with this fabulous promotion. What ARE you waiting for???

Order products early from catalogs AND enjoy that 20% discount, join my team now… you may do that here.

Just a few of the perks of being a Stampin’ Up! Demonstrator AND part of our Critters ‘n Creatin’ Krew Team:

  • At least a 20% discount on everything that you order as a Demonstrator!
  • Early peeks at new release items and preorders for new items about a month before they are available to customers!
  • The ability to attend Demonstrator exclusive Stampin’ Up! events!
  • No pressure to sell to anyone, hold classes or workshops or run a business.  You can simply order for yourself and get the discount!  And as long as you have at least $300 in sales per quarter, you’ll continue as an active Demonstrator and continue to get the discount.  If you aren’t able to maintain the $300 per quarter minimums, you simply go back to being a customer, no commitment required and no penalty if decide that being a Demonstrator isn’t right for you.
  • Stampin’ Up! does have an extensive library of class and project ideas for those wishing to jump into hosting classes as well as training to help start your business, should you choose to do that.

If you join with me, you’ll also get:

  • Monthly team meetings via video conference where we talk about the latest happenings at Stampin’ Up! and share project ideas.  Team members are located all over the United States, but we still get together in person online and have lots of fun.
  • Quarterly in-person meetings if you live in the NJ or surrounding area, where we get together to do a little stamping, creating, getting to know one another and most of all SHARE inspiration. If you live outside the NJ area you can join us through that wonderful ZOOM video conference.
  • Free access to our online class tutorials. These are exceptional!
  • A private Facebook page where we can chat, ask questions and share ideas.
  • Team giveaways and prizes for reaching sales and team goals or attending specific meetings. 😉
  • The best part is the laughing and kidding and sharing of information/ creativity/ talent ~ following the SU! adage: Inspire. Create. Share. ❤️ 😁

Join our incredible group of crafters and creators.

If you would like to be able to order products early from catalogs AND enjoy that 20% discount,

join my team now… you may do that here

Remember to connect with me if you do not have a demonstrator and need a catalog.

Stampin’ Up! Gatefold Sympathy Card with Happiness Abounds

It’s still the weekend… Sunday as a matter of fact. It’s H-O-T here at the Jersey Shore… 88 yesterday & 85 in the house, cuz guess whose AC was broken. Ugh! It’s repaired now, but oh boy. Ok – to the card. It’s a beauty, at least I think so. And when I began making it, it wasn’t for anyone special. By the end of the day – it certainly was! 😞

Happiness Abounds Sympathy.1

The background paper is Waves of the Ocean, a retiring end of June DSP. The flowers were die cut directly from Hues of Happiness DSP with the Blossoming Happiness Dies. I added a bit of Wink of Stella to each rose.

Happiness Abounds Sympathy.2
Happiness Abounds Sympathy.3

Hopefully you can see the sparkle in the above two photos. I added Wink of Stella to the shaded areas only. The sentiment in the center panel comes from Inspired Thoughts stamp set. It was stamped in memento ink. I die cut the flowers for this panel, then trimmed them to use as edging pieces. I really like that added touch.

The card base is Petal Pink with a Basic White layer for many of the panels, then the Waves of the Ocean DSP. I wanted to use this particular DSP for several reasons. First it’s beautiful paper, it coordinates beautifully with the roses and I wanted to use it :O) How’s that?

A Gatefold card is really easy to do, It’s a matter of scoring the card base, then adding the layers, then the ‘gate’ panels. It’s important the ‘gate’ panels are not so wide they make it difficult to close the card. I remember my first gatefold card from a few years back… hard to open ‘cuz the ‘gates’ were too wide they kept running into each other opening or closing the card. So, look at the first photo again and notice how there is spacing between the panels. Another tip is to add the top & bottom ‘gates’ first, then the center ‘gate’ last. And you will notice, the top & bottom ‘gates’ are attached on the left fold, the center ‘gate’ is attached to the right fold. Just wanted to point that out. Let’s take a peek at the inside.

Happiness Abounds Sympathy.4

The flower on the Basic White center panel is a die cut adhered with liquid glue – and yes, it has Wink of Stella on it too. The side panels only have the DSP, not the Basic White layer. I didn’t want the added bulk. And finally the envelope… more Waves of the Ocean DSP on the flap and a stamped in Memento ink rose from Happiness Abounds Stamp set. I chose to color it with the Petal Pink Stampin’ Blends and Granny Apple Green for the stem. No Wink of Stella on this rose, but you certainly could. I’ll list the card cuts at the end of this post.

Happiness Abounds Sympathy.5

I really like how this card turned out, and because I know to whom I’m sending it, that makes it more special. If you have any questions about making this, just give me a shout, reply to this post. As I said, measurements will be at the end of this post.

Products to make this card are listed below. If you do not have a demonstrator and need an Annual Catalog please reach out to me (the 2022-2023 AC) – happy to send one to you. When ordering, please also use current host code: AZQDZ4U4. I offer my customers a free item from Stampin’ Up! item valued to $10 with your order of $50 and above. Click here to go my store. When the order is over $150, you still receive that free gift from me, but SU! has Stampin’ Rewards that may be used for additional products, so don’t use the host code at that time. If you have questions just let me know. If you would like to be able to order products early from catalogs AND enjoy that 20% discount, join my team now… you may do that here. WooHoo! We have lots of fun and are a creative bunch that encourages & supports one another. Would love to have you. :O)

Let’s talk starter kit… New In Colors, New 2022-2023 Annual Catalog release

Starter Kit Price: $99 USD | $135 CAD
Redemption Value: $125 USD | $165 CAD
Additional In Color Products: $66.50 USD | $91.25 CAD

 In Color Grid PaperIn Color Ink Pad Collection, In Color Cardstock Collection, and In Color 6″ x 6″ (15.2 x 15.2 cm) Designer Series Paper Assortments. 

You’ll also get a free Paper Pumpkin kit! 

PROMOTION DATES: 3–31 MAY 2022

Time is getting short my friends… today is the 22nd and you have until the 31st to join with this fabulous promotion. What ARE you waiting for???

Order products early from catalogs AND enjoy that 20% discount, join my team now… you may do that here.

Just a few of the perks of being a Stampin’ Up! Demonstrator AND part of our Critters ‘n Creatin’ Krew Team:

  • At least a 20% discount on everything that you order as a Demonstrator!
  • Early peeks at new release items and preorders for new items about a month before they are available to customers!
  • The ability to attend Demonstrator exclusive Stampin’ Up! events!
  • No pressure to sell to anyone, hold classes or workshops or run a business.  You can simply order for yourself and get the discount!  And as long as you have at least $300 in sales per quarter, you’ll continue as an active Demonstrator and continue to get the discount.  If you aren’t able to maintain the $300 per quarter minimums, you simply go back to being a customer, no commitment required and no penalty if decide that being a Demonstrator isn’t right for you.
  • Stampin’ Up! does have an extensive library of class and project ideas for those wishing to jump into hosting classes as well as training to help start your business, should you choose to do that.

If you join with me, you’ll also get:

  • Monthly team meetings via video conference where we talk about the latest happenings at Stampin’ Up! and share project ideas.  Team members are located all over the United States, but we still get together in person online and have lots of fun.
  • Quarterly in-person meetings if you live in the NJ or surrounding area, where we get together to do a little stamping, creating, getting to know one another and most of all SHARE inspiration. If you live outside the NJ area you can join us through that wonderful ZOOM video conference.
  • Free access to our online class tutorials. These are exceptional!
  • A private Facebook page where we can chat, ask questions and share ideas.
  • Team giveaways and prizes for reaching sales and team goals or attending specific meetings. 😉
  • The best part is the laughing and kidding and sharing of information/ creativity/ talent ~ following the SU! adage: Inspire. Create. Share. ❤️ 😁

Join our incredible group of crafters and creators.

If you would like to be able to order products early from catalogs AND enjoy that 20% discount, join my team now… you may do that here

Remember to connect with me if you need a catalog!Make someone’s day… send them a handmade card filled with love! Inspire. Create. Share.

Card cuts for this Gatefold Card:

  • card base 8 1/2 x 5 1/2 scored @ 2 1/8, turn to opposite side and score again @ 2 1/8, burnish
  • layer 1 – Basic White 1 7/8 x 5 3/8 (cut 2)
  • layer 2 – DSP 1 5/8 x 5 1/8 (cut 2)
  • Gates:
    • Petal Pink – 1 5/8 x 4 (cut 3)
    • Basic White – 1 1/2 x 4 (cut 3)
    • DSP – 1 3/8 x 4 (cut 2)
  • Inside:
    • Basic White – 4 x 5 1/4
    • DSP – 1 7/8 x 4 (cut 2)

Stampin’ Up! W-V Fun Fold w/ Abstract Beauty and Butterflies

Fun Folds are just that – f-u-n to create. And this one is so easy, although it looks complicated, it isn’t. I’m continuing with a theme of sorts, Bugs or Butterflies using the Abstract Beauty 4 x 6 DSP to attract the butterflies. Let’s take a peek…

Brilliant Wings Dies & Abstract Beauty.1

Here you can easily see the W-V fold of the card and I’ve added three of the Brilliant Wings Dies in various places. Cut out of the DSP or vellum or combining the two papers, the butterflies appear almost real. Here’s another photo with the card flat.

Brilliant Wings Dies & Abstract Beauty.2

You may be saying, but there’s no place write… so flip the card over and this is the perfect place for notes.

W-V Fun Fold, back.3

Night of Navy was used for the card base, and Crushed Curry card stock to coordinate with the DSP. In these photos, it almost looks orange! On the butterflies are holiday Rhinestone Basic Jewels to add some glam; Basic White for the sentiments stamped in Night of Navy ink come from Artfully Layered stamp set. I embossed the Crushed Curry card stock using the Hive 3D EF prior to adhering them. Here are a few more photos… and yes, there are two cards, so you will notice the butterflies are cut from other papers in the Abstract Beauty 4 x 6 DSP pack and the envelope flaps are other papers in the pack.

This is a really fun card to make ~ let me see if I can give you some pointers for putting it together. Card cuts are listed below. One of the important parts is making certain that sentiment on the back panel is centered. I tend to use my grid paper to line things up just right.

Adhere the floral panel and the embossed pieces in the appropriate places using the photos above as your guide. Adhere the sentiment panels (the Night of Navy square) to the far right panel, again using your grid paper to make certain it is centered. The reason for this is… the V panel when the card is closed, covers this completely, so you want it just right. :O)

Adhering the V panel before decorating the card is next: lay the V panel on top of the sentiment panel, centering it. No glue at this point! Now close that inner W to see where it will ‘sit’ on the W (you are adhering the V to the fold that is closest to the flat portion of the card!); then lift the W, add a bit of glue to the V on the portion that will be adhered to the card and close that first W on the V. Once that dries sufficiently, close the card completely and fold the embossed portion of the V onto the card front panel (the floral piece). Note where that will ‘sit’, open the card and add liquid glue to that portion of the V, close the card again and adhere. Bingo! Now decorate as desired. YAY!!! You did it 😏

Abstract Beauty 4 x 6 DSP is not carrying over to the new cattie. Nor are the Holiday Rhinestone Basic Jewels. Brilliant Wings Dies IS carrying over, just not in the bundle with the Butterfly Brilliance stamp set. Night of Navy & Crushed Curry card stocks ARE in the new cattie, as are Basic White products. Do share with me what you create with this wonderful fun fold :O).

Products to make this card are listed below so feel free to order away. :O) If you do not have a demonstrator and need an Annual Catalog please reach out to me (the 2022-2023 AC) – happy to send one to you. AND… I have the Jan-Jun 2022 Mini Catalog and can send that as well – ordering from that catalog ends May 2! When ordering, please also use current host code: 22R4JPCG. I offer my customers a free item from Stampin’ Up! item valued to $10 with your order of $50 and above. Click here to go my store. When the order is over $150, you still receive that free gift from me, but SU! has Stampin’ Rewards that may be used for additional products, so don’t use the host code at that time. If you have questions just let me know. If you would like to be able to order products early from catalogs AND enjoy that 20% discount, join my team now… you may do that here. WooHoo! We have lots of fun and are a creative bunch that encourages & supports one another. Would love to have you. :O)

You can reserve your copy of this catalog by contacting me ~ just let me know and I’ll get in touch with you :O). Be a part of this amazing community! I received my copy of the catalog yesterday… and the preorder for demonstrators has begun… guess who got their order in early … me, me, me! Can’t wait! And I want to share it with you – so stay tuned. 👍😁😉

What else is going on… oh yes… with the upcoming launch of a new catalog, there are also items RETIRING, for a real bargain. It is always bittersweet to see some of these items go away. Remember too, only available while supplies last.

You may click here to see the list of last chance products.

After making your list, click here to go my store. Happy, happy shopping!

Thanks for stopping by. May you have a beautiful day.

Maker someone happy by sending them a handmade card filled with love.

Inspire. Create. Share.

Card cuts for today’s project:

Night of Navy card base: 11 x 5 1/2, scored at 1 3/4, 3 1/2, 5 1/4 & 7: folds are mountain, valley, mountain, valley

Night of Navy: 5 x 2 1/2 scored at 2 1/2 for the V; 2 1/4 x 2 1/4 for the sentiment panel

DSP: 1 1/2 x 5 1/4 (2) preferably not the same but coordinating

Crushed Curry: 2 1/4 x 2 1/4 (embossed for the V panel); 1 1/2 x 5 1/4 (also embossed); 3 3/4 x 5 1/4 (embossed)

Basic White:4 x 5 1/4 for the card back; 2 x 2 for the sentiment panel + scrap for the front sentiment

Stampin’ Up! Heart & Home Part 2

Good morning! I’ve created another super easy card for you using the Heart & Home Memories & More Card Pack + Cards & Envelopes. I DID add some die cutting elements to the card using the Pierced Bloom Dies. Abstract Beauty 4 x 6 Specialty DSP is also a part of the mini card front. Let’s take a look…

Heart & Home Part 2.1

The large card base is from the Heart & Home Mem’ries & More Cards & Envelopes, as is the wood grain piece :O) – so this is two cards in one. And the lovely die cuts add a nice element of dimension and pull in the colors of the flowers in the Abstract Beauty SDSP. The flower & flower center were die cut from Fluid 100 Watercolor Paper that I had created earlier. You can see that post here. Below is the colored panel. The leaf die cut is from Just Jade card stock. The background panel for the SDSP is Crushed Curry.

Fluid 100 Watercolor Paper

The inside of the front card is two of the stickers from the Heart & Home Mem’ries & More Card Pack.

Heart & Home Part 2, front inside

And the inside of the card… another panel of the Heart & Home Mem’ries & More Card Pack trimmed down just a bit & adhered to a slightly larger panel of Crushed Curry, then attached to the card base.

Heart & Home Part 2, inside

The envelope got another couple of die cuts using the Pierced Bloom Dies plus one of the stickers from Heart & Home Mem’ries & More Card Pack.

Heart & Home Part 2

As yesterdays card (you can see that here), there is no sentiment added, making this super versatile: thank you, birthday, just a note, hello ~ you name it. I appreciate having versatility in a card and, this will be part of a gift set for someone special.

Products to make this card are listed below so feel free to order away :O) If you do not have a demonstrator and need an Annual Catalog please reach out to me – happy to send one to you. AND… I have the Jan-Jun 2022 Mini Catalog and can send that as well! When ordering, please also use current host code: Y4NW3AK. I offer my customers a free item from Stampin’ Up! valued to $10 with your order of $50 and above. Click here to go my store. When the order is over $150, you still receive that free gift from me, but SU! has Stampin’ Rewards that may be used for additional products, so don’t use the host code at that time. If you have questions just let me know. If you would like to be able to order products early from catalogs AND enjoy that 20% discount, join my team now… you may do that here. WooHoo! We have lots of fun and are a creative bunch that encourages & supports one another. Would love to have you. :O)

Beginning 1 March and through 31 March, Stampin’ Up! has a promotion that is hard to pass. See below for details. This is such a sweet deal and the bundles available are extraordinarily priced.

Details:

The Mini Stampin’ Cut & Emboss Machine will be available for purchase at a 20% discount.
A number of select stamp-and-die bundles that are compatible with the Mini Stampin’ Cut & Emboss Machine will also be available for purchase at a 20% discount.
For this promotion only, we’ve brought back the previously popular Art Gallery, Celebrate Sunflowers, and Garden Wishes bundles. They will only be available in their bundle form during this promotion, so make sure to snag ‘em while you still can!
The Mini Stampin’ Cut & Emboss Machine and select compatible bundles can be bought together or separately.
There is no limit on the number of Mini Stampin’ Cut & Emboss Machines you can purchase during this promotion. In fact, having more than one machine is ideal for workshops, classes, and other events!
Products are available in all markets while supplies last. Offer may vary from market to market based on product availability. No backorders or substitutions will be allowed.
The stamp-and-die bundles that can be found in a current catalog will be replenished until they retire. When they do retire, the bundles will be added to the Retiring List.
Due to supply chain challenges, this promotion may be altered or ended early. We will post a Current Update with further information if this is anticipated. 

itemPrice
150673Mini Stampin’ Cut & Emboss Machine$60.00 $48.00 USD
$82.00 $65.50 CAD
158382All Squared Away Bundle$50.00 $40.00 USD
$68.00 $54.25 CAD
156227Art Gallery Bundle$56.00 $44.75 USD
$76.00 $60.75 CAD
155834Beauty of Friendship Bundle$58.00 $46.25 USD
$79.00 $63.00 CAD
154065Celebrate Sunflowers Bundle$57.00 $45.50 USD
$78.00 $62.25 CAD
156220Garden Wishes Bundle$57.00 $45.50 USD
$78.00 $62.25 CAD
159519Hydrangea Haven Bundle$58.00 $46.25 USD
$79.00 $63.00 CAD
155674Pansy Patch Bundle$57.00 $45.50 USD
$78.00 $62.25 CAD
155847Quiet Meadow Bundle$59.00 $47.00 USD
$81.00 $64.75 CAD
158359Seascape Bundle$52.00 $41.50 USD
$70.00 $56.00 CAD
155823Sweet as a Peach Bundle$41.00 $32.75 USD
$55.00 $44.00 CAD
159529Welcoming Window Bundle$56.00 $44.75 USD
$76.00 $60.75 CAD
155845What’s Cookin’ Bundle$51.00 $40.75 USD
$69.00 $55.00 CAD
155507Wild Cats Bundle$43.00 $34.25 USD
$58.00 $46.25 CAD

Thanks for stopping by. May you have a beautiful day.

Make someone happy sending them a handmade card filled with love.

Inspire. Create. Share.

Stampin’ Up! Z Fold Window Card

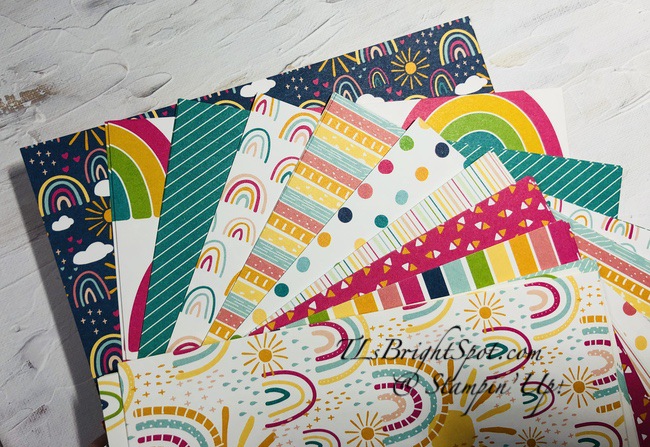
Hello Friday! It’s been a busy week here and what we’ve got today is a fun fold for Valentines. And these are for our grand kids :O) I think they are going to like them. I’ve used Sunshine & Rainbows 6×6 DSP (FREE during Sale-a-bration with a $50 order – just sayin’) and some of the new stamp bundles from the Jan-Jun 2022 Mini Catalog.

For the card on the & far left I’ve used the Brilliant Rainbows Dies to get the rainbow, die cut directly from the Sunshine & Rainbows 6×6 DSP! And I used the Cloud Punch to create the clouds, again, directly punching them from the Sunshine & Rainbows DSP. The little heart is from the Sweet Hearts Dies.

For the middles card I taken the heart from the Love & Happiness bundle – using the Bouquet of Love dies and the smaller heart. The sentiment panel is a die from that same set, while the sentiment is from Love & Happiness stamp set.

For the far right cards: heart, flowers and sentiment banner are all from the Bouquet of Love Dies. The DSP is another of the Rainbows & Sunshine 6×6 DSP.

OK, I got theses in reverse order! But you can still see they are all different while still being the same fold. And here’s the full view of the inside when it’s pulled fully open.

Z Fold Valentines

Sweet conversations stamp set for the hearts & both sentiments.

Sweet Conversations stamp set for the sentiments on the center; Happy & heartfelt for the sentiment on the flap; and the tiny hearts are from Rainbows of Happiness stamp set.

Z Fold Window card, inside

The sentiment & hearts are from Rainbows of Happiness stamp set.

Directions for creating this fun fold are super easy.

  • Card base is 8 1/2 x 5 1/2 scored at 4 1/4
  • Basic White panel is 8 x 5 1/4, scored at 4″ & 6″
  • The Designer Series Paper is 4 1/4 x 5 1/2 (front panel); 1 3/4 x 5 (inside panel) and 1/2 x 4, all from the same DSP piece, just turned over to use the opposite side
  • Adhere the DSP to the card front and cut the window with the Layering Circles Dies. I found it helpful to run it through twice for a sure cut.
  • Stamp the Basic White panel as desired, then adhere to the inside of the card as shown.
  • You may at this point chose to die cut additional circles, just be certain to use the same size as the circle cut from the card front – so it covers the entire window opening. Adhere all pieces together.
  • Close the card and adhere the circles making certain to put adhesive only on the side that attaches to the fold :O). It’s best to adhere when the card is closed, so the circle fits the window perfectly.
  • Now finish decorating the circle as desired, making certain nothing interferes with the closure. Finis!

Sale-a-bration is from 4 Jan to 28 Feb ~ that means placing orders during this time can earn you some FREE PRODUCTS. What are you waiting for??? Products are listed below so feel free to order away :O) If you do not have a demonstrator and need an Annual Catalog please reach out to me – happy to send one to you. AND… I have the Jan-Jun 2022 Mini Catalog and the 4 January to 28 February 2022 Sale-a-bration catalogs and can send those as well! When ordering, please also use current host code: R6D2 7PHD. I offer my customers a free item from Stampin’ Up! valued to $10 with your order of $50 and above. Of course, right now you get all those fabulous FREE Sale-a-bration items too. Click here to go my store. When the order is over $150, you still receive that free gift from me, but SU! has Stampin’ Rewards that may be used for additional products, so don’t use the host code at that time. If you have questions just let me know. If you would like to be able to order products early from catalogs AND enjoy that 20% discount, join my team now… you may do that here. We have lots of fun and are a creative bunch that encourages & supports one another. Would love to have you. :O)

SAB FLYER

When you as a customer reach the qualifying purchase amount required to earn a free Sale-A-Bration item, Stampin’ Up! will let you know by highlighting the “rewards” icon. This will allow you to choose from multiple reward options depending on the total amount of your shopping cart. Before checking out, you can easily select which products you want! 

SAB FLYER

If you decides to sign up as a Stampin’ Up! demonstrator during Sale-A-Bration, you will receive two free stamp sets after picking all of the products you want in your Starter Kit. The stamp sets need to be live at the time of picking them, so anything you see in a current catalog or at stampinup.com is eligible.  Remember, the two free stamp sets are available if you join now through the end of February.

Thanks for stopping by. May you have a beautiful day.

Make someone happy sending them a handmade card filled with love.

Inspire. Create Share.

Stampin’ Up! Artfully Layered Fun Fold Thank You

Hello again! It’s Saturday… and I hope you have a day to relax a bit from the stresses of everyday obligations, AND an opportunity to play in your crafty place. :O) I’m sharing a fun fold today, an uneven gate fold card that is super easy to do. But first I want to share some snow photos of yesterday’s storm. We got about 6-8″ (it was hard to tell because it compacted ‘cuz it was a bit wet, not fluffy) and it was like waking in a wintry wonderland ~ and it kept coming for several more hours. ❄️

Charlie Brown tree on patio table
Kousa Dogwood in our back yard
Spruce in our front yard

Luckily our neighbor has a snowblower & cleared our driveway – so grateful ‘cuz the snow was heavy!

OK, the card… this goes out today to hubby’s sister who lives in Hawaii. She sent us homemade Baklava! This new DSP and coordinating stamp/ dies seemed perfect for her.

Artfully Layered Thank You.1

It’s obvious this is a lopsided, or perhaps we should say, uneven gate fold card. By scoring the 5 1/2 x 8 1/2 card base at 2 3/4 & 7, this makes it uneven and just a bit different. Aren’t these fun dies too? The larger almost looks like the top of a pineapple :O) (IDEA!) It was die cut from Pear Pizzazz card stock using the Tropical Layers dies (10% off when purchasing the bundle!), then sponged on the edges with a sponge dauber and Old Olive ink. The front frond was die cut with Old Olive card stock and the veining was die cut with Just Jade card stock. Great color combination, don’t you think? The DSP layers are… Artfully Composed DSP – all of these products are new in the Jan-Jun 2022 Mini Catalog. And what about that fun edge die! Yep – it’s from the same Tropical Layers die set. That was die cut in Basic Black card stock, same as the card base. I also used the Tailored Tag Punch to create the end for the thank you banner. I’ve also used Pale Papaya card stock for the backing of the Artfully Composed DSP. And the sentiment – yep, from the same Artfully Layered stamp set. I used the Classic Matte Dots in White to accent the sentiment on the front.

Let’s take a peek at the inside…

Artfully Layered thank you.2, inside

Do you see the fun hash marks? That’s from the Tropical Layers Dies! While it cut through the paper, it doesn’t have an edge to make a cutout. It’s perfect for adding texture and a little fun to a card. The sentiment is stamped in Memento Black ink and comes from the Artfully Layered stamp set.

Here’s what I did with the envelope…

Artfully Layered thank you.3

Here I used more of the Artfully Composed DSP for the envelope flap. For the front of the envelope I stamped this fun frond in Just Jade ink using the Artfully Layered stamp set. It adds to the tropical look of the other leaves on the DSP :O)

I can’t wait to see what you do with this fun stamp & die set AND the gorgeous DSP – and how you use this uneven gate fold idea to make it your own. Please do share with me!

Products are listed below so feel free to order away :O) If you do not have a demonstrator and need an Annual Catalog please reach out to me – happy to send one to you. AND… I have the Jan-Jun 2022 Mini Catalog and the 4 January to 28 February 2022 Sale-a-bration catalogs and can send those as well! When ordering, please also use current host code: R6D2 7PHD. I offer my customers a free item from Stampin’ Up! valued to $10 with your order of $50 and above. Of course, right now you get all those fabulous FREE Sale-a-bration items too. Click here to go my store. When the order is over $150, you still receive that free gift from me, but SU! has Stampin’ Rewards that may be used for additional products, so don’t use the host code at that time. If you have questions just let me know. If you would like to be able to order products early from catalogs AND enjoy that 20% discount, join my team now… you may do that here. We have lots of fun and are a creative bunch that encourages & supports one another. Would love to have you!

Thanks for stopping by. May you have a beautiful day.

Make someone happy sending them a handmade card filled with love.

Inspire. Create. Share.

Stampin’ Up! Rainbow of Happiness Fun Fold Happy Inkin’ Thursday Blog Hop

This is the last Happy Inkin’ Thursday Blog Hop for 2021… and I cannot believe it. Where did 2021 go? Despite all the challenges during the year, it has gone F-A-S-T and I think there may have been a couple of times when it felt as though I was off the ‘merry-go-’round’. Lately I have been computer challenged. I don’t know what went wrong b ut I was locked out of my computer. I could text and that was about it. Wierd… but now, well, it seems to be ok again. Let’s hope for that!

Today’s hop is all about fun folds. Let’s take a look at what we’ve got.

May be an image of text that says 'Happy Inkin Thursday Blog Hop December 30 Theme Challenge Fun Fold'

Rainbow of happiness Fun Fold.1

I had fun creating today’s card. I haven’t been in my craft room for a couple of days; we had family here and my craft room is also a bedroom :O). Needless to say, the room was being used by our granddaughter and we loved having her here – and the rest of the family too BTW! but it did limit my productivity :o) Having the computer go on the blitz just prior to their arrival didn’t help matters any. 😩

The theme as you saw above is a fun fold – and this is a super easy one. It’s similar to a card within a card, with a hole in the middle of the card front.

As I said, super easy to create.

  • Card base is So Saffron card stock 5 1/2 x 8 1/2, scored at 4 1/4
  • Designer Series Paper is Sunshine & Rainbows 6 x 6 DSP cut to 5 3/8 x 4 1/8 adhered directly to the card front. (This DSP is free with a $50 order beginning Jan 4 from the new Jan-Jun 2022 Mini Catalog) hint, hint.
  • Die cut the center with the Tailor Made Tag Dies. (You could use the Layering Circles Dies and a different stamp set for a completely different look.)
  • Die cut the cute rainbow & tag using the Brilliant Rainbow Dies. Reserve the cutouts for the rainbow in this small die!
  • Cut a panel of Basic White card stock 5 1/4 x 8 1/4 and score at 4. (This will become your inner panels with the fold on the right.)
  • Place the ‘liner’ on the inside of the card without adhering it to the inside of the card. Adhere the ‘tag’ to the ‘front’ of the inner card piece. Remember, the inner liner fold is on the right. Decorate.
    • Adhere the tag cut from the card front using the Tailor Made Tag Dies. (I did this by laying the inner panel on the inside of the card, closed the card front over this [the die cut opening will show]) and attached the die cut with Stampn’ Seal. This will allow the tag to ‘fit in’ the die cut of the card front :O) Add the ribbon by tying it in a knot and cutting fairly short so the card easily opens/ closes. The ribbon is Just Jade Open Weave Ribbon.
    • Stamp the sentiment from the Rainbow of Happiness stamp set in Magenta Madness ink on a Basic White panel. Die cut with the small rainbow ‘tag’ die from the coordinating Brilliant Rainbow dies. Reserve the rainbow cutouts!
    • Adhere this stamped rainbow ‘tag’ with dimensionals to the die cut tag with the DSP on it. Color the rainbow cutouts with Stampin Blends: Dark Magenta Madness, Dark So Saffron, Dark Pool Party and Petal Pink Marker for the smallest. Adhere behind the rainbow die cut with just dabs of liquid glue. I used tweezers to hold and place easily.
  • Stamp randomly around the larger tag with the thank you stamp from Rainbow of Happiness stamp set in various ink colors: So Saffron, Petal Pink, Pool Party, and Magenta Madness.
  • Open the card insert and stamp the rainbow: Magenta Madness & So Saffron inks – of course using the Rainbow of Happiness stamp set.
  • Stamp the rainbow pattern in Pool Party ink and the sentiment in Petal Pink ink.
  • Stamp the hearts from the Rainbow of Happiness stamp set in Magenta Madness ink.
  • Adhere this panel to the inside of the card, lining up the card front tag hole, then closing the card to adhere. Works like a charm! And voila… the card is finished!

For the envelope, I stamped the lines in Pool Party ink and the sentiment in So Saffron ink. I added more Sunshine & Rainbow 6×6 DSP to the envelope flap and called it done.

Rainbow of Happiness.4

Here’s a photo of the stamp set and coordinating dies, plus both sides of the DSP. This is such fun paper… lively colors and fun designs. I have several thank you cards to make and think this stamp set/ dies/ DSP are going to fit that need!

Such fun patterns!

If you do not have a demonstrator and are interested in the Annual Catalog OR Jul-Dec 2021 Catalog, please reach out to me – happy to send one to you. AND… I now have the Jan-Jun 2022 Mini Catalog and the 4 January to 28 February 2022 Sale-a-bration catalogs and can send those as well! When ordering, please also use current host code: UQ6U2WQZ I offer my customers a free item from Stampin’ Up! valued to $10 with your order of $50 and above. Click here to go my store. When the order is over $150, you still receive that free gift from me, but SU! has Stampin’ Rewards that may be used for additional products, so don’t use the host code at that time. If you have questions just let me know. If you would like to be able to order products early from catalogs AND enjoy that 20% discount, join my team now… you may do that here. We have lots of fun and are a creative bunch that encourages & supports one another. Would love to have you!

Paper Share information is below… registration ends Jan 2, 2022 – yikes, just a few days days away.

Follow along the hop to see some fantastical projects by this Krew! You may use the ‘next’ button or click on a name to take you to that person’s blog. Either way – enjoy the hop!

Amy Koenders

Mary Deatherage

Jaimie Babarczy

Sue Prather

Karen Finkle

Akiko Sudano

Karen Ksenzakovic

Tara Carpenter

Terry Lynn Bright ~ YOU ARE HERE!

Below is my paper share deal… take a peek and let me know if you’re interested. If you are a regular and or local customer, I will accept cash or a check from you prior to placing the order. If you haven’t received your catalog from me yet, know it is on the way and should arrive SOON!

TLsBrightSpot DSP Share – $21 – Plus $5.50 for First Class Shipping

(Or pick up at my home, no shipping)

Included in the share are 69 – 6″ x 6″ sheets (except for Abstract Beauty – those are pre-cut at 4″ x 6″!) of fabulous new Designer Series Papers and some fun Specialty Papers, too!  If you wanted to buy one of each of these packs of papers it would be about $120 – plus shipping! UGH… this is just a great opportunity to see the papers and determine which will be on your next order :O)

  • Abstract Beauty Specialty 4″ x 6″ DSP – 12 sheets
  • Artfully Composed DSP – 6 sheets
  • Flowering Fields DSP – 6 sheets
  • Heart & Home DSP – 6 sheets
  • Hey Sports Fan DSP – 6 Sheets
  • New Horizons 6″ x 6″  DSP – 12 sheets
  • Sweet Talk DSP – 6 sheets
  • Symbols of Fortune Specialty DSP – 6 sheets

Specialty Papers

  • Supple Shimmer Specialty Paper – 2 sheets – one each color
  • Vellum 12″ x 12″ Layering Designs – 6 sheets – 2 each of 3 designs
  • Mother of Pearl 12″ x 12″ Specialty Paper – 1 sheet

Want a DOUBLE Share?  $42- Plus $8.50 for Priority Shipping

With a Double Share – you’ll get 138 sheets of DSP and specialty paper!  The designer paper sheets will be cut into 6×12 so you’ll be able to get 3 full A2 size card fronts from each sheet (except for the New Horizons 4″ x 6″ and Abstract Beauty 6″ x 6″ DSPs – you’ll get double sheets of those as they are already pre-cut).

Included as a free gift from Me! – For participating in the share, you will receive samples of the papers from the Jan – Feb 2022 Sale-A-Bration Brochure! That includes samples of papers from the Daffodil AfternoonSunshine & Rainbows, Simply Marbleous Sale-a-bration DSP packs! Such fun papers!

Anyone is welcome to participate in this paper share. Unfortunately, I can only ship to addresses within the US. I accept PayPal and payment by Venmo. I’ll need your name (first & last) + the email address associated with your PayPal account. Just remember, I’ll need payment before I submit your order, thank you!

Product availability has been a bit troubling. Stampin’ Up! has advised us there may be some items unavailable when the catalog goes live. If that happens, I’ll adjust and refund as necessary. Questions? Tlsbrightspot@gmail.com

Deadline to sign up for the shares is Sunday, 2 Jan 2022 at 8pm EST!!

Thanks for stopping by. May you have a beautiful day. Make someone happy by creating a handmade gift and or card – or both!

Inspire. Create. Share.

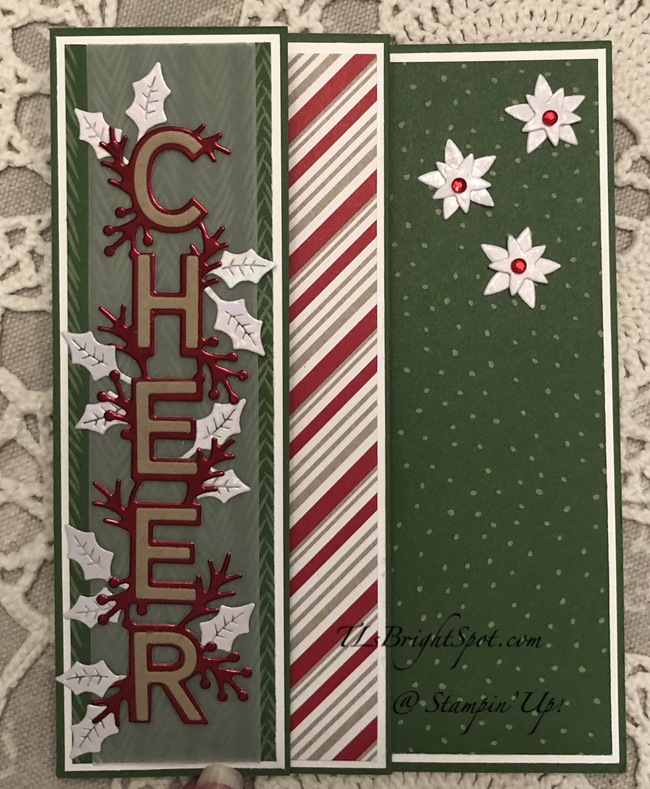
Hi Folks – it’s Sunday! Do you hav e your ‘Sunday go to meetin’ clothes laid out? As for me, I do know what I will be wearing :). I enjoy Sundays ~ it’s an opportunity for me to regroup, think about my week and how to be a better person. So, having said all that, are you ready to see my card today? Let me say first – this was so fun to do, I love this Words of Cheer bundle, but true confessions… I used some retired Sale-a-bration paper but you could use any DSP 😳 Here’s the card…

Cheer Fun Fold.1

Isn’t this bright? Let me tell you about the shiny white paper – I cheated! I used the Christmas Cheer Dies and some leftover ‘paper’ from the Wonderful Snowflakes to die cut the holly leaves & stars. I wanted the shine, kind of like foil, to make this stand out. More info…

Basics: Words of Cheer Bundle (includes Christmas Cheer Dies)

  • Die cut the cheer outline from Red Foil sheets
  • Die the letters from Crumb Cake. Adhere letters to the Red Foil die cut
  • Die cut the holly leavers and stars from Wonderful Snowflakes scraps. Adhere holly leaves to the back of the Red Foil die cut
  • Adhere this to a panel of Vellum 1 3/8 x 5 1/4. TIP: I recommend using glue dots to secure holly leaves to the Vellum.

Card cuts:

  • Card base – Garden Green 5 1/2 x 11 scored at 1 3/4, 4 1/4, & 6 3/4
  • Basic White panels -1 5/8 x 5 3/8 (2); 2 3/8 x 5 3/8 (2); 4 1/8 x 5 3/8
  • Coordinating DSP – 1 1/2 x 5 1/4 (2); 2 1/4 x 5 1/4 (2); 1 3/4 x 5 1/4
  • Burnish score lines firmly. see photo below for guide
Cheer Fun Fold.2

Attach papers as shown below. Remember the Cheer for the front of the card!

You can clearly see how I decorated the various panels: the holly leaves were die cut from the leftover Wonderful Snowflakes pieces; the tree is the Pine Tree punch and the ornaments are die cut from Real Red c s & Shimmer Paper with Wink of Stella added for glam (the die came from Christmas Trees Dies); the stars are also from the Cheer Dies and Wonderful Snowflakes paper scraps. There is no sentiment, but plenty of room for writing a precious message.

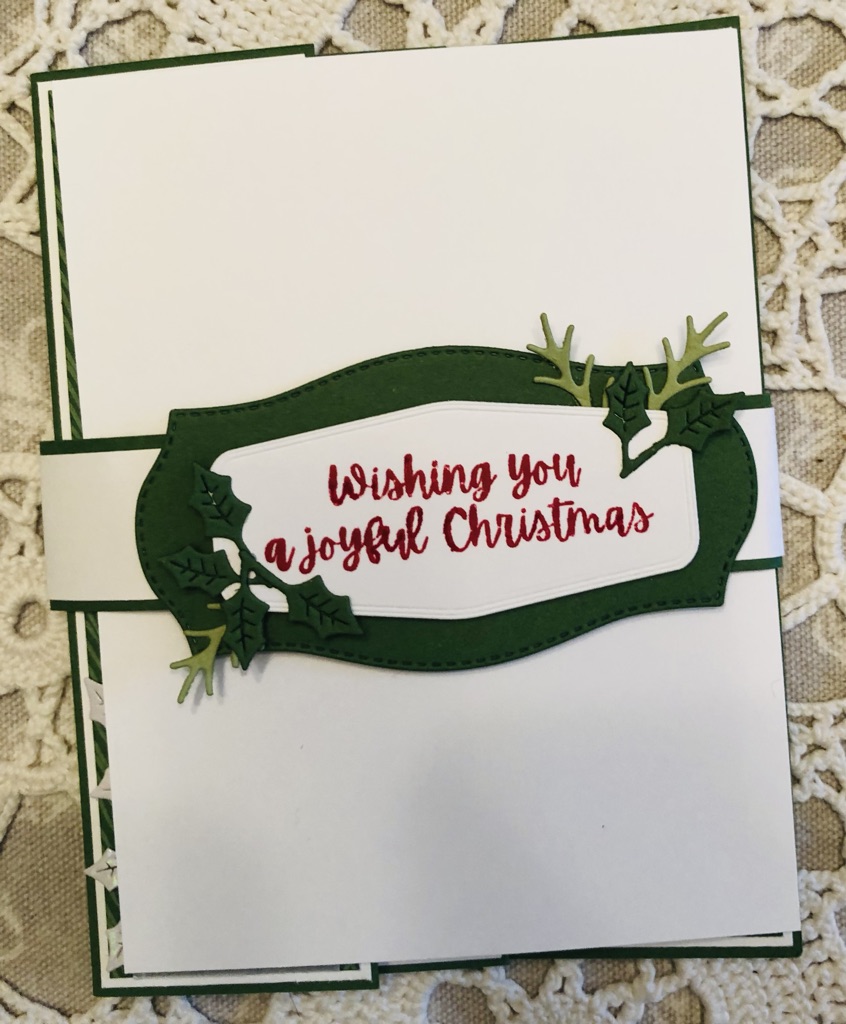
This is a thick card when closed and held securely by a belly band. To create the belly band: cut a length of Garden Green 1 x 11; cut a length of Basic White 7/8 x 11 and adhere together. Cut a label with the Tasteful Labels Dies from Garden Green & Basic White as shown. Stamp sentiment in Real Red ink using the Words of Cheer stamp set. Die cut holly leaves from garden Green & pine branches from Pear Pizzazz. Adhere as shown. Attach to the belly band with Tear n Tape.

Cheer Fun Fold Addition. belly band & label

This is a thick card when closed and held securely by a belly band. To create the belly band: cut a length of Garden Green 1 x 11; cut a length of Basic White 7/8 x 11 and adhere together. Cut a label with the Tasteful Labels Dies from Garden Green & Basic White as shown. Stamp sentiment in Real Red ink using the Words of Cheer stamp set. Die cut holly leaves from garden Green & pine branches from Pear Pizzazz. Adhere as shown. Attach to the belly band with Tear n Tape.

You can also see in this photo that I covered the front of the card with a panel of card stock – to protect the delicate leaves on the ‘Cheer’ front :O)

Not have a demonstrator so you can order? If you do not have a demonstrator and need an Annual 2021 Catalog OR Jul-Dec 2021 Mini Catalog, please reach out to me – happy to send one to you. Please also use my current host code when ordering: 26QYRFXB I offer my customers a free item from Stampin’ Up! item valued to $10 with your order of $50 and above. Click here to go my store. When the order is over $150, you still receive that free gift from me, but SU! has Stampin’ Rewards that may be used for additional products, so don’t use the host code at that time. If you have questions just let me know. If you would like to be able to order products early from catalogs AND enjoy that 20% discount, join my team now… you may do that here. We have lots of fun and are a creative bunch that encourages & supports one another. Would love to have you!

Thanks for stopping by. May you have a beautiful day. Nothing beats a handmade card!

Inspire. Create. Share.

Stampin’ Up! Fun Fold Friday

Happy Friday everyone! It’s a fun fold kind of day :O) and I’m doing one I haven’t done before. It isn’t difficult but it does demand preciseness in scoring and cutting. It’s called an Arrow Fold… and here it is. No wonder it’s called an arrow fold, right?

Arrow Fold w/ Nature’s Harvest

Besides the fun fold, what makes this stand out are two things: the Harvest Meadow DSP & the gorgeous flowers which I am calling Coneflowers. Love the contrast of the color on the flowers with the Misty Moonlight paper! When I was researching this fold, there are lots of videos making this a fairly large 6×6 card, but I didn’t want something that big. The process is still the same, despite the size. The difference is in the scoring and where that second score it. Let’s get to it, shall we?

Basic – step 1

  • Cut the card base 4 1/4 x 11 (Misty Moonlight for this card), scored at 5 1/2
  • Cut two panels of Basic White 4 1/8 x 5 3/8 + one square at1 7/8″
  • Cut one panel of DSP (Harvest Meadow) 4 x 5 1/4 + one 1 3/4″ square (this is a contrasting DSP that is best non-directional, no stripe either)

Scoring & cutting – step 2

  • Card base:
    • Lay the card base full open with the front of the card facing you. Mark the center point at the bottom front (2 1/4″)
    • Score from the top right corner of the 5 1/2″ score line (the fold as it were) to the center mark.
    • Now score from the top left corner (at the fold line) to the same center point
    • With the front of the card base still facing you, mark 2″ up from the bottom front on both long sides
    • Score from the 2″ mark to the center point (same point as before)
    • Now the card front looks as though it has two ‘V’ score lines – four score lines total, all meeting at the same center point.
    • FOLD the score lines ~ first the corner to center point scores fold to the inside (burnish well), THEN the two other scores are folded outward (burnish well)
  • Panels
    • Basic White panels… Mark the center of each of the two Basic White panels – on the short side on the bottom. (2 1/16) Cut from the top right corner to the bottom center point, then cut from the top left corner to the same center point. Do this to both Basic White panels.
    • DSP panel… Mark the center point at the bottom (2″) and cut from the top right corner to the center point. Now cut from the top left corner to the same center point
    • Squares, both the Basic White square & the DSP square… cut in half on the diagonal, from one corner to the other.

Adhere appropriate panels together. There will be extra Basic White panels that have no DSP – that’s OK! Before adhering panels to the card, we need to use some liquid glue to hold the arrow on the card front in place.

  • On the card front, fold in one of the long score areas (from corner to center) and add a light layer of liquid glue; hold in place until it is secure. Fold in the other long score area (corner to point) and adhere it in the same way. The other scored area is just loose at this point.
  • Add the square pieces to the loose score points. Fold the last scored area, adhere a light bit of glue and hold in place.
Inside front panel of the Arrow Fold Card

This is the inside of another Arrow Fold card. The Misty Moonlight card may overlap somewhat.

Now adhere the panels to the card in this manner:

  • Inside of card, two side panels first… wait to add the center panel until it has been stamped.
  • Center fron panel

Decorate the front… Here I took a Stitched Triangle and cut from a Basic White piece. I stamped a splotch from Gorgeous Leaves stamp set in Sahara Sand ink. On another piece of Basic White I stamped the Coneflowers image in Memento Black ink using the Nature’s Harvest stamp set. I colored the leaves & stems in Smoky Slate Stampin’ Blends and the flowers in Calypso Coral & Cajun Craze Stampin’ Blends I die cut the flower image with the Harvest Dies, put several dimensionals on the back and adhered it to the Stitched Triangle piece. I added a double bow of Linen Thread with a glue dot, then attached the triangle to the card front.

Arrow Fold w/ Nature’s Harvest, inside

For the inside I stamped the sentiment from Nature’s Harvest stamp set in Misty Moonlight ink, then stamped the small floral image in Memento Black ink – also from Nature’s Harvest stamp set. I colored it with the same Stampin’ Blends: Smoky Slate for the stems/ leaves, Calypso Coral & Cajun Craze for the flowers. I attached this piece with liquid glue in between the two DSP panels, making certain the areas were as even as possible. Voila! Love this!!!

Here’s another Arrow Fold card with slightly different score lines.

This card was made just a bit differently… the panel on the inside of the card was a solid one with the white panel adhered over the top. I don’t like it as much done that way. I used the Layering Circle Dies with basic White, Real Red & Vellum then a Wonderful Snowflake on top with a Rhinestone Basic Jewel in the center. The stamp set was Snowman Season for the images & sentiments and of course the Peaceful Prints DSP which was a FREE item during Sale-a-bration. The side marking was 2 3/4 in lieu of 2″. And let’s see, I also used the Banners Pick a Punch to create the banner for the front. Oh, and I added Red Rhinestone Basic Jewels to the banner.

Not have a demonstrator so you can order? If you do not have a demonstrator and need an Annual 2021 Catalog OR Jul-Dec 2021 Mini Catalog, please reach out to me – happy to send one to you. Please also use my current host code when ordering: 26QYRFXB I offer my customers a free item from Stampin’ Up! item valued to $10 with your order of $50 and above. Click here to go my store. When the order is over $150, you still receive that free gift from me, but SU! has Stampin’ Rewards that may be used for additional products, so don’t use the host code at that time. If you have questions just let me know. If you would like to be able to order products early from catalogs AND enjoy that 20% discount, join my team now… you may do that here. We have lots of fun and are a creative bunch that encourages & supports one another. Would love to have you!

Thanks for stopping by. May you have a beautiful day. Nothing beats a handmade card. Inspire. Create. Share.

Stampin’ Up! Detailed Pumpkin Dies

Talk about detail – this pumpkin has it! It’s gorgeous… and die cut from Copper Foil, even more so. It’s Friday, a day to be thankful (well, every day is one of those!) and TGIF day. I hosted a card class yesterday and will share photos of a few of the bridge cards folks made. Not everyone wanted theirs photographed, so I didn’t. I’ll post those at the end.

Detailed Pumpkin Dies.1

I was playing around… no sketch to follow or anything. Once this was die cut from foil it said, ‘use me alone – I’m stunning’ – so I did! Using Very Vanilla card stock and the Stitched Rectangle Dies, I cut a panel, and adhered the pumpkin with dots of liquid glue. (TIP: die cut the pumpkin from the foil used as backing for the Very Vanilla panel.) Adhere this VV panel to the Copper Foil with Stampin’ Seal. With another piece of Very Vanilla card stock, run it through the Bark 3D Embossing Folder. Adhere it to a slightly larger panel of Early espresso card stock. Coming back to the Fpol panel… add a length of Open Weave Ribbon in Pale Papaya to the back by running a strip of Stampin’ Seal in the area and attaching the ribbon as shown. Put dimensional on the back of the Foil panel and attach to the embossed panel. Add all of this to the Very Vanilla card base and the front is done!

Detailed Pumpkin Dies, inside panel.2

On another Very Vanilla piece I stamped the sentiment in VersaMark ink, sprinkled it with Copper Embossing Powder and heat set. The sentiment comes from the Heartfelt Wishes stamp set in the Jul-December 2021 Mini Catalog. (It has some gorgeous sentiments!) Adhere the VV panel to a slightly larger piece of Early Espresso card stock, then right into the inside of the card. Simply Elegant…

Detailed Pumpkins Dies.3

The envelope got more treatment of a panel of VV embossed with the Bark 3D Embossing Folder ~ that was it. I wanted this elegant and simple. Did I meet that goal? I think so, but you tell me.

This bundle ~ Pretty Pumpkins ~ will be around for a bit. The items in the Mini Catalogue can be ordered through Dec. But – fall, Thanksgiving, is well, now. Why wait? :O) Place your order soon so you can put these items to good use. If you do not have a demonstrator and need an Annual 2021 Catalog OR Jul-Dec 2021 Mini Catalog, please reach out to me – happy to send one to you. And when I send it, there will be a Sale-a-bration catalog in with it! That means more FREE items to choose from with every order of $50, or $100 or multiples of that. Please also use my current host code when ordering: R6U3VRBN. I offer my customers a free item from Stampin’ Up! valued to $10 with your order of $50 and above. Click here to go my store. When the order is over $150, you still receive that free gift from me, but SU! has Stampin’ Rewards that may be used for additional products, so don’t use the host code at that time. If you have questions just let me know. If you would like to be able to order products early from catalogs AND enjoy that 20% discount, join my team now… you may do that here. We have lots of fun and are a creative bunch that encourages & supports one another. Would love to have you!

Remember that Sale-a-bration is now through September 30! It’s the best time to buy (lots of free product) & JOIN ~ read on… it is ending SOON!!!

06.21_HEADER_SAB_ENG


It is during this period that when you place an order of $50 or increments of that, there are FREE items available in the Sale-a-bration catalog. Stampin’ Up! does not usually offer more than one sale-a-bration in a year, but this year, they DID! WooHoo – fun products too… Again, contact me if you do not have a catalog.

How do you pre-earn Sale-A-Bration products? It’s simple! For every $50 USD | $60 CAD and $100 USD | $120 CAD you spend, you’ll be able to take your pick of Sale-A-Bration products to add to your order—for free

And if you JOIN and become a demonstrator during Sale-a-bration… you have the opportunity to get one of the bundles below FREE!

OIN BUNDLE OPTIONSPRICELIMIT
156795Arctic Bears Bundle$47.50 USD | $64.75 CAD1
156819Beauty Of Tomorrow Bundle$50.25 USD | $68.25 CAD1
156801Christmas Season Bundle$54.00 USD | $73.75 CAD1
156806Christmas To Remember Bundle$60.25 USD | $81.75 CAD1
156807Frosted Gingerbread Bundle$48.50 USD | $66.50 CAD1
158609Gorgeous Leaves Bundle$44.00 USD | $60.25 CAD1
156813Nature’s Harvest Bundle$53.00 USD | $72.75 CAD1
156816Peaceful Cabin Bundle$54.00 USD | $72.75 CAD1
156391Peaceful Deer Bundle$36.00 USD | $48.50 CAD1
156789Penguin Place Bundle$31.50 USD | $42.25 CAD1
156798Sweet Little Stockings Bundle$47.50 USD | $64.75 CAD1
156810Whimsical Trees Bundle$51.25 USD | $70.00 CAD1


Those who join Stampin’ Up! during Sale-A-Bration may select one bundle from the list above to

add to their Starter Kit at no additional cost.

Joining during this sale-a-bration time allows you to create your own starter kit: $99 cost, $125 worth of product + a FREE bundle (listed above for no additional cost) + FREE Sale-a-bration items. Oh my – why pass up this deal? Join now… you may do that here.

Thanks for stopping by. May you have a beautiful day. Inspire. Create. Share.

Nothing beats a handmade card.

Cards from card class today… bridge fold card

This card made by Vicki