Stampin’ Up! and Paper Pumpkin

Good morning – it’s Tuesday. What are you ‘up to’ today? It is to rain here, so no gardening during that… guess I’ll have to make a card or two 😁

Do you hoard anything? I know, that’s a strong word – hoard…Let’s just say, up until yesterday I had a lot of them, some still tightly wrapped, some in incomplete stages with maybe two to three cards made. Today’s cards are all about Paper Pumpkin. I found some really cool kits and cannot believe I hadn’t finished them.So for the last couple of days I have been making the past Paper Pumpkin kits and really really had fun! Unfortunately I didn’t write down the months on all those I created but here are my favorites.
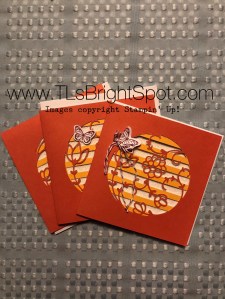
Past Paper Pumpkin #1
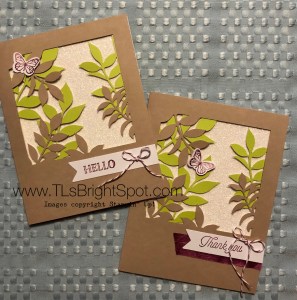
Past Paper Pumpkin #2

The cards on the left were extra fun and I had only three to do… go figure… why would I hold off making three cards? The cards on the right are from Dec 2017 – a l-o-o-n-g time ago. The nautical boxes are gift cards and my favorite ones to put together. They are going to be a gift for a special friend. I like that they have a destination already.
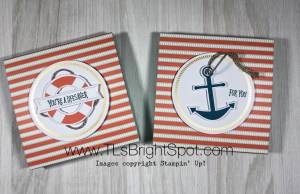
Past Paper Pumpkin #3
April 2018

I spent the morning putting the above items together and what do you suppose came in the mail – my April 2020 Paper Pumpkin! This first is per directions… I didn’t alter anything.

April 2020 PP per directions

Card #1 is first alternative. Thick Whisper White 4 1/4 x 11, scored at 2 3/4 and 5 1/2. Run the left portion through your embossing machine using the Subtle embossing folder. Cut Pear Pizzaz 4 3/4 x 3 3/4. Adhere sentiment piece from the PP directly to the Pear Pizzaz using liquid glue. Punch out leaves from the kit, add dimensionals to all leaves and adhere to the sentiment piece. Punch out butterfly and add using a glue dot. Cut a piece of the ribbon included in the kit, tie in knot and adhere with glue dot. Embellish with the blue pearls included in the kit. Adhere this to the left fold of the card with snail. For the inside, cut a piece of DSP 2 3/4 x 4 1/4 and adhere to card using liquid glue. Add sentiment from the PP kit with Pear Pizzaz ink. For the envelope, cut another piece of the DSP 2 1/4 x 6, adhere with liquid glue and trim.
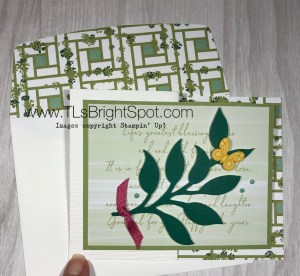
Current Paper Pumpkin #1
April 2020

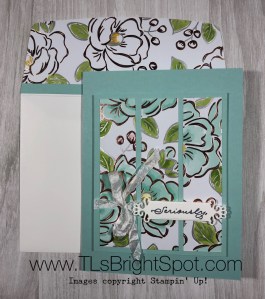
Card #2 – I really like this sentiment piece in the kit and did not want to cover it. I felt it needed full disclosure! With card from the kit (it is 4 1/4 x 12 BTW), use a coordinating DSP ( I used.Garden Lane) and cut a piece 3 3/4 x 4/3/4 and adhered the sentiment piece to it with liquid glue. I added SU! Basic Pearls from own stash and adhered this section to the left card front with snail. Add sentiment of choice to the inside.
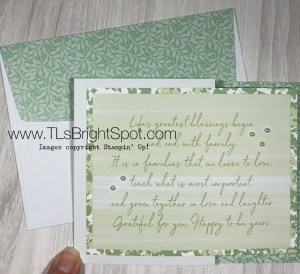
Current Paper Pumpkin #2
April 2020

Card #3… I cut the cardstock included in the kit to 4 x 5 1/4. I stamped the fern from Positive Thoughts Stamp set in Pear Pizzaz ink, stamping off as I went.  Adhere the. puched out leaf from the kit direrctly to the card front with glue tos to each leaf. Stamp a banner from the kit using a sentiment from from the kit and Pear Pizzaz ink. Adhere ribbon included in the kit with glue dots, weaving it back and forth. Add blue pearls from the PP kit. Adhere this completed panel to the card front with dimensionals. Add a punched out bird from the kit to the banner. This card front gets dimensionals on the back and adhered to Blushing Bride CS cut to 4 1/4 x 11 and scored at 5 1/2. I used a coordinating envelope from the kit to complete this set.
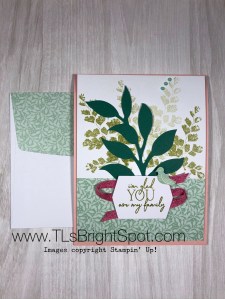
Current Paper Pumpkin #3
April 2020

Bing bang boom – four cards from the kit completed on the day it arrived! I think I get kudos for that – at least from myself. I like how I was able to coordinate current DSP with the cards from the PP kit to make it different. And today I will complete the April PP kit. I am determined not to hold back any more.

To place an order for the May PP kit, you must be registered by May 10. And this kit will have 4 (four) of the new 2020-2022 IN COLORS! Be sure to order your PP kit soon so you can preview the early release of these new colors.

Thanks for stopping by.

May you have a beautiful day.

Make someone happy by sending them a handmade card.
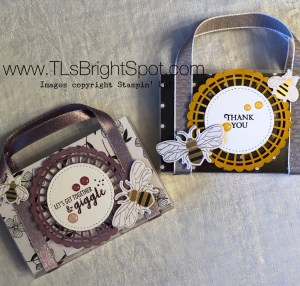


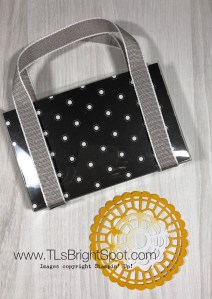
Stampin’ Up! Acetate Card Boxes and DSP

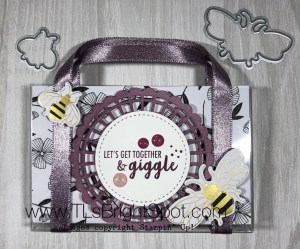
Acetate Card Boxes and Detailed Bee Dies

It’s Sunday! Today on the coast of Jersey we have a sunshiny day, a bit cool at just 32 degrees but it is to get up to 61 before the day begins to cool again. I have to say, the daffodils and pansies and Hellebores (Lenten Rose) love these cool temps and are thriving. What’s our card for today? There isn’t one – it’s a box 😁. Todays post is all about the Stampin’ Up! Acetate Card Boxes, a bit of ribbon and Designer  Series Paper. Let’s take a look…

Acetate Card Box #1

Acetate Card Box #2

I’m going to walk you through this with photos and it’s really quite easy…

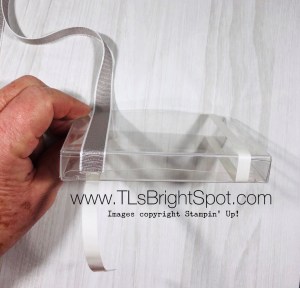
  • Cut your Acetate Card Box in half before opening it – at 4″. Put each half together, folding in the tabs and bottom.
  • Add Tear n Tape about 1/2″ from edge, beginning at the cut edge of the box and wrapping around the bottom to the next cut edge. Do this for both sides of each box.

Adding Tear n Tape & Ribbon

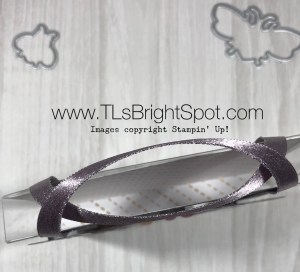
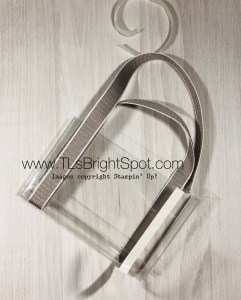
  • Cut ribbon 24″. The purple ribbon is NOT a Stampin’ Up! product – shame on me… but the other is Gray Granite Textured Weave 1/2′ ribbon
  • Beginning at bottom of box and on the back side, wrap ribbon up to cut edge, create a loop and then back down on the same side of the box, then turning box over continue the wrapping process. TIP: You will notice in the picture that I unraveled only a portion of the Tear n Tape as I went – this prevents sticking to any of your surface area if you put the box down. I used glue dots at the end of the ribbon to hold it in place.

Adding ribbon

Adding Tear n Tape & Ribbon

Picture from the top after ribbon added

  • Cut your DSP 6 x 4 3/8, and score at 2 3/4 and 3 1/4. Burnish. This becomes your bottom. I used Golden Honey Specialty DSP for both boxes. Add a glue dot to each side of the “bottom” about 1/2″ in from edge. This holds the paper in place and is covered by the ribbon. Slip your DSP inside the box. Adhere a glue dot at the top, also where the ribbon is, again to hold the paper in place.
  • Embellish you Acetate Box front… I used Pearlized Doilies and colored them. The purple is done with Blackberry Bliss ink and a roller. It creates a soft look. The Daffodil Delight doily was colored using Dark Daffodil Delight Stampin Blends. I wanted it to really stand out.

Acetate Card Box #2

  • Using your Stitched Shapes Dies, cut a circle. Stamp your sentiment: for the purple box I used Part of My Story stamp set in Blackberry Bliss ink; for the Daffodil Delight box I used the Honey Bee stamp set and Memento Black ink.
  • Adhere the circle to the doily with liquid glue. Adhere to the box with dimensionals. Add Glitter Enamel Dots.
  • Using the Detailed Bee Dies, cut two bees for each box from another piece of the Specialty DSP. Color the stripes on the bees with Dark Basic Black Stampin Blends. Adhere with dimensionals.

Acetate Card Boxes and Detailed Bee Dies

I love these little boxes and so fun to decorate. I’m preparing card kits for some of my students and will fill these with the card cuts. I think they will enjoy the little extra surprise for them.

Thanks for stopping by. Please check out the Clearance Rack as it has some really awesome products at a very reduced price. And the Honey Bee Dies are back in stock so order those quickly before they disappear.

May you have a beautiful day today.

Make someone happy by sending them a special gift!


Stampin’ Up! Ornate Borders and Ornate Layers Dies

Whoa – it’s Friday! And what are your plans this weekend – stay at home you say? Us too. Praying things will turn around soon – so many lives lost and families heartbroken….

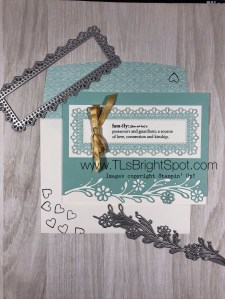
The card for today is made using Stampin’ Up! Ornate Borders Dies and Ornate Layers Dies. It’s nice they work together so well.This particular border I had not played with yet and it is so gorgeous – it could become a favorite very easily. Here it is…

Ornate Borders Dies, Ornate Layers Dies

The details:

  • Pool Party cs 4 1/4 x 5 1/2
  • Thick Whisper White 4 1/4 x 11, scored at 5 1/2
  • Regular Whisper White 2 x 5 plus diecut  panel
  • Tropical Oasis DSP 2 1/4 x 5 for the diecut plus 2 1/4 x 6 for the envelope flap
  • Shimmer Ribbon 1/4″ (from the holiday catalogue
  • Praiseworthy Prose stamp set


Ornate Borders Dies Ornate Layers Dies

  • Place the floral die cut from the Ornate Borders Dies on the edge of your Pool Party on the long side and run through your die cutting machine. Voila – you have this gorgeous edge! Isn’t it beautiful? There are some leaf like pieces that come out of this you will definitely want to save – just sayin’.
  • Adhere this directly to your Thick Whisper White with liquid glue
  • With your Ornate Layers Dies, run this through your die cutting machine using the Tropical Oasis DSP 
  • Run your Whisper White panel through this same machine using the stitched rectangle  from the Ornate Layers Dies.
  • Using your stamparatus, stamp your sentiment from the Praiseworthy Prose stamp set with Memento Black ink. Adhere this with liquid glue to the die cut DSP, then to the Whisper White 2 x 5 panel. Isn’t this a perfect sentiment for our times right now? It’s perfect for any time really, but certainly fits what’s going on in the world right now.
  • Wrap a length of the Shimmer Ribbon 1/4″ around and tie a bow. Hold in place with a glue dot
  • Adhere to the card front with liquid glue and your card front is complete!

For the envelope…

  • Adhere 2 1/4 x 6 piece of DSP to the envelope flap. Trim to fit.
  • Stamp the heart in the corner of the flap then several hearts on the front with Memento Black ink. This heart is also from Praiseworthy Prose stamp set

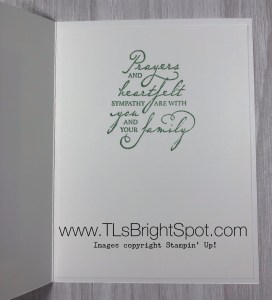
I cannot share the inside as this will be for a specific family member and just in case they see this post – well, I can’t share it yet.  I’ll definitely share after I’ve given it to them 😘

A couple of things before I sign off…

Stampin’ Up! has updated it’s Clearance Rack and there are some real deals – so check it out!

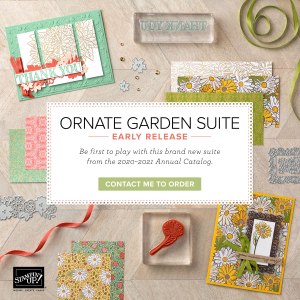
The Ornate Garden Suite is a premier promotion for the 2020-21 Annual Catalogue. Since it is a premier it is available for a limited time as a suite of products – therefore a much better deal than if purchased individually.

And lastly – there will be anew set of In Colors for 2020-21, so shop those retiring In Colors before it’s too late!

Thanks for stopping by.

May you have a beautiful day.

Make someone happy by sending them a handmade card!

Ornate Borders Dies Ornate Layers Dies

Stampin’ Up! Daisy Lane, Medium Daisy Punch and Garden Lane DSP

Todays card features the Stampin’ Up! Daisy Lane stamp set, the Medium Daisy punch and the Garden Lane DSP. The soft colors used give an element of comfort and elegance, and perfect for a sympathy card.

With yesterdays beautiful weather I did NOT work on my craft room – I worked (played) in the yard, first picking up the branches down from the couple of days worth of storms, nothing big thank goodness. Then the clippers came out to cut back some overgrowing bushes, some minor trim on hydrangea and holly shaping, When I cleared the area of leaves a few weeks ago, I had taken down fencing that keeps the dog out of the flower beds. (He really likes to lie on the cool plants in the heat of summer!) I got several of those back in position. After two hours of work, it was time for a break. That’s when I created this card, still in the confusion and messiness of an incomplete craft room cleanup.

Medium Daisy punch and Garden Lane DSP

Here are the deets:

  • Thick Whisper White 8 1/2 x 5 1/2, scored at 4 1/4
  • So Very Vellum , an item free from the SAB catalogue 4 x 5 1/4
  • Garden Lane DSP 2 5/8 x 3 7/8


  • With Soft Seafoam ink, stamp the Medium daisy from the Daisy Lane stamp set 3 times on a scrap of Whisper White cs. Punch out with the Medium Daisy punch. Curl the edges inward gently using your bone folder. Adhere together with liquid glue.
  • Wrap a length of Mint Macaron 1/8″ ribbon around the DSP and tie a bow, adhering with a glue dot under the bow.
  • Attach the Daisies with two dimensionals layered together, to the DSP, and place on the wrapped ribbon. This additionally helps hold the ribbon in place. Add a Gold Faceted Gem to the daisy center.
  • Adhere the Garden Lane DSP to the So Very Vellum with several dimensionals, and glue this in place on the Thick Whisper White using liquid glue. Your card front is complete.


  • TIP… Use liquid glue only where you can see the DSP as the glue will show through if it goes outside this area!

The inside…

Woven Heirlooms inside of card

  • Stamp the sentiment using Mint Macaron ink and the Woven Heirlooms stamp set on a pice of Whisper White cs 4 x 5 1/4.  L.O.V.E. this script!
  • Adhere to the inside of the card with liquid glue. Inside done!

The envelope…

  • Adhere a 2 1/4 x 6 piece of the Garden Lane DSP to the envelope flap and your card is complete.

Medium Daisy punch and Garden Lane DSP

Woven Heirlooms inside of card

Thanks for stopping by.

May you have a beautiful day.

Make someone happy by sending them a handmade card.
Stampin’ Up! Ornate Thanks Stamp Set and Flowering Foils DSP

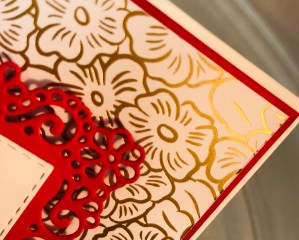
Todays card features the fabulous Flowering Foils DSP that was available as a free item during Sale-a-bration. I know… I shouldn’t be promoting this DSP, but honestly, ANY DSP could be used and a coordinating cardstock to create this card. I love the layout and the elegance and the simplicity.

Before sharing the card I want to apologize for not posting the past couple of days. I have been cleaning my craft room – and quite frankly could not get to my stamping table. 😒 What a nightmare! Having said that, it’s still a work in progress – not quite finished, but workable…

Ornate Thanks stamp set and Flowering Foils DSP

Here are the deets…

  • Cardstock (Pool Party) 8 1/2 x 5 1/2, scored at 4 1/4; 3 1/2 x 4 1/4
  • DSP of choice – 3 cut to 1 x 4 (this is Flowering Foils and I colored it with Stampin Blends – Light/ Dark Pool Party, Light/ Dark Granny Apple Green, Dark Daffodil Delight)
  • White Crinkle Ribbon
  • Detailed Band Dies

After coloring the Flowering Foils DSP, using your grid paper as a guide, adhere the center DSP to the smaller card stock with liquid glue. Starting with this center piece allows for perfect edges and balancing. Wrap the Whisper White Crinkle Ribbon around this and tie a bow. Secure with a glue dot. Stamp your sentiment (this is from Ornate Thanks stamp set – new for the 2020-21 catalogue and available now!) with Memento Black ink and cut with your Detailed Bands Dies. Adhere this diecut with dimensionals. Adhere this entire section, centering it, on the card front. Voila! Your card front is complete 😏

Ornate Thanks stamp set

For the inside… Whisper White 4 x 5 1/4… stamp your sentiment using Pool Party ink and the Ornate Thanks stamp set. Remember this is available now as a premier suite of products! Adhere a scrap of the Flowering Foils DSP 1/4″ from bottom of cs. Adhere using liquid glue to the inside of the card.

For the envelope… I colored a 2 1/4 x 6 piece of the Flowering Foils DSP and adhered it to the envelope flap using liquid glue. Trim to fit. And voila again… your card is ready for mailing!

Ornate Thanks stamp set and Flowering Foils DSP

Ornate Thanks stamp set


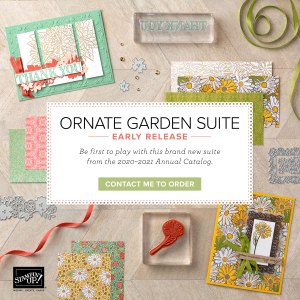
Thanks for stopping by today! While you are browsing around, here’s another photo of the Ornate Garden Suite. PLUS – Stampin’ Up! has updated it’s list of supplies available for special prices – the Clearace Rack. Don’t hesitate if you want to purchase something… items go FAST!

Ornate Garden Suite video – available for. purchase April 1!

Stampin’ Up! DSP and Detailed Bands Die

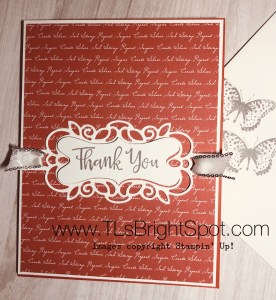
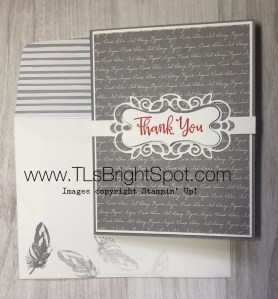
Todays post is all about the Stampin’ Up Detailed Bands Dies and a couple of 6 x 6 DSPs – to be exact, the 2019-21 In Color 6×6 DSP and the Neutrals 6×6 DSP. I’ve created two cards in the same format, just changed things up a bit differently for each. Let’s take a look.

2019-21 In Color 6×6 DSP, Detailed Bands Die

Neutrals 6×6 DSP, Detailed Bands Die


See how similar? Can you tell the differences? Both hav e ther raised center, but the left or Smokey Slate card has a shadow created at the top with a piece of Smokey Slate, the Terracotta Tile card on the right does not. The other obvious difference is the ribbon on the Terracotta Tile card. Originally I thought each card would be totally monochromatic, but I didn’t like it so simply switched the center section. What’s pretty cool with this die is the center is cut at the same time, so it can be used – or not.

Here are the details:

  • Smokey Slate 8 1/2 x 5 1/2, scored at 4 1/4
  • The next layer is a Thick Whisper White 5 3/8 x 4 1/8
  • The following layer is the coordinating DSP. I love the handwriting piece!
  • Adhere layers 2 and 3 together with liquid glue
  • In the Smokey Slate card those two layers were adhered to the front of the card with liquid glue. In the Terracotta Tile card, I put these two layers on dimensionals and adhered them to the card front
  • Using the Detailed Bands Dies, cut your band out of Whisper White cs. Adhere directly to the card front with liquid glue in the center of the card. On the Terracotta Tile card I did attach a Metallic Edge Ribbon 3/8″ to each end using glue dots, then adhered it to the card front. Here’s a picture (not a very good one) of where I put the liquid glue on the back of the band.

Detailed Bands Die – glue areas circled

  • Cut another center out of Smokey Slate, cut in half lengthwise and set aside
  • Stamp your sentiment on the center piece using your Stamparatus. It allows for perfect centering! Since I was creating two cards at the same time, one was stamped using Smokey Slate, and the other was Terracotta Tile. The sentiment – Peaceful Moments stamp set
  • The center band stamped in Terracotta Tile got one half of the Smokey Slate piece adhered to the back to create a shadow
  • Adhere the center band to the card front with dimensionals.
  • Trim the ends of the bands

The inside…

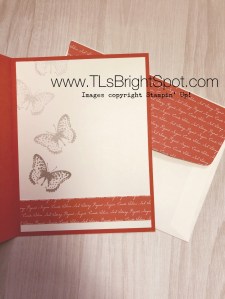
           Terracotta Tile card inside

  • Cut a 4 x 5 1/4 Whisper White panel
  • Adhere a 1/2 x 4 strip of the coordinating DSP 1/4″ from bottom
  • Using the Positive Thoughts stamp set, stamp the butterfly in Smokey Slate full strength and then continuing up the panel without reinking
  • Adhere the white panel to the card inside and the card is done!
  • The envelope is the last step…

    Neutrals 6×6 DSP, Detailed Bands Die

    Stamp the feather from Positive Thoughts stamp set on the card front using the same steps as with the butterfly – stamp full strength and continue stamping across without reinking. Adhere a coordinating Smokey Slate Neutral 6×6 DSP panel to the envelope flap.

    2019-21 In Color 6×6 DSP, Detailed Bands Die

    Terracotta Tile card inside


  • Here the butterfly is stamped in Smokey Slate full strength each time for the card front. I actually stamped 3 times but one is hidden!
  • Adhere the same 2019-21 In Color 6×6 DSP to the envelope flap and these two cards are complete! So why did I use a feather on one card and a butterfly on the other? Simple… I wanted to use the feather on the Smokey Slate card to make it more useful as a masculine card and I think it works perfectly.

I love how Stampin’ Up! creates products that can be used for so many different types of projects. Are you interested in purchasing some products? Let’s connect!

Thanks for stopping by today

May you have a beautiful day.

Make someone happy by sending them a handmade card!

Stay safe. Stay well

Stampin’ Up! and a Fun Fold and DSP

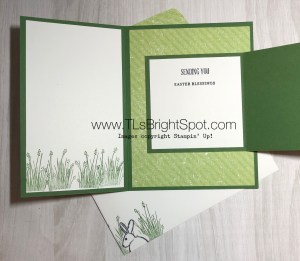
Today’s card is made using Stampin’ Up! products and a very fun fold… Since we can’t be with our grands this Easter, with all the coronavirus about us, making and sending is the best I can do. I’ve gotten a bit of a late start but will finish up today so you may see the other items in a future post 😏 But for now, here we go…

Fun Fold with PP bunny, grass

DSP Treat holders


Items needed for the card…

  • Garden Green 5 1/2″ x 8 1/2″, scored at 4 1/4″, then 1″ removed from the front; 3 1/4″ x 6 1/2″, scored at 3 1/4″ (this is the insert); approximately 3″ x 3″ for front of insert; 2 1/4″ x 6″ for the envelope flap
  • Designer Series Paper (DSP) of choice 3″ x 5 1/4″ for the left front; 4″ x 5 1/4″ for the inside
  • Whisper White 3 x 5 1/4″ for inside the front flap; 3″ x 3″ for the left part of the insert; approximately 3″ x 3″ for the front of the insert
  • Iridescent Sequins Assortment from the SAB catalogue
  • Basic Pearl Jewels
  • Assorted Pom-Poms from the SAB catalogue
  • Layering Squares Dies
  • March PP stamps
  • Garden Green ink & Memento black ink

Directions…

  • Adhere DSP to the card front, the inside and the insert plus your envelope flap
  • Stamp your bunny in Memento Black ink for the insert front, create a mask for the bunny, place it over the stamped bunny on the Whisper White cs, and stamp the grass with your Garden Green ink (I love this grass!!!)
  • Using just the grass stamp, stamp the Whisper White piece for inside the front of the card, stamping twice (Did I say I love this grass?)
  • Go ahead and stamp your envelope while you have everything handy 😁
  • Die cut your bunny that is on the 3″ x 3″ piece with a Layering Squares Die
  • Die cut the 3″ x 3″ Garden Green with the scalloped Layering Squares Die. Adhere the two together with liquid glue, put on dimensionals and adhere to the insert piece, MAKING CERTAIN THE FOLD IS ON THE RIGHT.
  • Adhere this to the inside of your card – almost finished…
  • Stamp your 3″ x 3″ piece with sentiment of choice. Mine came from A Wish For Everything stamp set and Itty Bitty Greetings stamp set

Fun Fold inside

Items needed for the treat bags…

  • 6″ x 6″ DSP of choice (Our grands are 19, 12 and 10, the girl being the 10 yr old. Can you tell which treat bag goes to which grand?)
  • Buttons (these are retired ones in my stash!)
  • Thread or twine to coordinate (again retired items in my stash)
  • Tear n Tape
  • Glue dots

Directions for the treat bags…

  • Choosing one side, adhere Tear n Tape almost to end of paper
  • Fold DSP into a cone shape carefully rounding the paper so it doesn’t fold, adhere together
  • Thread button and tie a bow, adhere to DSP with glue dots
  • FILL – this is important 😳

Thanks for stopping by today. It was nice being with you to share my creations. 

May you have a beautiful day.

Make someone happy by sending them a handmade card – or a treat!

Fun Fold with PP bunny, grass

DSP Treat holders

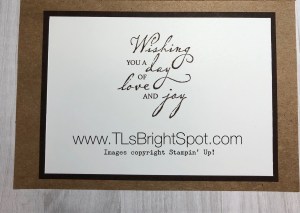
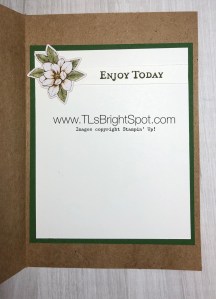
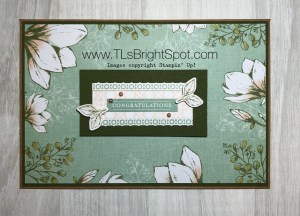
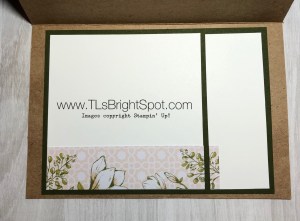
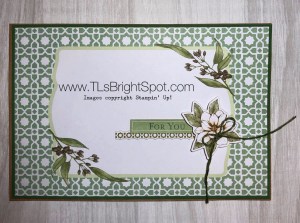
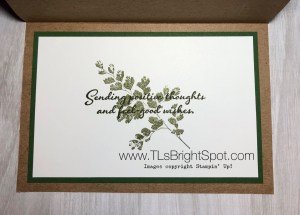
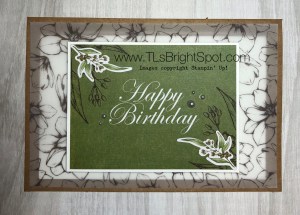
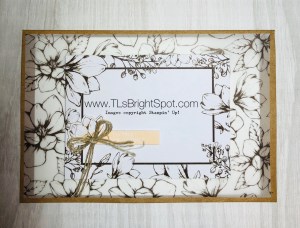
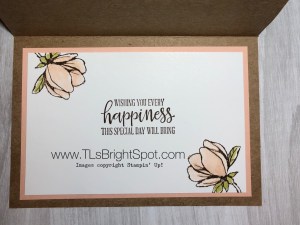
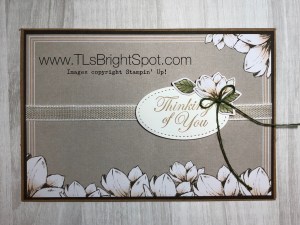
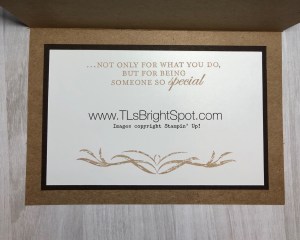
Stampin’ Up! More… Morning Magnolia Memories and More Card Pack

Todays post brings a few more cards made with the Morning Magnolia Memories and More Card Pack. I took yesterday off and didn’t post. Could you tell? 😏 What a strange Palm Sunday it was! Our church is doing its worship services by Livestreaming and that’s good, just feels odd. All this social distancing… some people do it, others not so much. Ah sigh… guess we have to give this at least another month. I’m doing my best, so is hubby. We are very upbeat and positive people and that’s good, ‘cuz we don’t get ‘down in the dumps’ much. I just feel for those folks who panic easily. It’s helpful for everyones psyche when there is a sense of order to our lives ~ and well, we don’t have that right now. I mean, sometimes I forget what day of the week it is!!! ‘Nuf… on with the cards. I only made three this time…. and I tried just using the elements from the card pack. I was successful to a point.

Card #1…

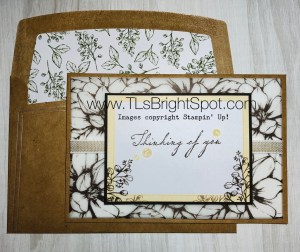
  • Whisper White cardstock behind the printed vellum, Early Espresso behind the ‘card’ and placed on dimensionals.
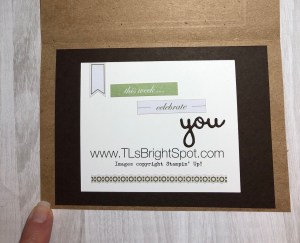
  • The inside uses the same cardstocks and sticky embellishments from the card pack.
  • This could be a nice masculine card!

Morning Magnolia Memories and More Card Pack card #1

card #1 inside


Card #2…

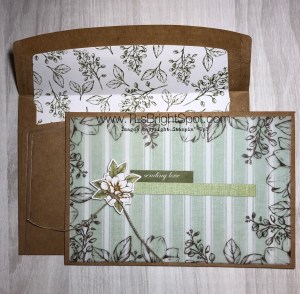
  • Nothing behind the printed vellum this time and I kind of like it with this particular card. Petal pink is behind the ‘card’ and both are wrapped with the Petal Pink gold edged ribbon from the SAB catalogue, then raised on dimensionals.
  • The inside is simple but elegant to me… Petal Pink and Whisper White cardstocks, two strands separated from the Flax 5/8″ ribbon tied in a bow and the sentiment is from Parisian Beauty stamp set, also from the SAB catalogue.

Morning Magnolia Memories and More Card Pack card #2

inside card #2


Card #3…

  • Vellum on one of the larger cards from the pack, the magnolia is on a dimensional and then a small linen thread ribbon adhered with a glue dot.
  • The inside is Mint Macaron and Whisper White cardstock with one of the sticky embellishments in the card pack.

Morning Magnolia Memories and More Card Pack card #3

inside card #3


That’s it folks – what do you think? I’m rather pleased with these and hope you like them too. Although I have a very few of the cards and envelopes left, tomorrow we’ll have something else to share. If you are interested in purchasing the Morning Magnolia Memories and More Card Pack (item # 149554)and the Magnolia Lane Large Specialty Memories and More Cards and Envelopes (item #149487), check them out in the 2019-20 Catalogue on page 171. These two together make a huge number of cards. There are 50 double sided cards in the card pack – two different sizes, some vellum sheets included and 4 sticker sheets with some really fun and beautiful options for creating your own ideas; and 20 large specialty cards and envelopes in the other pack. Am I encouraging you to purchase these two items – you bet I am. They are a wonderful product and very reasonably priced.

When you purchase product from me, please use my CURRENT HOST CODE ZUPR7SAY for purchases between $50- $150 to receive a free $10 item of your choice from me. Such a deal!!!

Thanks for stopping.

May you have a beautiful day.

Make someone happy by sending them a handmade card.
Stampin’ Up! Magnolia Lane Memories and More Card Pack

Today’s post is all about the fun Stampin’ Up! Magnolia Lane Memories and More Card Pack with the coordinating Magnolia Lane Large Specialty Memories and More Cards and Envelopes.. Do you hoard some of your card making products? Let’s say I used to but am getting better at actually making use of most everything. So why do I ask about hoarding? I have had this card pack for quite some time, used one or two then set it aside. I even made a fun “album” of sorts very early on. There were so many new products I think I got a bit overwhelmed. Yesterday I pulled out that card pack and went to ‘town’. I think this would make a lovely gift package as there are birthday, wedding, and congratulations cards made from this set. Enjoy.

These large specialty cards and envelopes are of a lighter weight paper than our regular cardstock, so you will notice I have used additional cardstock behind all the cards. I just felt it needed it and even more importantly, I liked the look. 😏 Here’s  what I used on various cards along with the Magnolia Lane Memories and More Card Pack … Notice nearly every card has aspects on dimensionals. I really like the layered look

Card #1…. Large Specialty Cards and Envelopes and the Magnolia Lane Ribbon Combo pack, Early Espresso cardstock, Glitter Enamel Dots, Whisper White and the Woven Heirlooms stamp set

Magnolia Lane Memories and More Card Pack card #1

Inside card #1


Card #2…. Magnolia Lane Ribbon Combo pack, Garden Green cardstock, Good Morning Magnolia stamp set in Mossy Meadow ink

Magnolia Lane Memories and More Card Pack card #2

Inside card #2


Card #3….Mossy Meadow cardstock, Basic Pearls colored with Light and Dark Petal Pink Stampin’ Blends, Whisper White cardstock. Yes I split the Whisper White inside… ‘cuz I wanted to!

Magnolia Lane Memories and More Card Pack card #3

Inside card #3


Card #4….Mossy Meadow cardstock, Whisper White cs, Positive Thoughts stamp set in Mossy Meadow ink

Magnolia Lane Memories and More Card Pack card #4

Inside card #4


Card #5…. Whisper White cardstock and Basic Pearls. I did nothing special on the inside, just added Whisper White cardstock. Yes, itg will need a swentiment but I couldn’t figure out what at the time. 😔

Magnolia Lane Memories and More Card Pack card #5

Card #6….Linen Thread in a triple bow, Whisper White cardstock, Petal Pink cs, Good Morning Magnolia stamp set for the flower, Light and Dark Petal Pink and Old Olive Stampin’ Blends for coloring the flower, Peaceful Moments for the sentiment stamped in Early Espresso ink

Magnolia Lane Memories and More Card Pack card #6

Inside card #6


Card #7….Early Espresso cardstock, Magnolia Lane Ribbon Combo Pack, Crumb Cake ink, Good Morning Magnolia stamp set for the sentiment

Magnolia Lane Memories and More Card Pack card #7

Inside card #7


So do you have a favorite. I think mine are cards #1, #6 and #7. Sometimes I liked the inside better than the outside! Imagine that. Thanks to those who inspired these creations. If I found something I liked, I put my own twist on it.

Thanks for stopping by today.

May you have a beautiful day.

Make someone happy by sending them a handmade card.
 

Stampin’ Up! Ornate Garden Suite

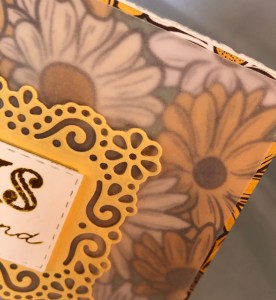
Today’s post is meant to tease you about the Stampin’ Up! Ornate Garden Suite available today, April 1. This is no joke!!! It’s available for the month and then will be available for purchase again when the new Annual Catalogue 2020-21 goes live (Jun 2). In other words – special deal.

Here are a couple of cards I posted recently using this suite of products and a couple of “teaser” pictures of cards to come.

Ornate Garden Suite #1

Ornate Garden Suite #2, inside

Ornate Garden Suite #2


Ornate Garden Suite teaser #2

Ornate Garden Suite teaser #1


Ornate Garden Suite #3

Ornate Garden Suite

Shop with me? Love it if you would… Please us my new HOST CODE ZUPR7SAY if your purchase is between $50-$150 to receive a free item of your choice worth $10.

Make someone happy by sending them a handmade card.
May you have a beautiful day

Thanks for stopping by!