Stampin’ Up! NEW Charming Day

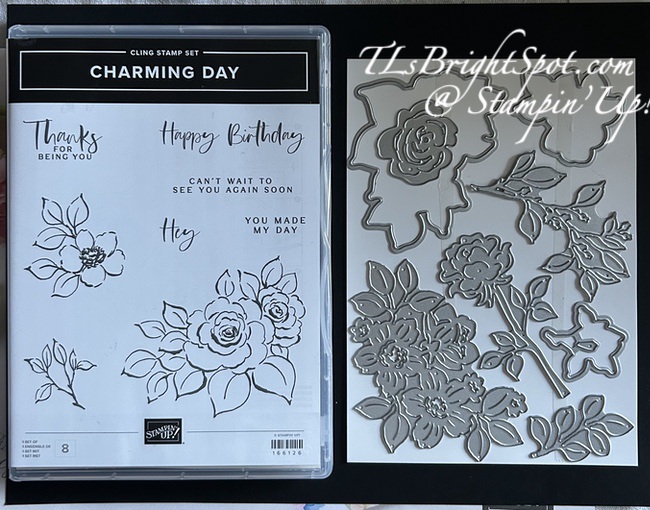
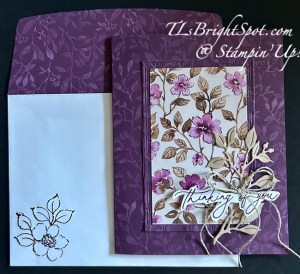
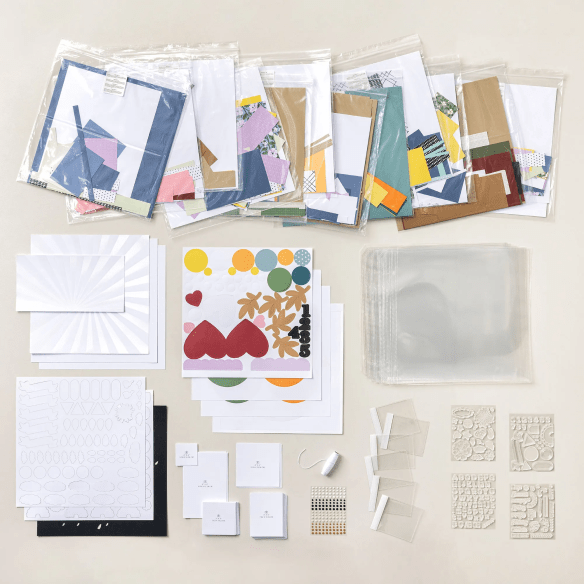
This is a suite of products that will be available Jul 1 to customers – and I am using only a couple of the items to make this card: the Charming Day bundle and Floral Charm 12×12 DSP. Let’s take a look at the bundle and the card.

Stampin' Up! Charming Day bundle
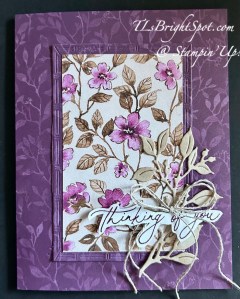
Stampin' Up! Charming Day Sympathy card front

The card base is Blackberry Bliss with a panel of the Floral Charm DSP covering the entire front of the base. Next i took the Textured Notes Dies and die cut another piece of the same pattern of the DSP using the third largest of the dies.. I cut another piece of the Floral Charm DSP 2 3/8 x 3 7/8 and attached it to the die cut piece. Both of these were adhered directly to the card front. I used Basic Beige card stock and a stunning leaf die from the Charming Day Diesnto cut a leaf, then nused Early Espresso ink and anBlending Brush to very gently add some color to the leaf die cut. I then added this to the card front with dabs of liquid adhesive. I stamped the sentiment with Blackberry Bliss ink and Everyday Greetings stamp set, then fussy cut it. I sued mini dimensionals to add to the back & attach to the card front. I tied a double bow with Linen Thread & attached with a glue dot.

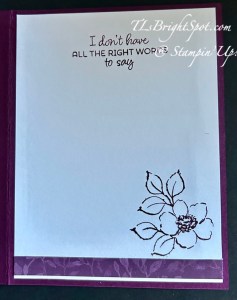
Stampin' Up! Sympathy card inside

For the inside… I added a stgrip of 3/8 x 4 Floral Charm DSP to the bottom of the Basic White panel. I stamped the floral image in Blackberry Bliss ink using the Charming Day stamp set, then added the sentiment – again, Blackberry Bliss ink but this time using the Comforting Thoughts stamp set. This is obviously a sympathy card – and mentally a tough one because it’s so personal.

Stampin' Up! Charming Day Sympathy card & envelope

For the envelope… more of the same Floral Charm 12×12 DSP on the flap and trimmed to fit. On the front the same gorgeous floral stamp as used on the inside of the card in Blackberry Bliss ink from the Charming Day stamp set.

Stampin' Up! Suite Sale

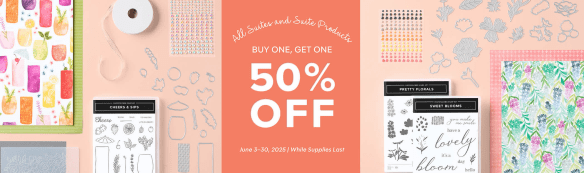
ONLY DAYS LEFT FOR THIS SALE!!! Starting June 3, all available suites and suite products from the 2025–2026 Annual Catalog and Online Exclusives are buy one, get one 50% off! If you’ve had your eye on a new suite from the annual catalog or you really like the look of a stamp set from an Online Exclusives suite, you don’t have to choose—you can get both!

Sales Period: June 3–30, 2025

Ordering Deadlines

Phone: June 30, 2025, at 6:59 p.m. (MT)

Online: June 30, 2025, at 11:59 p.m. (MT)

  • All available suites and suite products from the 2025–2026 Annual Catalog and Online Exclusives are buy one, get one 50% off.
  • When you shop the sale, the 50% off discount will apply to the lower-priced item (for example, if you buy a suite collection and a stamp set from a suite, the suite would be full price, and the stamp set would be 50% off).
  • Suite collections are available if all items are in stock; if all items are not in stock, you can still shop the available suite products.
  • You don’t have to buy a suite and suite products all from the same suite collection for the discount to apply. You can buy any suite products from any suite.
  • The discount will appear in your cart once you’ve added two items within the sale parameters to your cart.
  • Products are available only while supplies last.
  • See and shop all qualifying suites in the online store.

SHOP LAST CHANCE PRODUCTS HERENEW ITEMS ADDED TO THE LIST… MAKE CERTAIN MY NAME IS LISTED AS YOUR DEMONSTRATOR WHEN YOU CHEVCK OUT! :O) REMEMBER…Browse the selection of Last Chance paper crafting products. Additional items are added every other month. These products are available only while supplies last so be sure to buy them before they are discontinued! Discounts vary and are subject to change.

VIRTUAL ALBUM RETREAT!!!

Stampin' Up! virtual album retreat

Who: Crafters who love to scrapbook!

When: July 16–18, 2025, 2:00–10:30 p.m. (MT)

Where: Private Facebook Group

Registration: There is no registration for this event! By purchasing the Month by Month Album Retreat 2025 kit, you’ll get access to an exclusive Facebook group where the live event will stream.

Price of Month by Month Album Retreat 2025 kit: $250

Language of Event: This event will be presented in English only.

After the Event: You can access the recorded event videos on the Virtual Album Retreat Facebook group page.

CONTACT ME FOR INFORMATION RE: ADDITIONAL SUPPLY LIST

Click HERE to join with me & create your Starter Kit! What’s to lose – 20% discount/ 20% commission on all orders.

THANKS FOR STOPPING BY. MAY YOU HAVE A BEAUTIFUL DAY. MAKE SOMEONE HAPPY SENDING THEM A HANDMADE CARD FILLED WITH LOVE. ❤️ Product List

Stampin’ Up! Happy Inkin’ Thursday Blog Hop Color Challenge

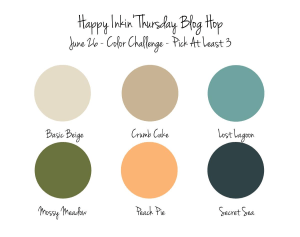
Welcome to our blog hop – it’s Thursday! We have a color challenge today that absolutely stumped me at first. But once I pulled out this bundle of Inspiring Imperfections and coordinating products, it all fell in place.

Stampin' Up! Inspiring Imperfections card front

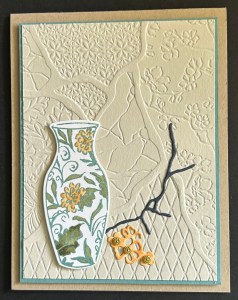
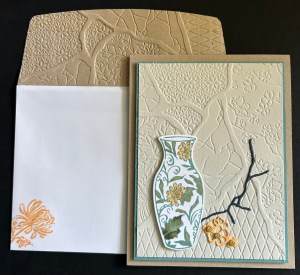
The card base is Crumb Cake cut to 4 1/4 x 11 & scored at 5 1/2. Lost Lagoon is part of the layer on dimensionals and is cut 3 7/8 x 5 1/8 (please cut 2 & save one for the inside of the card. The Basic Beige piece is 3 3/4 x 5 and run through the Joined Together 3D embossing folder, which is part of the Kintsugi Inspirations suite of products in the 2025-2026 Annual Catalog on pages 58-60. I added this panel to the Lost Lagoon and set them aside.

I stamped this gorgeous vase from the Inspiring Imperfections stamp set in Lost Lagoon ink on Basic White scrap, then used Stampin’ Blends in Peach Pie & Mossy Meadow to add additional color. Next I die cut the ‘break’ in Secret Sea and the flower s from Basic White. The flowers I colored with Peach Pie Stampin’ Blends. Once the Vase was in place on the card front (on dimensionals I might add), I attached the ‘break’ and the flowers with dabs of liquid glue. The final touch was to add Wink of Stella to the small flowers and to the flowers & colored leaves on the vase. The final touch was the Flower Accents in the center of each of the flowers.

Stampin' Up! Inspiring Imperfections card inside

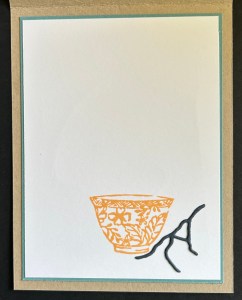
For the inside … remember the saved Lost Lagoon panel? Attach it to the inside of the card to frame the Basic White stamped panel. 😀. This panel is stamped with another of the vases in the Inspiring Imperfections stamp set and has another of the die cut ‘breaks’ form the coordinating dies in the bundle. And yep – die cut from Secret Sea.

Stampin' Up! Inspiring Imperfections card & envelope

For the envelope, Crumb Cake 2 1/4 x 6 run through the same Joined Together 3D embossing Folder and attached to the flap & trimmed to fit. On the envelope front, this sweet flower stamped in Peach Pie ink. I love it – & hope you approve.

See the product list below to purchase from my ONLINE store. Now – be sure to see what others have created for the hop by clicking the ‘next’ button to take you to Amy, or click on a name to visit someone else. Happy hopping!

Stampin' Up! Blog Hop link

Amy Koenders

Mary Deatherage

Karen Ksenzakovic

Tara Carpenter

Terry Lynn Bright

ONLY DAYS LEFT FOR THIS SALE!!! Starting June 3, all available suites and suite products from the 2025–2026 Annual Catalog and Online Exclusives are buy one, get one 50% off! If you’ve had your eye on a new suite from the annual catalog or you really like the look of a stamp set from an Online Exclusives suite, you don’t have to choose—you can get both!

Sales Period: June 3–30, 2025

Ordering Deadlines

Phone: June 30, 2025, at 6:59 p.m. (MT)

Online: June 30, 2025, at 11:59 p.m. (MT)

  • All available suites and suite products from the 2025–2026 Annual Catalog and Online Exclusives are buy one, get one 50% off.
  • When you shop the sale, the 50% off discount will apply to the lower-priced item (for example, if you buy a suite collection and a stamp set from a suite, the suite would be full price, and the stamp set would be 50% off).
  • Suite collections are available if all items are in stock; if all items are not in stock, you can still shop the available suite products.
  • You don’t have to buy a suite and suite products all from the same suite collection for the discount to apply. You can buy any suite products from any suite.
  • The discount will appear in your cart once you’ve added two items within the sale parameters to your cart.
  • Products are available only while supplies last.
  • See and shop all qualifying suites in the online store.

SHOP LAST CHANCE PRODUCTS HERENEW ITEMS ADDED TO THE LIST… MAKE CERTAIN MY NAME IS LISTED AS YOUR DEMONSTRATOR WHEN YOU CHEVCK OUT! :O) REMEMBER…Browse the selection of Last Chance paper crafting products. Additional items are added every other month. These products are available only while supplies last so be sure to buy them before they are discontinued! Discounts vary and are subject to change.

VIRTUAL ALBUM RETREAT!!!

Stampin' Up! Virtual Album Retreat

Who: Crafters who love to scrapbook!

When: July 16–18, 2025, 2:00–10:30 p.m. (MT)

Where: Private Facebook Group

Registration: There is no registration for this event! By purchasing the Month by Month Album Retreat 2025 kit, you’ll get access to an exclusive Facebook group where the live event will stream.

Price of Month by Month Album Retreat 2025 kit: $250

Language of Event: This event will be presented in English only.

After the Event: You can access the recorded event videos on the Virtual Album Retreat Facebook group page.

CONTACT ME FOR INFORMATION RE: ADDITIONAL SUPPLY LIST

Click HERE to join with me & create your Starter Kit! What’s to lose – 20% discount/ 20% commission on all orders.

THANKS FOR STOPPING BY. MAY YOU HAVE A BEAUTIFUL DAY. MAKE SOMEONE HAPPY SENDING THEM A HANDMADE CARD FILLED WITH LOVE. ❤️

Product List

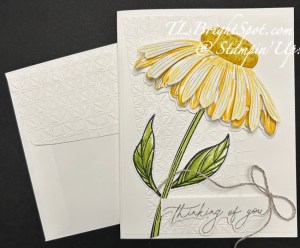
Stampin’ Up! Coneflower Celebrations in a Sympathy card

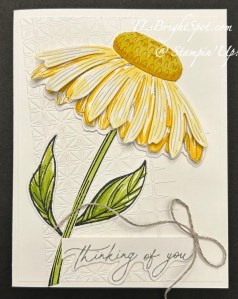
I’m sharing a card today made with the amazing Coneflower Celebrations bundle in the new 2025-2026 Annual Catalog. I’ve made it looking more like a white daisy with bits of color.

Stampin' Up! Coneflower Celebrations card front

The card base is Thick Basic White with an attached Basic White layer run through with one of the Glass Gardens embossing folders (there are two in this package!). I offset the embossing folder for added interest, putting on an angle on the sheet. Then I began creating the flower using the Coneflower Celebration Dies. The top layer is from one die and has light color with the Light Daffoldil Delight Stampin’ Blends; and the other two are from another die. I stamped on one of those bottom layers with stamped off Smoky Slate then added color with Daffodil Delight Stampin’ Blends. I adhered these together creating layers, so slightly offset. The center of the flower is a gorgeous little die cut from Darling Duckling card stock with added color with the Dark Daffodil Delight Stampin’ Blends & Wink of Stella. This too was added to the flower then attached to the card front. The stems and leaves were stamped in Memento ink and colored lightly with Granny Apple Green Stampin blends, then added in place. The sentiment is from the Everyday Greetings stamp set and is stamped in Smoky Slate then fussy cut at the bottom & attached with dimensionals. The final touch is a Linen Thread bow.

Stampin' Up! Conflower Celebrations card inside

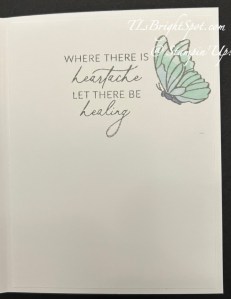
For the inside… again the sentiment is from Everyday Greetings stamp set and stamped in Smoky Slate ink. The butterfly is from the Coneflower Celebrations stamp and stamped in Smoky Slate and colored with Light Balmy Blue, Light Pool Party and Light Misty Moonlight – and of course Wink of Stella. The Basic White panel was added to the inside of the card.

Stampin' Up! Coneflower Celebrations card & envelope

For the envelope… I embossed a piece of Basic White with the same Glass Gardens embossing folder, adhered to the flap & trimmed to fit – done!

BUY ONE GET ONE 50% OFF has begun

On All SUITES and SUITE PRODUCTS!

Stampin' Up! Suite Sale

Starting June 3, all available suites and suite products from the 2025–2026 Annual Catalog and Online Exclusives are buy one, get one 50% off! If you’ve had your eye on a new suite from the annual catalog or you really like the look of a stamp set from an Online Exclusives suite, you don’t have to choose—you can get both!

Sales Period: June 3–30, 2025

Ordering Deadlines

Phone: June 30, 2025, at 6:59 p.m. (MT)

Online: June 30, 2025, at 11:59 p.m. (MT)

  • All available suites and suite products from the 2025–2026 Annual Catalog and Online Exclusives are buy one, get one 50% off.
  • When you shop the sale, the 50% off discount will apply to the lower-priced item (for example, if you buy a suite collection and a stamp set from a suite, the suite would be full price, and the stamp set would be 50% off).
  • Suite collections are available if all items are in stock; if all items are not in stock, you can still shop the available suite products.
  • You don’t have to buy a suite and suite products all from the same suite collection for the discount to apply. You can buy any suite products from any suite.
  • The discount will appear in your cart once you’ve added two items within the sale parameters to your cart.
  • Products are available only while supplies last.
  • See and shop all qualifying suites in the online store.

SHOP LAST CHANCE PRODUCTS HERENEW ITEMS ADDED TO THE LIST… MAKE CERTAIN MY NAME IS LISTED AS YOUR DEMONSTRATOR WHEN YOU CHEVCK OUT! :O) REMEMBER…Browse the selection of Last Chance paper crafting products. Additional items are added every other month. These products are available only while supplies last so be sure to buy them before they are discontinued! Discounts vary and are subject to change.

VIRTUAL ALBUM RETREAT!!!

Stampin' Up! Virtual Album Retreat

Who: Crafters who love to scrapbook!

When: July 16–18, 2025, 2:00–10:30 p.m. (MT)

Where: Private Facebook Group

Registration: There is no registration for this event! By purchasing the Month by Month Album Retreat 2025 kit, you’ll get access to an exclusive Facebook group where the live event will stream.

Price of Month by Month Album Retreat 2025 kit: $250

Language of Event: This event will be presented in English only.

After the Event: You can access the recorded event videos on the Virtual Album Retreat Facebook group page.

CONTACT ME FOR INFORMATION RE: ADDITIONAL SUPPLY LIST

Click HERE to join with me & create your Starter Kit! What’s to lose – 20% discount/ 20% commission on all orders.

Thanks for stopping by. May you have a beautiful day. Make someone happy sending them a handmade card filled with love. ❤️

<!– /wp:paragraph — Product List

Stampin’ Up! Cutest Onsie Baby Boy Card

Hello Sunday! We are slated to have a pretty nice day today – after a drenching rain yesterday that we desperately needed. Those fires in South Jersey did not affect us personally, but they weren’t far. Lots of businesses destroyed & 15,000 acres burned. We needed this rain to put out remaining hot spots on the forests floor. Sigh.

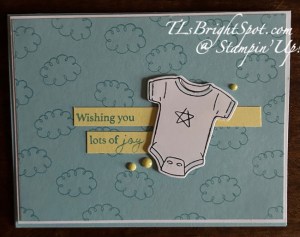
Today’s card is about new life – a baby boy – and I’ve used the carrying over Cutest Onsie Bundle to make it, and Balmy Blue.

Stampin' Up! Cutest Onsie Bundle card front

I began with by stamping a Balmy Blue panel (4 x 5 1/4) with these cute ‘clouds’ (think dreamy 🙂 and Balmy Blue ink. I then stamped the ‘onsie’ with Memento ink and with a Balmy Blue Stampin’ Blends, colored the neck, sleeves and bottom edges. I also stamped the star in Memento ink. I die cut the onsie and set it aside. Next I stamped the sentiment on two pieces of Lemon Lolly card stock, inking just a portion of the sentiment for each stamping. It was stamped in Azure Afternoon ink I adhered the strips with liquid glue then paced the onsie on dimensionals and overlaid the strips The embellishments are Adhesive-Backed Solid Gems in Lemon Lolly. This panel was adhered to Basic White 4 1/8 x 5 3/8 then attached to a card base of Balmy Blue (8 1/2 x 5 1/2 scored at 4 1/4) with dimensionals.

Stampin' Up! Cutest Onsie inside card

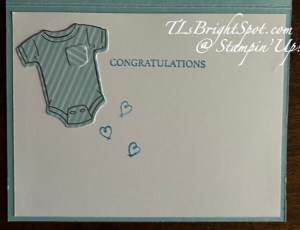
For the inside of the card, I stamped the onsie with Memento ink on a piece of Subtles 6×6 DSP (Balmy Blue of course) and while die cutting, I also die cut the pocket for the onsie. I adhered it directly to the Basic White inset (4 x 5 1/4) then stamped the sentiment in Azure Afternoon ink and the hearts too. This was attached to the inside of Balmy Blue card base for the completed card.

Stampin' Up! Cutest Onsie card & envelope

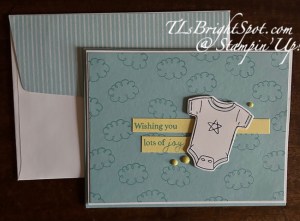
For the envelope, more of the Subtles 6×6 DSP in Balmy Blue was added to the flap and trimmed to fit. This added touch just unifies every project – love this! And there ya go… a baby boy card for a new little one.

All the items for today’s card are in the 2024-2025 Annual Catalog, which you may find in my store by – Clicking here to go to my store – and be sure to visit the LAST CHANCE PRODUCTS and the ONLINE EXCLUSIVES too. Remember that when your order is $50+ you will receive in your inbox this months tutorial (Memorable Blooms for April) and with the new Stampin’ Up! rewards system, you will have rewards from Stampin’ Up! that can be used for your next order!

On May 6, 2025, the Stampin’ Up! 2025-2026 Annual Catalog will go ‘live’ and you’ll find this bundle in that catalog as well :O) Need a catalog and don’t have a demonstrator? Please let me know & I can quickly send one to you.

Stampin’ Up! Painted Stripes & Gallery Blooms bundle

This is my 2nd post today – the first being a reminder of the FREE SHIPPING provided by Stampin’ Up! for purchases of $75+ AND… up to 75% off some Paper Pumpkin supplies. If you haven’t ordered or looked – please Click here to go to my store – and be sure to visit the LAST CHANCE PRODUCTS and the ONLINE EXCLUSIVES too.

For my 2nd post, here is this extra pretty card using new products in the 2025-2026 Annual Catalog AND in the ONLINE EXCLUSIVES – both available May 6. That will be an auspicious day!!!

Stampin' UP! Painted Stripes & Gallery Blooms bundle

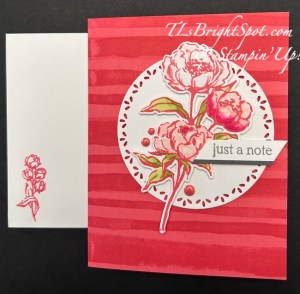
I used the new IN Color for 2025-2027 called Strawberry Slush both for the card stock base, the Painted Stripes stamp set inked & stamped and the floral design also inked, stamped & die cut. After stamping the flowers, I used Stampin’ Blends to color them: Pretty In Pink, Melon Mambo, also Color Lifter for highlights and Wink of Stella. The leaves were colored with Granny Apple Green Blends. I then die cut and added dimensionals to the back and set it aside. I used the Spotlight on Nature Dies to die cut the circle from Basic White card stock and added it to the card front with dimensionals, off-setting it. I then added the flowers to the circle. The sentiment is from the Beautiful Motifs stamp set & Basic Gray ink. I added a very thin strip to the sentiment piece, then attachecd this to the card front… a dimensional on the back right of the sentiment and a dab of glue on the left. The final step was adding embellishments: 2025-2027 In Color Gems in Strawberry Slush.

Stampin' Up! Painted Stripes & Gallery Blooms card inside

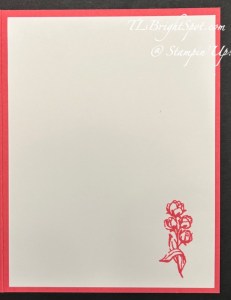
For the inside of the card I kept it really simple: this sweet bouquet of roses from the Gallery Blooms stamp set, stamped in Strawberry Slush ink on the Basic White 4 x 5 1/4 panel.

Stampi' Up! Painted Stripes & Gallery Blooms bundle card & envelope

For the envelope I used the very same sweet rose bouquet from the Gallery Blooms stamp set and Strawberry Slush ink to stamp the envelope front.

Stampin' Up! FREE SHIPPING

What are your favorite items to purchase during FREE SHIPPING? With paper costs going up with the new annual catalog, card stocks are a perfect choice. I also stock up on envelopes which I use a lot, and your adhesives of choice are also a good purchase during free shipping.

Thanks for stopping by. May you have a beautiful day!

Stampin’ Up! LAST DAY FOR FREE SHIPPING!

TODAY, my friends, is the last day for FREE SHIPPING offered by Stampin’ Up! with purchases of $75+ AND up to 75% off some Paper Pumpkin items.

Stampin' Up! FREE SHIPPING
  • All order types qualify for this promotion.
  • Free shipping is for three days only. Orders must be opened and closed April 23–25.
  • Free shipping automatically applies to your cart after the qualifying amount has been met, which is $75 USD | $100 CAD (before tax).
  • Coupon codes and product credits are non-commissionable and will lower your order’s retail amount. Orders must meet the qualifying amount to be eligible for free shipping.
  • The additional cost for expedited shipping is not covered by this promotion.
  • Prepaid 3-, 6-, and 12-month Paper Pumpkin subscriptions and month-to-month subscriptions do not qualify for free shipping. Refills, past kits and add-ons do qualify toward free shipping, but you must be a subscriber to purchase. Subscriptions billed and shipped this month will be charged for the normal amount ($25.00 USD | $34.75 CAD shipping included) + tax.

What are your favorite items to purchase during FREE SHIPPING? With paper costs going up with the new annual catalog, card stocks are a perfect choice. I also stock up on envelopes which I use a lot, and your adhesives of choice are also a good purchase during free shipping.

Thanks for stopping by. May you have a beautiful day!

Stampin’ Up!

Stampin' Up! FREE SHIPPING

What are your favorite items to purchase during FREE SHIPPING? With paper costs going up with the new annual catalog, card stocks are a perfect choice. I also stock up on envelopes which I use a lot, and your adhesives of choice are also a good purchase during free shipping.

Want to shop? Click here to go to my store – and be sure to visit the LAST CHANCE PRODUCTS too n& save even more. Now is also that perfect time to check the ONLINE EXCLUSIVES as well.

Thanks for stopping by. May you have a beautiful day!

Stampin’ Up! Impressions Abloom Fun Fold for the Happy Inkin’ Thursday Blog Hop

Welcome to our fabulous hop! It’s Thursday – Maundy Thursday as a matter of fact. We have a fun challenge today, and that is to make a fun fold card – right up my alley, in my wheelhouse or however you want to say it. I’m not certain what this fun fold is called: a z-fold, a zig zag fold, an accordion fold, but I did have fun creating it.

Stampin' Up! Impressions Abloom Fun Fold card front

I began with a card base of Fresh Freesia 4 1/4 x 5 1/2 and layered a panel of Beautiful Bokeh 4 1/8 x 5 3/8. (You could cover the entire card front.) I next cut a length of Basic White 12×12 to 4 x 12. I put this in my trimmer & with one end at the 2″ mark & the other at the 4″ mark, I from the 2″ end up creating the angled strip. This I scored at 4 & 8, adhering the taller end to the card base. Next was die-cutting the circles: 6th from largest for the Fresh Freesia circle; 8th from largest for the two Beautiful Bokeh circles & the Basic White circle on the Fresh Freesia circle; and 10th from largest for the smallest front Basic White circle. TIP: when die cutting the two Beautiful Bokeh circle, cut one of them from one side of the DSP & the other from the other side of the DSP – otherwise they will not match together :O)

Adhere circles to remaining sections of the card

  • Add the largest Basic White circle first – to the Fresh Freesia circle, centering it.
  • Using that Basic White circle as a guide, add the two Beautiful Bokeh circles to the next section.
    • I adhered the two Bokeh circles together TOP ONLY!
    • Slip these over the section to which they are to be attached with one circle on each side
    • Line them up exactly with the Basic White circle & adhere in place
  • Add smallest white circle to last section, making certain it is on the proper side – refer to z fold photo. If you attach to the wrong side, simply die cut another Basic White circle & attach back to back.

Create all the floral and leaf die cuts using the Impressions Abloom bundle

  • The daisy has 2 layers: the stamped layer (on Beautiful Bokeh stamped in Daffodil Delight) and the card stock layer – Daffodil Delight. These are adhered together , offsetting them & attached with a dimensional
  • The smallest flower has two layers: the stamped layer (on Beautiful Bokeh stamped in Balmy Blue) and the card stock layer in Balmy Blue. These are adhered together , offsetting them & attached with a dimensional
  • The largest flower has two layers: the stamped layer (on Beautiful Bokeh stamped inFresh Freesia) and the card stock layer in Fresh Freesia. These are adhered together , offsetting them & attached with liquid glue
  • The leaves are die cut from Lemon Lime Twist, cut apart as needed & tucked in, adhering with liquid glue
  • The flower centers were all die cut from Beautiful Bokeh 6×6 D
    SP and added with liquid glue
  • The teeniest flowers are die cut from Basic White. Using Dark Daffodil Delight Stampin’ Blends, I added dots of color to the centers & attached to the card with dots of liquid glue – 3 on front 2 on second panel of circles & one on largest of the circle

Final step – stamp the front sentiment. This sentiment is from the So Sincere stamp set & is stamped in Fresh Freesia ink.

Stampin' Up! top/down look at Impression Abloom Fun Fold
Stampin' Up! Impressions Abloom fun fold, open

Here’s how the card looks standing up, front view.

Stampin' Up! Impressions Abloom fun fold, standing front view

And finally, the envelope, I used another piece of the Beautiful Bokeh to add to the flap & trimmed it to fit. Because the card was so busy, I did not add more to the envelope.

Stampin' Up! Impressions Abloom Fun Fold card & envelope

Want to purchase these products from me? See below the list of names for more info! For now… make the rounds of this creative group – & enjoy!

Amy Koenders

Mary Deatherage

Karen Finkle

Akiko Sudano

Karen Ksenzakovic

Tara Carpenter

Terry Lynn Brightyou are here!

These items will all be available May 6 when the new catalog goes live to the customers. I hope you, my customers, have received the new 2025-2026 Annual Catalog. If you have not, reach out to me so that can be remedied. :O)

Remember too, that April 15 was the day the new Stampin’ Rewards program went into effect.  You’ll be earning 10% rewards with all orders of $20+, a 10% reward that can be used on your next order! YAY! And what’s also really neat – you can save those rewards & use them all at once – or a bit at a time – they are GOOD FOR A WHOLE YEAR! Make sure you have a Stampin’ Up! online store account at stampinup.com so you can earn & redeem those rewards – AND make certain my name is listed as your demonstrator.

Want to shop? Click here to go to my store – and be sure to visit the LAST CHANCE PRODUCTS too.

Thanks for stopping by. May you have a beautiful day!

Stampin’ Up! Split Front Fun Fold with Beautiful Gallery 6×6

Good morning and happy Wednesday! We have bright sunshine today – wheee! I wanted to make this split front card for a while and decided to use this gorgeous paper in the 2005-2006 Annual Catalog that goes live May 6.

Split Front Fun Fold w/ Beautiful Gallery 6x6, card front

This fun fold is so super easy! Cut a piece of card stock 4 1/4 x 11 (here I used Mossy Meadow), trim away 1 1/2″ then another 2 1/2″ then score the remaining piece at 1 1/2. Save those cut off pieces for the card front! Cut 2 pieces of DSP 4 x 1 1/4 & adhere to the short scored card front and the 1 1/2 x 4 card stock. Again, I used the Beautiful Gallery 6×6 DSP for those two cut pieces. Cut another piece of the Beautiful Gallery 6×6 DSP for the front panel – this time 2 1/4 x 4 and adhere to the 2 1/2 x 4 panel removed in the beginning – so Mossy Meadow. What I did… I trimmed away a portion of the edging on this DSP leaving the flower bud – top- and the leaf- lower left – loose. I adhered this to Gray Granite 2 1/8 x 41/8 then to the Mossy Meadow piece. Here’s the tricky part but not difficult … adding the front panel to the card front….With the card base closed, lay the loose bottom piece even with the bottom of the card base; using the grid paper, add the decorated front panel so it is equidistant top to bottom & right, adhering to top & bottom. Decorate front panel with Pressed Flower Motifs – and the card front is complete!

Stampin' Up! Split Front Fun Fold card inside

For the inside of the card, I stamped the Thinking of You in Mossy Meadow ink using the Beautiful Motifs stamp set from the Beautiful Gallery Suite in the new 2025-2026 Annual Catalog on a Basic White panel 4 x 5 1/4. I also stamped the fun image underneath in stamped off once Mossy Meadow ink. This was adhered to the inside of the card and the card was complete. Here’s what the card looks like standing.

Stampin' Up! Split Front Fun Fold with Beautiful Gallery 6x6, standing

For the envelope… more of the same Beautiful Gallery 6×6 DSP adhered to the flap, trimmed to fit then randomly stamped with the same image as the inside of the card, then stamped again on the envelope front.

Stampin' Up! Split Front fun fold with Beautiful Gallery 6x6, card & envelope

With the ‘open ended’ sentiment, this could be used as a get well, happy birthday, simply thinking of you, happy anniversary or even a wedding card! Love the flexibility!

These items will all be available May 6 when the new catalog goes live to the customers. I hope you, my customers, have received the new 2025-2026 Annual Catalog. If you have not, reach out to me so that can be remedied. :O)

Remember too, that April 15 was the day the new Stampin’ Rewards program went into effect.  You’ll be earning 10% rewards with all orders of $20+, a 10% reward that can be used on your next order! YAY! And what’s also really neat – you can save those rewards & use them all at once – or a bit at a time – they are GOOD FOR A WHOLE YEAR! Make sure you have a Stampin’ Up! online store account at stampinup.com so you can earn & redeem those rewards – AND make certain my name is listed as your demonstrator.

Want to shop? Click here to go to my store – and be sure to visit the LAST CHANCE PRODUCTS too.

Thanks for stopping by. May you have a beautiful day!

Stampin’ Up! Impressions Ablooms Apreciation Card

Today’s card has a bit of modern look to it and uses most of the new In Colors for 2025-2027: Strawberry Slush, Darling Duckling, Timid Tiger and for the sentiments… Secret Sea. The flowers are a two-step stamp, meaning they have an outline stamp & a filler stamp. For the flowers on this card, I only used the outline stamp. An additional color was used for the stems/ leaves and that is Granny Apple Green. And of course, Wink of Stella in all the flower centers :O) This layout was given to us at the convention a few weeks back.

The card base is Timid Tiger in an A2 size, folded in half. The layer (4 1/4 x 5 1/2) is stamped then cut in two directions on diagonals, then attached to the card front leaving the card base to show through and the excess of the layer removed. It sounds a little funky doesn’t it, but it works! A little explanation maybe… it’s necessary to begin with a layer that is the full size so the layers fit nicely into the corners. When adhering the layer, I kept the separation as even as possible, using my grid paper to help. I began attaching with the left top piece, which needed no trimming. Then I adhered the bottom left panel, keeping the left edge even with the card fold. This meant there was excess at the bottom to be removed when all panels are on. I added the top right layer even at the top but left that gap between & used my grid paper for straightness. Last panel to attach, bottom right. Where is the excess to remove: right side and bottom & you can use your paper trimmer for that by turning the card over and lining up the card base edge. Perfect! Sentiment- stamp in Secret Sea ink on Darling Duckling card stock, trim and add to card front with dimensionals. This particular sentiment is all one, so I taped off the various words to ink up each word separately and I wanted to angle the cut as well. The embellishments are the 2025-2027 In Color Flat Pearls in Timid Tiger.

Stampin' Up! Impressions Abloom Appreciate You card front

The inside… a panel cut 4 x 5 1/4 then stamped: Timid Tiger for the flower, Darling Duckling for the center and Granny Apple Green for the stem/ leaves. And yes, Wink of Stella added to the flower center.

Stampin' Up! Impressions Abloom Appreciation card& envelope

For the envelope, I stamped the flower both on the card front & on the flap in Timid Tiger with the center in Darling Duckling and Wink of Stella also in the centers. I am loving the new In Colors and hope you are as well.

These items will all be available May 6 when the new catalog goes live to the customers. I hope you, my customers, have received the new 2025-2026 Annual Catalog. If you have not, reach out to me so that can be remedied. :O)

Remember too, that today, April 15, is the day the new Stampin’ Rewards program goes into effect. That means things will be shut down for a bit so the computers can do their task… and when everything goes back on again, you, the customer will have a fresh start.  You’ll be earning 10% rewards with all orders of $20+, a 10% reward that can be used on your next order! YAY! And what’s also really neat – you can save those rewards & use them all at once – or a bit at a time – they are GOOD FOR A WHOLE YEAR! Make sure you have a Stampin’ Up! online store account at stampinup.com so you can earn & redeem those rewards.

Thanks for stopping by. May you have a beautiful day!