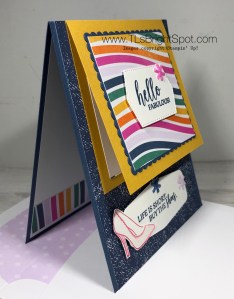
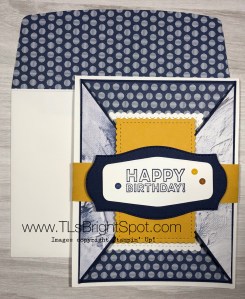
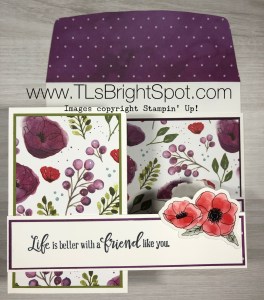
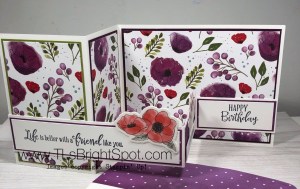
SU! Guilded Autumn Specialty DSP, Double Z Fold

Hello… Today is Fun Fold Friday – at least for today anyway. Fun Folds can be complicated or easy, This one is pretty easy: it’s as though you are creating two cards, one smaller, and putting together. Let’s take a look…


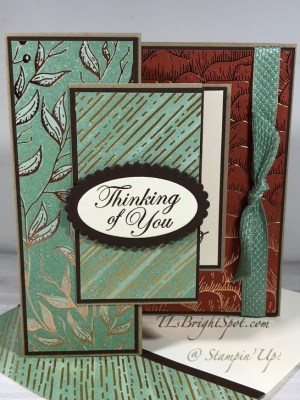
Guilded Autumn Specialty DSP, Double z Fold #1

Is that fun or what? And beautiful? SU! has done it again with their gorgeous coordinating papers. These papers come from the Guilded Autumn Specialty DSP pack in the August ~ December 2020 Mini Catalog. If you want to know how to get your pack of these papers, contact me and we’ll connect!

Now let’s talk about how to put this card together:

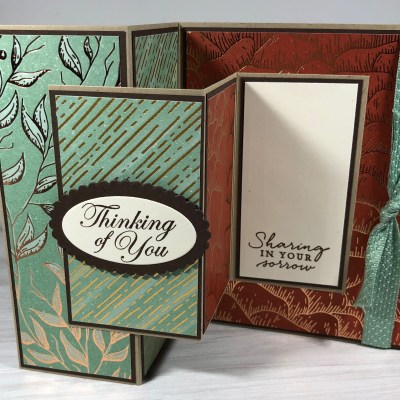
  • Crumb Cake  is our card base 8 1/2 x 5 1/2, scored at 2 1/8 and 4 1/4 on the long side; cut another piece for the smaller portion 3 3/4 x 6 1/4, score at 2 1/8 and 4 1/4 along the long side
  • Cut Early Espresso (2) 2 x 5 3/8  and 4 1/8 x 5 3/8 for the card base; for the smaller card cut Early Espresso (3) 1 7/8 x 3 5/8
  • Cut Specialty DSP (2) 1 7/8 x 5 1/4, 4 x 5 1/4; for the smaller card cut Specialty DSP (2) 1 3/4 x 3 1/2
  • Cut Very Vanilla 1 3/4 x 3 1/2
  • Stamp the sentiment on Very Vanilla using Early Espresso ink ~ mine is from Path of Petals stamp set
  • Adhere all Specialty DSP to the appropriate size Early Espresso.
  • Adhere these panels to their respective card bases, including the Very Vanilla sentiment panel
  • Adhere these to their respective card bases EXCEPT THE LARGEST PANEL.
  • Wrap a ribbon around the right edge of this largest panel and tie as knot. Adhere in back with glue dots and also under the knot. My ribbon is from the Guilded Autumn Suite and it is called Mint Macaron 1/2″ Basketweave Ribbon. It comes in a combo pack called the Basketweave Metallic Ribbon Combo Pack. Gorgeous! Now adhere this large panel into your card base.

Now it is time to adhere the two cards together.. I find it helpful to use my grid paper for placement.. This NOT difficult… place the smaller card in the center of the larger panel and adhere with liquid glue. TIP: I find it helpful to use my grid paper for centering.

Now close the card with the smaller, loose card flap coming over the top of the base card. Keeping the base card closed, adhere the loose panel with liquid glue. Bingo…

I used my Oval Dies to cut a scalloped oval out of Early espresso. Stamp the appropriate sentiment in Early Espresso ink on a panel of Very vanilla (mine is from Good Morning Magnolia stamp set) then die cut with another plain Oval Die. Adhere together with liquid glue. Put dimensionals on the back and attach to the small front card. YAY! Your card is complete and wonderful and ready to send. Mine is going to a family that I have worked with over the last 30 plus years that has done printing for me. The woman died after a very short illness. UGH! Loss is so hard, especially during these physically distant times….

Anyway, back to the card…  for the envelope I adhered a strip of Early Espresso then the additional Specialty DSP to the envelope flap and nothing else. I hope you try making this fun fold. I like all the layering… it adds a ton of elegance to the card.

Guilded Autumn Specialty DSP, Double Z Fold

Thanks for stopping by.

May you have a beautiful day.

Make someone happy by sending them a handmade card filled with love.
SU! Boho Indigo Product Medley Spanner Card

Hello… Happy Fourth!!! Woohoo… We are so used to being ‘out and about’ for  this holiday, attending a picnic or two – with the pandemic life is very different… Enjoy your day whatever you are doing. Go0d Bless America… Now, on to the card for today…

I was on Pinterest the other day and found this fun idea for a card and of course I HAD to try it myself… it’s called a spanner card. I rather like a good challenge, something new ~ here is what I created using the Boho Indigo Product Medley

Boho Indigo Product Medley
Spanner Card
#1

It was fairly easy but did take several steps to make. Let’s get started in the telling…

Begin with an 8 1/2 x 5 1/2 Misty Moonlight cs, scored at 4 1/4. Using your paper trimmer, cut the front panel on each side 1 1/4″  from the edge TO THE SCORE LINE.  Cut a piece of window sheet 1 1/4″ x 3 1/2 and adhere to the card front at the bottom. (I used Tear n Tape for the window sheet) This creates the ‘span’ to hold the two front panels together 😏. Cut 2 panels of Very Vanilla 1 1/8 x 4 1/8 and one.panel 1 1/4 x 3 1/8. Cut panels of Boho Indigo cs: 2 at 1 x 4 and 2 at 1 x 3. Adhere the Very Vanilla to the side front panels and one covering the window sheet. Then adhere the Boho Indigo panels over these. Do not adhere the the last 1x 3 Boho Indigo strip yet.

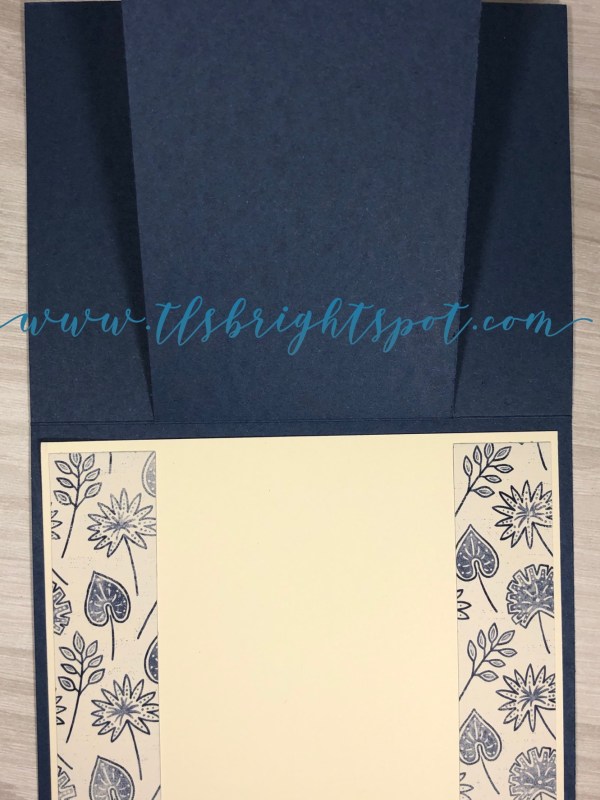
This product medley has these fabulous green leaves and I adhered three of these to the card front. The largest was attached with a glue dot, the palm leaf is on dimensionals and the smallest frond is adhered to the window sheet ON THE BACK SIDE OF THE CARD FRONT.  This creates wonderful dimension. Now cover the back side of the window sheet with that last 1 x 3 strip. Here’s what it looks like from the inside…

Boho Indigo Product Medley
Spanner Card
#2

The only thing left to do for the front is the sentiment banner. Cut a 3/4 x about 2 1/2 strip of Very Vanilla. Trim one end by using the Lovely Labels Pick a Punch. Stamp the sentiment in Garden green from the Bloom and Grow stamp set. Add Gilded Gems from the Ornate Garden Suite of products. Put dimensionals on the back and adhere to the card front.

For the inside… there are two sections really: one is the rest of the card front… cut a panel of the embossed Very Vanilla from the Boho Indigo Product Medley (gorgeous papers!) 3 x 4 1/8 and adhere to that cut front panel. The above picture shows that embossed piece clearly.

Now let’s complete the real inside of the card… cut a Very Vanilla 4 x 5 1/4 and adhere with liquid glue. Cut two strips of the Boho Indigo cs 1 x 3 3/4 and adhere with liquid glue. I added no sentiment as this will be a handwritten card, a friendly uplift to a dear person.

Boho Indigo Product Medley
Spanner card
#3

Your card is now complete. Let’s do the envelope… Cut a panel of the Boho Indigo cs 2 1/4 x 6 and adhere to the flap. Trim to fit. Remember those punch-out leaves from this product medley? I took the punched piece and ‘taped’ around it with post-it notes leaving just the leaf I wanted open, and sponged it with a sponge dauber and Garden Green. Then I took my Light Soft Suede Blends marker and made the lines on the palm leaf. I stamped the hello sentiment from the …. Bloom and Grow stamp set and my envelope was complete. TIP: slip a scrap piece of cs into your envelope when using a blends marker. This keeps it from bleeding through the envelope!

Wasn’t that fun? A new type of card for me and I like it – a spanner card…

BoHo Indigo Product Medley
Spanner Card
#4

NEW, NEW, NEW… The Aug – Dec Mini Catalog is available for Demonstrators and we were able to place a preorder to play with products.  I am soooo excited – my box is set to be delivered today – eek! Depending on when my box arrives, perhaps I’ll pop on later today to share some new products with you.  If you want a catalog and you do not have a demonstrator, please connect with me. SU! is offering a fabulous deal right now… for every $50 order, you receive a $5 coupon in your email for use from Aug 4- the end of Aug. Deal? Yes! Shop with me and get extra bonus… a $10 SU item of your choice when you spend over $50. (One free item per customer per month please.) I’m also setting up STAR rewards that will earn points as well toward SU! product. I’m working out the fine points and hope to have that info out later today as well. All kinds of great happenings going on! Sending hugs your way for now ~ hope to ‘see’ you later!

Thanks for stopping by.

May you have a beautiful day.

Make someone happy by sending them a handmade card.

SU! Playful Alphabet Dies and Z Fold

Hello… last baby card I promise! Made with the Playing with Patterns 6×6 DSP and the Playful Alphabet Dies, this is another fun fold card. Here ’tis…

Playful Alphabet Dies
Playing with Patterns 6×6 DSP
#1

The card base is Purple Posy 4 1/4 x 11 scored at 2 3/4 and 5 1/2. Burnish the 5 1/2 as though the card were going flat, then fold back the 2 3/4 scored panel – this makes a z – therefore… ta da… a Z Fold Card. Cut a panel of Coastal Cabana 2 3/8 x 4. Adhere a panel of the Playing with Patterns 6×6 DSP cut to 2 x 3 7/8. Wrap a length of the Silver/ Misty Moonlight ribbon from the Flowers for Every Season Ribbon Combo Pack three times around and tie in knot. Hold in place on the back with tape. Put dimesnionals on this panel back and set aside.

Adhere Foam Adhesive Sheet strip (about 1 x 2 1/2) to a piece of coordinating DSP then die cut the letters B-O-Y using the Playful Alphabet Dies. Adhere to the card front by simply removing the backing on the Foam Adhesive strip! Now adhere this completed panel to the front of your Z-Fold. Add three 2020-2022 In Color Enamel Dots – these are Just Jade.

For the inside… Coastal Cabana 4 x 5 1/4 then Whisper White 3 3/4 x 5, then add a coordinating strip 1/4″ from right end. Voila! The envelope got the same DSP adhered to the flap. Baby card #5 is done…

#2

Playful Alphabet Dies
Playing with Patterns 6×6 DSP
#3

Here are all five cards – and yes, they have been sent already! What a fun gift set to forward to a new Mom. Hope she really likes them; I had such fun creating them for her.

Playful Alphabet Dies
Playing with Patterns 6×6 DSP
Pattern Play stamp set

Playful Alphabet Dies
Waterfall card

Playing with Patterns 6×6 DSP
Playful Alphabet Dies
Gatefold

Tasteful Labels Dies
Playing with Patterns 6×6 DSP

Thanks for stopping by.

May you have a beautiful day.

Make someone happy by sending them a handmade card.

Stampin’ Up! Using Retiring Paper

Hi Everyone! I hope you are doing well. It’s beautiful today on the East coast and cries out to be enjoyed and appreciated. One of the things I did this past week was open our backyard to a specific group of folks for meditation and social distancing. They were thrilled at the opportunity to get out! Our backyard provides a peaceful setting and is full of birds so it’s perfect for this. Today may be the time to do that again…

To today’s card(s)… Peaceful Poppies DSP and Lovely Lipstick are not a perfect match, but my challenge to use retiring papers moved me in this direction, and I don’t think it’s too bad. My other challenge was to create something simple, few embellishments (no extra postage!) and be cheerful. I also needed a lot of them. Let’s take a peek:

Peaceful Poppies DSP
Fun Folds
#1

Each card was either a Gatefold or a Z fold to create a bit of fun. And here are the details…

Z Fold Card…

  • Z fold cards are all cut 4 1/4 x 11, scored at 2 3/4 and 5 1/2. I used Lovely Lipstick.
  • DSP is 3 x 4 and i used the retiring Peaceful Poppies.
  • The DSP was adhered to basic Black 3 1/4 x 4 1/4 with liquid glue. This was adhered just to the left portion of the Z fold – again with liquid glue.
  • Whisper White cs for the sentiment panel – die cut with the Layering Circles Dies. The sentiment comes from Under My Umbrella – NOT RETIRING!
  • The inside panel, 3 x 4 in Whisper White, was stamped in Black Memento ink using the Peaceful Poppies stamp set. Adhere this so it does not show when the card is closed!

Gatefold Card… I created eight total but used two different dimensions

  • 4 1/4 x 11, scored at 2 3/4 from each end. The Whisper White inside panel is 5 1/4 x 4
  • 8 1/2 x 5 1/2, scored at 2 1/8 from each end. The Whisper White inside panel is 4 x 5 1/2
  • The DSP is 3 x 4, adhered to Basic Black 3 1/4 x 4 1/4. Adhere to the left front ‘gate’
  • The inside panel was stamped using the Peaceful Poppies stamp set  – NOT RETIRING!

Peaceful Poppies DSP
Gatefold
#2

The envelopes…

  • All were stamped in the lower left corner with the beautiful poppy from Peaceful Poppies stamp set
  • DSP was adhered to the envelope flap with liquid glue and trimmed to fit. I ran out of this particular DSP so on one envelope I stamped the flap with the same poppy stamp. You can see that in each of the photos.

Peaceful Poppies
#3

Peaceful Poppies DSP
#4


All in all I was able to create 11 cards in such a short time. I’m generally not one to make multiples of the same card, but cutting everything and laying it out made it so easy peasy. I hope you enjoyed this little exercise and make use of some of your retiring papers.

Peaceful Poppies
Gatefold and Z Fold
#5

Thanks for stopping by

May you have a beautiful day

Make someone happy by sending them a handmade card


Stampin’ Up! Paper Pumpkin Alternatives

Hello All! Today’s post is all about Paper Pumpkin, primarily the May ’20 PP. The colors in this kit show off the new In Colors: Bumblebee, Cinnamon, Just Jade, Magenta Madness, Misty Midnight. I really like the names AND the colors themselves – together, well, not so much 😏. Included in the kit was a new ink spot from the new In Color Misty MidnightLet’s take a look…

This first card is made just as suggested…

PP April ’20
Card 1

Card #2 is similar, except I cut it apart vertically in various widths and mounted it on Magenta Madness cs. Everything else is the same.

PP Alternative 1
Card 2

Card 3 I cut apart again making various sizes of squares. They didn’t fit together quite the way I wanted (ugh!) Again I mounted the squares on Magenta Madness. I used a sentiment from Silhouette Scenes. 

PP Alternative #2
Card 3

Card 4 wasn’t cut at all, simply mounted on the Magenta Madness and put on dimensionals, again using the sentiment from Silhouette Scenes.

PP Alternative #3
Card 4

The second set of cards I chose to do was a bit more of a challenge and I made not one the way it was suggested. Card 5…  I removed the card front and cut it in fourths, adhered to Misty Madness cs and mounted on dimensionals, adhering to Thick Whisper White cs. I cut a 1 1/2″ banner from the In Color 2020-2021 6 x 6 DSP using the Triple Banner Punch and adhered to the vellum banner that was part of the kit. I trimmed the vellum banner point to match. I stamped a sentiment on a  1 1/4″ banner from Silhouette Scenes stamp set and adhered that to the same banner. I wrapped the Ruched Daffodil Delight 1/4″ Ribbon around and tied a knot, adhering with a glue dot. The full banner then got dimensionals and was placed as you see it.

PP Alternative #4
Card 5

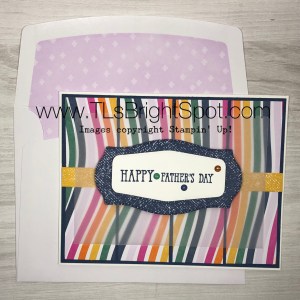
Card 6 was done similarly except… I placed a 1/2″ strip in the middle from the In Color 2020-2021 6×6 DSP pack (new and available Jun 3), included the vellum panel from the kit, cut a label from Tasteful Labels Dies (new in catalog and available Jun 3) in the In Color 6×6 DSP pack and adhered in the center with dimensionals. I cut another label from the same die set (this is an awesome die set folks!), stamped the sentiment using the ink spot Misty Midnight from the Well Said stamp set. (Father’s Day is JUST around the corner and I thought this could be a fun masculine card)This was adhered to the blue label with dimensionals. I added three 2020-2021 n Color Enamel Dots

PP Alternative #5
Card 6

Card 7 I got a bit more creative and decided a lighthearted Father’s Day card would be fun. I again removed the card front, then used the Balloon Punch to create two balloons. Using the colors in the stripes, I punched additional balloons from Bumblebee cs, Misty Midnight and Pumpkin Pie. I stamped the sentiment on various balloons using the Well Said stamp set. Special Someone stamp set was used to create the rest of the card: tails on the balloons, the raccoon (Soft Suede), the mouse (Smokey Slate). The little embellishments were included in the kit. I added a banner at the bottoms from leftover parts of the card front. This Whisper White got dimesnionals and adhered to Misty Midnight card base.

PP Alternative #6
Card 7

Card 8 and I went a little crazy over the top…  There were left overs from the previous card front so I cut it down to make a square (about 3″), adhered that to a Misty Midnight scallop square cut from the Squares Dies and adhered this to a Bumblebee 3 1/2 x 7 panel (scored at 3 1/2). I used a section of the card front for the inside that shows a bit of the colors where I removed the card front 😉

PP Alternative #7
Card 8

PP Alternative #7
Card 8 small panel inside


Using a Misty Midnight card base, I adhered a panel 4 x 5 1/2 from the 2020-2021 In Color 6×6 pack to the card front . I then adhered the Bumblebee piece all the way to the top of the fold with liquid glue. I stamped a sentiment from the Dressed to Impress stamp set to a piece of Whisper White and cut a banner from the Tasteful Labels Dies (did I say I love these dies?). I adhered one of the fun embellishments from the PP kit to the banner, added dimensionals and adhered to this Bumblebee panel. For the bottom of this card, I stamped another sentiment from the Dressed to Impress stamp set using the included ink spot and cut it using another banner from the Tasteful Labels Dies. I stamped the show in Melon Mambo, colored in with Wink of Stella to give it some glimmer and fussy cut it and adhered to this banner with liquid glue. This banner was added to the card with dimensionals. Again, more embellishments from the PP kit.

Since this card was made with someone special in mind, I wanted lots of room to write something. I simply adhered another of the leftover pieces from the removed card front to a Whisper White 4 x 5 1/4. This was adhered with liquid glue and this card was now complete.

PP Alternative #7
Card 8

Whew! That was fun… 4 more cards in the PP kit to make, but not today. Paper Pumpkin is a fun “gift” to receive each month. It most often has cards to make, but sometimes includes bags or boxes. Each kit includes a stamp set, an ink spot, embellishments such as seen today, also ribbon, adhesives, AND instructions – how great is that?! Consider a PP kit for one month, six months or a years subscription. Ship with me now…

The new Annual 2020-2021 Catalog goes live Jun 3. Start making your list and checking it twice. When shopping with me, include my CURRENT HOST CODE J2E4VDGM  for a free gift from me when your purchase is between $50 – $150. No more than one free gift per customer per month though – let’s not be greedy, ok? That free gift is an item of your choice worth $10.

Thanks for stopping by.

May you have a beautiful day.

Make someone happy by sending them a handmade card. 


Stampin’ Up! AMY’S INKIN’ KREW Blog Hop

The theme for this month’s Blog Hop is all about “For the boys/ men…” and we could interpret that any way we wanted. Hubby’s birthday is in June and he is a sailing man. The new blue in the 2020-2021 In Colors for Stampin’ Up! is titled Misty Midnight. I love that! And it’s perfect to work with for a man – my man. And the Sailing Home carrying over stamp set is a perfect match in many ways. I also used the NEW Tasteful Labels Dies (eek! – fun!) and the Many Mates stamp set (love this too!)

You may be joining me today from the talented Julie Johnston. Thanks for following the blog hop!

The card is a take-off of a Gate Fold card – modified version. I actually followed the really good directions of my upline Mary Deatherage, who created a card using this fun fold. It’s easy!

For the boys/ men #1

  • Cut your card base 4 1/4 x 11, score at 5 1/2. I used Whisper White
  • Cut another piece of card stock (I used Night of Navy 5 1/4 x 8, score at 2″ and 6″
  • Mark the center of each of the short panels( 2 5/8). Cut to the center of each short panel (or gates) creating a V – see photo… I apologize… should have taken a photo PRIOR to completing the card – grrr

For the boys/ men #2

  • Cut a piece of  In Good Taste DSP 1 7/8 x 5 (2 of these) Follow the same procedure for cutting.  Adhere DSP panels to the card front “gates” using liquid glue. (This DSP is available to customers June 3!)
  • Cut apiece of the 2020-2021 6 x 6 DSP  Misty Midnight 3 7/8 x 5 1/8 and adhere using liquid glue to the inside of the Night of Navy panel (This DSP is available to customers June 3!)
  • Using the Stitched so Sweetly Dies, cut a panel for the sentiment and the sailboat. The sentiment, sailboat and birds are from Sailing Home stamp set.  I used Night of Navy ink. Adhere to the inside front panel with liquid glue.
  • Adhere this modified gate-fold to your card base with liquid glue.
  • Cut a strip 1 x 10 for the belly band. I used the new 2020-2021 IN COLOR Bumblebee. Don’t you love that name? It is so descriptive.
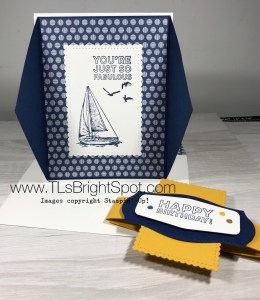
  • Cut another panel using a smaller Stitched So Sweetly Dies and Bumblebee card stock. Adhere to the belly band with dimensionals.
  • * Using two of the Tasteful Labels Dies (available to customers June 3!), cut panels, one in Night of Navy and one in Whisper White. Adhere with liquid glue to the Bumblebee diecut.
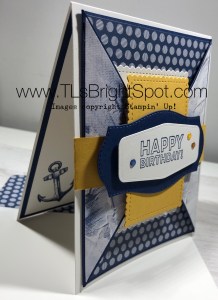
  • Stamp your sentiment using the new Many Mates stamp set. I added three of the new 2020-2021 In Color Enamel Dots. They are so cute! (Both of these are also available to customers June 3)

The front of your card is complete! Yay! And it’s gorgeous already. 😏 Now for the inside…

For the boys/ men… #3

  • Cut a piece of Night of Navy 5 3/8 x 4 1/8. Adhere using liquid glue.
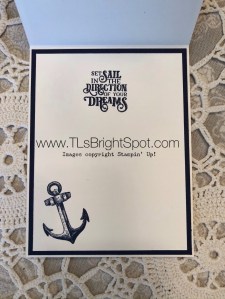
  • Cut a Whisper White 5 x 3 7/8. Stamp with your sentiment and the anchor from the Sailing Home stamp set and Night of Navy ink. Adhere using liquid glue. Done!

Remember your envelope…Cover the envelope flap with the new 2020-2021 6 x 6 In Color DSP, adhering with liquid glue. Trim. Done, done, done…

For the boys/ men #


This was such a fun card to do. It looks complicated but isn’t at all and is just stunning.

Remember all those products I mentioned that are NEW! Purchasing from me is easy and when buying product between $50 – $150 you receive free product from me :O) Please use my current HOST CODE… J2E4VDGM .

Thanks for stopping by.

May you have a beautiful day.

Make someone happy by sending them a handmade card.


Now on with the hop…. to the very creative Amy Koenders.

If you get lost or disconnected along the way, you may get back in by connecting with any of these participating members today… Enjoy the hop!

  1. Mary Deatherage – https://wp.me/p5snyt-cPT
  2. Karen Ksenzakovic – https://wp.me/paaNf4-2ap
  3. Sue Prather – https://wp.me/p5yitZ-1Ua
  4. Jaimie Babarczy – https://wp.me/p79UhD-3Rf
  5. Leslie Larkin – https://leslielarkin.com/friendlikeyoubundle
  6. Karen Finkle – https://karenscardkorner.blogspot.com/2020/05/stampin-up-tropical-oasis-masculine.html
  7. Connie Troyer – http://constantlycreating.me/2020/05/12/masculine-unisex-card-with-stampin-ups-come-sail-away-memories-and-more-card-pack-for-stamp-with-amy-ks-tuesday-blog-hop
  8. Akiko Sudano – https://wp.me/paOv8E-1bb
  9. Julie Johnston – https://wp.me/p8SzmQ-2kc
  10. Terry Lynn Bright – https://wp.me/p8fxPh-tt
  11. Amy Koenders – https://wp.me/p2SFwf-juR


Stampin’ Up! Peaceful Moments and Coordinating DSP

Double Z Fold with Peaceful Poppies DSP #1Hi Everyone! Yesterday was so delightful, I played in the yard ALL DAY. Today is a wonderful light rain to help with all the transplanting I did 🥵 It was hard work, but I enjoyed every moment of it. Speaking of moment… good segue into today’s card made with the Peaceful Moments  stamp set and the Coordinating Peaceful Poppies DSP. Here it is…

Double Z Fold with Peaceful Poppies DSP #1

And here’s how to create this fun double z-fold card…

  • Thick Whisper White 4 1/4 x 11, scored at 5 1/2 & 2 3/4
  • Old Olive 2 1/2 x 4 for the front panel
  • Blackberry Bliss 2 1/2 x 4, 4 x 5 1/4
  • Peaceful Poppies DSP 2 3/8 x 3 7/8 (cut 2) 3 7/8 x 5 1/8; for the panel…1 1/8 x 5 3/8, 1 1/8 x 2 1/8 (cut 2)
  • Whisper White 1 1/8 x 5 1/4, 1/2 x 2 5/81 1/8  x 2 5/8

Double Z Fold with Peaceful Poppies DSP

  • Adhere appropriate panels to your Thick Whisper White cs using liquid glue. Refer to the photo for guidance.
  • Adhere the DSP to the smaller z fold piece using liquid glue
  • Stamp your sentiments in Black Memento ink on the appropriate Whisper White strips
  • Adhere the longest Whisper White with sentiment with liquid glue to the longest z fold panel – add the Peaceful Poppies element with liquid glue
  • Color the Peaceful Poppies element with Light Blackberry Bliss Blends. Cover with the coordinating vellum, attaching jsut at the base with snail. Adhere to the middle panel with liquid glue. Adhere the narrow stamped piece over this with liquid glue.
  • For the last portion of the narrow z-fold panel, stamp your sentiment and adhere with liquid glue.
  • Tricky part… adhering the narrow z fold to the card… adhere the longest panel first, remembering to just adhere to the front left panel of the card. Close the card and adhere the far right panel. Using your grid paper to. line up this panel helps to keep it straight. Card is done!

For the envelope, simply adhere a 2 1/4 x 6 panel of coordinating DSP to the envelope flap; trim and your card is complete – YAY!

Double Z Fold with Peaceful Poppies DSP #1

Double Z Fold with Peaceful Poppies DSP #2


I hope you feel a sense of accomplishment in creating this fun Double Z Fold card. This layout has so many possibilities, I would love to see what you do with it.

The new 20220-2021 Annual Catalogue is going live to those folks who are demonstrators in just a few days Want to be a part of that “in” group? Join my team and I will help you develop your skills both in card making and in the realm of developing your business (unless you simply want to be a hobby demo and get the incredible discounts, which is TOTALLY OK!)

Thanks for stopping by.

May you have a beautiful day.

Make someone happy by sending them a handmade card.


Stampin’ Up! Forever Blossoms and Parisian Blossoms SDSP

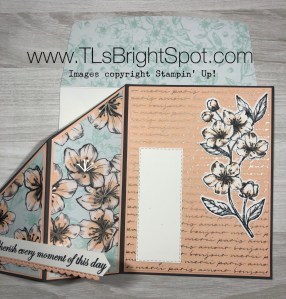
Hi Everyone – it’s Wednesday – hump day as many folks call it. Guess that means mid week 😉 Today’s card is a rather fun fold – maybe accordion (?) and uses a bit more than the usual Specialty DSP. I like it, but it needed LOTS of card cuts cuz I did multiple layering (which I really like). This has two additional layers to each panel…

Forever Blossoms stamp set & Parisian Blossoms SDSP #1

And here’s how it happens…

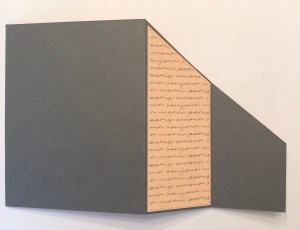
  • Basic Gray cs 8 1/2 x 5 1/2, scored at 4 1/4. Cut diagonally from the score line to 2″ up from the bottom of the left side of the card stock.
  • Petal Pink cs 4 1/8 x 5 3/8, 2 x 5 1/4, 2 x 3 1/2, 2 x 5 3/8
  • Parisian Blossoms DSP 4 x 5 1/4,1 7/8 x 5 1/8, 1 7/8 x 1 3/8, 1 7/8 x 5 1/4
  • Whisper White scraps approx 1/2 x 4 1/4 fro front sentiment, 4 x 5 1/4 sentiment panel on inside and stamped flowers die cut.  Take a peek  how the panels adhere…

Forever Blossoms #2 – open front

Forever Blossoms #3 – open back


  • The tricky part is the angle for the supplementary panels… but I hope to make this real easy for you 😏… I used the card stock base and the angle already cut as my guideline. For instance, in picture #3 that panel is Petal Pink 2 x 5 1/4. Lay the Petal Pink under the Basic Gray (Basic Gray is on top) and softly pencil the angle onto the Petal Pink. Trim on that pencil line. If it needs more length removed, cut it off the straight bottom.This keeps the angle correct and simply adjusts the length of the new panel. Now do the same for the Parisian SDSP: lay it under the Basic Gray, draw a thin pencil line for the angle (making certain the SDSP is going in the appropriate direction) and trim along the pencil line. Adjust the length to fit 1/8″ smaller than the Petal Pink. Adhere the Petal Pink o the “back” as shown in picture #3, then the SDSP.
  • Now go back to picture #2 and do the same steps for cutting the angle for the front panels – do the Petal Pink first, then the SDSP.
  • Adhere SDSP to the appropriate Petal Pink panel, then adhere to the Basic Gray card base.
  • TIP: Adhering each panel as you go saves you from making mistakes in cutting and adhering.

Now you are ready for the largest panel…

  • Adhere the 4 1/8 x 5 3/8 Petal Pink to the Basic Gray cs, then adhere the SDSP 4 x 5 1/4 to the Petal Pink
  • Stamp the large flower from Forever Blossoms stamp set in Black Memento ink. Color using the Dark Petal Pink Blends. Die cut this with the Cherry Blossoms Dies and adhere using liquid glue.
  • Using the Stitched Rectangles Dies, cut a piece from Whisper White and adhere using liquid glue
  • Stamp your sentiment from the Forever Blossoms stamp set on the 1/2 x 4 1/4 strip, using Black Memento ink. Cut to size
  • Cut a strip of Petal Pink for the scallop under the sentiment, from Be Mine Stitched Framelits. Adhere to the sentiment strip with liquid glue and attach to the far left front panel using liquid glue.

For the envelope..

  • Adhere a 2 1/4 x 6 strip of the SDSP to the envelope flap using liquid glue; trim to fit
  • Stamp the single flower from Forever Blossoms stamp set in Back Memento ink and color using Dark Petal Pink Blends

Done, done, done. Now you have completed an accordion card with multiple layers and it wasn’t so hard. Do you love it? My hubby did and that made me very happy.

What’s retiring from the items used today… only the Parisian Specialty DSP – and folks, it is beautiful and right now a real bargain.. Love love love this paper and I am so glad this stamp set is carrying over into the new 2020-2021 catalogue. If youy would like to shop with me (I like that idea by the way!), please use my CURRENT HOST CODE J2E4VDGM for purchases between $50 – $150 to receive a free item of your choice from me – up to a $10 value. If your purchase is over $150, you will receive not only your free item of choice from me, but Stampin’ Up will offer you something as well. Shop now looking at not only the CLEARANCE RACK but also the RETIRING LIST…


Last Chance Products JJ (US)

Last Chance Products AC (US)

Thanks for stopping by

May you have a beautiful day

Make someone happy by sending them a handmade card


Stampin’ Up! and Bonanza Buddies and Bonanza Dies

Hi Everyone… Back for my second post of the day – yes, unusual it is! I needed a birthday card and this struck my fancy – today’s card is made using SU! Bonanzas Buddies, Bonanza Dies and Birthday Bonanza DSP. How fun is that!!! This card was inspired by one I saw by
Dawn Olchefske. Thank you Dawn for sharing.

The card cuts are just a bit different and you can see it so clearly in this first photo…

Bonanza Buddies #1

  • Bermuda Bay cs 8 1/2 x 5 1/2, scored at 4 1/4. Remove 1″ from each FRONT SIDE

For the card front…

  • Cut Grapefruit Grove cs 3 3/8 x 4 1/8 and adhere to from panel with liquid glue
  • Cut Birthday Bonanza  DSP 3 1/4 x 4 1/8 and adhere to Grapefruit Grove with liquid glue
  • The tag is made with Whisper White scrap about 2 1/2 x 4 1/4 – cut with the fabulous tag from the Bonanza Dies
  • Stamp your sentiment onto the tag using Memento Black ink and your Stamparatus. I find I get the stamp just so perfectly straight and I don’t have so many mistakes – just sayin’
  • Fussy cut – yes, I did say fussy cut… a toucan and balloons from another of the Birthday Bonanza DSP. This is such fun paper!!!
  • Attach a Grapefruit Grove  twine from the Nature’s Twine set then adhere the tag to the card front with dimensionals. Attach the fussy cut toucan with balloons with liquid glue and dimensionals on the far right of the Crushed Curry and Bermuda Bay balloons.

For the inside…

Bonanza Buddies #2

  • Cut two (2) Grapefruit Grove cs 1 x 4 1/8 and adhere to the far left and far right sides.
  • Cut two (2) Birthday Bonanza DSP 7/8 x 4 and adhere to the Grapefruit Grove panels
  • Cut Grapefruit Grove cs 3 1/4 x 4 1/8 and adhere to the center of your inside
  • Cut Whisper White cs 3 1/8 x 4. Stamp your sentiment from the Bonanza Buddies stamp set in Memento Black ink. Again I used the Stamparatus to make the sentiment straight and centered.
  • Cut a banner using the Bonanza Dies and the Birthday Bonanza DSP and adhere with liquid glue.

YAY! Your card is complete… ready to send to someone with a sense of fun n- and who doesn’t need a bit of fun these days to lighten their heart?

Remember this stamp set, dies and DSP retire as of Jun 2 – and they make a birthday card  so easy… Join the fun and order today. Remember to use my CURRENT HOST CODE if your order is between $50 and $150 to receive a free item of your choice worth up to $10 😁😁😁

CURRENT HOST CODE J2E4VDGM


Bonanza Buddies
#3

Thanks for stopping by

May you have a beautiful day

Make someone happy by sending them a handmade card

Stampin’ Up!, Fun Fold and DSP

Wow! Late post today… I’ve been cleaning out a space and got caught up in the throws of it all… Todays cards are two for one:  another fun fold as yesterday, but turned sideways & a regular 4 1/4″ x 11″. Yesterdays was for our 10 yr old granddaughter – who is a sweetheart and growing up waaay too fast. This one is for our 19 year old grandson, so it needed to be masculine 😏. He’s wonderful… and a general gem of a young man. Am I a proud Nana? You bet I am! The next card is for our 12 year old grandson and I get bragging rights on him too: gentle soul, tender hearted and growing to a man already.

Here’s the card for the 19 year old… it’s simple and perfect for him…

Fun Fold, sideways

Fun Fold inside


Here are the card cuts…

  • It starts with a 4 1/4″ x 11″ Thick Whisper White. Score at 5 1/2″, then trim off 1″ the front edge
  • Cut your DSP 4 1/4″ x 4″ for the front panel, 4 ” x 5 1/4″ for the inside, 2 1/2″ square for the insert panel and a 2 3/4″ square for the back of the insert panel (the part you see when you open the insert); 2/14″ x 6″ for the envelope flap
  • Night of Navy 2 3/4″ square (the 2 1/2″ DSP gets adhered to this) + approx. 3″ scrap for the scalloped layer on card front
  • Whisper White 4″ x 4 1/4″ inside front panel); 3″ x 6″ scored at 3″ (insert panel), a 2 3/4″ square for the inside panel + scrap approx. 3″ square for stamping the image for the front of the panel

Directions…

  • Adhere the 4″ x 5 1/4″ DSP to the card inside; adhere the 2 1/2″ DSP square to the 2 3/4″ Night of Navy and adhere this to the 3″ x 6″ insert panel for the card front
  • Stamp the 4″ x 4 1/4″ Whisper White with the grass from the March PP kit in Garden Green. Add the bunny, also from the same kit, using Memento Black ink. Adhere this to the left inside of your card using liquid glue
  • While you have the grass and Garden Green handy, stamp the front of the envelope
  • With the scrap of Whisper White, stamp the bunny in Memento Black ink making certain you are stamping it on the diagonal, create a mask, and stamp the grass in Garden Green. Using a Layering Square Die, cut this piece
  • Using a scalloped Layering Square Die, cut a piece of Night of Navy to go behind the bunny/ grass Whisper White piece. Adhere the Whisper White stamped piece to the Night of Navy scalloped piece with liquid glue. Put dimensionals on the back and adhere to the insert panel. Add a pom-pom for the Assorted Pom-Poms  elements available in the SAB catalogue. Stamp your sentiment (I used Itty Bitty Greetings) in Memento Black ink and adhere this insert panel to the inside of the card (the DSP layer).
  • Using a glue dot, adhere a neodynium magnet to the inside panel insert (it should sit right behind the point of the diagonal piece on dimensionals). With the second magnet attached to this, add a glue dot to the back and close the panel over the front of the card that has no decoration. This will match those magnets perfectly and allow your card to stay shut.
  • Open your card and adhere your 4 1/4″ x 4″ DSP to the card front panel using liquid glue

Wow – your card is done…

Envelope…

  • You have already stamped the grass on the envelope front. Now adhere the 2 1/4″ x 6″ DSP to the envelope flap

Card #2 is for the 12 year old growing to close to 6′ already

Tropical Oasis DSP

Tropical Oasis inside


Here’s what’s needed…

  • Old Olive and Pear Pizzazz markers
  • Light Petal Pink Blends
  • Iridescent Sequins Assortment
  • Assorted Pom-Poms
  • Burlap Ribbon – about 5″
  • Papers: Early Espresso Grapefruit Grove, Pear Pizzazz, Whisper White and Tropical Oasis DSP
  • Stitched Rectangle Dies
  • Int the Tropics Dies
  • Itty Bitty Greeting for the sentiment
  • March PP stamps

Directions are super easy…

  • Early Espresso 4 1/4″ x 11″ scored at 5 1/2″
  • Grapefruit Grove 4″ x 5″1/4″ adhered to the card front
  • Tropical… DSP 3 3/4″ x 5″ adhered next
  • With your Whisper White, stamp the palm trees and the bunny. Color the bunny using the Light Petal Pink Blends and adhere the Pom-Pom for the tail (I used liquid glue). Cut with the Stitched Rectangle Dies. Adhere to the card front using dimensionals
  • Add the Iridescent Sequins Assortment with glue dots. They are like little eggs buried for the finding. 😉

Inside the card…

  • Grapefruit Grove 4″ x 51/4″ – adhere to the inside with liquid glue
  • Whisper White 3 3/4″ x 5″ . Die cut two leaves from the In The Tropics Dies from Old Olive cs. Cut a 1/2″ x 5″ strip of matching DSP. Lightly place these so you see where to stamp the bunny.
  • Stamp the bunny in Memento Black ink. Color using the Light Petal Pink Blends
  • Adhere the leaves then the DSP Strip using liquid glue. Adhere all this to the card inside and card is complete!

the envelope…

  • Stamp the grass in Garden Green across, then the bunny in Memento Black ink, just peeking near the edge
  • Adhere the 2 1/4″ x 6″ DSP to the envelope flap.

What fun making cards for very particular folks, knowing they will appreciate and love your creations. The package is already mailed – another delay for my blogging efforts today, but I wanted it there for Easter fun.

Here are all three cards…

Fun Fold with PP bunny, grass

Fun Fold, sideways


Tropical Oasis DSP


Thanks for stopping by today. I hope you enjoyed the cards.

May you have a beautiful rest of your day

Make someone happy by sending them a handmade card.