Stampin’ Up! Forever Blossoms Anniversary Card Fun Fold

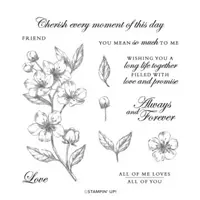
December seems to be a month of anniversaries – our #2 daughter was married on the 27th several years ago, so my mind turned to making one. On my desk for some time has been the Forever Blossoms floral bunch, ready for me to color and I began working on it. I had stamped the bunch in Tuxedo Black Memento ink, so knew I could color with the Stampin Blends. Let’s take a look…

Forever Blossoms Fun Fold – #1

It’s the wrong time of year for cherry blossoms, but aren’t they pretty? On that gray background they really stand out. I used Calypso Coral Stampin Blends for the flowers and Old Olive Stampin Blends for the leaves. This was stamped on Thick Whisper White and it tends to dry the ink faster than the regular Whisper White, so I did just a portion of the flower at a time and used a lighter touch at the same time.Once colored, die cut with the Cherry Blossoms Dies. I tied a double Linen Thread bow, adhered it to the bottoms of the floral bunch with a glue dot, put dimensionals on the back of the floral bunch and set it aside to prepare the papers.

  • Thick Whisper White card base 8 1/2 x 5 1/2, scored at 4 1/4 & 6 1/2. Note this second score line is folded back, creating a z-fold.
  • Calypso Coral 1 7/8 x 5 3/8 (front panel), 2 1/8 x 5 3/8 (inside panel), and 4 1/8 x 5 3/8. Adhere with liquid glue to the appropriate panel
  • Peony Garden DSP for the front panel 1 3/4 x 5 1/4 + 2 1/4 x is 6 for the envelope flap. Adhere with liquid glue to the front panel.
  • Whisper White 1 3/4 x 5 1/4 (inside panel), 4 x 5 1/4 for the far right panel + enough for the cherry blossom bunch, the single flower, the cherry bud and the sentiment (about 2 1/2 x 6 should do all that).
    Adhere the small panel to the appropriate place.
  • On the larger Whisper White panel, stamp the leaves at the top right and bottom right in Old Olive ink. These will be embellished later with the die cut bud and die cut flower
  • Stamp the single flower from the Forever Blossoms stamp set using Tuxedo Black Memento ink and color with Stampin Blends – Calypso Coral. Put a dimensional on the back and adhere to the lower leaves.
  • Stamp the flower bud from the Forever Blossoms stamp set in Old Olive ink and color carefully with Stampin Blends – Calypso Coral. Die cut this and adhere to the upper leaves with liquid glue.
  • Stamp the sentiment from Forever Blossoms stamp set in Tuxedo Black Memento ink between the two flowers.
  • Back to the front panel… Stamp the sentiment in Tuxedo Black Memento ink & die cut. This sentiment/ die cut comes from the new stamp set Many Messages & Messages Dies (available to customer Jan 5, 2021), but you could easily use something else.

Add the cherry blossom bunch on dimensionals to that small front panel, then the die cut sentiment and the card itself is complete!

For the envelope, adhere the 2 1/4 x 6 Peony Garden DSP to the flap with liquid glue and trim to fit. On the envelope front, stamp just a portion of the cherry blossom with Tuxedo Black Memento ink. I chose not to color this as the simplicity of the flower ‘speaks’ for itself – in other words, is enough.

Forever Blossoms Fun Fold – #4

What do you think? Do you like this? Products to make this card may be found below.

As a thank you to my customers, when the order is between $50-$150 I offer a SU! item of your choice valued at $10. Remember to use MY CURRENT HOST CODE SVFB9YJY – good until Dec 3, 2020 (that’s today!). When the order is over $150, you still receive that free gift from me, but SU! has Stampin’ Rewards that may be used for additional products 😁

Thanks for stopping by.

May you have a beautiful day.

Make someone happy sending them a handmade card filled with love.
Stampin’ Up! Playful Pets & Cat Punch Fun Fold

Hi there! Welcome to my blog. Today shares another fun fold ~ actually the same fold as yesterday but created differently. And the focus is the Playful Pets DSP. I had an order for the loss of a kitty and this is what I did.

Playful Pets & Cat Punch Fun Fold

I love the way the punched cat sits nearly off the card front – and this kind of fun fold allows that to perfection. And here’s the how-to…

  • Cut a piece of Soft Suede card stock 5 1/2 x 8 1/2 and score at 4 1/4
  • On the upper half, or front half, trim off 1″ from each end, just to the score line. This gives the full card base and all that left to do is decorate it 😊
  • The card front is now only 3 1/2 x 4 1/4: cut a panel of Real Red card stock 3 3/8 x 4 1/8 and adhere with liquid glue.
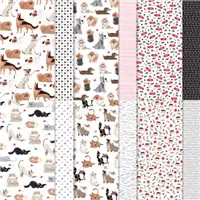
  • Cut a piece of the Playful Pets DSP 3 1/4 x 4 and adhere with liquid glue
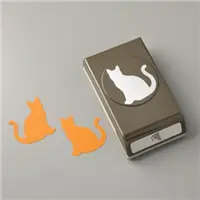
  • Using the sweet Cat Punch and Basic Black card stock, punch a cat. Adhere with dimensionals to the edge of the front flap.
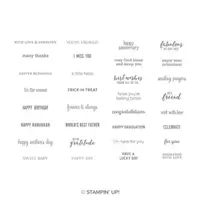
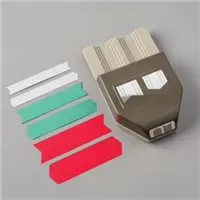
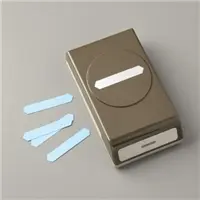
  • Stamp the sentiment using Itty Bitty Greetings stamp set and Tuxedo Black Memento ink on a 1/2″ Whisper White card stock strip. Trim end using the Banners Pick-a-Punch. Adhere this with liquid glue to a 5/8″ Real Red card stock strip. Adhere the sentiment strip to the card front with liquid glue.
  • The heart for the cat…. with a 1/2″ strip of Real Red card stock, and the Detailed Hearts Die, place the strip at the top of this beautiful die and run it through the Cut & Emboss machine. Choose one of the many hearts and attach to the cat with a mere dot of glue. And your card front is done!

For the inside – lots of card cuts and no stamping…

Playful Pets – card inside #2

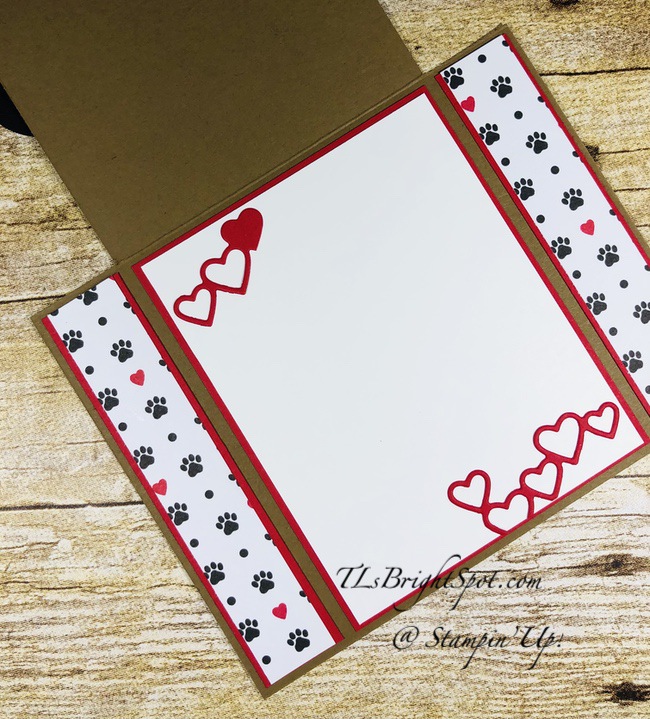
Love this inside ~ for me, the hearts make it. The inside is a full 5 1/2 width and I cut lots of panels as a ‘step up’ from yesterdays same fun fold.

  • Cut two strips of Real Red card stock 7/8 x 4 1/8 and one @ 3 3/8 x 4 1/8
  • Cut two strips of Playful Pets DSP 3/4 x 4. Adhere to the Real Red strips with liquid glue and then to the card base at each end with liquid glue.
  • Adhere the larger Real Red panel to the card inside with liquid glue
  • Cut a panel of Whisper White card stock 3 1/4 x 4. Adhere the heart die cuts that remain from cutting the heart for the cat. I trimmed mine apart and cut back some of what felt unnecessary edges to get the look I wanted. Adhere with mere dots of liquid glue to the Whisper White panel, then to the inside of the card and voila!

For the envelope… cut a strip of coordinating Playful Pets DSP 2 1/4 x 6, adhere to the envelope flap with liquid glue and trim. Stamp the cat feet (this is a non SU! product that I have kept from years of crafting) in Tuxedo Black ink..

Playful Pets & Cast Punch Fun Fold

The person who ordered this sympathy for a cat loss, loved it… and I do too. Would like to know what you think. The product list is below for your ease of ordering. As a thank you to those who use me as their demonstrator, I offer a SU! item of choice valued at $10 when their order is between $50-$150. Please use my CURRENT HOST CODE: XS4MSSFN through Nov 18. When your order is above that amount, you still get my free item, but Stampin’ Up! offers Stampin’ Rewards for more product. It’s a real deal!

Thanks for stopping by.

May you have a beautiful day.

Make someone happy by sending them a handmade card filled with love.
Please let me know if you have questions by replying to this blog or by sending me an email:

tlsbrightspot@gmail.com.

Stampin’ Up! Poinsettia Fun Fold

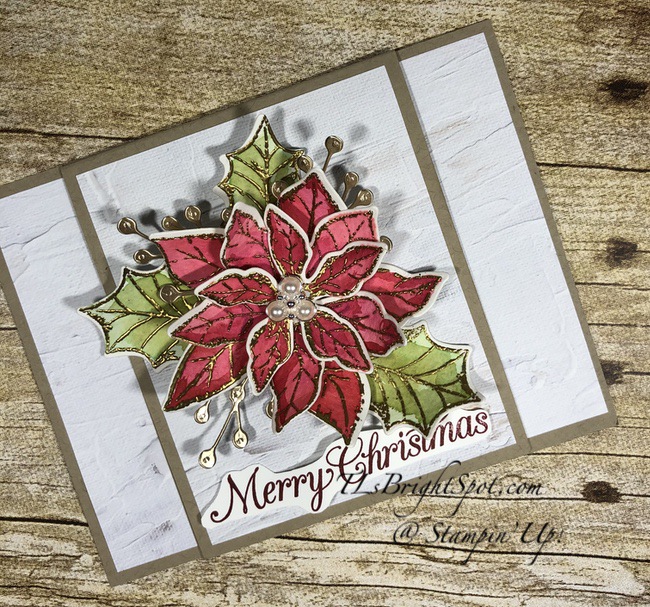
Hello! It’s MONDAY, start of a new week – woohoo! Special plans/ opportunities/ or challenges set for yourself? I’m excited about sharing today’s project with you. I have created other Poinsettia Petals cards but not with watercolor. And that’s what I have done for today – watercolor… One of the things I have learned in this card making process, is it doesn’t have to be complicated to be beautiful. This card is not complicated, a bit time consuming maybe, but easy to break up into portions to keep the process moving along. I don’t do watercoloring nearly often enough and maybe this creation will get me back to it – as I enjoyed it quite a lot. Here’s my card…

Poinsettias Fun Fold – #1

Isn’t this pretty? I love the layers and the In Good Taste DSP creates a wonderfully simple background to show off this flower.

Process & Details…

  • First we stamp the three poinsettia petals & at least three holly leaves using Versamark ink on the Watercolor Paper – yep, Poinsettia Petals stamp set. And yes, do clean the paper by swiping it with the embossing buddy first. Swish in Gold Embossing Powder and heat set with your heat gun.
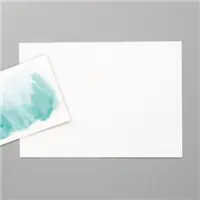
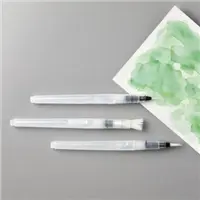
  • Watercolor using the new Water Painters: Cherry Cobbler ink & Real Red ink for the poinsettia petals; Old Olive ink and Garden Green ink for the holly leaves. I like to stamp my ink pad on an acrylic block and using my Water Painter add a bit of water, creating the depth of color I want. Begin with the lighter shade and add the darker. My poinsettias/ leaves turned out a bit lighter than I like but they are still beautiful. Set aside to dry.
  • Cut Crumb Cake card stock for the card base 4 1/4 x 5 1/2. Cover with In Good Taste DSP 4 x 5 1/4 using liquid glue.
  • Cut another Crumb cake panel 3 1/2 x 8 1/2, scoring at 4 1/4. Adhere to the center of the card base panel with liquid glue. Adhere another panel of In Good Taste DSP to this folded front panel 3 1/4 x 4.
  • The watercolored Poinsettia Petals pieces should all be dry now, so die cut those with the Poinsetttia Dies.
  • Die cut at least three berry sprigs from the Poinsettia Dies from Brushed Metallic Paper in Gold.
  • Curl the poinsettia petals with a bone folder (the watercolor paper allows this beautifully) and put together with dimensionals. Adhere the beautiful Beaded Pearls element to the center.
  • Adhere this poinsettia to the card front with liquid glue and add the holly leaves & berry die cuts to suit you. Yes, I did curl the leaves also, and I pulled up the berries a bit once dry. I love this three-dimensional look!
  • Stamp the sentiment in Cherry Cobbler ink to a strip of Whisper White card stock and fussy cut. The sentiment comes from this wonderful Poinsettia Petals stamp set. Curl with the bone folder so the center is raised and each end as well. Double the dimensionals for the center of the sentiment and adherer with liquid glue just before the end curl and the card front is done!
  • Cut a panel of Whisper White card stock 3 1/4 x 4, stamp the sentiment in Cherry Cobbler ink – again with a sentiment from the Poinsettia Petals stamp set. Stamp the pine bow in Garden Green ink – and yes, it is from the Poinsettia Petals stamp set.
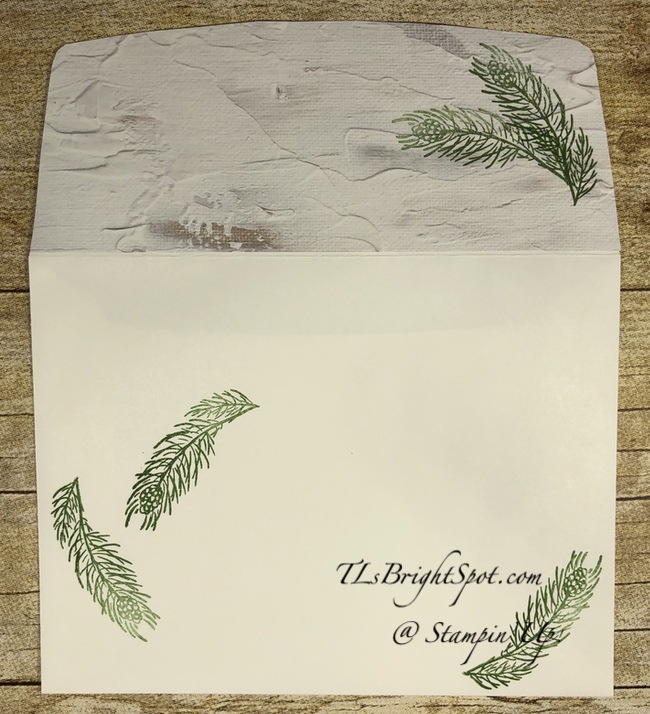
  • Adhere another panel of In Good Taste DSP (2 1/4 x 6) to the envelope flap and trim to fit. Stamp the pine bow over it in Garden Green ink. Also stamp the pine bow on the envelope front.

And here’s another photo as well

Poinsettia Petals Fun Fold #4

What a fun card! I MUST get back to doing more watercoloring… I really enjoy making Christmas cards, but soon I must stop ~ too many, too many… Guess I can resort to doing some fun tags for Christmas – yes! Perhaps that’s what I’ll do :O)

You will find the product list below. Please feel free to ask questions, either via this post or my email… tlsbrightspot@gmail.com. Thanks for being a customer! As a thank you I offer with a $50 – $150 purchase a SU! item valued at $10 – your choice of item! Please use my current HOST CODE XS4MSSFN when ordering now through Nov 18 to receive your free item.

Please let me know if I may assist you in some way.

Thanks for stopping by.

May you have a beautiful day.

Make someone happy by sending them a handmade card filled with love.

Stampin’ Up! Snowflake Wishes Side-fold Card

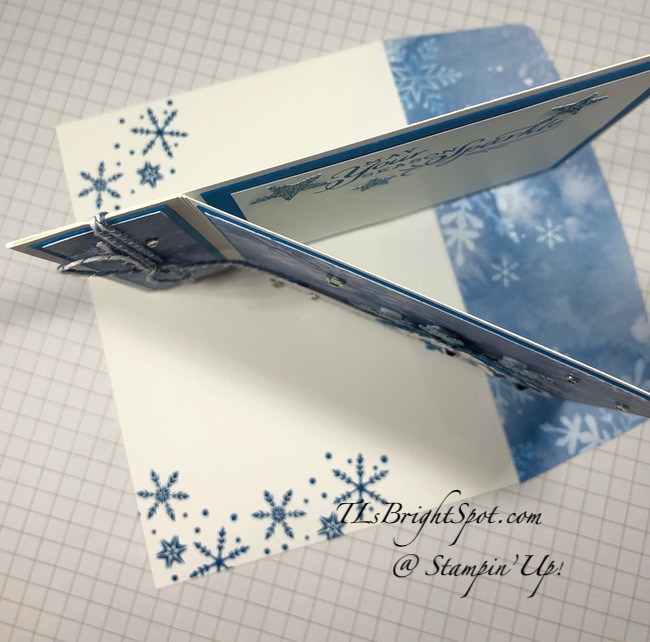
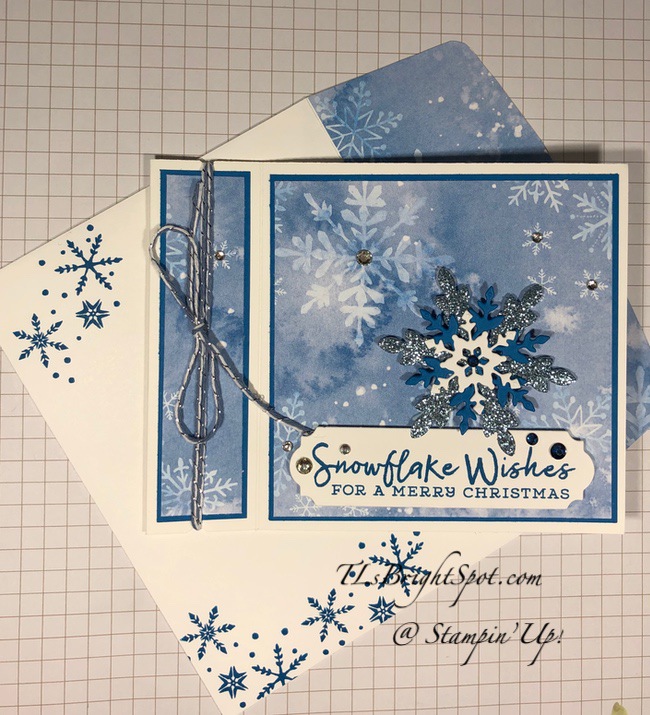
Hi folks! What are you up to on this ‘day after’ the time roll-back? Me? Well it’s fairly cool here and raining outside , so I’m not out playing in the raindrops… What I DID do is make this fun card to share with you today using the Snowflake Wishes Bundle and the gorgeous paper of the Snowflake Splendor DSP. The idea to make this card came from my upline, Mary Deatherage. She does fabulous work and is an inspiration. Here’s the card and you’ll see why it is called a ‘side-fold’.

Isn’t this stunning? The Snowflake Splendor DSP does all the work for me. And the So Many Snowflake Dies (part of the bundle) just add to the gorgeousness.

Let’s take it apart and re-create it…

  • Thick Whisper White card base – 4 1/4 x 11, scored at 4 1/4 & 5 1/2
  • Pacific Point – 1 x 4, 4 x 4 (front of card), 2″ square (snowflake); 4 x 4 (inside of the card)
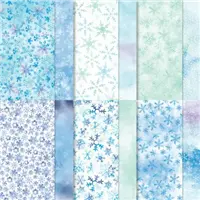
  • Snowflake Splendor DSP – 7/8 x 3 7/8, 3 7/8 square (front of card)
  • Whisper White – 3 3/4 x 1 (sentiment banner), 1 1/2 square (snowflake;, 3 7/8 square for inside
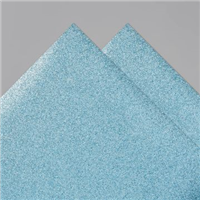
  • Balmy Blue Glimmer Paper – 2 1/2 square for snowflake

Take the Thick Whisper White card base and fold it on the 5 1/2 scoreline (this is the valley fold on the card)n with the 4 1/4″ score line facing you; fold that section back (this is the mountain fold). Adhere that 1 1/4″ area together with liquid glue. See photo #2 above for reference. Mark the center of that 1 1/4″ area at top & bottom, then use the Classic Label punch to create very small notches for the ribbon (which will be added later).

Now you are ready to decorate this panel… Adhere with liquid glue the 7/8 x 3 7/8 DSP to the Pacific Point 1 x 4. Adhere this to the 1 1/4″ strip of the card base with the punched notches for ribbon. Adhere the 3 7/8″ DSP square to the 4″ square of Pacific Point – with liquid glue; then adhere to the right front panel. Beautiful already isn’t it – even without the embellishing of snowflakes, gems, and ribbon.

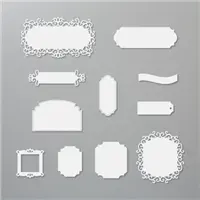
  • Stamp the sentiment on Whisper White using Pacific Point ink. Die cut using the Ornate Frames Dies. NOTE: the die is smaller than the sentiment! How do you make it longer? Die cut half the area by placing the clear cutting plate on 2/3 of the die, run it through the die cutting machine, move the die to the end of the sentiment, aligning the cutting lines; cover that section with the clear cutting plate, run it through the die cutting machine and VOILA! This may take some practice but if I can do it – so can you!!! Put dimensionals on the back and adhere to the card front.
  • Create the snowflake: larger snowflake in Balmy Blue Glimmer Paper, medium snowflake in Pacific Point and the smallest snowflake in Whisper White. Adhere together with liquid glue (just in the centers of each snowflake); add dimensionals to the largest snowflake and adhere as shown.
  • Add several Rhinestone Basic Jewels (I used 7) AND Holiday Rhinestone Basic Jewels (I used 3) for glam.
  • Wrap a long length of the Misty Moonlight/ silver Bakers Twine from the Flowers For Every Season Combo Pack around the 1 1/4″ area, fitting it in the notches and tie a bow. Adhere the bow with a glue dot.

Love, love, love this! But we are finished yet; we must do the inside.

Snowflake Wishes Side-fold Card, inside – #3
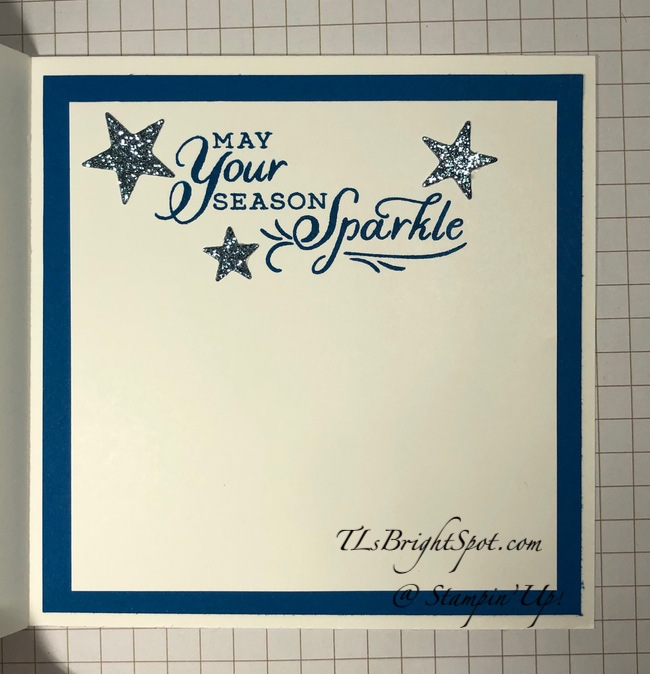
  • Stamp the sentiment from the Snowflake Wishes stamp set in Pacific point on the 3 7/8″ square. Adhere it to the 4″ square of Pacific Point with liquid glue, then to the card inside.
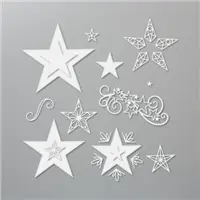
  • Adhere several stars (I added 3) die cut from the Balmy Blue Glimmer Paper. These were from a previous project and left over, but I used the Stitched Stars Dies to create them.

For the envelope… Take another snowflake stamp from the Snowflake Wishes stamp set and stamp the envelope front in Pacific point ink. Cover the envelope flap with more of this wonderful Snowflake Splendor DSP, trim to fit.

Snowflake Wishes stamp set – #1

I hope you have as much fun creating your side-fold card ads I did – especially if you use the Snowflake Splendor DSP and the Snowflake Wishes Bundle to do so. I can’t wait to see what you do!

The products are listed below. Remember when you shop with me, you will receive a free SU! item of choice valued at $10 when your purchase is between $50-$150. If it is over that amount, don’t use my current host code as Stampin’ Up! offers Stampin Rewards. You WILL still get my gift…

CURRENT HOST CODE NOV 1 – 18 XS4MSSFN

SU! Birthday Triple Cube Pop Up Fun Fold

Hellooooo 😁 It’s F-A-L-L, officially… and today’s card is sort of fall and definitely a birthday card. It was, I confess, my first attempt at making this fun fold, and I’m generally pretty pleased with it. We learn from mistakes, hopefully, and I should make another real soon as to remember what I would do differently… Here ’tis…

Triple Box Fun Fold
#1

The gorgeous Gilded Autumn Specialty DSP is the highlight of this card – and the background to it is the Brushed Metallic card stock in copper and the card base is Cinnamon Cider. I used the Ornate Frames Dies to frame the sentiment and Fancy Phrases stamp set for the sentiment. I added the Gilded Gems on the sentiment label.

Ornate Frames Dies, Gilded Gems
#2

The Butterfly Gala Bundle (stamp set/ butterfly punch) were used for the butterflies (3 of them) and several Blends for coloring: Lt Purple Posy, Lt Bermuda Bay and Lt Mango Melody. To add as bit of glam on the butterflies, I added Champagne Rhinestone Basic Jewels. I also used gold metallic trim for the butterfly antennae – this is from the Forever Greenery Trim Combo Pack.

For the “inside” decorations I used the Forever Gold Laser-Cut Specialty DSP and the Boho Indigo Dies for the vases.

Triple Fun Fold, inside
#3

On another of the ‘inside panels” I created a banner/ tag using the Fancy Phrases Bundle (stamp set and Fancy Tag Topper Punch).

Fun Fold, inside
#4

Fancy Tag Topper Punch
#5

The tag was stamped in Tuxedo Black Memento ink, then the flowers colored with Calypso Coral and Just Jade Blends. Champagne Rhinestone Basic Jewels were centered on the two flowers. Basketweave & Metallic Ribbon Combo Pack – copper metallic for the trim + Forever Greenery Ribbon Combo Pack using the Vanilla. I did trim the width to allow it to slip inside the prepared sleeve.

Here are photos in general preparation of this FUN FOLD… card cuts will be. listed at the end of this post.

Triple Box Fun Fold
#6

Triple Box Fun Fold
#7


tabs for holding the sentiment
#8

This is great picture of the tabs to hold the sentiment… each is about 1/2″ width x 2″ in length then folded in half. Adhere tear n tape to each side. Adhere the folded side to the fold of the lower ‘boxes’, centering. Remove tear n tape and carefully apply sentiment tag.

sentiment added to tabs
#9


Triple Box Fun Fold
#10

What a fun project… I suggest/ highly recommend doing a You Tube search before beginning this project. That will be very helpful – and there are several out there. Find what works best for you.

Thanks for stopping by.

May you have a beautiful day.

Make someone happy by sending them a handmade card filled with love.
The above card was made for our daughters birthday and given to her yesterday. She’s a sweetheart – and of course we are not prejudiced at all. 😏

Shop with me? Below are the products used for today’s card.

Current Host Code from now through Sep 30 GNH9MVXK

Earn a SU! item worth $10 when your order is over $50

(one free item per month please/ thank you!

<div><div><div id=”0a60eb34-89c3-4b03-8256-27c9ee4261f7″>https://mystampinblog.com/Showcase/Details/294f4087-cb28-464e-9dd3-d2000942d8f7?layout=Tiled&showSku=True&showPrice=True&showSalePrice=True&showAddToCart=False&showAddAllToCart=True&showDownload=True&transparent=True&bordered=True&hFontHeight=14&rFontHeight=13&imageHeight=120&middleContent=False</div>https://mystampinblog.com/Script/ShowcaseDetailsScript</div></div>


Card Cuts for today’s project:

  • Cinnamon Cider : 5 1/2 x 11 1/2 (main cube) scored at 2 3/4, 5 1/2, 8 1/4 and 11; (side cubes) 2 3/4 x 11 1/2 scored at 2 3/4, 5 1/2, 8 1/4 and 11 – cut  & prepare 2
  • Card stock mats (I used Brushed Metallic) 2 1/2 square (6)
  • DSP: 2 1/4 square (6) I used Gilded Autumn SDSP
  • DSP for inside coverings: 2 1/2 square (6) I used Gilded Autumn SDSP
  • Card stock for tabs, 1/2 x 2 (2)
  • Card stock for sentiment banner – depends on what banner/ sentiment chosen
  • addition… sleeve for tag – 2 5/8 x 5 1/4; tag – 2 x 5


SU! Ornamental Envelopes and Celebrations Labels Z-Fold

Helllooooo. It’s Monday, the start of a new week. What’s your plan – who are you reaching out to? My card today is guess what – a CHRISTMAS CARD! Yep – I’m back to making them and a fun fold is always a bit exciting – and creating a Z-Fold is – just – easy. Let’s take a look…

Z-Fold, Celebration Labels w/ Ornamental Envelopes
#2

Z-Fold, Celebration Labels
#1


Fun look, right? I’ve used a few stamp sets on this card to get the sentiments or images I wanted. I love these ornaments and they were so fun to color. But I’m getting ahead of myself… Choose a DSP that will add color to the background but not compete with your main image. Here I chose Snowflake Splendor DSP and adhered it to the card front (that card stock is Pacific Point 4 1/4 x 11 and scored at 5 1/2). With the Celebration Labels Dies, cut one in Whisper White for your stamping and the next size larger for a nice background. You are actually cutting through the card front and the DSP and card stock layers. AND – big tip here, listen carefully – you are cutting from the back side of the card front . The reason for this is to have the plain side behind your main image and to have a decorated side when you open the card. It makes the larger die cut stand out more as well. 

Stamp the ornaments from the Ornamental Envelopes stamp set, only using the four ornaments shown. In other words using sticky notes, tape off that section on the stamp you do not want in your image prior to inking, ink the appropriate area in Tuxedo Black Memento ink – then remove the sticky notes and stamp on the die cut Whisper White. Stamp the sentiment using the Itty Bitty Greetings stamp set in Granny Apple Green. Now color the ornaments – I used: Poppy Parade, Granny Apple Green, Daffodil Delight  and Shaded Spruce Stampin Blends. Put dimensionals on the back and adhere to the solid color side of the larger die cut.

For the Z-Fold: cut a strip from Whisper White 2 1/2 x 10 and score at 4 & 8. Burnish these score lines well so they make a wonderful Z. This creates ‘panels that are 4″, 4″ and 1 1/2″. The smallest panel is the end that will attach to the Celebration Dies and the opposite end will adhere to the inside of the card. With the 4″ end and the score line against the score line of the card, adhere the two together with liquid glue, centering it from top to bottom.  Look at this photo again for reference… Now it is time to adhere the die cuts for the front. With the card closed and the 1 1/2 strip facing you, place the die cut panel right into it’s place and adhere with liquid glue. Voila – the Z-Fold is created! Now you are ready to create the inside.

Z-Fold, Celebration Labels
#1For the inside, cut  2 panels of Seaside Spray cs 2 3/8 x 3 7/8; then cut two panels of Whisper White cs 2 1/4 x 3 3/4. Stamp your Whisper White panels. I used Yuletide Pasture stamp set ‘cuz these animals remind me of those in the stable with baby Jesus. 🙂 I stamped them in Soft Suede ink and then used the smallest of the Water Painters to ‘bleed’ the color. The collar of the sheep was colored with Poppy Parade, the bells with Daffodil Delight and the leaves with Granny Apple Green – all Stampin’ Blends. The sentiment on the sheep panel was from the Itty Bitty Greetings stamp set and stamped in Granny Apple Green ink. The bull  got fun ornaments hung from his horns using the Little Treats stamp set and colored with Poppy Parade, Granny Apple Green and the Daffodil Delight Stampin Blends. 

Now these Whisper White panels are colored, adhere them to the Seaside Spray panels with liquid glue, then adhere to the inside of the card on the strips. This picture will help you. I apologize it’s in the wrong direction! Should have fixed that… 😦

Z-Fold inside card
#3

Now flip the card over and do something for the back – – I cut a panel of Whisper White 4 x 5 1/4, stamped the sentiment from the Little Treats stamp set in Granny Apple Green ink and adhered to the card with liquid glue. And your card is complete!!! Such fun. Love doing this.

Z-Fold, back
#5

Z-Fold
#4


Thanks for stopping by today.

May you have a beautiful day.

Make someone happy by sending them a handmade card filled with love.

 

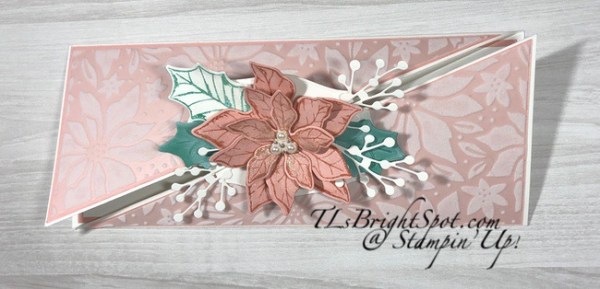
SU! Slimline Diagonal Gatefold Card with Poinsettia Petals Bundle

Hi Everyone… Today’s card is just a gem but I might be a tad prejudiced… I have used this bundle in a previous card and fell in love with the set. Slimline cards seem to be all the rage these days and I had not done any of these. But here I am… and pleased with the results.

Before I get to the card: a couple of days ago I shared two Mini Paper Pumpkin boxes that I had decorated and asked for feedback, comments and said there would be a prize/ gift to one of the ‘commentees’. Karen Andrews – your name “plopped out of the spinner”. Please send your address to my email: tlsbrightspot@gmail.com and I will get that in the mail today Congratulations – hope you like it! The differences in the boxes? All inks, papers and ribbons used were the same; differences listed below. I’ll do a more complete post about the boxes tomorrow, Aug 1.

1) I used a brayer and colored the one box with Pretty Peacock ink

2) That same box was decorated on four sides

3) The top DSP was two (2) pieces

I also want to give an update on our S-I-L: he is doing very well. Recovery will take a while but he is in PT with mostly massage/ stimulation to help reduce the expected swelling in the affected arm. He has an amazing attitude and strong will and that will be to his advantage during the recover. If you are new to my blog, S-I-L had a rather nasty bicycle accident and shattered his right elbow.

Now – to the card of the day: I’m calling it the Slimline Diagonal Gatefold. Card cuts listed at the end of this post.

Slimline Gatefold with Poinsettia Petals
#1

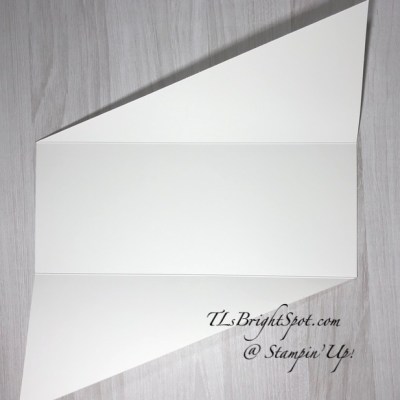
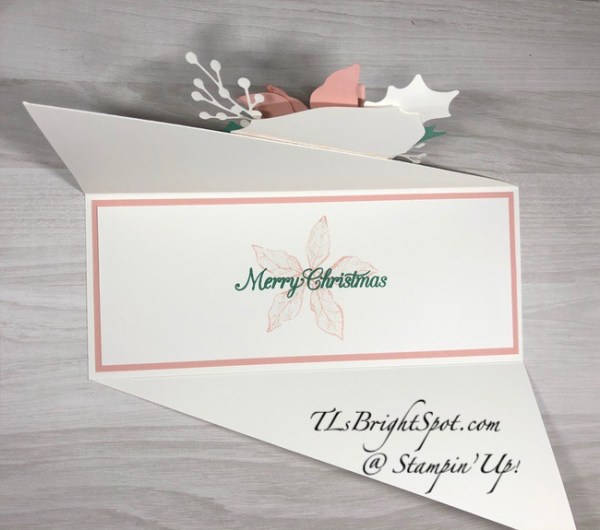
The base is Thick Whisper White, scored in two places, and cut on the diagonal. I then cut a panel of Blushing Bride and cut it on the diagonal – then did the same with the Plush Poinsettia Specialty Paper. TIP: be sure you are cutting the Specialty Paper on the proper diagonal. Ask me how I know that!

Slimline Gate Fold with Poinsettia Petals
#3

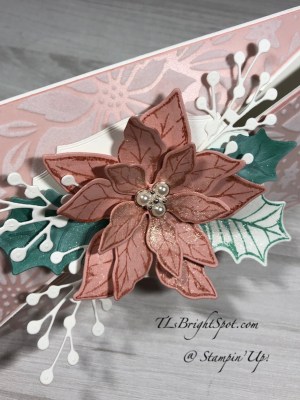
Once those have been adhered to the appropriate diagonal for the card front, you are halfway to completing this gorgeousness. Again using Blushing Bride cs, stamp the three poinsettia in Blushing Bride ink using the Poinsettia Petals stamp set. Die cut those with the coordinating Poinsettia Dies. (This is one fabulous bundle – and 10% off when purchased that way. 😉) With Just Jade cs, die cut two leaves. This die set allows you to not only die cut the outline, but also to ’emboss’ the leaf impression. LOVE THIS! I also took a Whisper White scrap, stamped a leaf in Just Jade ink and using the outline die, cut that out as well. Using additional Whisper White cs, I cut out three berry  sprays. Then I took another die set – the wonderful Tasteful Labels Dies, and cut a label from Whisper White.

Before assembling the poinsettia, I took my Wink of Stella and covered the poinsettia, and the three leaves to give them sparkle. TIP: Be careful not to cover the centers so the glue adheres the layers together better. You can see that pretty clearly in this photo.

Slimline Gate Fold with Poinsettia Petals
#2

Now put the poinsettia together with liquid glue. I did use a dimesnional for the top layer. Add a Beaded Pearl for the center adhering with a glue dot. Are these pretty or what? I layered my poinsettia in the center of the Tasteful Labels die and adhered with liquid glue. Then I added the leaves and finally the berry sprays, adhering with liquid glue.

The last step for the card front is attaching the ‘bouquet ‘to the card. Decide if you want the centerpiece of the card attached to the bottom panel or the top diagonal. It doesn’t really matter. The key is to make certain it is in the middle AND that the adhesive is only on the portion to adhere to the card. You might find it helpful to even mark the back of the label so the adhesive is in the right spot. You don’t want extra adhesive beyond the label.

The inside I kept very simple but it is elegant as well.

Slimline Gate fold with Poinsettia Petals
#4

Cut a Blushing Bride panel and set aside. Cut a Whisper White panel: stamp with the next largest poinsettia in stamped off once Blushing Bride ink. Over this stamp the sentiment in full strength Just Jade ink. Adhere the stamped Whisper White panel to the Blushing Bride with liquid glue, then add that to the inside of the card. Voila! Your card is complete…

Slimline Gatefold with Poinsettia Petals
#1

The Poinsettia Petals bundle will be available to customers Aug 4. As demonstrators, we have the opportunity to preorder catalog items to play/ create/ inspire one another to new levels. Interested in being a demo? Join my team and we can create together.

Today is the last day to use my July Host Code – see below. I will post a new Host Code Aug 1

Bonus days are coming to an end soon – now through 3 Aug, just 4 days. That $5 coupon (s) should be eating a hole in your pocket… to use in Aug. Did you make your list?


Bonus Days. Earn in July, spend in August.

And when you order from me, please use my July host code to receive a SU! item worth $10 when your purchase is $50-$150. Sounds like another good deal, right?! It is…

Thanks for stopping by.

May you have a beautiful day.

Make someone happy by sending them a handmade card made with love.
Card cuts for today’s project:

  • Thick Whisper White – 8 1/2 x 10 1/2, scored at 3 1/2 and 7 on the long side
  • Blushing Bride cs – 3 3/8 x 8 for the card front, cut on diagonal + scraps for Poinsettia; 3 1/4 x 8 1/4 for the inside
  • Plush Poinsettia Special Paper – 3 1/8 x 7 3/4, cut on diagonal
  • Whisper White  – scraps for leaf and berry spray; 3 x 8 for inside

SU! Back On Your Feet Double Z Fold

Hi everyone ~ how’s it going? You doing OK? Some days during this self containment are easier than others, right? So, one day at a time just do the best you can; try not to look ahead too far cuz that can get you kinda crazy. Take the best care you can of yourself and family. Guess I’m feeling a bit philosophical this morning….

Todays card is for a friend who had surgery on their neck – a couple of fuses – and they are struggling, really struggling. I decided a little levity might be helpful and this is what I created.

Back On Your Feet Double Z Fold
#1`

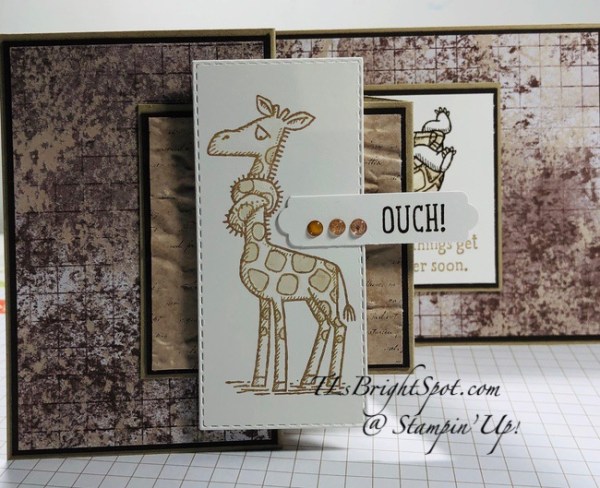
Is this perfect for neck surgery or what! And it’s a double z fold which puts it up a couple of notches in being special. The World of Good Specialty DSP is perfect for this man as he has traveled around the world and then some. I doubt they will notice the significance but I certainly did while making this card.

Here are the products I used… card cuts are listed at the bottom of the post…

  • Back On Your Feet stamp set
  • Crumb Cake cs for the base of the larger Z and the smaller Z
  • Early Espresso cs for layering
  • World of Good Specialty DSP
  • Whisper White cs
  • Old World Paper 3D embossing folder
  • Stitched Rectangles Dies
  • Lovely Labels Pick a Punch
  • Wink of Stella
  • Crumb Cake and Early Espresso inks
  • 2020-2022 In Color Enamel Dots, Cinnamon Cider

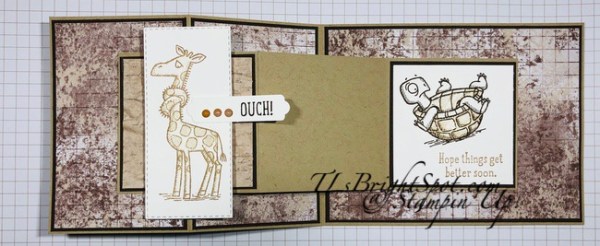
When I create a card like this, I do one portion at a time – one Z fold, then the other. You can cut everything and lay it out for efficiency, but I was still working out sizes for the smaller Z. Crumb Cake is the base of the card, layer the Early espresso for all three sections of the larger Z, then layer the World of Good Specialty DSP for the three sections. For the smaller Z, Crumb Cake cs was used for the card base layer, then Early Espresso cs for the first (or front) and last (or back) layers, then DSP on the first and Whisper White for the last (for sentiment). For the front layer, the DSP was run through the Old World Paper 3 D embossing folder. Gosh that embossing folder is amazing… You can see it very clearly in this photo.

Back On Your Feet Double Z fold
#2

I don’t adhere the Whisper White panel until I have the sentiment or design on cuz – you know, mistakes happen… lol. The turtle was stamped in Early Espresso ink. Then I took my Wink of Stella and colored in the shell only. This moved the ink around a bit and gave it some variety. Then I stamped the sentiment in Crumb Cake ink.

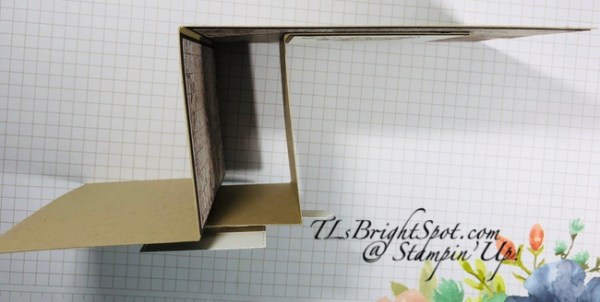
Now that both Z folds are created I put them together… I lay the small one on to get an idea where it should sit on the larger Z. When the card is closed, we don’t want to see the last panel of the small Z at all. Once I have seen how it fits, I adhere the back panel first, then the front and it creates this wonderful Z. Take a peek at this photo from the top of the card.

Back On Your Feet Double Z fold
#3

That cute giraffe was stamped on Whisper White in Crumb Cake ink. I used the light Crumb Cake Blends to color in the spots very lightly, then covered the giraffe in Wink of Stella. Again, this moves the ink around a bit and colors the giraffe lightly. The giraffe was adhered with dimensionals. I then stamped the word OUCH! on a 1/2″ wide length of Whisper White in Early Espresso and cut the ends with the Lovely Labels Pick a Punch. I added three 2020-2022 In Color Enamel Dots and attached with liquid glue.

The envelope flap was covered in the World of Good SDSP and then stamped on the front with the word SIGH… several times since this is such a long recovery. The card is complete and guess what – mine is already in the mail as we speak. How fast is that for a turn-around?

Back on Your Feet Double Z Fold
#4

What do you think? I think the man will appreciate the card AND the thought behind it… If you are interested in purchasing these products, they may be found in the SU! 2020 Annual Catalog. And if you do not have a demonstrator, would love to connect with you. Right now SU! has an awesome deal going on called Bonus Days..For every purchase of $50 from now until 3 Aug. you will receive from SU! by email, a $5 coupon that is redeemable 4-31 Aug. Such a deal!

Bonus Days. Earn in July, spend in August.

And when you order from me, please use my July host code to receive a SU! item worth $10 when your purchase is $50-$150. Sounds like another good deal, right?! It is…

Thanks for stopping by.

May you have a beautiful day.

Make someone happy by sending them a handmade card made with love.
Card Cuts for todays card:

Large Z Fold..

  • Crumb Cake cs 4 1/4 x 11, scored at 2 3/4 and 5 1/2
  • Early Espresso cs 4 1/8 x 5 3/8, 2 3/8 x 4 1/8 (x 2)
  • World of Good SDSP 2 1/2 x 4 (x 2), 4 x 5 1/4

Smaller Z Fold…

  • Crumb Cake 2 3/4 x 8 3/8, scored at 2 3/4 and 5 1/2
  • Early Espresso cs 2 5/8 square (x 2)
  • World of Good SDSP 2 1/2 square run through the Old World Paper 3D embossing folder
  • Whisper White cs 2 1/2 square


.


SU! Mini Gatefold

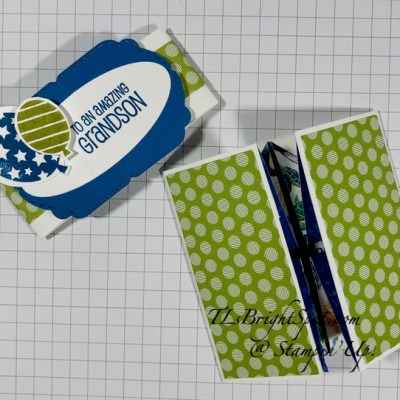
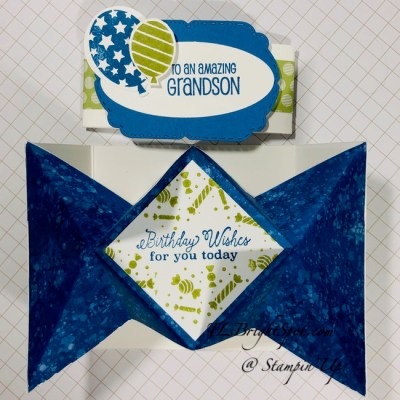
Hello there… Weather advisory for the East coast is to stay INSIDE today – it will feel like 104! Yeck!  Be safe…I have been doing doing several different fun folds lately and well, I just couldn’t stop… todays is a mini version, a little 3″ card for a grandson turning 20… Cannot believe he is 20! 6’4″ and handsome – oh my…I’m just a little bit prejudiced. 😍 Anyway, the card… This young man has come to expect something fun in the way of a card, not something you can buy at the store – yay.. getting them trained. :o) So here it is…

Mini Gate Fold
#1

Mini Gate Fold #2

Mini Gate Fold
#3

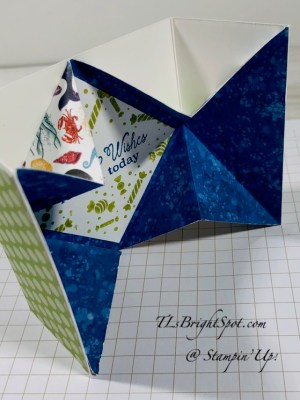
This is so cute – perhaps because it is small. And I just love the way the folds are… here it is from a another angle.

Mini Gate Fold
#4

Now you can really see all the folds. Here are the products used in this cute mini card:

  • Whale of a Tail DSP
  • Whisper White card base + belly band
  • Details Bands Dies – oval in Whisper White cs
  • Celebration Labels and Dies for the larger portion of the banner, Pacific Point cs
  • So Much Happy stamp set – balloons, fussy cut
  • A Grand Kid stamp set – front banner sentiment
  • Little Treats stamp set – inside sentiment
  • Pear Pizzazz and Pacific Point inks

Let’s see if I can tell you how to do this…

  • card stock base (Whisper White) is 3 x 6 scored at 1 1/2 and 4 1/2 on long side. Burnish well.
  • DSP panel (Whale of a Time) is 3 x 6. Mark center on the long side, at the top & bottom lightly with pencil. Fold from the top left to center bottom making a triangle – burnish and open. Fold from the left bottom to the center top making another triangle – burnish and open. Fold left portion to center, as in step one – burnish and open.
  • Do the same on the right side: right top to center bottom making a triangle, burnish and open. Right bottom to center top making a triangle, burnish and open. Right to center, burnish and open. It will look like picture #4 above even though it isn’t attached to anything yet. 😊
  • Cut a panel in Whisper White for inside sentiment, 2″ square. Stamp the sentiment from Little Treats stamp set in Pacific Point ink. Then stamp the party favors in Pear Pizzazz ink. Remember to stamp ON THE DIAGONAL. Adhere to the DSP.

Mini Gate Fold
#3

  • Now adhere adhere the DSP to the Whisper White card base: triangle on the left first making certain it is al the way to the edge. With the papers flat, adhere the center diagonal square then the right triangle.
  • Belly band: 1″ x about 7″ to go around in Whisper White, DSP is 3/4″ x about 7. Adhere the papers together and wrap around card. Secure in front with Tear n Tape. It should slide easily on and off the card.
  • Cut banner in Pacific Point using the smallest Celebration Labels & Dies. Put dimensionals on back and attach to belly band where it overlaps.
  • Stamp the banner sentiment from A Grand Kid in Pacific Point – off to the right side to allow room for the balloons. Cut with the oval from Detailed bands dies. Adhere with liquid glue to the Pacific Point banner.
  • Stamp balloons from the So Much Happy stamp set: one in Pacific point and one in Pear pizzazz. Fussy cut both. Adhere the larger with liquid glue and the smaller with a dimensional. Slide over the card and bingo this cute little mini is ready for giving.

I love this. Mini cards are just a different kind of treat and this one is extra special cuz it’s a Gate Fold.

That does it for today. Think about shopping during SU! Bonus Days. Items for this card are listed in the Aug-Dec 2020 Mini Catalog which goes live to customers 4 Aug. AND the 2020 – 2021Annual catalog. Don’t have a catalog or a demonstrator? Then talk to me and we can fix that 😁

SU! has some awesome items in their 2020-2021 Annual Catalog and a real bonus going on now – called BONUS DAYS. For every purchase of $50 from now until 3 Aug. you will receive from SU! by email, a $5 coupon that is redeemable 4-31 Aug. Such a deal!

Bonus Days. Earn in July, spend in August.

And when you order from me, please use my July host code to receive a SU! item worth $10 when your purchase is $50-$150. Sounds like another good deal, right?! It is…

Thanks for stopping by.

May you have a beautiful day.

Make someone happy by sending them a handmade card made with love.
 

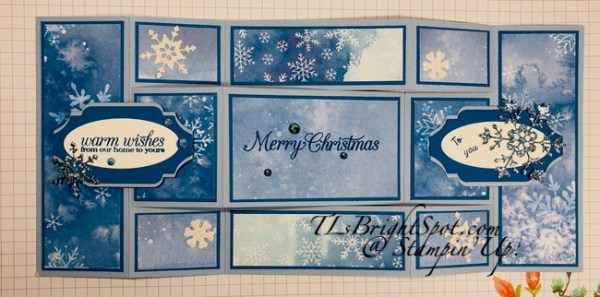
SU! Triple Shutter Card with Snowflake Splendor Suite

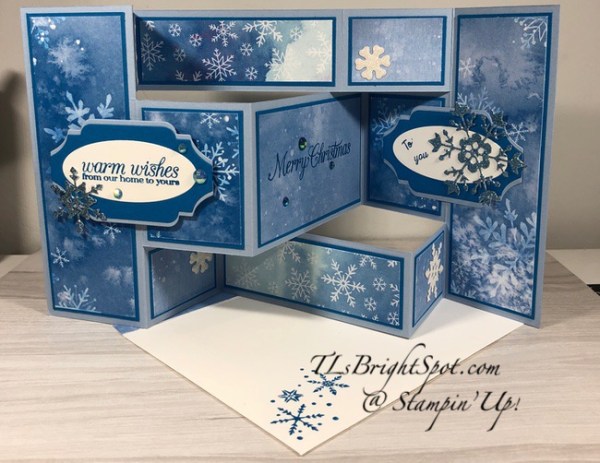
Hi Everyone – lots of new items to share with you today… products. from the Snowflake Splendor Suite AND using those to make a Triple Shutter Card! First of all, I have never made one of these before and was concerned it would be extremely difficult. It wasn’t… It did take a bit of figuring out, which DSP to go where and making certain I had the die cuts correct. But it was super fun and I felt a sense of accomplishment after. Here’s the card…

Snowflake Splendor in Triple Shutter card
#1

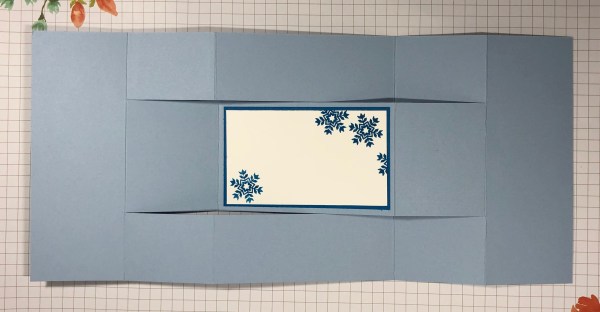
Notice how the center panel is folded mountain, valley. The upper and lower panels are just the opposite: valley, mountain. valley – three folds. Burnishing the score lines in the proper direction is one of the most important aspects of this fun fold. Notice too, that where the sentiment banners are, there is no fold. Those papers are also the same and form what I would call a ‘T’. This will help you if you can remember this when scoring and putting the papers together. Here’s another picture – a flat one that shows off every panel.

Snowflake Splendor SuiteTrifold Shutter Card
#2

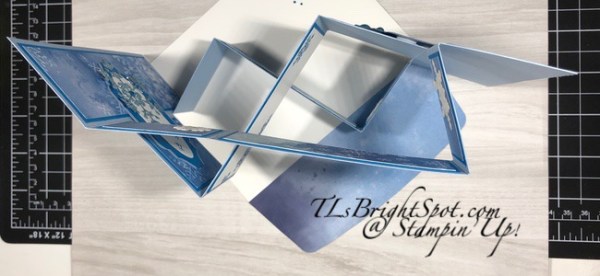
And here’s a top–down photo.

Snowflake Splendor SuiteTrifold Shutter Card
#3

This doesn’t quite show that upper strip going in the same direction of the bottom strip, but it does! Here’s a list of products I used to make this card… dimensions are listed at the bottom of the post.

  • Snowflake Splendor Suite…
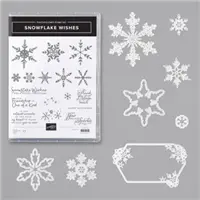
    • Snowflake Wishes stamp set
    • coordinating So Many Snowflake Dies
    • Blue Adhesive-Backed Gems
    • Snowflake Splendor DSP – 3 patterns
    • Balmy Blue Glimmer Paper
  • Seaside Spray cs – card base 5 1/2 x 12 (scored at 2, 4, 8, 10 on the long side) + extra scraps for the two banners
  • Pacific Point cs – background for all DSP
  • Whisper White scraps
  • Pacific Point ink
  • Detailed Bands Dies
  • Poinsettia Petals stamp set
  • a retired item… Dazzling Diamonds Glimmer Paper – could use Silver Foil Sheets

Basic directions:

  • Score cs base as mentioned earlier at 2, 4, 8, 10 on the long side. Card stock base for this card is Seaside Spray.

  • Turn paper to short side and place at 1 1/2″ mark: cut from first score line to bottom score line. Turn paper over, still on the short side, place at 1 1/2″ mark again and cut from first score line to bottom score line.
  • Burnish top and bottom “strips” so they are valley, mountain, valley
  • Burnish middle strip at second score line, mountain; then third score line valley. Do not burnish the middle strip first or last score lines.
  • Cut Pacific Point cs to dimensions listed below and adhere to appropriate panels
  • Cut DSP to dimensions listed below: there are 3 designs used from the Snowflake Splendor DSP. There are listed below as a, b, c. Adhere to appropriate panels.
  • Die cut snowflakes using the So Many Snowflakes Dies: 2 from Balmy Blue Glimmer Paper and 4 from Dazzling Diamonds (you could also use Whisper White cs and cover snowflakes with Wink of Stella OR cut from Silver Foil sheets)
  • Stamp banner sentiments from Poinsettia Petals stamp set in Pacific point ink (for end panels)
  • Cut banners using the Detailed Bands Dies: 2 from Pacific point, 2 from Seaside Spray (cut in half lengthwise) and 2 stamped sentiments using the oval from Whisper White. The front banner is attached with dimenionals. The other banner is attached with liquid glue.
  • Use liquid glue to adhere snowflakes
  • Attach the Blue Adhesive-Backed Gems
  • Here’s what I did with the bak of the card…

    back of Trifold Shutter card
    #6


Snowflake Splendor Suite Trifold Shutter card
#4

The envelope got a strip of the Snowflake Splendor DSP and a snowflake bunch stamped from the Snowflake Wishes stamp set.

Snowflake Splendor Suite Trifold Shutter card – envelope
#5

This is such a showy card, elegant as well ~ and I had lots of good vibes putting it together. It’s always a special feeling when creating something that I feel so good about. All of these items are available in the Aug-Dec 2020 Mini Catalog, which goes live to customers 4 Aug. If you do not have a demonstrator I would be happy to connect with you, send along this catalog and find out something about you so I can serve you better.

Right now, SU! has a special called BONUS DAYS. For every $50 you spend from now until 3 Aug, you receive an email from SU! with a $5 coupon to be redeemed 4-31 Aug. Got it? It’s a real deal… Bonus Days. Earn in July, spend in August.

And when you order from me, please use my July host code to receive a SU! item worth $10 when your purchase is $50-$150. Sounds like another good deal, right?! It is…

Card dimesnions:

  • Seaside Spray 5 1/2 x 12, scored at 2, 4, 8, 10 + scraps for sentiment banners
  • Pacific Point cs:
    • panels a ~ 1 3/4 x5 1/4 (x 2); 1 1/4 x 2 1/4 (x 2)
    • panels b ~ 1 1/4 x 1 3/4 (x 4)
    • panel c ~ 3 3/4 x 2 1/4 (x 2 – one is for the back of card)
    • + scraps for sentiment banners
  • Snowflake Splendor DSP:
    • design a ~ 1 5/8 x 5 1/8 (x 2); 1 5/8 x 2 1/8 (x 2)
    • design b ~ 1 1/8 x 1 5/8 (x 2); 3 5/8 x 2 1/8 (x 1)
    • design c ~ 3 5/8 x 1 1/8 (x 2)
  • Whisper White:
    • 3 5/8 x 2 1/8 for back of card
    • + scraps for sentiment banners

Thanks for stopping by.

May you have a beautiful day.

Make someone happy by sending them a handmade card made with love.