Good Sunday morning – actually, Palm Sunday morning. Spring is definitely in the air. I ordered several Hellebores (Lenten Rose) and they arrived this week. It’s been too cold at night to plant them yet (30 degrees) and it’s best to try to acclimate plants a bit at a time anyway. Yesterday it was 60 degrees so I took them outside is a shaded sun area, then was able to leave them overnight as temps didn’t go too low. I was able to do the same with coleus I had rooted from last years plants then potted – and they look super this morning.
You did not join me to talk about plants… this is another book fold with By the Bay 6×6 Specialty DSP ( I was on a roll) but I used a seashell pattern and paired it with Friends are like Seashells bundle. Love this bundle & I’m sad it’s going away… but it is time to make room for new :O) I also used the Lasting Label Punch for the sentiment banner and Faux Sea Glass Shapes to decorate the banner – all of which will be retiring as of May 1. Don’t you love those Sea Glass Shapes?!

For this card I began with Night of Navy cut 4 1/4 x 11 and scored at 5 1/2 & 6 3/4. I adhered the section to the card back between 5 1/2 & 6 3/4 to create the book fold, then decorated the front panels. See the image below for how it should look.

First a layer of Balmy Blue then a layer of the By the Bay 6×6 DSP. I pulled out the Friends Are Like Seashells bundle for the sentiment and a coordinating shell. I stamped the sentiment in Coastal Cabana ink on Basic White, punched it with the Lasting Labels Punch, then used a Coastal Cabana Marker to decorate the edge. For even more sea-likeness, I added the Faux Sea Glass Shapes. Aren’t they fun? I stamped the sea shell in Sahara Sand ink on another Basic White piece & die cut it with the Seaside Seashells Dies. I added the decorated label to the card front with dimensionals, then the seashell right beside it, also on dimensionals. Really & truly, the DSP does all the work on this card.

For the inside I kept it really simple… a strip of the DSP on the Basic White panel and that was it. Since the inside panel is only 4 x 4, there is not a lot of room, and with a sentiment as is on the front, a personal note is usually needed.
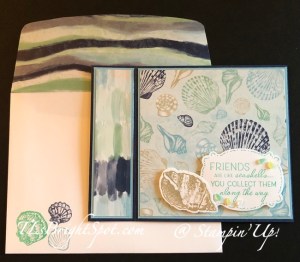
For the envelope, more of the By the Bay 6×6 Specialty DSP on the flap and then some fun seashells from the Friends Are Like Seashells stamp set on the front: inks used were Coastal Cabana, Night of Navy & Balmy Blue, bringing out like colors of the DSP on the card front.
These are all retiring products: the By the Bay Specialty DSP, Friends Are Like Seashells bundle and the Fancy Label Punch and will go away as of May 1. As with all things retiring, there is a retiring list for both the 2022-2023 Annual Catalog AND the Jan-Apr 2023 Mini Catalog. These items are available while supplies last… and the sale beings 4 April through 1 May.

Click here for the PDF of the 2022-2023 Annual Catalog
Click here for the PDF of the January to April LAST CHANCE PRODUCTS
Now… products… As you know Stampin’ Up! is coming out with their new 2023-2024 Annual Catalog May 2 and have done a color refresh at the same time. That’s why I mentioned Balmy Blue and Night of Navy are carry over colors. Below is a list of those colors being retired.
- Blushing Bride
- Pear Pizzazz
- Mint Macaron
- Rich Razzleberry
- So Saffron
- Merry Merlot
- Pacific Point
- Mango Melody
- Soft Suede
- Sahara Sand
- Bermuda Bay
I have put together a list of bundles that are items carrying over, just not as bundles.


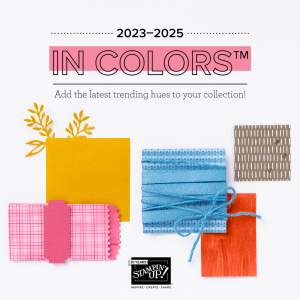
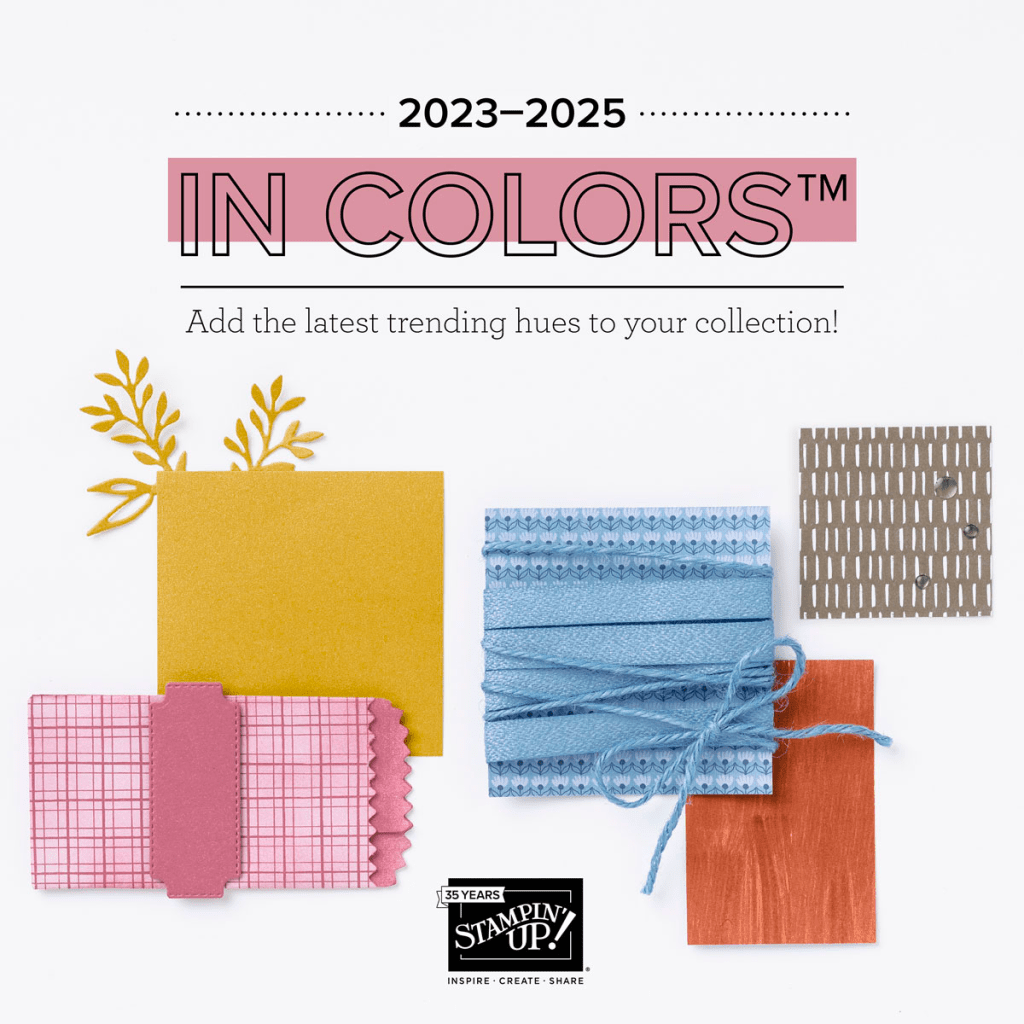
These new In Colors are:
- Pebble Path
- Moody Mauve
- Boho Blue
- Copper Clay
- Wild Wheat.
Love, love these new colors! You can see a fun video here… about these colors. Drum roll here… this next graphic shows all the colors being used in the new 2023-2024 Annual catalog. You will note there are some returning colors, meaning from past years, and new colors being introduced.

For every $50 that you order from my online store (before shipping & taxes) and when you add my current Host Code CXR49K4W you will earn 1 STAR Reward. Orders of $49.99 or below DO NOT earn any rewards. Example $50 = 1 STAR Reward, $100 = 2 STAR Rewards , $150 = 3 STAR Rewards etc. When you have earned 8 STAR Rewards you will get a FREE product order valued up to $40.00, your choice, and mailed directly to you! Is that a deal or what??? You also earn my monthly Online Class Tutorial of exclusive projects when you place an order. For any order $50 or more you will also receive 1 free gift from me valued up to $10. DOUBLE STAR REWARDS MAR 29 – APRIL 5 That means double the pleasure, double the fun.
Please note… I have had to remove card stock as a free item due to increased cost of mailing – ugh.
Card cuts:
Night of Navy: 4 1/4 x 11 scored at 5 1/2 & 6 3/4
Balmy Blue: 1 1/8 x 4 1/8; 4 1/8 x 4 1/8
By the Bay DSP: 1 x 4; 4 x 4; 5/8 x 4; 2 1/4 x 6 (envelope flap)
Basic White: 4 x 4


 Please note… I have had to remove card stock as a free item due to increased cost of mailing – ugh.