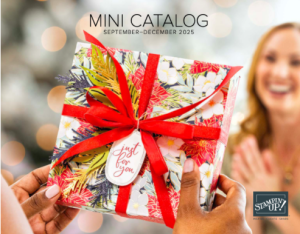
Happy Sunday and the last day of August! Remember that today is the last day (11:59 PM MT ) to get in on the 2025-2027 IN COLOR SALE. Here are the details… Click the image below to shop with me!
Sale includes select inks, cardstock, Designer Series Paper, embellishments, and other products that include these new In Colors. Only products featured on the 2025–2027 In Colors page are included in this promotion.
Some products are excluded from the sale, including the Month by Month Album Retreat 2025 kit (167338).
Products are available only while supplies last.
Here’s a video you might appreciate about color theory and the new In Colors
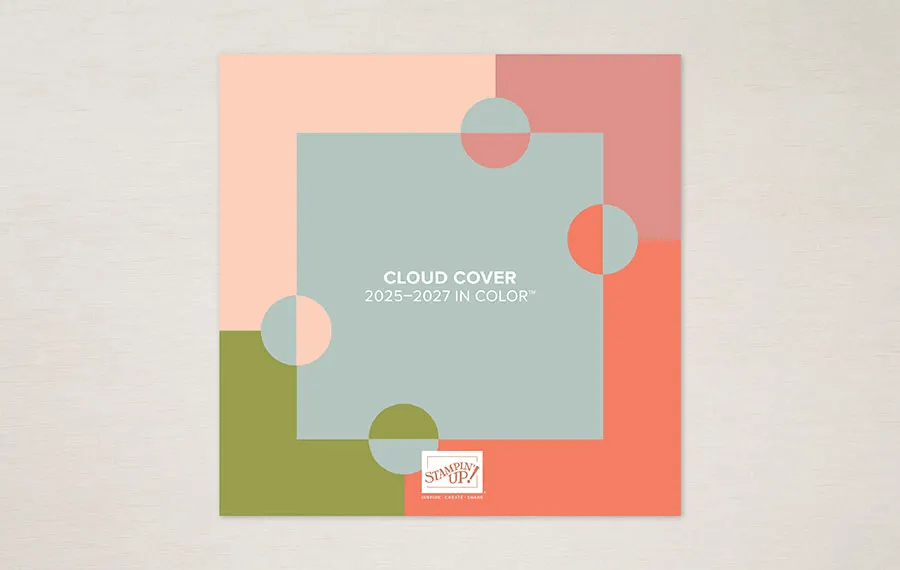
Cloud Cover: look at this options above for the many combinations of colors to pair with Cloud Cover: Petal Pink, Calypso Coral, Old Olive, & Pumpkin Pie
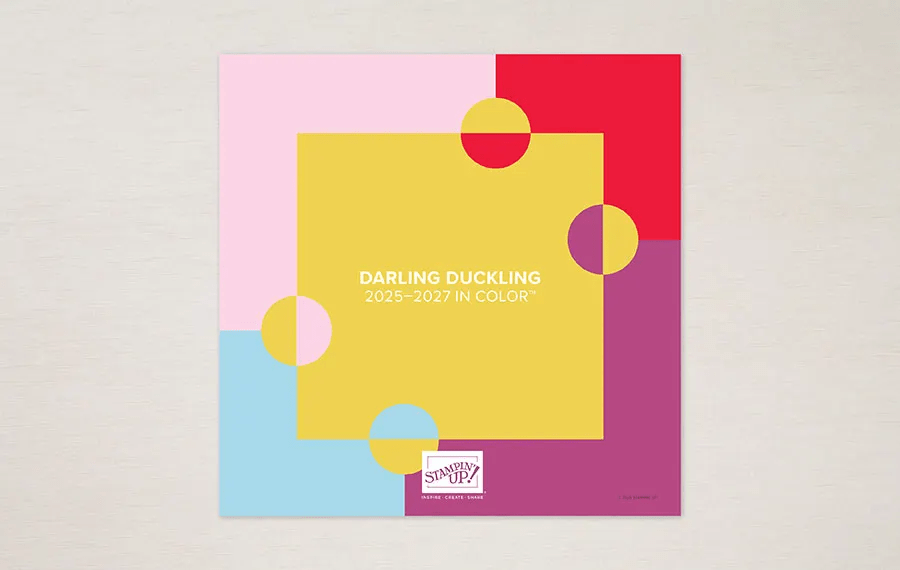
Darling Duckling color options: Coastal Cabana, Real Red, Melon Mambo, Bubble Bath
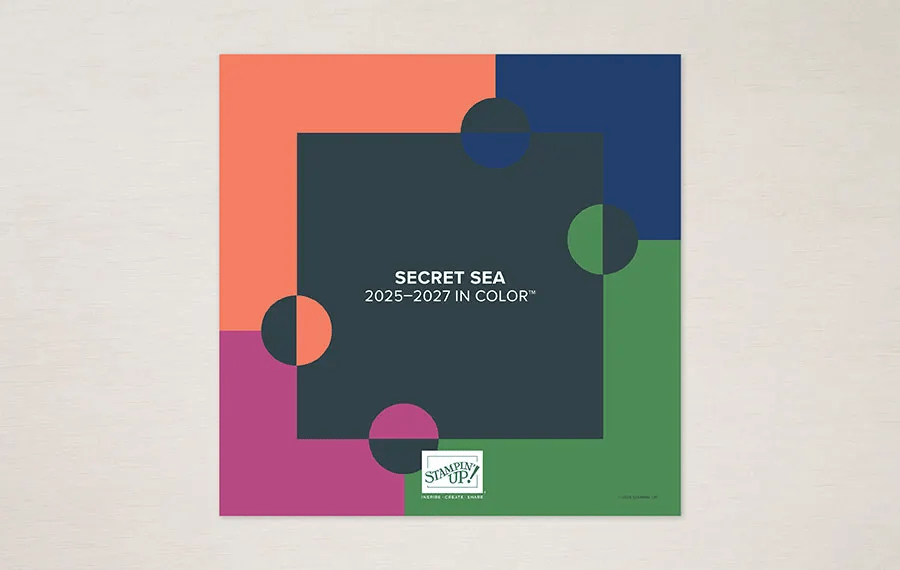
Secret Sea is one of my favorite new colors – a deep, deep blue: Balmy Blue, Berry Burst, Calypso Coral & Granny Apple Gteen
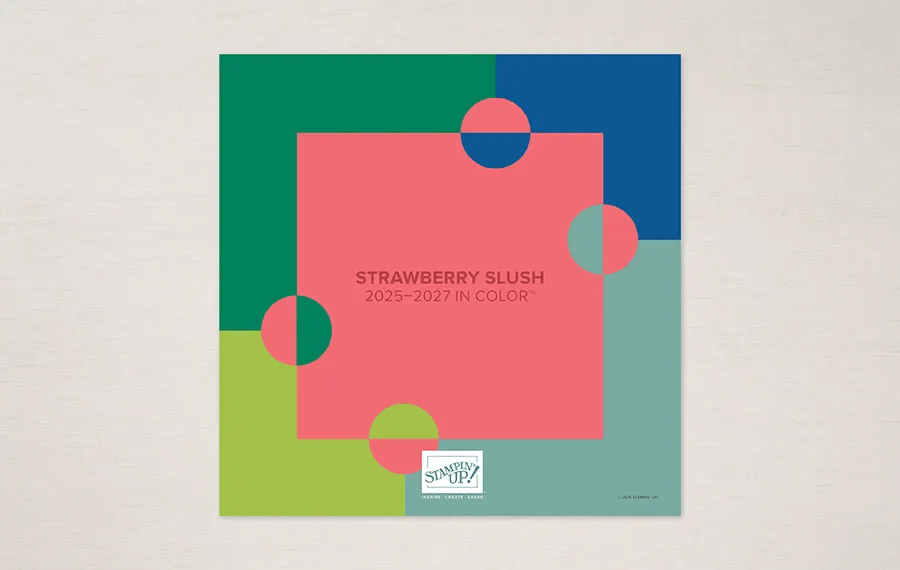
And look at these color options for Strawberry Slush – another favorite: Lost Lagoon, Coastal Cabana, Secret Sea, & Lemon Lolly
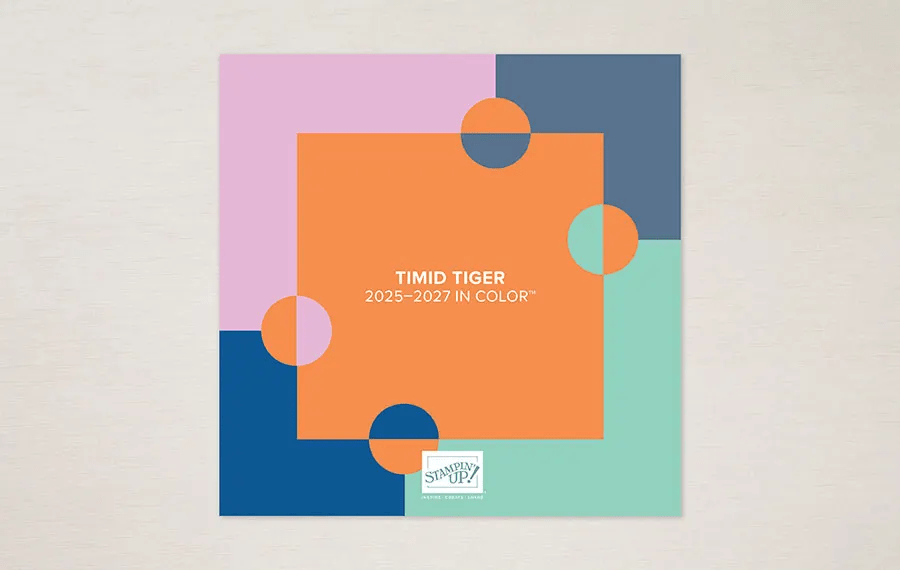
Timid Tiger and it’s color options… Lost Lagoon, Misty Moonlight, Petal Pink & Mossy Meadow
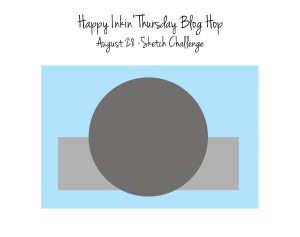
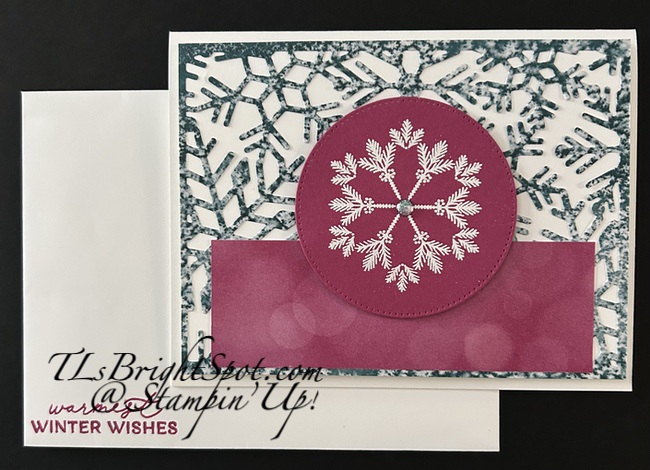
Welcome to our weekly blog hop! We have a sketch challenge today and I’m using the Delicate Pines stamp set to create the snowflake for my centerpiece and the Snowflake Kisses Dies for the background. These are ONLINE EXCLUSIVES being released Wed. Sep 3 and are part of the Elegant Pines Snowflakes Suite of products – both are bundles. The Designer Series Paper in the suite is called Elegant Pines Snowflakes DSP & it comes in the 12×12 size. It’s gorgeous – I used the ‘back side of one of the papers.
These. are so non-traditional colors that it sorta makes me second guess myself – and yet, it’s growing on me! I used the Color Wheel for help… 😀 So how to make this card.
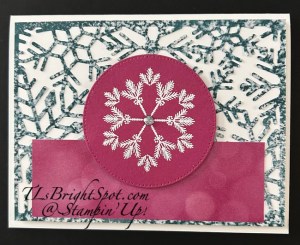
Add an adhesive sheet to the Elegant Pines Snowflakes DSP cut 4 x 5 1/4. Run through the cut & emboss machine to create die cut, remove backing on Adhesive Sheet and add to a Basic White panel 4 x 5 1/4. Put dimensionals on the back and add to a Thick Basic White card base 8 1/2 x 5 1/2 scored at 4 1/4.
Cut a strip of Beautiful Bokeh 6×6 DSP 1 1/2 x 4 and add over the die cut piece.
Stamp the snowflake image using the Delicate Pines stamp set (remember this is also a bundle, so it has dies!) with VersaMark ink on a 3″ square of Berry Burst card stock. Sprinkle with WOW! White Embossing Powder and heat set. Once cooled, die cut with 2nd largest circle of Stitched Shapes Dies and add to card front with dimensionals.
Add a single embellishment in the center of the snowflake – Two-tone Sparkle Gems.
Card front is complete!!!
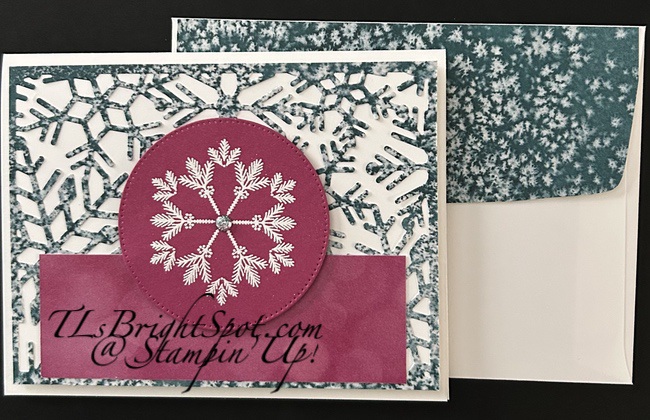
For the inside… when die cutting the snowflake background, there is a center circle that also is die cut. I set it aside at the time and added it to a Basic White inside panel (4 x 5 1/4), removing the adhesive sheet to attach it. The Greetings For All Seasons Mix & Match Ephemera pack has the perfect sentiment – and I added it with liquid glue. As a final touch, I added two more of the Two-Tone Sparkle Gems next to the sentiment. I added the panel to the inside of the card – and one & done!
For the envelope… pictures below… I stamped the sentiment in Berry Burst ink using the Delicate Pines stamp set on the front of the envelope. For the flap, I added more of the Elegant Pines Snowflakes DSP and trimmed to fit. As I said… it’s growing on me 😀
To continue on the hop, click on the ‘next’ button or click on a name. Enjoy – you will be amazed at the creations!
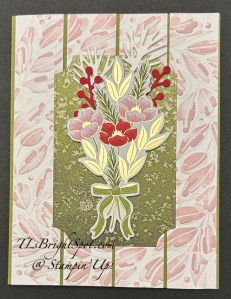
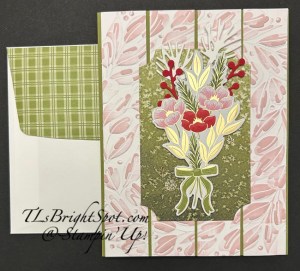
In the new September-December 2025 Mini Catalog on pages 21-27 the Traditions of Christmas Suite of products is showcased. The Christmas Wreath embossing folder creates a beautiful large wreath. Some time ago I had embossed this wreath on a Basic White panel then used a Bubble Bath ink pad to run across it. I set this aside and created other cards with the suite of products, but this wreath I left alone – until now. This is what I created with it.
The original size of the embossed wreath was 6 x 6. I cut this in 1 x 5 1/2 strips, discarding the first & last strips. The remaining four strips were added to an Old Olive card base, creating a rather stunning background. A September – December 2025 Mini Catalog release is called Branching out (page 50), and it’s a bundle (stamp set & dies). I used one of the dies to die cut the old olive panel of Elegant Pines Snowflake 12×12 DSP and attached it to the center of the card. I die cut from Basic White the additional sprigs poking out the top of the bouquet. The bouquet is cut directly from Traditions of Christmas 12×12 DSP with a Christmas Greenery Dies. With Real Red I die cut the two berry sprigs using the Christmas Greenery Dies. I added these to the card front with dimensionals and liquid adhesive. Final touch for the card front are three Traditional Sparkling Sequins in gold.
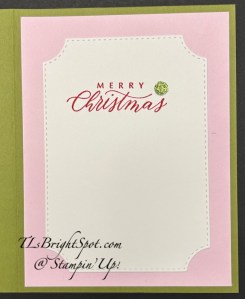
For the inside… I carried out the Bubble Bath with a panel adhered to the Old Olive card base. Using a larger Branching Out Dies, I cut the Basic White panel, stamped the sentiment in Real Red using a September ONLINE EXCLUSIVE stamp set called Hope & Peace. I added a single Traditional Sparkling Sequin in green.
For the envelope… I adhered a piece of the Traditions of Christmas SDSP to the flap & trimmed to fit – and that was it. I am going to go back and add a stamped in Real Red ink bow to the front of the envelope, using the Christmas Greenery stamp set.
If you. do not have a demonstrator, reach out to me to get the new Sep-Dec 2025 Mini Catalog!
The 2025-2027 In Color sale ends Aug 31. Click the image below to shop those products with me.
Last chance Products are just that – last chance. There are some awesome bargains on this list. Click the image below to take you to my store and the last chance products.
Thanks for stopping by. Make someone happy sending a handmade card filled with ❤️
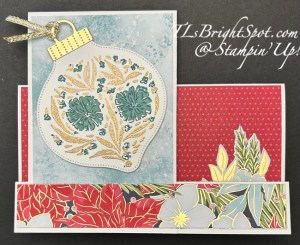
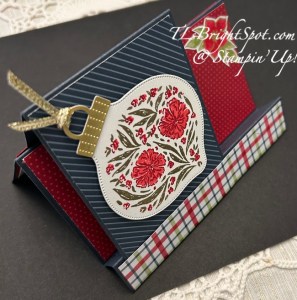
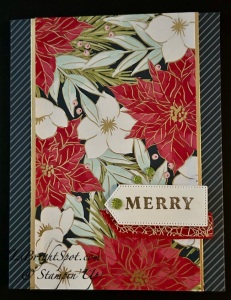
Good morning! We seem to have a more stable Internet today – thank goodness! Today’s card is extra easy & fun made with the Bauble Blooms bundle as well as Traditions of Christmas 12×12 DSP.
Putting this card together… card cuts are important and coordinating papers as well. Here I used the Traditions of Christmas SDSP plus Subtles 6×6 DSP in Pool Party. I also created the ‘Bauble’ first so I knew the contrasting to work with the focal image, the bauble.
I used the embossing buddy to eliminate any any static from the Basic White panel on which I was stamping. With Versamark, stamp the leaves, sprinkle with WOW! Metallic embossing powder in gold and heat set.
Stamp the ‘filler’ image of flowers in Lost Lagoon then stamp the detail image in Pretty Peacock. Die cut the bauble with the Bauble Blooms Dies
With Gold Foil sheets, die cut the bauble top and add with liquid glue; add the gold ribbon from the Silver & Gold ribbon combo pack – set aside
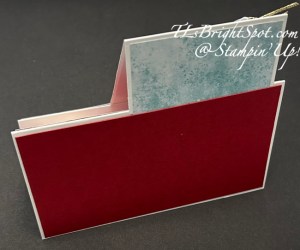
Card stock cuts:
card base: Basic White 5 1/2 x 8 scored at 3, 6, & 7. Burnish – 3″ mountain, 6″ valley and 7″ mountain
step panel: 3 x 6 scored at 4 1/4
DSP pieces:
card panels: 2 7/8 x 5 3/8 – center front – adhere now; 7/8 x 5 3/8 -save
step panel pieces: 2 7/8 x 3 1/2 – front of step, adhere; 2 7/8 x 1 3/4 – back of step, adhere
Directions:
Add step panel (long section is the front) to the very front 1″ section, making it even at the bottom. Fold the card flat and adhere the short end of the step panel to the back. Add a card stock layer (here it is Cherry Cobbler) 2 7/8 x 5 3/8 to back panel. You can add a Basic White panel to this for additional sentiment or writing, I chose not to do that.
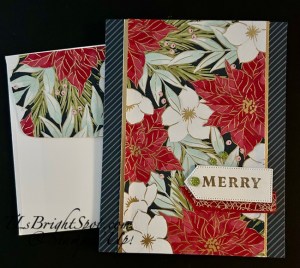
On the inside, add a piece of Cherry Cobbler 2 7/8 x 5 3/8. Add a Basic White 2 3/4 x 5 1/4 and stamp or decorate. I chose no sentiment but did add a fussy cut poinsettia & leaf image from the Traditions of Christmas 12×12 SDSP.
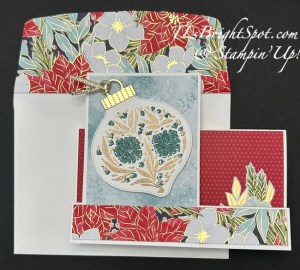
Time to add the set aside bauble and any additional decorations… The Bauble is added with dimensionals to the step front. An additional fussy cut image from the Traditions of Christmas SDSP was added to the front center panel – and the card is done!
To the envelope… I added more of the Traditions of Christmas SDSP (2 1/4 x 6) to the envelope flap & trimmed to fit. Yay! – love how simple and pretty this looks.
Here’s another I created with the same Bauble Blooms bundle and Traditions of Christmas SDSP. The card base & step panel are Secret Sea. Ink colors for the flowers are Strawberry Slush and Cherry Cobbler.
You can see the products made to make this card below but some products are not available until Wednesday Sep 3. You can Still create this fun fold with several other designer series papers and colors. Be creative, share with me what you have done.
Need catalogs? Connect with me as I would love to share Stampin’ Up! information and products to purchase.
Click the image below to shop with me for the2025-2027 In Color SALE!
Last Chance products are just that – once gone, gone for good. There are some super buys in this list. Click the image below to shop with me from this list.
Thanks for stopping by. May you have a beautiful day making someone happy with a card made with ❤️
Our Internet is quite spotty & intermittent today so not sure if this will publish appropriately. I’ve been trying all morning.
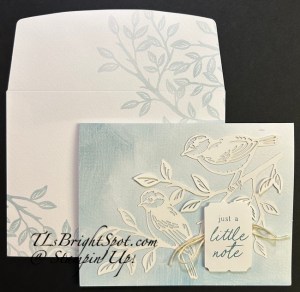
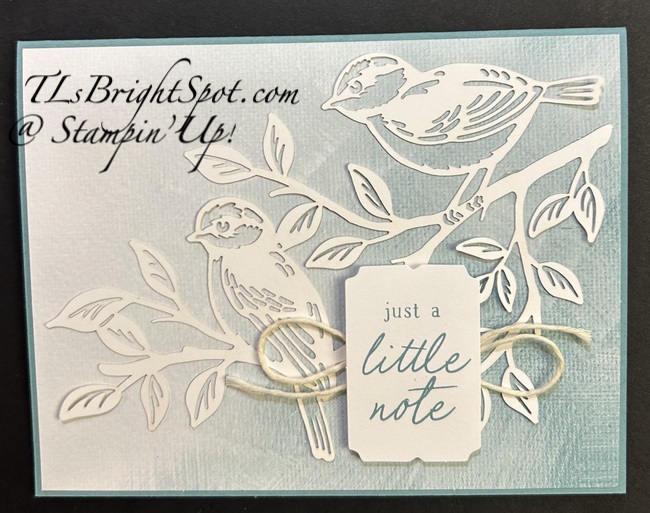
This is such a beautiful kit and I had promised to share photos of my completed cards a few days ago. I had a difficult reaction to a vaccine that really set me back for two straight days. Thanks goodness that is behind me!
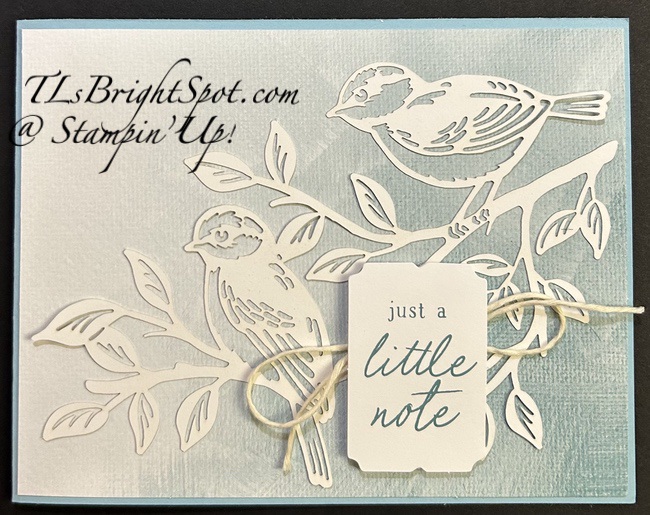
Each card in this kit has a laser-cut delicate design – so three designs for nine cards, make sense? I made one each of the ‘prescribed’ card designs and here they are
These first three cards are the original ‘plan’ of the kit and they show Fresh Freesia, Basic Beige and Balmy Blue. These next two images are of the birds with a card base of Balmy Blue on the left and Lost Lagoon on the right, both using what had been the original base as part of a layer for the card front.
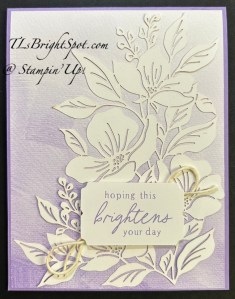
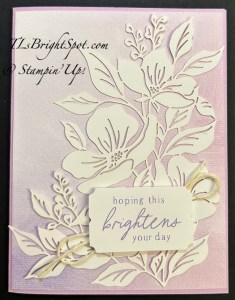
With the remaining cards bases, I trimmed each down to 41/8 x 5 3/8, thereby making a card front panel and an inside panel with each supplied card base. Here are my completed cards – nothing fancy or over the top done, just incorporated an additional card base.
Below left has a card base of Balmy Blue with the original card base as a layer for the laser-cut image. Below right uses Lost Lagoon as the card base
These two cards show card bases in Highland Heather for the left card and Fresh freesia for the right card, again using the original card base as a front layer.
I took a LOT more pictures but they just didn’t turn out that well so I have not included them – bummer!
OK – so this is one of the fabulous kits Stampin’ Up! is offering. There is always something going on… remember there are changes coming to the packaging for both photopolymer stamps and dies. Also, rubber stamps are being discontinued. Both of these will take effect at the end of each catalog. What that means is at the end of both the Sep-Dec 2025 catalog and the 2025-2026 Annual Catalog, no more rubber stamps. For full disclosure, check this post. It will give you measurements of the new packaging and you’ll see a glimpse of a new bundle available in the ONLINE EXCLUSIVES for November. There is also a video you can access.
Other items of interest… the In Color Sale ends Aug 31 and here it is the 22nd. Click the link in the image below to shop those products!
If you do not have a demonstrator and need the Sep-Dec 2025 Mini Catalog – please give me a shout-out. I’m here to help you have fun in this crafting world! And if you see LOTS of items on your wish list, consider joining my team, become apart of the Stampin’ Up! party, craft with others, learn new techniques, receive at least 20% off each order, attend a convention or two, or three 😀, get catalogs early to play with new products, JOIN HERE with me.
Thanks for stopping by today. Make this a beautiful day for others – send a card made with ❤️!
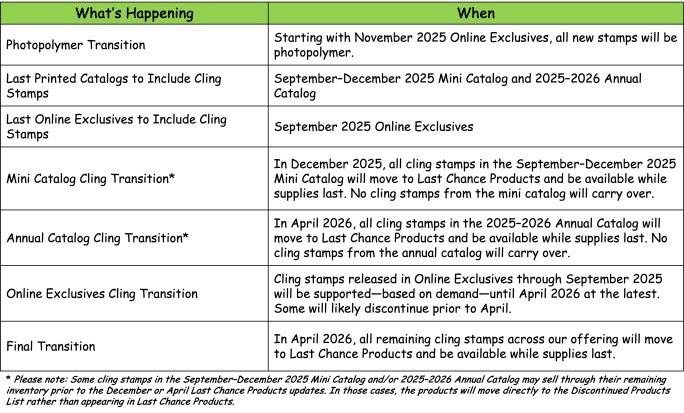
Stampin’ Up! is making some changes and they are coming SOON! I don’t want you to be left out or too surprised – so here’s the scoop…
Cling Stamps (Red Rubber)
Stampin’ Up! has decided to discontinue their cling stamp line due to challenges in sourcing the necessary raw materials. While they currently have access to enough raw materials to continue production for the time being, the supply has become increasingly inconsistent, and certain key raw materials are no longer being manufactured. They’re choosing to make this change now to ensure a smoother, more strategic transition—with minimal disruption. They will continue to offer a wide range of photopolymer stamps to support various artistic styles and techniques.
Here are some specifics about the transition from cling stamps to photopolymer:
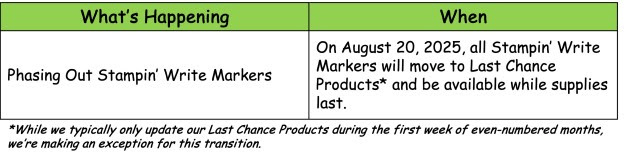
Stampin’ Write Markers – Discontinuing and Available While Supplies Last Starting Tomorrow, 20 Aug 2025!
Stampin’ Up! has also decided to discontinue Stampin’ Write Markers. With the growing popularity of Stampin’ Blends, they’ve seen a steady decline in sales of Stampin’ Write Markers. One of the primary techniques unique to Stampin’ Write Markers is coloring directly on cling stamps—a technique that will become less relevant as we transition away from cling stamps.
Here are a few details about the Stampin’ Write Markers:
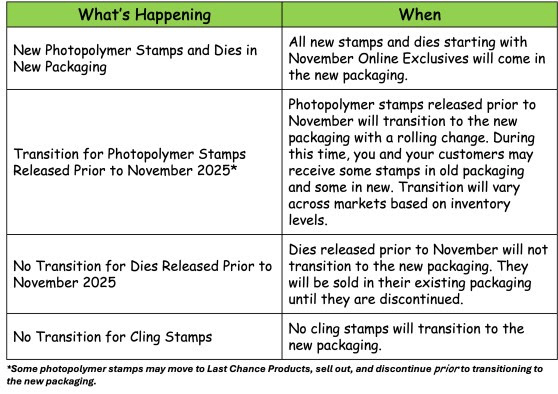
New And Improved Stamp And Die Packaging
As part of Stampin’ Up!’s transition away from cling stamps, Stampin’ Up! is excited to introduce updated packaging for stamps and dies! Because photopolymer stamps are thinner, they’re able to offer sleeker, slimmer packaging that saves space. Both stamps and dies will now come in the same size and style of packaging, making it easier than ever to store bundles and coordinating products together (WooHoo!). The new packaging is similar to their current die packaging—durable, clear plastic envelopes—but with an exciting improvement: Die packaging will now feature printed artwork for quick and easy identification! Stamp packaging will continue to display artwork as well.
Packaging Details
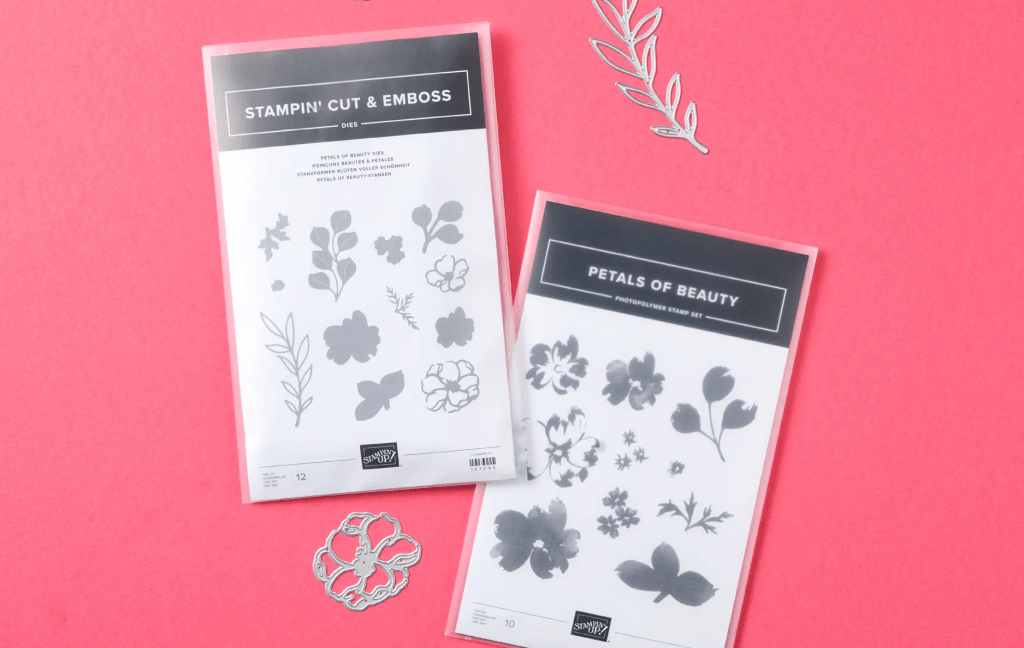
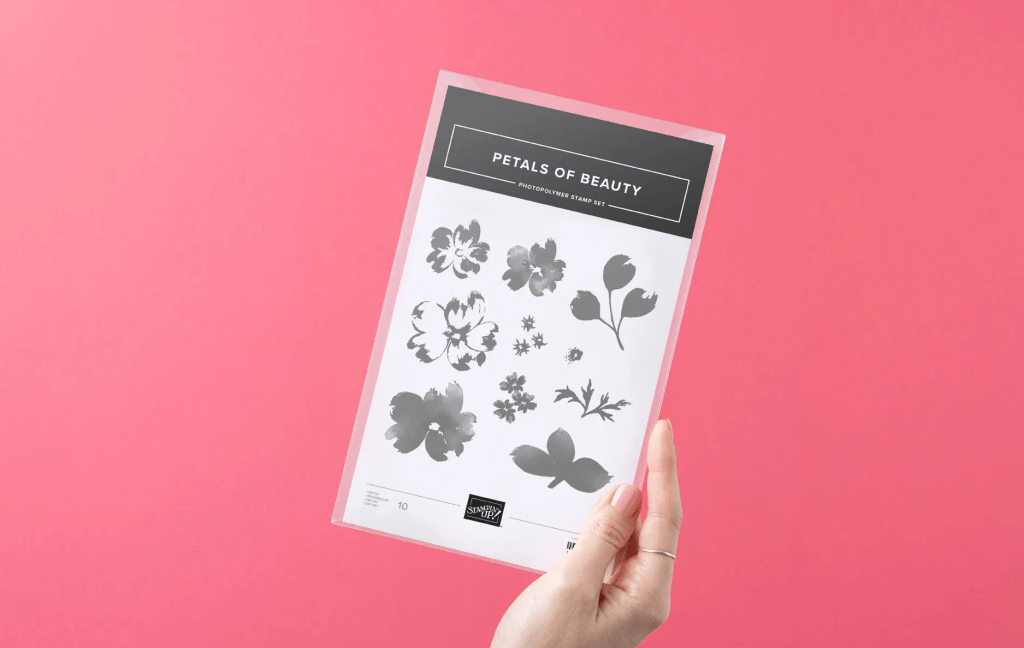
– New packaging measures 5-5/8″ x 9″ (14.3 x 22.9 cm). – Stamps and dies will now come in the same size and style of packaging, making it easy to store bundles and coordinating products together. – Packaging is clear with an insert that displays stamp or die artwork for quick and easy identification—yes, both stamp and die packaging will now show artwork! – Larger packaging dimensions allow us to showcase more stamp artwork at 100% on the insert. – Sleek, slim design will help you and your customers store more in less space. – Envelope closure includes a tuck-in flap for quick and easy opening and closing. – Packaging is sized to fit a variety of organization systems.
Here are a few photos of the new packaging AND a Nov. Online Exclusive.
And here’s a video to hear it first hand from Stampin’ Up! headquarters 😀
I use Stampin’ Write Markers a lot – and if you want to get yours before they sell out, see below!
This is all exciting stuff happening in the Stampin’ Up! world of crafting. This new packaging will be available in the November ONLINE EXCLUSIVES – and yes, you will be able to purchase these packaging materials in sets of 10 when they become available. Again – woohoo!
Remember too that the 2025-2027 In Color Sale is going on now. Click the image below to take you to this sale.
Sale Dates: August 5–31
Ordering Deadline: August 31, 2025, at 11:59 p.m. (MT)
Sale includes select inks, cardstock, Designer Series Paper, embellishments, and other products that include these new In Colors.
Only products featured on the 2025–2027 In Colors page are included in this promotion.
Products are available only while supplies last.
If you have questions about any of this, please reach out to me – I’m here to help. And if you don’t have a demonstrator, I would love to connect with you.
Yesterday was a blog hop & I used the Traditions of Christmas SDSP for my focal point. Today – still the same package of Designer Series Paper, but used very differently. First of all, there is a coordinating stamp & die bundle that coordinates and die cuts images in the paper – the Christmas Greenery bundle, available Sep 3 in the Sep-Dec 2025 Mini Catalog.
I began with one of those die cuts – of this beautiful ‘swag’. I then stamped some extra leaves from the Christmas Greenery stamp set in Old Olive ink on Old Olive card stock scraps – and die cut them as well. I adhered the ‘swag’ with dimensionals and the leaves directly to a Basic White panel. Next I die cut this gorgeous bow from Real Red and adhered it together, placed a cut dimensional and put it in place. Pulling out another bundle that coordinates is the Traditional Labels bundle that has all sentiments and label dies. I stamped on Basic White in Real Red ink, then die cut the label – love this curve die! I also die cut the same lable from Old Olive cardstock, cut it min half lengthwise to give a ‘shadow effect’ or frame to the white label. I added this to the card front with dimensionals. Once that was inn place, I felt the white space was ‘too white’ – too much white space (for me). So I pulled out the Christmas Greenery stamp that had the three berries and stamped those in Real Red all over the open spaces. As a final touch I added Traditional Sparkling Sequins in gold to the sentiment banner. This entire panel was adhered to an Old Olive card base.
For the inside of the card, I stamped the sentiment from the Traditional Labels stamp set in Old Olive on a Basic White panel, then added berries in Real Red using the Christmas Greenery stamp set. This was adhered to the inside of the card – and done!
For the envelope… more of the Traditions of Christmas SDSP but using this fun olive plaid pattern, was adhered to the flap & trimmed to fit.
Don’t have a demonstrator & need/ want a Sep-Dec 2025 Mini Catalog?
Reach out to me so I can fix that!
The 2025-2027 IN COLOR SALE continues through the end of August.
Last chance products are those that are closing out & MANY at a fabulous sale price. Click the image below to take you right there.
Kits collection… Three new kits available. Click the image below to visit and see ALL THE KITS
Remember that shopping with me has benefits… Stampin’ Up! already gives it’s own product credits when shopping with me – and when your order is $50 & up, you will receive the monthly tutorial (this month is the Painterly Pears) via email, which has lots of ideas. And Daisy points add up – sometimes I offer double Daisy Points :O)
Thanks for stopping by. May you have a beautiful day.
Make someone happy sending them a handmade card filled with love ❤️
It’s Thursday and you know what that mean – a super dooper hop. Let’s get to it! We have a sketc h challenge today and I’ve used NEW PRODUCTS from the Sep-Dec 2025 Mini Catalog. Wheee!
I used Secret Sea for my card base and adhered strips of Traditions of Christmas DSP & Gold Foil to create the front of the card. (card cuts are listed below) I stamped then sentiment in VersasMark ink then sprinkled WOW! Metallic Embossing Powder (gold) and heat set it. This small banner seemed to need some accent – so I cut a length of ribbon 1/2″ Shiny Ribbon in Real Red, angling one end to mimic the banner. To this ribbon i added 3/8″ Irregular Weave Trim with Stampin’ Seal. I adhered these to the card front, put dimensionals on the sentiment banner (die cut with the Traditional Labels Dies) and attached over the ribbons – creating a great accent. NOTE: you could easily create the same thing with card stock. My final step was adding three Traditional Sparkling Sequins – and the card front was complete! Remember these items will be available in the Sep-Dec 2025 Mini Catalog. You could also join my team now and be able to order these items as part of your starter kit!
For the inside of the card, I stamped the sentiment using the Traditional Labels stamp set and Real Red ink. I then fussy cut the image from one of the Traditions of Christmas SDSP and adhered it with liquid glue next to the sentiment.
For the envelope, more of the same main pattern of the Traditions of Christmas SDSP adhered to the envelope
Visit all those participating in today’s hop for inspiration – it’s going to be fabulous! Click the next button or click on a name. Enjoy!
The 2025-2027 IN COLOR SALE continues through the end of August. See all that’s available by clicking here.
Last chance products are those that are closing out & MANY at a fabulous sale price. Click the image below to take you right there.
Kits collection… Three new kits available. Click the image below to visit and see ALL THE KITS
Remember that shopping with me has benefits… Stampin’ Up! already gives it’s own product credits when shopping with me – and when your order is $50 & up, you will receive the monthly tutorial (this month is the Painterly Pears) via email, which has lots of ideas. And Daisy points add up – sometimes I offer double Daisy Points :O)
Card cuts for today’s card:
Secret Sea card base 8 1/2 x 5 1/2 scored at 4 1/4
Layer: Traditions of Christmas SDSP – 3/8 x 5 1/2 (2 side strips); Gold Foil – 1/8 x 5 1/2 (2); 3 1/4 x 5 1/2 (center panel)
Basic White 1 x 2 1/4 (sentiment label); 4 x 5 1/4 (inside)
Envelope: Traditions of Christmas 2 1/4 x 6 (flap)
Thanks for stopping by. May you have a beautiful day.
Make someone happy sending them a handmade card filled with love ❤️
Sneaky Peeks are so fun – you get to see new products that will be available in the Sep-Dec 2025 Mini Catalog and I get to p-l-a-y! Or should I say, experiment?! We hasve a challenge for this blog hop – “fall frenzy” and we can interpret that any way we like. So, here we go…
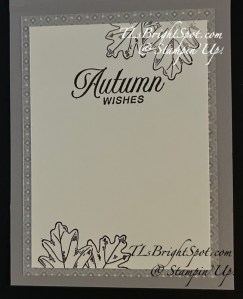
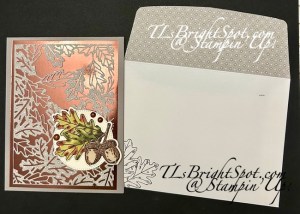
This is a BRAND NEW bundle – part of a suite of products in the Sep-De c 2025 Mini Catalog… Love, love, love this suite of products! We have LOTS of oak trees in our back area and because of that, acorns. That inspired this card – of course along with the theme. 😀 I used Gray Granite for my card base, then a layer of the shiny Earthen Toned Metallic Specialty Paper. It has a brownish coppery kind of look and as I said – is shiny. I then die cut the leaves using the Amber Autumn Dies (it’s one die) using the Autumn Toile DSP with Adhesive Sheet attached. Removing the adhesive sheet, I attached it to the Earthen Toned Metallic Specialty Paper. The main image is stasmped in Early Espresso ink and colored with several Stampin’ Blends: Old Olive, Mossy Meadow, Crumb Cake & Cajun Craze.I used a Blender Pen to move the Early Espresso ink on the acorn top and on the shading of the acorn, then filled in the rest of the acorns with Crumb Cake. After coloring, I die cut this image with the Amber Autumn Dies. I adhered this to a Stitched Shapes circle (third from largest) in Very Vanilla. This was attached to the card front with dimensionals. As a final touch three of the Streaked Dots, part of this suite of products.
For the inside of the card… I stamped the sentiment in Early Espresso ink, then stamped a portion of the acorn stamp (also from Amber Autumn stamp set. stamping in the upper right corner, re-inking and stamping in the lower left corner.. This Very Vanilla stamped panel was adhered to an Autumn Toile DSP, then attached to the inside of the card.
For the envelope… more of the same Autumn Toile DSP adhered to the flap & trimmed to fit. Again… I stamped a partial image of the acorn stamp from the Amber Autumn stamp set in the lower left corner.
Now check out what the others in this group have created just for this hop. Click the next button or click on a name to take you around.
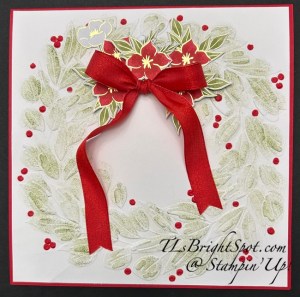
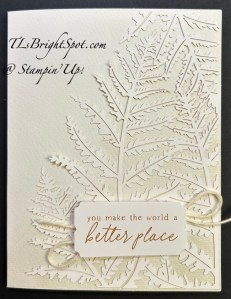
New product releases in the September-December 2025 Mini Catalog are opportunities for challenges to inspire. This embossing folder is part of a suite of products called the Traditions of Christmas Suite. Let’s look…
This is a large embossing folder… about 6×6… good for a card but also could be something to be framed. The image is beautiful and full of texture. After running the Basic White panel through the embossing folder, I used a sponge dauber & Old Olive ink to add color to the raised leaves.I then used my Dark Real Red Stampin’ Blends to color the berries. Next I pulled out one of the papers in the Traditions of Christmas SDSP and fussy cut several of the images of a poinsettia & leaves.I adhered these both with dimensionals and directly to the embossed piece. I used the ribbon in the suite – Shiny Ribbon in Real Red – to tie this gorgeous bow. It is attached with a glue dot. I used a tiny bit of Stampin’ Seal to attach the lengths of the ribbon in place. This panel was added to Real Red to create the card.
For the inside, I stamped the sentiment using the Traditional Labels stamp set (has dies too!) in Real Red ink, which is also part of the Traditions of Christmas Suite. These products will be available Sep 3 in the new Sep-Dec 2025 Mini Catalog.
Last Chance Products are a great way to get stamps, dies, embellishments, papers at a discount. Check those out by clicking the image below.
There are also some current products on sale NOW THROUGH END OF AUGUST. Check those below by clicking the image.
Thanks for stopping by. May you have a beautiful day.
Make someone happy by sending them a handmade card filled with love. ❤️


![Bubble Bath Classic Stampin' Pad [ 161664 ]](https://assets1.tamsnetwork.com/images/EC042017NF/161664s.jpg "Bubble Bath Classic Stampin' Pad [ 161664 ]")
![Bubble Bath 8 1/2" X 11" Cardstock [ 161718 ]](https://assets1.tamsnetwork.com/images/EC042017NF/161718s.jpg "Bubble Bath 8 1/2\" X 11\" Cardstock [ 161718 ]")
![Basic White 8 1/2" X 11" Cardstock [ 166780 ]](https://assets1.tamsnetwork.com/images/EC042017NF/166780s.jpg "Basic White 8 1/2\" X 11\" Cardstock [ 166780 ]")
![Old Olive 8-1/2" X 11" Cardstock [ 100702 ]](https://assets1.tamsnetwork.com/images/EC042017NF/100702s.jpg "Old Olive 8-1/2\" X 11\" Cardstock [ 100702 ]")
![Stampin' Cut & Emboss Machine [ 149653 ]](https://assets1.tamsnetwork.com/images/EC042017NF/149653s.jpg "Stampin' Cut & Emboss Machine [ 149653 ]")
![Paper Trimmer [ 152392 ]](https://assets1.tamsnetwork.com/images/EC042017NF/152392s.jpg "Paper Trimmer [ 152392 ]")
![Stampin' Dimensionals [ 104430 ]](https://assets1.tamsnetwork.com/images/EC042017NF/104430s.jpg "Stampin' Dimensionals [ 104430 ]")
![Multipurpose Liquid Glue [ 110755 ]](https://assets1.tamsnetwork.com/images/EC042017NF/110755s.jpg "Multipurpose Liquid Glue [ 110755 ]")
![Mini Glue Dots [ 103683 ]](https://assets1.tamsnetwork.com/images/EC042017NF/103683s.jpg "Mini Glue Dots [ 103683 ]")
![Paper Snips [ 103579 ]](https://assets1.tamsnetwork.com/images/EC042017NF/103579s.jpg "Paper Snips [ 103579 ]")

![Bauble Blooms Bundle (English) [ 166096 ]](https://assets1.tamsnetwork.com/images/EC042017NF/166096s.jpg "Bauble Blooms Bundle (English) [ 166096 ]")
![Basic White 8 1/2" X 11" Thick Cardstock [ 159229 ]](https://assets1.tamsnetwork.com/images/EC042017NF/159229s.jpg "Basic White 8 1/2\" X 11\" Thick Cardstock [ 159229 ]")
![Metallics Wow! Embossing Powder [ 165678 ]](https://assets1.tamsnetwork.com/images/EC042017NF/165678s.jpg "Metallics Wow! Embossing Powder [ 165678 ]")
![Embossing Additions Tool Kit [ 159971 ]](https://assets1.tamsnetwork.com/images/EC042017NF/159971s.jpg "Embossing Additions Tool Kit [ 159971 ]")
![Heat Tool (Us And Canada) [ 129053 ]](https://assets1.tamsnetwork.com/images/EC042017NF/129053s.jpg "Heat Tool (Us And Canada) [ 129053 ]")

![Brighten Your Day Kit [ 166460 ]](https://assets1.tamsnetwork.com/images/EC042017NF/166460s.jpg "Brighten Your Day Kit [ 166460 ]")
![Basic Beige 8 1/2" X 11" Cardstock [ 164511 ]](https://assets1.tamsnetwork.com/images/EC042017NF/164511s.jpg "Basic Beige 8 1/2\" X 11\" Cardstock [ 164511 ]")
![Pecan Pie 8 1/2" X 11" Cardstock [ 161717 ]](https://assets1.tamsnetwork.com/images/EC042017NF/161717s.jpg "Pecan Pie 8 1/2\" X 11\" Cardstock [ 161717 ]")
![Balmy Blue 8-1/2" X 11" Cardstock [ 146982 ]](https://assets1.tamsnetwork.com/images/EC042017NF/146982s.jpg "Balmy Blue 8-1/2\" X 11\" Cardstock [ 146982 ]")
![Lost Lagoon 8-1/2" X 11" Cardstock [ 133679 ]](https://assets1.tamsnetwork.com/images/EC042017NF/133679s.jpg "Lost Lagoon 8-1/2\" X 11\" Cardstock [ 133679 ]")
![Fresh Freesia 8 1/2" X 11" Cardstock [ 155613 ]](https://assets1.tamsnetwork.com/images/EC042017NF/155613s.jpg "Fresh Freesia 8 1/2\" X 11\" Cardstock [ 155613 ]")
![Highland Heather 8-1/2" X 11" Cardstock [ 146986 ]](https://assets1.tamsnetwork.com/images/EC042017NF/146986s.jpg "Highland Heather 8-1/2\" X 11\" Cardstock [ 146986 ]")


![2024–2026 In Color™ Stampin' Write Markers [ 163829 ]](https://assets1.tamsnetwork.com/images/EC042017NF/163829s.jpg "2024–2026 In Color™ Stampin' Write Markers [ 163829 ]")
![2025–2027 In Color™ Stampin' Write Markers [ 165292 ]](https://assets1.tamsnetwork.com/images/EC042017NF/165292s.jpg "2025–2027 In Color™ Stampin' Write Markers [ 165292 ]")
![Basic Black Stampin' Write Marker [ 162481 ]](https://assets1.tamsnetwork.com/images/EC042017NF/162481s.jpg "Basic Black Stampin' Write Marker [ 162481 ]")
![Brights Stampin' Write Markers [ 161696 ]](https://assets1.tamsnetwork.com/images/EC042017NF/161696s.jpg "Brights Stampin' Write Markers [ 161696 ]")
![Neutrals Stampin' Write Markers [ 161697 ]](https://assets1.tamsnetwork.com/images/EC042017NF/161697s.jpg "Neutrals Stampin' Write Markers [ 161697 ]")
![Regals Stampin' Write Markers [ 161699 ]](https://assets1.tamsnetwork.com/images/EC042017NF/161699s.jpg "Regals Stampin' Write Markers [ 161699 ]")
![Subtles Stampin' Write Markers [ 161698 ]](https://assets1.tamsnetwork.com/images/EC042017NF/161698s.jpg "Subtles Stampin' Write Markers [ 161698 ]")
![Stampin' Write Markers Collection [ 163136 ]](https://assets1.tamsnetwork.com/images/EC042017NF/163136s.jpg "Stampin' Write Markers Collection [ 163136 ]")


![Old Olive Classic Stampin' Pad [ 147090 ]](https://assets1.tamsnetwork.com/images/EC042017NF/147090s.jpg "Old Olive Classic Stampin' Pad [ 147090 ]")
![Real Red 8-1/2" X 11" Cardstock [ 102482 ]](https://assets1.tamsnetwork.com/images/EC042017NF/102482s.jpg "Real Red 8-1/2\" X 11\" Cardstock [ 102482 ]")
![Real Red Classic Stampin' Pad [ 147084 ]](https://assets1.tamsnetwork.com/images/EC042017NF/147084s.jpg "Real Red Classic Stampin' Pad [ 147084 ]")
![Basic White Medium Envelopes [ 159236 ]](https://assets1.tamsnetwork.com/images/EC042017NF/159236s.jpg "Basic White Medium Envelopes [ 159236 ]")
![Bone Folder [ 102300 ]](https://assets1.tamsnetwork.com/images/EC042017NF/102300s.jpg "Bone Folder [ 102300 ]")
![Stampin' Seal [ 152813 ]](https://assets1.tamsnetwork.com/images/EC042017NF/152813s.jpg "Stampin' Seal [ 152813 ]")
![Take Your Pick [ 144107 ]](https://assets1.tamsnetwork.com/images/EC042017NF/144107s.jpg "Take Your Pick [ 144107 ]")


![Secret Sea 8 1/2" X 11" Cardstock [ 165624 ]](https://assets1.tamsnetwork.com/images/EC042017NF/165624s.jpg "Secret Sea 8 1/2\" X 11\" Cardstock [ 165624 ]")
![Versamark Pad [ 102283 ]](https://assets1.tamsnetwork.com/images/EC042017NF/102283s.jpg "Versamark Pad [ 102283 ]")