Stampin’ Up! Ornate Thanks, Ornate Borders Dies, So Very Vellum Specialty DSP

Today’s card makes use of the Stampin’ Up! Ornate Thanks and Ornate Borders Dies, and So Very Vellum Specialty DSP and the Eyelet Lace embossing folder. It was inspired by TGIF Challenges #tgifc255. Here it is in all it’s glory – feminine and fresh, bringing a note of thanks to the receiver…

Here are the details for the card front:

  • Soft Seafoam 8 1/2″ x 5 1/2″, scored at 4 1/4″
  • So Very Vellum 3 3/4″ x 5 1/2″
  • Whisper White 1/2″ x 5 1/2″, 1/2″ x 3″ strip for the sentiment


  • Use the border die from the Ornate Borders dies to create this wonderful delicate edge. Adhere this to the left front of the So Very Vellum SDSP. This takes a very thin line of liquid glue. Adhere this, again with liquid glue, just along where the die edge is attached to the vellum. This is important – if glue is anywhere else on the vellum it will show. You don’t want that!
  • Stamp the sentiment from Ornate Thanks with Tuxedo Black Memento ink. Angle the one end. Put on dimesionals – I used three – and add to card front. Mine is placed 3/4″ up from the bottom. Add bling with the Noble Peacock Rhinestones. Front is complete!
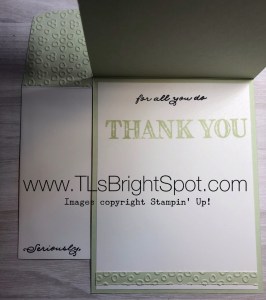
Inside the card:

  • Whisper White 4″ x 5 1/4″ Stamp the sentiments from the Ornate Thanks stamp set using Tuxedo Black Memento ink and Soft Seafoam ink. Use a leftover strip from the embossed piece from the envelope flap and adhere to the bottom. This strip is  1/4″ x 5 1/4″

The envelope:

  • Nary a “neked” envelope to be found – right? Right! Cut a piece of Soft Seafoam 2 1/4″ x 6″, spritz lightly with water and run through the Eyelet Lace embossing folder. Adhere to the envelope flap using liquid glue. Trim. The leftover scrap was cut down and used on the inside of the card 🙂
  • Stamp the sentiment from Ornate Thanks in Tuxedo Black Memento ink.

I love this card! It is just so sweet. I hope you like it too. Remember that this stamp and die set can be yours beginning Apr 1- May 1. It is part of the Early Release Ornate Garden Suite of products.  While the items will be be available in the Annual 2020-2021 catalogue, they most likely will not be as a suite of products – and therefore will be more expensive.

I would love to have you shop with me. When you purchase product $50- $149 from me, you receive a free item of choice up to $10. A deal right? Use my current HOST CODE XYW2SYNV.

May you have a beautiful day. Make someone happy by sending them a handmade card.


Stampin’ UP! Ornate Garden Suite

Eeeek! My order for the Ornate Garden Suite arrived, so yesterday I took some time to play. I only had time to create two items and I’m really excited about them. Take a peek. (OOPS … I’ll share the other items in tomorrows post.)

The card was super simple and oh my goodness, the Ornate Floral 3D embossing folder is just wonderful – little tiny flowers all over. That is going to become a favorite I’m sure. And the Ornate Layers dies – eeek! Stunning results!

Details:

  • Run the ….. lightly spritz a 4″ x 5 1/4″ piece of So Saffron cs  then run it through the Ornate Floral 3D embossing folder. The spritzing allows the papers’ fibers to bend to create deeper impressions instead of cracking and breaking and not as clear definition. Does that make sense?
  • Using about a 22″ piece of the Ornate Garden Ribbon Combo pack (I used the Old Olive ribbon in the package), wrap it around the embossed piece and tie a bow. Make certain it is centered on the paper. Use glue dots to keep in place. Adhere the embossed cs with liquid glue directly to the Whisper White thick 4 1/4″ x 11″ base.
  • Using the Ornate Layers dies cut a piece of Terracotta Tile. Cut a piece of Whisper White cs, stamp the front sentiment from the Ornate Thanks stamp set and adhere with liquid glue to the Terracotta Tile die cut. Adhere two little Gilded Gems from this wonderful suite of products. Put dimensionals on the back  of the die cut and place it centered over the ribbon. The front it complete!

The inside…

  • Cut another piece of So Saffron cs 4″ x 5 1/4″, run it through your diecut machine using another of the Ornate Layers dies. Is that gorgeous or what! This could so easily be a card front, or better yet, used to cut down the embossed piece.  Yes, yes! I must try that. On with the directions… Stamp the sentiment in Tuxedo Black Memento ink from the Ornate Thanks stamp set. Adhere to the inside of the Whisper White thick cs.
  • Those little die cut pieces are from another of the die cuts in this set that I saved, cuz I liked them. 🙂 I’ll share that die another day.

Be sure to decorate your envelope. I stamped the adorable little flower in Tuxedo Black Memento ink then used Stamp’ UP! blends to color it. Just remember, when using the blends on an envelope to slip a piece of scrap paper inside so the blends don’t bleed through the envelope. Ask me how I know that!!! And I adhered a piece from the Ornate Garden Specialty DSP to the flap. These papers are stunning folks! I can’t wait to share more of them with you.

Thanks for stopping by. Please remember to used my HOST CODE 2TMMA9HX when ordering $50 + in products. This gives you the opportunity to receive a free product of your choice from me – not to exceed $10.

May you have a beautiful day! Make someone happy by sending them a handmade card.


Stampin’ UP! Clubhouse fun fold card

Hello – today’s card is definitely masculine and I hope you like it. It can be used for a birthday, congratulations or simply a friendly card. I created it for someone who is a golfer and just needs a ‘pick me up’. Here it is…

What do you think? One of the aspects about SU! that I like so much is that colors coordinate pretty much across the board. When they package their Designer Series Paper, it lists on the back of the package coordinating colors for that particular design. And what I’ve learned is often other shades of a particular color,  say green, may work in nicely as well. And that’s what I did on this card – worked in a different shade of green.

Here are the details…

  • Cut a piece of thick Whisper White cs 6 1/4″ x 5 1/2″, scoring on the long side at 2″.
  • Cut a piece of Country Club DSP 1 3/4″ x 5 1/4″ and adhere using liquid glue to the left portion of the card front. Refer to the photo for help.
  • Using Night of Navy ink, stamp both the sentiment as well as the golfer from the Clubhouse stamp set on Whisper White card stock. Using the Golf Club dies cut out the golfer and JUST the Greatest Guy part of the sentiment.
  • Using the Stitched So Sweetly dies and Pear Pizzaz cs, cut out a rectangle large enough for the golfer.
  • Using the next larger die from Stitched So Sweetly dies, cut a piece of Night of Navy cs.
  • Using liquid glue, adhere the Pear Pizzaz to the Night of Navy cs. Using dimensionals, adhere the golfer to these two pieces. See photo for placement. Set aside.
  • Cut another piece of DSP 4″ x 5 1/4″ and adhere to the inside of the card.
  • Cut a piece of Whisper White  2 1/2″ x 3 3/4″ for the inside. Stamp in Night of Navy ink accordingly. I used the golf ball and this wonderful sentiment. When you look at the photo of the inside of the card, you will see that I separated this into two sections. There’s a simple explanation for that… I goofed when stamping and stamped the sentiment upside down! I was so annoyed with myself. So how to fix it? I simply cut it into two sections 🙂

Back to the front and adhering the panel to the card front.

With the card closed adhere the panel approximately 5/8″ from the left, top and bottom. This will mean it is pretty well centered on the card. I put the glue on the card front instead of the panel cuz I wanted to be sure not to have glue where it wasn’t needed.

Now complete the inside. Open the card and adhere the Whisper White panel to the inside so it is approx. 7/8″ from the fold, bottom and and right edges. What you want to be certain of is that this panel does not show when the card front is closed.

Remember to decorate the envelope – no “naked” envelopes please! And be certain to sign your card. People love to see your name or initials on there.

I hope you like today’s card. Masculine cards are sometimes tricky to create but I like the way this turned out.

Sale-a bration is quickly coming to an end – Mar 31. If you are still wanting to pick up any of these fabulous products do so right away. Reach out to me if you have questions – love to hear from you.

May you have a beautiful day. Make someone happy by sending them a handmade card.


Stampin’ Up! Painted Poppies Gift Card Box

Hello again! Nice to have you visiting. Sunday is a card “party” with a new group of folks and I had created cards for the hostess and determined they definitely needed a box for them. The finished box size is 6″ x 4 1/2″, just right for holding five standard A2 cards. Here’s the finished look…

Here are the super easy directions…

For the base:

  • Cut card stock (I used Pool Party) 8 1/2″ x 7″ and score at 1 1/4″ on all sides. Burnish and snip ends – see photo… add Tear ‘n Tape to corners and seal.

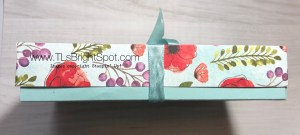
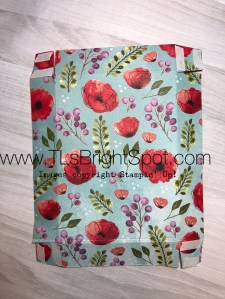
This is the inside of the box lid – perhaps you can better see the clip lines

For the top:

  • Cut Painted Poppies DSP 8 1/2″ x 7″ and score 1 1/4″ on all sides. Scoring… Use a shim or a piece of card stock to hold against the left edge of the scoring tool, place the DSP against it and score. This shim or extra paper gives just the right of extra for the lid to fit snugly without buckling the sides of the box.
  • Burnish all sides, trim as per the box base, add Tear ‘n Tape adhesive to box edges. Adhere one corner then place on box bottom and continue with other corners. Box lid will fit perfectly – not too tight but snugly.

Thanks for stopping by today. Would enjoy seeing your project when you create a gift card box.


Poppies Moments Dies

Hi All… Oh gosh – I so love today’s card…made with the SU! Poppy Moments Dies and a couple of other stamp sets and another die. 😏 As yesterday’s card, this is primarily monochromatic with Highland Heather the paper of choice. What did I do? Here are the details…

  • Card stock layer is Highland Heather (8 1/2″ x 5 1/2″ scored at 4 1/4″), with DSP from Best Dressed  6 x 6 DSP. (4″ x 5 1/4″). Adhere the DSP with liquid glue to the Highland Heather card base.
  • Layer… 3 1/2″ x 4 1/2″ Highland Heather with the Best Dressed 6 x 6  DSP (3 1/4″ x 4/ 1/4″) adhered with liquid glue. Put on dimensionals and adhere to card base, centering the layer.
  • Die cuts: Using the Poppy Moments dies, Whisper White for the outline poppy, and the two centers; vellum for the larger poppy and the leaves,  green vellum from Perennial Essence for the accent on the leaves. Color the large poppy vellum with Highland Heather dark Stampin’ blends. Adhere the poppy outline to the vellum with glue dots in the3 center only. Adhere each of the centers with mini dimensionals. Adhere the green outline vellum to the plain vellum with glue dots and slip under the poppy to your satisfaction.
  • Stamp the front sentiment  from Timeless Tropical stamp set (available as part of the SAB. catalogue) in Memento Tuxedo Black ink. Cut out with Ornate Frames dies. Adhere with dimensionals.
  • The bow – so cute, so fun… I pulled apart three (3) small strands from the flax ribbon and tied in a bow. Adhere with a glue dot.
  • The outside is done!!!

Inside…

  • Whisper White card stock cut to 4″ x 5 1/4″.
  • Adhere 3/8″ strip of Highland Heather to your liking, then add the Best Dressed 6 x 6 DSP.
  • Stamp the sentiment from Rare Blessings stamp set with Tuxedo Black Memento ink.
  • Adhere with liquid glue to the inside of the card.

Envelope…

  • Stamp the flower from Rare Blessings stamp set in Tuxedo Black Memento ink and color using Stampin’ blends markers Highland Heather light and dark and light Old Olive. I LOVE this little flower!
  • Make certain when coloring the flower that you slip a barrier inside the envelope as the Stampin’ blends bleed through. I use old card stock scrap and that works just fine.
  • Adhere a piece of the remainder of the Best Dressed 6 x 6 DSP piece to the envelope flap.

YAY! Card is complete… be sure you sign it on the back so the receiver knows you made it 😉

This is such a beautiful card. Make certain you send it to someone who could use a brightening of their day.

Timeless Tulips

Hello! The birds are singing wildly this morning. Isn’t it amazing how bulbs popping out of the ground can get us all enthused? It happens to me for sure. So today’s card is a hint of Spring – Pool Party is the lead color with just a hint of Petal Pink and Soft Seafoam. Here it is…

  • Card base is 4 1/4″ x 11″, scored at 5 1/2″ – Pool Party
  • Layer 4″ x 4 1/4″ Pool Party dry embossed with the beautiful Parisian Flourish 3D embossing folder. Adhere with liquid glue directly to the card base
  • Layer #2: 3 1/4″ x 4 1/4″ Pool Party. Cut 3″ x 4″  Parisian Blossoms Specialty DSP and adhere with liquid glue to the smaller Pool Party. Put dimesnionals on the back and adhere to the card base by centering it on the card.
  • Layer #3: Using the Stitched So Sweetly dies and second from largest scalloped edge, cut a piece of Whisper White. Stamp the sentiment in Tuxedo Black Memento ink, the stamp the smaller tulip in Petal Pink, followed by the stem and leaves in Soft Seafoam.
  • Adhere pearls from Share What You Love OR color pearls using Stampin Blends markers.

Love the simplicity of this primarily monochromatic look. The sentiment chose lends itself to being used as a birthday, sympathy, congratulations or just a note card.

Thanks for stopping by. I hope you enjoyed the card today. This kind of card lifts my spirits and I hope it does the recipient as well.

When you’re ordering from me, Please use my current HOST CODE 2TMMA9HX if your order is between $50- $150 and I’ll send you a product of your choice not to exceed $10. If your purchase is over $150, don’t use a host code – accept the freebies offered by Stampin’ UP! and I’ll still send you a product of your choice not to exceed $10. One fvrfee item per month per customer, thank you.

May you enjoy your day. Make someone happy by sending them a handmade card!

Painted Poppies

I just cannot get enough of the Painted Poppies stamp set! Today’s post was inspired by another demonstrator – Sharon Burkert – must give credit where credit is due!

Using Tuxedo Memento Black, I stamped the Painted Poppies on Whisper White CS then colored them with Rich Razzleberry blends. I wanted this card simple so used no other colors. While the Rich Razzleberry blends was in my hand I colored the Metallic edge ribbon until I liked the depth of color. The blends dry so quickly and easily and doesn’t rub off on your fingers either. It allows us / you to coordinate with whatever is being created. Fun right?

OK – on with the directions… I cut out the Painted Poppies to the size I wanted with the Layering Squares dies then used the scalloped die from the same set to create this delicate edge, cutting it in Rich Razzleberry. I adhered the Painted Poppy to the Rich Razzleberry scalloped edge, adhered dimensionals to the back and set aside.

Using the Scripty 3D embossing folder, run a 4 1/8″ x 5 3/8″ piece of Whisper White through the embosser. Remember to lightly spritz the paper with water to get a wonderful indentation. Adhere another piece of Whisper White cs with liquid glue behind this to give this layer more sturdiness. Wrap the blends colored ribbon around these two layers and tie a knot. Place the Painted Poppy squares where you want them and voila! Put dimensionals on this layer OR adhere directly to the Whisper White card base (8 1/2″ x 5 1/2″ scored at 4 1/4″).

This card could fit so many occasions depending on the sentiment used on the inside. I see this as a sympathy or birthday or thinking of you card – so many possibilities.

I hope you enjoyed todays card. Please share a photo of your creation if you are inspired by this post. When ordering from me, pleaser use my HOST CODE: 2TMMA9HX if your order is over $50. I’ll send you a product of your choice not to exceed $10 – yay! a freebie for ordering from me. If your order is over $150 SU! allows you to order freebies.

May you have a beautiful day. Make someone happy by sending them a handmade card!

February Paper Pumpkin from SU!

Extra short post today but I wanted to share with you my current creations with the February PP kit. PP is such a treat to receive with all the embellishments, glue dots, dimensionals, card stock AND directions. I usually create one or two per directions that come with the kit, but not always. Here’s what I’ve done thinking “outside the box” …

Questions about PP? Please contact me for more details… now is a great time to invest in this monthly subscription. If you are interested in the March subscription you may order until Mar 10. One of the ideas SU! is using is coordinating the PP with current stamp sets. WOW, does this make it even more valuable for future use.

For now – ta ta. Enjoy your day… make it better by creating and sharing what you love to do!

Bloom and Grow, matching dies Budding Blooms

I really enjoy coloring, so using the blends is very relaxing to me. How about for you? This card in particular was pretty simple & easy to do. What makes a difference in a card are the details. For instance, did you notice the coloring on the background? That was done oh so casually with both light and dark Stampin Blends. It’s a bit too straight for my liking but for today we’re going with it.

Here are the details:

  • Very Vanilla card base cut to 4 1/4″ x 11″ and scored at 5 1/2″ – opens from the left
  • Poppy Parade layer 4 7/8″ x 3 5/8″, put on card with dimesionals
  • Shimmer card layer 4 3/4″ x 3 3/8″: use Stampin blends Petal Pink to color, alternating light and dark. Adhere Shimmer paper to the Poppy Parade layer with liquid glue.
  • Stamp the flower in Memento black ink; color flowers with Poppy Parade blends light and dark; color leaves with Call Me Clover blends light and dark; color berries with light Poppy Parade; cut out with appropriate die and adhere with dimentionals onto the Shimmer paper.
  • Stamp the sentiment on a scrap of Basic Black cs with Versamark ink. (Use the embossing buddy first to clear the cs of static) Dip into white embossing powder, flicking off excess, and heat emboss. Adhere to card fron with dimensionals.
  • YAY! Front is done…

Inside… I wanted to keep this really simple so stamped one of the flower bouquet on the bottom right side in Memento black ink.

Envelope… Again, wanted it to be simple but eye-catching so dry embossed a 6″ x 2 1/4″ Poppy Parade with the Coastal Weave 3D embossing folder. This was adhered with liquid glue and cut to fit.

This card could so easily be done in most any shade using the Stampin Blends. Whatever color you use for the flower, coordinate the underlying paper and the envelope flap. YAY! Can’t wait to see what you do with this stamp set.

OK, after writing this post, I just had to share the rest of the cards I created. I had a class Monday night and did some extra stamping to share how to move the light and dark blends. Here are several:


Enjoy creating, crafting, sharing. Please use my HOST CODE 2TMMA9HX if your order is over $50 and I will send you a free $10 .item of your choice. One freebie per customer per month, thank you!

Bloom and Grow with coordinating Budding Blooms dies

Oh my goodness… I think I have shared with you how much I enjoy coloring. If not, well now you know 😏 The weather here was gray, overcast and rainy – a bit on the dreary side to say the least. Hubby was home and wanted a fire in the fireplace so I brought my crafty stuff to that cozy spot and had a “jolly good” time.

The night before I had taught a class and demonstrated coloring with blends. I had stamped and cut some extra pieces so I could demo a different color than what we were making in class. I only did one the night of the class and this set was calling me to do more. With this delightful, cozy setting of the fireplace ablaze, our Springer Spaniel lying close to the fire and my hubby reading, I couldn’t resist staying close by.

Here are the cards… card 1 is the one created in class. The others are what I completed yesterday afternoon. n

Blends used varied with each card… the first is Poppy Parade and coordinating blends with Petal Pink both light and dark blends for the back ground; and Call Me Clover light and dark for the leaves, Poppy Parade dark for the berries. The next card shows Granny Apple Green light & dark blends for the back ground, Petal Pink light & dark for the flowers, Mint Macaron light & dark blends for the leaves, and light Flirty Flamingo for the berries. The next card was kept very simple – no card stock background and I love it! Highland Heather light & dark blends for the flowers, Granny Apple Green light & dark blends for the leaves, dark Flirty Flamingo for the berries and Soft Seafoam light and dark blends for the back ground. Card four: light Poppy Parade + dark Petal Pink for the flowers, Granny Apple Green light & dark blends for the leaves, soft Seafoam light and dark blends for the background and oh yes, dark Poppy Parade for the berries. Last but not least: the yellow card is affixed to Daffodil Delight card stock but is colored using both light and dark Mango Melody blends, Old Olive light and dark for the leaves and dark Flirty Flamingo for the berries, Mint Macaron light and dark blends for the back ground. Whew – a whole lot of fun!

Remember when using the blends, it’s better to start with the darker shade first and only do a small area then sweep in with the lighter blend to do what – blend together. 😁 The reason for doing small areas is to keep the blend moist so it easily “moves” for the blending process.

I hope you enjoyed todays post. Would you share with me which card you like the most… I’m leaning toward the Highland Heather but I also really like the yellow card. I also liked putting the card stock on an angle as opposed to straight on. Do you have thoughts on that?

When you shop with me and your purchase is over $50, please use my CURRENT HOST CODE – 2TMMA9HX to receive a free gift from me.

May you have a beautiful day – share what you love!