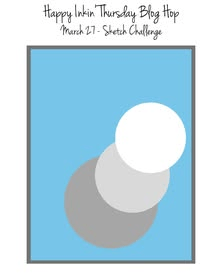
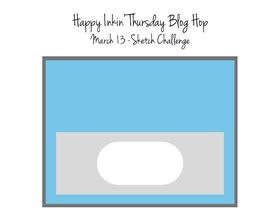
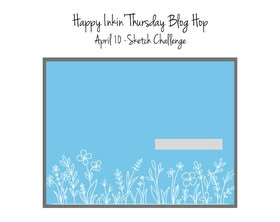
Hello – and WELCOME to the Happy In kin’ Thursday Blog Hop. We have a sketch challenge today & I’ve maybe stretched the parameters just a bit, but I like the card and think it works.

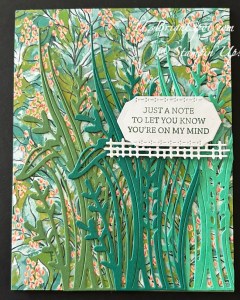
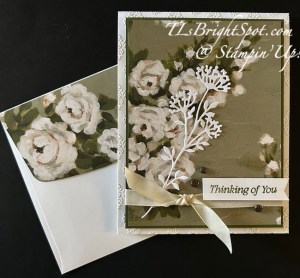
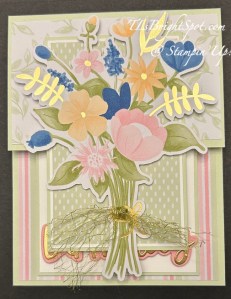
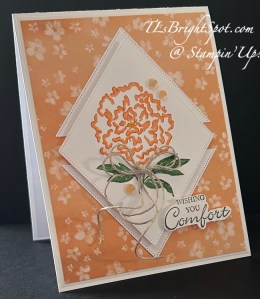
I’ve used some ONLINE EXCLUSIVE products for this card – primarily the Mixed Media Florals DSP, the Mixed Labels Bundle and the Mixed Florals Bundle. I LOVE this DSP for the background. It reminds me a bit of a jungle and it was adhered directly to the Garden Green card base. The multiple die cut leaves are in Garden Green, Shaded Spruce and Shy Shamrock & I used the Mixed Florals Dies to create them. I simply adhered them with dabs of liquid glue but could very easily have used Adhesive Sheets as a backing, I just didn’t. The next step was to stamp the sentime on a Basic White scrap in Garden Green ink using the Mixed Labels stamp set. I die this and the rectangular piece using the Mixed Labels Dies. I adhered the fence-like piece to the back of the sentiment label then added dimensionals to the sentiment & attached it to the card. Viola!
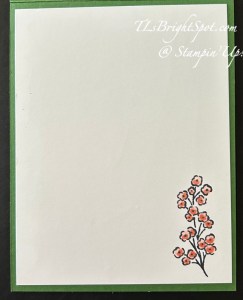
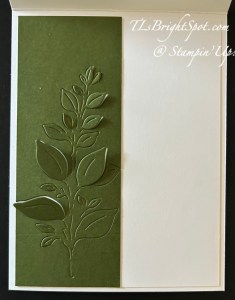
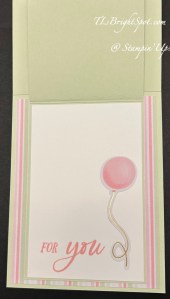
For the inside… I stamped this beautiful floral image in Memento ink on the Basic White panel then colored it with Calypso Coral Stampin’ Blends. Done!
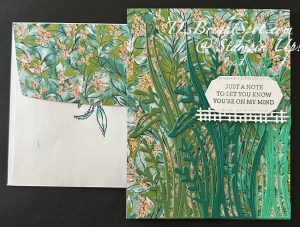
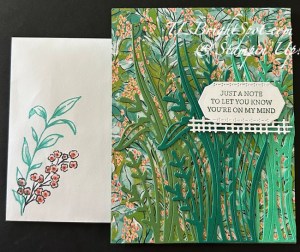
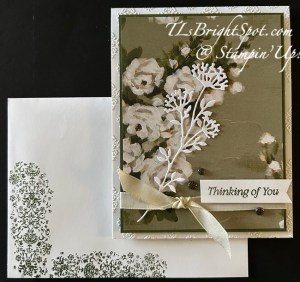
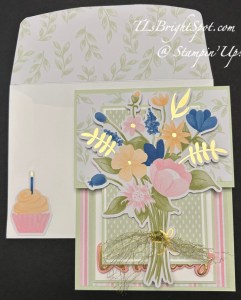
For the envelope… I added more of the Mixed Media Florals DSP to the flap (after messing up the stamp image of the leaf!), trimmed the paper to fit. Since the mess-up of the stamped image on the flap, I decided to add some ink ‘edging’ to the remaining leaves, making them look like the leaves on the DSP :O) I added some extra ‘doodles’ for fun – all this with a SU! Journaling Pen. For the envelope front, I stamped the image of the leaves (just fine) with Shy Shamrock ink & used a Blends in Shy Shamrock to add some extra color depth. I also stamped the same sweet image as on the inside of the card in Memento ink & colored the flowers with Calypso Coral Stampin’ Blends. Finis…
This is such pretty DSP and the coordinating bundles are so perfect to layer or use individually. I encourage you to visit my ONLINE EXCLUSIVE store – see info below.
Now, make the rounds of the hop – don’t miss a single one :O) & have fun! Click on the next button or click on a name to make the rounds.

When shopping with me and your purchase is $50 or more, you will receive a SU! item valued up to $10 and the current months fabulous tutorial – for April, it’s Memorable Blooms. And use my HOST CODE until April 12. If you do not have a demonstrator, I would love to support, encourage and help you create your best. Contact me!
HOST CODES are going away April 12, but something even better for you is happening – you will be earning Stampin’ Rewards when your purchases are $20 or more.
Remember the LAST CHANCE LIST ? Click here to shop that list.
Click this link to see all that’s available in the Stampin’ Up! world – this includes the link to ONLINE EXCLUSIVES – and make sure my name is at the top when checking out. This link allows you to see the online exclusives, Kits Collection, The Paper Pumpkin information, etc., etc. If you have questions, please connect with me!
Thanks for stopping by. May you have a beautiful day!