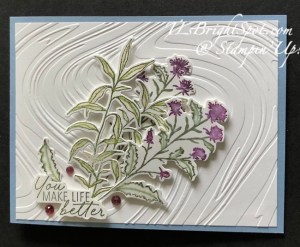
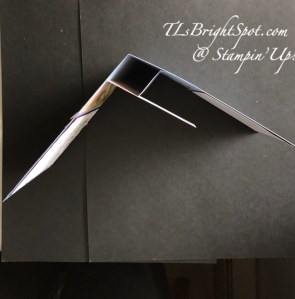
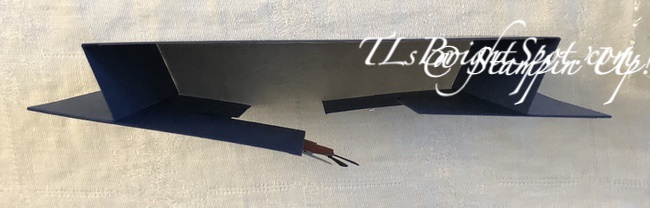
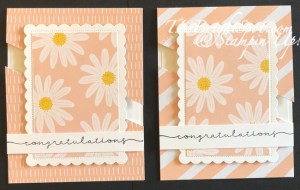
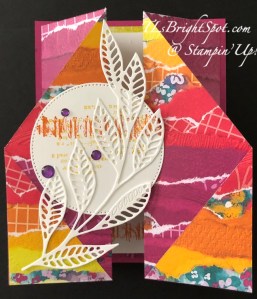
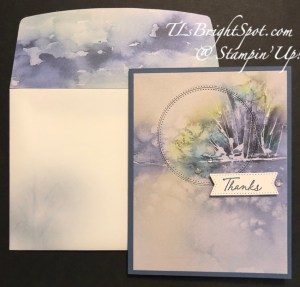
Good morning, good morning! It’s cool this AM – 57 – after a couple of days of 100% humidity and 87 temps. This feels much more refreshing :O) Thursday was my card class and we did a window z-fold card, similar to what I posted a week or so ago, which you see here. I’m hooked on this style card – just sayin’. I needed a couple of cards – thank you and another for a friend recovering from surgery – and here’s what I did.
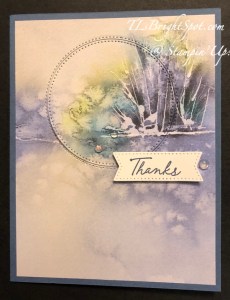
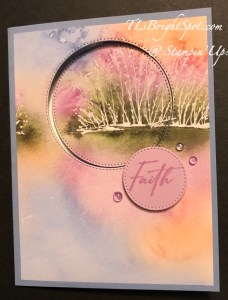
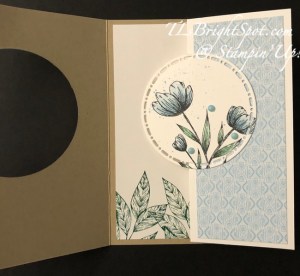
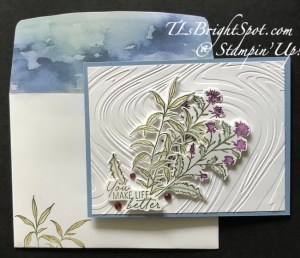
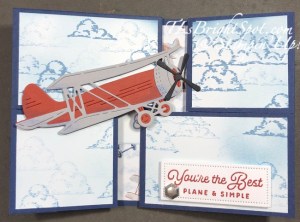
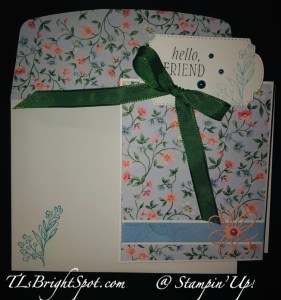
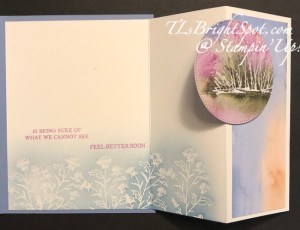
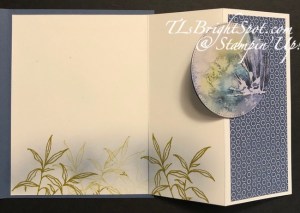
I really like the colors of the thank you card with the Misty Moonlight card base than the other card. However, when making a card for a specific person, and the card on the right was, we follow what would be best for them. The card cuts and basic directions are the same for both cards. The main difference is the inside on the second card using the emboss resist technique. The Stitched Shapes Dies were used for the circles and the banner die cuts.
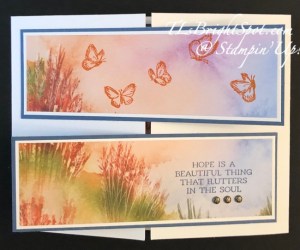
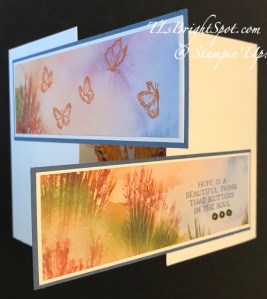
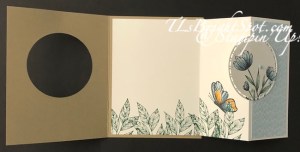
I stamped the partial image of these flowers in VersaMark ink using the Thoughtful Wishes stamp set – re-inking and stamping across the bottom five times. I sprinkled white embossing powder over the image, heat embossed with the heat tool and let it cool for a bit. Once cool, I took a Blending Brush and Boho Blue ink and with swirling/ circling strokes went over the stamped images. Here’s a close-up.
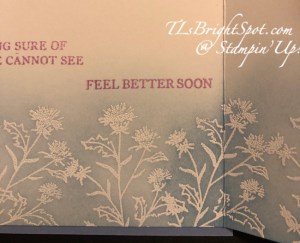
I love this effect and it mimics the Thoughtful Journey 6×6 DSP. I stamped the sentiments in Fresh Freesia ink using the Unbounded Love stamp set.
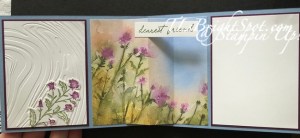
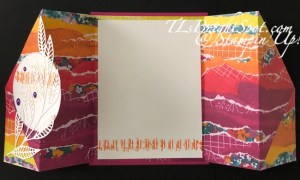
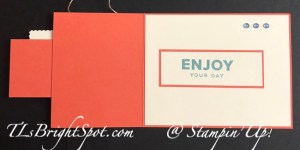
Here’s the inside of the ‘thanks’ card.
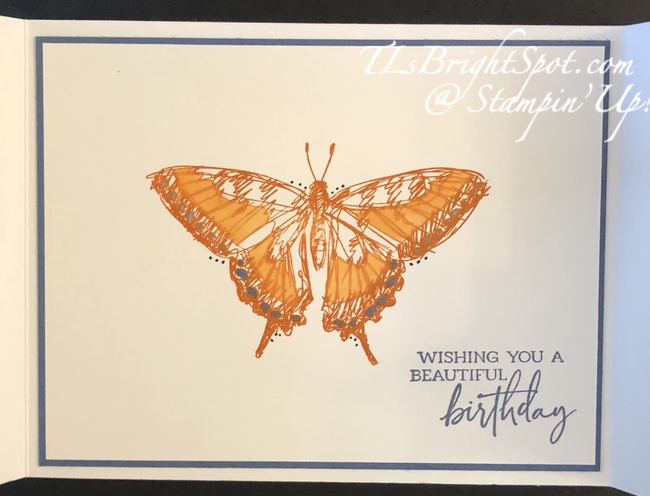
On this card I stamped the partial image in Wild Wheat ink, mimicking the image on the front of this card. I used a Blending Brush and Misty Moonlight ink to add color over this.
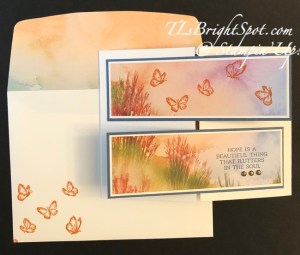
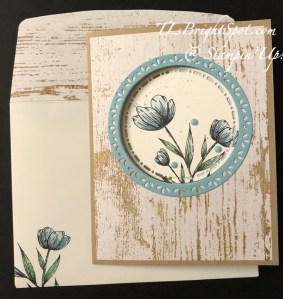
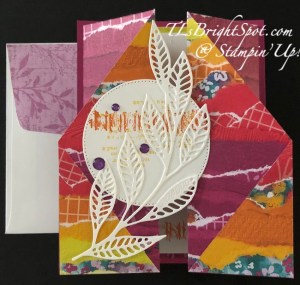
After stamping the image on the inside of the card and not really ‘sold’ on the image, I looked over my stamps and found another image I liked better to use on the envelope front. I stamped it in Whisper White ink then heat set it since it is a pigment ink and takes a bit to dry. I then used that same Blending Brush that I had used on the inside with Misty Moonlight ink and colored over the image. In person, the image is obvious – in the photo it is not. The stamp set used for that was the Charming Ducks stamp set.
Thoughtful Journey 6×6 DSP item 163303
Thoughtful Wishes stamp set, also on pg 47 – item 163305 HOWEVER… there are coordinating dies, and when purchased as a bundle during the month of June, it is 20% off – Thoughtful Wishes bundle item 163314
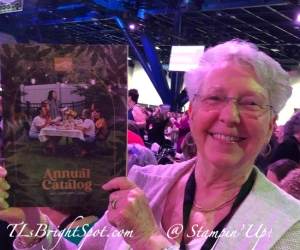
These may be found on page 47 in the 2024-2025 Annual Catalog.
here’s a link to take you directly to the items available in this catalog –
and to shop with me.

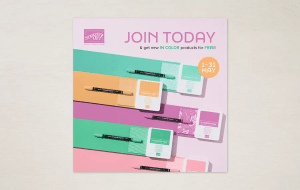
STAMPIN’ UP! STAMP & DIE BUNDLE 10% OFF SALE!!
Sales Period: 5–30 June 2024
Ordering Deadlines
Phone: 28 June 2024 at 6:59 p.m. (MT)
Online: 30 June 2024 at 11:59 p.m. (MT)
- Get an additional 10% discount on stamp and die bundles only (that’s a total of 20% discount on stamp and die bundles!). This excludes suite collections, stamp and punch bundles, bundles not yet released to customers, and any other bundles*.
- Save 10% on Stampin’ Cut & Emboss Machine and Mini Stampin’ Cut & Emboss Machine (white and Boho Blue).
- The 10% discount applies automatically to stamp and die bundles in all orders… including Starter Kit orders.
- See and shop all qualifying bundles in the online store.
*Please note Close to My Heart products are not included in this promotion.

Stampin’ Up! Demonstrators get the SAME discounts and sales that CUSTOMERS do – on TOP OF their demonstrator discount
Keeping that information in the forefront of your mind,
NOW is a perfect time to JOIN THE TEAM!
Join with me by following this link...
To view all the available ONLINE EXCLUSIVES, click here.
Clearance items may be found here
While you’re looking around in my store, remember there are some stunning kits available, for all ages and all seasons – even Christmas! And while you’re shopping, I offer fringe benefits to my customers: free tutorial of the month and a FREE Stampin’ Up! item valued to $10 – all for a $50 order, before shipping and taxes. Use my current host code to receive those benefits – especially when your order does not exceed $150. Make certain my name is listed as your demonstrator when checking out! :O)
HOST CODE BAQG9RSE
Thanks for stopping by. May you have a beautiful day. Make someone happy when sending them a handmade card filled with love.
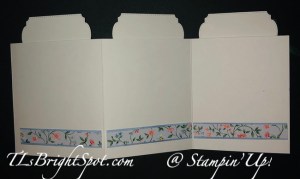
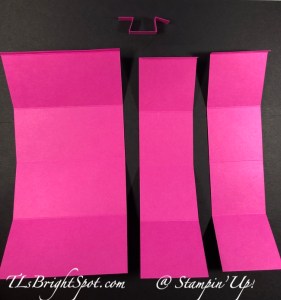
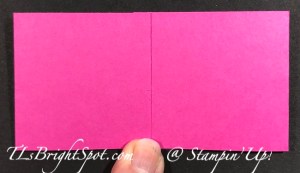
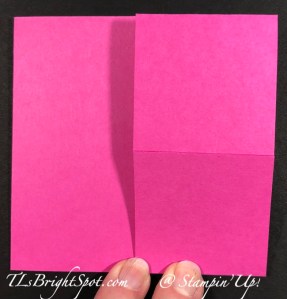
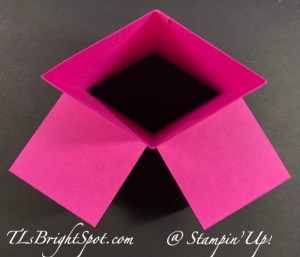
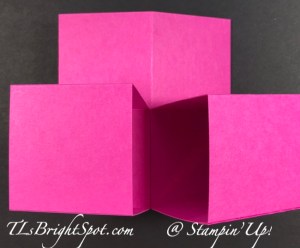
CARD CUTS:
- Card base 8 1/2 x 5 1/2 scored at 4 1/4
- Basic White inside: 8 1/2 x 5 1/4 scored at 4 & 6 1/4, burnishing to make it a z-fold.
ITEMS USED:
- Thoughtful Journey 6×6 DSP
- Thoughtful Wishes stamp set / bundle available!
- Stitched Shapes Dies
- Blending Brush
- Boho Blue nink
- Misty Moonlight ink
- VersaMark ink
- White embossing powder
- Heat tool
- Stampin’ Die Cut machine
- Paper Trimmer
- Bone folder