Stampin’ Up! Biggest Wish Masculine Birthday

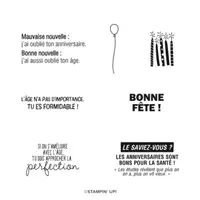
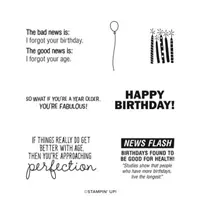
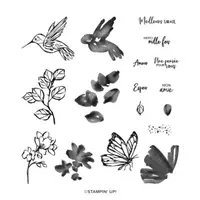
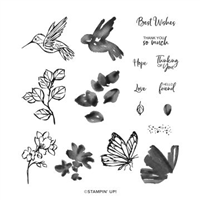
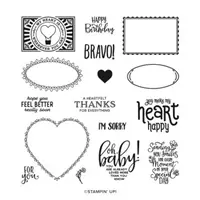
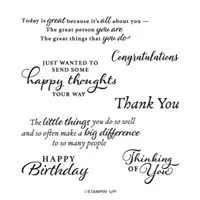
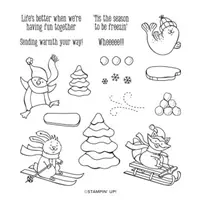
The Biggest Wish stamp set just arrived recently and it is a fabulous stamp set. I’m going to share two cards with you today, both using this set. One is a sort of fun fold, simple & easy but a change from the ordinary. The other is more traditional. Both are masculine cards – and birthday. Here is the fun fold card…

Biggest Wish Masculine Birthday.1

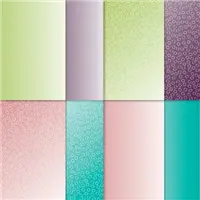
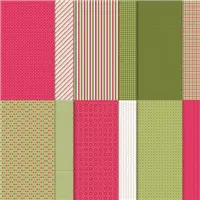
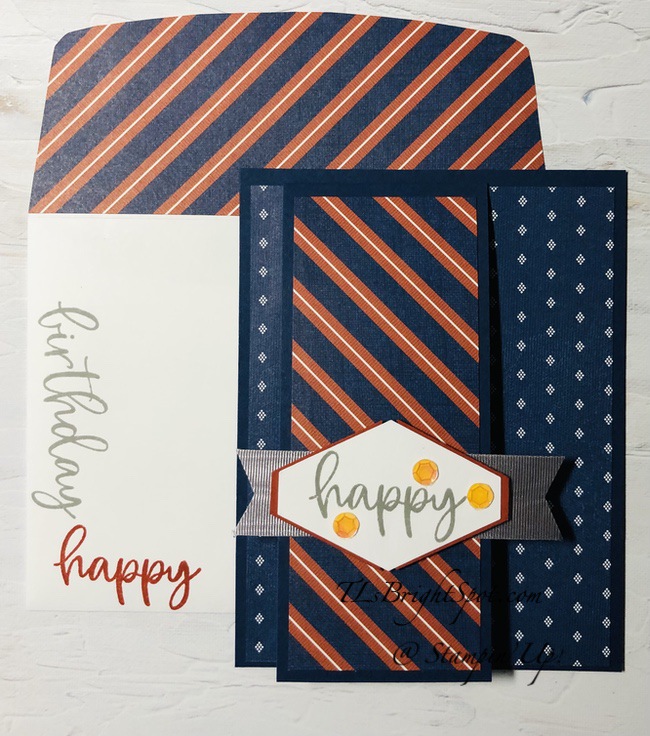
The Designer Series Paper is called Well Suited and it is from the Jan-Jun Mini Catalog – which retires 30 June! Some of the coordinating papers for this DSP are Night of Navy, Smoky Slate, Cajun Craze and of course Basic White, which I have used. The stripy piece flips up for additional sentiment.

Biggest Wish Masculine Birthday.2

And here’s how I created this… the Night of Navy card base is 4 1/4 x 5 1/2. 1/2″ from the left edge, I adhered another panel of Night of Navy cut 2 1/4 x 10 1/2 and scored at 5 1/4. Leaving this panel open, I adhered the Well Suited DSP 4 x 5 1/4 over this and right to the top of the fold on the panel. I then attached the striped pattern of the DSP ( cut 2 x 5). For the Basic White panel, I stamped the sentiment first in Night of Navy ink and that comes from the Days to Remember stamp set. I then stamped the balloons in Cajun Craze ink, also from the Days to Remember stamp set and used the Night of Navy marker to create the tails of the balloons. The balloons on the left were stamped off once. This panel is just a tad wider – 2 1/8 x 5 and adhered in place. Back to the front of the card… I stamped the word happy from the Biggest Wish stamp set in Smoky Slate ink on a Basic White piece then punched it with the Tailored Tag Punch. I punched another from Cajun Craze card stock, cut it in half vertically and adhered it to the back of the tag with liquid glue. I cut a length of Smoky Slate Textured Ribbon, made pointy ends and adhered it on the front flip panel with Seal+. The sentiment banner got dimensionals and was adhered over the ribbon. For a final bit of bling – even guys need bling now & then – I added three Artistry Blooms Adhesive-Backed Gems – and the front was complete! Foolish me, I did not take a picture of the back… but I did cut a panel of Basic White 4 x 5 1/4, stamped the large BIRTHDAY in Smoky Slate ink at the bottom left corner, then stamped the scripty word happy in Cajun Craze ink above it. This gave enough writing room for something fun.
Biggest Wish Masculine Birthday.3

For the envelope, I stamped the scripty word birthday in Smoky Slate ink, along the side, then the word happy in Cajun Craze ink. Both come from Biggest Wish stamp set. The flap was covered in more of the Well-Suited DSP.

Card #2… super simple, still using the Well-Suited DSP and Biggest Wish stamp set.

Biggest Wish Masculine Birthday.4

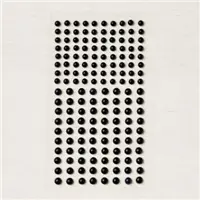
Here I used a different piece of the Well-Suited DSP and coordinated it with Pacific Point and Smoky Slate, with a bit of bling using the Metallic Pearls in silver. The card base is Thick Basic White 4 1/4 x 11 scored at 5 1/2. The DSP is 3 3/16 x 4 1/4 adhered to Pacific Point card stock 3 3/8 x 4 1/4. Both were added to the card front with liquid glue. I stamped the large word BIRTHDAY in Smoky Slate ink then the scripty word happy in Pacific Point ink. then added the three Metallic Pearls in silver… and the card front was done!

Biggest Wish Masculine Birthday.5

For the inside – Well-Suited DSP 5/8 x 4 1/4 adhered with liquid glue to a Pacific Point piece 3/4 x 4 1/4. This was added near the bottom of the inside of the card and the inside was complete.

Biggest Wish Masculine Birthday.6

For the envelope, I used another panel of the Well-Suited DSP and adhered it to the flap and voila – that was it! Here are the two cards together…

I have really enjoyed playing with the Well-Suited DSP. It has been perfect for many masculine cards. And now that I have played with the Biggest Wish stamp set, it will be used a lot! DANG! just checked and the Well-Suited DSP is sold out!!! That’s good for Stampin’ Up! – not so good for you…

Products for todays project are from the 2021-22 Annual Catalog AND the Jan-Jun Mini Catalog which retires Jun 30!. They may be found in the list below. I’ve made it easy for you to simply ‘add all to cart’. If I can help you in any way to order these items, or others, please give me a holler. As a thank you to my customers, when the order is between $50-$150 I offer a SU! item of your choice valued at $10. Remember to use MY NEW HOST CODE – 4A6RJ2TA . When the order is over $150, you still receive that free gift from me, but SU! has Stampin’ Rewards that may be used for additional products, so don’t use the host code at that time. If you have questions just let me know. If you would like to be able to order products early from catalogs AND enjoy that 20% discount, join my team now… you may do that here. We have lots of fun and are a creative bunch that encourages & supports one another.

Thanks for stopping by. May you have a beautiful day. Inspire. Create. Share.
Stampin’ Up Fun Fold with Fine Art Floral DSP

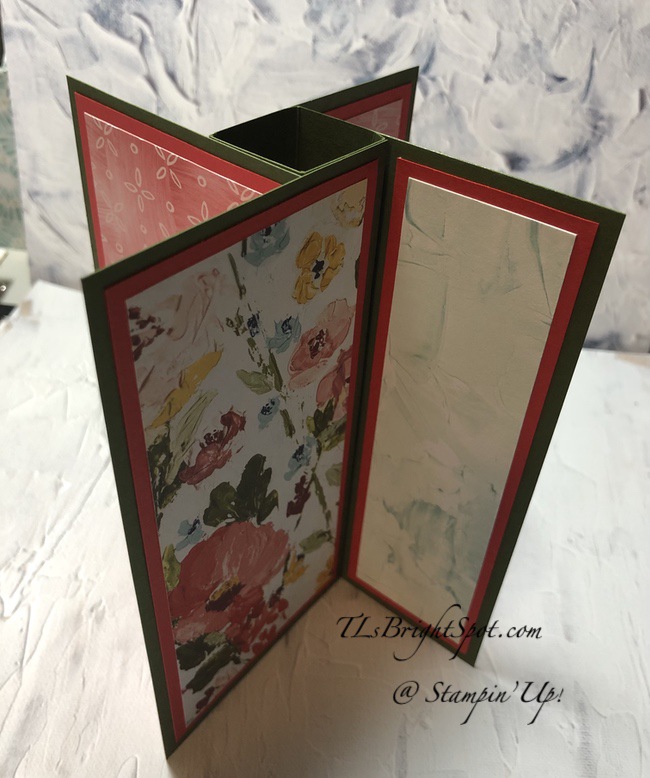
Oh this was fun to create…and to build. And yes, when the fun fold is a new one, it really does seem like a building project 🙂 The concern is, the finished product is 6 x 6 and that’s problematic creating an envelope. Having said that, I still like the card… and the idea.

Pinwheel Tower Card.1

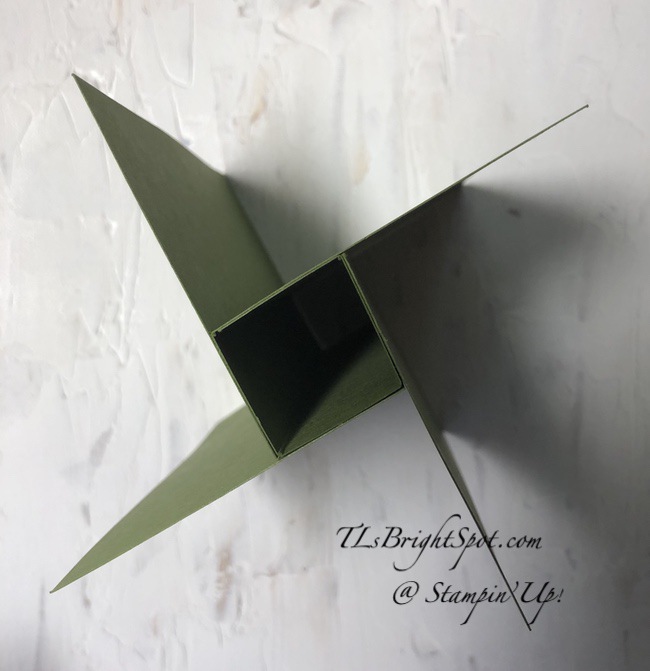
Begin by cutting & scoring your card base: 7 x 6 and scored on the long side at 1, 2, 3, & 4. Burnish the folds and roll together to create a box. Adhere with liquid glue. It should look like this…

Pinwheel Tower Card.2

Attach to each of the flat edges a panel cut 3 x 6. There are three panels. It will look like this.

Pinwheel Tower Card.3

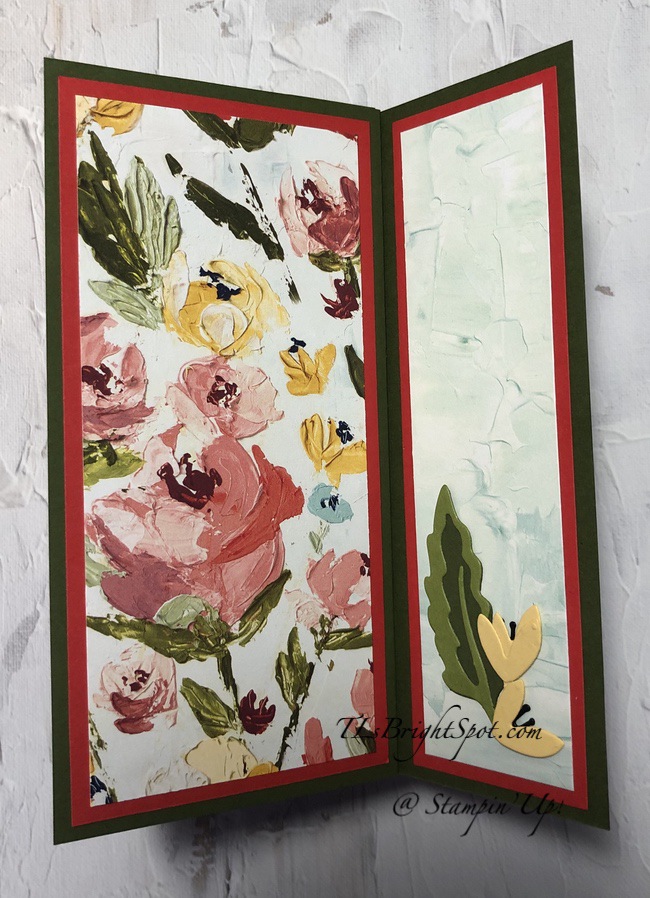
Decorate each side of the pinwheel – there are eight sides, four narrow and four wider. And you can embellish as much as you like. I kept mine fairly simple as I used the Fine Art Floral DSP and it is showy all by itself. Here are some of the decorated sides and I’ll give the card cuts below.

You can see I used the Tailor Made Tags Dies, Mossy Meadow Braided Trim and Poppy Moments Dies. For the sentiments I used Peaceful Moments and the Stamparatus for the ‘Happy Birthday’ and Encircled in Friendship for ‘You’re the BEST’.

Layer measurements:

  • Mossy Meadow card base 7 x 6 scored at 1, 2, 3, & 4; 3 x 6 (3) [for pinwheels]
  • Poppy Parade – 2 3/4 x 5 3/4 (4), 1 3/4 x 5 3/4 (4)
  • DSP layer (Fine Art Floral DSP, coordinating patterns) – 2 1/2 x 5 1/2 (4), 1 1/2 x 5 1/2 (4)

Decorations: I used Mossy Meadow & old Olive for the leaves; So Saffron and Basic Black for the flower buds.

When doing the layering panels, I found it helpful to have those that would be facing each other, side by side to make certain the layers matched in pattern and in spacing, then attached them to the pinwheel panels.

Thanks to craftykarendesigns for the card inspiration!

Products for todays project are from the 2021-22 Annual Catalog. They may be found in the list below. I’ve made it easy for you to simply ‘add all to cart’. If I can help you in any way to order these items, or others, please give me a holler. As a thank you to my customers, when the order is between $50-$150 I offer a SU! item of your choice valued at $10. Remember to use MY NEW HOST CODE – 4A6RJ2TA . When the order is over $150, you still receive that free gift from me, but SU! has Stampin’ Rewards that may be used for additional products, so don’t use the host code at that time. If you have questions just let me know. If you would like to be able to order products early from catalogs AND enjoy that 20% discount, join my team now… you may do that here. We have lots of fun and are a creative bunch that encourages & supports one another.

I want to help you in your creativity, to share in your progress, to witness your growth. Feel free to ask questions.

Thanks for stopping by. May you have a beautiful day!

Stampin’ Up! Sweet Ice Cream Fun Fold

Hello there… do you know what today? Besides Tue the 27th? It is one week until the 2021-2022 Annual Catalog goes LIVE…. which also means – it’s LESS THAN one week until the end of the 2020-2021 Annual Catalog. Remember there are last chance products awaiting and that sale ends May 3.

Today’s card is one I am using in a class for today. Folks will be learning tips & tricks to create SIX fun folds. They won’t be fully creating all of them, not in two hours, but they will do the folds and adhering card stock & DSP then adding sticky notes so they can finish them at home. This particular group wanted a firehose version. We’ll see how it goes – it’s a LOT in that short a time!

Sweet Ice Cream Fun Fold – #1

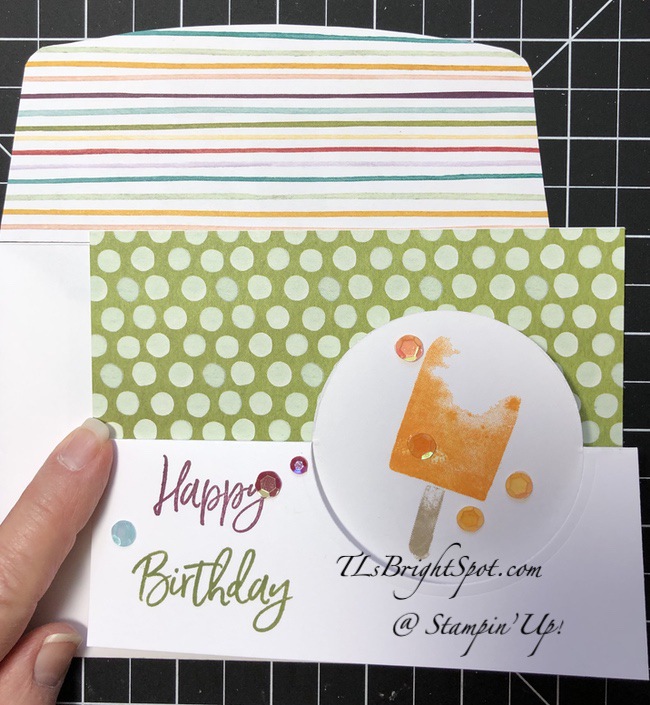
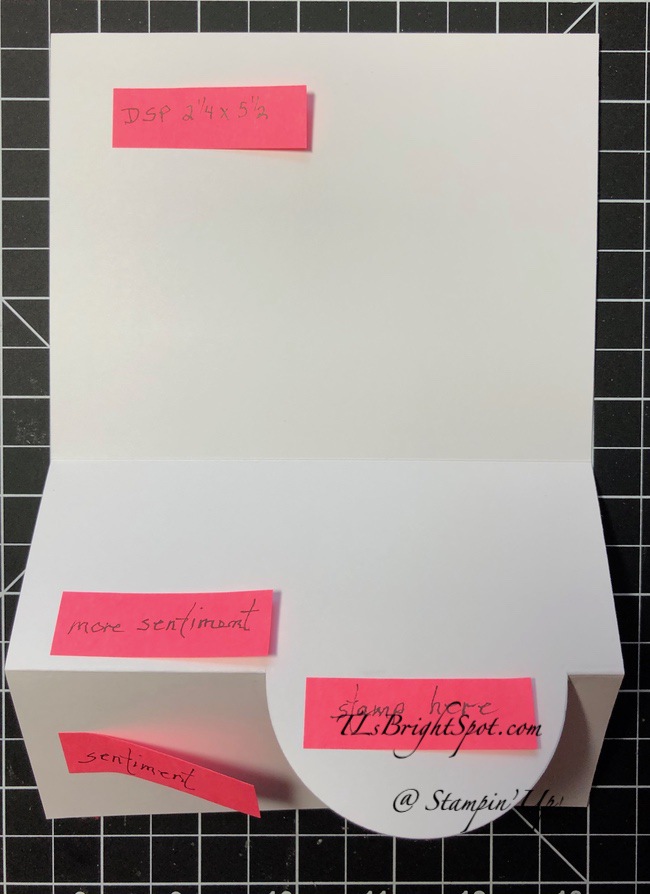
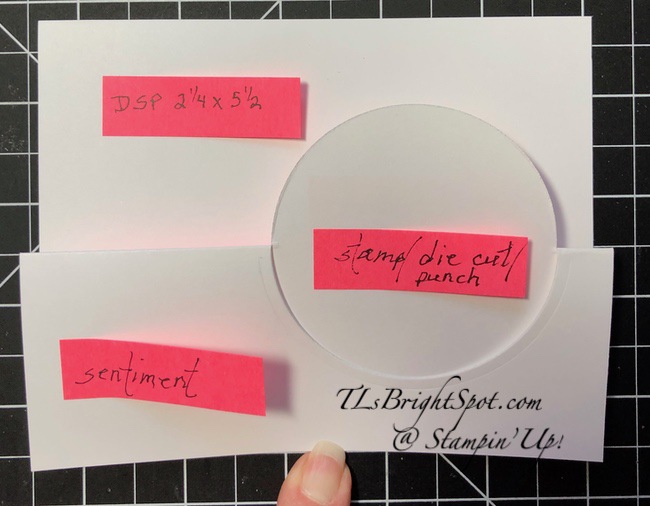
Above is the finished product. Here are two photos prior to decorating and with post-its.

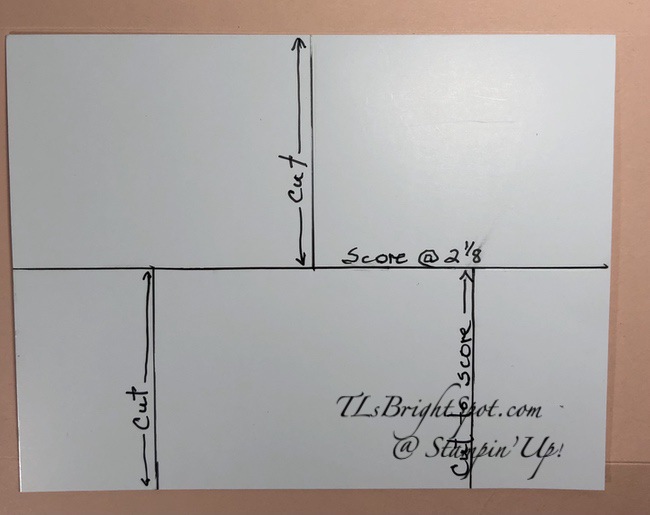
I began with a standard 5 1/2 x 8 1/2 Thick Basic White panel, scored at 4 1/4. I marked very lightly the 21/8 mark just where I wanted to die cut the circle. And of course, this doesn’t have to be a circle – it can be an oval or square or a diamond, but for this card, it’s a circle. With the marking I placed the Layering Circles die fairly close. to the right edge of the paper and placed it on the die cutting machine. In order to die cut just half the circle, place the top plate over the area to be die cut – and with the markings I knew just where that was. The neat part is, the machine will cut only where the top plate is 👍 Once removed from the machine, create the score line at 2 1/8, avoiding scoring the circle. Burnish the folds so they are mountain, valley – as shown. Now stamp and decorate!

Sweet Ice Cream Fun Fold – #4

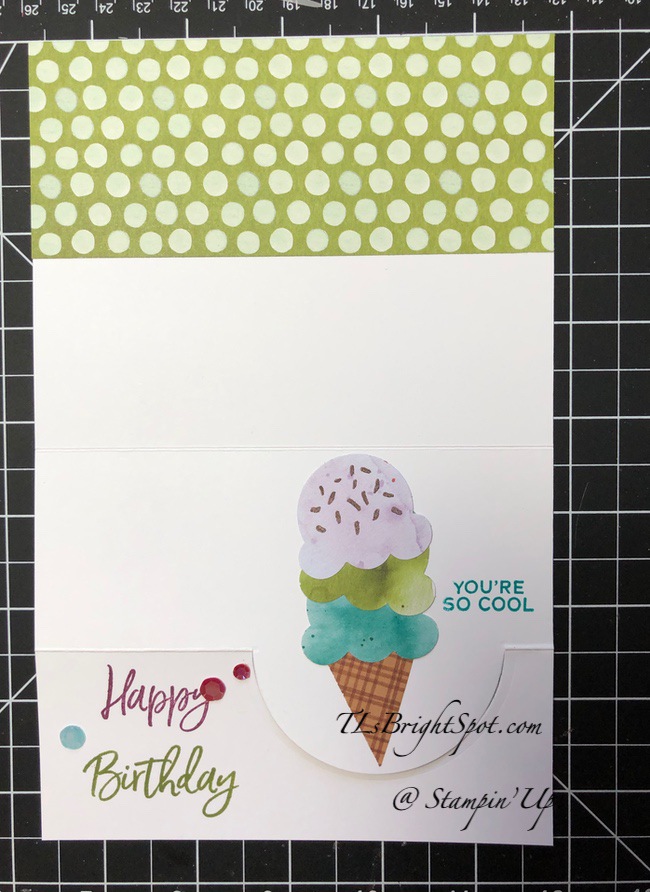
This is the ‘inside’ of the card. There’s lots of room for the sender to write something personal, yet, when the card is closed, it won’t be seen.

  • The DSP is from the Ice Cream Corner DSP and can be found in the Jan-Jun Mini Catalog. It is cut 2 1/4 x 5 1/2 and adhered with liquid glue.
  • The cone was created with more of the Ice Cream Corner DSP and using the Ice Cream Corner Builder Punch
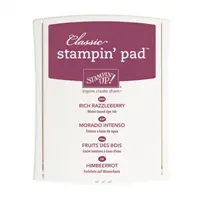
  • Stamp the sentiments using the Sweet Ice Cream stamp set. I used Rich Razzleberry, Old Olive and Bermuda Bay
  • Stamp the ‘sprinkles’ using Early Espresso ink
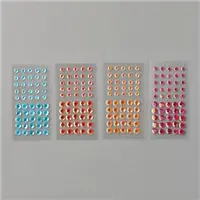
  • Add Artistry Blooms Adhesive-Backed gems and this portion is complete

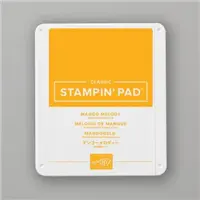
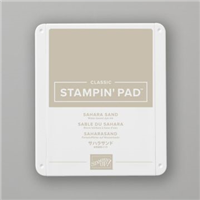
The front of the card is already partially done – just the circle needs decorating. I stamped the popsicle in Mango Melody ink and Sahara Sand ink and added more of the Artistry Blooms Adhesive Backed gems – and the card was done.

Sweet Ice Cream Fun Fold -#1

For the envelope I added more of the Ice Cream Corner DSP and the card was done – voila!

Products for todays project are from the 2020-21 Annual Catalog which ends May 3, and from the Jan-June Mini Catalog. They may be found in the list below. I’ve made it easy for you to simply ‘add all to cart’. 😉 If I can help you in any way to order these items, or others, please give me a holler. As a thank you to my customers, when the order is between $50-$150 I offer a SU! item of your choice valued at $10. Remember to use

MY CURRENT HOST CODE – 2HWX9GEA – good Apr 16-30

When the order is over $150, you still receive that free gift from me, but SU! has Stampin’ Rewards that may be used for additional products, so don’t use the host code at that time. If you have questions just let me know. Card cuts are listed at the bottom of this post. If you would like to be able to order products early from catalogs, join my team now… you may do that here. We have lots of fun and are a creative bunch that encourages & supports one another.

Trying some of the NEW Designer Series Paper from the 2021-2022 Annual Catalog gets you in the spirit of creating with some gorgeous papers. I’m offering a Designer Series Paper share from that Annual Catalog and it would be my pleasure to supply you!  I‘ll place my share order early on May 4 and use the expedited shipping option so I should be able to have the shares cut, bundled and back out to you that very next week. Please place your order with me by May 2 @ 9 PM ET.

TLsBrightSpot 2021-2022 Annual Catalog

Designer Series Paper Shares!

New Designer Series Paper Share – $55.00 plus $7.75 for Priority Mail shipping

You will receive one 6×6 sheet of each design from the following DSP packs (the number behind the name indicates how many 6×6 sheets of that paper pack you will receive):

  • Beauty Of The Earth – 6
  • Bloom Where You’re Planted – 6
  • Expressions In Ink Specialty – 6
  • Hand-Penned – 6
  • In The Wild – 6
  • Pansy Petals – 6
  • Simply Elegant Specialty – 6
  • Sweet Symmetry – 6
  • Tidings Of Christmas 6″ x 6″ – 6
  • You’re A Peach – 6
  • 2020-2022 In Color 6″ x 6″ – 10
  • 2021-2023 In Color 6″ x 6″ – 10
  • Brights 6″ x 6″ – 20
  • Neutrals 6″ x 6″ – 20
  • Regals 6″ x 6″ – 20
  • Subtles 6″ x 6″ – 20
  • Ombre Specialty – 4 (one of each color)
  • 2021-2023 In Color Shimmer Vellum – 5 (one of each color)
  • Gold & Rose Gold 6″ x 6″ – 2 (one of each color)
  • Linen Specialty – 1
  • Ombre Gift Bags – 5 (one of each color)

In all, you’ll receive 172 – 6” x 6” sheets of designer or specialty paper plus the awesome food safe gift bags!

Double DSP Share – $110 + $8 Shipping by Priority Mail – if you’d like double shares of the designer paper, I can do that as well. The designer paper sheets will be cut into 6×12 so that you’ll be able to get 3 full A2 size card fronts from each sheet (Tidings Of Christmas, 2020-2022 In color, 2021-2023 In Color, Brights, Neutrals, Regals, Subtles and Gold & Rose Gold 6×6, you’ll get double sheets of those since they’re already precut).

FREE Gift from me! – As a bonus for joining my share, you’ll get a sampling of the new host exclusive Pattern Party 12″ x 12″ Designer Series Paper!

Anyone is welcome to join in my share (please note, I can only ship to addresses within the US).  If you’d like to join, either complete the form below or email the following information to tlsbrightspot@gmail.com.

  • Your first and last name
  • Your share selection
  • The email address that is connected to your Paypal account. I only accept Paypal for payment unless you are a customer of mine.  If you are a customer, I will accept payment by check.  ***You do not need to have a Paypal account to pay the invoice, you can choose to pay by credit card without having a Paypal account.

Deadline to sign up for my share is Sunday, May 2 at 9:00 PM ET.

Thanks for stopping by.

May you have a beautiful day.

Make someone happy sending them a handmade card filled with love.

Stampin’ Up! Fun Fold w/ Forever Fern

It’s Tuesday – woohoo… and the weather is warming: hostas are rising from their sleep as are other perennials. Love this time of year! Late yesterday my preorder arrived, so I’m hoping to provide a glimpse later of some of the goodies in my Stampin’ Up package. For now however, we’ll take a look at the card I created for today – and it’s another triple-fold, but totally different from yesterday.

Fun Fold w/ Forever Fern – #1

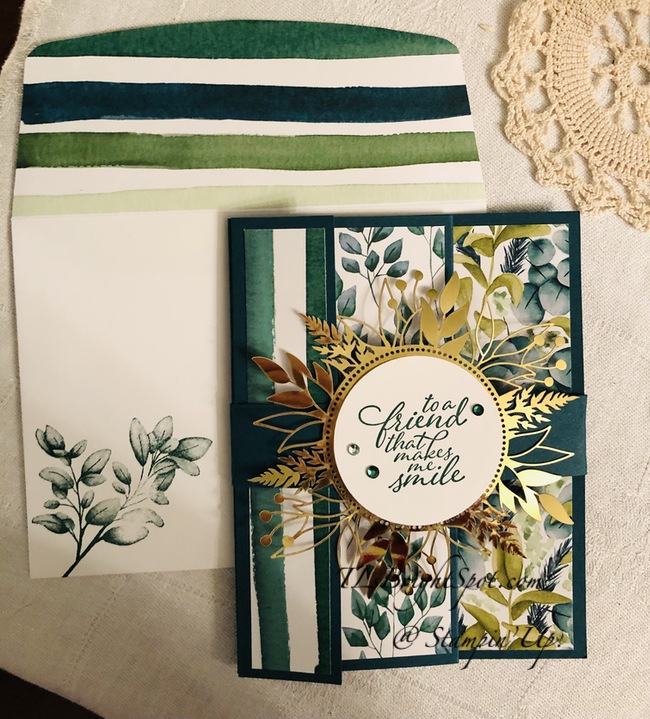
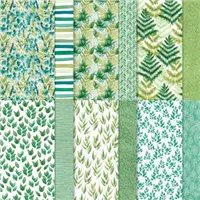
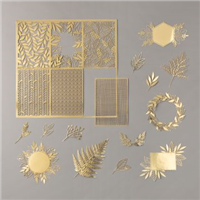
The Forever Greenery DSP and the Forever Gold Laser-Cut SDSP really show off in this fold. Here it is open wide.

Fun Fold w/ Forever Fern – #2

See how this paper shows off? The color contrasts are wonderful. It begins with a card base of Pretty Peacock 5 1/2 x 11 scored at 1 1/4, 4 and 6 3/4. Fold in valley, mountain, valley and burnish creases; decorate each fold; create belly band 1 x 11 and decorate. Easy, easy… I don’t like this one quite as much as yesterdays fold – just sayin’. It is a good way to show off the DSP however. 🙂 And this is a pretty general card – can be used asx a simply – hey, thinking of you kind of card ~ and it’s nice to have those in your stash. For that basic White panel, since it’s narrow, I simply stamped a leaf from the Forever Fern stamp set in Old Olive ink, then stamped the sentiment on a Basic White 5/8″ wide strip in Shaded Spruce ink and trimmed the end with the Banner Pick a Punch and adhered it over a part of the leaf with liquid glue. This was adhered with liquid glue as shown.

Card cuts:

  • on the 1 1/4 wide fold, adhere a different panel of DSP on both front & back: 1 x 5 1/4
  • next panel adhere a DSP 2 1/2 x 5 1/4
  • next panel is the Basic White 2 1/2 x 5 1/4
  • last or widest panel is 4 x 5 1/4
  • Belly Band is 1 x 11 folded around the closed card not too tightly and ends adhered with liquid glue. I decorated this by adhering a Forever Gold Laser-Cut SDSP so it centered on the front, then punched a 2″ circle out of Basic White card stock and stamped the sentiment (from Forever Fern stamp set) in Shaded Spruce ink. I adhered this over the gold of the circle with dimensionals and added three Holiday Rhinestone Basic Jewels for a bit of pizzazz.

For the envelope, I adhered more Forever Greenery DSP to the flap and trimmed to fit, then stamped a fun leaf from Forever Fern stamp set in Shaded Spruce ink. DONE!

Products for todays card may be found in the list below. I’ve made it easy for you to simply ‘add all to cart’. If I can help you in any way to order these items, or others, please give me a holler. As a thank you to my customers, when the order is between $50-$150 I offer a SU! item of your choice valued at $10. Remember to use MY CURRENT HOST CODE – 63SXY3X6– good April 1- 15 . When the order is over $150, you still receive that free gift from me, but SU! has Stampin’ Rewards that may be used for additional products, so don’t use the host code at that time. If you have questions just let me know. Card cuts are listed at the bottom of this post. If you would like to be able to order products early from catalogs, join my team now… you may do that here. We have lots of fun and are a creative bunch that encourages & supports one another.

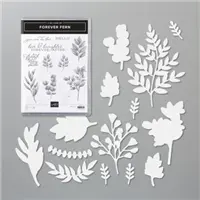
Remember that Stampin’ Up! has lots of wonderful items on their retired list. SHOP EARLY BEFORE ITEMS ARE SOLD OUT! Sale ends May 3. The Forever Fern bundle is carrying over, however the DSP and Laser-cut SDSP, circle punch are not – just sayin’.

03.23.21_HEADER_LAST-CHANCE_NA

Product list for today’s card:

Thanks for stopping by.

May you have a beautiful day.

Make someone happy sending them a handmade card filled with love.

Stampin’ Up and The Impossible

Baby it’s cold outside. Baby it’s cold outside.When we let the dog out this morning to ‘tour’ the estate’ 😏 and check every nook and cranny, the snow was crunchy. Not only that but he didn’t stay out! He wanted right back in after taking care of business. This surprised me as he likes roaming around checking things out, just not this morning…It will be a cold walk for us once it’s daylight.

Today’s card ~ is called The Impossible card because it doesn’t seem as though it could be done, but it can – and I did. There are a couple of videos out there that I highly recommend, cuz written directions would be, well, next to impossible 🙂 And here’s the finished product.

The impossible Card – #1

And here’s how it looks before it’s decorated.

The Impossible Card – #2

Interesting, isn’t it? Let me give you some basic directions and if you decide to make this beauty, take a gander at a couple of videos: Jan Mansor Brown, Mary Deatherage, or May May are a few.

  • Card base is 4 1/4 x 5 1/2: scored in half on the short side at 2 1/8.
  • Turn and score on the long side at 2 3/4 JUST TO THE SCORE LINE.
  • Turn the card base 180 degrees and score at 1 1/4 & 4, JUST TO THE SCORE LINE. That is 1 1/4 at each end
  • Using your trimmer to make certain lines are very straight, cut on each score line.

Here are a couple of photos: one to show score lines, one with score lines cut.

score lines for The Impossible card
appropriate scores lines cut

Holding the panel longways, what you have now is a piece with three (3) slits: one at top and two ‘legs’. Hold the left side of the card stock asnd rotate the other half 180 degrees and crease along the center fold, making certain edges are even. Essentially you have two ‘L’s’ with a connection. YAY! The hardest part is done. And here’s yet another photo.

right section turned 180 degrees

Now let’s make a template to use to decorate this card base – and it will look like an L. Cut a piece 2 5/8 x 4 1/8. On the short side mark down the middle with a pencil. Turn this to the long side and mark down the middle. Look at the photo above again, and holding the piece in the portrait position, trim away the upper right quadrant. This is best done with the paper trimmer to keep lines straight but can be done with your paper snips as well. This becomes your template for decorating the card base.

template for decorating The Impossible Card

Cutting pieces for this card:

  • Larger sentiment panel: Flirty Flamingo 2 7/8 x 2; Basic White 2 3/4 x 1 7/8
  • Sentiment panel to hold card together: Flirty Flamingo 3/4 x 3; Basic White 1/2 x 3
  • Flower & Field DSP 2 1/8 x 4 1/8 (2). Trim, removing panel as shown in photo above. Remember they are opposite! I highly recommend cutting/ adhering panel one at a time to avoid a mistake. Yep – did it!
  • Perennial Petals Dies for the flower, and Many Mates stamp set for the upper sentiment and Well Said stamp set for the sentiment strip. Opal Rounds for the flower and additional embellishment. I used Memento Black ink for stamping.
  • The sentiment strip is what holds this card together so it isn’t floppy. It also keeps everything straight. When adhering this strip, use your grid paper to make certain everything is in alignment.
  • This is a very flat card. Adhere everything together with liquid glue.

I decorated the envelope with the same DSP but did not take a photo – and it is mailed already. Here is photo again of the completed card – The Impossible card, made possible!

The Impossible Card

I do hope you try making this ~ and have fun doing it!

Products for todays card are from the new Jan-Jun 2021 Mini Catalog, the Sale-a-bration catalog and the 2020-2021 Annual Catalog ~ and those products are available now for purchase. You will find them in the product list below. As a reminder… I’ve made it easy for you to simply ‘add all to cart’. If I can help you in any way to order these items, or others, please give me a holler. As a thank you to my customers, when the order is between $50-$150 I offer a SU! item of your choice valued at $10. Remember to use MY CURRENT HOST CODE WZBPZ7N4- good Feb 4 – Feb 28. When the order is over $150, you still receive that free gift from me, but SU! has Stampin’ Rewards that may be used for additional products, so don’t use the host code at that time. Now is also Sale-a-bration – a time from now through the end of February when Stampin’ Up! offers FREE items with $50 and $100 purchases. Those products are shown below today’s product list as well. Happy shopping!

Now is the perfect time to become a team member of Stampin’ Up! – with your choice of items in your $99 Starter Kit (valued at $125!) you will receive five packs of new 6×6 DSP paper packs – only during Sale-a-bration though!!! Act quickly… JOIN MY Team here. Being a part of the Stampin’ community brings all kinds of fringe benefits ~ early access to new catalogs, guaranteed 20% discount on all Stampin’ Up! products, free tutorials, access to web sites that will encourage and strengthen your abilities. Join now… Again – you may do that here.

FREE product during Sale-a-bration with $50 purchase

FREE product with $100 purchase during Sale-a-bration

And if you HOST a party with $300 sales

Thanks for stopping by.

May you have a beautiful day.

Make someone happy sending them a handmade card filled with love.

Stampin’ Up Fun Fold

The Happy Thoughts stamp set does the trick when matched with the Field & Flower DSP and the little snail from the Snail Mail bundle. Fussy cutting a flower or two and the Tasteful Labels Dies rounds out all the major items needed to make this card.

Happy Thoughts

The card begins with a standard 8 1/2 x 5 1/2 layout, but the scoring makes the difference: score on the long side at 2, 3 1/8, 5 3/8 & 6 1/2. After scoring and burnishing, the paper will look like this…

Happy Thoughts – #1

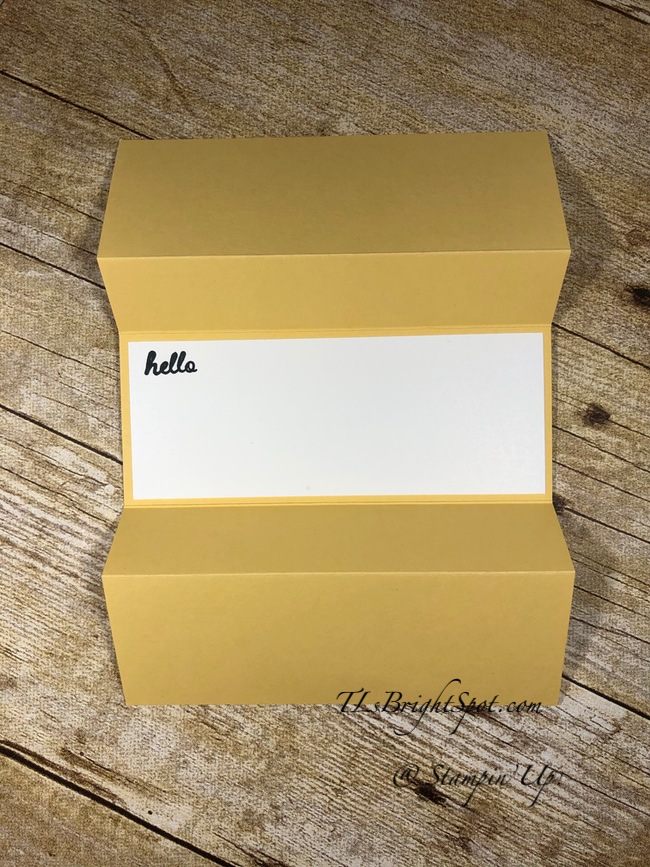
This makes for a narrow center but this where the highlight of the card is as well. Let’s add the DSP with liquid glue to each of the 3 front sections – it’s from Flower & Field DSP, remember? 😊 Decorating the center panel is easy. Stamp the sentiment from the Happy Thoughts stamp set in Memento Black ink on a panel of Basic White card stock and die cut with the Tasteful Labels Dies. Adhere this, centering on the middle panel, with dimensionals. On another piece of Basic White card stock, stamp the snail from Snail Mail stamp set, again in Memento Black ink. Then color him – Crumb Cake Blends for the shell and Just Jade Blends for the snail itself. The heart is done with the Dark Daffodil Delight Blends. Die cut him with the coordunating Snail Dies and adhere with liquid glue on the right side and dimensionals on the left side of him – so he is attached to both the card front and the sentiment panel. Now fussy cut the adorable flower from the Flower & Field DSP and adhere with a glue dot. Add one of the Matte Black Dots to the center and voila!

Now turn this over to adhere a Basic White panel in the center to write something special. I did stamp the ‘hello’ from the Snail Mail stamp set in Memento Black ink before attaching it to the card.

Happy Thoughts – back

For the envelope, I used the same sentiment from the Snail Mail stamp set but this time in Daffodil Delight ink, then the bubble around it from the Snail Mail stamp set in Memento Black ink. The envelope flap got treatment of adhering Flower & Field DSP and trimming to fit. All Done!!!

Happy Thoughts w/ Flower & Field DSP

It has just occurred to me I may have posted this card some time ago… I found it and one other in the card box I shared yesterday. If I did post it before, my apologies. It’s still a fun, happy card that is a fun fold. Oh well :o) Card cuts will be listed at the end of this post.

Products for todays card are from the new Jan-Jun 2021 Mini Catalog, the Sale-a-bration catalog and the 2020-2021 Annual Catalog ~ and those products are available now for purchase. You will find them in the product list below. As a reminder… I’ve made it easy for you to simply ‘add all to cart’. If I can help you in any way to order these items, or others, please give me a holler. As a thank you to my customers, when the order is between $50-$150 I offer a SU! item of your choice valued at $10. Remember to use MY CURRENT HOST CODE WZBPZ7N4- good Feb 4 – Feb 28. When the order is over $150, you still receive that free gift from me, but SU! has Stampin’ Rewards that may be used for additional products, so don’t use the host code at that time. Now is also Sale-a-bration – a time from now through the end of February when Stampin’ Up! offers FREE items with $50 and $100 purchases. Those products are shown below today’s product list as well. Happy shopping!

Now is the perfect time to become a team member of Stampin’ Up! – with your choice of items in your $99 Starter Kit (valued at $125!) you will receive five packs of new 6×6 DSP paper packs – only during Sale-a-bration though!!! Act quickly… JOIN MY Team here. Being a part of the Stampin’ community brings all kinds of fringe benefits ~ early access to new catalogs, guaranteed 20% discount on all Stampin’ Up! products, free tutorials, access to web sites that will encourage and strengthen your abilities. Join now… Again – you may do that here.

Sale-a-bration is almost over… 10 more days! Products FREE with $50 purchase through Feb 28 – Level 1

Products available FREE with $100 purchase during Sale-a-bration – Level 2

And, if you HOST a party or have an order at $300 – this is FREE during Sale-a-bration

Card cuts for todfay’s project:

  • So Saffron card base 8 1/2 x 5 1/2 – scoring listed above
  • Field & Flower DSP – end panels 1 3/4 x 5 1/4; center panel 2 x 5 1/4; envelope flap 2 1/4 x 6
  • Basic White panel 2 x 5 1/4

Thanks for stopping by.

May you have a beautiful day.

Make someone happy sending them a handmade card filled with love.

Stampin’ Up! Jan. Paper Pumpkin Fun Fold~Alternative

Hello again! Snow is still on our ground. The neighbor kids were sliding down the hill behind us and WE had such fun watching. They were up and down dozens of times, and played until nearly dark. Ah youth 🤗

On the home front here, I created another Paper Pumpkin Alternative using the January kit called Sending Hearts. I used minimal additional supplies.

Jan. PP Alternative Fun Fold – #1

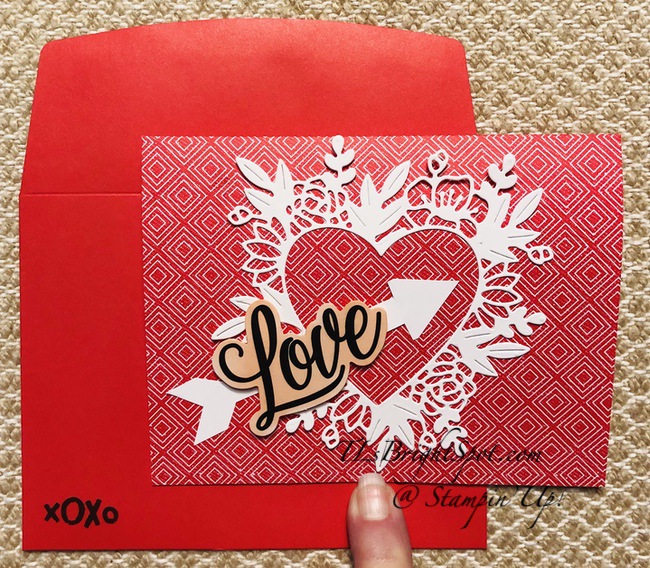
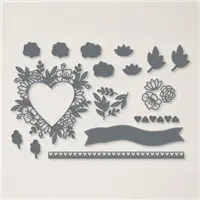
For the front of the card I used a Floral Heart Die to cut this lacy heart from Basic White card stock. I used a Basic White strip to fussy cut an arrow. Both were adhered with liquid glue. I then colored the sentiment from the kit with a Petal Pink Stampin Blend and adhered it with dimensionals.

Jan. PP Alternative Fun Fold n- #2

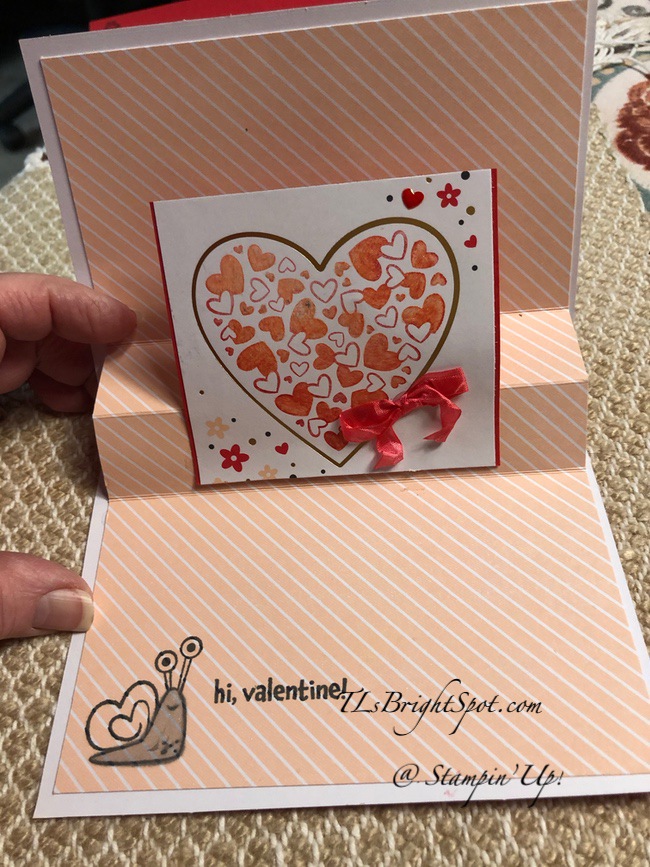
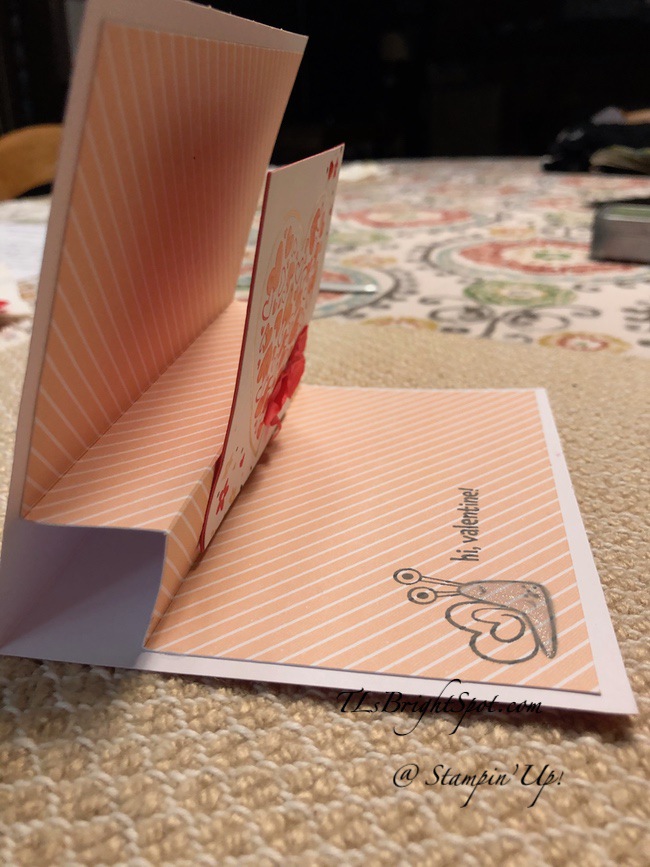
I have no idea what this fold is called, I just knew I wanted to try it! The inside is one of the kits card bases, trimmed 1/8″ on the long side and scored one inch on either side of the center fold. The center fold becomes the mountain and the other two the valley folds. Adhere one side first; close card and adhere other side ~ both done with liquid glue. I stamped the very cute snail in Memento Black ink and colored him with Light Smoky Slate Stampin Blends, then covered that with Wink of Stella. I also stamped the sentiment with the same Memento Black ink.

The center heart is one provided in the kit cut down to 3 x 3 1/4. I stamped the hearts from the stamp in the kit using Petal Pink ink, then covered all the solid hearts in Wink of Stella to give it a bit of glam. I colored one of the resin hearts from the kit using Poppy Parade Stampin Blends, added it to the upper right corner over one of the hearts. I then colored the Whisper White Crinkled Ribbon with Poppy Parade Stampin Blends, tied it in a bow and adhered with a glue dot. I mounted the panel on Poppy Parade 3 x 3 3/8 with liquid glue and it was ready to go into the card. It was mounted using liquid glue in the center of the card. And voila!

Jan PP Alternative Fun Fold #3

On the envelope I stamped the XOXO in Memento black ink and called the card done…. Love it when something comes together ~ and most of it from the monthly kit!!!

A couple of things to remember when using this kind of fold… The center panel must be no taller than the dimension from the fold to the edge of the DSP on the bottom of the card – or it will stick out beyond the top of the card… ask me how I know that!

Products for todays card are from the Paper Pumpkin subscription and the 2020-2021 Annual Catalog ~ and those products are available now for purchase. You will find them in the product list below. I have included Paper Pumpkin subscription options as well – so look closely if you are interested in that. Also, there is a listing for the Refill Kit for Sending Hearts. If you are not a subscriber, you would miss the stamp set and the ink spot – just FYI! As a reminder… I’ve made it easy for you to simply ‘add all to cart’. If I can help you in any way to order these items, or others, please give me a holler. As a thank you to my customers, when the order is between $50-$150 I offer a SU! item of your choice valued at $10. Remember to use MY CURRENT HOST CODE WZBPZ7N4- good Jan 21 – Feb 3. When the order is over $150, you still receive that free gift from me, but SU! has Stampin’ Rewards that may be used for additional products, so don’t use the host code at that time. Now is also Sale-a-bration – a time from now through the end of February when Stampin’ Up! offers FREE items with $50 and $100 purchases. Those products are shown below today’s product list as well. Happy shopping!

Now is the perfect time to Join my team – you can do that here. No need to be afraid ~ get the 20% discount and enjoy the Stampin’ Up! products and family 😁. I’m here to support you in whatever your needs are.

Sale-a-bration items FREE with $50 purchase – Level 1

Sale-a-bration items FREE with $100 purchase – Level 2

Thanks for stopping by.

May you have a beautiful day.

Make someone happy sending them a handmade card filled with love.

Stampin’ Up! Heartwarming Hugs Fun Fold

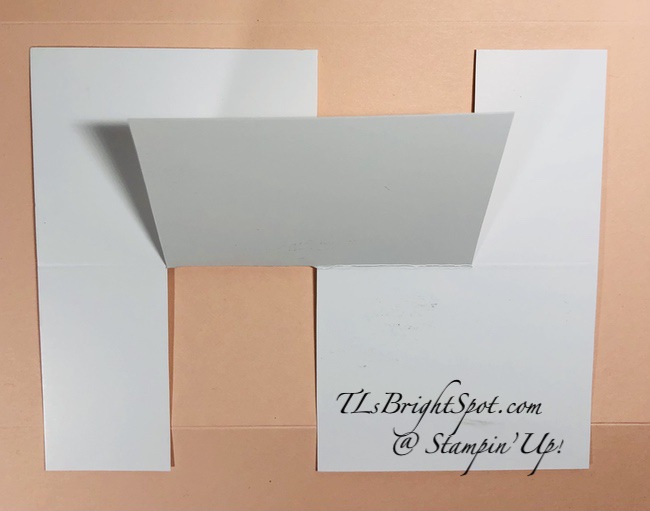
Hi there! I’ve been mailing catalogs to my customers and including a card with instructions as part of the package. All of a sudden I realized I needed two more… so got busy and created these. I blogged about this fun fold some time ago and you can find that post here.
Heartwarming Hugs Easel card – #1

The directions and card stock cuts are the same, I just used different DSP and I like this too! I’ll list the card stock cuts again for your convenience. 🙂

Products used:

  • Wrapped in Christmas stamp set (circular stamp)
  • Freezin’ Fun stamp set (banner for easel)
  • 1 1/2″ Circle Punch
  • Starburst Punch or 2″ Circle punch
  • Classic Label Punch
  • Heartwarming Hugs DSP
  • Red Foil Sheets
  • Mossy Meadow card stock
  • Whisper White card stock
  • Real Red ink

Card stock cuts:

  • Card base: 8 1/2 x 5 1/2, scored at 4 1/4. Make cuts in card front panel to the score line at 1 1/2″ & 4″
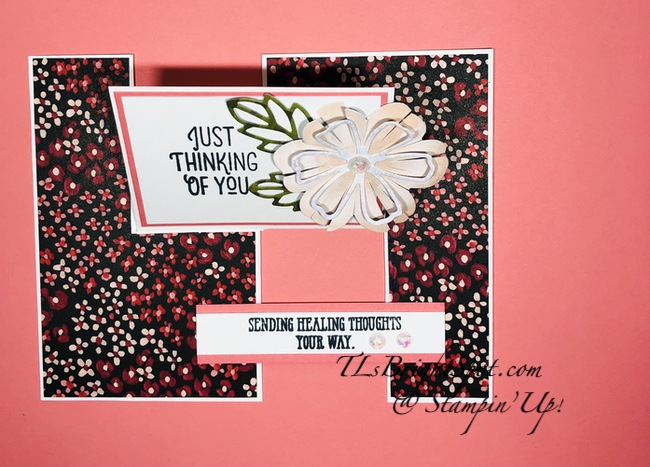
  • DSP side strips: ~ (2) 1 3/8 x 4 1/8
  • DSP center panels ~ (2) 2 3/8 x 2
  • Whisper White card stock ~ 3 x 4 1/8 + scraps for circular stamp and banner sentiment
  • Red Foil Sheets – punch 2″ circle

Directions:

  • Prepare card base as described in cardstock cuts
  • Adhere DSP strips to side panels of card front with liquid glue
  • Adhere Whisper White panel to inside card with liquid glue
  • Adhere side panels to card back with liquid glue, overlapping the Whisper White panel
  • Fold the center (loose) panel in half and burnish well
  • Adhere the remaining 2 DSP panels to top & bottom sections just folded in half
  • Stamp banner sentiment (for the easel) in Real Red ink using the Freezin’ Fun stamp set. Punch with the Classic Label Punch. Adhere to a strip of Mossy Meadow 5/8 x 2 ¼. Put dimensionals on back and adhere to the Whisper White panel of the card about ¾” from bottom
  • Stamp circle sentiment using the Wrapped in Christmas stamp set in Real Red ink on Whisper White card stock and punch with 1 ½” circle punch
  • Punch a 2” circle from Red Foil Sheets paper.
  • Adhere stamped circle to this glimmer paper. HINT: suggest using Stampin’ Seal to adhere stamped piece to the foil – no slippage! Put dimensionals on the LOWER HALF of this circle and adhere just at the fold

Your card is complete ~ enjoy!

Heartwarming Hugs Easel card – #2

So I’m curious which card you prefer ~ the DSP combination on the left, or the one on the right? Truly, I can’t decide!

Products used for today’s project may be found below. As a thank you to my customers, when the order is between $50-$150 I offer a SU! item of your choice valued at $10. Remember to use MY CURRENT HOST CODE SAZV3JTK– good until Jan 3. When the order is over $150, you still receive that free gift from me, but SU! has Stampin’ Rewards that may be used for additional products 😁

Thanks for stopping by.

May you have a beautiful day.

Make someone happy sending them a handmade card filled with love.

WooHoo! Stampin’ Up! has gone over the top… check out the Giant Year-end sale here

Sale Dates:  December 8, 2020 through January 4, 2021

  • No minimum purchase required.
  • Retiring items are available while supplies last.
  • Exclusions apply: Carryover items will not be discounted.
  • Due to increased shipping times and possible shipping delays during the month of December, we can’t guarantee delivery before Christmas.
  • Ordering Deadlines:  January 4, 2021 at 11:50 PM (MT)

Shop early!  The items that are retiring are only while supplies last!!

Stampin’ Up! Darling Donkey Birthday Fun Fold

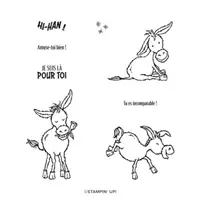
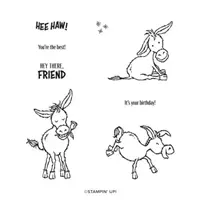
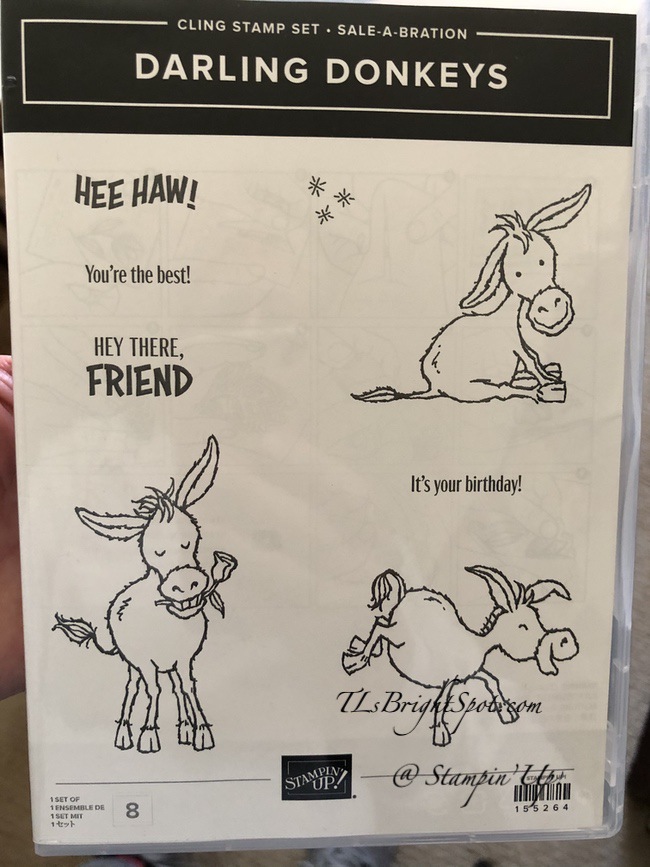
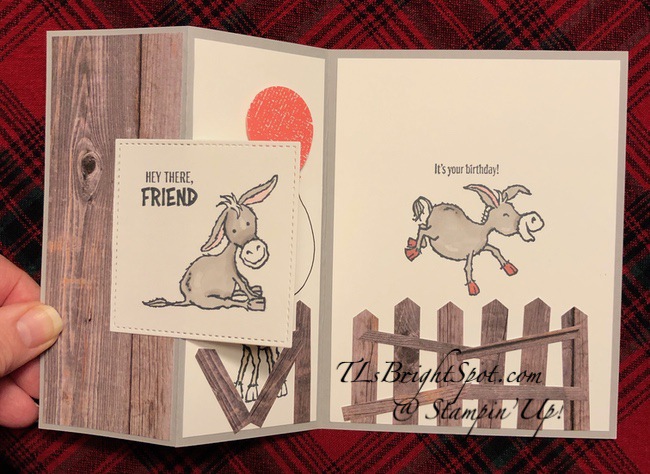
Hello again… Today’s card is full of fun – a birthday card using the Darling Donkey stamp set that will be available Jan 5, 2021 as a FREE ITEM when you purchase $50 in product – it’s Sale-a-bration time Jan 5 – end of Feb 2021. Woohoo! :O)

Darling Donkey stamp set available Jan 5, 2021 – Sale-a bration item

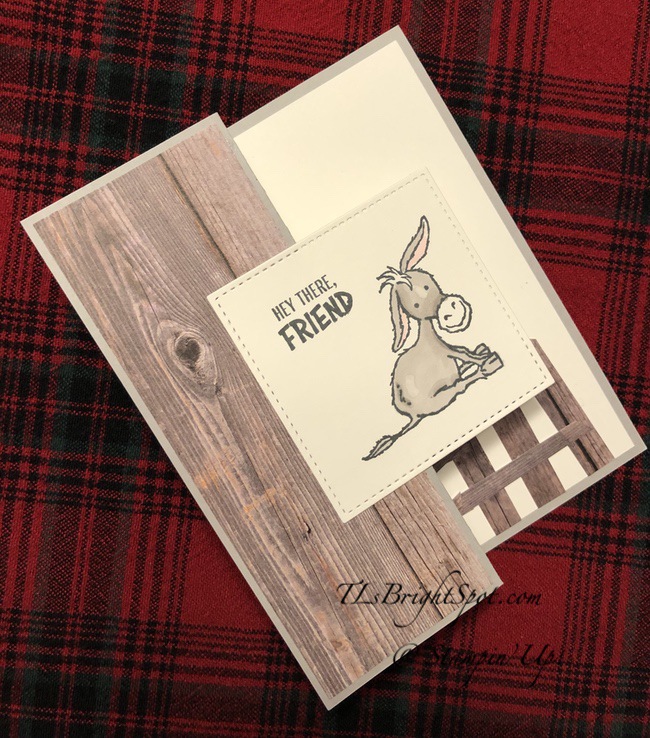
This little donkey is just too cute – love the impish smile… that square needs a back to it though so I may take that off, add a backing and put it on again. But let’s talk through how I did this. It’s a z-fold, so scored in the center and the front panel folded back on itself exactly in half, then the square added. Here’s what you need to create this card…

Darling Donkey Birthday Fun Fold – #1
  • Smokey Slate card base
  • In Good Taste DSP
  • Whisper White card stock
  • Stitched Shapes (largest square)
  • Classic Label Punch (fence)
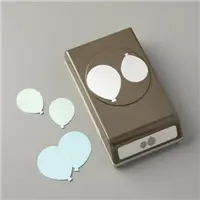
  • Balloon Punch (balloon)
  • Tuxedo Black Memento ink
  • Blends: Flirty Flamingo (ears), Crumb Cake/ Gray Granite (donkeys), Color Lifter
  • Black Marker (tail for balloon)
  • Wink of Stella (color ther balloon)
Darling Donkey Birthday – #2
Darling Donkey Birthday Fun Fold – #3

Details:

  • Fold card base (Gray Granite) in half and fold the front flap in half back on itself – to create a z-fold
  • Cover the front fold using In Good Taste DSP
  • Stamp the front donkey in Tuxedo Black Memento ink on Whisper White card stock; color with Stampin’ Blends – light & dark Gray Granite. Use the Color Lifter to highlight – between the eyes & near his backside. (Yes – this one is definitely a male donkey!) Die cut with largest Stitched Shapes Dies (largest square). Here’s where I should have cut a scalloped square out of Basic Black card stock for a backing. Adhere to the front panel with liquid glue, centering.

For the inside: there are two panels, the far right and the folded ‘in’ . Often the ‘in fold’ is not covered but for this card, I definitely wanted to do that.

  • Right panel ~ stamp the donkey from Darling Donkey stamp set in Tuxedo Black Memento ink in the center of the Whisper White panel, making certain it will be covered when the card is closed. Color in Stampin’ Blends: light & dark Gray Granite, light Flirty Flamingo for the ears, dark Flirty Flamingo for the hooves – after all this is a girl donkey 🙂 Stamp the sentiment above it from the same stamp set and in Tuxedo Black Memento ink. Adhere to the right panel of the card base with liquid glue, creating the inside of the card. It was at this point I decided the donkey need a fence and punched several ‘fencing’ using the Classic Label Punch and more of the same In Good Taste DSP. I punched various heights and widths then adhered to the panel with liquid glue.
  • Folded in panel ~ stamp the donkey from Darling Donkey stamp set in Tuxedo Black Memento ink on a Whisper White panel, blocking off the flower so it doesn’t get ink. Color in Stampin’ Blends light & dark Crumb Cake, light Flirty Flamingo for the ears. And yes, I used a bit of Color Lifter for highlight. Punch a small balloon using the Balloon Punch from Bright 6×6 DSP – Flirty Flamingo. Adhere with dimensionals and color with Wink of Stella. Add a balloon ‘tail’ from the balloon to the donkeys mouth. Cute right? Adhere this panel to the card and the card is complete. OOPS! I did add some more fencing to this guy.
Darling Donkey Birthday Fun Fold – #4

For the envelope… I used more of the same In Good Taste DSP to the envelope flap & trimmed to fit. For the envelope front I stamped the sentiment and the ‘sparkels’ in Tuxedo Black Memento ink and called it done.

Card Cuts are listed at the end of this post. Products used for today’s project may be found below. As a thank you to my customers, when the order is between $50-$150 I offer a SU! item of your choice valued at $10. Remember to use MY CURRENT HOST CODE SAZV3JTK– good until Jan 3. When the order is over $150, you still receive that free gift from me, but SU! has Stampin’ Rewards that may be used for additional products 😁

Card Cuts:

  • Smoky Slate 8 1/2 x 5 1/2, scored @ 4 1/2 & 2 1/8: fold in half, then fold back on itself the small panel
  • In Good Taste DSP 2 x 5 1/4 + 2 1/4 x 6 for envelope + scraps for fencing
  • Whisper White 4 x 5 1/4, 2 x 5 1/4

Thanks for stopping by.

May you have a beautiful day.

Make someone happy sending them a handmade card filled with love.

WooHoo! Stampin’ Up! has gone over the top… check out the Giant Year-end sale here

Year End Closeout Sale Details:

Sale Dates:  December 8, 2020 through January 4, 2021

  • No minimum purchase required.
  • Retiring items are available while supplies last.
  • Exclusions apply: Carryover items will not be discounted.
  • Due to increased shipping times and possible shipping delays during the month of December, we can’t guarantee delivery before Christmas.
  • Ordering Deadlines:  January 4, 2021 at 11:50 PM (MT)

Shop early!  The items that are retiring are only while supplies last!!

Stampin’ Up Wrapped in Christmas Easel Card

So sorry for the late post – hubby and I bought a fresh cut tree yesterday and it was extra heavy- it took both of us to carry it in and get it set up. Then lights, etc…. No, not done yet; hubby is still working on the lights. I’ll share a picture Monday as we won’t get it done until late Sunday afternoon. 🌲🎄🤶🏻

Such fun making this card… an easel card – which I haven’t made in some time. One of my teammates sent an easel card and I was inspired to create several.

Wrapped in Christmas with Snowflake Splendor Easel card – #1

I love the bling from the Balmy Blue Glimmer Paper. Hear are details on how to do this…

  • Cardstock base is 8 1/2 x 11, scored at 4 1/4 (this happens to be Misty Moonlight, but I also used Pacific Point card stock which coordinates with the DSP. When I used Pacific Point card stock, I also used Pacific Point ink.
  • Use your paper trimmer to make two cuts JUST TO THE SCORE LINE on the card front: 1 1/2 & 4
  • Fold the center portion in half and burnish well with your bone folder. This becomes the stand up on the card.
  • Cut 2 strips of Snowflake Splendor DSP and adhere with liquid glue to the side panels
  • Cut 2 additional panels of coordinating Snowflake Splendor DSP and adhere with liquid glue to the center folded panel, one piece above the fold, the other below it. NOTE: I think it looks best if these pieces are cut so the pattern on the DSP matches top to bottom panels
  • Cut a panel of Whisper White and adhere to the INSIDE of the card, centering
  • Adhere side panels to card base with liquid glue.
  • Stamp the sentiment from Freezin’ Fun stamp set in Misty Moonlight ink on Whisper White. Punch out with the Classic Label Punch. Adhere to a strip of Misty Moonlight with liquid glue. Put dimensionals on back and adhere to the Whisper White panel, about 3/4″ from bottom. This creates the easel :O) and allows the upper panel to stand up.
  • Punch a starburst with the Starburst Punch (OOPS! retired item 😞)and Balmy Blue Glimmer Paper
  • Stamp the sentiment from Wrapped in Christmas in Misty Moonlight ink and punch with the 1 1/2″ circle punch. Adhere to the Glimmer paper. NOTE: by scrapping some of the ‘glimmer’ away the paper will adhere more readily. Add liquid glue to that area and bingo, the sentiment adheres.
  • Put dimensionals ON THE LOWER HALF of the Glimmer Paper and attach to the lower center panel near the fold line. Because the lower sentiment is on dimensionals, this allows the upper portion of the card to ‘stand’.
Wrapped in Christmas with Snowflake Splendor Easel Card – #2

I have made several of these, which I don’t usually do, but they were fun and easy and look pretty neat. Notice how the color variations in the DSP make the cards look so different. Hope you enjoyed this design. Card cuts will be listed at the end of this post. Let me know if you have questions.

Card cuts:

  • Card base: 8 1/2 x 11, scored at 4 1/4: top of the card cut to score line at 1 1/2″ and 4″
  • DSP strips for side panels- 1 3/8 x 4 1/8 (cut 2)
  • DSP panels for folded area – 2 3/8 x 2 (cut 2)
  • Whisper White – 3 x 4 1/4 + banner sentiment + circle sentiment
  • Misty Moonlight / Pacific Point for sentiment banner 2 1/4 x 5/8
  • Glimmer paper – use circle dies for 1 3/4 or slightly larger frame for circle sentiment

Thanks for stopping by.

May you have a beautiful day.

Make someone happy sending them a handmade card filled with love.