Stampin’ Up! Forever Greenery Gift Set

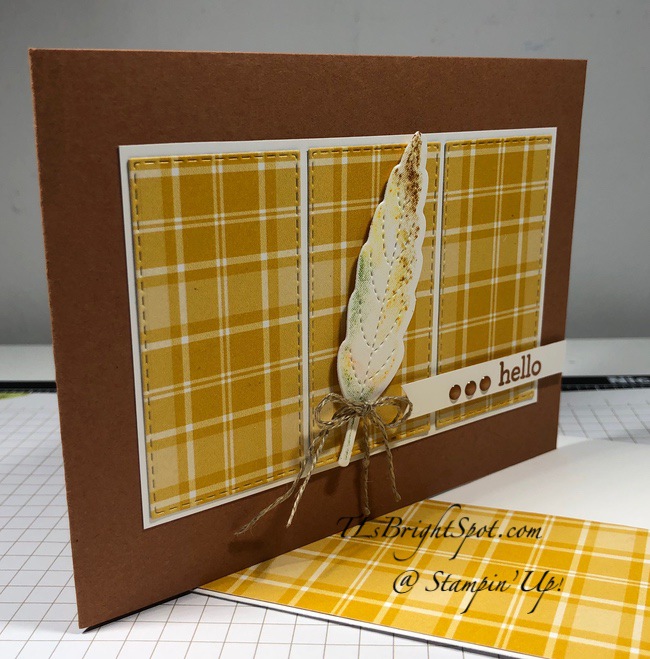
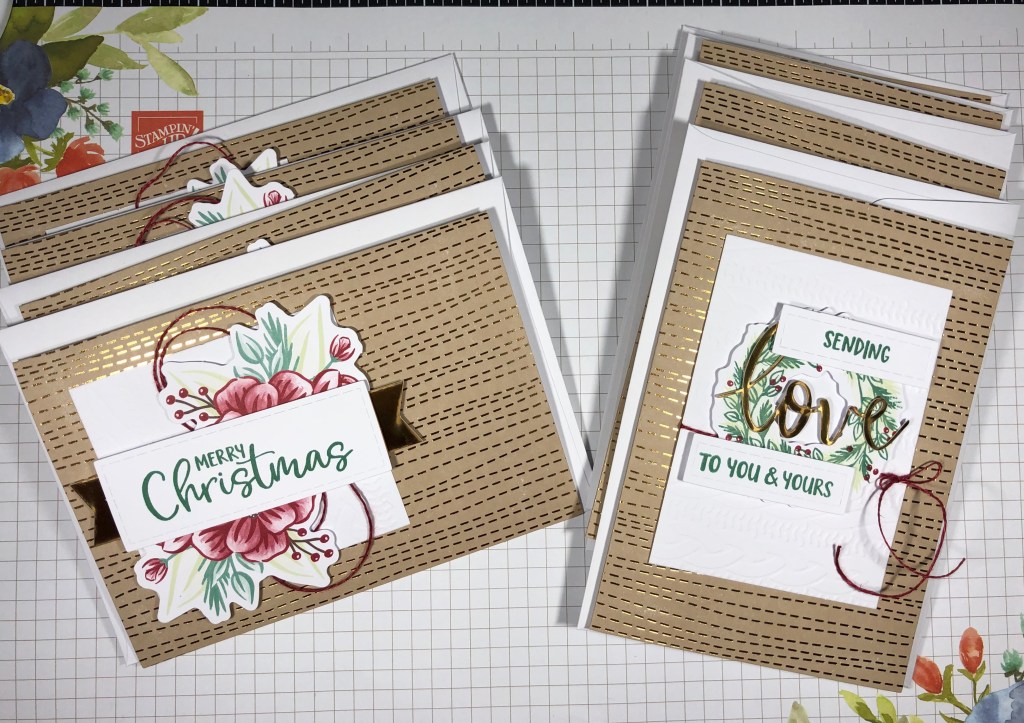
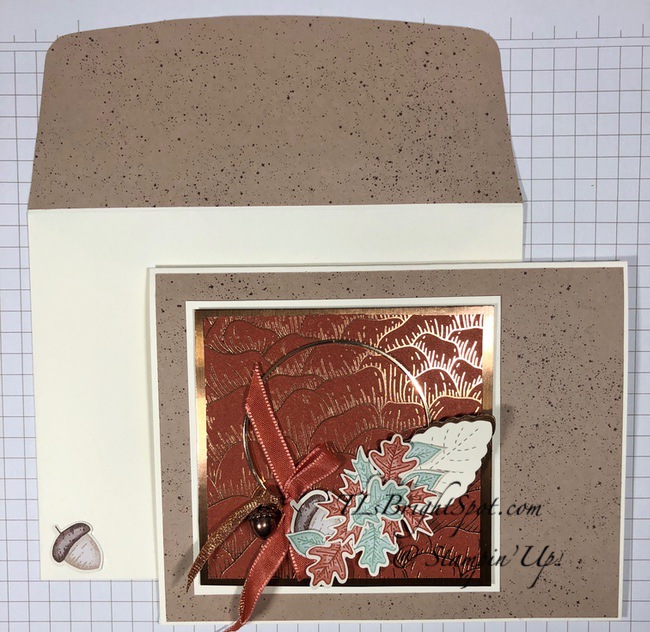
Today’s cards were such a delight to create. For one thing, when creating for someone special, somehow it makes a difference. I wanted to make a card set using all one DSP package, but have the cards be totally different, but not too fussy or bulky ~ and I think it was successful. Let’s take a look.

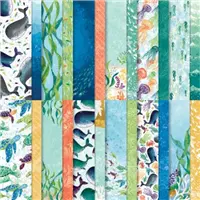
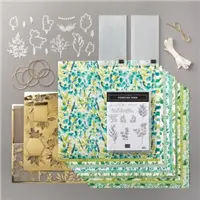
The Forever Greenery DSP is simply stunning. The colors are vibrant but not too, too, if you know what I mean. Anyway, let’s start with the first card.

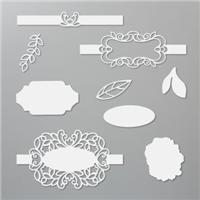
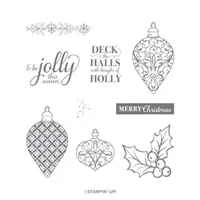
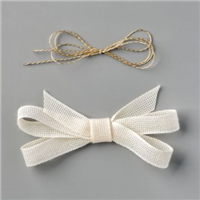
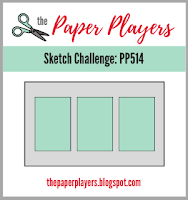
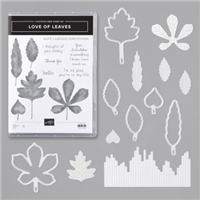
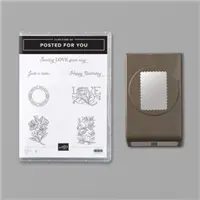
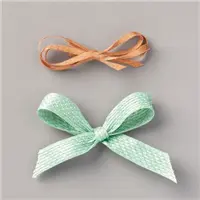
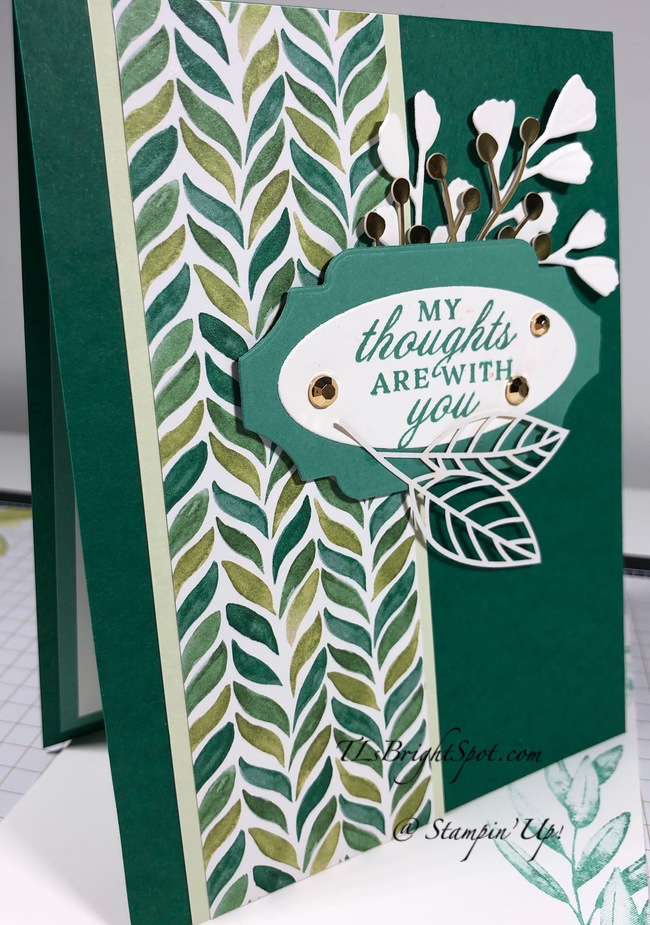
I wanted to enter this into a challenge, and therefore the Stitched Rectangle Dies came in very handy, as did the Forever Fern stamp set for the sentiment and some lovely Holiday Rhinestone Jewels and the 1/4″ Crinkled Seam Binding Ribbon in Whisper White. Alas, that particular challenge closed before I posted, but I sill liked the idea.

Here are the card cuts for card #1…

  • Soft Sea Foam 4 1/4 x 11, scored at 5 1/2
  • Shaded Spruce 4 x 5 1/4 (cut 2, one for inside panel
  • Whisper White 3 3/4 x 5 (cut 2, one for inside

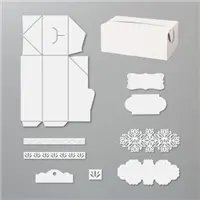
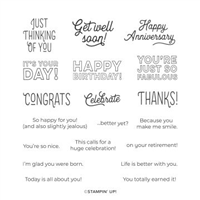
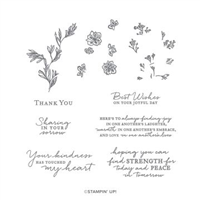
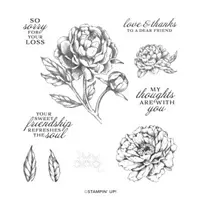
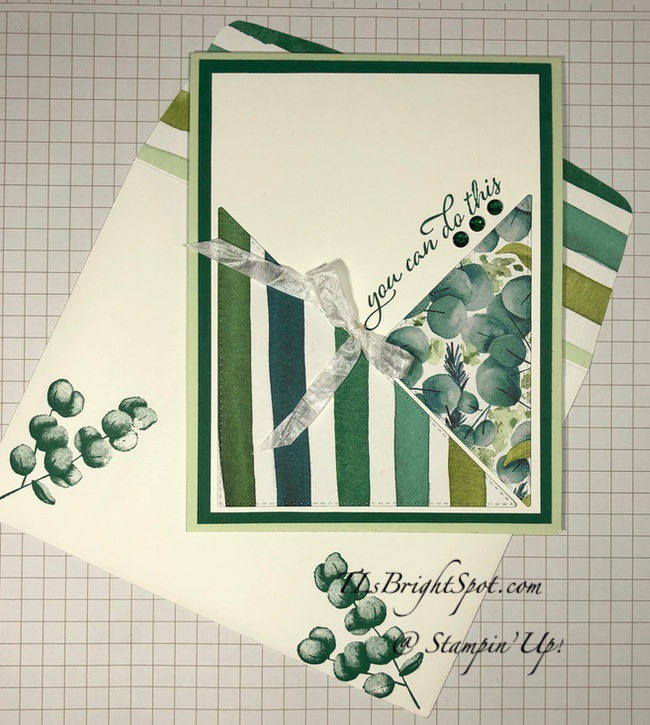
Card # 2: it’s sometimes difficult to coordinate DSP within it’s own pack, but this came fairly easily and I really like how it turned out. Again I used the !/4″ Crinkled Seam Binding Ribbon in Whisper White, and combined it with the Perfect Parcel Dies for the sentiment banner and Many Mates stamp set for the sentiments. The sentiments were stamped in Shaded Spruce ink and the leaves for the inside of the card and envelope were Soft Sea Foam.

Card Cuts for this card:

  • Soft Sea Foam 4 1/4 x 11 scored at 5 1/2
  • Shaded Spruce 4 x 5 1/4 (cut 2, one for inside) + banner
  • Forever Greenery DSP: 2 1/2 x 3 1/2; 2 1/2 x 1 3/8; and 1 1/4 x 5
  • Whisper White 3 3/4 x 5 + banner

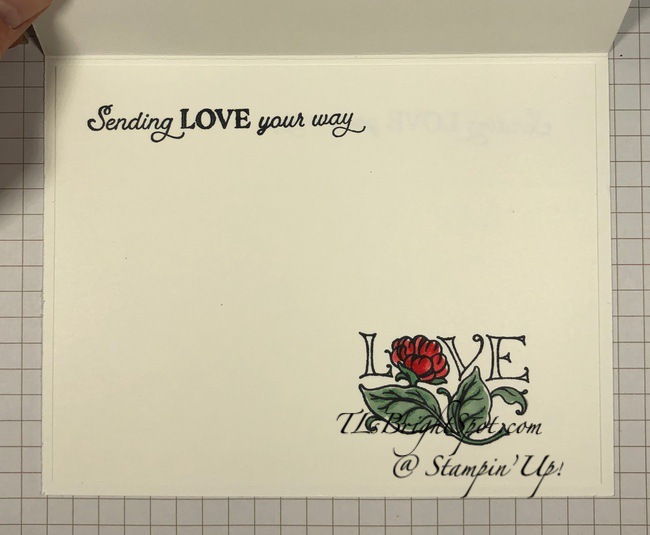
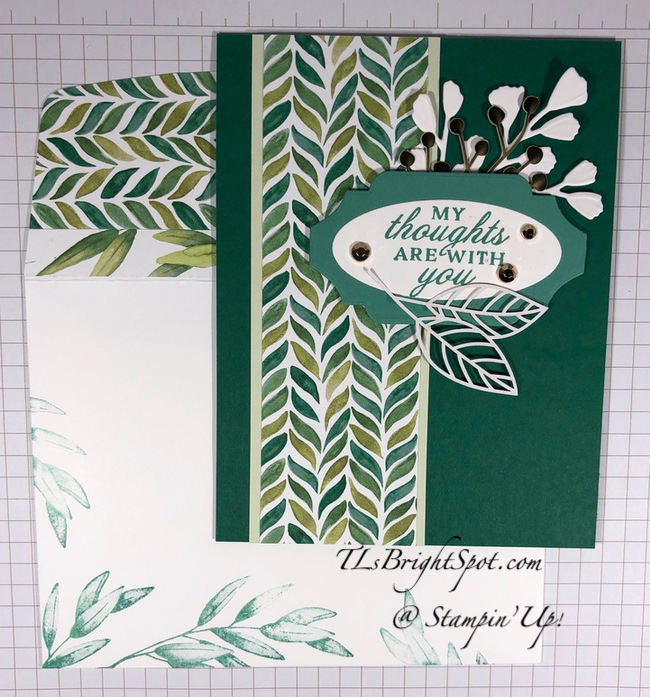
Card #3 has a flat card base with the folded card on top. Here I die cut the lovely band out of one of the Forever Greenery DSP selections using the Detailed Band Dies. The oval sentiment banner comes from the same die set and the sentiment itself from A Wish For Everything stamp set and again I used the Holiday Rhinestone Jewels. For the inside and the envelope, I stamped the leaves from the Forever Fern stamp set with Shaded Spruce ink.

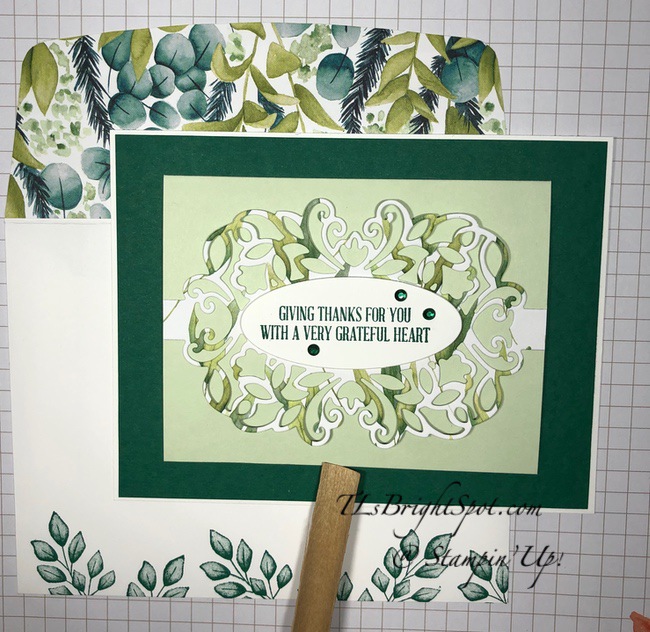
Card cuts for this card:

  • Whisper White Thick 4 1/4 x 5 1/2 + oval
  • Shaded Spruce 4 1/8 x 5 3/8
  • Soft Sea Foam 3 1/4 x 6 1/2 scored at 3 1/4
  • Forever Greenery DSP approx 4 1/2 x 3

I love this gift set and think the recipient will as well. I’m curious if you have a favorite.

Products for this sweet set may be found below. Remember to use my CURRENT HOST CODE XS4MSSFN when your purchase is between $50-$150 to receive a SU! gift from me valued at $10. If your purchase is over $150, don’t use my host code so you can reap the benefits of Stampin’ Rewards. (you will still receive the free gift from me!)

Thanks for stopping by.

May you have a beautiful day.

Make someone happy by sending them a handmade card filled with love.

Stampin’ Up! Snowflake Wishes Side-fold Card

Hi folks! What are you up to on this ‘day after’ the time roll-back? Me? Well it’s fairly cool here and raining outside , so I’m not out playing in the raindrops… What I DID do is make this fun card to share with you today using the Snowflake Wishes Bundle and the gorgeous paper of the Snowflake Splendor DSP. The idea to make this card came from my upline, Mary Deatherage. She does fabulous work and is an inspiration. Here’s the card and you’ll see why it is called a ‘side-fold’.

Isn’t this stunning? The Snowflake Splendor DSP does all the work for me. And the So Many Snowflake Dies (part of the bundle) just add to the gorgeousness.

Let’s take it apart and re-create it…

  • Thick Whisper White card base – 4 1/4 x 11, scored at 4 1/4 & 5 1/2
  • Pacific Point – 1 x 4, 4 x 4 (front of card), 2″ square (snowflake); 4 x 4 (inside of the card)
  • Snowflake Splendor DSP – 7/8 x 3 7/8, 3 7/8 square (front of card)
  • Whisper White – 3 3/4 x 1 (sentiment banner), 1 1/2 square (snowflake;, 3 7/8 square for inside
  • Balmy Blue Glimmer Paper – 2 1/2 square for snowflake

Take the Thick Whisper White card base and fold it on the 5 1/2 scoreline (this is the valley fold on the card)n with the 4 1/4″ score line facing you; fold that section back (this is the mountain fold). Adhere that 1 1/4″ area together with liquid glue. See photo #2 above for reference. Mark the center of that 1 1/4″ area at top & bottom, then use the Classic Label punch to create very small notches for the ribbon (which will be added later).

Now you are ready to decorate this panel… Adhere with liquid glue the 7/8 x 3 7/8 DSP to the Pacific Point 1 x 4. Adhere this to the 1 1/4″ strip of the card base with the punched notches for ribbon. Adhere the 3 7/8″ DSP square to the 4″ square of Pacific Point – with liquid glue; then adhere to the right front panel. Beautiful already isn’t it – even without the embellishing of snowflakes, gems, and ribbon.

  • Stamp the sentiment on Whisper White using Pacific Point ink. Die cut using the Ornate Frames Dies. NOTE: the die is smaller than the sentiment! How do you make it longer? Die cut half the area by placing the clear cutting plate on 2/3 of the die, run it through the die cutting machine, move the die to the end of the sentiment, aligning the cutting lines; cover that section with the clear cutting plate, run it through the die cutting machine and VOILA! This may take some practice but if I can do it – so can you!!! Put dimensionals on the back and adhere to the card front.
  • Create the snowflake: larger snowflake in Balmy Blue Glimmer Paper, medium snowflake in Pacific Point and the smallest snowflake in Whisper White. Adhere together with liquid glue (just in the centers of each snowflake); add dimensionals to the largest snowflake and adhere as shown.
  • Add several Rhinestone Basic Jewels (I used 7) AND Holiday Rhinestone Basic Jewels (I used 3) for glam.
  • Wrap a long length of the Misty Moonlight/ silver Bakers Twine from the Flowers For Every Season Combo Pack around the 1 1/4″ area, fitting it in the notches and tie a bow. Adhere the bow with a glue dot.

Love, love, love this! But we are finished yet; we must do the inside.

Snowflake Wishes Side-fold Card, inside – #3
  • Stamp the sentiment from the Snowflake Wishes stamp set in Pacific point on the 3 7/8″ square. Adhere it to the 4″ square of Pacific Point with liquid glue, then to the card inside.
  • Adhere several stars (I added 3) die cut from the Balmy Blue Glimmer Paper. These were from a previous project and left over, but I used the Stitched Stars Dies to create them.

For the envelope… Take another snowflake stamp from the Snowflake Wishes stamp set and stamp the envelope front in Pacific point ink. Cover the envelope flap with more of this wonderful Snowflake Splendor DSP, trim to fit.

Snowflake Wishes stamp set – #1

I hope you have as much fun creating your side-fold card ads I did – especially if you use the Snowflake Splendor DSP and the Snowflake Wishes Bundle to do so. I can’t wait to see what you do!

The products are listed below. Remember when you shop with me, you will receive a free SU! item of choice valued at $10 when your purchase is between $50-$150. If it is over that amount, don’t use my current host code as Stampin’ Up! offers Stampin Rewards. You WILL still get my gift…

CURRENT HOST CODE NOV 1 – 18 XS4MSSFN

Stampin’ Up! Christmas Gleaming Fun Fold

This fun fold is a new one for me and I really enjoyed doing it. Using the Christmas Gleaming stamp set and the Brightly Gleaming Specialty DSP really brought it to life. The fun fold is called a Pull tab pop-up card.

In the pictures above you can see the pull tab with the ribbon with the pop-up closed. In the right photo the pop-up has been pulled open. AND the card has an inside to it as well – but we’ll get to that later. Let’s begin with some specific card stock cuts for the front of the card.

  • card base is 8 1/2 x 5 1/2 scored at 4 1/4. Here I used Thick Very Vanilla.
  • layer 1 is 3 3/4 x 5 and I used Brushed Metallic in copper
  • layer 2 is the DSP 3 1/2 x 4 3/4 – Brightly Gleaming Specialty DSP
  • the pull tab pop-up layer…
    • the tab is 2 x 6 scored at 2 & 2 1/2, then punched on the long end with the Scalloped Tag Topper punch (Night of Navy for this card)
    • die cut 3 stitched squares for the front of the pop-up using the Stitched Shapes Dies: 1 large from Night of Navy, 1 next to largest in the Brushed Metallic Copper, and the next size down in
    • the Brightly Gleaming SDSP
  • the sentiment layer of the pull tab…
    • die cut 2 stitched squares using the Stitched Shapes Dies: 1 next to largest in Night of Navy and 1 in next smaller square in Very Vanilla for the sentiment

Directions for putting the pull tab together….

  • Put the front 3 layers together using liquid glue: Night of Navy, then Brushed Metallic, then the SDSP. Add a gilded Gem to the center of the SDSP. Set this front panel aside.
    • with the scalloped end of the pull tab to the right, and the tab folded forward on the 2″ mark, adhere the remaining Night of Navy square to it with liquid glue, butting it up against the fold.
    • now fold on the 2 1/2″ score and add a strip of Tear n Tape between the score lines. Adhere the decorated front panel again adhering against the 2 1/2″ fold line. This larger square should now completely cover the smaller sentiment square.
  • Stamp the sentiment using the Christmas Gleaming stamp set and Pretty Peacock ink onto the Very Vanilla stitched square. Adhere to the inner Night of Navy square with liquid glue. Your pull tab. is now ready to install 😁.

Directions for adhering the pull tab into the card.

  • with the 3 1/2 x 4 3/4 piece of Brightly Gleaming SDSP and the Classic Label Punch, make a vertical “slit” for the tab, centering it vertically. It should be centered both vertically and horizontally
  • slip the scalloped end of the tab through from the top and add a ribbon (Very Vanilla 1/2″ ribbon from the Forever Greenery Trim Combo Pack was used here). Staple to the tab
  • the next step is to adhere the tab to the front of the SDSP :
    • the tab is through the punched opening with the decorated front panel face down and the sentiment panel showing.
    • adhere a strip of Tear n Tape to the right hand side of the BACK of the sentiment panel.
    • bring the decorated front panel forward making certain it is centered on the SDSP front and press – adhering the tab.
  • adhere this SDSP panel & pull tab to the Brushed Metallic copper panel with liquid glue
  • Put dimensionals on the back, avoiding the pull tab area and adhere to the Very Vanilla card base. VOILA! Your card front is complete.😉

For the inside and the envelope…

You have done all the hard part – the rest is easy…

  • stamp the ornament & the sentiment using the Christmas Gleaming stamp set & Pretty Peacock ink on the Very Vanilla panel (3 3/4 x 5)
  • adhere to a piece of Night of Navy (4 x 5 1/4) with liquid glue and then into the card base with liquid glue.
  • for the envelope, adhere a strip (2 1/4 x 6) of the Brightly Gleaming SDSP to the envelope flap with liquid glue and trim.
  • stamp the smaller ornament to the envelope front with the Christmas Gleaming stamp set & Pretty Peacock ink. Your card is DONE…

I hope my directions are clear… more pictures of the steps might have helped. Having said that, if you try to follow the step by step it will get the desired result.

Products are listed below…. today is the LAST DAY to order any of the 15% off select Designer Series Papers. When you purchase from me, please use my CURRENT HOST CODE – HXXMKN2X to receive a free item valued at $10 when you spend $50 – $150 in my online store. This Host code is good through October – just one more day – then we start with a new one! If your purchases exceed $150, you’ll still get that free item from me, but don’t use the host code as Stampin’ Up! has rewards as well.

Thanks for stopping by.

May you have a beautiful day.

Make someone happy by sending them a handmade card filled with love.

Stampin’ Up! Love of Leaves Hello Card

Today’s card uses the fabulous Love of Leaves Bundle. Have you noticed I can’t seem to stop using this bundle? The Stitched leaves Dies are really outstanding. This card was also inspired by the Paper Players Challenge.

And here’s the card…

Love of Leaves Hello card – #1

I started this with the Plaid Tidings 6×6 DSP. There are so many beautiful plaids in this package, double-sided even, that it is sometimes difficult to decide which to use :O) This plaid really drew me in though, so here are the details.

  • Start with Cinnamon Cider card stock 4 1/4 x 11, scored at 5 1/2
  • Using the Rectangle Stitched Dies, die cut three rectangles from the Plaid Tidings 6×6 DSP. Adhere these to a panel of Whisper White card stock 3 x 4 1/2 with liquid glue. Adhere this to the card base, centering.
  • Sponge a leaf from the Love of Leaves stamp set and stamp off, then stamp on a Whisper White scrap. I used Crushed Curry ink then Cinnamon Cider ink then a touch of Garden Green ink. (The first stamp leaf – die cut it and save for the inside of the card.) And why stamp off? The colors seemed way too bold and stamping off gives the stamp a soft hue. Oh, and I spritzed it with a bit of water before stamping it the second time.
  • Die cut this leaf with the Stitched Leaves Dies. I love how one of the dies embosses the leaf while the other does the die cut. Adhere to the center panel with dimensionals. Add a double Linen Thread bow with a glue dot.
  • The sentiment banner is a 3/8″ strip of Whisper White, stamped in Cinnamon Cider ink with the Love of Leaves stamp set. Add three 2020-2022 In Color Enamel Dots in Cinnamon Cider and attach with dimensionals to the card front – and voila!

For the inside…

Loves of Leaves Hello Card – #2
  • On a Whisper White panel 4 x 5 1/4 , add a Plaid Tidings 6×6 DSP strip with liquid glue. I added a notched end for creativity :O).
  • Stamp the sentiment in Cinnamon Cider ink – and it comes from the Love of Leaves stamp set. The leaf is the one from the front that was the first stamp. You can see the colors are much more bold and for me, it was too strong for the front of the card, but I love it for here. It’s adhered with liquid glue.
  • Adhere this Whisper White panel to the inside of the card with liquid glue and the card is complete.

For the envelope…

Love of Leaves Hello Card – #3

This is a simple card – and I kept the envelope simple as well – by adding a panel of the Plaid Tidings 6×6 DSP to the flap with liquid glue, trim to fit – and that was it. Lovely Lovely.

Options for this card…

#1 create a layer of texture by embossing a panel and adhering it directly to the card front, then adding the rest of the parts.

#2 die cut leaves for all three panels; adhere the two outside leaves with liquid glue while keeping the center leaf on dimesnionals. If adding leaves to all three panels, maybe don’t color them at all.

Ok, just thought I would add those couple of thoughts in hopes you will share what you create 😁. I hope you like today’s card. I really like the simplicity of it, the unfussiness.

Products for today’s card may be found below. When you purchase from me, please use my CURRENT HOST CODE – HXXMKN2X to receive a free item valued at $10 when you spend $50 – $150 in my online store. This Host code is good through October – just two more days – then we start with a new one! If your purchases exceed $150, you’ll still get that free item from me, but don’t use the host code as Stampin’ Up! has rewards as well. Make sense? OK… two more days left for the Designer Series Paper sale – 15% off – how can you beat that? Stock up now before it’s too late!

Thanks for stopping by.

May you have a beautiful day.

Make someone happy by sending them a handmade card filled with love.

Designer Series Paper Sale – 15% off!

Stampin’ Up! Dragonfly Garden Sympathy Card

Hello again! Today’s card is made with a brand new suite of products that will be available in the new Jan- June 2021 Mini Catalog . It’s called the Dragonfly Garden Suite, beautiful, beautiful. Remember that dragonfly from a couple of years ago – now there is a new Dragonfly Punch that coordinates with this stamp set! Let’s take a peek at the card…

Dragonfly Garden – Sympathy – #1

This card incorporates several products from the suite: the Dandy Garden 6×6 DSP, the Dragonfly Garden stamp set, the Dragonfly punch (although I only punched the small dragonfly) and the Braided Linen Trim in Mossy Meadow. The only product not used is the Lady Bug Trinkets – next time.

Let me talk you through the making of this card…

  • Begin with Thick Whisper White 4 1/4 x 11 scored at 5 1/2 for your card base.
  • Add a layer (4 1/4 x 5 1/2) of the Dandy Garden 6×6 DSP to the card front with liquid glue.
  • Die cut a panel of Mossy Meadow card stock and another of Whisper White card stock with the same size Rectangle Stitched Dies (I used the third largest die)
  • Stamp the Whisper White panel with the lovely spray of wildflowers from the Dragonfly Garden stamp set in Mossy Meadow ink. Color with Markers: Bumblebee, Soft Suede and Pear Pizzazz
  • Stamp the butterfly bunch in Tuxedo Black Memento ink and color with Highland Heather Blends. Cover with Wink of Stella for added sparkle.
  • Stamp the sentiment from the Path of Petals stamp set in Tuxedo Black Memento ink.
  • Punch the small dragonfly from a Whisper White scrap using the Dragonfly Punch. Color with Basic Black Marker and the Highland Heather marker. Attach with a mini glue dot.
  • Find the center on this panel and punch a hole for the ribbon. Depending on the size of the ribbon, the hole size will vary. Loop a length of ribbon through the hole (I used the Polka Dot 5/8″ Tulle Ribbon) and tied this with a short length of the Mossy Meadow Braided Linen Trim. Yep, I need to trim the length of this tulle – it’s too long 😜
  • Adhere the stamped Whisper White panel to the already die cut Mossy Meadow panel with liquid glue or Stampin Seal, creating an interesting angle. Attach these two to the card front with dimensionals.

For the inside… and the envelope too

Dragonfly Garden – Sympathy card inside – #2
  • Stamp the dragonfly from the Dragonfly Garden stamp set twice on the Whisper White panel (3 3/4 x 5) with Tuxedo Black Memento ink. Color with Highland Heather Blends. Cover with Wink of Stella. The shine is glorious! Perhaps this picture will show it better.
Dragonfly Garden – Sympathy #3
  • Adhere the stamped Whisper White panel to Mossy Meadow card stock (4 x 5 1/4) with liquid glue. Then add this to the inside of the card, also with liquid glue.
  • Stamp the Butterfly on the envelope front in Tuxedo Black Memento ink and color with Stampin Blends Highland Heather and cover with Wink of Stella. VOILA! Your card is complete…
Dragonfly Garden – Sympathy – #4

This is such a beautiful stamp set and suite of products – I’ll be posting more ideas using it in the coming weeks…. The Dragonfly Garden Suite!

Thanks for stopping by.

May you have a beautiful day.

Make someone happy by sending them a handmade card filled with love.

Stampin’ Up! Retired items for…. Halloween

What do you do with your retired Stampin’ Up! items? I know most of us sell the retired stamps and dies – and maybe some embellishments too. Retired paper I have more trouble giving away. Why? I have no idea… maybe I’m a paper hoarder, but I don’t think so. At any rate, this Halloween is odd, would you agree? With the Covid thing, I have no idea if we will have very many kids, but I think we will. And somehow it seems to me, I needed to do something special. So I’m making these cute little bags from retired Designer Series Paper and ribbon and stuffing them with candy Here’s my basket at this point.

Retired items for… halloween – #1

You can see the Paper Pumpkin ‘parcels’ in there too, right? And these little bags have leftover parts to the recent Halloween Paper Pumpkin. Those pumpkins are just so cute! I’m not spending a lot of time on these, but they needed some kind of decoration after all.

And these are some of my extra bags…

Retired SU! DSP

What’s nice about these is they store flat – as these are. While it may be a bit late for you to create these for Halloween, they are perfect for stocking stuffers or little gifts. Here are the details.

  • Cut the Retired DSP to 4 1/2 x 6 1/2
  • Score on the long side at 2″, 3″, 5″, and 6″
  • Score on one short side at 1″. This becomes the bottom
  • Burnish all sides, then trim as shown.
Retired & trimmed for cute bag
  • Adhere the 1/2″ edge to the opposite side
  • Put the bottom together and adhere just the last fold
  • Pinch the top together to determine the middle and punch a hole for the ribbon, going through both sides. The hole will vary depending on the ribbon width.
  • Tie your ribbon – see the photos below for the two ways I tied them.

This is such a fun way to use retired Stampin’ Up! Designer Series Paper, ribbon and embellishments – and I think the trick or treaters will appreciate the special packaging.

That’s it for now… Thanks for stopping by.

May you have a beautiful day.

Make someone happy by sending them a handmade card

(in this case package!) made with love.

Stampin’ Up! Posted For You Birthday Card

Hellooooo! First of all, my apologies for not posting first thing this morning… I played hooky by carving pumpkins with our local family – such fun! But alas – my card for today… Posted For You stamp set and the coordinating Rectangle Postage Stamp Punch, which is a BUNDLE! And what does a bundle mean? It means 10% off when you purchase them together :O)

Here’s the card…

Posted For You Birthday – #1

Confession… I haven’t played much with this set, but this convinced me to do more with it. It’s delicate and sweet… could be for a child or adult depending on what you did with it. And the Rectangle Postage Stamp Punch creates this wonderful edge that looks like what else – but a postage stamp!

The how to….

  • Begin with a Thick Whisper White card base 8 1/2 x 5 1/2, scored at 4 1/4
  • Next layer is a panel of Whisper White 4 x 5 1/4 run through the Tasteful Textile 3D embossing folder. This is a 3D embossing folder so it’s especially helpful to lightly spritz your paper to prevent it from cracking.
  • Adhere the ribbon with Stampin’ Seal by running it along the ribbon. This ribbon is wide enough and it works perfectly. The ribbon is the 1/2″ Mint Macaron from the Basketweave & Metallic Ribbon Combo Pack.
  • Adhere this embossed & ribboned panel to the card base with liquid glue.
  • Stamp the image three times from Posted For You stamp set on Whisper White card stock using Tuxedo Black Memento ink and color the leaves with Just Jade Stampin Blends; color the sweet birds with two items… first the belly with Cherry Cobbler pencil and a Blender pen, then the bird body with Balmy Blue Blends. I used the pencil as I didn’t want the belly to be a strong color and there is more control with the pencil as to darkness. Punch them out with the Rectangular Postage Stamp Punch.
  • Adhere the punched birds with liquid glue to a panel of Balmy Blue card stock: 2 1/4 x 4 3/4.
  • Adhere the Balmy Blue panel with liquid glue to a Just Jade card stock strip 2 1/2 x 5.
  • Adhere this to the card front with dimensionals.
  • Stamp the Special Delivery stamp using Tuxedo Black Memento ink onto a Whisper White scrap and die cut with the smallest circle in the Stitched Shapes Dies.
  • Stamp the birthday stamp from the Posted For You stamp set in Tuxedo Black Memento ink on a Whisper White strip about 3/4″ wide and die cut with the banner die in the All Dressed Up Dies.
  • Adhere this banner with liquid glue to a 1/4″ strip of Balmy Blue card stock, trim the ends, then adhere this to a 1/2 wide strip of Just Jade card stock.
  • Adhere the banner to the card front with dimensionals, then add the Special Delivery circle also with dimensionals and voila – your card from is complete!

For the inside…

Postage For You Birthday card, inside – #2
  • Stamp the sentiment from Posted For You stamp set in Tuxedo Black Memento Black ink on a Whisper White panel 4 x 5 1/4.
  • Stamp the LOVE stamp in the lower right corner with Tuxedo Black Memento ink and color with Stampin Blends: Just Jade & Poppy Parade.
  • Adhere to the inside of the card with liquid glue and your card is done, done!

For the envelope… All I did was cut a panel of Balmy Blue card stock 2 1/4 x 6, run it through the Tasteful Touches 3D embossing folder and adhere with liquid glue to the envelope flap and trim.

Such a sweet and cheerful birthday card using the Posted For You stamp set & Rectangle Postage Stamp Punch – available as a bundle to say 10%. Just sayin’… this is a deal. and here’s a picture of the card again.

Posted For You Birthday card – #3

Thanks for stopping by.

May you have a beautiful day.

Make someone happy by sending them a handmade card filled with love.

Product list is below… remember to use my CURRENT HOST CODE: HXXMKN2X when your order is between $50-$150 to receive a free gift from me valued at $10 (yep – a SU! product!!!)

Stampin’ Up! Paper Pumpkin

Stampin’ Up! Paper Pumpkin monthly kits can be so fun. Each one is different and unique to the season. Two kits ago were the cute Halloween treats to make – and there were twenty of them! Here are just two that I made and gave to those attending a card class.

Stampin Up! Paper Pumpkin Sep kit

And here’s a fun card that I made with some of the leftover parts. I need to send this in tomorrow’s mail – along with a fun little care package of the Stampin’ Up! Paper Pumpkin Treat holders! Yes, filled with treats….

Stampin’ Up! Paper Pumpkin – Sep extras

This months kit was eight Christmas cards. I just loved the design and all the elements included and simply made them as instructed. Here’s that photo.

Stampin’ Up! Paper Pumpkin – Oct kit

Refill kits for both the September & October kits will be available October 26 – so if you want refills, order quickly. They are only available while supplies last! Refill kits do not include an acrylic block, the ink pad or the stamps – as the subscriber already has those from the previous kit :O)

The November kit can still be ordered, but only until Nov 10. And the way to order is to become a subscriber. You can do monthly or pay for a full year. Some kits you may like more than others, but I always find a way to utilize what’s in the kit. It gets the creative juices going. :O) Here’s more info about the November kit:

  • Kit contains enough supplies to create 15 gift card carriers and coordinating envelopes.
  • Kit contents can also be used to design traditional holiday cards, gift tags, and other paper projects.
  • Contents arrive in a collectible, special-edition box!
  • Project size: 2-1/4″ x 4″
  • Envelope size: 2-3/4″ x 4-3/8″
  • Coordinating colors: Cinnamon Cider, Daffodil Delight, Calypso Coral, Mint Macaron, Shaded Spruce, Blushing Bride, and Whisper White

Here’s a link to a Stampin’ Up! video to get you excited about the November kit… https://youtu.be/vjYw7nVzfUk

And here’s my link to subscribe!

https://www.paperpumpkin.com/en-us/sign-up/?demoid=2169800

Remember to subscribe before November 10 to receive this kit. If you are a first time subscriber, your first kit will include an acrylic block you can use for all the Paper Pumpkin kits.

OK, I think that does it for now. Stampin’ Up! Paper Pumkin is a great way to either begin your journey as a stamper or a fun way to create regularly.

Thanks for stopping by.

May you have a beautiful day.

Make someone happy by sending them a handmade card filled with love.

Stampin’ Up! Forever Fern

Well, hello again! Today’s card is a sympathy card is a sympathy card made with the fabulous Forever Fern Bundle, the Forever Gold Laser-
Cut Specialty DSP and Detailed Bands Dies
– and a few other products as well. Let’s take a look…

Forever Fern Bundle – #1

The Forever Flourish Dies that are part of this bundle and the Forever Greenery DSP are what makes this card pop. Let’s break it down to the step by step…

  • The card base is Shaded Spruce card stock 4 1/4 x 11 scored at 5 1/2
  • Layer a panel of Soft Sea Foam card stock 2 x 5 1/2 with liquid glue
  • Add a panel of Forever Greenery DSP 1 3/4 x 5 1/2 over the Soft Sea Foam with liquid glue.
  • Die cut a ‘flourish’ using Whisper White card stock and the Forever Flourish Dies.
  • Pull out a couple of the fantastic gold pieces in the Forever Gold Laser-Cut Specialty DSP
  • Die cut a banner from Just Jade card stock using the Detailed Bands Dies.
  • Stamp your sentiment: mine is from the Prized Peony stamp set, on a scrap of Whisper White card stock and die cut with another of the Detailed Bands Dies.
  • Layer the sentiment onto the Just Jade banner with liquid glue. Put dimensionals on the back and set aside to ‘work’ your other elements. Once you have determined how you want the card to look, adhere them to the card front as shown.
  • Add Gilded Gems to enhance the focus of the sentiment and your card front is complete!

For the inside…

Forever Fern card inside – #2
  • Adhere a panel (4 x 5 1/4) of Just Jade card stock to the inside of the card base.
  • On a panel of Whisper White card stock, stamp your sentiment in Just Jade ink. Again I stayed with using the Prized Peony stamp set.
  • Stamp one of the leaf flourishes in stamped off TWICE Just Jade ink – from the Forever Fern stamp set.
  • Adhere this Whisper White panel with liquid glue to the card inside – Voila! the card is complete :O)

For the envelope…

Forever Fern Bundle – #3
  • Stamp the front of the envelope using the same leaf stamp used on the inside of the card, stamping off at least twice.
  • Cover the envelope flap with panels of Forever Greenery DSP and trim to fit. Your card is now done, done, done!

This Forever Fern Bundle, the Forever Gold Laser-Cut Specialty DSP, the Forever Greenery DSP are all part of the Forever Greenery Suite of products – and I highly recommend it :O)

Product list is below…

Thanks for stopping by.

May you have a beautiful day.

Make someone happy by sending them a handmade card filled with love.

Stampin’ Up Beautiful Autumn Bundle – yet again!

Today’s card is another focus of the Gilded Autumn Specialty DSP and the Beautiful Autumn Bundle. I can’t seem to get enough of these two! Here the card…

Beautiful Autumn Bundle again – #1

Isn’t this paper stunning? First of all, those little leaves are punched out of one of the Specialty papers in this pack – using what else? the Autumn Punch Pack! The background leaf – or cream colored one is from the Love of Leaves Bundle and is a leftover from a card a couple of days ago :O) I’m getting ahead of myself again. Let’s break down the details of the how…

  • Punch out several leavers & acorns from one of the Gilded Autumn Specialty DSP – using the Autumn Punch Pack. I wanted to make a wreath again and decided to use the Gold Hoop Embellishment as my base, but felt the leaves needed something else to ‘sit’ on. Since I had this leaf already lying on my table (Love of Leaves Bundle), that became the real foundation.
  • Layer leaves on a foundation – the leaf as mentioned above. Adhere each with liquid glue, curling the leaves just a bit before attaching. Add an acorn or two as well.
  • Tie a bow using the wonderful Terracotta Tile from the Ornate Garden Ribbon Combo Pack. Adhere with a glue dot.
  • With a length of the Copper from the Metallic Ribbon Combo Pack, add this adorable Acorn Trinket and tie directly to the Gold Hoop Elmbellishment forming a knot.
  • Attach the wreath with glue dots to a 3″ square of the Gilded Autumn Specialty DSP.
  • Adhere the DSP panel to a nearly 3 1/4″ square of Copper from the Brushed Metallic Papers – using Stampin Plus
  • Adhere these two papers to a 3 1/2″ square of Very Vanilla card stock with dimensionals.
  • Cut another panel of Gilded Autumn Specialty DSP 4 x 5 1/4 and adhere to the card base of Thick Very Vanilla 4 1/4 x 11 scored at 5 1/2 – and your card front is complete!
  • For the inside…
Beautiful Autumn Bundle again – #2

I wanted to use stamps from this Beautiful Autumn stamp set to bring in the colors of the card front – and they were stamped on a panel of Very Vanilla card stock 4 x 5 1/4. Inks…I used Soft Suede ink for the outline of the oak leaf, full strength. I used Crumb Cake ink for the filler of this leaf; Cajun Craze ink for the maple leaf, stamped off twice for the filler; and Mint Macaron ink for the larger leaf. In the lower right corner, I stamped very softly, stamping off until there was only a bit of ink on the stamp. The sentiment used is from Beautiful Autumn stamp set as well – stamped in full strength Soft Suede ink. This panel was adhered with liquid glue directly to the card case – and voila!

For the envelope…

Beautiful Autumn Bundle again – #3

Adhere the same DSP as the large panel on the card front from the Gilded Autumn Specialty DSP to a Very Vanilla envelope. Adhere a punched acorn with liquid glue – and yep – use that cute acorn punch from the Autumn Punch Pack!

Wow – was that easy or what – and another stunning card. This will be one of those hand delivered cards. The product list is below… Please use my October host code when ordering: HXXMKN2X to receive a free SU! item valued at $10 when your purchase is between $50-$150. If your order exceeds that 😁, you will still receive a gift from me PLUS any rewards offered by Stampin’ Up!

Have you made your Designer Series Paper purchase yet? It’s still on sale through the end of October. With the 15% of select papers, this is a bargain. You can see those papers below.

Thanks for stopping by

May you have a beautiful day.

Make someone happy by sending them a handmade card filled with love.