Stampin’ Up! C’mas Banners Bundle for the Happy Inkin’ Thursday Blog Hop

Happy, happy Thursday! We have a fun creative challenge today for the hop and you may have come from Tara or just hopping in here. Either way this is what I’ve created for the hop.

C’mas Banners Bundle. 1

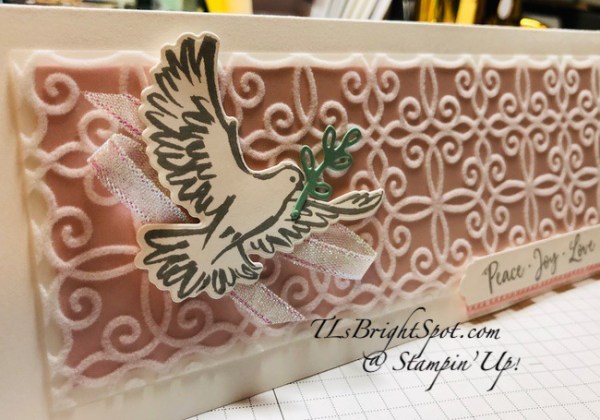
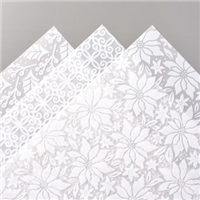
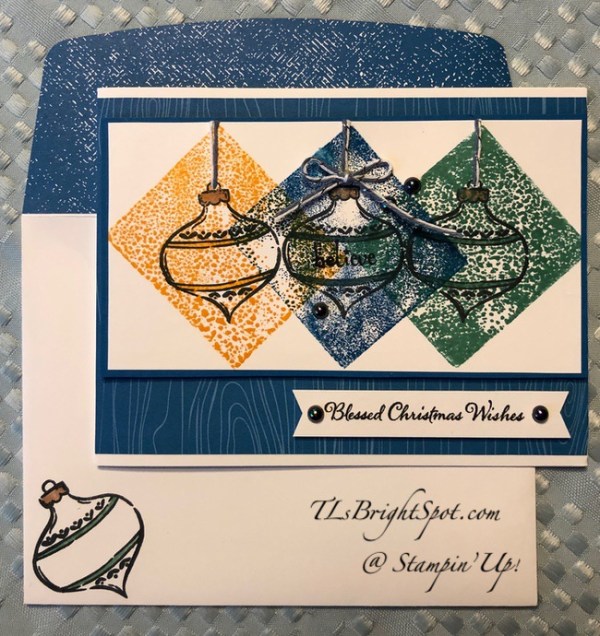
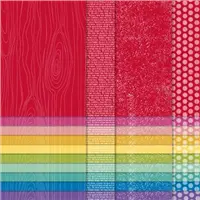
I chose to really ‘stick with’ the sketch challenge today šŸ˜ and had lots of fun doing it. The DSP for the background is Sweetest Christmas 12 x 12 DSP and I edged it with narrow strips of Pool Party. I built on that with lots of die cuts using Decorated Pine Dies for the large pine fronds, then Christmas Banners Dies for the rest of the die cuts. I wanted to use all the colors in the DSP. The sentiment banner is stamped with the Christmas Banners stamp set in Sweet Sorbet then die cut with the same dies. I added it to the card front with dimensionals under the far ends of the banner, then slipped all the other die cuts in under and held in place with liquid glue. The large pine fronds die cut in Garden Green served as the background – as mentioned using the Decorated Pine Dies. The lower pine fronds are from the Christmas Banner Dies. Next layer is the stamped in Pool Party ink leaves (and I did three) and die cut with the Christmas Banner Dies. I used Pear Pizzazz card stock to die cut the single layer of leaves – also from the Christmas Banner Dies. For the berry spray, the branches were die cut from Soft Suede card stock (again 3). The berries are stamped in Real Red ink and die cut with the C’mas Banners Dies then adhered with dabs of liquid glue to the variousSoft Suede branches. Lastly I added Adhesive Backed Seasonal Sequins: 3 in Garden Green above the banner and 2 in white below the banner.

C’mas Banners Bundle, inside

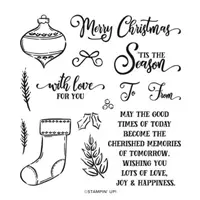
For the inside of the card… I stamped a leaf bunch from the C’mas Banners stamp set in stamped off Pear Pizzazz ink, then over that with a pine spray from the same stamp set in Garden Green ink. I stamped the Merry in Real Red ink and the Christmas in Sweet Sorbet. Can you tell the difference? I like the contrast! This Basic White panel was adhered to Pool Party card stock then into the Thick Basic White card base ~ and the card was complete.

Christmas Banners Bundle.3

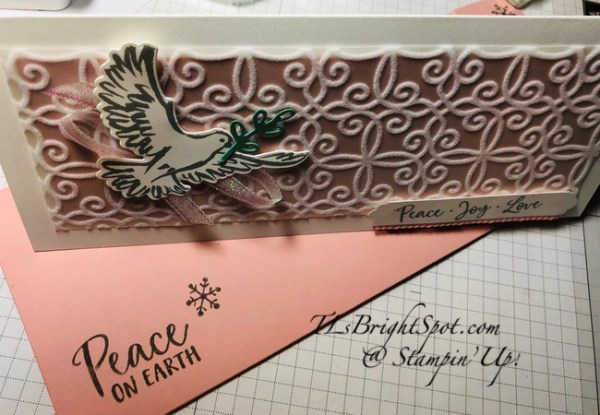
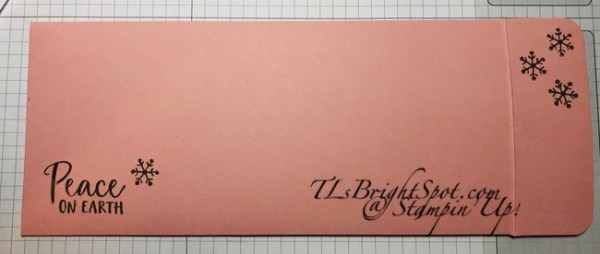
For the envelope, another bit of the same Sweetest Christmas 12 x 12 DSP on the flap and that was it. While this card has several die cuts, it is not heavy and I do not think will need extra postage – and that’s a PLUS!

Now HOP on to the next by clicking the ‘next’ link or by clicking on a name. Enjoy!

Amy Koenders

Mary Deatherage

Kristi Gray

Karen Finkle

Karen Ksenzakovic

Tara Carpenter

Terry Lynn Bright ~ you are here 😁

Star Special kicking off the new Jul-Dec 2022 Mini Catalog

With the start of this new catalog I am beginning a DOUBLE STAR REWARDS program ~ YAY! This begins today and goes through Thursday Jul 7! Today is Jul 7 – and the LAST for DOUBLE STAR REWARDS!

Here’s how my STAR REWARDS work for now:

  • For each $50 that you order from my online store (before shipping & taxes) and when you add my current Host Code, you will earn 2 STAR Rewards.  Orders of $49.99 or below DO NOT earn any rewards.
    • Example $50 = 2 STAR Rewards, $100 = 4 STAR Rewards, $150 = 6 STAR Rewards etc.
  • When you have earned 8 STAR Rewards you will get a FREE product order valued up to $40.00, your choice, and mailed directly to you!
  • You also earn my monthly Online Class Tutorial of exclusive projects.
  • For any order $50 or more you will also receive 1 free gift from me valued up to $10.

And remember too, during this time of Sale-a-bration, for every $50 order from any catalog, you’l earn free Sale-a-bration goodies from Stampin’ Up!

Remember to use MY current HOST CODE: YM6ZTUJE Click here to go my store.

HAPPY SHOPPING!!

Products to make this card are from the Jul-Dec 2022 Mini Catalog and Sale-a-bration Catalog. If you do not have a demonstrator and need those catalogs or an Annual Catalog please reach out to me (the 2022-2023 AC) – happy to send one to you. When ordering, please also use current host code: YM6ZTUJE. I offer my customers a free item from Stampin’ Up! item valued to $10 with your order of $50 and above. Click here to go my store. When the order is over $150, you still receive that free gift from me, but SU! has Stampin’ Rewards that may be used for additional products, so don’t use the host code at that time. If you have questions just let me know. If you would like to be able to order products early from catalogs AND enjoy that 20% discount, join my team now… you may do that here. WooHoo! We have lots of fun and are a creative bunch that encourages & supports one another. Would love to have you. :O)

Thanks for stopping by. May you have a beautiful day.

Make someone happy sending them a handmade card filled with love.

Inspire. Create. Share.

Stampin’ Up! Perched In A Tree for the Happy Inkin’ Thursday Blog Hop

It’s that time of week for the Happy Inkin’ Thursday Blog Hop. You may have come from the fun creation of Tara Carpenter or just hopped in right here. Whatever the case… welcome!

Perched In A Tree.1

Our challenge is a color one: Black & White + color of choice. I chose Balmy Blue, which you can see in the background between the trees. Snow gets a fun tinge to it when it’s falling at dusk :O) The challenge is below.

Back to my card… I die cut the Basic White front panel with the Aspen Trees Dies. It coordinates with Perched In A Tree stamp set and comes as a bundle (which means 10% off!). Remember, this bundle is available Jul 1 – which is Friday – woohoo!!! OK, card… I keep getting distracted. I used a Blending Brush to shade the aspens and Basic Gray ink. I love the look it gave. I set that aside and took another panel of Basic White and stamped the ‘snowflakes’ in Balmy Blue. I stamped the sweet bird in Memento ink and colored it with Watercolor Pencils in Balmy Blue and Early Espresso. I used a Blender Pen to smooth the pencil lines. I die cut the bird with the Aspen Trees Dies and adhered it with liquid glue. I did move it around a bit before I found the right spot, cuz wanted him peeking out of the trees. The Aspen die cut got lots of dimensionals & was adhered to the snow-stamped panel. That was added to the Thick Basic White card base. I stamped the sentiment in Basic Gray ink – love, love the font! – and fussy cut it. I used Stasmpin’ Seal on the back and wrapped a length of the Simply Elegant Trim in Silver on the back, then added dimensionals and placed it on the front. Final touch – a bit of glam with three Adhesive-Backed Seasonal Sequins in white.

Perched In A Tree, inside

For the inside… Using a Blending Brush I added Balmy Blue all around the edges of the Basic White panel, then stamped the sentiment from Perched In A Tree stamp set in Basic Gray ink. This was added to the inside of the card.

Perched In A Tree.3

For the envelope, more Balmy Blue ‘snowflakes’ to the flap and the wonderful Aspen branch stamped in Basic Gray to the front. I really, really like this. And yes, I took some liberties and substituted Basic Gray for the Black for the challenge. :O) Now – it’s time to get on with the hop! Use the ‘next button to move on to Amy Koenders or… click on a name to go to their blog. Enjoy the hop!

Amy Koenders

Mary Deatherage

Sue Prather

Karen Finkle

Karen Ksenzakovic

Tara Carpenter

Terry Lynn Bright ~ you are here!

All this week I’m sharing cards made with products from the Jul-Dec 2022 Mini Catalog. I hope you like the inspiration. Products to make this card are from the Jul-Dec 2022 Mini Catalog and Sale-a-bration Catalog and can’t be shown below. They CAN be ordered Jul 1!!! If you do not have a demonstrator and need those catalogs or an Annual Catalog please reach out to me (the 2022-2023 AC) – happy to send one to you. When ordering, please also use current host code: H7EUAMXD. I offer my customers a free item from Stampin’ Up! item valued to $10 with your order of $50 and above. Click here to go my store. When the order is over $150, you still receive that free gift from me, but SU! has Stampin’ Rewards that may be used for additional products, so don’t use the host code at that time. If you have questions just let me know. If you would like to be able to order products early from catalogs AND enjoy that 20% discount, join my team now… you may do that here. WooHoo! We have lots of fun and are a creative bunch that encourages & supports one another. Would love to have you. :O)

So what else??? Oh yes… some great opportunities for BOGO Kits Collection and Last Chance Products. Read on about those.

Share a Kit with a Friend with the Kits Collection BOGO 50% Off Promotion

Get ready—the Kits Collection is having a buy one, get one 50% off promotion. This is the perfect time to #ShareYourMoment and share a kit from the Kits Collection with a friend! As always, the kit selection is based on availability. You can see what’s available in the Kits Collection selectionĀ here.Ā 

Ordering info:

Sale runs through 1–30 June 2022.
All kits in the Kits Collection by Stampin’ Up! qualify for this sale. 
Kit selection is based on availability.
You will need at least two kits in your cart for the discount to automatically apply at checkout. 
There are no order limits on this promotion.
On the customer store, the discount will automatically apply to the most expensive kit in your cart.

The January–June 2022 Mini Catalog will be retiring soon! It’s always bittersweet to see a classic Stampin’ Up! catalog take a trip to retirement. But, we’re looking forward to all the new products on their way—and we hope you are, too!

Thanks for stopping by. May you have a beautiful day.

Make someone happy sending them a handmade card filled with love.

Inspire. Create. Share.

Stampin’ Up! Christmas Banners

Hi everyone… I didn’t post yesterday, silly me. But I had a REALLY good read of the most recent National Geographic magazine AND worked outside. But… here’s a promised card done in Parakeet Party – one of the new In Colors. It may seem a bit bright, but I have to say, I really, really like it. :O)

C’mas Banners Bundle.1

The card base as you can see, is Parakeet Party with a die cut in the same color die cut with Candy Canes Dies and adhered to the card base with liquid glue. The next is a grouping created on the 2022-2024 In Color 6×6 DSP (Sweet Sorbet). Layers attached to the DSP are die cuts in Garden Green card stock, Lovely Layers Vellum, Soft Suede, and the berries are die cut from 2022-2024 In Color 6×6 Glimmer Paper, Sweet Sorbet. The holly is stamped in both Garden Green ink & Parakeet Party ink on Basic White. The sentiment banner is stamped in Sweet Sorbet ink with the words in Garden Green ink. This was die cut with the Christmas Banner Dies and is on dimensionals. The fabulous die cut background is a die from the Candy Canes Dies, cut from Parakeet Party card stock and adhered with liquid glue to the same color card base. Isn’t that die wonderful? The Parakeet Party is a non-traditional color for Christmas, but I really like how it all ties together. Hubby is a conservative man and I wasn’t sure what he would think either, but he liked it a lot! The last touch for the card front was three Adhesive-Backed Seasonal Sequins in white.

C’mas Banners Bundle, inside

For the inside… the pine frond stamp from the Christmas Banners stamp set, first in Parakeet Party, then in Garden Green on the basic white panel.

C’mas Banners Bundle.3

As you can see, the envelope got the same treatment: pine frond from the C’mas Banners stamp set, stamped first in Parakeet Party ink, then in Garden Green ink. What do you think of the colors? It’s hard to tell the Sweet Sorbet is not Real Red! And I have to say, I like the contrasts of color.

All this week I’m sharing cards made with products from the Jul-Dec 2022 Mini Catalog. I hope you like the inspiration. Products to make this card are from the Jul-Dec 2022 Mini Catalog and Sale-a-bration Catalog and can’t be shown below. They CAN be ordered Jul 1!!! If you do not have a demonstrator and need those catalogs or an Annual Catalog please reach out to me (the 2022-2023 AC) – happy to send one to you. When ordering, please also use current host code: H7EUAMXD. I offer my customers a free item from Stampin’ Up! item valued to $10 with your order of $50 and above. Click here to go my store. When the order is over $150, you still receive that free gift from me, but SU! has Stampin’ Rewards that may be used for additional products, so don’t use the host code at that time. If you have questions just let me know. If you would like to be able to order products early from catalogs AND enjoy that 20% discount, join my team now… you may do that here. WooHoo! We have lots of fun and are a creative bunch that encourages & supports one another. Would love to have you. :O)

Sweetest Christmas Suite… 159579 includes the Christmas Banners Bundle, Sweet Candy Canes Bundle, Adhesive-Backed Seasonal Sequins and more! The items I used for this card, I listed. :O)

So what else??? Oh yes… some great opportunities for BOGO Kits Collection and Last Chance Products. Read on about those.

Share a Kit with a Friend with the Kits Collection BOGO 50% Off Promotion

Get ready—the Kits Collection is having a buy one, get one 50% off promotion. This is the perfect time to #ShareYourMoment and share a kit from the Kits Collection with a friend! As always, the kit selection is based on availability. You can see what’s available in the Kits Collection selectionĀ here.Ā 

Ordering info:

Sale runs through 1–30 June 2022.
All kits in the Kits Collection by Stampin’ Up! qualify for this sale.Ā 
Kit selection is based on availability.
You will need at least two kits in your cart for the discount to automatically apply at checkout.Ā 
There are no order limits on this promotion.
On the customer store, the discount will automatically apply to the most expensive kit in your cart.

The January–June 2022 Mini Catalog will be retiring soon! It’s always bittersweet to see a classic Stampin’ Up! catalog take a trip to retirement. But, we’re looking forward to all the new products on their way—and we hope you are, too!

Thanks for stopping by. May you have a beautiful day.

Make someone happy sending them a handmade card filled with love.

Inspire. Create. Share.

Stampin’ Up! Decorated w/ Happiness #2

Good Saturday morning! It’s a goin’ to be a hot one today. I’ll need to get outdoor chores done ASAP, but I do want to share this card with you first. It’s yesterday’s card in different colors – monochromatic if you will, and I like it even better.

Decorated w/ Happiness #2.1

The card base is Smoky Slate, inks for pine boughs & sentiment are also Smoky Slate; Silver Foil for the bell, pine boughs and stars; Shaded Spruce for the small boughs & Cherry Cobbler for the ‘smoosh’ behind the bell; and Whisper White for the snowflakes. And – you can see the Jingle Bell Trinket – I love the added touch and it doesn’t bother me that it contrasts with the foil.

Decorated w/ Happiness #2, inside

The inside I did just a bit differently from yesterdays card – by adding the pine bough. Inks are Smoky Slate, Cherry Cobbler & Shaded Spruce stamped on a Basic White panel.

Decorated w/ Happiness #2.3

The envelope is very similar to yesterday’s card – just using Shaded Spruce and Cherry Cobbler. And here are the photos for yesterday’s card…

Decorated w/ Happiness

Products to make this card are from the Jul-Dec 2022 Mini Catalog and Sale-a-bration Catalog and can’t be shown below. They CAN be ordered Jul 1!!! If you do not have a demonstrator and need those catalogs or an Annual Catalog please reach out to me (the 2022-2023 AC) – happy to send one to you. When ordering, please also use current host code: H7EUAMXD. I offer my customers a free item from Stampin’ Up! item valued to $10 with your order of $50 and above. Click here to go my store. When the order is over $150, you still receive that free gift from me, but SU! has Stampin’ Rewards that may be used for additional products, so don’t use the host code at that time. If you have questions just let me know. If you would like to be able to order products early from catalogs AND enjoy that 20% discount, join my team now… you may do that here. WooHoo! We have lots of fun and are a creative bunch that encourages & supports one another. Would love to have you. :O)

Decorated with Happiness Bundle… 159711

Jingle Bell Trinkets… 159980

So what else??? Oh yes… some great opportunities for BOGO Kits Collection and Last Chance Products. Read on about those.

Share a Kit with a Friend with the Kits Collection BOGO 50% Off Promotion

Get ready—the Kits Collection is having a buy one, get one 50% off promotion. This is the perfect time to #ShareYourMoment and share a kit from the Kits Collection with a friend! As always, the kit selection is based on availability. You can see what’s available in the Kits Collection selection here

Ordering info:

Sale runs through 1–30 June 2022.
All kits in the Kits Collection by Stampin’ Up! qualify for this sale. 
Kit selection is based on availability.
You will need at least two kits in your cart for the discount to automatically apply at checkout. 
There are no order limits on this promotion.
On the customer store, the discount will automatically apply to the most expensive kit in your cart.

The January–June 2022 Mini Catalog will be retiring soon! It’s always bittersweet to see a classic Stampin’ Up! catalog take a trip to retirement. But, we’re looking forward to all the new products on their way—and we hope you are, too!

Thanks for stopping by. May you have a beautiful day.

Make someone happy sending them a handmade card filled with love.

Inspire. Create. Share.

Stampin’ Up! Sale-a-bration Treat Bags

Hello Friday! Christmas must be on my mind this week… Yesterday’s blog hop was a
Christmas Fun Fold, today is a very cute (well two) treat bag. Our out of town daughter came last weekend bringing her family and a couple of fun ‘gifties’. The laser-cut wooden stars were one of the treats and not a Stampin’ Up! product. As I was trying to decide what to do with them, she said she would like to use them in a window or on a tree… or something. Here’s what I did.

Sale-a-bration Treat Bags.1
Sale-a-bration Treat Bags.2

The paper is from – what else – the Sale-a-bration Catalog and is a FREE Item with a $50 purchase. You can get your hands. on this paper Jul 3!!! It’s called Silver & Gold 6×6 DSP. This is obviously the gold. And I’ve used ribbon from the Jul-Dec Mini Catalog: Real Red & Garden Green 3/8″ Ribbon Combo Pack. It’s part of a Suite of products called the Sweetest Christmas Suite on pages 9-11. Behind each star is a glimmer paper: Real Red & White 6×6 Glimmer Paper – also part of the Sweetest Christmas Suite. The Glimmer paper was die cut with Layering Circles Dies and added to a Basic White piece cut with Layering Circles Dies, but with a scallop. I slipped a White Baker’s Twine through the star, tied a knot and when tying the Real Red or Garden Green Ribbon, I slipped it in between to hold it in place.

Here’s how to do the treat bag.

  • 6×6 piece of card stock or DSP, scored at the top: 1 3/8, 2 3/4, 4 1/8 & 5 1/2
  • Turn paper to right to score for the bottom: 1 3/8
  • Trim as shown in photo
Sale-a-bration Treat Bags.3
  • Add Tear n Tape to narrow strip ~ see photo
  • Burnish score lines with fingers, fold in half along middle score line and seal after removing Tear n Tape covering.
  • Fold in bottom pieces and seal with Tear n Tape or adhesive of choice.
  • Pinch top together; tie ribbon around the top. This can just slip off to get to the treats inside :O)

Fun, right? The fun part about making a treat bag like this, is that it can be decorated to fit the occasion: hearts, banners stamped & layered ~ the possibilities are endless. It’s up to you. Would love to see your creations, so please share.

Products to make this card are from the Jul-Dec Mini Catalog and Sale-a-bration Catalog and can’t be listed below. If you do not have a demonstrator and need those or an Annual Catalog please reach out to me (the 2022-2023 AC) – happy to send one to you. When ordering, please also use current host code: H7EUAMXD. I offer my customers a free item from Stampin’ Up! item valued to $10 with your order of $50 and above. Click here to go my store. When the order is over $150, you still receive that free gift from me, but SU! has Stampin’ Rewards that may be used for additional products, so don’t use the host code at that time. If you have questions just let me know. If you would like to be able to order products early from catalogs AND enjoy that 20% discount, join my team now… you may do that here. WooHoo! We have lots of fun and are a creative bunch that encourages & supports one another. Would love to have you. :O)

So what else??? Oh yes… some great opportunities for BOGO Kits Collection and Last Chance Products. Read on about those.

Share a Kit with a Friend with the Kits Collection BOGO 50% Off Promotion

Get ready—the Kits Collection is having a buy one, get one 50% off promotion. This is the perfect time to #ShareYourMoment and share a kit from the Kits Collection with a friend! As always, the kit selection is based on availability. You can see what’s available in the Kits Collection selectionĀ here.Ā 

Ordering info:

Sale runs through 1–30 June 2022.
All kits in the Kits Collection by Stampin’ Up! qualify for this sale. 
Kit selection is based on availability.
You will need at least two kits in your cart for the discount to automatically apply at checkout. 
There are no order limits on this promotion.
On the customer store, the discount will automatically apply to the most expensive kit in your cart.

The January–June 2022 Mini Catalog will be retiring soon! It’s always bittersweet to see a classic Stampin’ Up! catalog take a trip to retirement. But, we’re looking forward to all the new products on their way—and we hope you are, too!

Thanks for stopping by. May you have a beautiful day.

Make someone happy sending them a handmade card filled with love.

Inspire. Create. Share.

SU! Dove of Hope Bundle

Hello again… I think you are going to love this card… it’s a slimline card made with the Dove of Hope Bundle and Plush Poinsettia Specialty Paper. Gosh this is pretty … velvetty-like on vellum.

Dove of Hope Bundle
#1

This definitely non-traditional Christmas colors, but I’m really pleased with the way it turned out. Let’s talk about how we did this…

  • Thick Whisper White card base – slimline fashion
  • Layer of Blushing Bride cs adhered with liquid glue to the card front
  • Plush Poinsettia Specialty Paper layer adhered with liquid glue HINT: glue in strategic spots on the backside of the ‘plush’ where the plush comes together.
  • Stamp the dove with Smokey Slate ink onto Whisper Whiter cs.
  • Using the Detailed Dove Dies from this exquisite bundle, die cut the stamped dove.
  • Die cut the ‘olive branch’ out of Mint Macaron cs.
  • Adhere the ribbon – Snowflake Splendor Ribbon – using snail
  • Adhere the dove over the top of the ribbon with dimensionals.
  • Stamp the sentiment from the Dove of Hope stamp set, again in Smokey Slate ink, on a Whisper White strip. Punch the ends using the Lovely Labels Pick a Punch.Ā 
  • Using the Ornate Borders Dies and a 1/2″ x 3 1/4″ scrap of Blushing Bride, cut a decorative border. Add to the back of the sentiment banner with liquid glue and trim for proper length. Adhere banner with dimensionals to the card front.

For the inside…

Dove of Hope Bundle #2

  • Adhere Blushing Bride cs to the card inside
  • To a Whisper White panel, stamp the sentiment from Dove of Hope stamp set in Smokey Slate ink.
  • Over the top of this stamp the larger ‘olive branch’ with stamped off twice Mint Macaron ink.
  • Adhere this panel to the card inside and the card is complete.

Dove of Hope Bundle
#3

Now for the envelope… first we create the envelope 😊 – easy peasy

  • Using a full 8 1/2 x 11 Blushing Bride cs, score on the long side @ 2 1/2″ & 6 1/2″. Score on the short side 1 1/2″ & 10 1/2″. Burnish all score lines.
  • Remove the corners by cutting along the score lines.

On the 1 1/2″ end, use the Detailed Trio Punch, round the corners. Your piece should look like this…

Slimline envelope #4

    • Fold in the 1/2 end, add Tape n Tape or liquid glue and fold over the 2″ length, adhering it.
    • Add liquid glue to the long side andĀ  fold the 2 1/2″ length over it. Your envelope is created!
    • Now decorate… I stamped the sentiment from the Dove of Hope stamp set in Smokey Slate ink, then added the snowflake from the same stamp set near the sentiment and several on the envelope flap, also in Smokey Slate ink.

      Slimline envelope
      #5

      Such a fun and beautiful card using this wonderful Dove of Hope Bundle. I do hope you will try this and would love to see your version.Ā  Card cuts are listed at the end of this post. Would love to have you shop with me – and the items used for this project are shown below. Just click on them and it will take you directly to my online shop to complete your purchase – or… click “add all to cart” :O)

      Thanks for stopping by.

    • May you have a beautiful day.
    • Make someone happy by sending them a handmade card filled with love.
Card cuts for todays card…
  • Thick Whisper White 8 1/2 x 7
  • Blushing Bride 2 1/2 x 7 for card front,1/2 ” x about 3 1/4″ scrap for under sentiment panel, 3 x 8 for inside, 8 1/2 x 11 for envelope
  • Whisper Whiten – 3 x 3 for the dove die cut, 1/2 x 4 for the sentiment banner, 2 1/2 x 7 1/2 for the inside panel

li>

SU! Tag Buffet w/ Itty Bitty C’mas

Hi everyone! It’s been a couple of days since I posted… things have been a bit crazy here. Another gorgeous day here on the East Coast. Truly, I wish this would last a while. We’ll wait for Mother Nature to decide though :O) Today’s card…

Tag Buffet w/ Itty Bitty C’mas
#1

And here’s how…

  • With an acrylic block, stamp the block on an ink pad, stamp off then stamp on the Whisper White card stock This leaves a fun background on which to stamp.I first used Mango Melody, then Pacific Point then Just Jade inks. It doesn’t make a sold imprint but one that easily will show another stamp over it.
  • With Tuxedo Memento Black ink, stamp the image directly on the center of the ‘inked spot’. This adorable ornament comes from Tag Buffet stamp set.
  • I did some minor coloring on each ornament using Mango Melody Blends, Pretty Peacock Blends and Just Jade Blends.
  • Stamp the word ‘believe’ in the open area of the center ornament. This comes from Itty Bitty Greetings stamp set and I used Tuxedo Black Memento ink.
  • Using a Take Your Pick Tool, poke a hole in the ornament top and slip a bit of string orĀ  ribbon through to the back and tape. Here I used the Misty Moonlight/ silver Bakers Twine from the Flowers for Every Season Ribbon Combo Pack.Ā Add a bow with a glue dot on the center ornament.
  • Adhere this completed Whisper White panel to a piece of Pacific Point card stock.
  • Adhere a panel of Bright 6×6 DSP to the Thick Whisper White card base with liquid glue.
  • Now attach the decoratedĀ  panel to the card front with dimensionals.
  • The sentiment banner was stamped with Tuxedo Black Memento ink on a Thick Whisper White 1/2″ strip.Ā 
  • I trimmed the ends with the Banners Pick a Punch. Adhere with dimensionals to the card front.
  • For a final touch I added these fun and elegant Blue Adhesive-Backed Gems.

The inside was super easy…

Tag Buffet w/ Itty Bitty Greetings
#2

  • Add a strip of the Brights 6×6 DSP in Pacific Point to the bottom of the card.
  • Stamp the sentiment from Itty Bitty Greetings stamp set in Tuxedo Black Memento ink.
  • Adhere to card inside with liquid glue.

The envelope…

Tag Buffet & Itty Bitty Greetings
#3

  • With another piece of the Brights 6×6 DSP in Pacific Point, adhere with liquid glue to the envelope flap and trim to fit.
  • Stamp the ornament o0n the front of the envelope with Tuxedo Black Memento ink using the Tag Buffet stamp set.
  • Again I colored with Just Jade Blends and Bronze Blend for the top. Remember to slip a piece of scrap card stock in. the envelope before coloring or the blends will bleed through.
  • Products to purchase to make this card may be found below. Card cuts may be found at the bottom of this post.
  • Fun card to create folks and so easy using an acrylic block to create the background.

Only a couple more days before the end of the ‘joining’ special offered by SU! Here is the info once more. Join my team and let’s have some F-U-N.

  • SU! has a promotion going on for new recruits that is a win-win for everyone… for $99 you will get a starter kit worth of products valued at $125 – plus two card sets with instructions & an additional stamp set & Rhinestones. What’s not to like about that? Join my team- and yes, do it NOW so you get all the benefits of this awesome deal. More details below.

.

  • In addition to the regular starter kit (forĀ $99 USD/$135 CAD, new recruits chooseĀ $125 USD/$165 CAD-worth of products) new recruit will also receive enough card stock pieces to make 16 cards, a pack of Rhinestone Basic Jewels, the So Much Love stamp set, and the Queen Anne’s Lace stamp set—all for their first event.
  • 8 packs of precut card stock of the coastal cabana pack will be provided, and 8 packs of precut card stock of the Granny Apple Green pack, for a total of 16 cards (packs include envelopes). The new recruit can choose what samples to replicate and how to distribute the packs to their customers.
  • Important note: Ink, adhesive, cutting tool, and clear block for stamping must be purchased separately. However, these products may be included as part of the Starter Kit product selection.

Thanks for stopping by.

May you have a beautiful day.

Make someone happy by sending therm a handmade card filled with love.

Card cuts for today’s card

  • Thick Whisper White 4 1/4 x 11 scored at 5 1/2
  • Brights 6×6 DSP, Pacific Point 4 x 5 1/2, 2 1/4 x 6 (envelope flap) + 1 /4 x 5 1/4 for inside strip
  • Pacific Point 2 7/8 x 5 3/8
  • Whisper White 1/2 x 3 (sentiment banner), 2 3/4 x 5 1/4 (decorated front panel), 4 x 5 1/4 (inside)


SU! Poinsettia Petals Bundle

Hi again – DO HOPE you have taken the opportunity to purchase stamp sets during today’s 24 hr STAMP SALE!Ā If not, get on it šŸ˜


Today’s card is another using the Poinsettia Petals Bundle – I just love this set… so FUN to create using different colors, either on the bloom (bract) itself or the background. I’ve done both today…

Poinsettia Petals Bundle
#1

Is this gorgeous or what?! Now that I look at it, I guess I could have added some linen thread behind the poinsettia for more texture – that might have been very nice. What I DID add was Shimmery Crystal Effects to the berries. It adds a wonderful sheen in real life – not certain it shows in this photo though. I also add the same Shimmery Crystal Effects to the center of the flower on the envelope. Again, it doesn’t show but I did do it. So, steps, how to..

  • Thick Whisper White for the card base
  • Crumb Cake layer both inside and out
  • ‘Tis the Season 6×6 DSP – die cut with second largest Stitched Rectangles Dies
  • Whisper White for stamping/ die cutting the poinsettia, leaves & sentiment: Stamp everything using Tuxedo Black Memento ink. Color the Poinsettia layers with Crumb Cake Blends; color the leaves with Just Jade Blends, color the berries with Cherry CobblerBlends. Die cut all: 2 small leaves, 1 large leaf, 4 layers of poinsettia bracts and 3 berry clumps. Curl the poinsettia bracts and leaves with a bone folder.
  • Adhere the DSP layer to the Crumb Cake with liquid glue.
  • Adhere the poinsettia together with liquid glue. Adhere flower to the DSP/ Crumb Cake panel with liquid glue. Place leaves and adhere with liquid glue. Lastly add the berry clumps, again with liquid glue.
  • Cover the berries with Shimmery Crystal Effects and set aside to dry.
  • Stamp the sentiment from the Poinsettia Petals stamp set with Tuxedo Black Memento Ink and fussy cut. Place on Mini dimensionals and adhear to the card.
  • If the Crumb Cake/ DSP panel with the poinsettia/ berries is now dry, put dimensionals on the back and adhere to the card base.
  • Add a single Beaded Pearl to the poinsettia center then add Pearl Basic Jewels for the final touch completing the card front.

The inside…

Poinsettia Petals, inside
#2

  • Stamp the sentiment from the Poinsettia Petals stamp set in TuxedoĀ 
    Black Memento InkĀ on a panel of Whisper White
  • With a leaf stamp from Poinsettia Petals stamp set, stamp off twice with Just Jade ink and stamp in center of the sentiment.
  • Adhere theĀ Whisper White panel to the Crumb Cake panel with liquid glue then add this to the inside of the card.

Envelope…

Poinsettia Petals Bundle
#3

  • Cover the envelope flap with a strip of the ‘Tis the Season 6×6 DSP (I used the same pattern). Add a strip of Crumb Cake cs to complete the flap. Trim.
  • On the front, stamp the poinsettia from the Poinsettia Petals stamp set in Tuxedo Black Memento Ink.
  • Color with Blends: Crumb Cake for the bracts, Cherry Cobbler for the center. TIP: be sure to slip a piece of scrap card stock inside the envelope when coloring the poinsettia – otherwise it will bleed through to the back of the envelope – and that’s a no-no.
  • Cot the center of the flower with the Shimmery Crystal Effects and let dry.

Poinsettia Petals Bundle
#4

Whee! This gorgeous card is ready to sending to someone special in December! Card cuts are listed at the bottom of this post.


p style=”text-align: center;”>Thanks for stopping by.

May you have a beautiful day.

Make someone happy by sending them a handmade card filled with love.

Card stock cuts for today’s project…

  • Thick Whisper White 8 1/2 x 5 1/2 scored at 4 1/4
  • Crumb Cake 3 3/4 x 5 (2)
  • Whisper White 3 5/8 x 4 3/4 (inside) probably 5 1/2 x 8 1/2 for die cuts
  • ‘Tis the Season 6×6 DSP cut with Stitched Rectangles Dies OR… 4 5/8 x 3 3/8


SU! Winter Woods

Howdy! It’s Sunday… do you have routines for a Sunday? We certainly do… and they have changed some ever the last several months due to the pandemic. I look back and remember the routines of my family on a Sunday – it was something that could be counted on. I wonder in our routines of a Sunday if it’s something that will be handed down. I just finished reading a book by Lisa Wingate – The Book of Lost Friends. It’s about generational history, beautifully written. I highly recommend it.

Today’s card looks like tradition to me – a stately tree, decorated for the holidays.

Winter Woods
#1

Here’s what’s needed for this project….

  • Thick Whisper White card stock and regular Whisper White cs
  • Winter Woods stamp set
  • Cherish the Season stamp set (inside sentiment)
  • Ornate Frames Dies (banner on front)
  • Just Jade card stock/ ink
  • Cherry Cobbler ink
  • Old World Paper 3D Embossing Folder
  • Star Designer Elements
  • Wonderful Gems

On a Whisper White panel, stamp this beautiful tree from Winter Woods stamp set in Just Jade ink. My inking pad is very inky so it was necessary for me to stamp off once. With another Whisper White scrap – say 1 1/4 x 3, stamp the sentiment in Cherry Cobbler ink. I love this combined font – so crisp! Using a die from Ornate Frames Dies, die cut, add dimensionals and adhere under the tree. Adhere this tree panel to Just Jade cs. It too should have dimensionals before adhering to the Thick Whisper White card base. I added the Star Element at the tree top, then the Wonderful Gems all over the tree and on the sentiment panel as well.

For the inside…

Winter Woods, inside
#2

I love how this turned out, and there’s a story here. I had cut my Whisper White panel and must have gotten distracted, cuz I stamped the trees as though it was a landscape profile, not portrait!Ā  (Yes, I needed to stamp off once more.) I went ahead and stamped the sentiment from Cherish the Season stamp set in Cherry Cobbler ink.Ā It was then I realized the error. 😳 Instead of going into a panic, I simply cut the inked paper down to size, adhered it with liquid glue to the Just Jade panel and then into the card base. I adhered another panel below it for writing a message. Project saved!!!

For the envelope…

Winter Woods
#3

I used a strip of Just Jade cs and ran it through the Old World Paper 3D Embossing Folder, adhered it with liquid glue and cut it to fit. For the from I stamped this sweet pine needle from the Winter Woods stamp set along the side and bottom in stamped off once Just Jade ink, And the card is complete – yay…

Thanks for stopping by.

May you have a beautiful day.

Make someone happy by sending them a handmade card filled with love.


<div><div><div id=”a9bc2bf4-c30d-4dbc-8578-16f4a7709b63″>https://mystampinblog.com/Showcase/Details/91952bed-c575-4eea-b807-746c5052c2bf?layout=Tiled&showSku=True&showPrice=True&showSalePrice=True&showAddToCart=False&showAddAllToCart=True&showDownload=True&transparent=True&bordered=True&hFontHeight=14&rFontHeight=13&imageHeight=120&middleContent=False</div>https://mystampinblog.com/Script/ShowcaseDetailsScript</div></div>

Card cuts for this project:

  • Thick Whisper White 4 1/4 x 11 scored at 5 1/2
  • Whisper White 3 3/4 x 5, scrap – say 1 1/4 x 3 (for front); 3 3/4 x 5 OR as shown 3 3/4 x 3 3/4, 1 1/8 x 3 3/4 (for inside)
  • Just Jade 4 x 5 1/4 (x 2), 2 1/4 x 6


Whisper White

SU! Sep. Team Projects

Hi Everyone – it’s Saturday! It’s amazing what cool weather can do…this is that in-between season, before the leaves turn and fall – cool temps, absolutely perfect for sleeping, not quite cool enough for a fire in the fireplace though. We live in a ‘shore community’ and have lots of folks visit due to the many beaches. By now though, the beaches are OURS again….😁

Today I want to share a couple of team projects we created virtually ‘together’ last Sunday. We had been sent pictures and dimensions and instructions via email, but then created them via ZOOM. What a great tool ZOOM has become! Anyhoo – these are fun projects and primarily use the Celebration Tidings Bundle. The stamp set has stamps for Halloween, Thanksgiving, Christmas AND Valentines!Ā  Here are three of the projects…

Celebration Tidings Bundle and Poinsettia Petals


Isn’t this beautiful? Yep – the bag is empty – I had no candy to fill it, but the Celebrations Labels Dies create the ‘fold-over’ and background for the Poinsettia Dies. Plaid Tidings 6×6 DSP was used for the ‘label’, Shaded Spruce for the leaves, a bit of Brushed Metallic for the berries, Cherry Cobbler for the poinsettia and the gorgeous Beaded Pearls to accent the center of the poinsettia. . The cello bag pictured here is a retired commodity (unfortunately)n but SU! has Mosaic Gusseted Cello Bags that are very versatile.


celebrations Tidings Bundle
Project #2


Project #2 is a Christmas card… Celebration Tidings Bundle, Stitched Rectangles Dies and Winter SnowĀ 
Embossing Folder were the primary SU! items used. Another pattern from Plaid Tidings 6×6 DSP was a major focus and I love how the Celebration Dies were used for a fold-over flap for a surprise addition. It was my personal addition of the Linen Thread bow and Red Rhinestone Basic Jewels for the card front. Let me share inside the flap and the card inside as well.


Celebration Tidings Bundle, inside flap

It was my decision to add the Plaid Tidings 6×6 DSP to the top inside of the die cut. And here’s my reasoning… When using the Blends to color, the stamping element, their is some bleeding through and I didn’t like the way that looked. I simply used the smallest die to cut a piece of DSP to cover the bleeding through. It makes it look more complete and professional to me. Now for the inside…

Celebration Tidings C’mas card inside
Project #2


I chose to do no coloring for the inside – I liked the simplicity, and no additional sentiment needed – lots of room for sharing a friendly update!


Project #3 is a fall card, again using the Plaid Tidings 6×6 DSP and the Celebration Tidings Bundle.

Celebration Tidings Bundle, Fall
Project #3

Celebration Tidings Bundle, Fall
Project #3


Another gorgeous project! Plaid Tidings 6×6 DSP takes center stage again, but the stamped Celebration Die holds its own for sure. Colors here are Cinnamon Cider, Blackberry Bliss, Crumb Cake and Very Vanilla card stocks. Blends used for coloring are Pumpkin Pie, Shaded Spruce. Markers used are Early Espresso and Bumblebee.

Thanks for letting me share our team projects! They are beautiful and it’s fun to gather, even if virtually, to encourage and learn from one another. Want to be able to do this? Join my team!

SU! has a promotion going on for new recruits that is a win-win for everyone… for $99 you will get a starter kit worth of products valued at $125 – plus two card sets with instructions & an additional stamp set & Rhinestones. What’s not to like about that? Join my team- and yes, do it NOW so you get all the benefits of this awesome deal. More details below.

.

  • In addition to the regular starter kit (forĀ $99 USD/$135 CAD, new recruits chooseĀ $125 USD/$165 CAD-worth of products) new recruit will also receive enough card stock pieces to make 16 cards, a pack of Rhinestone Basic Jewels, the So Much Love stamp set, and the Queen Anne’s Lace stamp set—all for their first event.
  • 8 packs of precut card stock of the coastal cabana pack will be provided, and 8 packs of precut card stock of the Granny Apple Green pack, for a total of 16 cards (packs include envelopes). The new recruit can choose what samples to replicate and how to distribute the packs to their customers.
  • Important note: Ink, adhesive, cutting tool, and clear block for stamping must be purchased separately. However, these products may be included as part of the Starter Kit product selection.
  • Thanks for stopping by.
  • May you have a beautiful day.
  • Make someone happy by sending them a handmade card filled with love.